THE PALEO KITCHEN: GETTING STARTED
The Paleo Swap at a Glance: Ten Crucial Ingredients You Need to Rethink
Buying Produce, Meat, and Seafood
Restocking Your Pantry: What’s In, What’s Off-Limits, and Why
Flours, Starches, and Other Baking Essentials

Introduction
Here in the test kitchen, we’re always looking for new challenges: recipes and techniques that will test our skills and make us better, more knowledgeable cooks. And although we don’t usually concern ourselves with “diets” in the traditional sense of the word, there was something about the paleo diet that intrigued us—the focus on whole foods, the emphasis on cutting out processed junk foods, and the importance of cooking at home. The widespread popularity of paleo made us think that this was more than just a trend. And as with many diet-oriented books, there seemed to be room for the test kitchen to contribute and add value.
We quickly realized that a lot of the staple ingredients that we rely on every day were off the table. Things like cornstarch, vegetable oil, soy sauce—even table salt—were out. Half the challenge of making successful paleo dishes was in coming up with replacements for these items. We still wanted pan sauces, stir-fries, and creamy dips, so to get these things right, we tested every method we could come up with.
Meat is an important part of the typical paleo diet, so we knew we would need to move beyond the standard beef, pork, and chicken. Proteins like lamb shoulder chops, duck breasts, and even venison steaks made their way onto our table of contents. (The venison recipe even inspired us to develop a rich, beautifully creamy paleo béarnaise sauce.)
But the most challenging thing we tackled in this book was paleo baking. We discovered a whole new world of flours: almond, arrowroot, coconut, and tapioca. We developed recipes for muffins, pancakes, crackers, and pie dough, each of which required dozens of rounds of testing and retesting. Sometimes, a mere teaspoon of coconut flour or ghee was the difference between good and great. Our tasters doggedly ate their way to the final version of every recipe (though it wasn’t always easy), and we’re confident that the results are the best they can be.
A surprising obstacle we came up against was the fluid definition of what paleo means. Our solution was to build our recipes around strict paleo guidelines. We used limited natural sweeteners, moderate amounts of nuts and seeds, and no dairy. We relied on grass-fed or pasture-raised meats, paleo-friendly tomato paste and bacon, and homemade stocks. But we also know that not everyone reading this book is going to want to follow the paleo diet to the letter. Not everyone has time to stock their pantry with homemade chicken broth and mayonnaise every week. So we made sure our recipes would also work with store-bought versions of these ingredients, and provided plenty of shopping tips.
We were constantly surprised by the challenges we faced: Recipes that we thought would be merely a matter of switching out a couple of ingredients (like stuffed mushrooms, chicken stir-fry, and crab cakes) ended up being some of the most interesting and eye-opening of all. We hope you’re just as pleasantly surprised as we were.

Eating the Paleo Way
At the center of the paleo diet is the philosophy that eating minimally processed, whole foods is the key to good health. Taking inspiration from our Paleolithic-era, hunter-gatherer ancestors, the modern paleo template centers around eating plenty of meat and vegetables while avoiding dairy, grains, refined sugar, alcohol, and more—processed foods that, as a result of organized agriculture, were introduced to human diets after the Paleolithic period. The chart below summarizes the essence of the paleo diet.
YES
Meat (pasture-raised/grass-fed/wild)
Seafood (wild-caught/sustainable)
Eggs (from pasture-raised birds)
Vegetables (organic)
Fermented foods
Spices
Healthy fats (like animal fats, olive oil, coconut oil, nut oils, avocados and avocado oil)
NO
Processed foods
Sugar, artificial or processed sweeteners (including agave and stevia)
Grains and cereals (like wheat, corn, rice, and oats)
Legumes (including peanuts)
Highly processed fats and oils (like vegetable oil, canola oil, safflower oil, and corn oil)
Alcohol
Dairy
IN MODERATION
Fruit (organic)
Nuts (like cashews, almonds, walnuts, pecans, macadamia nuts, and pine nuts)
Seeds (like sesame seeds, poppy seeds, and sunflower seeds)
Starches (like arrowroot or tapioca, which come from nutrient-dense plants)
Natural sweeteners (like honey, coconut sugar, maple syrup, and maple sugar)
The Paleo Swap at a Glance: Ten Crucial Ingredients You Need to Rethink
Given the restrictions this diet presents, people serious about following it need to rethink not only how they shop and stock their pantry but also how they cook. Many fundamental ingredients that we depend on when cooking are off-limits, and you must make homemade versions of other key ingredients since the commercial versions are highly processed or contain stabilizers and gums (think mayonnaise, broths, and canned tomatoes). Before you even get started, take a look at the chart below, which we developed to make paleo cooking less intimidating to those who may not be familiar with it yet. We’ve provided some of the test kitchen’s favorite alternatives for some nonpaleo ingredients that are normally crucial to most recipes. Although these substitutes won’t work in every recipe—nor are they simply one-for-one swaps—this chart will help you start to understand how to approach paleo cooking.
INSTEAD OF THIS
Vegetable oil
USE THIS
Coconut oil or extra-virgin olive oil
WHY?
Instead of reaching for highly processed vegetable oil, we often use coconut oil or ghee, both of which perform well at high temperatures. The coconut flavor in our preferred coconut oil is too faint to detect in most dishes. Extra-virgin olive oil also works well for cooking, but save the expensive, high-end versions for raw applications.
INSTEAD OF THIS
Butter
USE THIS
Ghee
WHY?
Because ghee, which is made by straining the milk solids from melted butter, is dairy-free, it’s widely considered to be paleo-friendly. Although ghee won’t work in all recipes, it is fairly high-heat-stable, so it performs well in applications like sautéing or pan-frying.
INSTEAD OF THIS
Milk, cream, and yogurt
USE THIS
Whipped cashews, coconut or almond yogurt
WHY?
Soaked and pureed cashews make a surprisingly good substitute for dairy in creamy fillings and panades (paste made from bread and milk used to keep ground meat tender and moist). Nut-based yogurts also make a great stand-in for dairy-based yogurt in parfaits and creamy sauces.
INSTEAD OF THIS
All-purpose flour
USE THIS
Nut flours
WHY?
Since no single nut-based flour can perform the same functions as all-purpose flour, we use a combination of almond flour and coconut flour, along with arrowroot flour (see here for more information), to give baked goods structure.
INSTEAD OF THIS
Cornstarch
USE THIS
Arrowroot flour or tapioca flour
WHY?
We found that arrowroot flour works well to thicken sauces and gravies and helps to lighten the texture of baked goods. Tapioca flour works well in coatings, such as velveting chicken for stir-fries.
INSTEAD OF THIS
Sugar
USE THIS
Honey, maple syrup, coconut sugar, maple sugar, dried or fresh fruit
WHY?
Sugar—even raw sugar—is a highly processed food. Instead, we use natural sweeteners, like honey, maple syrup, maple sugar, coconut sugar, and fruit. Each of these sweeteners has different characteristics (like flavor and moisture content); we chose which one to use based on the specific recipe.
INSTEAD OF THIS
Store-bought broths
USE THIS
Homemade broths or water
WHY?
Most store-bought broths contain additives, preservatives, and sugar—and those that don’t can be hard to find. Homemade broths (see the recipes) have a depth and intensity that store-bought broths lack, and even a small amount can provide a boost of savory flavor to many recipes. When possible, we make a broth within the body of a recipe to help keep things streamlined. That means using bone-in cuts or adding marrow-rich bones to recipes like beef stew. In recipes that already have a lot of flavor but need a small amount of liquid, water does the trick.
INSTEAD OF THIS
Canned tomatoes
USE THIS
Fresh tomatoes and/or tomato paste
WHY?
Most brands of canned tomatoes contain preservatives and some even contain added sugar. We use fresh tomatoes wherever possible, processing them to approximate canned diced tomatoes. When appropriate, we also boost tomato flavor with tomato paste, which is simply tomato puree that is cooked to remove moisture.
INSTEAD OF THIS
Rice and potatoes
USE THIS
Cauliflower or celery root
WHY?
We use cauliflower to make “rice” by processing the raw florets into rice-size pieces. Hardy root vegetables like celery root, rutabaga, or parsnips, which hold their shape nicely when cooked, work well in place of potatoes.
INSTEAD OF THIS
Soy sauce
USE THIS
Coconut aminos and fish sauce
WHY?
To replace soy sauce, we use two ingredients to create a similarly salty, savory flavor profile: coconut aminos, which looks like soy sauce but has a slightly sweeter, less intense flavor (see here for more information), and fish sauce, which helps deepen savory flavor but doesn’t taste fishy when used in small quantities.
Buying Produce, Meat, and Seafood
Paleo meals should be nutrient-dense, satisfying, and, most of all, delicious. Meat and vegetables are the building blocks of paleo cooking, and what you buy will make a difference in how your dishes turn out. Although shopping for paleo-friendly ingredients like pasture-raised pork or wild-caught salmon might take some extra effort, the resulting dishes will be well worth the time spent.
Produce
The paleo diet encourages you to eat organic, non-GMO fruits and vegetables whenever possible, since these are not grown using pesticides and so will not contain any trace chemicals. If you can’t buy all organic produce, try buying organic for the items known as the “Dirty Dozen”. This list is published annually by the Environmental Working Group (EWG), and you can find the latest updates at ewg.org/foodnews. The food with the highest pesticide residue is at the top.
On the other hand, the EWG also publishes the “Clean 15”, which lists the items with the least amount of pesticide. These are considered safer to buy conventionally grown. This list starts with the food with the lowest pesticide residue.
DIRTY DOZEN |
CLEAN 15 |
|
Apples Peaches Nectarines Strawberries Grapes Celery Spinach Sweet Bell Peppers Cucumbers Cherry Tomatoes Snap Peas (imported) Potatoes
|
Avocados Sweet Corn (not paleo) Pineapples Cabbage Sweet Peas (frozen) (not paleo) Onions Asparagus Mangos Papayas Kiwi Eggplant Grapefruit Cantaloupe Cauliflower Sweet Potatoes |
Meat
Most beef sold in supermarkets today is grain-fed, meaning that after the animals are 6 months old, they are fed a diet of corn and other grains. These grains are cheap and fatten the animals quickly, lowering production costs for large-scale farms and increasing the marbling in the meat. But since cows’ bodies are not designed to digest corn, this type of diet makes them sick, often requiring antibiotics. Grass-fed animals, on the other hand, eat grass and hay, are not fed antibiotics or growth hormones, and are not confined. Grass-fed meat is generally leaner than grain-fed, but after some testing, we discovered that the differences are minimal. Note that because it has less fat, grass-fed beef is less forgiving when it comes to overcooking, so be sure to check the temperature of the meat at the beginning of the time range. The best way to source grass-fed beef, lamb, and bison is to seek out a high-end grocery store or a local butcher shop.
Unlike cows, pigs and chickens are naturally omnivorous and have no trouble digesting grain. But conventionally raised pigs and chickens are often confined to tiny cages in unhygienic conditions with no room to roam. So when shopping for pork, poultry, and eggs, try to purchase pasture-raised. Note that the term “pasture-raised” is not government regulated, so you’ll have to look for third-party certifications, like Certified Humane, Animal Welfare Approved, or American Humane Certified. (“Free-range” means that animals must have access to the outdoors, but the amount, duration, and quality of access are not defined.) If you can’t find pasture-raised chickens, go for organic: Certified organic producers must follow stricter guidelines than conventional producers. Birds must be fed organic (and therefore non-GMO) feed, be raised without antibiotics, and have access to the outdoors (though how much is not regulated).
In addition, be sure to avoid pork or chicken that has been “enhanced,” meaning it has been injected with flavorings. It’s not paleo, and it compromises the flavor and texture of the meat. We also recommend that you avoid water-chilled chicken, which is chilled after slaughter in a water bath that may contain chemicals like chlorine. Instead, look for labels that say “air-chilled.” Besides not containing added chemicals, air-chilled birds don’t absorb extra water (which you would pay for at the market).
Seafood
When purchasing fish and other seafood, your best bet is to find a reliable high-end grocery store or local seafood purveyor, and look for fish that is wild-caught and sustainable. For the most up-to-date recommendations on sustainable seafood choices, look for the Marine Stewardship Council logo at the store, or check the Monterey Bay Aquarium Seafood Watch website (montereybayaquarium.org).
When buying shrimp, there are a few things to keep in mind. Just because shrimp is raw doesn’t mean it’s fresh. Since only 10 percent of the shrimp sold in this country comes from U.S. sources, chances are the shrimp has been previously frozen. Unless you live near a coastal area, “fresh” shrimp likely means defrosted shrimp. We recommend skipping the seafood counter and going straight for the freezer section. There, you’ll find wild shrimp that have been individually quick-frozen (IQF). IQF shrimp are frozen at sea, locking in quality and freshness. Make sure to read the ingredient list carefully; “shrimp” should be the only ingredient listed on the bag or box. (In an effort to prevent darkening or water loss during thawing, some manufacturers add salt or sodium tripolyphosphate [STPP]. Not only are these additives not paleo-friendly, our tasters found an unpleasant texture and taste in salt-treated and STPP-enhanced shrimp.) Finally, look for shrimp with the shells still on; they have more flavor and better texture.
Shellfish like lobsters and crab are all wild-caught and are well suited for a paleo diet as long as they are not processed. For example, canned crab meat often contains additives that are not paleo-friendly. Look for fresh, in-season crab if you can find it. Some other shellfish, such as clams and mussels, are mostly farmed, but are still good options. When shopping for scallops, make sure that your scallops are “dry,” not “wet.” Wet scallops have been treated with a chemical solution to extend their shelf life, which compromises their quality and isn’t paleo-friendly. Dry scallops will look ivory or pinkish; wet scallops are bright white.
Restocking Your Pantry: What’s In, What’s Off-Limits, and Why
Getting started on a paleo diet can be intimidating, but familiarizing yourself with paleo ingredients and having a well-stocked pantry ensures that cooking paleo is easy and approachable. Below are a few essentials that we rely on throughout the book. Be sure to read all labels carefully when shopping, as some surprising items can contain nonpaleo ingredients like preservatives, stabilizers, or sugar.
Oils and Fats
Vegetable oil and other common cooking oils like canola, sunflower, or corn oil are generally made from genetically modified organisms (GMOs) and are often chemically refined. Although all oils are processed to some degree, these oils are more highly processed than other oils. In this book, we use minimally processed oils and fats.
GHEE: Ghee is made from butter that has had all of the milk solids removed. It is solid at room temperature and can be stored in the pantry—it does not need to be refrigerated. It is fairly high-heat stable, which means that it can be used as a cooking medium. Although you can buy ghee at many grocery stores, it is easy to make yourself (see the recipe).

COCONUT OIL: Made by extracting oil from the meat of coconuts, coconut oil comes in “refined” and “unrefined” versions. We generally prefer to use refined coconut oil, since its coconut flavor is less pronounced. Some refined coconut oil undergoes chemical processing, so check labels carefully and look for oils that are expeller pressed. Coconut oil is solid at room temperature—we don’t recommend keeping it in the fridge, since it gets very hard.
EXTRA-VIRGIN OLIVE OIL: Real extra-virgin olive oil is pressed without using heat or chemicals. It has a lower smoke point than ghee or coconut oil but can still be used for cooking in most cases. It also works well in raw applications like dressings. Our favorite high-end olive oil, which is best enjoyed in raw applications, is Columela. For cooking, we like California Olive Ranch Arbequina or Lucini Italia Premium Select.
MACADAMIA NUT OIL: This nut-based oil has a light, pleasant flavor that makes it well suited for homemade mayonnaise. Macadamia oil has a high smoke point, which means you can use it for cooking, but we recommend saving this relatively pricey oil for raw applications like mayo and salad dressing.
AVOCADO OIL: Avocado oil is extracted from the soft flesh of avocados, not the seeds as many other oils are. We prefer the neutral flavor of refined avocado oil to unrefined, which has a strong and distinct flavor. Like macadamia oil, we recommend saving this pricey oil for raw applications, although it does have a high smoke point and can be used for cooking.
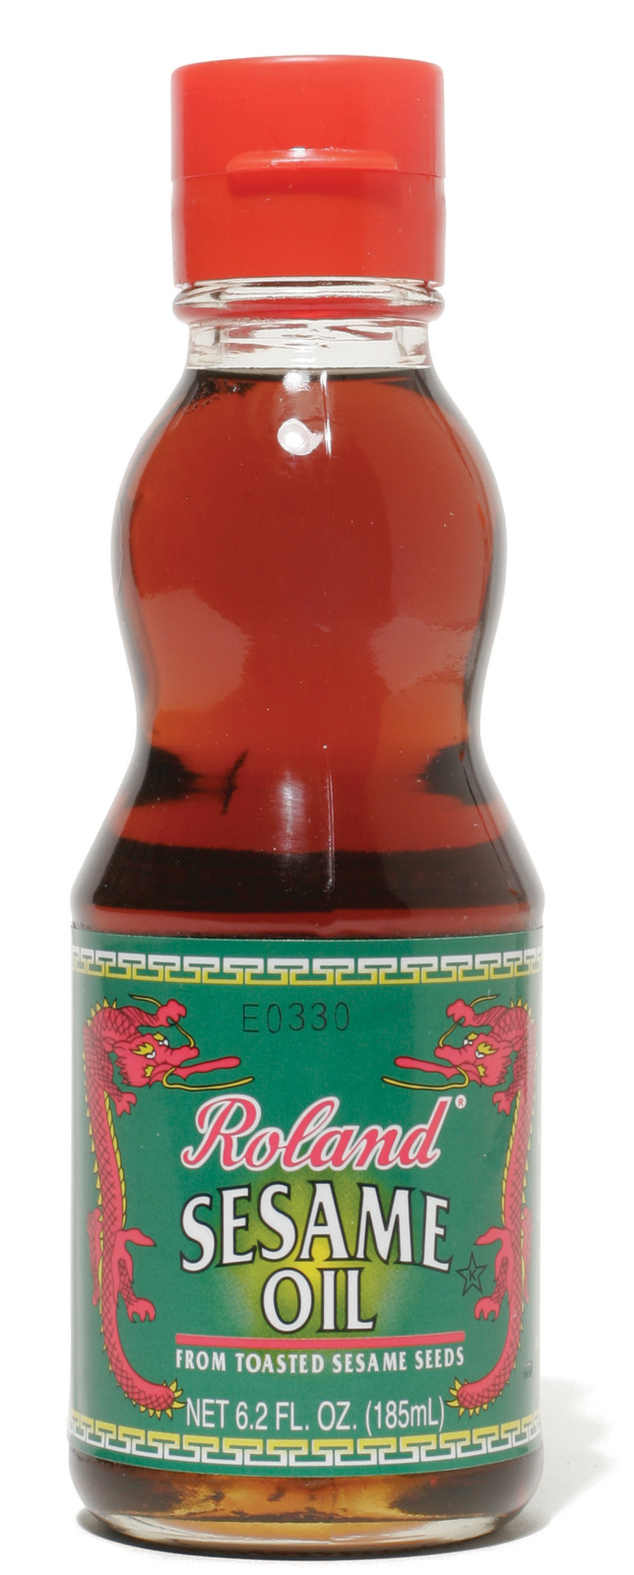
TOASTED SESAME OIL: This flavorful, nutty-tasting oil is made from toasted sesame seeds. We use it largely in raw applications, though it also provides flavor to some of our stir-fry recipes. Purchase sesame oil in a glass bottle and refrigerate it to extend its shelf life.
RENDERED BACON FAT: Bacon is a great way to enhance the meaty depth of a dish, and it makes a savory addition to a variety of recipes. If we’re already using bacon in a recipe, we sometimes use the bacon fat as a cooking medium or as an ingredient. If you’re serving bacon but not using the fat right away, you can reserve the rendered fat to use later. Keep rendered bacon fat in the fridge for up to one month.
Flours, Starches, and Other Baking Essentials
Many of the fundamental ingredients used in baking, such as wheat flour, sugar, and butter, aren’t included in the paleo diet. And even many common “alternative” flours, like rice flour or chickpea flour, are grain- or legume-based. We had to completely rethink our baking pantry essentials. See here for more information.

ALMOND FLOUR: We use high-protein almond flour as the bulk of the flour in most of our baking recipes—its mild, subtly sweet, nutty flavor works well in a variety of applications. Almond flour is usually made with blanched almonds, while almond meal can be made with blanched almonds or almonds with their skins on. We prefer flour (or meal) made from blanched almonds since the lighter color tends to be more versatile and appealing. You can make your own almond flour by grinding blanched almonds in the food processor. Store almond flour in the refrigerator or freezer to extend its shelf life.

COCONUT FLOUR: Coconut flour is made from dried ground coconut meat. It has a noticeable coconut flavor when used on its own, but we tend to use it in small amounts to break up the denseness of almond flour, giving baked goods more structure and a better crumb. We also use it to help absorb the fat and liquid that almond flour can’t. Store coconut flour in the refrigerator or freezer to extend its shelf life.

ARROWROOT FLOUR: Arrowroot flour is a pure starch. We use it for a range of purposes, including as an ingredient in baked goods, where it provides balance to protein-heavy almond and coconut flours. We also use arrowroot to make a batter for fried chicken: The starch crisps up nicely in the hot oil without becoming heavy or saturated. We find that to prevent a gritty texture in baked goods and batters, it is important to let the uncooked mixture rest to allow the arrowroot to fully hydrate. Arrowroot is also useful as a thickener; just a small amount gives pan sauce a better consistency. Arrowroot should be stored in the pantry.

TAPIOCA FLOUR: Made from the starchy tuberous root of the cassava plant, this white powder, like arrowroot, is a pure starch. But different starches absorb water, swell, and gel at different temperatures and to different degrees; we found that tapioca and arrowroot are not interchangeable. Tapioca starch works best in coatings, such as when velveting meat for a stir-fry or dredging chicken for a bound “breading.” It also makes a good thickener in our stir-fry sauces, where an ultrasmooth, satiny texture is desirable. In addition, we use tapioca in our Paleo Wraps, since it gives the finished wraps some elasticity and stretch. Tapioca flour is sometimes labeled tapioca starch. Either product can be used in our recipes. Tapioca should be stored in the pantry.

BAKING SODA: Containing just bicarbonate of soda, baking soda provides lift to baked goods. When baking soda, which is alkaline, encounters an acidic ingredient (such as lemon juice), carbon and oxygen combine to form carbon dioxide. The tiny bubbles of carbon dioxide then lift up the dough or batter. In addition to lift, baking soda improves browning in everything from pie dough to batter-fried chicken, and can help tenderize tough proteins like lamb shoulder chops or calamari.
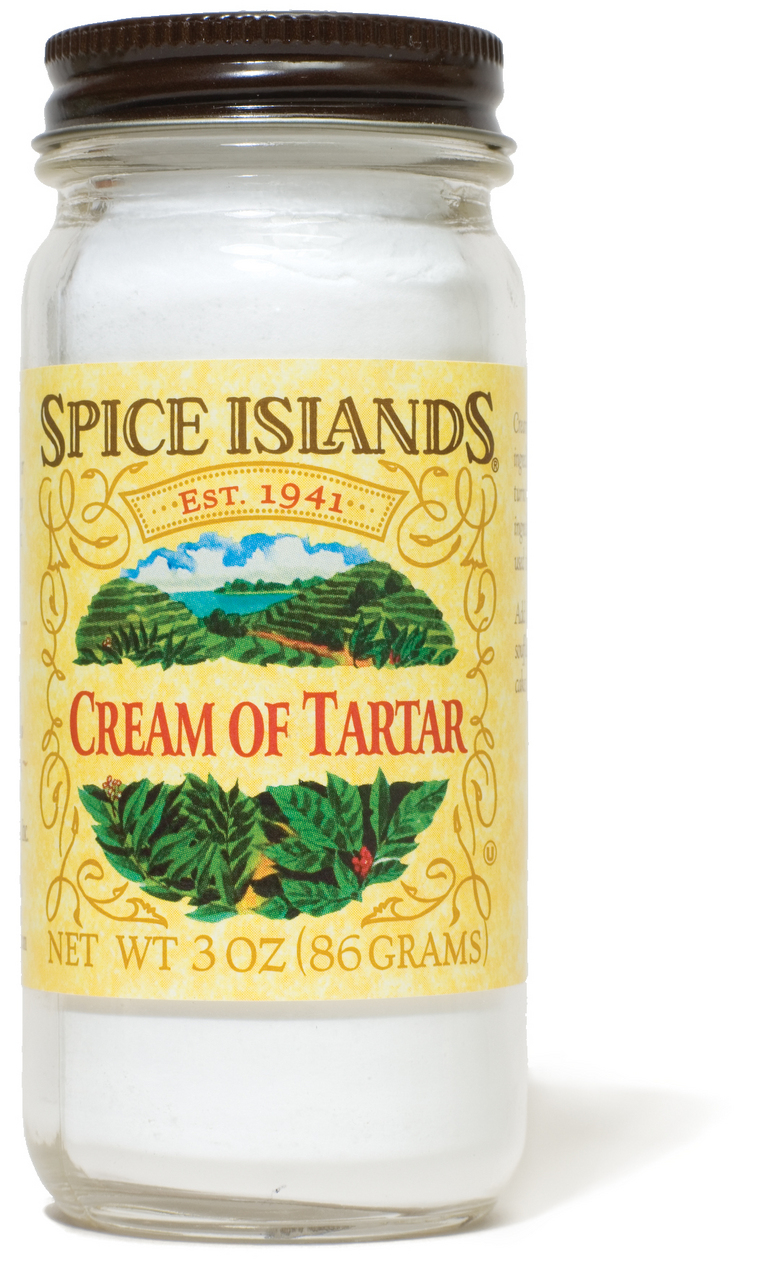
CREAM OF TARTAR: This fine white powder is sold in small bottles in the spice aisle, but it’s not actually a spice—it’s a byproduct of the wine-making process. Since cream of tartar is naturally acidic, we use cream of tartar and baking soda to approximate the effects of baking powder. Baking powder contains both baking soda and an acidic ingredient and is traditionally used in recipes where there is no natural acidity. Since it generally contains cornstarch to keep the powder dry, baking powder is not paleo-friendly.

PSYLLIUM HUSK: We use psyllium husk powder in our Paleo Sandwich Rolls to help create an open crumb and good structure. Psyllium interacts with proteins to create a strong network capable of holding in lots of gas and steam during baking. It provides a strong enough structure to support the rolls even when they’ve cooled. It also adds a pleasant, wheaty flavor. We tested a number of widely available brands of powdered psyllium husk and found their performance varied. We had the best luck using Now Foods Psyllium Husk Powder, which is available online.
Natural Sweeteners
White sugar is highly processed; chemicals must be used to purify the cane syrup and turn it into refined sugar. Instead, the paleo diet relies on natural sweeteners, like the ones listed here. We choose which sweetener to use based on each individual recipe; because each option has a distinct flavor and interacts with other ingredients differently, it’s helpful to have a variety of sweeteners on hand.
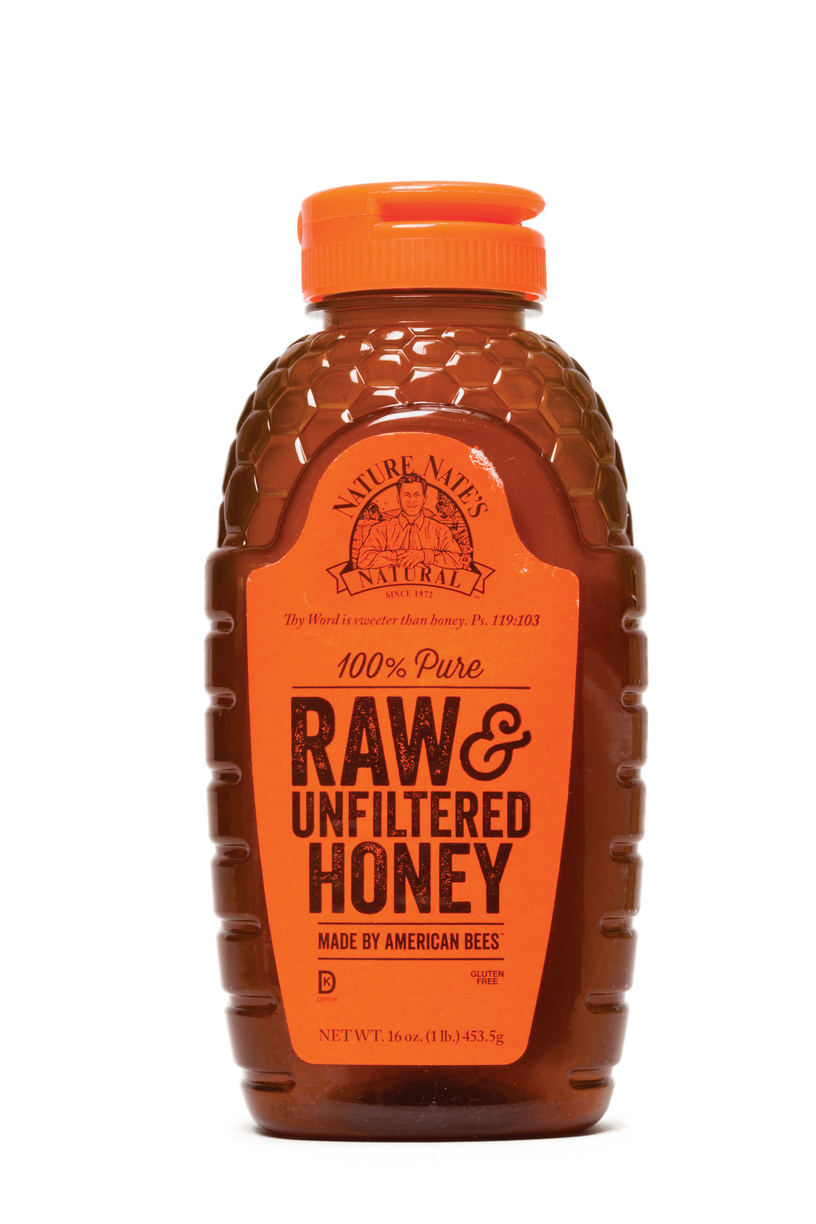
HONEY: The flavor of honey, which is made by bees from the nectar of flowers, varies depending on the source of the nectar and on the style of processing. Honey comes in two styles: traditional translucent honey and raw honey. All honey is heated and strained to remove impurities: Traditional honey is strained under high pressure to remove pollen, while raw honey is gently strained, just enough to rid it of wax or debris. We prefer the more nuanced flavor of raw honey—our favorite is Nature Nate’s 100% Pure Raw and Unfiltered Honey. Since it has such a distinct flavor, it is best used in specific applications where the flavor is desirable or won’t be noticed. Store honey in the pantry; it will keep indefinitely.
MAPLE SYRUP: Although maple syrup ranges in color and flavor, from mild-tasting light amber to boldly flavored, dark-colored syrups, all maple syrup is produced the same way—by boiling the sap of maple trees. Choose one that best suits your tastes, and make sure the ingredient label reads only “maple syrup.”

MAPLE SUGAR: Maple sugar is made by boiling the liquid out of maple syrup. Like cane sugar, it is granulated and can be used in a wide variety of applications. We like to use maple sugar in recipes where a maple flavor is desirable, but extra moisture (as would be found in maple syrup) is not.
COCONUT SUGAR: Coconut sugar is made from coconut palm flower sap, from which the liquid is evaporated over moderate heat. Like maple sugar, it usually comes granulated. Its flavor is more mild than maple sugar’s, but, like maple sugar, it doesn’t add extra moisture to a recipe. We use coconut sugar in muffins to give them a neutral-flavored sweetness.
DRIED FRUIT: Dried fruits, like dates and raisins, can make great natural sweeteners. Since every fruit has its own distinct flavor profile, it’s important to choose the fruit carefully based on the recipe. Sometimes we puree dried fruit (as in our All-Morning Energy Bars to create uniform sweetness or flavor, but we also use small pieces of dried fruit to provide bursts of sweetness in a dish.
Seasonings and Flavorings
While most herbs and spices are paleo-friendly, some other ingredients that we use to boost flavor are not—like soy sauce, Parmesan cheese, and wine, to name a few. But without these ingredients, some dishes can taste flat. Keeping your pantry stocked with the ingredients below can help ensure that your food tastes great.
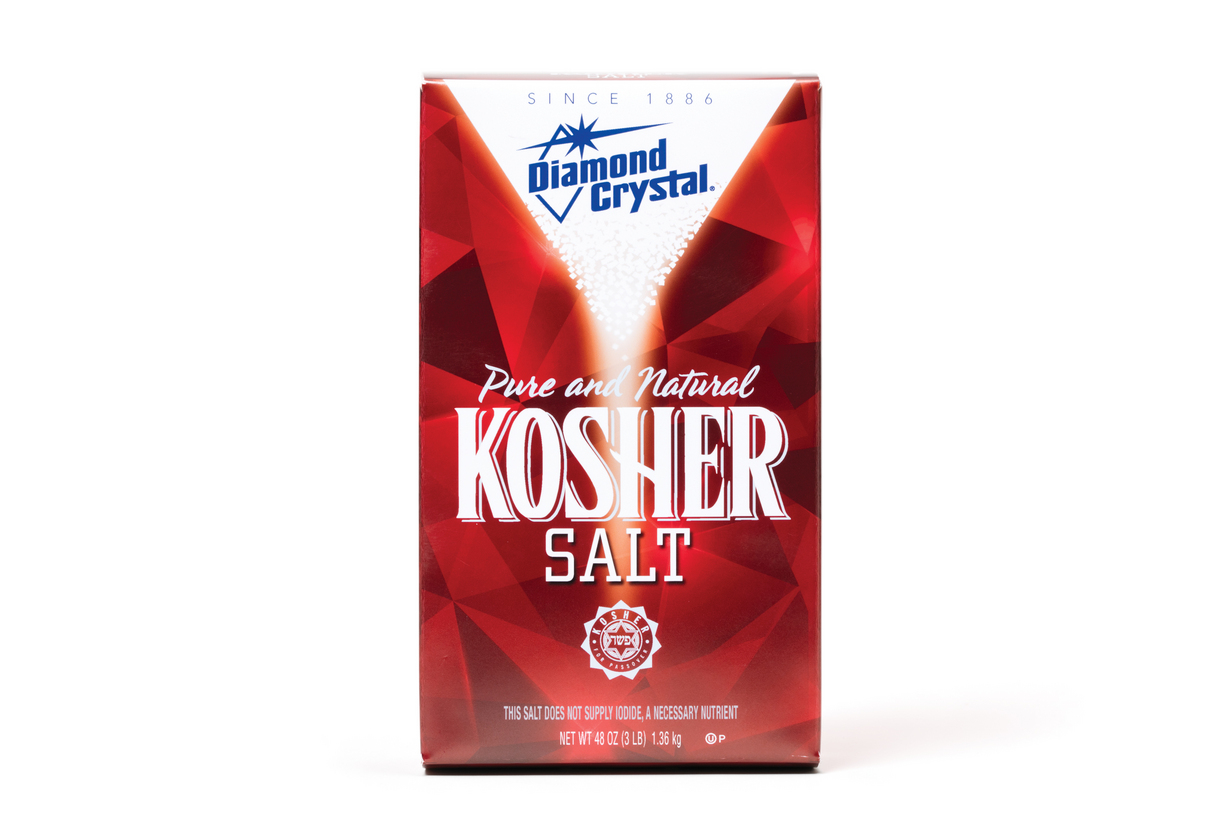
KOSHER SALT: Table salt often contains anti-caking agents and other additives that are not part of the paleo diet. All of the salt called for in this book is kosher salt. The larger crystals in kosher salt mean that it weighs less than table salt, so you must use more of it to achieve the same flavor. Do not use table salt in the recipes in this book, as it will make dishes taste overly salty. We use Diamond Crystal Kosher Salt in the test kitchen (note that Morton’s Kosher Salt, another common brand, contains anticaking agents and should be avoided). You can substitute finely ground sea salt for the kosher salt; reduce the amount of salt by half if using sea salt.
VINEGAR: Vinegar isn’t just for making vinaigrettes; we also use it to perk up sauces, stews, and braises. Much like lemon or lime juice, a drizzle of acidic vinegar before serving can brighten and balance a dish. Different types lend distinct flavors to dishes, and we rely on several varieties in this book to lend nuanced flavor to recipes. We recommend keeping a variety of vinegars on hand, such as sherry vinegar, balsamic vinegar, white and red wine vinegars, and cider vinegar. Check labels carefully to make sure the vinegar does not contain added sugars, artificial colors, or other additives.
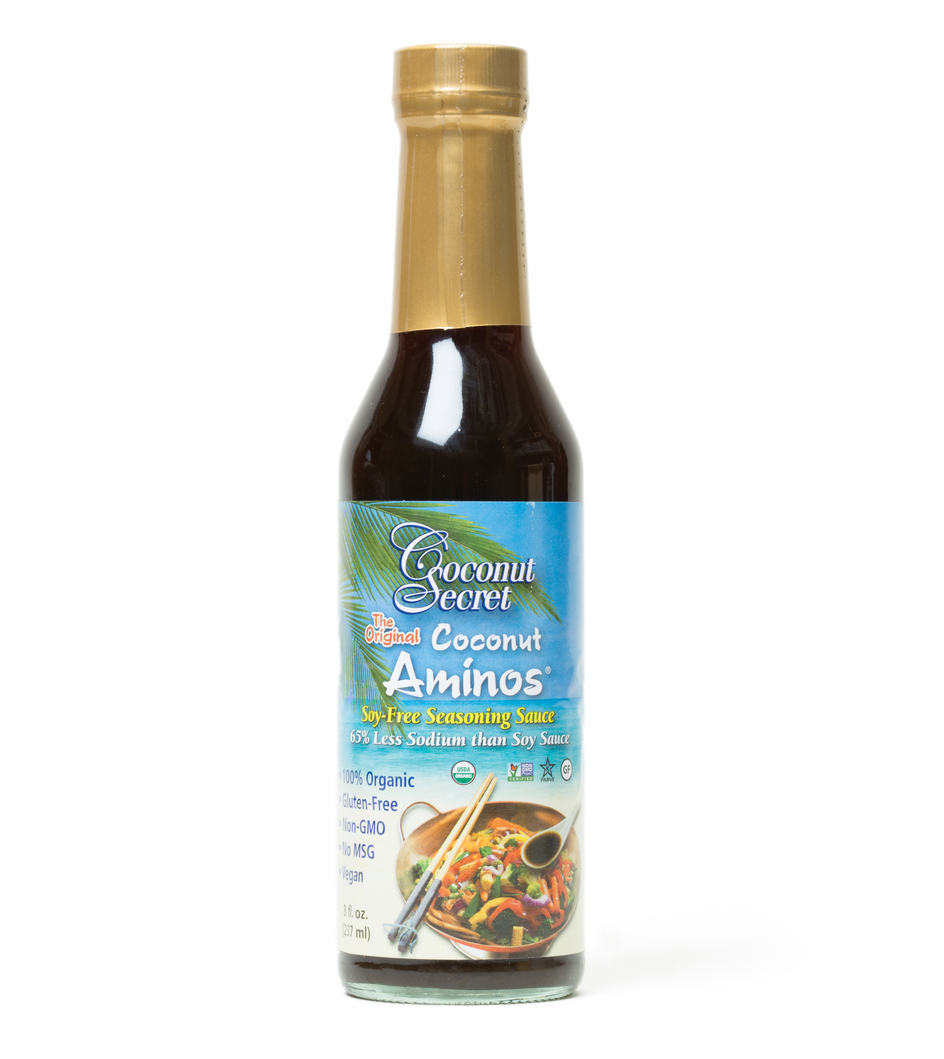
COCONUT AMINOS: Coconut aminos is often used as a paleo replacement for soy sauce. It’s made by aging coconut tree sap. The dark, almost black liquid looks similar to soy sauce, though we find the flavor of coconut aminos to be sweeter and less intense than that of soy sauce. Look for coconut aminos in the international aisle of well-stocked supermarkets, specialty stores, or online.

FISH SAUCE: At its most basic, fish sauce is made from just fermented anchovies and salt. The amber-colored liquid is used both as an ingredient and a condiment in Asian cuisines. We use small amounts of fish sauce to add well-rounded savory flavor to many dishes, including stir-fries. But many brands of fish sauce contain additives or preservatives; make sure to read labels carefully and buy one with only anchovies and salt on the ingredient list. We use Red Boat 40° N Fish Sauce in our recipes.
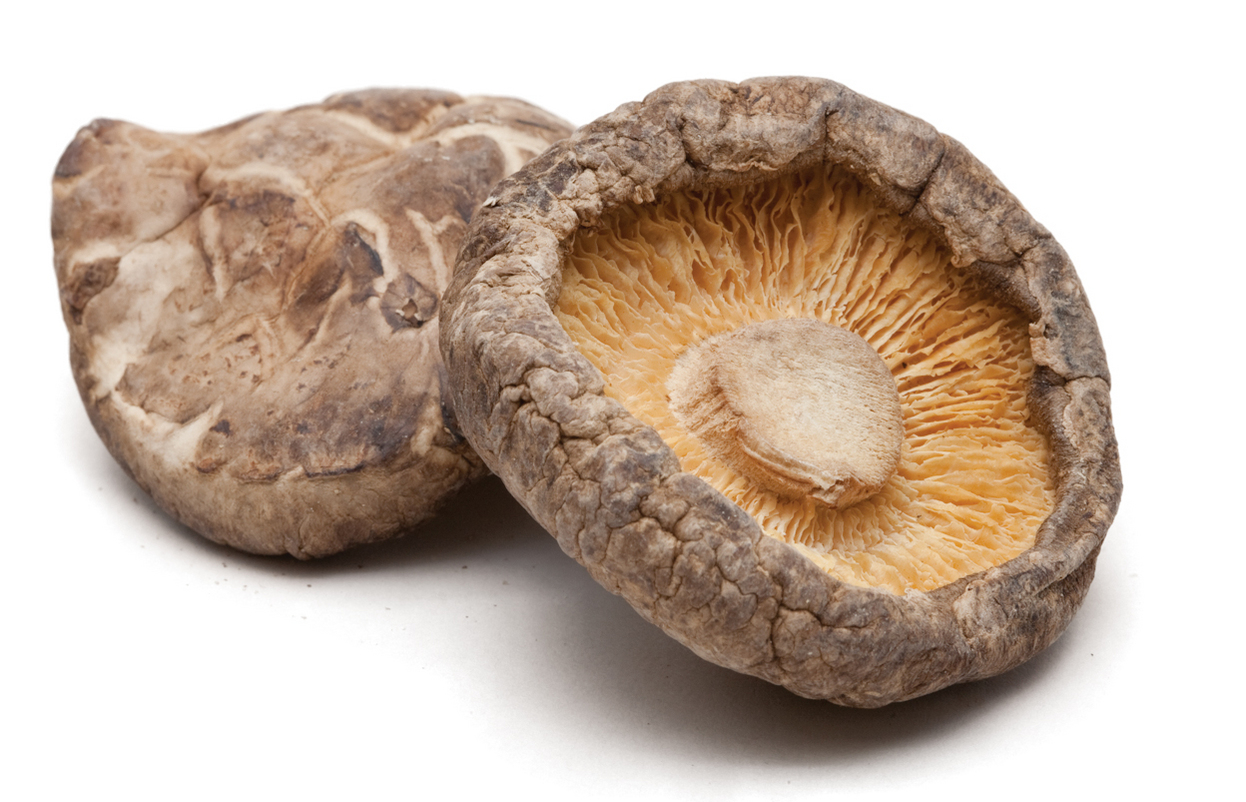
DRIED MUSHROOMS: Mushrooms are particularly high in savory umami flavor, and are especially useful when cooking paleo dishes that use water instead of broth. Dried mushrooms have highly concentrated flavor, giving recipes a major dose of meatiness; dried porcini or shiitake are good options. When buying dried mushrooms, always inspect them closely. Avoid those with small holes, which indicate the mushrooms may have been subjected to pinworms. The mushrooms should also be free of dust and grit.

ANCHOVIES: These small fish are salt-cured and then packed in either salt or olive oil. Like fish sauce, they can add savory depth to everything from stews to braises. Anchovy paste provides a similar flavor; you can substitute ¼ teaspoon of paste for one anchovy fillet. (However, when a recipe calls for more than a couple of anchovies, skip the paste and use jarred fillets; the intensity of the paste can be overwhelming in larger quantities.) Be sure to read labels carefully to ensure that your anchovies (or anchovy paste) are paleo-friendly. Our favorite brand of anchovies is Ortiz.

THAI RED CURRY PASTE: Thai red curry paste combines a number of hard-to-find, authentic Thai aromatics—including galangal (Thai ginger), bird’s eye chiles, lemon grass, and kaffir lime leaves—in one easy-to-find ingredient. It is usually sold in small jars with the Thai ingredients at the supermarket. Be sure to check the label to make sure the ingredients are paleo-friendly.
Miscellaneous Essentials
Just as in nonpaleo cooking, it’s important to keep your pantry stocked with a few key ingredients that you’ll use often. Here are some that we think are important to know about.
TOMATO PASTE: Most canned tomatoes contain sugar and chemical additives, so they’re not considered paleo. The exception: tomato paste (but be sure to check labels). Tomato paste is tomato puree that has been cooked to remove almost all moisture. It can provide long-simmered tomato flavor in dishes that would normally rely on canned tomatoes. We also use tomato paste to add savory flavor to recipes. Because it’s so concentrated, it’s naturally full of glutamates, which provide the meaty flavor known as umami.
MUSTARD: Mustard is useful for more than just topping burgers; it also lends bright, tangy flavor to many dishes and dressings. Not all mustards are paleo-friendly; many contain added sugar or preservatives, so check the labels carefully. We like to have Dijon and whole-grain mustards on hand. If you’d like to make your own, see our recipes on pages 20-21.
NUT MILK YOGURTS: Like regular cow’s milk yogurt, nut-based yogurts are made by culturing nut milks. But because nut milks don’t naturally thicken the way that cow’s milk does when cultured, they usually require some type of thickening agent—and often, store-bought nut yogurts utilize multiple thickening agents, stabilizers, and gums to achieve the right consistency. To avoid these, we make our own almond yogurt (see the recipe), which is great for breakfast parfaits or making creamy yogurt sauces.
Baking with Alternative Flours
All-purpose flour is milled from wheat berries, which contain starches, proteins, and fats. When flour comes in contact with water, gluten forms, which gives finished baked goods their structure and chew. When developing recipes like Blueberry Muffins and Paleo Single-Crust Pie Dough, we were charged with the task of figuring out how to create structure without using wheat flour. And since nut-based flours do not contain the proteins that create gluten, nor does any single nut flour work exactly like all-purpose flour, we had to use a combination of paleo-friendly almond flour, coconut flour, and arrowroot flour to give baked goods just the right structure, texture, and flavor.
FLOUR
Almond
WHY WE USE IT
Almond flour is perfect for creating volume—its mild, pleasant flavor makes a great base for a wide variety of recipes. But since it’s made from nuts, it has a much higher fat and protein content than regular all-purpose flour (all-purpose flour contains 10 to 12 percent protein, while almond flour contains a whopping 21 percent). While you might think that all that protein would provide a lot of structural integrity, the opposite is in fact true: The high fat content disrupts the protein network, so baked goods made from almond flour alone have little structure and turn out dense. Almond flour is also low in starch, which means it can’t absorb liquid. Combine the lack of absorption power with the fact that the fat from the nuts tends to leach out when baked, and you’ve got heavy, greasy baked goods. To counteract these problems, we decrease the amount of fat in our recipes (relative to traditional versions), and, more importantly, we supplement with coconut and arrowroot flours.
FLOUR
Coconut
WHY WE USE IT
Coconut flour works very differently than almond flour. For one thing, it is much higher in starch than almond flour, which means that it can easily absorb and trap liquid during mixing and baking. Plus, coconut flour is defatted and dehydrated during production, so its ability to absorb liquids is increased even further. Because of this, it can turn baked goods too dry when used in large amounts, but when used judiciously, it can help give baked goods structure, improve their texture, and create a more open crumb.
FLOUR
WHY WE USE IT
Arrowroot flour is a pure starch, which means it contains no protein at all. Because it is a starch, it absorbs liquids easily and helps to lighten the texture of baked goods without making them overly dry. We found that when using arrowroot in doughs or batters, a resting period is often necessary to allow the starch granules to fully hydrate and not taste gritty or starchy. (Tapioca flour, like arrowroot flour, is a pure starch, but tasters found that it gave baked goods an off-flavor and a pasty texture. We like tapioca better as a coating for meat in stir-fries and when creating a bound breading.)
Spiralizing 101
Vegetables are an integral part of the paleo diet, so it’s important to have creative ways to incorporate them into your meals. Spiralized vegetables can work as a main meal, a side dish, or a colorful and healthy addition to soups and stews—almost anywhere that traditional recipes might call for pasta.
The Best Veggies to Use
During our testing, we found that vegetables with solid cores were a must for spiralizing—hollow vegetables like acorn squash or very soft vegetables like tomatoes do not spiralize well. We chose noodles that paired well with the other flavors and textures in each recipe; overall, we favored summer squash, zucchini, butternut squash, and carrots. Summer squash and zucchini have delicate, neutral flavor profiles that meld seamlessly with flavorful sauces. They have a pasta-like texture with pleasant chew, and hold their shape nicely once cooked. They are quite easy to spiralize, and they work as short noodles or longer, spaghetti-like strands. Carrots, with their sturdy texture, spiralize beautifully, and make a great base for a side dish where their distinct flavor can shine.
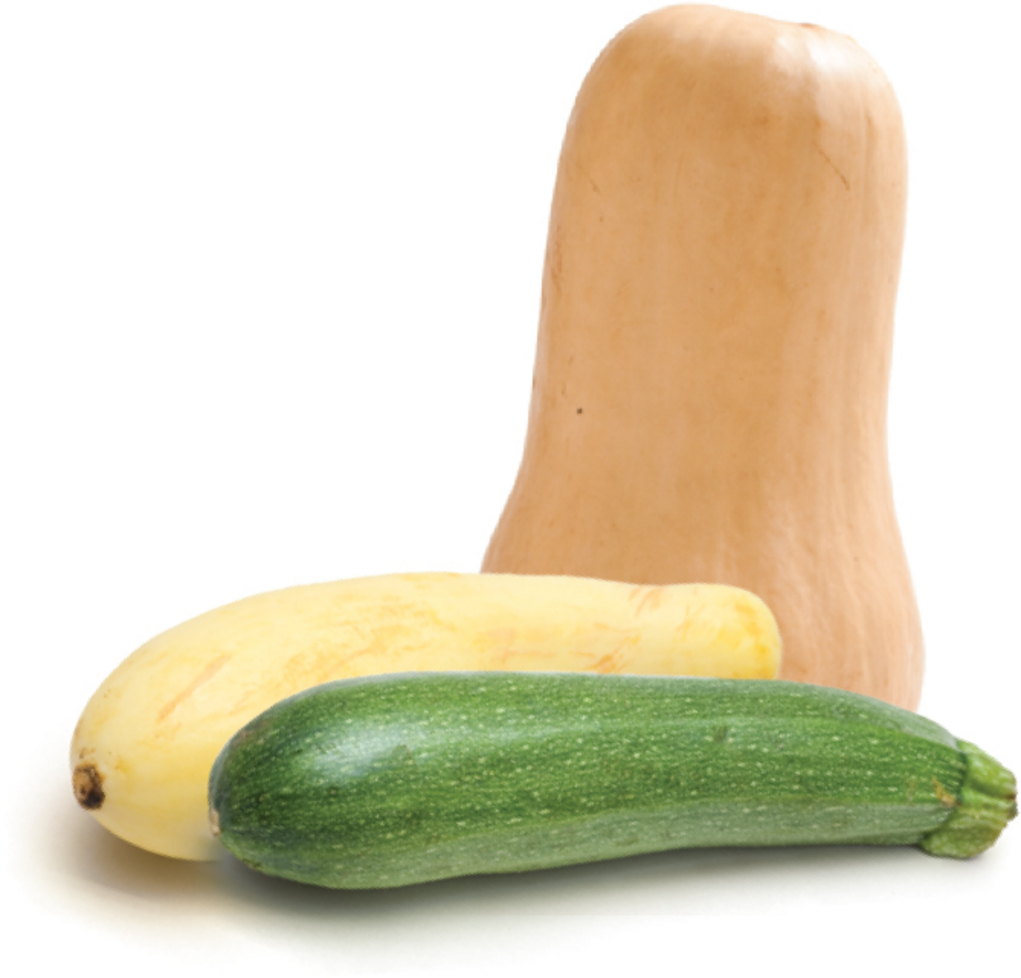
Tasters also loved the flavor of butternut squash noodles; their subtle sweetness works well with bold sauces. However, butternut squash is more difficult to spiralize than zucchini and summer squashes, since it is a harder vegetable. We cut off the seed-filled bulbs and reserve them for other uses, spiralizing only the solid necks. Cooked, butternut squash noodles are considerably more delicate than zucchini and summer squash, making it more difficult to get long strands.
Although the flavors of zucchini, summer squash, carrots, and butternut squash work best with the recipes in this book, vegetables like beets, celery root, cucumbers, parsnips, rutabaga, and sweet potatoes can also be successfully spiralized.
Cooking Spiralized Noodles
In addition to finding the best types of noodles, we had to test a number of different cooking techniques to find the best way to prepare them. Zucchini noodles tasted great raw in some applications, but most recipes worked best with cooked noodles. Boiling the noodles in salted water didn’t work, since the water later leached out of the noodles and into the sauce. We also tried sautéing, but fitting a full batch of noodles in a skillet was challenging, and even with constant stirring, the noodles cooked unevenly. We liked roasting best: It was easy to spread all of the noodles out on a baking sheet, and the noodles softened evenly while maintaining some texture and chew. Roasting also eliminated excess moisture, preventing the finished dishes from becoming watery.
When roasting tender vegetable noodles like summer squash and zucchini, we roast them uncovered for the entire cooking time. This allows moisture to evaporate and results in tender, flexible noodles. We find that draining the noodles after cooking helps to further ensure that we don’t end up with unwanted moisture in the finished dish.

When roasting firmer vegetable noodles, like butternut squash, beets, celery root, or sweet potatoes, we recommend cooking them covered with foil for part of the cooking time so that they will steam slightly and become tender. Removing the foil partway through allows the surface moisture to evaporate. Don’t drain these noodles; because they contain less moisture to begin with, they are less pliable once cooked, and transferring them to and from a colander results in unnecessary breakage.
Buying a Spiralizer

If you plan on making spiralized vegetables often, it’s worth purchasing a spiral slicer, or spiralizer. Spiralizers are relatively inexpensive and will save you time in the kitchen—if you buy the right one. There is a wide array of styles available, and we tested several models and found that not all of them work equally well. Our favorite model is the Paderno World Cuisine Tri-Blade Plastic Spiral Vegetable Slicer, which rapidly and effortlessly produces mounds of long, thick or thin strands and wide, curling ribbons. It works by holding food on prongs against a cutting blade while you turn a crank; our testers found it easy and intuitive. Its rectangular, 12-inch-long chamber can hold vegetables up to 10 inches long or 7 inches thick. It comes with three blades that store in the base of the unit and sets up in seconds.
What If You Don’t Have a Spiralizer?
If you don’t own a spiralizer, you can also use a mandoline or a V-slicer fitted with an ⅛-inch julienne attachment. Make sure to position the vegetable on the mandoline vertically so that your noodles are as long as possible. Our favorite mandoline is the Swissmar Börner Original V-Slicer Plus Mandoline, which cuts effortlessly and produces stunningly precise results.

Although it’s a little bit less efficient, you can also use a julienne peeler to create decent vegetable noodles. We do not recommend cutting vegetable noodles by hand.
How to Spiralize
Depending on your spiralizer, the amount of trimming required will vary. Be sure to check the recipe for specific instructions on peeling the vegetables and cutting the noodles.

1. Trim vegetable so it will fit on prongs. Secure vegetable between prongs and blade surface.
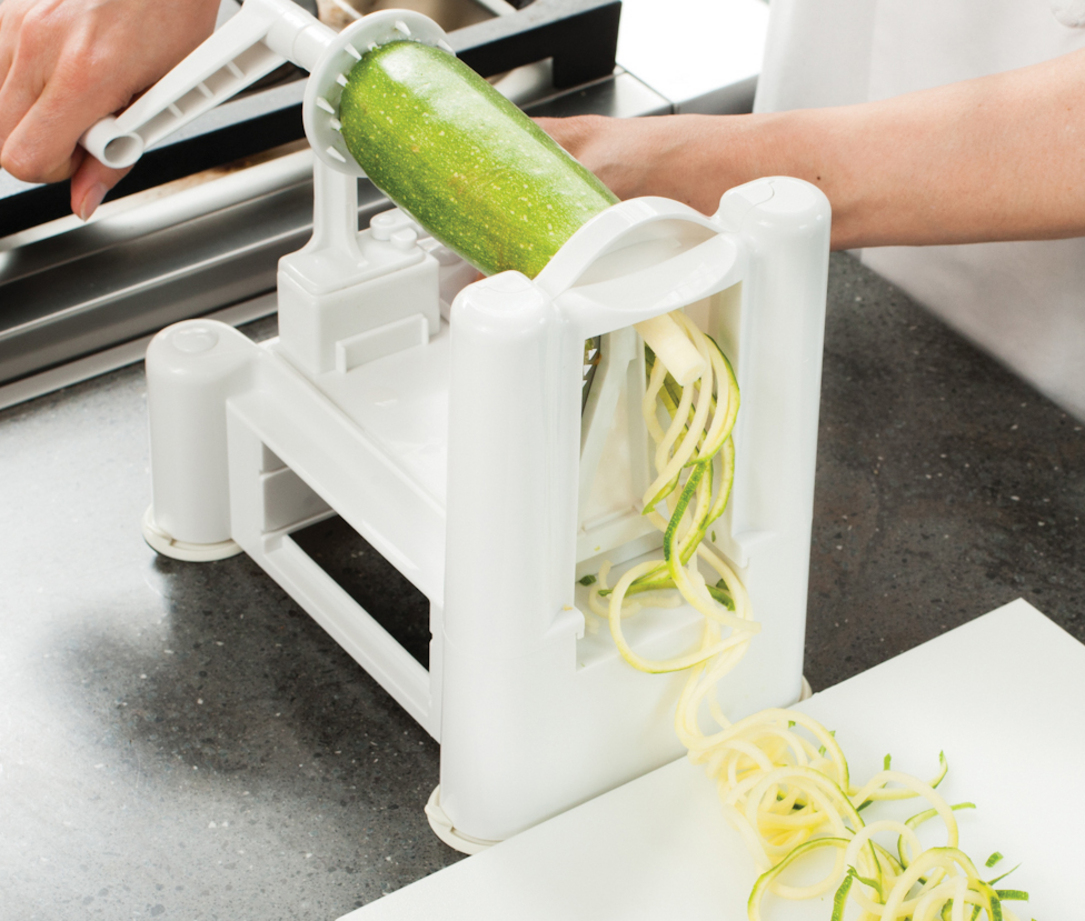
2. Spiralize by turning crank.

3. Pull noodles straight and cut into correct lengths as directed by recipe.
Since many of the store-bought items we rely on every day are not paleo-friendly (and versions that are can be difficult—if not impossible—to find), we created homemade versions that not only adhere to paleo standards, but also taste far better than anything we could buy.
MAKES ABOUT 1½ CUPS

![]() WHY THIS RECIPE WORKS Traditional ghee is made by slowly simmering butter until the liquid has evaporated and the milk solids have started to brown. The solids are then strained out so that all that’s left is pure butterfat. Because the milk solids have been removed, ghee no longer contains dairy, making it paleo-friendly. It’s an invaluable ingredient in the paleo pantry, since it is well suited for most high-heat cooking methods, and provides a rich, buttery flavor to many a dish. Making ghee at home is very simple and more economical than buying it. We first tried making ghee on the stovetop, but the direct heat increased the risk of burning the milk solids and ruining the ghee. Instead, we turned to the gentle, even heat of a low oven, and put the butter in an uncovered Dutch oven to ensure that all of the water evaporated. To give the ghee its signature nutty flavor, it was important to let it cook until the milk solids were well toasted. Finally, we lined a fine-mesh strainer with cheesecloth to ensure that none of the solids would slip through, which would compromise the ghee’s flavor and shelf life. Be sure to use unsalted butter here. This recipe can be doubled.
WHY THIS RECIPE WORKS Traditional ghee is made by slowly simmering butter until the liquid has evaporated and the milk solids have started to brown. The solids are then strained out so that all that’s left is pure butterfat. Because the milk solids have been removed, ghee no longer contains dairy, making it paleo-friendly. It’s an invaluable ingredient in the paleo pantry, since it is well suited for most high-heat cooking methods, and provides a rich, buttery flavor to many a dish. Making ghee at home is very simple and more economical than buying it. We first tried making ghee on the stovetop, but the direct heat increased the risk of burning the milk solids and ruining the ghee. Instead, we turned to the gentle, even heat of a low oven, and put the butter in an uncovered Dutch oven to ensure that all of the water evaporated. To give the ghee its signature nutty flavor, it was important to let it cook until the milk solids were well toasted. Finally, we lined a fine-mesh strainer with cheesecloth to ensure that none of the solids would slip through, which would compromise the ghee’s flavor and shelf life. Be sure to use unsalted butter here. This recipe can be doubled.
1 pound (4 sticks) unsalted butter
1. Adjust oven rack to middle position and heat oven to 250 degrees. Place butter in Dutch oven and bake uncovered until all water evaporates and solids are golden brown, 2½ to 3½ hours.
2. Line fine-mesh strainer with triple layer of cheesecloth that overhangs edges and set over large bowl. Let ghee cool slightly, then transfer to prepared strainer and let sit until all ghee is extracted; discard solids. (Cooled ghee can be stored at room temperature for up to 3 months or refrigerated for up to 1 year.)
MAKES ABOUT 8 CUPS
![]() WHY THIS RECIPE WORKS This rich and well-rounded chicken broth is perfect for use across a wide range of paleo recipes—as a base for soups, stews, and sauces; as a cooking medium; and even on its own. Many recipes for chicken stock call for simmering a whole chicken, but we found that cutting the chicken into pieces yielded more flavor by providing more surface area for browning. We tested a variety of vegetables to round out our broth and found that onion enhanced the chicken flavor while also imparting a gentle sweetness. Chopping and then sautéing the onion in the pot after browning the chicken helped concentrate the onion’s flavor. We simmered pots of broth from 1 to 24 hours, and tasters agreed that at 4 hours, our broth had the best flavor—a deep, well-rounded chicken base with a slightly aromatic sweetness. After 8 hours, the broth began to taste slightly metallic, and further cooking gave way to bitter, harsh, and even burnt tones. If using a slow cooker, you will need one that holds 5½ to 7 quarts. You can reserve the separated chicken fat in step 4 and substitute it in savory recipes where olive oil, coconut oil, or ghee are called for.
WHY THIS RECIPE WORKS This rich and well-rounded chicken broth is perfect for use across a wide range of paleo recipes—as a base for soups, stews, and sauces; as a cooking medium; and even on its own. Many recipes for chicken stock call for simmering a whole chicken, but we found that cutting the chicken into pieces yielded more flavor by providing more surface area for browning. We tested a variety of vegetables to round out our broth and found that onion enhanced the chicken flavor while also imparting a gentle sweetness. Chopping and then sautéing the onion in the pot after browning the chicken helped concentrate the onion’s flavor. We simmered pots of broth from 1 to 24 hours, and tasters agreed that at 4 hours, our broth had the best flavor—a deep, well-rounded chicken base with a slightly aromatic sweetness. After 8 hours, the broth began to taste slightly metallic, and further cooking gave way to bitter, harsh, and even burnt tones. If using a slow cooker, you will need one that holds 5½ to 7 quarts. You can reserve the separated chicken fat in step 4 and substitute it in savory recipes where olive oil, coconut oil, or ghee are called for.
1 tablespoon extra-virgin olive oil
3 pounds whole chicken legs, backs, and/or wings, hacked into 2-inch pieces
1 onion, chopped
8 cups water
3 bay leaves
Kosher salt
1. Heat oil in Dutch oven over medium-high heat until just smoking. Pat chicken dry with paper towels. Brown half of chicken, about 5 minutes; transfer to large bowl. Repeat with remaining chicken; transfer to bowl.
2. Add onion to fat left in pot and cook over medium heat until softened, about 5 minutes. Stir in 2 cups water, bay leaves, and 1 teaspoon salt, scraping up any browned bits.
3A. FOR THE STOVETOP: Stir remaining 6 cups water into pot, then return browned chicken and any accumulated juices and bring to simmer. Reduce heat to low, cover, and simmer gently until broth is rich and flavorful, about 4 hours.
3B. FOR THE SLOW COOKER: Transfer browned chicken and any accumulated juices and onion mixture to slow cooker. Stir in remaining 6 cups water. Cover and cook until broth is rich and flavorful, about 4 hours on low.
4. Remove large bones from pot, then strain broth through fine-mesh strainer into large container; discard solids. Let broth settle for 5 to 10 minutes, then defat using wide, shallow spoon or fat separator. (Cooled broth can be refrigerated for up to 4 days or frozen for up to 1 month.)
MAKES ABOUT 8 CUPS
![]() WHY THIS RECIPE WORKS We set out to create a deeply flavorful, nuanced beef broth that we could use in recipes or enjoy as a drinking broth. We started with the most important ingredient: the beef. Although many recipes call for roasting beef bones, we found that these broths didn’t have much beefy flavor. Using meat alone produced thin broths that lacked body. Finally, we settled on oxtails—they were economical, widely available, and served as all-in-one bundles of flavor-packed meat, fat, collagen-rich connective tissue, and bone marrow. Plus, since they’re sold precut, they didn’t require any special preparation at home. Next, we needed to figure out how to extract the most flavor from the oxtails. We browned them first to create fond, then simmered broths for 4, 8, 12, 24, and 48 hours. The range of colors and flavors amazed tasters; at 4 hours, the broth resembled chicken broth and had barely any beefy flavor, but by 48 hours, it had a burnt, metallic taste. Although the 12-hour broth had decent flavor, the 24-hour broth was the runaway winner: The beautiful mahogany color, rich beefy flavor, and luxurious, almost silky texture had tasters going back for seconds. An onion, a bit of tomato paste, and some bay leaves enhanced the broth’s meaty flavor while adding a touch of aromatic sweetness, and white mushrooms played a crucial role in rounding out the overall flavor with their warm, savory tones. We found that the long, slow simmer could be accomplished in a 200-degree oven or in a slow cooker set on low, keeping our recipe streamlined and hands-off. Try to buy oxtails that are approximately 2 inches thick and 2 to 4 inches in diameter; they will yield more flavor for the broth. Oxtails can often be found in the freezer section of the grocery store; if using frozen oxtails, be sure to thaw them completely before using. If using a slow cooker, you will need one that holds 5½ to 7 quarts. You can reserve the separated beef fat in step 4 and substitute it in savory recipes where olive oil, coconut oil, or ghee are called for.
WHY THIS RECIPE WORKS We set out to create a deeply flavorful, nuanced beef broth that we could use in recipes or enjoy as a drinking broth. We started with the most important ingredient: the beef. Although many recipes call for roasting beef bones, we found that these broths didn’t have much beefy flavor. Using meat alone produced thin broths that lacked body. Finally, we settled on oxtails—they were economical, widely available, and served as all-in-one bundles of flavor-packed meat, fat, collagen-rich connective tissue, and bone marrow. Plus, since they’re sold precut, they didn’t require any special preparation at home. Next, we needed to figure out how to extract the most flavor from the oxtails. We browned them first to create fond, then simmered broths for 4, 8, 12, 24, and 48 hours. The range of colors and flavors amazed tasters; at 4 hours, the broth resembled chicken broth and had barely any beefy flavor, but by 48 hours, it had a burnt, metallic taste. Although the 12-hour broth had decent flavor, the 24-hour broth was the runaway winner: The beautiful mahogany color, rich beefy flavor, and luxurious, almost silky texture had tasters going back for seconds. An onion, a bit of tomato paste, and some bay leaves enhanced the broth’s meaty flavor while adding a touch of aromatic sweetness, and white mushrooms played a crucial role in rounding out the overall flavor with their warm, savory tones. We found that the long, slow simmer could be accomplished in a 200-degree oven or in a slow cooker set on low, keeping our recipe streamlined and hands-off. Try to buy oxtails that are approximately 2 inches thick and 2 to 4 inches in diameter; they will yield more flavor for the broth. Oxtails can often be found in the freezer section of the grocery store; if using frozen oxtails, be sure to thaw them completely before using. If using a slow cooker, you will need one that holds 5½ to 7 quarts. You can reserve the separated beef fat in step 4 and substitute it in savory recipes where olive oil, coconut oil, or ghee are called for.
2 tablespoons extra-virgin olive oil
6 pounds oxtails
1 large onion, chopped
8 ounces white mushrooms, trimmed and chopped
2 tablespoons tomato paste
10 cups water
3 bay leaves
Kosher salt and pepper
1. Heat 1 tablespoon oil in Dutch oven over medium-high heat until just smoking. Pat oxtails dry with paper towels. Brown half of oxtails, 7 to 10 minutes; transfer to large bowl. Repeat with remaining 1 tablespoon oil and remaining oxtails; transfer to bowl.
2. Add onion and mushrooms to fat left in pot and cook until softened and lightly browned, about 5 minutes. Stir in tomato paste and cook until fragrant, about 1 minute. Stir in 2 cups water, bay leaves, 1 teaspoon salt, and ¼ teaspoon pepper, scraping up any browned bits.
3A. FOR THE OVEN: Adjust oven rack to middle position and heat oven to 200 degrees. Stir remaining 8 cups water into pot, then return browned oxtails and any accumulated juices to pot and bring to simmer. Fit large piece of aluminum foil over pot, pressing to seal, then cover tightly with lid. Transfer pot to oven and cook until broth is rich and flavorful, about 24 hours.
3B. FOR THE SLOW COOKER: Transfer browned oxtails and any accumulated juices and vegetable mixture to slow cooker. Stir in remaining 8 cups water. Cover and cook until broth is rich and flavorful, about 24 hours on low.
4. Remove oxtails, then strain broth through fine-mesh strainer into large container; discard solids. Let broth settle for 5 to 10 minutes, then defat using wide, shallow spoon or fat separator. (Cooled broth can be refrigerated for up to 4 days or frozen for up to 1 month.)
MAKES ABOUT 1¾ CUPS BASE; ENOUGH FOR 7 QUARTS BROTH
![]() WHY THIS RECIPE WORKS A good vegetable broth is an important ingredient to have on hand, but supermarket offerings don’t taste like vegetables—and they often include preservatives or additives. For a simple, economical, and space-saving solution, we decided to grind a selection of fresh vegetables, salt, and savory ingredients into a paste that we could store in the freezer and reconstitute as needed. Leeks provided an aromatic backbone, and a small amount of freeze-dried onions rounded out the flavor of the leeks. Tomato paste and coconut aminos provided a savory boost. Adding 2 tablespoons of kosher salt to the broth base not only helped with seasoning, but also kept it from freezing solid, making it easy to remove 1 tablespoon at a time. To make 1 cup of broth, stir 1 tablespoon of fresh or frozen broth base into 1 cup of boiling water. If particle-free broth is desired, let the broth steep for 5 minutes and then strain it through a fine-mesh strainer. For more information on coconut aminos, see here.
WHY THIS RECIPE WORKS A good vegetable broth is an important ingredient to have on hand, but supermarket offerings don’t taste like vegetables—and they often include preservatives or additives. For a simple, economical, and space-saving solution, we decided to grind a selection of fresh vegetables, salt, and savory ingredients into a paste that we could store in the freezer and reconstitute as needed. Leeks provided an aromatic backbone, and a small amount of freeze-dried onions rounded out the flavor of the leeks. Tomato paste and coconut aminos provided a savory boost. Adding 2 tablespoons of kosher salt to the broth base not only helped with seasoning, but also kept it from freezing solid, making it easy to remove 1 tablespoon at a time. To make 1 cup of broth, stir 1 tablespoon of fresh or frozen broth base into 1 cup of boiling water. If particle-free broth is desired, let the broth steep for 5 minutes and then strain it through a fine-mesh strainer. For more information on coconut aminos, see here.
1 pound leeks, white and light green parts only, chopped and washed thoroughly (2½ cups)
2 carrots, peeled and chopped (⅔ cup)
¾ cup chopped celery root
½ cup fresh parsley leaves and thin stems
3 tablespoons dried minced onions
2 tablespoons kosher salt
1½ tablespoons tomato paste
3 tablespoons coconut aminos
1. Process leeks, carrots, celery root, parsley, minced onions, and salt in food processor to fine paste, about 4 minutes, scraping down sides of bowl as needed. Add tomato paste and process for 1 minute, scraping down sides of bowl every 20 seconds. Add coconut aminos and process for 1 minute.
2. Transfer mixture to airtight container and tap firmly on counter to remove air bubbles. Press small piece of parchment paper flush against surface of mixture and cover. (Paste can be frozen for up to 6 months.)
MAKES ABOUT 1 CUP
![]() WHY THIS RECIPE WORKS Most store-bought mayonnaises have long ingredient lists that include preservatives, stabilizers, and unwanted additives, and even homemade mayo recipes often call for vegetable oil. We wanted to create a simple, paleo-friendly mayonnaise that could be used in many different applications. Most mayo recipes contain egg yolks, and for good reason: Egg yolks contain a natural emulsifier, which first helps bind the ingredients and then prevents them from separating, creating a uniformly creamy consistency. To make our mayo even more foolproof, we wanted to boost the emulsifying power of the egg yolks with another ingredient. We found that just a bit of Dijon mustard further emulsified the mixture and added a pleasant hint of acidity. Since vegetable oil was off the table, we replaced it with extra-virgin olive oil. We decided to use a food processor to mix our mayo since the mechanical agitation forms a much more stable emulsion than most cooks can achieve by hand. However, our mayonnaise ended up with an unpleasant bitter flavor. We were puzzled until we remembered a recent test kitchen discovery: Extra-virgin olive oil tends to become bitter when processed because it contains bitter-tasting compounds that break into small droplets at high processing speeds and become more prominent. We decided to cut the bitterness by supplementing with another oil. Our tests revealed that mild-flavored macadamia nut oil worked well; we could put it in the food processor without it becoming bitter. To balance out the flavor of the macadamia nut oil and create a more traditional-tasting mayo, we whisked in some olive oil by hand at the end. You can substitute refined avocado oil for the macadamia nut oil, if desired. This recipe can be doubled.
WHY THIS RECIPE WORKS Most store-bought mayonnaises have long ingredient lists that include preservatives, stabilizers, and unwanted additives, and even homemade mayo recipes often call for vegetable oil. We wanted to create a simple, paleo-friendly mayonnaise that could be used in many different applications. Most mayo recipes contain egg yolks, and for good reason: Egg yolks contain a natural emulsifier, which first helps bind the ingredients and then prevents them from separating, creating a uniformly creamy consistency. To make our mayo even more foolproof, we wanted to boost the emulsifying power of the egg yolks with another ingredient. We found that just a bit of Dijon mustard further emulsified the mixture and added a pleasant hint of acidity. Since vegetable oil was off the table, we replaced it with extra-virgin olive oil. We decided to use a food processor to mix our mayo since the mechanical agitation forms a much more stable emulsion than most cooks can achieve by hand. However, our mayonnaise ended up with an unpleasant bitter flavor. We were puzzled until we remembered a recent test kitchen discovery: Extra-virgin olive oil tends to become bitter when processed because it contains bitter-tasting compounds that break into small droplets at high processing speeds and become more prominent. We decided to cut the bitterness by supplementing with another oil. Our tests revealed that mild-flavored macadamia nut oil worked well; we could put it in the food processor without it becoming bitter. To balance out the flavor of the macadamia nut oil and create a more traditional-tasting mayo, we whisked in some olive oil by hand at the end. You can substitute refined avocado oil for the macadamia nut oil, if desired. This recipe can be doubled.
2 large egg yolks
1 tablespoon white wine vinegar
½ teaspoon Dijon mustard
Kosher salt and pepper
¾ cup macadamia nut oil
¼ cup extra-virgin olive oil
Process egg yolks, vinegar, mustard, and ½ teaspoon salt in food processor until combined, about 10 seconds. With machine running, slowly drizzle in macadamia nut oil until completely incorporated. Transfer mixture to medium bowl and, whisking constantly, slowly drizzle olive oil into egg mixture. If pools of oil gather on surface as you whisk, stop addition of oil and whisk mixture until well combined, then resume whisking in oil in slow stream. Mayonnaise should be thick and glossy with no pools of oil on its surface. Adjust mayonnaise consistency with water as needed, 1 teaspoon at a time. Season with salt and pepper to taste. (Mayonnaise can be refrigerated for up to 3 days.)
MAKES ABOUT 1 CUP
![]() WHY THIS RECIPE WORKS At its most basic, ketchup is a simple combination of tomatoes, vinegar, salt, and spices, but most store-bought ketchup also contains high-fructose corn syrup—a red flag for paleo dieters. We wanted to create a recipe for classic ketchup without the added preservatives and refined sugars. We started out with deeply flavored tomato paste as our base, which gave us the thick texture and tomatoey backbone we wanted. Simple white vinegar provided brightness and tang. Ground mustard, onion powder, garlic powder, and just a pinch of ground allspice offered complexity, while coconut sugar gave the rich mixture some much-needed sweetness. To bring all the flavors together and achieve the perfect, spreadable consistency, we simmered the ketchup for about 10 minutes. When reducing the ketchup, make sure to occasionally scrape the bottom of the saucepan with a rubber spatula to prevent scorching. This recipe can be doubled or tripled.
WHY THIS RECIPE WORKS At its most basic, ketchup is a simple combination of tomatoes, vinegar, salt, and spices, but most store-bought ketchup also contains high-fructose corn syrup—a red flag for paleo dieters. We wanted to create a recipe for classic ketchup without the added preservatives and refined sugars. We started out with deeply flavored tomato paste as our base, which gave us the thick texture and tomatoey backbone we wanted. Simple white vinegar provided brightness and tang. Ground mustard, onion powder, garlic powder, and just a pinch of ground allspice offered complexity, while coconut sugar gave the rich mixture some much-needed sweetness. To bring all the flavors together and achieve the perfect, spreadable consistency, we simmered the ketchup for about 10 minutes. When reducing the ketchup, make sure to occasionally scrape the bottom of the saucepan with a rubber spatula to prevent scorching. This recipe can be doubled or tripled.
1 (6-ounce) can tomato paste
½ cup distilled white vinegar
½ cup coconut sugar
¼ cup water
1 teaspoon kosher salt
¼ teaspoon dry mustard
¼ teaspoon onion powder
⅛ teaspoon garlic powder
Pinch ground allspice
Whisk all ingredients together in medium saucepan. Bring to gentle simmer over medium-low heat and cook, stirring occasionally, until ketchup is thickened and measures about 1 cup, about 10 minutes. Let cool to room temperature. (Ketchup can be refrigerated for up to 1 week.)
MAKES ABOUT 2 CUPS
![]() WHY THIS RECIPE WORKS We wanted to come up with a versatile, paleo-friendly barbecue sauce that could be used to marinade, baste, or finish a range of grilled or roasted meats. Most recipes for homemade sauces include hefty amounts of refined sugar, much like their store-bought counterparts. Instead, we created a naturally sweet foundation for our sauce by gently coaxing out and caramelizing the sugars from an onion. We built up our sauce with tomato paste and cider vinegar, and we added a touch of woodsy sweetness with maple syrup. A combination of garlic, chili powder, cayenne pepper, and Dijon mustard gave the sauce its necessary kick, with a hint of smokiness from smoked paprika. We found that in order for the flavors to meld, a long, slow simmer was key. When reducing the barbecue sauce, make sure to occasionally scrape the bottom of the saucepan with a rubber spatula while stirring to prevent scorching. This recipe can be doubled or tripled.
WHY THIS RECIPE WORKS We wanted to come up with a versatile, paleo-friendly barbecue sauce that could be used to marinade, baste, or finish a range of grilled or roasted meats. Most recipes for homemade sauces include hefty amounts of refined sugar, much like their store-bought counterparts. Instead, we created a naturally sweet foundation for our sauce by gently coaxing out and caramelizing the sugars from an onion. We built up our sauce with tomato paste and cider vinegar, and we added a touch of woodsy sweetness with maple syrup. A combination of garlic, chili powder, cayenne pepper, and Dijon mustard gave the sauce its necessary kick, with a hint of smokiness from smoked paprika. We found that in order for the flavors to meld, a long, slow simmer was key. When reducing the barbecue sauce, make sure to occasionally scrape the bottom of the saucepan with a rubber spatula while stirring to prevent scorching. This recipe can be doubled or tripled.
2 tablespoons extra-virgin olive oil
1 onion, chopped fine
Kosher salt and pepper
3 garlic cloves, minced
1 teaspoon chili powder
1 teaspoon smoked paprika
⅛ teaspoon cayenne pepper
1 cup tomato paste
1½ cups water
3 tablespoons maple syrup
3 tablespoons cider vinegar
2 tablespoons Dijon mustard
1. Heat oil in medium saucepan over medium-low heat until shimmering. Add onion and 1 teaspoon salt and cook until softened and golden brown, about 10 minutes. Stir in garlic, chili powder, paprika, and cayenne and cook until fragrant, about 30 seconds. Stir in tomato paste and cook until beginning to brown, about 2 minutes.
2. Whisk in water, maple syrup, vinegar, and mustard, scraping up any browned bits. Bring to gentle simmer and cook, stirring occasionally, until sauce is thickened and measures about 2 cups, about 30 minutes. Let cool to room temperature. Season with salt and pepper to taste. (Barbecue sauce can be refrigerated for up to 1 week.)
MAKES ABOUT 1 CUP
![]() WHY THIS RECIPE WORKS Mustard is a must-have condiment: Not only does it make a great spread, but it also brightens up dressings and sauces. We wanted to make a flavorful Dijon mustard without any of the artificial flavors, preservatives, or additives often found in store-bought mustards. We also wanted to ensure that our recipe stayed simple and straightforward. To that end, we started with a base of three simple ingredients: yellow mustard seeds, vinegar, and salt. Many recipes also called for wine for additional flavor; to keep our recipe paleo, we opted to use water and white wine vinegar instead. Happily, tasters didn’t miss the flavor of the alcohol. We also incorporated mustard powder for some kick and garlic powder and cinnamon for additional aromatic flavor. A little turmeric helped to enhance the yellow color. Before processing the ingredients together, we let the seeds soak for at least 8 hours to soften. A quick simmer on the stovetop thickened the mustard slightly, while passing the finished mustard through a fine-mesh strainer ensured a smooth, velvety texture. Finally, we found that letting our mustard sit for five days before using helped it to develop a more balanced and complex flavor.
WHY THIS RECIPE WORKS Mustard is a must-have condiment: Not only does it make a great spread, but it also brightens up dressings and sauces. We wanted to make a flavorful Dijon mustard without any of the artificial flavors, preservatives, or additives often found in store-bought mustards. We also wanted to ensure that our recipe stayed simple and straightforward. To that end, we started with a base of three simple ingredients: yellow mustard seeds, vinegar, and salt. Many recipes also called for wine for additional flavor; to keep our recipe paleo, we opted to use water and white wine vinegar instead. Happily, tasters didn’t miss the flavor of the alcohol. We also incorporated mustard powder for some kick and garlic powder and cinnamon for additional aromatic flavor. A little turmeric helped to enhance the yellow color. Before processing the ingredients together, we let the seeds soak for at least 8 hours to soften. A quick simmer on the stovetop thickened the mustard slightly, while passing the finished mustard through a fine-mesh strainer ensured a smooth, velvety texture. Finally, we found that letting our mustard sit for five days before using helped it to develop a more balanced and complex flavor.
1½ cups water
6 tablespoons yellow mustard seeds
3 tablespoons white wine vinegar
2 tablespoons dry mustard
1 tablespoon onion powder
2 teaspoons kosher salt
½ teaspoon garlic powder
¼ teaspoon ground cinnamon
⅛ teaspoon ground turmeric
1. Combine all ingredients in bowl, cover, and let sit at room temperature for at least 8 hours or up to 12 hours.
2. Process soaked mustard mixture in blender until smooth, about 2 minutes, scraping down sides of bowl as needed. Transfer mixture to medium saucepan, bring to simmer over medium-low heat, and cook, stirring often, until thickened slightly, 3 to 5 minutes.
3. Strain mustard through fine-mesh strainer set over bowl, pressing on solids to extract as much mustard as possible. Let mustard cool to room temperature. Transfer mustard to jar with tight-fitting lid and refrigerate for at least 5 days before using. (Mustard can be refrigerated for up to 2 months.)
MAKES ABOUT 1 CUP
![]() WHY THIS RECIPE WORKS For a more rustic version of our Paleo Dijon Mustard, we skipped the mustard powder in favor of spicier and more pungent brown mustard seeds. Cider vinegar, which has a mild acidity and a rounder flavor than white wine vinegar, nicely balanced the intensity of the seeds. A small amount of honey also helped to temper the mustard’s bite. Instead of processing the mixture in the blender until smooth, we turned to the food processor to attain mustard that was spreadable but still had the pleasant pop of seeds that tasters liked. As with our Dijon mustard, we let the seeds soak for at least 8 hours to soften before processing, then stored the mustard in the refrigerator for at least five days to allow the flavors to develop.
WHY THIS RECIPE WORKS For a more rustic version of our Paleo Dijon Mustard, we skipped the mustard powder in favor of spicier and more pungent brown mustard seeds. Cider vinegar, which has a mild acidity and a rounder flavor than white wine vinegar, nicely balanced the intensity of the seeds. A small amount of honey also helped to temper the mustard’s bite. Instead of processing the mixture in the blender until smooth, we turned to the food processor to attain mustard that was spreadable but still had the pleasant pop of seeds that tasters liked. As with our Dijon mustard, we let the seeds soak for at least 8 hours to soften before processing, then stored the mustard in the refrigerator for at least five days to allow the flavors to develop.
½ cup cider vinegar
¼ cup yellow mustard seeds
¼ cup brown mustard seeds
¼ cup water
1 tablespoon honey
1½ teaspoons kosher salt
Combine all ingredients in bowl, cover, and let sit at room temperature for at least 8 hours or up to 12 hours. Process soaked mixture in food processor until coarsely ground and thickened, about 1 minute, scraping down sides of bowl as needed. Transfer mustard to jar with tight-fitting lid and refrigerate for at least 5 days before using. (Mustard can be refrigerated for up to 2 months.)
MAKES ABOUT 8 CUPS
![]() WHY THIS RECIPE WORKS For many of us, jarred tomato sauce is a pantry staple. But along with traditional ingredients like tomatoes, basil, and garlic, many store-bought sauces contain calcium chloride, added sugars, and other nonpaleo ingredients. We wanted a fresh-tasting, paleo-friendly tomato sauce that took advantage of simple ingredients. We started with an ample quantity of fresh tomatoes. Although many rustic tomato sauces included the skins, we found them to be distracting in our finished sauce, so we peeled the tomatoes by scoring them on one end and blanching them in boiling water. After a quick dip in an ice bath, the skins loosened up nicely. We decided to puree the tomatoes before cooking to achieve maximum evaporation and more concentrated flavor. We processed the tomatoes in batches to ensure a consistent texture. Adding some tomato paste ensured a deep, rich tomato profile, and browning the paste in olive oil brought out its flavor even more. Although many recipes called for the basil to be added at the end of cooking, we found that its flavor was better distributed, subtler, and more well rounded when we added it at the beginning. Letting the sauce reduce for a couple of hours built deep, concentrated flavor. A splash of red wine vinegar added at the end of cooking provided welcome brightness.
WHY THIS RECIPE WORKS For many of us, jarred tomato sauce is a pantry staple. But along with traditional ingredients like tomatoes, basil, and garlic, many store-bought sauces contain calcium chloride, added sugars, and other nonpaleo ingredients. We wanted a fresh-tasting, paleo-friendly tomato sauce that took advantage of simple ingredients. We started with an ample quantity of fresh tomatoes. Although many rustic tomato sauces included the skins, we found them to be distracting in our finished sauce, so we peeled the tomatoes by scoring them on one end and blanching them in boiling water. After a quick dip in an ice bath, the skins loosened up nicely. We decided to puree the tomatoes before cooking to achieve maximum evaporation and more concentrated flavor. We processed the tomatoes in batches to ensure a consistent texture. Adding some tomato paste ensured a deep, rich tomato profile, and browning the paste in olive oil brought out its flavor even more. Although many recipes called for the basil to be added at the end of cooking, we found that its flavor was better distributed, subtler, and more well rounded when we added it at the beginning. Letting the sauce reduce for a couple of hours built deep, concentrated flavor. A splash of red wine vinegar added at the end of cooking provided welcome brightness.
7½ pounds tomatoes
3 tablespoons extra-virgin olive oil
¼ cup tomato paste
3 garlic cloves, minced
¼ cup chopped fresh basil
Kosher salt and pepper
Red wine vinegar
1. Bring 4 quarts water to boil in Dutch oven. Fill large bowl halfway with ice and water. Remove core from tomatoes and score small X in base. Working in batches, lower tomatoes into boiling water and cook until skins just begin to loosen, 15 to 45 seconds. Using slotted spoon, transfer tomatoes to ice bath to cool, about 2 minutes. Remove tomatoes from ice bath and remove loosened tomato skins; discard blanching water and skins.
2. Working in batches, process peeled tomatoes in food processor until almost smooth, 15 to 20 seconds; transfer to large bowl.
3. Heat oil in now-empty pot over medium heat until shimmering. Add tomato paste and garlic and cook until fragrant, about 1 minute. Stir in processed tomatoes, basil, and 1 tablespoon salt. Bring to simmer and cook, stirring occasionally, until sauce is thickened and measures about 8 cups, 1½ to 2 hours. Season with salt, pepper, and vinegar to taste. (Cooled sauce can be refrigerated for up to 1 week or frozen for up to 6 months.)
MAKES ABOUT 1¾ CUPS
![]() WHY THIS RECIPE WORKS Much of the coconut milk found in stores contains a great number of additives, preservatives, and stabilizers, and the one or two brands that don’t are difficult to find. We felt that the best way to avoid all nonpaleo ingredients was to develop our own recipe. We tested blending shredded coconut with water of varying temperatures and determined that near-boiling water worked best; the heat softened the coconut and extracted the most flavor. We wanted our recipe to make the equivalent of one can of coconut milk; after some testing, we landed on using 1¾ cups each of water and unsweetened shredded coconut meat. We strained the processed coconut mixture through a fine-mesh strainer lined with cheesecloth so that our milk would turn out perfectly smooth. Since the milk tended to curdle when heated to a simmer, we added a touch of baking soda if we planned on cooking with it. This made the milk more alkaline and discouraged the milk proteins from clumping. For an accurate measurement of water, bring a full pot of water to a near-boil and then measure out the desired amount. We do not recommend using coconut flakes here. This recipe can be doubled. For more information on processing the coconut mixture safely, see here.
WHY THIS RECIPE WORKS Much of the coconut milk found in stores contains a great number of additives, preservatives, and stabilizers, and the one or two brands that don’t are difficult to find. We felt that the best way to avoid all nonpaleo ingredients was to develop our own recipe. We tested blending shredded coconut with water of varying temperatures and determined that near-boiling water worked best; the heat softened the coconut and extracted the most flavor. We wanted our recipe to make the equivalent of one can of coconut milk; after some testing, we landed on using 1¾ cups each of water and unsweetened shredded coconut meat. We strained the processed coconut mixture through a fine-mesh strainer lined with cheesecloth so that our milk would turn out perfectly smooth. Since the milk tended to curdle when heated to a simmer, we added a touch of baking soda if we planned on cooking with it. This made the milk more alkaline and discouraged the milk proteins from clumping. For an accurate measurement of water, bring a full pot of water to a near-boil and then measure out the desired amount. We do not recommend using coconut flakes here. This recipe can be doubled. For more information on processing the coconut mixture safely, see here.
1¾ cups unsweetened shredded coconut
1¾ cups near-boiling water (200 degrees)
¼ teaspoon baking soda (optional)
Line fine-mesh strainer with triple layer of cheesecloth that overhangs edges and set over medium bowl. Process coconut and water in blender until coconut is finely ground, about 2 minutes. Transfer mixture to prepared strainer and press to extract as much liquid as possible. Gather sides of cheesecloth around coconut pulp and gently squeeze remaining milk into bowl; discard spent pulp. Stir in baking soda, if using. (Coconut milk can be refrigerated for up to 2 weeks.)
MAKES ABOUT 4 CUPS
![]() WHY THIS RECIPE WORKS Almond milk is a refreshing dairy-free alternative to milk. Unfortunately, much of the almond milk available in stores is loaded with thickeners, stabilizers, and gums. We wanted a simple recipe for almond milk that tasted great and would be welcome in a paleo kitchen. Before we could make the milk, we found it was essential to soak the nuts for at least 8 hours to soften them and ensure that our milk didn’t turn out grainy. We tested several ratios of almonds to water to determine which produced both the best flavor and the best texture. We found that blending 1¼ cups of soaked almonds with 4 cups of water gave us the ideal flavor and consistency. We then poured the mixture through a cheesecloth-lined fine-mesh strainer to separate the almond milk from the pulp. Since the pulp still contained a great deal of milk, we squeezed the pulp in the cheesecloth until no liquid remained. To round out the flavor of the almond milk, we added a small amount of salt and some honey. This recipe can be doubled.
WHY THIS RECIPE WORKS Almond milk is a refreshing dairy-free alternative to milk. Unfortunately, much of the almond milk available in stores is loaded with thickeners, stabilizers, and gums. We wanted a simple recipe for almond milk that tasted great and would be welcome in a paleo kitchen. Before we could make the milk, we found it was essential to soak the nuts for at least 8 hours to soften them and ensure that our milk didn’t turn out grainy. We tested several ratios of almonds to water to determine which produced both the best flavor and the best texture. We found that blending 1¼ cups of soaked almonds with 4 cups of water gave us the ideal flavor and consistency. We then poured the mixture through a cheesecloth-lined fine-mesh strainer to separate the almond milk from the pulp. Since the pulp still contained a great deal of milk, we squeezed the pulp in the cheesecloth until no liquid remained. To round out the flavor of the almond milk, we added a small amount of salt and some honey. This recipe can be doubled.
1¼ cups whole blanched almonds
Water
¼ teaspoon kosher salt
2 teaspoons honey (optional)
1. Place almonds in bowl and add cold water to cover by 1 inch. Soak almonds at room temperature for at least 8 hours or up to 24 hours. Drain and rinse well.
2. Line fine-mesh strainer with triple layer of cheesecloth that overhangs edges and set over large bowl. Process soaked almonds and 4 cups water in blender until almonds are finely ground, about 2 minutes. Transfer mixture to prepared strainer and press to extract as much liquid as possible. Gather sides of cheesecloth around almond pulp and gently squeeze remaining milk into bowl; discard spent pulp. Stir in salt and honey, if using, until dissolved. (Almond milk can be refrigerated for up to 2 weeks.)
MAKES ABOUT 3 CUPS
![]() WHY THIS RECIPE WORKS Following a paleo diet doesn’t mean you have to sacrifice the creamy texture and tangy taste of yogurt. Although there are a number of nondairy and soy-free alternative yogurts sold in stores, many of them contain additives, preservatives, and various gums. Our challenge was to create a paleo-friendly recipe that would have all the appeal and versatility of traditional yogurt. We first needed to determine the best milk for the job. To ensure that our yogurt was paleo-friendly, we knew we wanted to use one of our homemade nut milks. Yogurts made with coconut milk turned out consistently grainy; the smooth-textured almond milk yogurts were the clear preference. To promote the fermentation required in making yogurt, we elected to use probiotic capsules, since typical yogurt starters are often sourced from dairy products. But the probiotics alone weren’t thickening the yogurt: Since almond milk contains less protein than dairy milk, we couldn’t achieve the thick, creamy consistency we were after without introducing an additional thickening agent. We tested gelatin, tapioca, and agar-agar, a thickener made from algae. Tasters preferred the yogurt made with agar-agar for its smooth and creamy consistency. You can find agar-agar and probiotic capsules at your local natural foods store. The flavor of the yogurt may vary depending on the brand of probiotic used; we developed this recipe using Renew Life Ultimate Flora Critical Care 50 Billion probiotic capsules. Do not substitute agar-agar flakes for the agar-agar powder. You can substitute coconut milk for the almond milk; however, the yogurt will have a slightly grainy consistency.
WHY THIS RECIPE WORKS Following a paleo diet doesn’t mean you have to sacrifice the creamy texture and tangy taste of yogurt. Although there are a number of nondairy and soy-free alternative yogurts sold in stores, many of them contain additives, preservatives, and various gums. Our challenge was to create a paleo-friendly recipe that would have all the appeal and versatility of traditional yogurt. We first needed to determine the best milk for the job. To ensure that our yogurt was paleo-friendly, we knew we wanted to use one of our homemade nut milks. Yogurts made with coconut milk turned out consistently grainy; the smooth-textured almond milk yogurts were the clear preference. To promote the fermentation required in making yogurt, we elected to use probiotic capsules, since typical yogurt starters are often sourced from dairy products. But the probiotics alone weren’t thickening the yogurt: Since almond milk contains less protein than dairy milk, we couldn’t achieve the thick, creamy consistency we were after without introducing an additional thickening agent. We tested gelatin, tapioca, and agar-agar, a thickener made from algae. Tasters preferred the yogurt made with agar-agar for its smooth and creamy consistency. You can find agar-agar and probiotic capsules at your local natural foods store. The flavor of the yogurt may vary depending on the brand of probiotic used; we developed this recipe using Renew Life Ultimate Flora Critical Care 50 Billion probiotic capsules. Do not substitute agar-agar flakes for the agar-agar powder. You can substitute coconut milk for the almond milk; however, the yogurt will have a slightly grainy consistency.
1. Adjust oven rack to middle position. Sprinkle agar-agar over water in small bowl and let sit until softened, about 10 minutes.
2. Heat milk in large saucepan over medium-low heat until just simmering. Add softened agar-agar and cook, whisking constantly, until fully dissolved. Transfer mixture to bowl and let cool, stirring occasionally, until mixture registers 110 degrees, about 20 minutes.
3. Twist open probiotic capsule and whisk contents into cooled milk mixture; discard capsule’s casing. Cover bowl tightly with plastic wrap, place in oven, and turn on oven light. Let yogurt sit undisturbed for at least 12 hours or up to 24 hours. (Yogurt will not thicken while sitting.)
4. Refrigerate yogurt until completely chilled and set, about 4 hours. Process yogurt in blender until smooth, about 30 seconds. (Yogurt can be refrigerated for up to 1 week.)
MAKES ABOUT 1 CUP
![]() WHY THIS RECIPE WORKS Made by soaking and pureeing cashews, versatile nut “cheese” is a staple in many paleo kitchens. We wanted to develop a simple, foolproof recipe that would taste great on its own and also work in a wide variety of applications. Our recipe started with trying to determine what type of nut to use. In a side-by-side comparison of cheeses made with macadamia nuts, almonds, and cashews, the cashew cheese was the crowd favorite—the cheese was creamy, smooth, and had a pleasant, neutral flavor. (The almond cheese, although it had a slightly coarser texture, was a close second.) Next, we moved on to fine-tuning our recipe. We found that soaking the cashews for at least 8 hours was crucial in obtaining a creamy texture. A small amount of extra-virgin olive oil also contributed to creaminess, while lemon juice gave the mixture a bit of tang. We were amazed at the versatility of the finished nut cheese: It could be enjoyed as is, used as the base for a dip or spread, or substituted into recipes that would normally call for a cheese filling. You can substitute an equal amount of slivered almonds for the cashews; however, the cheese will have a slightly coarser consistency. This recipe can be doubled.
WHY THIS RECIPE WORKS Made by soaking and pureeing cashews, versatile nut “cheese” is a staple in many paleo kitchens. We wanted to develop a simple, foolproof recipe that would taste great on its own and also work in a wide variety of applications. Our recipe started with trying to determine what type of nut to use. In a side-by-side comparison of cheeses made with macadamia nuts, almonds, and cashews, the cashew cheese was the crowd favorite—the cheese was creamy, smooth, and had a pleasant, neutral flavor. (The almond cheese, although it had a slightly coarser texture, was a close second.) Next, we moved on to fine-tuning our recipe. We found that soaking the cashews for at least 8 hours was crucial in obtaining a creamy texture. A small amount of extra-virgin olive oil also contributed to creaminess, while lemon juice gave the mixture a bit of tang. We were amazed at the versatility of the finished nut cheese: It could be enjoyed as is, used as the base for a dip or spread, or substituted into recipes that would normally call for a cheese filling. You can substitute an equal amount of slivered almonds for the cashews; however, the cheese will have a slightly coarser consistency. This recipe can be doubled.
1 cup raw cashews
Water
2 tablespoons extra-virgin olive oil
2 teaspoons lemon juice, plus extra for seasoning
Kosher salt and pepper
1. Place cashews in bowl and add water to cover by 1 inch. Soak cashews at room temperate for at least 8 hours or up to 24 hours. Drain and rinse well.
2. Process soaked cashews, ¼ cup water, oil, lemon juice, and ½ teaspoon salt in food processor until smooth, about 2 minutes, scraping down sides of bowl as needed. Adjust consistency with extra water as needed. Season with salt, pepper, and extra lemon juice to taste. (Cheese can be refrigerated for up to 1 week.)
MAKES 12 (6-INCH) WRAPS
![]() WHY THIS RECIPE WORKS We wanted to create soft, pliable, and tasty paleo wraps that would work for sandwiches, tacos, and more. We started by creating a dough using almond flour for structure, mild-flavored tapioca flour to increase pliability, and olive oil and water for moisture. But this dough was too sticky to roll out, and adding more flour or reducing the liquid didn’t increase the dough’s workability. We decided instead to create a pourable batter that we could cook in a pan like a crêpe or pancake. We added three eggs for richness and coconut flour to help manage the moisture content of the finished wraps. For the sake of ease, we combined all the ingredients in a blender and then allowed the batter to rest so the flours could hydrate and the batter could thicken to the right consistency. Once the mixture was ready, we simply added some batter to the skillet and tilted gently to spread the batter over the bottom of the pan. But the resulting wraps were eggy-tasting and very delicate. To fix these problems, we reduced the number of eggs to two and increased the amount of tapioca flour, doing away with the dominant egg flavor and making the wraps sturdier. We also found that even though using the blender made combining the ingredients easier, the speed of the blender incorporated too much air into the batter, leaving tiny holes in the cooked wraps. By mixing the ingredients by hand, we were able to minimize the air bubbles and avoid leaky wraps. To allow for practice, the recipe yields extra batter. To make larger wraps, pour ⅓ cup of batter into a 10-inch skillet or ½ cup batter into a 12-inch skillet; cook as directed. To reheat wraps quickly we found it best to use the microwave. Simply stack the wraps on a plate, sprinkle them with a little water, cover them with a paper towel, and microwave until warm and soft, about 1 minute. Wraps can also be reheated one at a time in a skillet.
WHY THIS RECIPE WORKS We wanted to create soft, pliable, and tasty paleo wraps that would work for sandwiches, tacos, and more. We started by creating a dough using almond flour for structure, mild-flavored tapioca flour to increase pliability, and olive oil and water for moisture. But this dough was too sticky to roll out, and adding more flour or reducing the liquid didn’t increase the dough’s workability. We decided instead to create a pourable batter that we could cook in a pan like a crêpe or pancake. We added three eggs for richness and coconut flour to help manage the moisture content of the finished wraps. For the sake of ease, we combined all the ingredients in a blender and then allowed the batter to rest so the flours could hydrate and the batter could thicken to the right consistency. Once the mixture was ready, we simply added some batter to the skillet and tilted gently to spread the batter over the bottom of the pan. But the resulting wraps were eggy-tasting and very delicate. To fix these problems, we reduced the number of eggs to two and increased the amount of tapioca flour, doing away with the dominant egg flavor and making the wraps sturdier. We also found that even though using the blender made combining the ingredients easier, the speed of the blender incorporated too much air into the batter, leaving tiny holes in the cooked wraps. By mixing the ingredients by hand, we were able to minimize the air bubbles and avoid leaky wraps. To allow for practice, the recipe yields extra batter. To make larger wraps, pour ⅓ cup of batter into a 10-inch skillet or ½ cup batter into a 12-inch skillet; cook as directed. To reheat wraps quickly we found it best to use the microwave. Simply stack the wraps on a plate, sprinkle them with a little water, cover them with a paper towel, and microwave until warm and soft, about 1 minute. Wraps can also be reheated one at a time in a skillet.
2 cups (6 ounces) almond flour
¾ cup (3 ounces) tapioca flour
¼ cup (1 ounce) coconut flour
2 teaspoons kosher salt
1¾ cups water
2 large eggs
3 tablespoons plus 1 teaspoon extra-virgin olive oil
1. Whisk almond flour, tapioca flour, coconut flour, and salt together in large bowl. In separate bowl, whisk water, eggs, and 3 tablespoons oil together until combined. Whisk water mixture into almond flour mixture until thoroughly combined. Let batter rest for 15 minutes.
2. Meanwhile, place remaining 1 teaspoon oil in 8-inch nonstick skillet and heat over low heat for at least 5 minutes. Using paper towel, wipe out skillet, leaving thin film of oil on bottom and sides of skillet. Increase heat to medium and let skillet heat for 1 minute. After 1 minute, test heat of skillet by placing 1 teaspoon batter in center and cooking for 20 seconds. If mini test wrap is golden brown on bottom, skillet is properly heated; if too light or too dark, adjust heat accordingly and retest.
3. Whisk batter to recombine. Pour ¼ cup batter into far side of skillet and tilt and shake gently until batter evenly covers bottom of skillet. Cook wrap without moving it until top surface is dry and wrap starts to brown at edges, loosening wrap from side of skillet with rubber spatula, 1 to 3 minutes. Gently slide spatula underneath edge of wrap, grasp edge with your fingertips, and flip wrap. Cook until second side is lightly spotted, 1 to 3 minutes. Transfer cooked wrap to wire rack, inverting so spotted side is facing up.
4. Return skillet to medium heat for 10 seconds before repeating with remaining batter, whisking batter often to recombine. As wraps are done, stack on rack. Serve immediately or let cool to room temperature. (Cooled wraps can be wrapped tightly in plastic wrap and refrigerated for up to 1 week.)
MAKES 8 ROLLS
![]() WHY THIS RECIPE WORKS Too often, paleo-friendly sandwich breads turn out dry, crumbly, and dense or spongy, webby, and almost custard-like; plus, they usually lack the structure needed to stand up to a substantial filling. We wanted a hearty, sturdy sandwich roll that would taste great. To create good structure, we needed to use multiple flours and starches. For the base of our rolls we decided to use almond flour for its neutral flavor. Arrowroot flour was also essential, since the pure starch lightened the texture of the rolls and helped absorb moisture. Since we were after a bready flavor and texture, we used yeast as our leavener and added enough water to make a dough. But these ingredients alone didn’t give our rolls much structure—nor did they taste very good. A couple of eggs provided better structure and offered some subtle richness. Psyllium husk powder, a common ingredient in gluten-free breads, gave the rolls a more open crumb by creating a sturdier protein network. It also contributed a pleasant, wheaty flavor. Some cider vinegar gave the rolls a sourdough-like tang, while honey, olive oil, and salt rounded out the flavor nicely. But the rolls were still turning out rather wet and dense. We tried reducing the amount of water, but since we were counting on the water to create steam and help the rolls rise in the oven, we couldn’t reduce the amount enough to get rid of the wetness. Instead, we added some coconut flour to the dough, which easily absorbed the excess liquid without making the rolls crumbly. Finally, since the dough was fairly soft and tended to spread in the oven, we made foil collars to hold the dough in place during proofing and some of the baking time. Halfway through baking, we removed the collars to ensure even browning. A sprinkling of sesame seeds before baking was a welcome final touch.
WHY THIS RECIPE WORKS Too often, paleo-friendly sandwich breads turn out dry, crumbly, and dense or spongy, webby, and almost custard-like; plus, they usually lack the structure needed to stand up to a substantial filling. We wanted a hearty, sturdy sandwich roll that would taste great. To create good structure, we needed to use multiple flours and starches. For the base of our rolls we decided to use almond flour for its neutral flavor. Arrowroot flour was also essential, since the pure starch lightened the texture of the rolls and helped absorb moisture. Since we were after a bready flavor and texture, we used yeast as our leavener and added enough water to make a dough. But these ingredients alone didn’t give our rolls much structure—nor did they taste very good. A couple of eggs provided better structure and offered some subtle richness. Psyllium husk powder, a common ingredient in gluten-free breads, gave the rolls a more open crumb by creating a sturdier protein network. It also contributed a pleasant, wheaty flavor. Some cider vinegar gave the rolls a sourdough-like tang, while honey, olive oil, and salt rounded out the flavor nicely. But the rolls were still turning out rather wet and dense. We tried reducing the amount of water, but since we were counting on the water to create steam and help the rolls rise in the oven, we couldn’t reduce the amount enough to get rid of the wetness. Instead, we added some coconut flour to the dough, which easily absorbed the excess liquid without making the rolls crumbly. Finally, since the dough was fairly soft and tended to spread in the oven, we made foil collars to hold the dough in place during proofing and some of the baking time. Halfway through baking, we removed the collars to ensure even browning. A sprinkling of sesame seeds before baking was a welcome final touch.
1 cup plus 2 tablespoons warm water (110 degrees)
3 tablespoons honey
2 teaspoons instant or rapid-rise yeast
2 large eggs
3 tablespoons extra-virgin olive oil
1 tablespoon cider vinegar
3 cups (9 ounces) almond flour
1 cup (4 ounces) arrowroot flour
3 tablespoons coconut flour
5 teaspoons powdered psyllium husk
1 tablespoon kosher salt
1 teaspoon sesame seeds (optional)
1. Adjust oven rack to middle position and heat oven to 200 degrees. As soon as oven reaches 200 degrees, turn it off. (This will be warm proofing box for dough. Do not begin step 2 until oven has been turned off.) Line rimmed baking sheet with greased parchment paper. Using double layer of aluminum foil, create eight 13½ by 2-inch strips, then shape each into 4-inch circle and secure with staples. Grease inside of collars and place on prepared sheet.
2. Combine warm water, honey, and yeast in medium bowl and let sit until bubbly, about 5 minutes. Whisk in eggs, oil, and vinegar. Using stand mixer fitted with paddle, mix almond flour, arrowroot flour, coconut flour, psyllium husk, and salt together on low speed until combined, about 1 minute. Slowly add yeast mixture and let dough come together, scraping down sides of bowl as needed, about 1 minute. Increase speed to medium and beat until sticky and uniform, about 6 minutes. (Dough will resemble loose cookie dough.)
3. Moisten your hands and divide dough into 8 equal pieces (3½ ounces). Working with 1 piece of dough at a time, roll into rough round and place in foil collar. Cover loosely with plastic wrap, place sheet in warmed oven, and let rise for 10 minutes; do not let plastic touch oven rack.
4. Remove sheet from oven and let sit on counter until dough has doubled in size, about 20 minutes. Meanwhile, heat oven to 400 degrees.
5. Reduce oven temperature to 350 degrees. Remove plastic and adjust foil collars as needed to be flush with sheet. Spray rolls with water and sprinkle with sesame seeds, if using. Set sheet with rolls inside second rimmed baking sheet and bake until rolls are golden brown and firm, 30 to 35 minutes, rotating sheet and removing foil collars halfway through baking.
6. Transfer rolls to wire rack and let cool completely before serving, about 1 hour. (Split rolls can be wrapped in double layer of plastic wrap and stored at room temperature for up to 2 days or frozen for up to 1 month. If frozen, microwave at 50 percent power for 1 minute then toast until golden.)

1. Using double layer of aluminum foil, create eight 13½ by 2-inch strips. Shape strips into 4-inch circles and secure with staples.
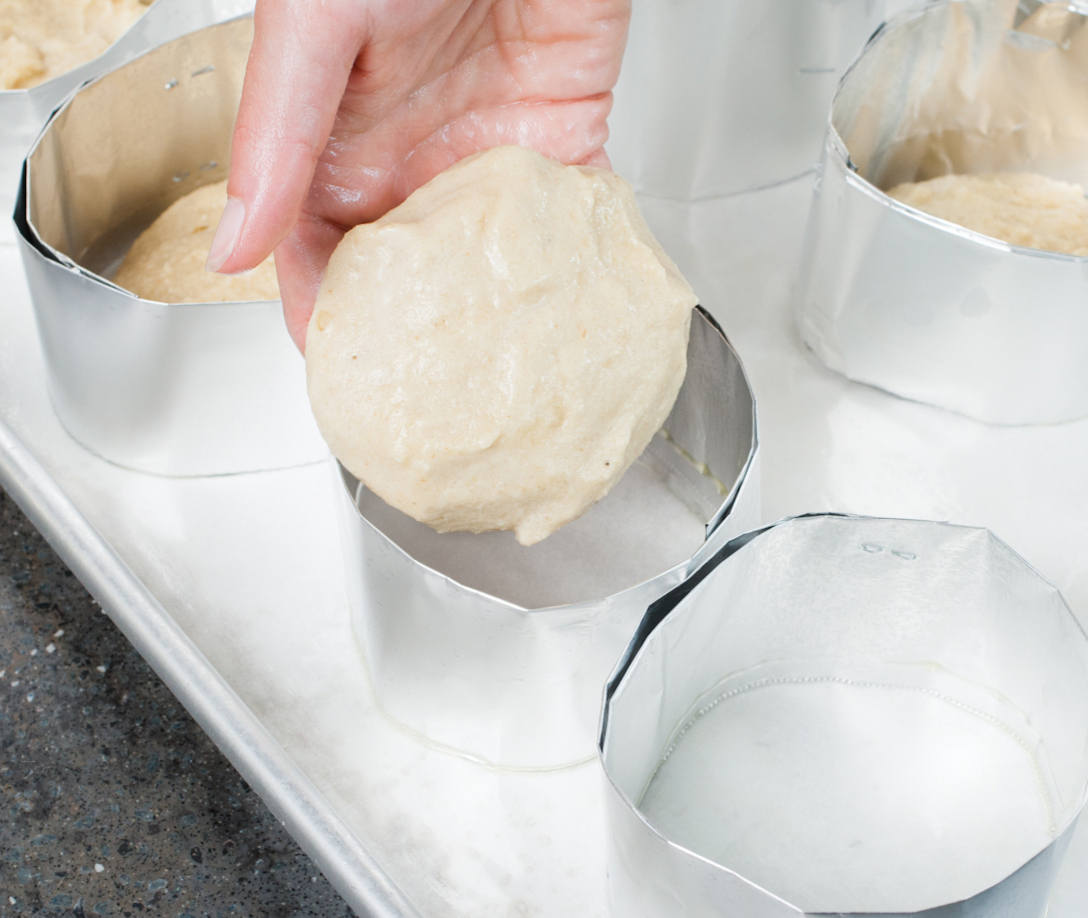
2. Grease inside of collars and place on greased parchment-lined baking sheet. Place shaped dough rounds in foil collars.
MAKES ENOUGH FOR ONE 9-INCH PIE
![]() WHY THIS RECIPE WORKS Making a successful pie crust is difficult enough when you have the entire pantry at your disposal. Add the challenge of omitting conventional flours and fats and you have a tall order in front of you. We weren’t deterred, however, and sought a single-crust pie dough that was just as light and flaky as a traditional one. We also wanted to make sure our pie crust was neutral-flavored enough to work in either sweet or savory applications. We began with almond flour, which provided an ideal base, but when used alone it cooked up dense and greasy. Adding some highly absorbent coconut flour made the shell more crisp and less oily, but it gave the dough a pliable texture that tasters didn’t like. A half-cup of arrowroot flour solved this problem, lightening the texture of the dough and helping it to crisp beautifully in the oven. A small amount of baking soda further lightened the shell and encouraged good browning. Our next challenge was to determine the fat and liquid components of the dough. Using an egg white instead of a whole egg provided structural support without making the dough taste eggy. Two tablespoons of water comprised the remainder of the liquid, while a generous amount of coconut oil gave the dough richness without adding unwanted flavor. Some lemon juice rounded out the dough’s flavor with subtle, fresh notes. The dough was too fragile to roll out on the counter; luckily, we found we could easily roll it between two sheets of parchment and then use the parchment to help transfer the dough to the pie plate. As with many traditional recipes, our paleo pie crust needed to be parbaked to make sure it didn’t turn gummy or soggy once we added fillings. Pie dough should be used immediately; do not store in refrigerator before rolling and baking.
WHY THIS RECIPE WORKS Making a successful pie crust is difficult enough when you have the entire pantry at your disposal. Add the challenge of omitting conventional flours and fats and you have a tall order in front of you. We weren’t deterred, however, and sought a single-crust pie dough that was just as light and flaky as a traditional one. We also wanted to make sure our pie crust was neutral-flavored enough to work in either sweet or savory applications. We began with almond flour, which provided an ideal base, but when used alone it cooked up dense and greasy. Adding some highly absorbent coconut flour made the shell more crisp and less oily, but it gave the dough a pliable texture that tasters didn’t like. A half-cup of arrowroot flour solved this problem, lightening the texture of the dough and helping it to crisp beautifully in the oven. A small amount of baking soda further lightened the shell and encouraged good browning. Our next challenge was to determine the fat and liquid components of the dough. Using an egg white instead of a whole egg provided structural support without making the dough taste eggy. Two tablespoons of water comprised the remainder of the liquid, while a generous amount of coconut oil gave the dough richness without adding unwanted flavor. Some lemon juice rounded out the dough’s flavor with subtle, fresh notes. The dough was too fragile to roll out on the counter; luckily, we found we could easily roll it between two sheets of parchment and then use the parchment to help transfer the dough to the pie plate. As with many traditional recipes, our paleo pie crust needed to be parbaked to make sure it didn’t turn gummy or soggy once we added fillings. Pie dough should be used immediately; do not store in refrigerator before rolling and baking.
2 cups (6 ounces) almond flour
½ cup (2 ounces) arrowroot flour
2 tablespoons coconut flour
1 tablespoon coconut sugar
½ teaspoon baking soda
½ teaspoon kosher salt
¼ cup plus 1 teaspoon coconut oil, melted
1 large egg white
2 tablespoons water
1 tablespoon lemon juice
1. Adjust oven rack to middle position and heat oven to 350 degrees. Grease 9-inch pie plate.
2. Whisk almond flour, arrowroot flour, coconut flour, coconut sugar, baking soda, and salt together in large bowl. In separate bowl, whisk ¼ cup melted coconut oil, egg white, water, and lemon juice together until thoroughly combined. Stir oil mixture into flour mixture with rubber spatula until dough comes together.
3. Turn dough onto sheet of parchment paper and flatten into 4-inch disk. Cover dough with second sheet of parchment paper and roll into 12-inch circle. Remove top parchment sheet, gently invert dough over prepared pie plate, and ease dough into plate. Remove remaining parchment and trim overhanging dough to ½ inch beyond lip of plate. Tuck overhang under itself; folded edge should be flush with edge of plate. (Dough rim may crack slightly, but will come back together once crimped). Using index finger of 1 hand and thumb and index finger of other hand, crimp edge of dough to make attractive fluted rim. Use excess dough to patch any holes. Gently brush dough with remaining 1 teaspoon melted coconut oil.
4A. FOR A PARTIALLY BAKED CRUST: Place pie plate on rimmed baking sheet and bake until crust looks dry and is lightly browned, 30 to 35 minutes. Transfer plate to wire rack. Following particular pie recipe, use crust while it is still warm or let it cool completely.
4B. FOR A FULLY BAKED CRUST: Place pie plate on rimmed baking sheet and bake until crust looks dry and is golden brown, 40 to 45 minutes. Transfer plate to wire rack. Following particular pie recipe, use crust while it is still warm or let it cool completely.

1. After trimming dough to ½ inch beyond lip of pie plate, tuck overhanging dough under itself to be flush with edge of plate.
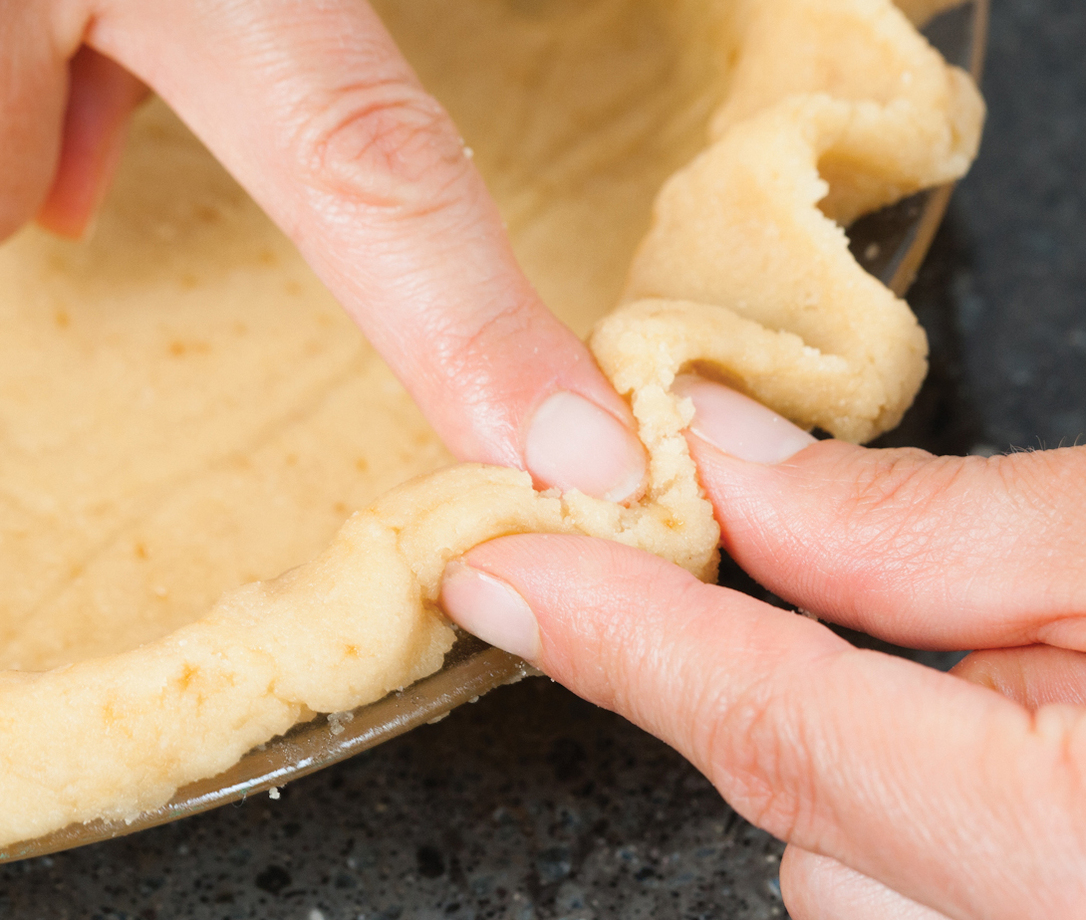
2. Using index finger of 1 hand and thumb and index finger of other hand, crimp edge of dough to make attractive fluted rim.
