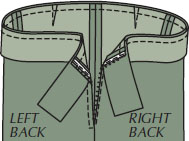
Choose 3/4″- to 1″-wide non-roll elastic. Wider elastic will tend to fold in half inside the band.
1. Fit the pants 1″-2″ looser in the waist by sewing narrower side seams or narrowing or eliminating darts. Sew the band to the pant.

TIP: Rather than cutting elastic to fit you perfectly ahead of time, use an extra long piece (for example, whatever is in the package) because it is MUCH EASIER!
2. Place elastic on the seam allowance of the waistband piece (not pant side of seam allowance). Start with the end that will be the UNDERLAP with elastic next to where you will sew the seam at the end of the band.
3. Zigzag elastic to seam allowances through all layers for 2″.
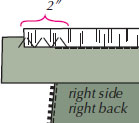
4. Fold band at this end in half right sides together, with seam allowances turned up. Stitch next to elastic. Backstitch at beginning and end. Trim seam and turn. Now elastic is caught in ONE end of the band.
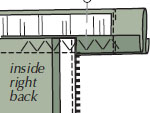
5. Clip the seam allowance of the band underside 2″ from each end. Turn under the seam allowance near the underlap end and slipstitch the folded edges together. Serge-finish and trim the remaining inside waistband seam allowance to ¼”-½”. (Or trim and zigzag.)
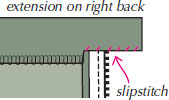
6. Fold rest of waistband over elastic tightly and pin. Stitch in the well of the stitch in well of seam from the right side to within 5″ of the unfinished end.
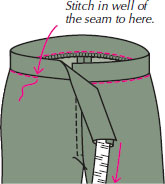
TIP: Use your edgestitch foot to guide stitching in the well of the seam.
7. Try on pants. Pull on elastic to tighten it until comfortable
8. Zigzag the elastic to the seam allowances from OVERLAP END for 2″. Cut off extra elastic even with edge of pant.
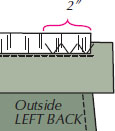
9. Finish OVERLAP end by stitching as you did for UNDERLAP end.
10. Finish stitching in the well of the seam. Slipstitch folded edge in place.
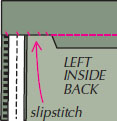
11. Sew on fasteners.
If you want a band that won’t roll in the front when you sit but has some give for expanding waistlines, try these techniques.
The band will fit in the front and be larger across the back only. The elastic sewn to each end of a piece of non-roll interfacing will be a total of 2″ shorter than the waistband, but any gathers will occur only across the back until your waist expands to make the elastic the same size as the band.
1. Determine length of finished waistband and add 2″. Measure from side to side across your front. Cut non-roll interfacing that length plus 1″ for lapping each end ½” over elastic. Measure from side to center back and cut two pieces of 1″ elastic that length less 1″.

2. Lap ends of non-roll interfacing ½” over each piece of elastic and stitch ends together.
3. Apply as in previous elastic application.
For even more give, fit the front to a non-roll interfacing but make the back very loose and gathered up by elastic. Since the non-roll interfacing is 1″ wide, use 1″-wide elastic. Side seams are finished after waistband pieces are applied.

1. Add extra fabric for a casing to the top of the back pant piece. (For 1″ elastic, add 2″ plus 5/8″ from original waistline seam.) Eliminate darts. Cut sides of pant straight up.
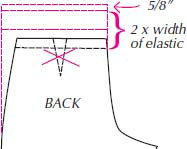
2. Stitch center back crotch seam. Finish top edge of waistband. Fold casing down and stitch. (For 1″ elastic, stitch about 1 1/8″ from fold.)
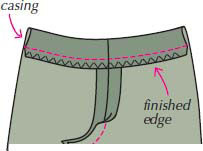
3. Apply non-roll interfacing to front waistband pieces. (See page 105.)
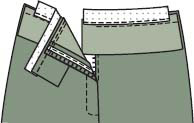
4. Insert elastic in back casing. Pin elastic ends to anchor them. Pin front and back side seams together.
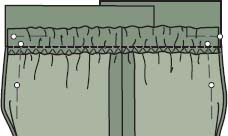
5. Try on pants to make sure waist is comfortable. Adjust elastic if necessary.
6. Sew side seams through waistband and elastic. Backstitch at top. Clip back side seam allowances to seamline. Press seam allowances above waistline toward front. (Or press side seams toward front.)
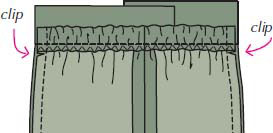
7. Finish the ends of the waistband (see page 107).
8. Fold front waistband to inside. Stitch in the well of the seam from the right side to anchor the front bands.
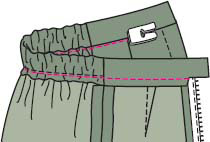
9. Slipstitch front ends of waistband and side seams. Stretch back waistband until smooth and stitch one or more rows through all layers. A longer stitch length will allow elastic to recover better.
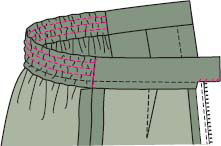
TIP: If including elastic in the seams is too bulky, sew an inch square of lightweight non-ravelly fabric to ends of elastic and include that in the seams instead. If you use seam tape or Stay-Tape, zigzag two pieces together.
