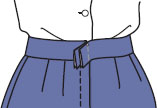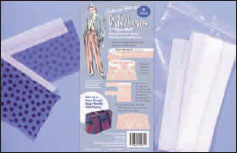
Monofilament nylon waistband interfacing is lightweight, will not stretch, and won’t roll (even after lunch!). “Perfect Waistbands” interfacing is 1″ wide and comes in a 6-yard package with instructions. (Armoflexx is no longer available. However, “Perfect Waistbands” is still called Armoflexx in Australia.) Some patterns are changing the standard width to 1″ from 1¼” when using this interfacing.

Wrap the tissue around your waist and mark where it meets. Leave a 3″ extension on each end in case you need it.
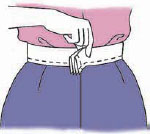
If you don’t have a waistband pattern piece or one that fits, use the gridded Perfect Pattern Paper or tissue. Cut your pattern piece 6″ longer than your waist measurement and twice the finished width, plus 1 ¼” for seam allowances.

TIP: For lightweight fabrics, fuse lightweight interfacing to the wrong side of the waistband for a little more body, then apply waistband interfacing as usual. If you can’t find the non-roll interfacing, fuse to the wrong side with a heavier weight fusible.
1. Mark the 5/8″ stitching line on one long edge of your band with machine basting. (Now it’s marked on both right and wrong sides of the fabric!)

2. Place the interfacing next to the stitching line on the WRONG SIDE of the band. Stitch interfacing to the seam allowance. Fold the waistband over the interfacing tightly and press.

TIP: The finished waistband needs to be ½” to 1½” bigger than your waistline to allow for the layers of fabrics in the waistband seam and tucked-in tops. Don’t fit your pants too tight!
3. We have a WONDERFUL new way to fit a waistband. Try on the pant without the waistband pinned to it. Wrap the waistband around your waist JUST AS IT WILL BE SEWN. When the waistband feels comfortably snug, pin the ends together. Distribute the ease at the top of the pants under the waistband until smooth. Chalk all matching points such as center front and back, darts, tucks, pockets, and side seams. Now you will know where to pin the band to the pants, making it fit perfectly, even if your right and left sides are different! We call it the QUICK FIT BAND TRICK! (See page 80, Sue.)
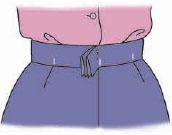

Before you chalk-mark, look for the following:
Pull the pants up above dimples. If wrinkles are pointing to the side waistband, pull pants down; and if ease is angled, move it until all wrinkles are gone.
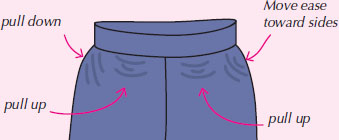
Horizontal wrinkles below the waistband mean the pant is too tight in the high hip area so it creeps up seeking more room. Let out the side seams just below the waistband.
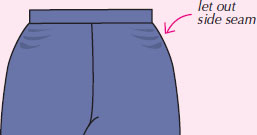
If you have uneven hips, adjust so more ease is above the fuller areas.
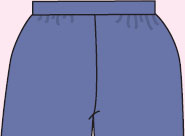
If your high hip is considerably larger than your waistline, you will end up with lots of ease or several curved darts and a curved side seam. (See darts page 98.)
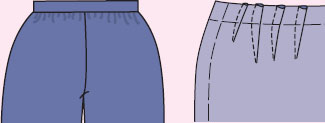
4. Pin band to pants, lining up chalk marks to matching points. If your waist seam allowance and your interfacing are both 1″, then just match the top edges. Marta pins horizontally and removes pins as she sews. Pati pins vertically, anchoring floppy seam allowances and darts.
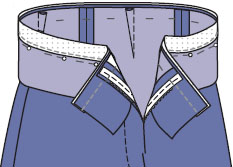
TIP: If your sides are straight up and down with little waist indentation, the pant will be only a little larger than the band, allowing the pants to fall gracefully over your hips. Then your feed dogs will help ease the pant to the band.
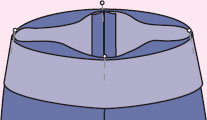
If you need to ease a lot of the pant into your waistband, hold the waistline over your hand as you pin. If the pant is on top of the band, the ease will disappear, making pinning a breeze. Use LOTS of pins! Remove pins as you sew or VERY CAREFULLY sew over them slowly so you don’t break your needle. Or you could sew rows of basting to help you ease evenly. Pull up the bobbin threads.
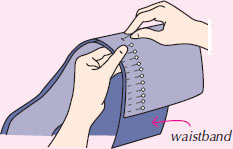
5. With the waistband on top, sew just below the interfacing. Your feed dogs will help ease the pant to the band.
NOTE: If you are lining the pants, before step 6 sew the lining into pants, wrong sides together. (See page 151.)
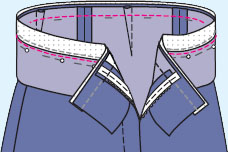
TIP: Is the waistband lining up at the zipper? Before finishing the wrong side of the band, close the zipper and put a pin where the bands should come together. Restitch until even.
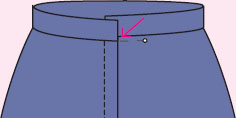
6. Fold band in half right sides together with seams turned up.
Don’t sew through the monofilament nylon interfacing because it will be too bulky. Trim the interfacing just inside the stitching line.
Stitch the ends, backstitching at the beginning and the end of the seam. After stitching, trim the seam to ¼” and cut corners diagonally.
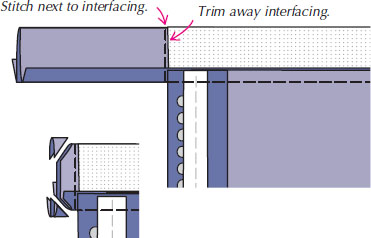
TIP: Generally, we sew the ends of the band even with the overlap edge and leave a 1″- 2″ extension on the underlap edge.
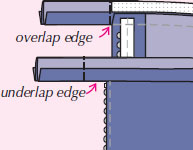
7. To make the ends firm so the fasteners won’t pull out and show, fuse everything together. Use a 1″ x 2″ rectangle of fusible web. Wrap it over the interfacing. Turn band to the right side. Press the ends until the web melts.

8. Clip the seam allowance on the underside of the band about 1½” from the zipper teeth. Hand slipstitch the seam allowance at the ends of the band together.
9. Finish the long edge of the underside of the band with zigzagging or serging, leaving at least a ¼” seam allowance. (Finish earlier if you wish.)
Then fold the band tightly over the interfacing and pin flat. Note that the interfacing acts as a cushion for the seam allowances, making the right side of the waistband very flat and smooth.
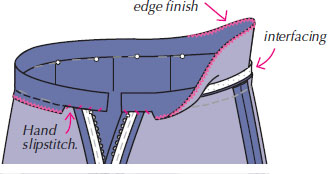
10. Stitch from the right side in the well of the seam to hold the band in place. This is less bulky than turning under the seam allowance.
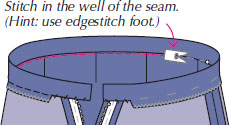
NOTE: You may turn under the inside seam allowance and slip stitch in place or finish the edge with a Hong Kong seam finish (page 95) or a binding before stitching in the well of the seam.
11. Sew on the hooks and eyes. A double set will hold better. Try sewing them on by machine if you are covering your band with a belt or if the fabric is dark and the stitches won’t show.
Tape them in place with Scotch Tape and use a narrow
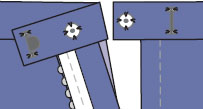
TIP: Do you get this pull at the top? Reposition hook or eye to tighten waistband and instantly solve the problem!


If you are short-waisted or like a softer waistband, the bound waistband seam is for YOU! Because it is narrow and filled with seam allowances, it won’t roll.
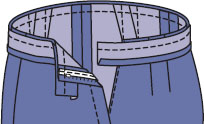
Use your fashion fabric on the lengthwise grain (least stretch). If your fabric is a natural fiber or a stretchy fabric, fuse a strip of interfacing to the wrong side with the stable direction the length of the waistband. Or, sew a strip of seam tape or Stay-Tape in the seam.
1. Cut the binding width four times your seam allowance. If it is 5/8″, the binding is 2½” wide.
2. Press under a seam allowance along one long edge, or serge, trimming ¼” off.
3. Pin binding to pants RIGHT SIDES TOGETHER. Stitch.
4. Fold binding in half RIGHT SIDES TOGETHER with seam allowances both turned up.
5. Stitch left back end even with center back.

6. Stitch right back end, leaving an extension for fasteners.

7. Trim seam and cut diagonally at corners.
8. Turn right sides out and slipstitch folded edge to pant, or stitch in the well of the seam as on previous band (page 107).

9. Sew on fasteners as on the previous band.

If you are smaller in the waist than your high hip area, or if you want to have the waistband sit below your waist, you might need to shape it. It will shape better if cut on crosswise grain.
Sew the monofilament nylon waistband interfacing to the seam allowance on the wrong side of the waistband (page 105).

Wrap the waistband tightly over the interfacing and press. Then shape it with an iron using steam and a press cloth if the fabric might shine.
As you press, curve the band.
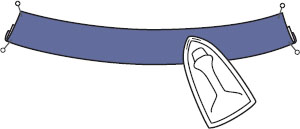
Shape it a little at a time and try it on to make sure you don’t over-shape it. Sew to pant as shown on page 106.
