CHAPTER 11
Cut, Mark, Sew, and Press
- Once you learn to fit yourself, make five pairs of pants in one month! Concentrated practice will make sewing and fitting pants easier.
- Use a pattern more than once. It gets faster each time.
- You should be able to sew one pair in three hours and two pairs in four hours. Sewing two pairs at one time adds only one hour to the total sewing time. That’s because repetition turns your sewing room into a mini-factory. Press a seam and while it cools, sew a seam on the other pair.
Quick Tips…Cutting
- Fold fabric right sides together so the crotch seams will be in a ready-to-sew position. Can’t tell right from wrong side? Pick one and use consistently. Most fabrics come folded right sides together. An exception is quilting cottons.
- Make sure pattern and fabric do not have wrinkles.
- Place pattern pieces in one direction to eliminate the possibility of shading differences or the “nap” effect of some fabrics.
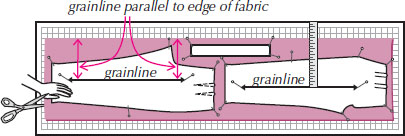
- Use a gridded cardboard cutting board so you can line the selvage along printed lines and place pins vertically into the board in every corner of the fabric.
- Use a see-through ruler for placing pattern on fabric. Measure from each end of the grainline to the edge of the fabric. Grainline should be parallel to the selvage or folded edge of the fabric.
- Use only eight pins. The first two go at each end of the grainline. Pin into the cutting board with pin heads angling outward from the center to keep the pattern from shifting.
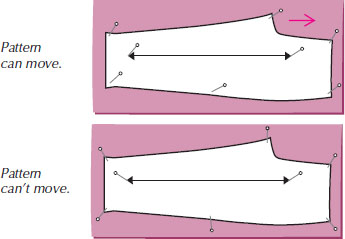
- Use your hands as extra pins. Keep one hand on the pattern edges while cutting. Practice by cutting slowly at first, but soon this will become a real time-saver!
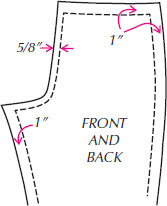
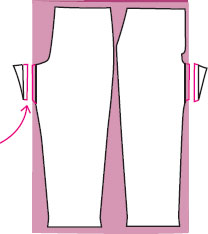
- Allow 1″ IN-CASE seam allowances at waistline, inseams, and side seams. It’s like having an “in-case” dinner in the freezer. Do this when you are not quite sure how a design will fit or you are using a heavy fabric that might require more room.
- Cut the waistband on the selvage to eliminate the need to finish the inside edge.
- If you are using an expensive fabric and can’t quite fit the pattern onto its width, piece the crotch. It won’t show. Remember to add seam allowances!
Quick Tips….Marking
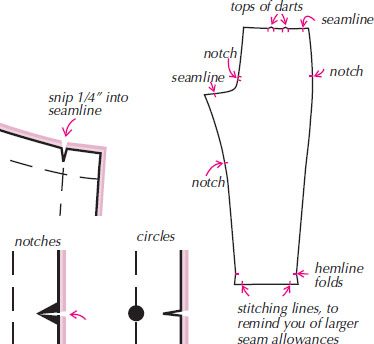
- Snip-mark edges: Snip ¼” into edge. Snip-mark the following:
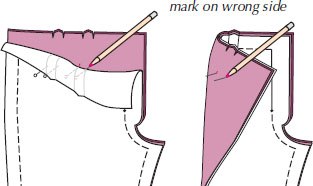
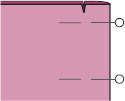
- For interior ends of pleats and darts, use pins. Put pins through all layers at pattern markings. Using chalk or a water soluble marker, mark wrong side of fabric where pins go through. Or tailor tack through circles.
- To pin pleats and darts, match snips at top and pin. At other end, pin so you will know where to stop sewing.
- Use tracing paper where accuracy is essential. Put a layer under and on top of your fabric so it marks on the wrong side of both layers of fabric. A plastic baggie will keep your pattern from tearing. Use a smooth tracing wheel; a serrated one can cut both your pattern and some fabrics.
Tip: Test tracing paper to make sure you won’t see it on right side and that it washes out or steams away.
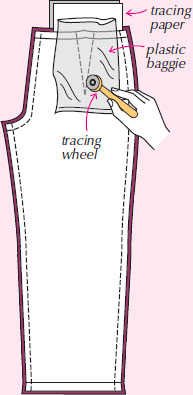
NOTE: Patterns are now sold multisize with multiple cutting lines. We have simplified the pattern shapes for clarity.
Speed Up Your Cutting and Pressing
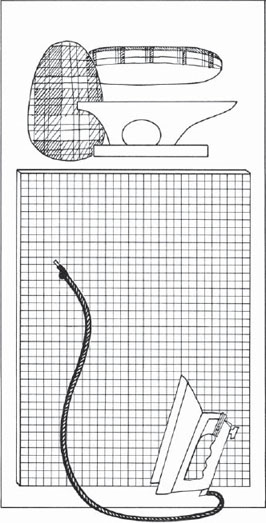
Make a “cut ‘n press” board and get all of these benefits:
- You can pin into its padded surface… more accurately than lifting the fabric to pin through the layers.
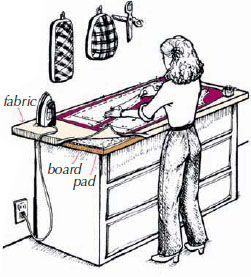
- Place it on top of a chest for a back-saving cutting and pressing surface.
- The large surface makes it easier to fuse interfacing to large pieces or several smaller pieces at once. Also, it is nice for creasing pants.
- It is a space saver—a dual-purpose cutting and pressing surface you can leave out all the time.
Materials
- ½”- or 5/8″-thick particle board (plywood will warp more quickly). It should be long enough to cut out a pant leg and wide enough for 60″ fabric folded in half. (Pati’s is 32″ x 48″—a third of a 4′ x 8′ sheet of particle board. Marta’s is 36″ x 48″ and her next one is going to be 36″ x 60″.)
- ½”-thick layer of absorbent padding such as wool or firm cotton felt. Wool army blankets work well. Cotton and wool batting found in quilt shops also works well. (Old wool from your stash can work too—a few moth holes won’t hurt!) Don’t use polyester batting.
- Smooth muslin to cover the padding, or a medium-colored gingham-check fabric.
- A staple gun to attach the cover to the underside of the board.
- Masking tape to cover the staples.
See our book Dream Sewing Spaces, Second Edition, for more sewing room tips (see page 174).
Quick Tips…Sewing
- Use “taut sewing” to prevent puckering of seams. Pull equally on the fabric in front and back of needle as you stitch. Do not stretch, just pull taut as if you were sewing with your fabric in an embroidery hoop. Let the fabric feed through the machine on its own. For knits, stretch the seams a little or you will get puckering on the lower legs because the knit fabric will have more give than the thread.
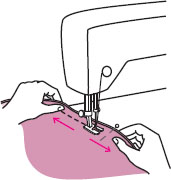
- Prevent “scooting.” The upper layer often scoots forward when sewing. The long length of the leg seams multiplies the effect. Prevent it by using lots of pins and taut sewing. If you begin to see a bubble, place fingers of your right hand on the sides of the presser foot to help the upper layer feed into the seam. Or use the points of embroidery scissors to scoot the fabric to the right of the foot forward. If you have a dual-feed foot or walking foot, use it.
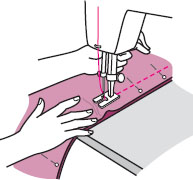
- Backstitch 5/8″ into the seam at seam intersection points instead of at the edge. When you trim a seam, you trim off backstitching if it is done at the edge. Or use a stitch length of 1mm for the first inch of the seam, especially on fine fabrics, for less bulk than backstitching.

Easy Seam Finishes
- None—a seam finish may not be necessary when you plan to dry-clean a fabric that doesn’t ravel easily, like many wool flannels, especially if you line the pants.
- Serging—the serger or overlock machine trims and overcasts the edge in one step. Use a 2-thread finish for the least bulk.
- Pinking—is best for lined pants out of moderately ravelly fabrics. When pinking, hold the blades loosely, because squeezing them will chew your fabric.
- Zigzagging—a fast, durable machine finish for medium and heavyweight fabrics. Use a stitch length of 2mm and width of 3mm.
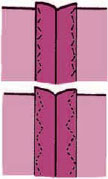
- Triple zigzag or serpentine stitch—excellent for lightweight silky fabrics. Use with taut sewing to prevent the edges from puckering.
- Hong Kong seam finish—Sew a 1″-wide bias strip of lining fabric to edge of seam, right sides together, ¼ from edge. Trim to 1/8″. Turn bias strip to the wrong side and topstitch in the well of the seam from the top side to catch it in place. (Even easier then using lining fabric is silk organza since it doesn’t slip.)
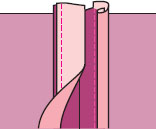
- Double-stitched narrow seam—perfect for loosely fitted pants of velours, sweatshirt fabrics, or lightweight knits. After sewing seam, stitch seam allowances together ¼” from first stitching. Trim to stitching.

- Stretch overlock (or double overlock) stitch—stitches a seam and overcasts in one step. It is the most durable stitch you can use for the curve of a crotch seam.
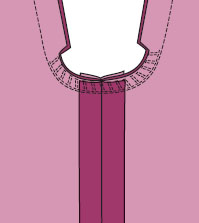
Press As You Sew
Pressing is second only to fitting in importance for the quality look of a finished garment.
Pressing Darts
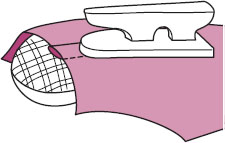
- Press darts flat first to flatten fold line and to eliminate any puckered stitching.

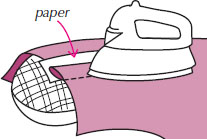
- Press darts toward center over a curve on a pressing ham that matches the curve of the dart (and your body!). Tuck paper under the fold if necessary to prevent an indentation from showing on the right side.
- Flatten dart, especially point area, with a pounding block/clapper. Hold down firmly until fabric cools.
Pressing Seams
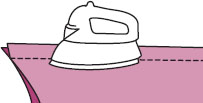
- Press seam flat just as it was stitched, to remove any puckers.
- Press seams open over a seam roll or Seam Stick® to prevent seam imprints from showing on the right side. Use a ham if seam is curved.
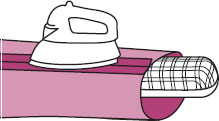
NOTE: The Seam Stick is a half dowel long enough to press open an entire leg seam.
3. While the seam is still moist and warm, apply pressure using the pounding block. Leave it in place for five seconds. As the fabric cools under the pressure and the wood absorbs the heat and steam, the seam gains a “memory.”
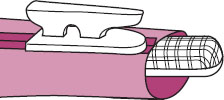
4. Do not move pants until fabric is cool or else what you have pressed in will fall out. Fabrics don’t have a memory until they are cool.
Creasing Pants
A pant crease is a vertical line that can make any figure appear taller and more slender. Some fabrics crease beautifully; others won’t hold a crease. Test a scrap before deciding to crease. Some styles lend themselves to creasing and others don’t.
When we might NOT crease a pant:
It is a soft fabric.
It is a knit.
It is a fitted or sporty style.
It is a very full pant.
It is a jean style.
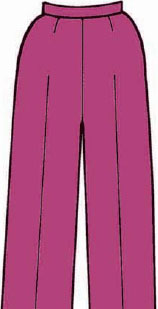
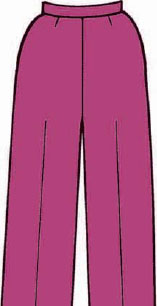
The FRONT crease goes to mid-hip. The BACK crease stops at the crotch line.
plain pant front
plain pant or trouser back
Place pants on a pressing board (page 94). From hem to knee, match all inseams and out-seams. (Pin the seams together.) Make sure creases are smooth and appear to be on straight of grain above knee area.
Use a press cloth if the fabric shines.
Press with an up and down motion instead of a sliding motion. Then use a pounding block to get a crisp edge. Let cool before moving.
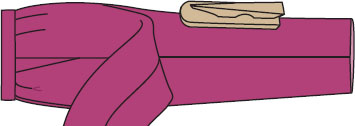
Press under leg first and then upper leg while it is on top. Then flip pant over and repeat.

(Also see pages 68, 69, 72, and 74.)
Pressing Pleated Trouser Creases
Press trouser creases in the same way, except the front crease goes all the way from hem to the pleat closer to the center front.
Usually one pleat is deeper than the other. The shallower one is often narrower at the bottom.
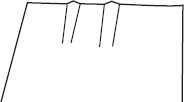
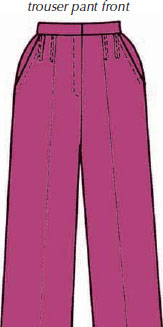
The deeper pleat, which lines up with the crease, can be pressed flat to the thigh area where it will be half the original width. The narrower pleat can be lightly pressed into a dart shape.
For more on trouser pleats, see Chapter 9.

When you press a crease into a pleat, it is less awkward if the pleat is next to the press board so you can press up INTO it.
1. Press the pleat in the direction pattern indicates.
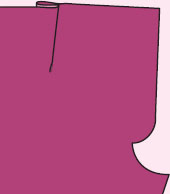
2. Place pant front right side down on the pressing surface. Fold front of pant over the pleat stitching to expose crease fold.
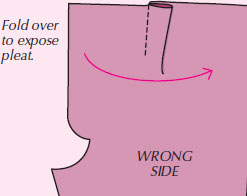
3. Press crease.
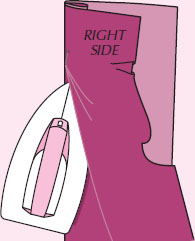
See page 74 for pressing the crease BEFORE sewing the pant front to the back.
To make trouser pleats more flattering, slip a seam roll or sleeve board under the front pleat. Pin into the surface to hold the pleat in place.
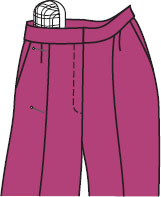
Use a press cloth if the fabric shines. Top-press the deeper pleat flat from the waist to the thigh, making it a little narrower at the thigh. Use a pounding block to flatten. Let cool before moving.
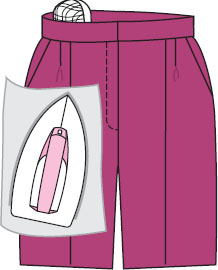
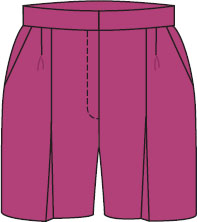
If pants with pleats were shorts, the hem would look like a pleated skirt.
(For more on pleats, see Chapter 9.)


