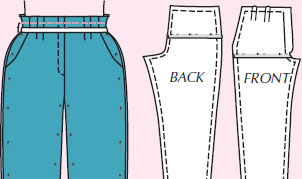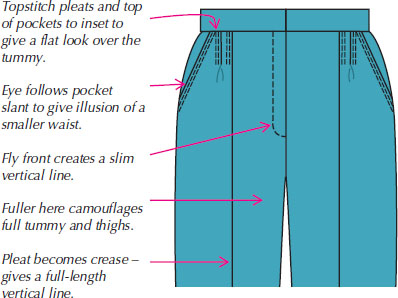
Do you realize that trousers are the most flattering pant style we can wear? This is because the details and the extra fullness in the front camouflage lumps and bumps.

This will happen if your trousers are too tight.
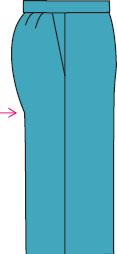
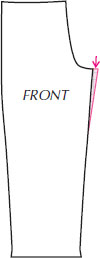
For less tummy emphasis, add to the front inseam.
Trousers will hang straight down from your tummy because of the extra fullness in the front.
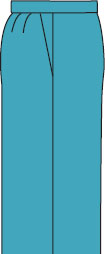
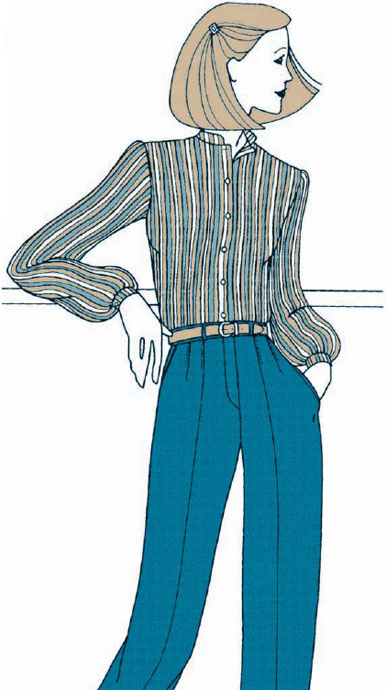
Anyone can wear trousers and look good in them IF they fit and IF the details are well done. However, because of all the details, we don’t recommend that you sew your first pair of pants using a trouser-style pattern. First, learn more about your body using a simple basic style. Then, concentrate on sewing flattering trousers.
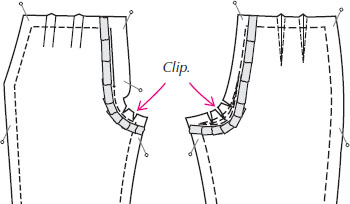
Tape front and back crotch next to the seam-line. If the pattern has lower back crotch stitching lines, tape below the lowest line. See page 24. Use short pieces of tape in curved areas, lapping them at least ½”.
Clip curves to tape. Pull on curves to make sure tape won’t tear.
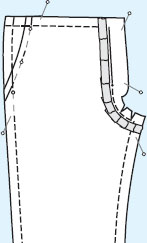
Place pant front on top of side panel, matching circles to seam intersections, and pin in place.
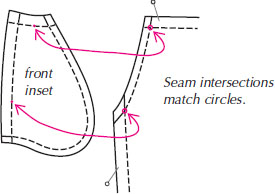
NOTE: When cutting lining front for a trouser, lap the inset pattern piece under the front just like this in order to eliminate a pocket in the lining.
NOTE: Straight vs. Curvy Bodies
Some trouser patterns have “play” in the pocket to make room for hands. If you curve in a lot from your upper hip to your waist, leave the play. If you are straight, the pocket will gap, so remove it.
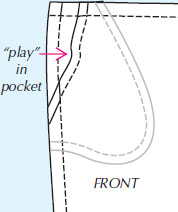
To remove “play” in the pocket, match the side seam on the front to the lower circle on the side inset. To ADD play, do the opposite.
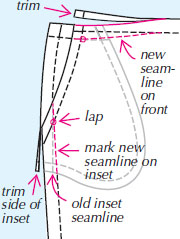
Smooth front until front waist seam intersection is directly above the circle. Re-mark the waist seamline on the front. Trim excess tissue off top of front and lower side seam of the inset.
Create the front creaseline by folding the tissue in half at the hemline. Match inseams and out-seams. Crease the fold with your fingers from hem to knee. From there, crease to the pleat stitching line. Mark the crease by drawing on the foldline. You will tailor tack on that line later.

From WRONG side, match pleat stitching lines. From RIGHT side, fold pleat in the direction shown in the pattern and pin flat. Flatten the pleat to the thigh area and pin through all layers.
Pin back darts on the outside. Place front and back legs WRONG SIDES TOGETHER. Pin in seamlines, with pins pointing down so they won’t fall out when fitting. Don’t put any pins above waistline seam. (OUCH!)
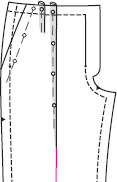
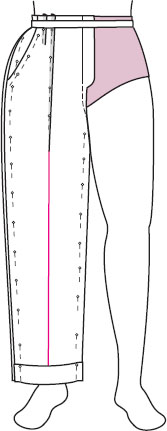
Follow the same tissue-fitting procedures as on page 25, with these additions:
If you need waist width only, add to the back side seam and to the side seam on the front inset only. Do NOT make front pleats narrower.
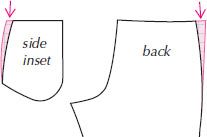
If the pattern center front is slanted, you can straighten it. This works well if you have a full tummy. Cut on center front to bottom of zipper opening. Cut from outside edge to first cut, leaving a “hinge” of tissue.
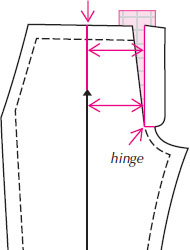
Straighten center front until it is parallel to the grainline. Insert tissue.
Add as shown.
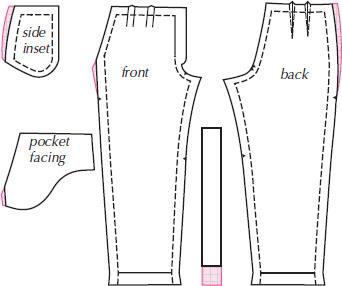
Lap front and back pattern pieces to make sure the amount and shape added is the same on the front and back at the side seams.
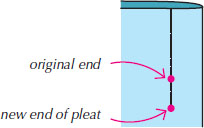
You don’t want pleat stitching to stop above the fullest part of your tummy, especially if you curve in above the tummy. Mark on your tissue the new end of pleat, stopping at the fullest part of the tummy.
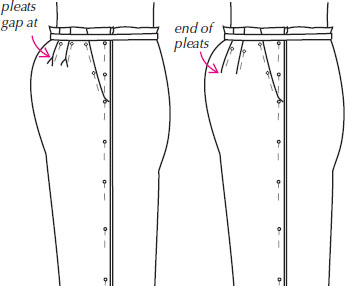
When sewing pleats, first mark the new end point for stitching.
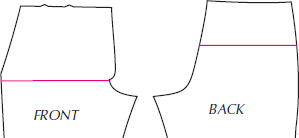
Draw a line on the front at the bottom of the fly, but ABOVE the crotch curve, and another line anywhere above the crotch curve on the back.
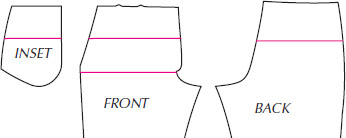
If you need to shorten or lengthen the crotch a lot (1½” - 4″), you may need a second lengthen-and-shorten line on the front to change the zipper and pocket length as well. In this case, add a line to the side INSET and pocket stay or facing too.
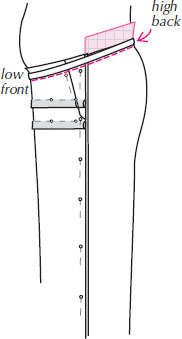
We have had a few women in our classes who are very low in the front and high in the back. It’s where they wear their pants and YES, the pants do stay up. These women need a shorter front crotch, zipper opening, and pocket opening. If you are really high in the back, you may even need to add tissue to the top of the back. Make one or two tucks across the front and none on the back. Mark waistline below elastic. See Verna, page 67.
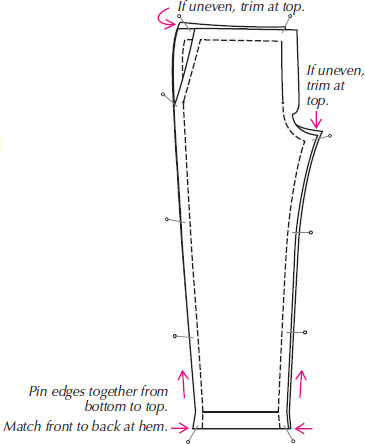
Place front and back legs WRONG SIDES TOGETHER on a cardboard surface. Start by matching HEMS FIRST. Pin into cardboard through hemlines.
Smooth tissue to top and pin into cardboard, matching seamlines along the way.
If inseams and side seams don’t match at top, trim them until even. (If you have made major changes to the inseams, they may be different lengths. The only reason the outseams might not be the same length is because of how the inset is pinned.)

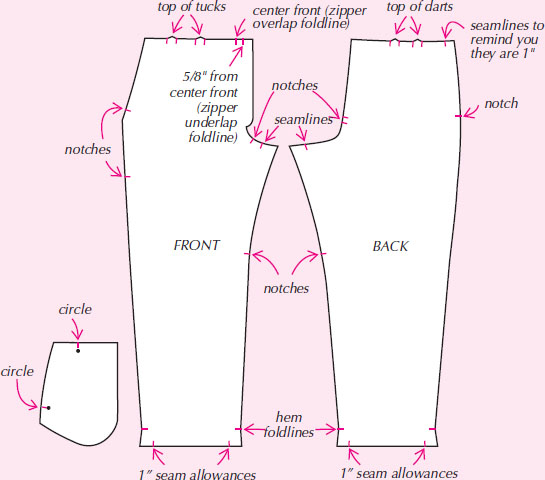
There are up to 14 chances to make mistakes (seam allowances, darts, pleats, and lapping points such as pockets and fly zipper). To prevent a disaster, we urge very careful marking.
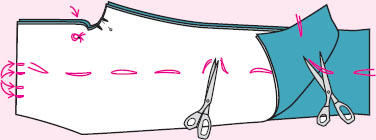

Snip-marking helps with speed and accuracy. Snip ¼” into cut edge at the places shown at right:
Snip circles so you’ll know circle is 1″ from snip.
1. Sew front crotch seam starting 1½” from inseam to zipper opening circle. Backstitch.
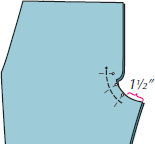
NOTE: Since you cut right sides together, you can pin and sew the crotch seam at this time. However, some people prefer to edge-finish or serge each front fly extension separately, then sew crotch seam.
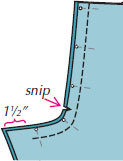
2. Sew back crotch seam beginning 1½” from inseam up to waist.
3. Make a ¼” snip above crotch curve and press open seam above snip.
4. Sew back darts. Press toward center back. Finish back seam allowances.
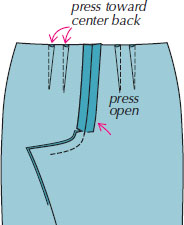
5. Stitch pleats, backstitching at circle.
6. Press the pleats in the direction your pattern indicates.
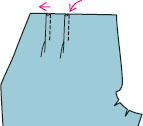
DON’T CHANGE THE DIRECTION OF THE PLEATS UNLESS YOU RE-MARK THE PLEATS.
The crease is designed to go into the fold of one of the pleats.
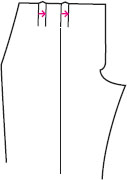
If you press them in the opposite direction, the crease will go off grain to meet the new fold.
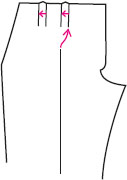
Re-mark pleat lines as shown.
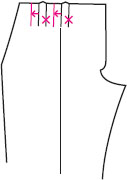
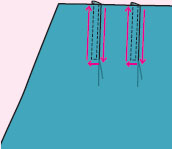
TIP: For a sporty look, top-stitch tucks flat in a “U” shape to 1½” below waist SEAMLINE. Stitch next to fold, pivot and stitch across the bottom, pivot and stitch ¼” from fold to top.

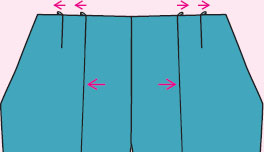
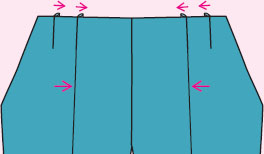
It doesn’t matter as long as your trousers are sewn and pressed properly and they fit well. It is done both ways in ready-to-wear. We used to prefer pleats pressed toward the side, but have since lightened up!! Try patterns designed both ways and you be the judge.
Pleats pressed toward side (from inside). You look into pleat from center.
Pleats pressed toward center (from inside). You look into pleat from side.
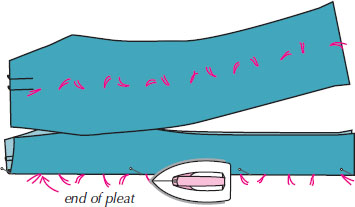
7. Crease front legs before continuing to sew. (For general creasing tips see page 96.) Place pant FRONT on a flat ironing surface. Fold along tailor tacks. Pin straight into ironing surface. Put pin in stitching line of pleat closest to center front.
Crease each leg with an up and down motion of the iron. Let cool before moving.
8. Remove tailor tacks. Lay the front flat on a pressing surface and top-press the stitched pleat. Below the pleat, let the fabric fold under to the width of the pleat. Continue pressing down to the thigh area, creating an unsewn pleat that lies flat. It should slightly taper in width as it goes down the leg.
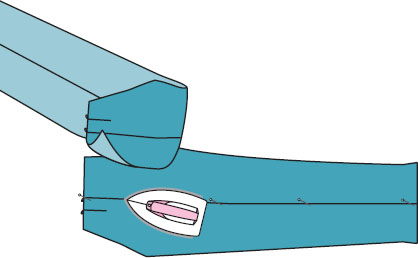
Let cool before moving.
9. Sew pockets. (See Chapter 20.)
10. Sew fly-front zipper. (See page 101.)

It is always easier to sew these details with the front flat and unattached to the back. Flat first is always faster!
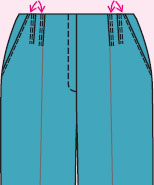
11. Pin inseams and side seams WRONG SIDES together with pins pointing down and none above waist seam.
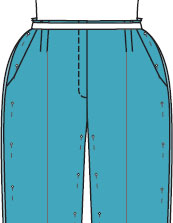
12. Fine-tune the fit. (See Chapter 7.)
13. Mark waistline seam if changed. Take pants off.
14. Mark seamline changes on wrong side of fabric.
15. Pin RIGHT SIDES TOGETHER and sew seams. Press open. Finish sewing the crotch seam. (See page 40.)
16. Apply waistband. (See Chapter 14.)
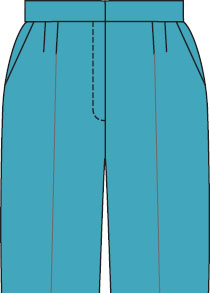
17. Hem pants. (See Chapter 22.)


During fabric fitting, if you pull pants up more than 1″ in the waist, go back to your pattern and make a tuck in it to shorten crotch depth. Then next time you won’t have to lengthen pleats or lose some of your pocket and zipper opening length. See shortening crotch depth, page 29.
