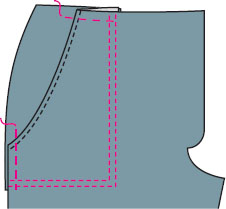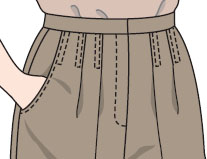
Trouser pockets are slanted pockets. The pant can be with or without pleats in the front. We will show a pleated pant because it requires a few more tips.

Turn your pocket into a front stay! The stay will be caught in the zipper, keeping the tucks and pocket bags flat.
If your pocket pattern piece doesn’t extend into the center front, it is not a stay.
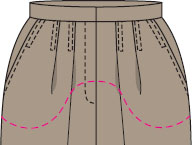
To create the stay, place pocket on front as shown. Fold out the pleat closest to the center front. Use the depth of the second pleat to form a dart in the stay. Draw a line from side seam to front edge on your front pattern piece and you have the pattern for the stay. Cut the stay out of lining.
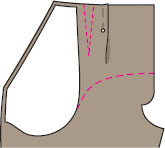
BEFORE SEWING TROUSER POCKET, sew and press pleats in pant front. Press front crease in pant as well (see page 74, 96, and 97).
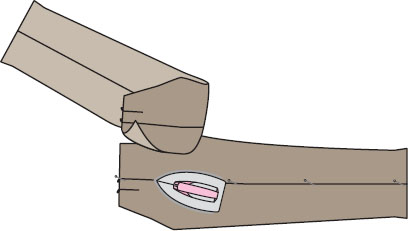
1. Sew the dart in each stay, if there is one. Press in the opposite direction of the pleats to reduce bulk.
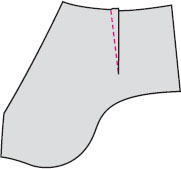
2. Pin stay to front pocket edge, right sides together. To keep this bias edge from stretching, place the pattern on top and make the fabric the same size. (Often it will have already grown. Simply ease it back to the length of the pattern.)
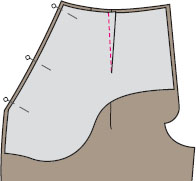
3. To stabilize, sew seam tape or the lighter weight Stay Tape into the seam. (The selvage of lining can also be used as tape.)
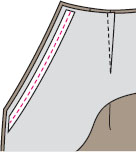
TIP: If your pockets always gap, center a stay tape over the stitching line and pin at one end. Mark a dot on the tape at the other end and one on the stay 1/8″ away. Pull tape until the marks line up. Pin, distributing fullness. Sew with tape on top; feed dogs will ease fabric to tape. (Don’t shorten the tape if your fabric is firmly woven and won’t ease well.)
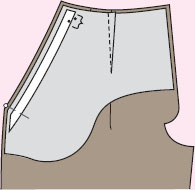
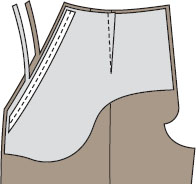
5. Press the lining over the seam allowances toward the side.
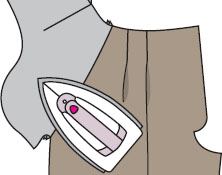
TIP: You can understitch lining to seam allowances, which helps keep the lining from showing.
6. Turn the stay to the inside and press.
TIP: Roll the seam 1/8″ to the inside when pressing so the lining won’t show. Pressing on a ham allows you to pin the pocket to the ham, anchoring it as you press.
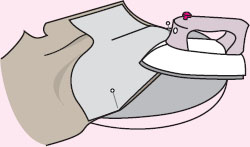
7. Pin to prevent the layers from slipping and causing a puckered edge. Edge-stitch the finished slanted edge 1/8″ from the edge.
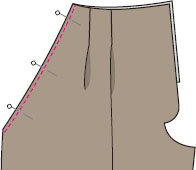
TIP: If fabric is slippery, hand-baste through all layers first to prevent a puckered edge. OR, use a temporary spray fabric adhesive to hold all of the layers together while you stitch.
8. Topstitch edge again ¼” away for a sporty look. If you do this, also topstitch pleats through all layers.
9. Finish upper straight edge as shown with serging or zigzagging.

10. Put pattern piece on side inset and put pins into circles. Lift tissue off pins.
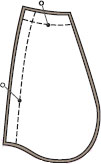
TIP: Your pocket will have room for your hand or will be flat and gap-free, depending on what you decided to do during tissue-fitting, page 75.
11. On a flat surface, with pants right side up, pin front to inset matching pocket edge to pins. Pin inset in place.
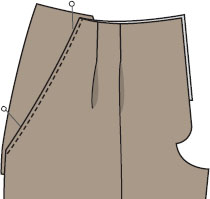
TIP: Check both sides before sewing. To ensure right and left trouser fronts are identical, check insets before attaching permanently to make sure they are lapped under the front exactly the same on both sides. The distances at the arrows should be the same.
If your hips are uneven, you will lower the waistband on one side and that will make one pocket shorter, but at this point, make sure they are even.
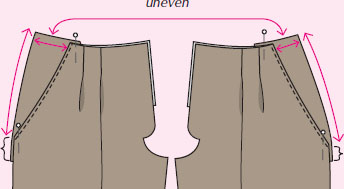
12. Flip front of pant out of way and pin edges of side inset and stay together. Don’t match edges if they are uneven. Just make sure pocket bags are flat with no bubbles.
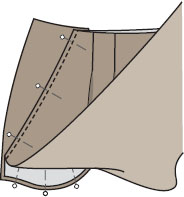
13. Fold pant front toward side seam. Stitch pocket sections together. Finish lower edge of pocket bags and stay if desired.
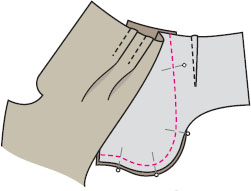
14. To make sure your lining will be caught and held by the zipper, machinebaste right front along center front.
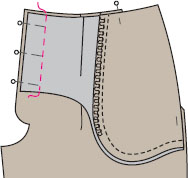
15. Machine base left front 5/8″ from center front (at fly-front underlap fold line snip).
16. Baste front to side inset along seam-lines at top and at sides.
17. Finish front edge of fly extensions if desired.
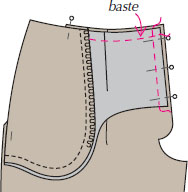
TIP: To prevent the pocket from gapping or pulling just below the waistband, topstitch on top of the original stitching for 3/4″ below waistline seam through all layers.
If you used two rows of stitching on pocket edge, stitch a “U” at the top of the pocket (page 126).
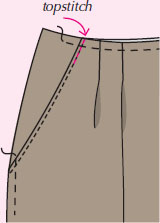
If you want to have fashion fabric facing at the edge of the pocket, follow steps two to eight on page 129.
In addition to the faced edge, above, designers often like the side inset to become the stay instead of the pocket facing as it covers up the pocket pieces on the inside and makes unlined pants look neater.
Simply add the stay section to the inset pattern piece. Fold pleats out of front and place inset on top, matching circles and notches. Add tissue from side edge of inset to front edge.
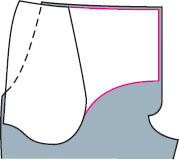
If you want a little play in the stay, make a small dart at the waistline before trimming the tissue even with front and top edges.
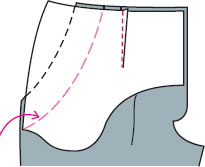
Draw a line that will be at least 1½” from the front of the pocket.
Cut your new side panel stay out of lining.
Cut a piece of fashion fabric that will go from the side seam to the line you drew and stitch it to the lining. (Use this combination inset/stay in place of the standard side inset in previous instructions.)
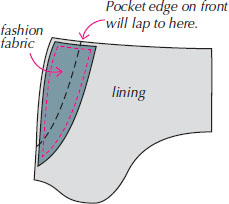
This is a sturdy pocket for a cotton pant. We’ve added a facing to add strength.
1. Square the corner of the pocket lining pattern piece while cutting lining out of a lightweight cotton or self-fabric.
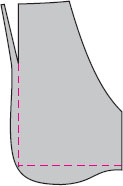
2. Cut a facing 1½” wide using the pocket pattern piece as a guide.

3. Finish lower edge of facing.
4. Pin wrong side of facing to right side of lining. Baste along pocket edge and topstitch or zigzag lower edge to lining.
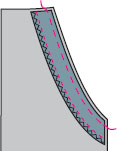
5. Pin pocket lining to pants right sides together. Stitch.
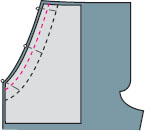
6. Trim and grade seam. If pocket edge is curved, clip if necessary.
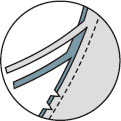
7. Press lining over seam allowances.
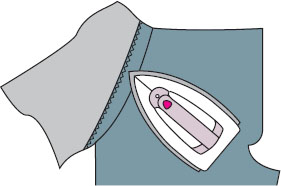
8. Turn lining to inside and press.
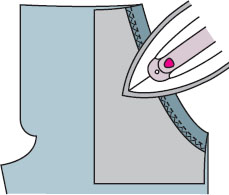
9. Edgestitch and/or topstitch outer pocket edge.
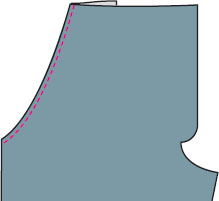
10. Pin inset to front.
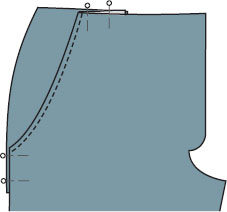
11. Stitch pocket edges together.
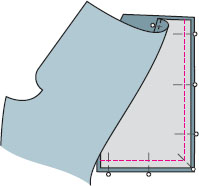
12. Hand baste top and side edges of pocket to pant front. Topstitch with one or two rows through all layers.
