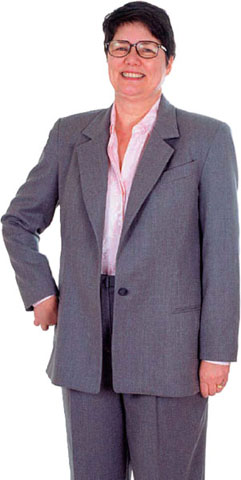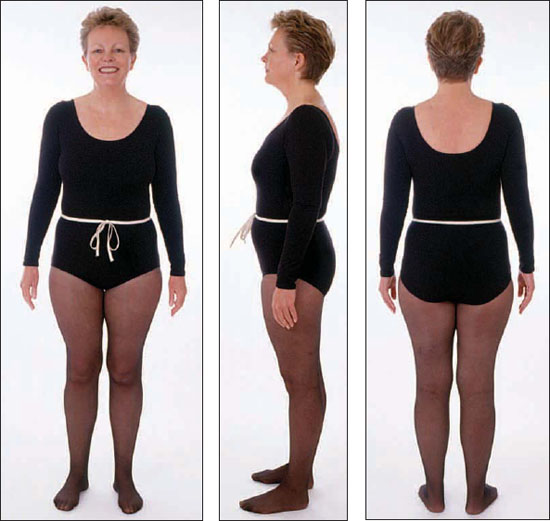
Sue Neall is the director of education for Palmer/Pletsch in Australia and has taught pant fitting in Australia and trained teachers to teach our tissue-fitting system. When Sue came to the United States and stayed with Pati, Pati decided she would be the perfect person to be featured in the book! Sue sews beautifully and represents another common body type.

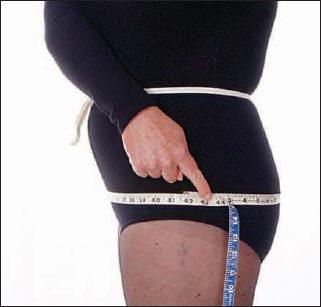
To find Sue’s best pattern size, we measured her hips. She measures 41½”, which is between a size 16 and 18. If you are between sizes, use the smaller size unless you have a flat derriere. Since Sue is flat in the back, we chose a size 18, which will allow us to take a tuck down the back and keep the side seam at Sue’s side.
Sue chose a McCall’s Palmer/Pletsch pant pattern with special tissue markings and 1″ side, inseam, and waist seam allowances to allow for different weights of fabric. Also, alteration lines are printed on the tissue, such as tuck lines for flat derriere and lower back-crotch stitching lines.
We pinned the pleats as they will be sewn and then pinned the larger pleat flat through all layers in the thigh area to prevent the pleat from giving extra width when pinning the side seams to fit.
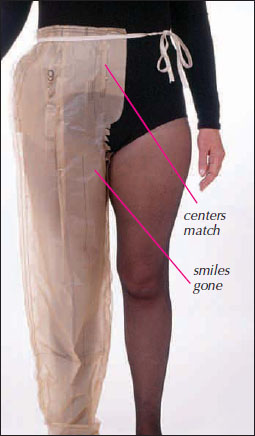
Sue’s waist is larger than the pattern (which may have fitted her when she was 18 years old and before three children!). Since the center front doesn’t come to her center front, we will need to expand the waist. The smiles in the crotch area need not be addressed until we fix the waist.
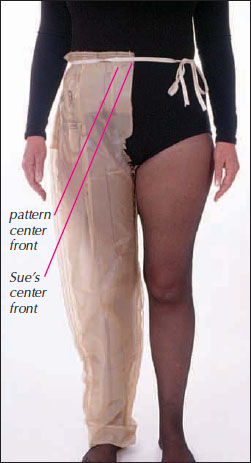
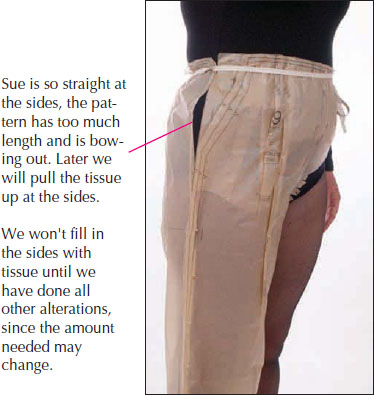
We unpin the side seam down to the upper thigh.
Now the center front comes to her center. Note that the smiles in the crotch disappear once the tissue comes to her center front.
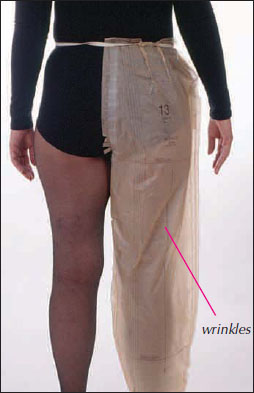
The back looks a little baggy. Note the wrinkles from the sides to the inseams.
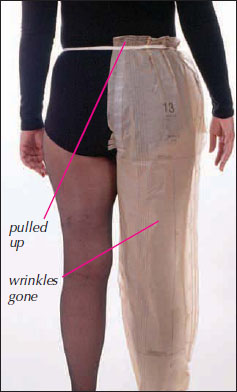
We pull up the tissue at the center back until the bagginess disappears. However, it seems a little full across the back.
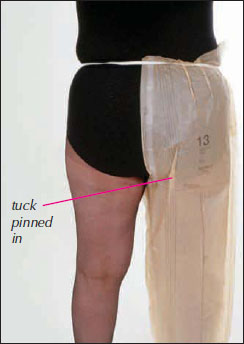
We pin a small tuck at the lowest area of her derriere to see how much width we need to remove. (See page 31, back bagginess.)
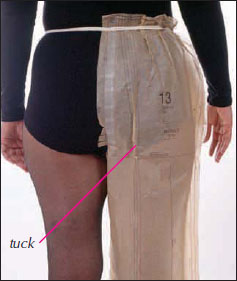
After taping the tuck in place, Sue again tries on the tissue. The back is still a little full in the thigh area, so we will take in the inseam.
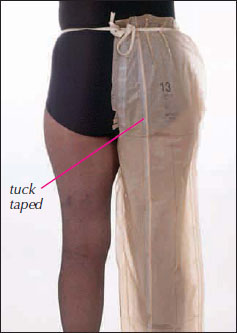
But first, let’s look at the front. Pulling up the back has caused smiles in the front crotch. We need to let out the front inseam.
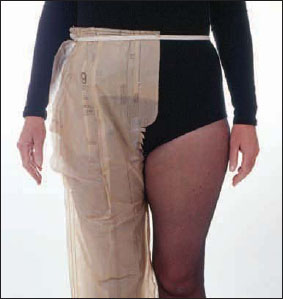
We drop the tissue to shift the inseams. We pin the back inseam a little deeper and let out the front inseam.
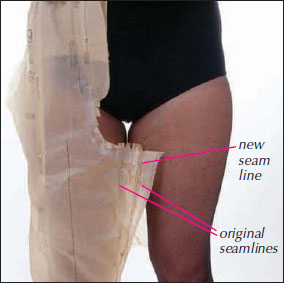
Now, the front looks good, but the sides still bow out due to her straight, rather than curved, hips. Also, this extra side length in the tissue is causing the front crease to veer toward the inseam.
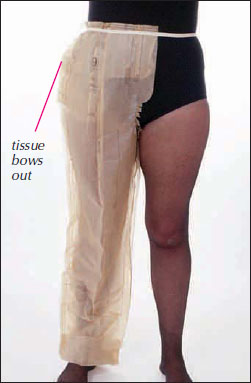
The gap at the sides will narrow when we pull up the tissue.
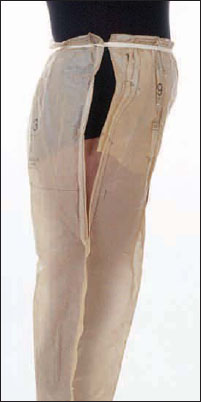
We pull the tissue up at the sides until it is flat against her body.
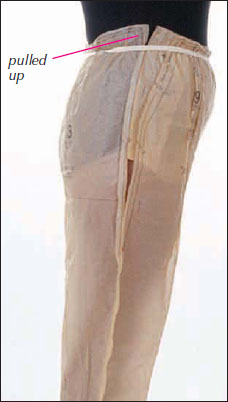
We pin the tissue up against her body. Then we add tissue to make even 1″ seam allowances.
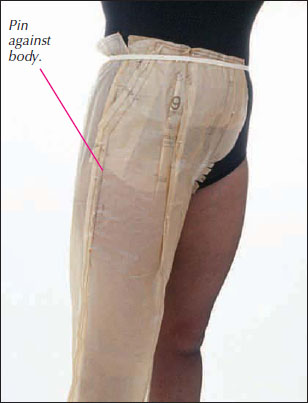
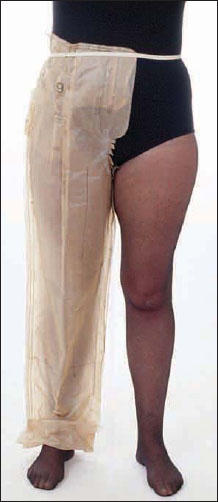
From the front, the tissue looks good. We turn up the hem of the tissue until it drapes a little on the front of her foot, which should allow enough length for a flat shoe. If she wants to wear heels, Sue would need to test the length with those shoes.
The back looks good. Sometimes, Sue has made an extended calf alteration on the back leg. Because the trouser is fuller, she doesn’t need to do this.
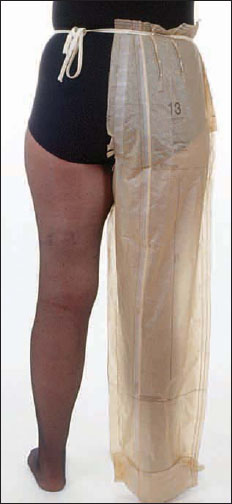
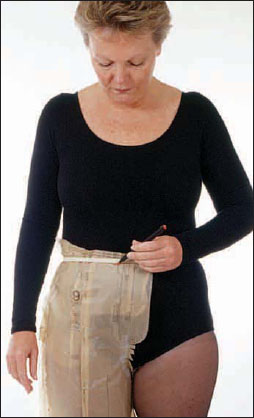
Sue marks the bottom of the elastic all the way around. After taking the tissue off, she will mark the pin locations at the sides and inseams with a pen that will go through both layers.
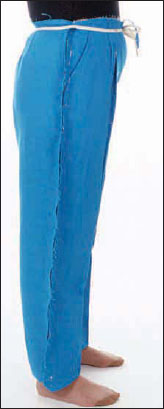
Sue has sewn the pockets, pleats, and zipper. She marked the crease with tailor tacks after cutting out the trousers. She has pinned the side seams and inseams wrong sides together and puts on the pants with elastic tied around her waist. It is important to fit with the pants right sides out because your left and right hips may vary in size.
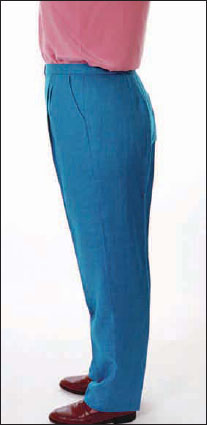
The side is perfect. The pants hang great. The side seam is perpendicular to the floor.
The Front
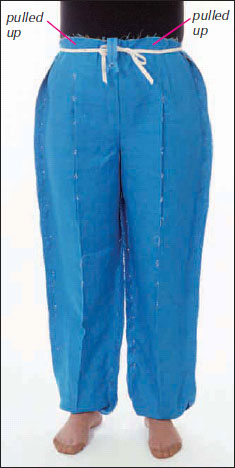
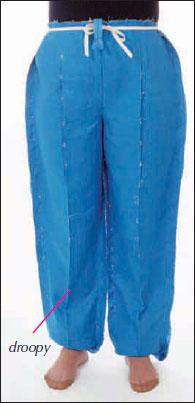
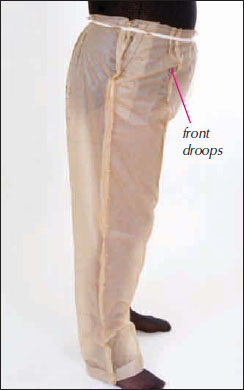
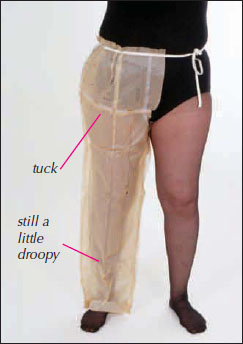
They look fabulous in the front. The only thing we see is a little drooping in the center of each leg.
We pull up the pants in the pleat area to remove the droop. Sewing the waistband lower in this area will anchor it. It is OK to have a wavy waistline.
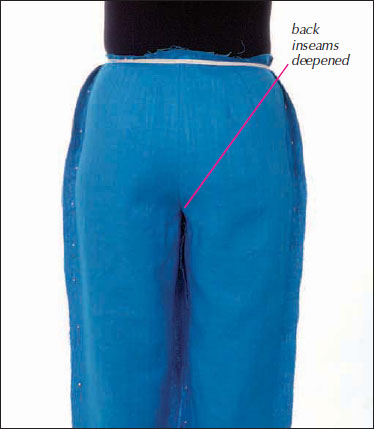
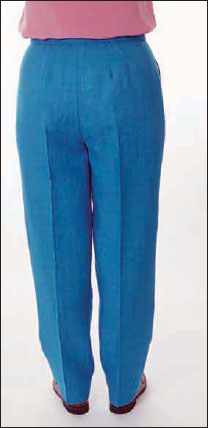
The back, below, looks good. However, there is a little extra fullness in the back inseam. This happens in fabric, depending on how much the bias crotch seam stretches in different fabrics.
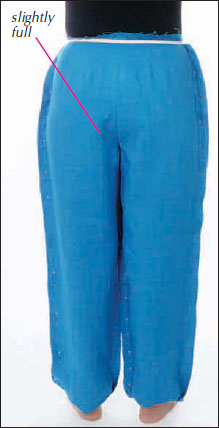
We pin a small tuck to help us decide how much to take off the back inseam. We decide to make the back inseam 3/4″ deeper.
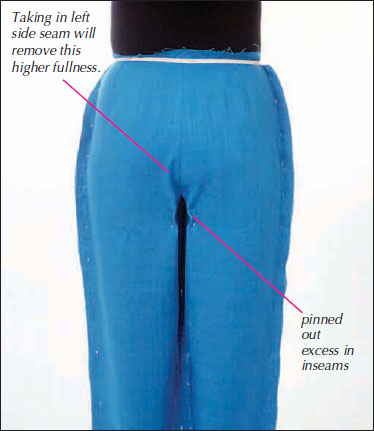
Sue took off the pants and repinned the back inseams 3/4″ deeper. Voila! It looks great!
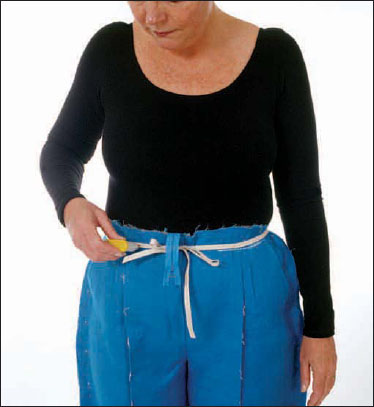
She now marks with a chalk wheel along the bottom of the elastic so that she will know where to sew on her waistband.
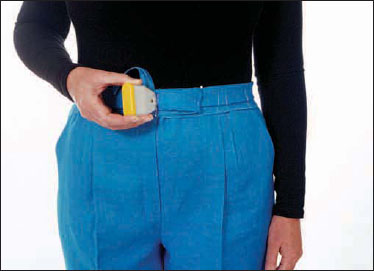
After sewing and pressing all of the seams, she tries the pant on again.
Sue has sewn her 1″ non-roll interfacing to the waistband and wraps it around her waist just as it will be stitched on. She pins the center front so the band is comfortable and then smooths the pant waist ease underneath the band. What you see is what you will get! Now she marks all of the matching points with chalk so when she pins the band to the pant, she can match the marks and get a perfect fit even if her left and right sides are different. (See page 105, waistband.)
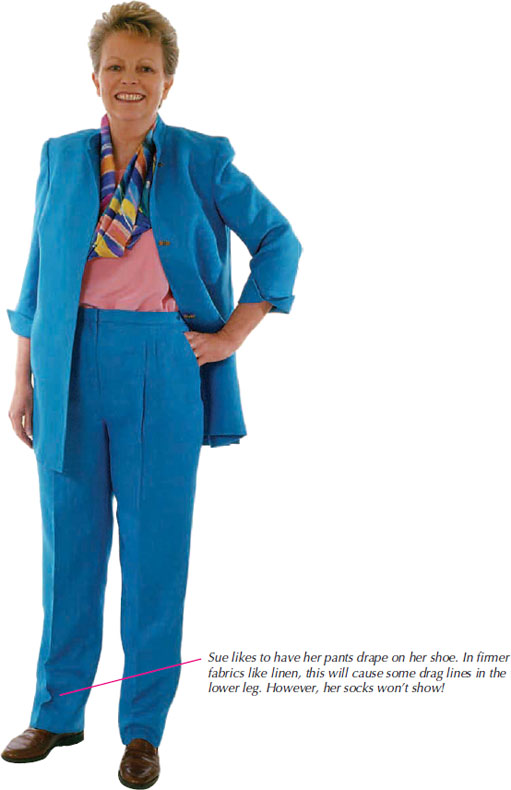
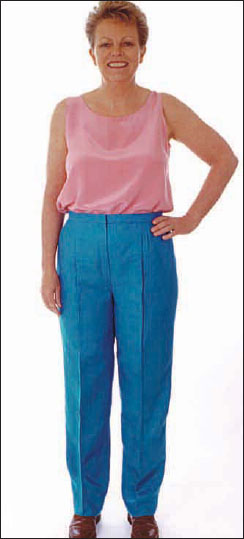
The finished pant, front, side, and back. Sue likes the hem to break on her shoe so that when she sits, less leg shows.
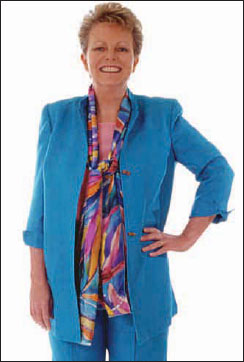
If you sew pants in a colored fabric like this beautiful linen, make a jacket to match so you will have a complete outfit. Here is Sue in her accessorized completed outfit.
Jean Baxter is a Palmer/Pletsch Certified Sewing Instructor from Granite Bay, California. She is a about 5′5″ tall. Her shoulder and hip width are the same and she has a definite waistline, making her an hourglass figure type. From the side you see she has back waist indentation, but not front.
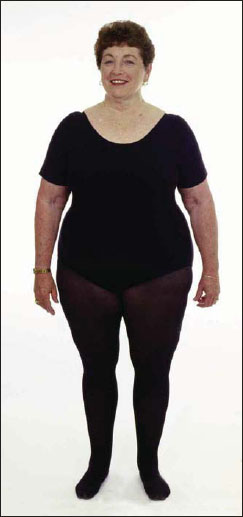
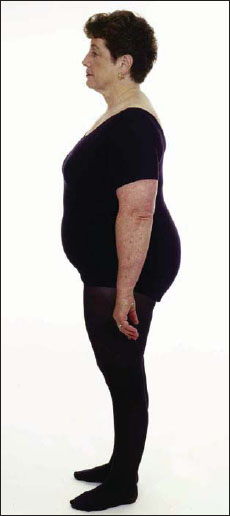
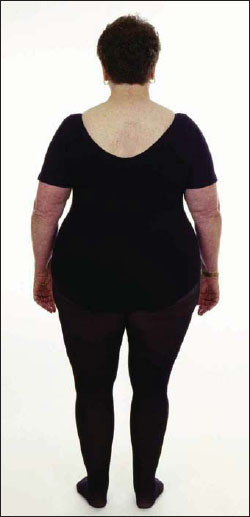
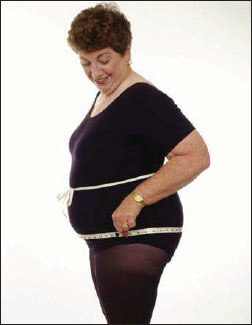
Jean has tied ¼” elastic around her waist. She measures 54½” in the hips, which would put her in a size 30W. Jean took our pant workshop before there were sizes larger than a 24, so we used a size 24. We found we liked it because the leg width was narrower.
Remember, you can make any size fit, but sometimes you need to experiment. This trouser is roomy. Jean might go to a larger size in a fitted pant.
Jean has the same hourglass silhouette from the back. Tucking in a blouse will show her waist in wellfitted pants. To de-emphasize her short waist, her pant and tucked-in top should be similar in color.
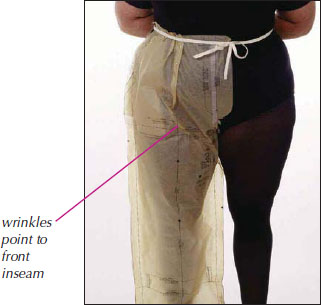
She tries on the tissue. The center front isn’t coming to her center front. Also, the front crotch is long.

We let out the side seam until the center front came to Jean’s center front. Note the smiles in the front crotch.
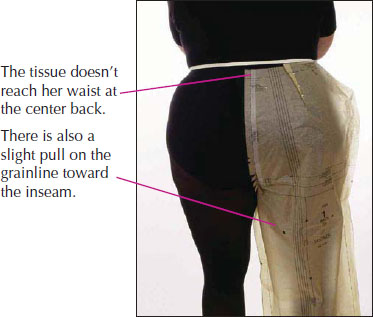
The tissue doesn’t reach her waist at the center back.
There is also a slight pull on the grainline toward the inseam.
Due to smiles in the front and needing length in the back to get the tissue up under the elastic, we drop the tissue and let out the inseams an even 3/4″
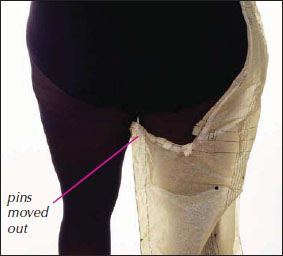
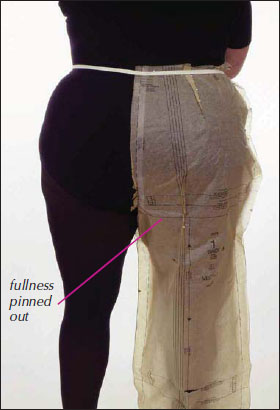
Now the back comes up to the waist and the back grainline hangs straight. There is, however, extra fullness across the back at the lowest point on the derriere.
We pull up the tissue until the front crotch touches her body. It will hang down at least ½” in fabric since the bias crotch seam will stretch a little.
The bottom of the elastic indicates the new waistline. The stitching lines for the front pleats will need to be lengthened. Note also that the front smiles are gone.
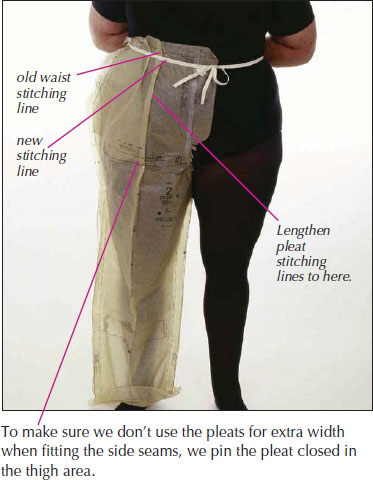
To make sure we don’t use the pleats for extra width when fitting the side seams, we pin the pleat closed in the thigh area.
We took a vertical tuck in the back tissue to remove the excess width. Note the tissue is more rounded at the side than Jean is.
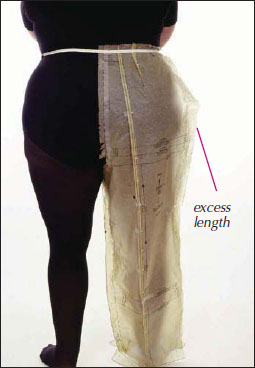
Now we see that the side seams don’t meet after taking the tuck. Also, they bow out. Jean has very straight sides and the pattern is for curved side.
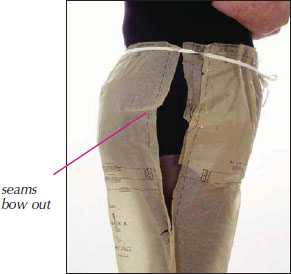
First, we pull the tissue up at the sides to eliminate the bow. Her new waistline seam is at the bottom of the elastic.
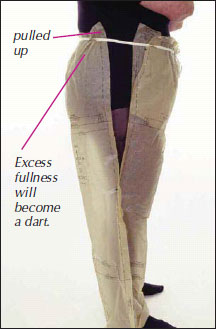
We add tissue to the sides and pin the tissue to skim along her body. We then add tissue where necessary to make even 1″ seam allowances. The 1″ seam allowances are necessary for fabric variations.
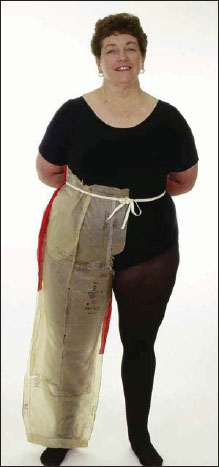
We mark the tissue at the bottom of the elastic for her new waist seamline. She will trim the waist seam allowance to an even 1″
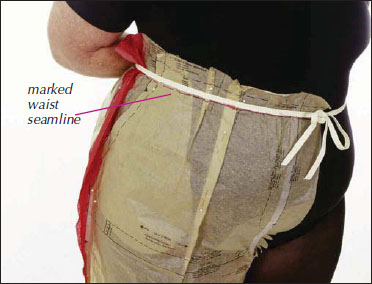
The back looks good.
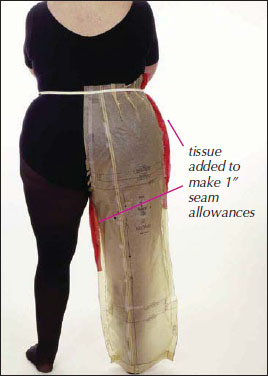
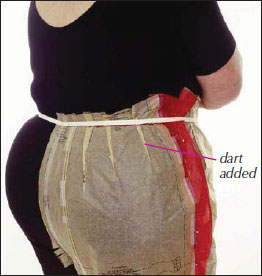
Note that we have added a third dart near the side seam to eliminate the excess fullness created after we pulled the tissue up at the sides.
Jean cut out her trousers, sewed the pleats, pockets, and zipper. She pinned her front to her back wrong sides together to make “tweaking” the ease simpler. You must try on pants right side out since your sides might be different. She tucked in her cotton shirt for the fitting. If her shirt had been silk, tucking it in for fitting wouldn’t have been necessary.
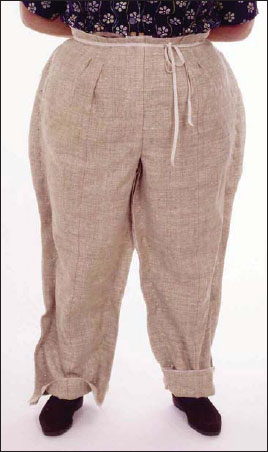
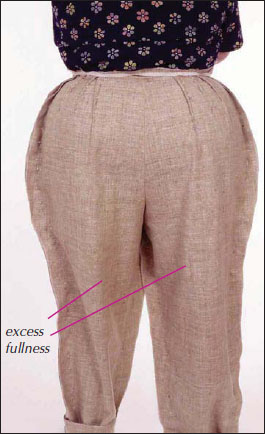
They look good, but there is excess fullness in the back, typical because the bias crotch stretches in fabric. The back crotch curve is longer and more sloping than the front, so it stretches more.
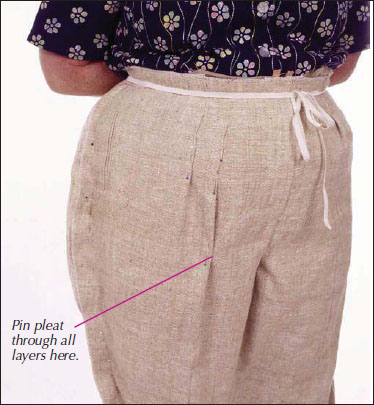
NOTE: To make sure we don’t pull the pleat open, we pin it flat to the thigh area.
By taking in the back side seam only, we are able to reduce some of the excess fullness in the back in this area without affecting pocket placement.
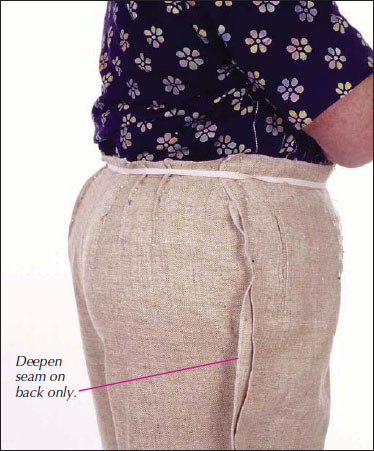
We also deepen the back inseam to remove fullness between the legs.
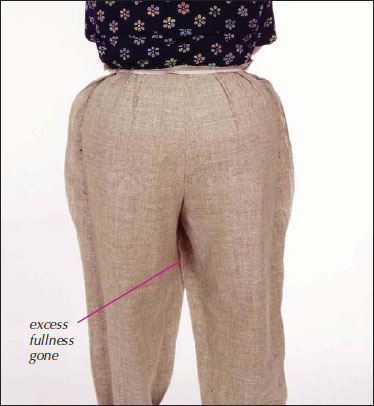
Jean is small in the waist compared to her upper hip. We deepen the darts at the top, curving them into her waist. You can also see in the photo above that her right hip is slightly fuller at the upper back. Marta fine-tunes Jean’s darts by pinning them exactly to her shape on each side.
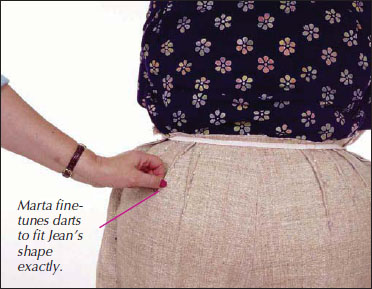
Once you perfect the darts, mark on wrong side where the pins are positioned. Unpin. Place tissue on pants and trace new left and right back darts with different color pens. Darts may vary in size on the left and right.
Jean has sewn her side and inseams and machine-basted along the waistline seam. There is a little excess fullness on the right side below the high hip. We pin the seam slightly deeper—only 1/8″.
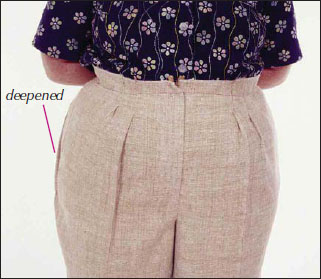
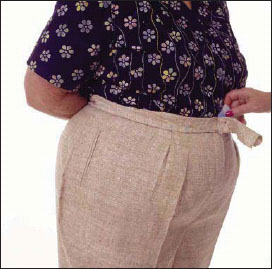
We sewed the interfacing to the waistband and wrapped it around the pants. It is pinned comfortably snug at the center front. The pants are smoothed out under the waistband. Using chalk, we marked where the waistband meets pleats, pockets, side and crotch seam in back, and darts. Now Jean can pin the band on and it will fit the right and left sides perfectly.
Jean sewed a jacket out of the same linen fabric and here wears her completed outfit with a silk blouse.
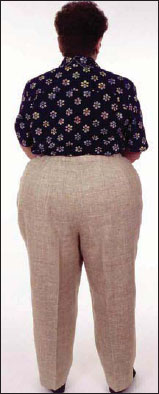
Now the back looks good.
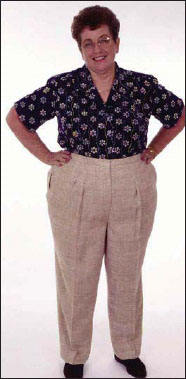
The front fits nicely and…
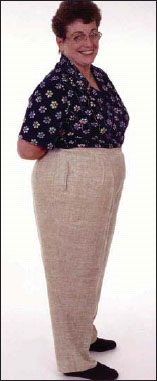
…the side seam falls straight. Now, let’s pin up the hem for the shoes she will wear with her pants.
Marta tries on the tissue. The tissue is not meeting her center front and there are wrinkles pointing to the inseam.
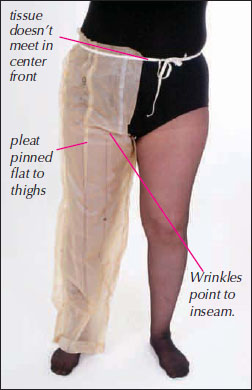
The front tissue droops.
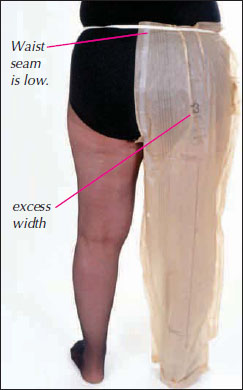
The waist seamline at the center back is not reaching Marta’s. Also, there is extra width across the derriere.
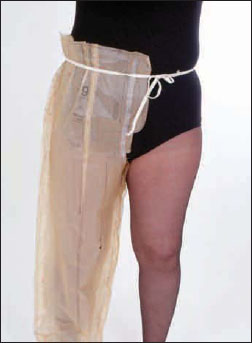
We pull up the front to see how much to shorten it. We let out the waist at the side seam until the center fronts match.
We pinch a tuck at the lowest part of the derriere to see how much width needs to be removed.
Marta took off the tissue and shortened the crotch depth by 1½” with a horizontal tuck across the front and the back.
The tissue grabs her front thigh when she walks. You can see her knee is almost as full as the top of her inner thigh.
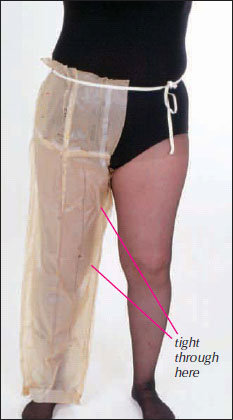
To solve this, we let out the inseam from just below the knee, tapering to original seamline at the crotch. (See page 32.)
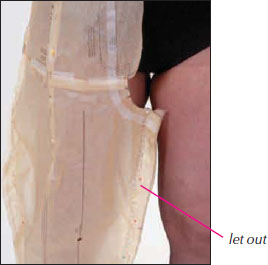
Now Marta can walk without the tissue pulling.
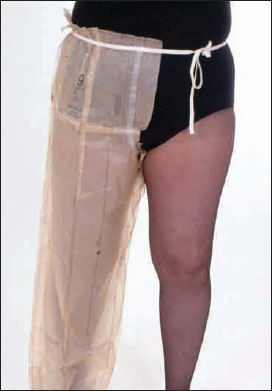
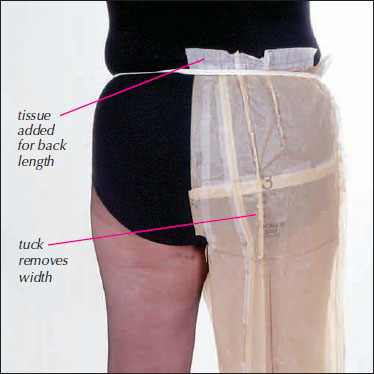
The full-length vertical tuck is pinned. Tissue is added to top of back. (If we had not shortened both back and front crotch depth, we would have needed to true the waistline seam at the side when finished altering like we did on Verna, page 67.)
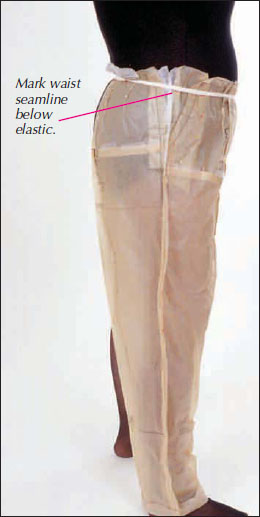
You can see Marta’s waist drops down in the front. We mark her waistline below the elastic. She really has a wavy waistline.
The fabric is pinned wrong sides together and the deepest pleats are pinned flat to the thighs. They get a little narrower at the thigh level.
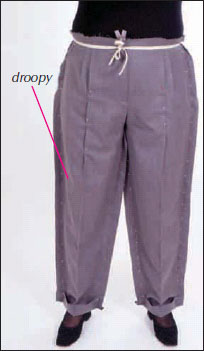
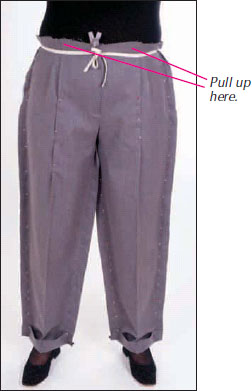
To remove the droop at the knees, we pulled the pants up straight above the pleats. The droop is gone.
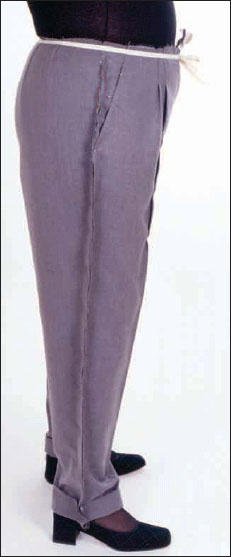
From the side, everything hangs well. It’s time to finish the pants.
The back looks good except for the little excess fabric. Her left side is flatter so the excess is greater there.
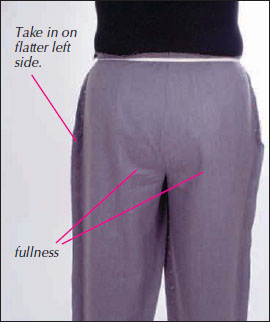
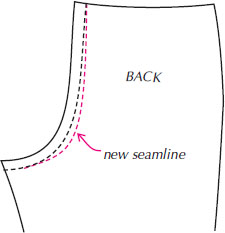
We pin her left side seam a little deeper. We pin the rest of the excess out in center back seam, which in essence straightens (deepens) the crotch seam. (See page 43.)
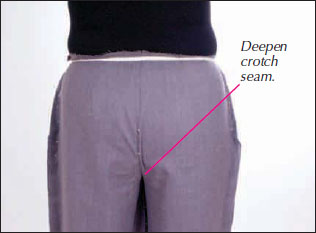
If this always happens in fabric, mark the new stitching line on your pattern.
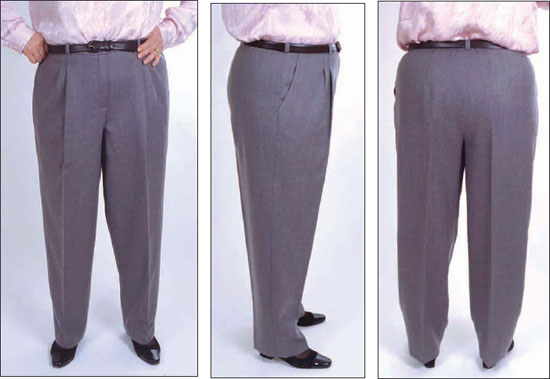
Marta models her finished trousers.
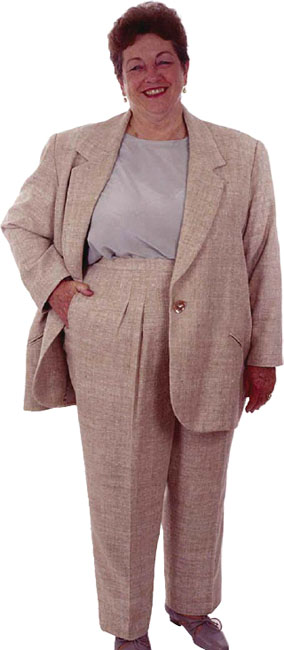
She teaches our tailoring workshops and her beautiful jacket shows off her skills.
