TIP: If you are converting a pattern with a waistband to one with a facing, fold out darts. Measure 3″ down from the top edge of the pattern. This section will be the pattern for the facing.
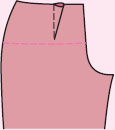
If you are short-waisted or you like low-rise pants, this is the waistline treatment for you.
Using an invisible zipper with the faced waistline is by far the easiest method for getting a nice finish at the top of the zipper. (If you want a lapped zipper, we would suggest binding the waistline instead of facing it for the neatest look.)
Fit the pants and sew and press all seams before applying facing.
TIP: If you are converting a pattern with a waistband to one with a facing, fold out darts. Measure 3″ down from the top edge of the pattern. This section will be the pattern for the facing.

1. Apply invisible zipper (see page 103). To avoid bulk, be sure the zipper stop or top of teeth is 3/8″ below the waistline seam.
2. Fuse interfacing to wrong side of facing with stable direction going around your body.
TIP: So that the facing fits the pant exactly, lap front and back at sides and snip where they lap at side seams. This marks where you will sew facing side seams.
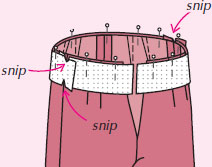
3. Sew facing side seams. Trim to ¼” and press open. Finish lower edge.
4. Sew facing to pant, right sides together. Sew through a stabilizing tape such as twill tape, seam tape, Stay-Tape, or the selvage of lining fabric. Trim and grade seam.
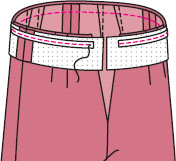
5. Understitch by folding the facing over the seam allowances. On the outside, stitch the facing to the seam allowances close to the seam.
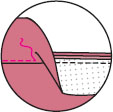
6. Turn facing to inside and press. Hand-stitch facings to zipper tapes and tack to seam allowance.
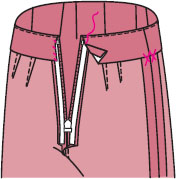
7. Optional: Sew hook and eye above zipper.
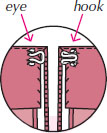
TIP: If your invisible zipper tab doesn’t match your fabric, paint it. You can find small quantities of paint colors in craft stores. Or sew a fabric tab that can be buttoned over the zipper tab.
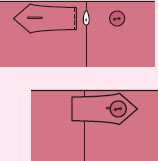
1. Trim 5/8″ off center back of facings.

2. Pin facing and pants right sides together. Stitch 3/8″ from the back edges from the top to the bottom edge of facing
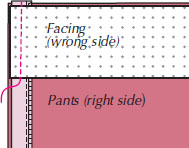
3. At each center back edge, fold 5/8″ to right side. Zipper teeth will be in the fold. Be sure to pull the facing tightly toward the side seam, out of the fold.
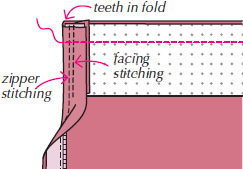
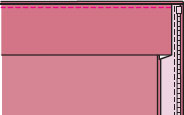
4. Stitch from center back around top of pants.

5. Slash corners, trim and grade seams to ¼”.
5. Turn facing to inside, rolling seam so it is 1/16″ to the inside so it won’t show. Press. Under-stitch if desired.
A contour band is curved to fit the body rather than being shaped with darts. (See page 60.)
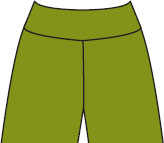
A pattern’s curve may not match yours. If you are curvy, your band will need to be curvy. If you are straighter, your band will be straighter. To fit the contour band, try on the tissue. You can fit the waistband first then attach the pant to it. The width of the band shouldn’t change. Length alterations are made on the pant only.
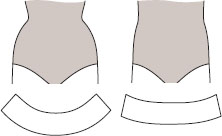
1. If the pattern has only a half front and back piece, trace on tissue to make a whole piece. Tape together at center front and center back.

NOTE: If you need more width to go around your waist, add a “chunk” of tissue to side seams of the band.
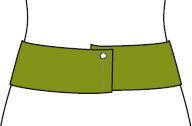
2. Pin side seams together with seams sticking out.
3. With 1″ elastic around your waist and the BOTTOM of the elastic where you want the TOP of the pant to be, pin the band tissue on top of the elastic with the waistline seam on band matching the BOTTOM of the elastic.
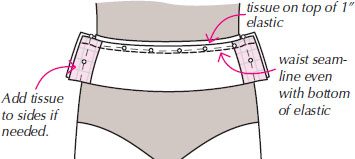
4. Alter the waistband pattern to fit your shape. Dart the tissue to fit your shape.
Hip is smaller.
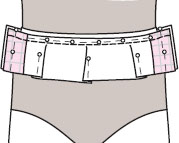
Waist is smaller.
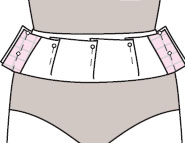
5. Pin band and pant together with pins in seamline, wrong sides together. If you added to the sides of the band, add the same amount of tissue to the sides of the pant at the top, tapering to nothing in thigh area. If the crotch is too long or short, adjust pant, not band.
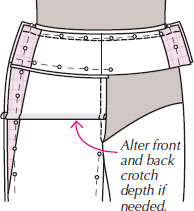
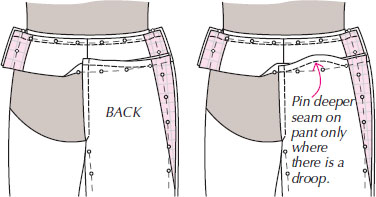
6. Make any alterations, such as flat back or uneven waist, on pant only.
It holds the weight of the entire pant, so don’t interface too lightly! Use a heavier interfacing on the band itself and a lighter one in the facings. Fuse interfacing to wrong side of band with stable direction going around your body.

1. After applying interfacing, pin side seams of the band together and try it on to check fit. If you need to dart out any fullness, do so and recut using this band as your pattern.

Then pin the pant to the band and double-check fit. Now is the time to pull the pants up in the back if the back is baggy.
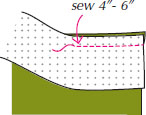
2. From the center back, sew 4″-6″ of the bands to the pants. This allows you to be able to sew the zipper before side seams are sewn, which is much easier. Press the band seam toward band. To reduce bulk in the zipper area, you could trim and grade the seam allowances.
3. Sew invisible zipper to one side. Zip up the zipper and mark band seam on other side of zipper tape. Match this mark to the seam when stitching the other side. Now band seams match!

4. Sew crotch seams to within 1½” of inseams.
5. Sew pant inseams, outseams, and finish stitching crotch seam.
6. Match band side seams to pant. Lap over pant seams and snip.
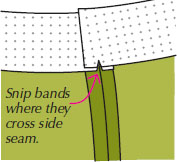
7. Sew band side seams from snip to top, trim, and press.
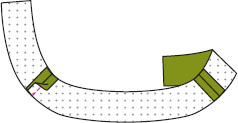
8. Sew band to pants.
9. To keep this seam from stretching, pin Stay Tape over the seam and stitch again on the seam-line. Trim seam and press toward the band.
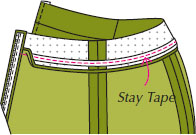
10. Sew band facing to the top edge of band.
11. Try on the pant. If the band is a little loose at the waist, make the waist tighter while stabilizing the waist seam with Stay Tape. Center the see-though tape over the waist seam. Pull gently on the tape as you sew. Trim. Understitch. Press.
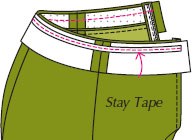
12. Finish ends and turn under facing seam allowance on the inside. Slipstitch in place.