CHAPTER 18
Organizing with Outlook
Navigate in Outlook
Outlook functions as a personal organizer, with Mail, Calendar, People, Tasks, and Notes components. You switch between these components using the Navigation bar.
The Outlook Mail component appears by default when you open Outlook, and enables you to send and receive email messages. The Outlook Calendar component enables you to keep track of appointments. The Outlook People component enables you to maintain a database of your contacts and include those contacts in email messages you send and appointments you schedule. The Outlook Tasks component enables you to keep a to-do list.
Navigate in Outlook
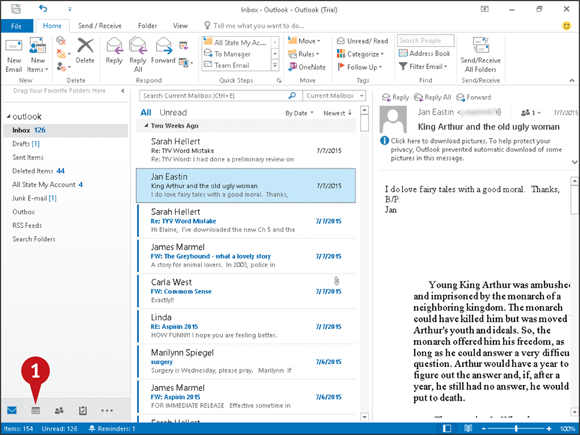
Note: When Outlook opens, the Mail component ( ) appears by default. You can read more about using the Mail component in Chapter 19.
 Click Calendar (
 ) in the Navigation bar.
Note: As you hover the mouse ( ) over Calendar ( ), Outlook displays a preview of upcoming appointments.
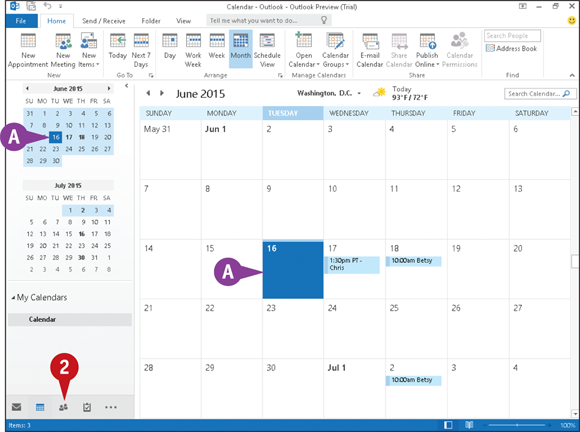
Outlook displays the Month view of the Calendar component.
 Today’s date appears selected in the main calendar and in the navigational calendars.
 Click People (
 ) in the Navigation bar.
Note: As you hover the mouse () over People (), Outlook displays a search box so you can easily find a contact.
Note: In earlier versions of Outlook, People was called Contacts, and the two terms are often used interchangeably.
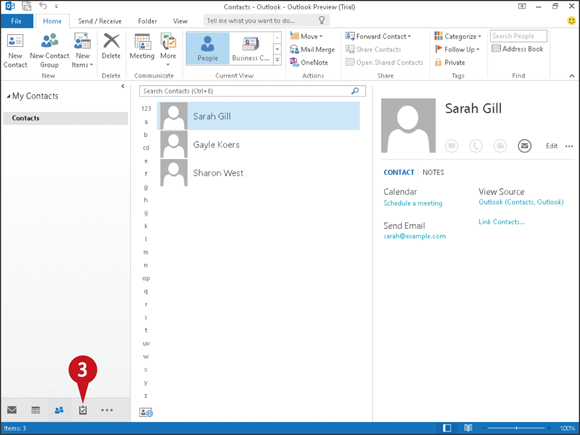
Outlook displays the People component.
 Click Tasks (
 ) in the Navigation bar.
Note: As you hover the mouse () over Tasks (), Outlook displays a preview of upcoming tasks.
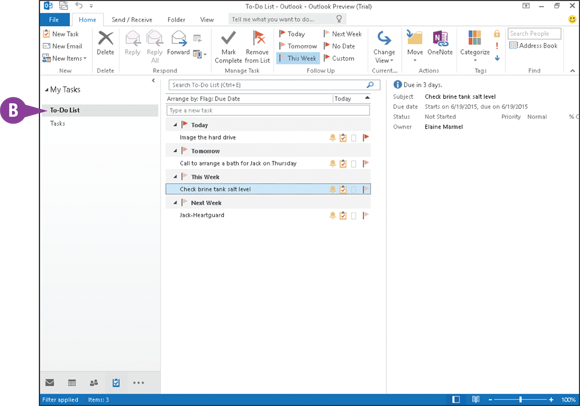
 Outlook displays the To-Do List of the Tasks component.
Schedule an Appointment
You can use Outlook’s Calendar component to keep track of your schedule. When adding new appointments to the Calendar, you fill out appointment details, such as the name of the person with whom you are meeting, the location and date, and the start and end times. You can also enter notes about the appointment, as well as set up Outlook to remind you of the appointment in advance.
If your appointment occurs regularly, such as a weekly department meeting, you can set it as a recurring appointment. Outlook adds recurring appointments to each day, week, or month as you require.
Schedule an Appointment
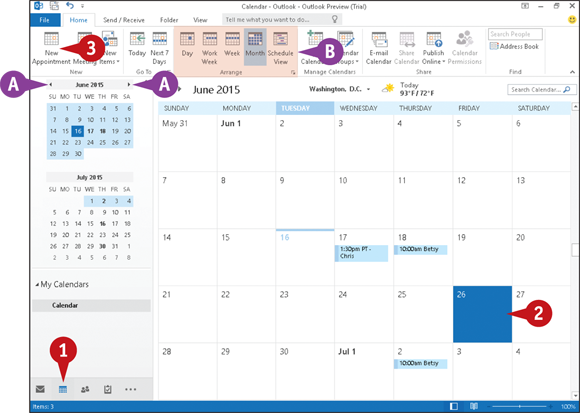
Click Calendar () in the Navigation bar.
Click the date for which you want to set an appointment.
You can click these arrows ( and
and  ) to navigate to a different month.
You can click these buttons to select a different calendar view, such as a daily or weekly view.
Click New Appointment to display the Appointment window.
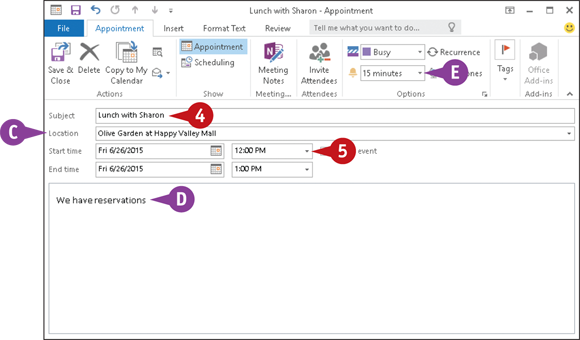
 Type a name for the appointment.
 You can type the appointment location here.
 Click the Start time
  and set a start time.
Note: In the Month view, Outlook allots 30 minutes for an appointment. You can click the End time and change the end time.
 You can type notes about the appointment here.
 Outlook automatically sets a reminder that you can change by clicking .
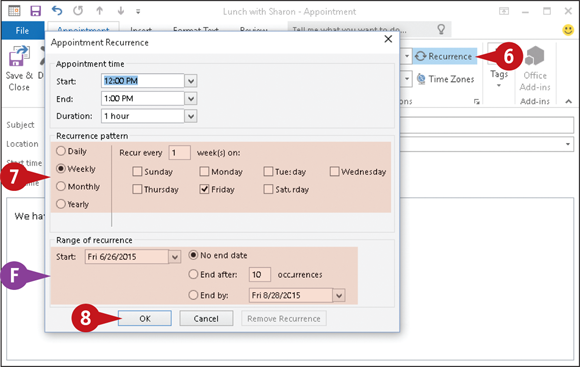
 If your appointment occurs regularly, click Recurrence. Otherwise, skip to Step 9.
Note: If the Appointment window does not display Recurrence or a reminder time, click Options.
The Appointment Recurrence dialog box appears.
 Select the recurrence pattern.
 In the Range of Recurrence section, you can limit the appointments if they continue only for a specified time.
 Click OK.

 Outlook marks the appointment as a recurring appointment.
 Click Save & Close.
Outlook displays the appointment in the Calendar. To view the appointment details or make changes, double-click the appointment. To delete an appointment, right-click it and click Delete.
Create a New Contact
You can use Outlook’s People component to maintain a list of contact information. You can track information such as your contacts’ home and business addresses; email addresses; instant message addresses; company information; home, work, fax, and mobile phone numbers; and social media updates. You can also enter notes about a contact.
By default, Outlook displays contact information using the People view; you can edit contact information and interact with your contacts from the People view. You can also switch to other views such as the Business Card or List view.
Create a New Contact
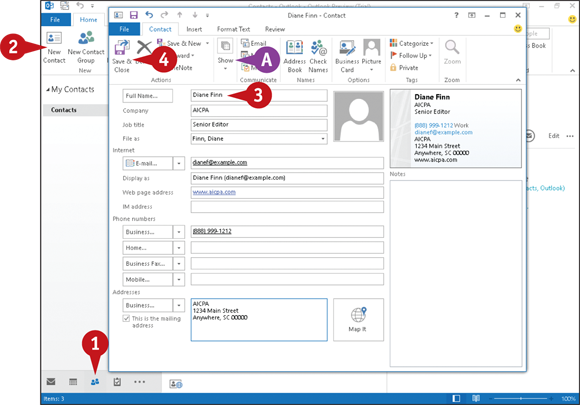
Create a Contact
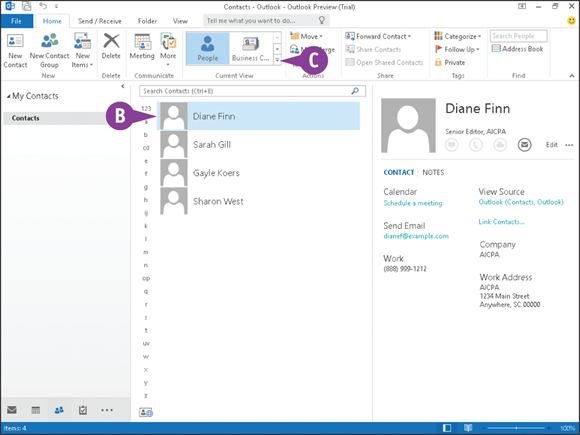
Click People () in the Navigation bar.
Click New Contact.
Outlook opens a Contact window.
Fill in the contact’s information.
You can press  to move from field to field.
You can click Show and then click Details to fill in additional information about the contact.
Click Save & Close.
Outlook saves the information and displays the contact in the People component.
You can click the More button ( ) to see and switch to available views.
Work with the People Card
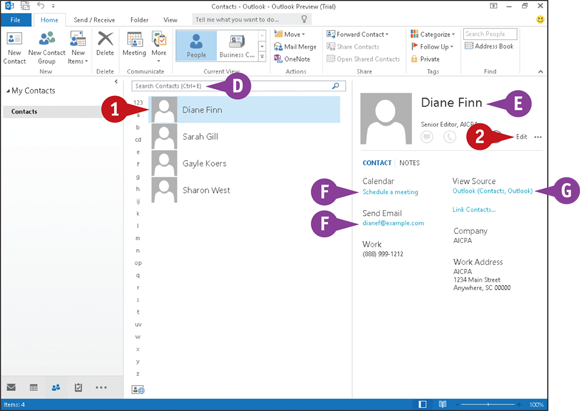
Click a contact.
To find the contact, you can click here and type part of the contact’s name.
Information about the contact appears here.
You can click these links to set up an appointment or meeting with the contact or send an email to the contact.
You can click this link to reopen the window shown in the subsection “Create a Contact” to edit the contact’s information.
To edit using the People card, Edit.
Outlook displays People card fields in an editable format.
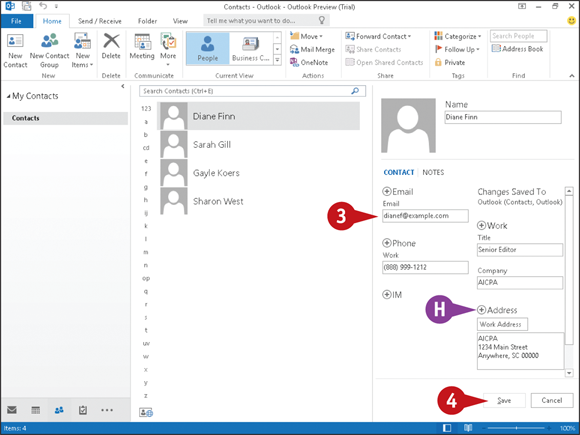
Make any changes.
 You can click any Add button (
 ) to add information.
Click Save.
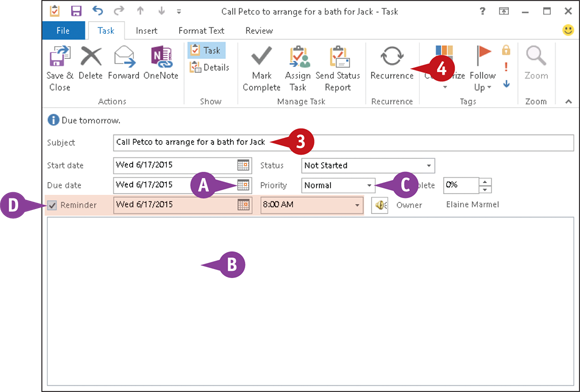
Create a New Task
You can use Outlook’s Tasks component to keep track of things that you need to do; for example, you can create tasks for a daily list of activities or project steps that you need to complete. You can assign a due date to each task, prioritize and categorize tasks, and set a reminder date and time. You can set up a recurring task and even assign tasks to other people.
When you finish a task, you can mark it as complete. Depending on the current view, completed tasks may appear with a strikethrough on the Tasks list or they may not appear at all.
Create a New Task
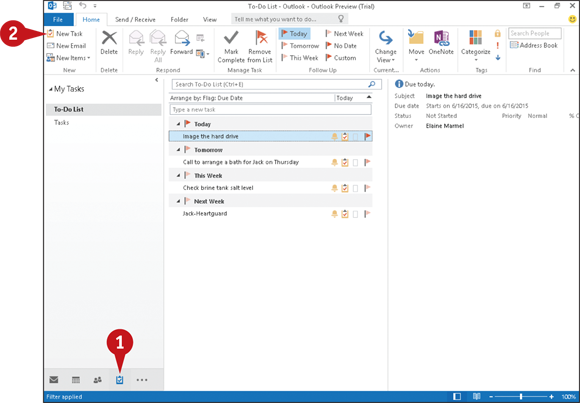
Click Tasks () in the Navigation bar to open the Tasks component.
Click New Task.
Outlook displays a Task window.
Type a subject for the task.
You can click the calendar icon ( ) to enter a due date.
You can type notes or details about the task here.
You can set a priority for the task using the Priority .
You can select Reminder ( changes to
  ) and then set a reminder date and time.
If your task occurs regularly, click Recurrence; otherwise, skip to Step 7.
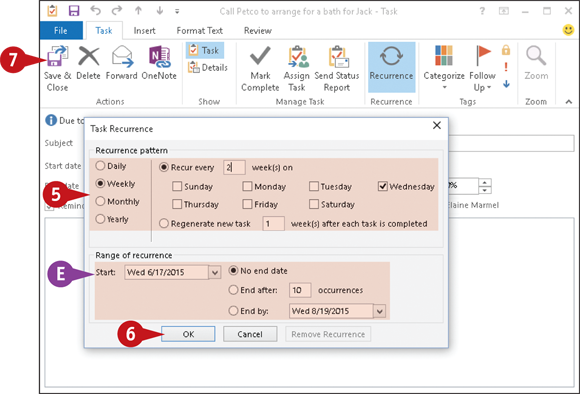
The Task Recurrence dialog box appears.
Select the recurrence pattern.
In the Range of Recurrence section, you can limit the tasks if they continue only for a specified time.
Click OK.
Click Save & Close.
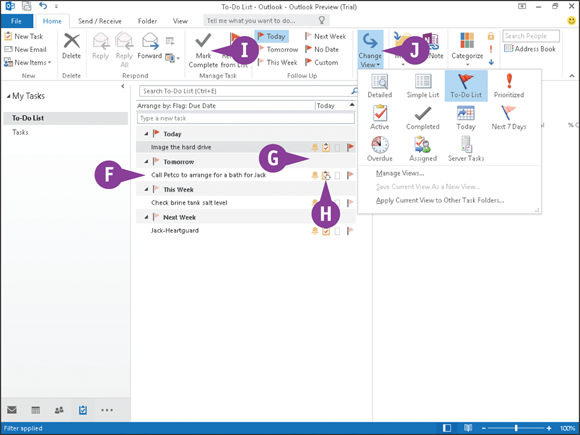
Outlook displays the task in the list. Details of the selected task appear in the pane to the right of the list of tasks.
Note: To edit a task, you can double-click the task to reopen the Task window.
This indicator ( ) represents a reminder.
This indicator ( ) represents a recurring task.
 You can click a task and mark it complete by clicking Mark Complete.
 You can click Change View and choose a different view of tasks.
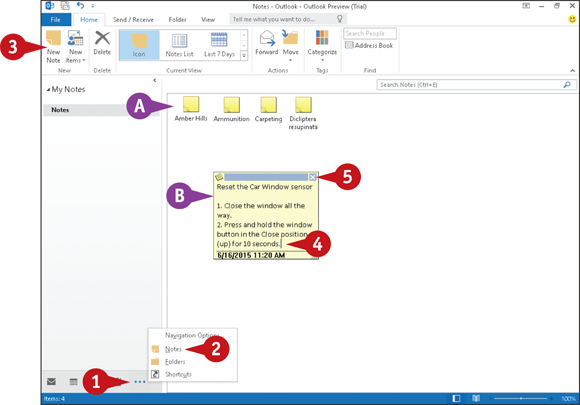
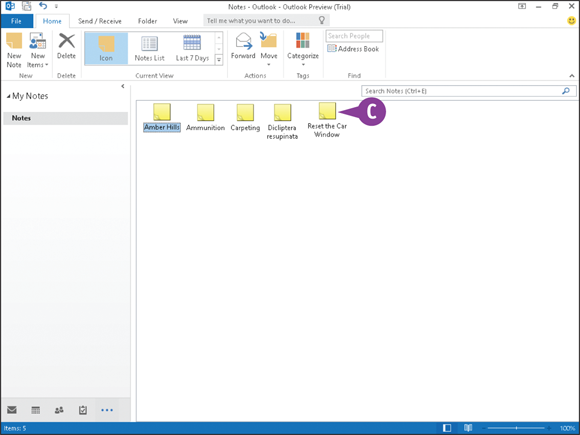
Add a Note
Outlook includes a Notes component, which you can use to create notes for yourself. Much like an electronic version of yellow sticky notes, Outlook’s Notes component enables you to quickly and easily jot down your ideas and thoughts. You can attach Outlook Notes to other items in Outlook, as well as drag them from the Outlook window onto the Windows desktop for easy viewing.
Add a Note
Click the More button ( ) to display a pop-up menu.
Click Notes to open the Notes component.
Notes appear in Icon view.
Click New Note.
Outlook displays a yellow note.
Type your note text.
When you finish, click the note’s Close button ( ).
).
Outlook adds the note.
To view the note again or to make changes, you can double-click it.
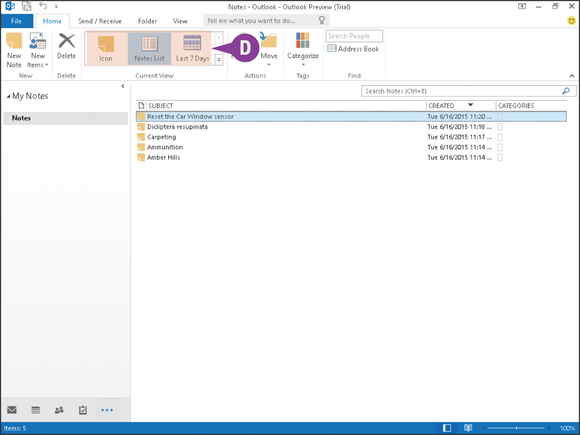
To change your view of notes, you can click an option in the Current View group.
This example displays the Notes List view.
Customize the Navigation Bar
You can control the appearance of the Navigation bar, displaying fewer items or more items to suit your needs. For example, suppose that you use the Notes component regularly. You can save mouse clicks if you display the Notes component as part of the Navigation bar.
In addition to determining which components appear on the Navigation bar, you can control the order in which they appear. You can also control the size of the Navigation bar by choosing to display buttons that represent each component instead of displaying the component name.
Customize the Navigation Bar
From any Outlook component, click the More button ().
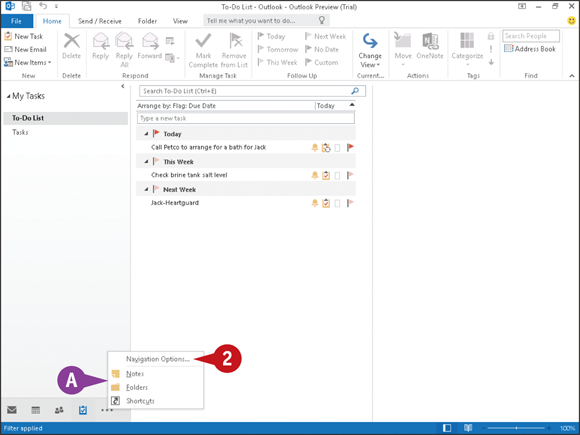
A pop-up menu appears.
Click Navigation Options.
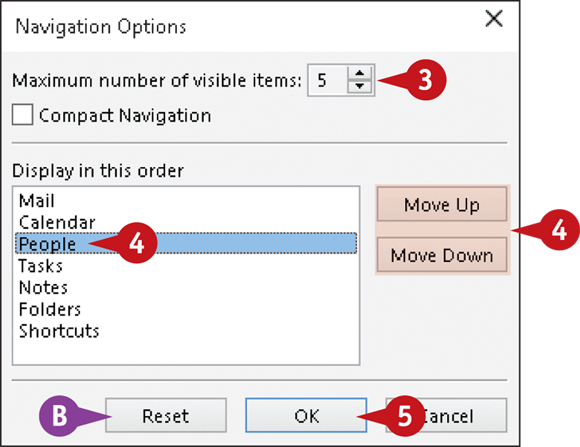
The Navigation Options dialog box appears.
Click  to specify the number of items you want visible on the Navigation bar.
To reorder the Navigation bar entries, click an item and then click Move Up or Move Down.
You can click Reset if you want to return the Navigation bar to its original state.
Click OK.
The Navigation bar appears with your changes.
Note: You might need to widen the left pane in Outlook to see all the Navigation buttons. Slide the mouse over the pane divider ( changes to  ) and drag the pane divider to the right.
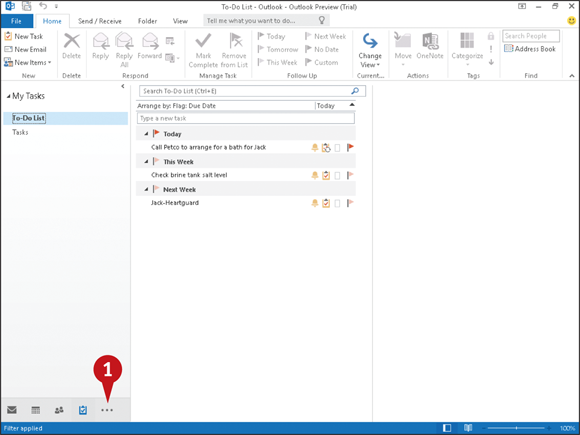
Peek at Appointments and Tasks
From any Outlook component, you can take a peek at today’s appointments and at your task list. You do not need to select the Calendar component or the Tasks component to view appointments or tasks.
If you also unpin the Folder pane, which is pinned by default, you hide the leftmost pane in each component view and give more real estate to each component. When you hide the Folder pane, you can peek at appointments and tasks, and you also can pin the peeked view so that it remains visible for as long as you need to see it.
Peek at Appointments and Tasks
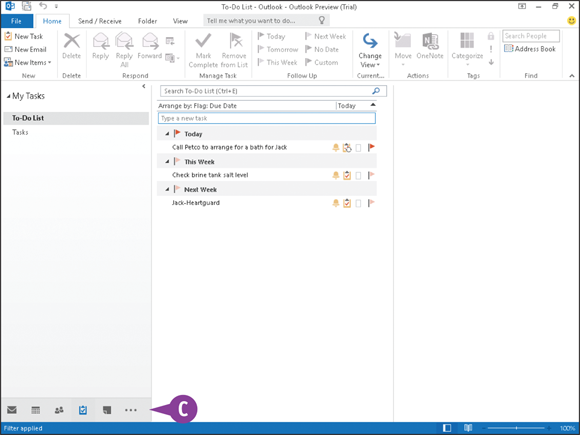
To hide the Folder pane, click the Collapse Folder button ( ).
).
Outlook hides the Folder pane and instead displays the Expand Folder Pane button ( ).
).
Outlook docks the Navigation bar buttons on the left side of the screen.
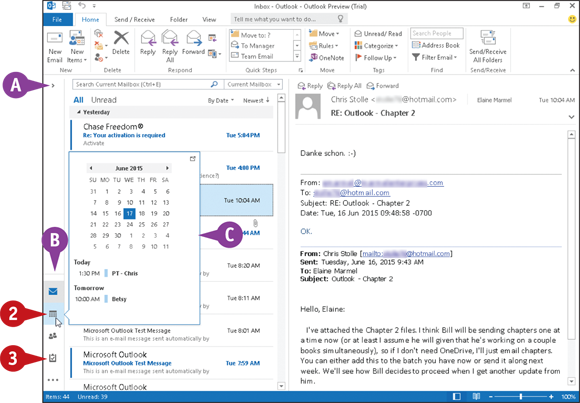
To peek at your appointments, hover the mouse () over Calendar () on the Navigation bar.
Outlook displays a small window that enables you to “peek” at your calendar.
To peek at your tasks, hover the mouse () over Tasks ().
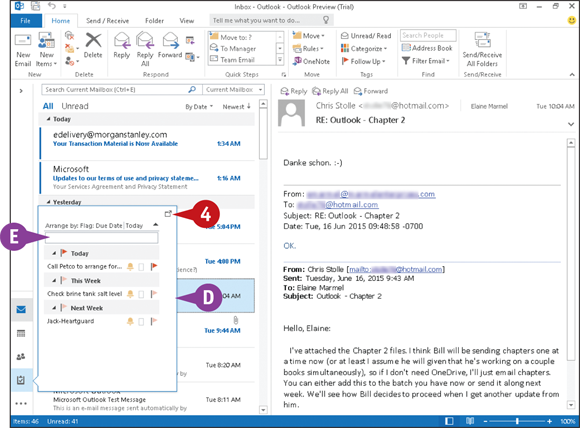
Outlook displays a list of your tasks.
You can click here and type a name to add a new task.
Note: When you press  to add the task, Outlook adds the task to your list as a task for today. See the section “Create a New Task” for details on editing the task.
To pin a peek view so that it is permanently visible, click the docking button ( ).
).
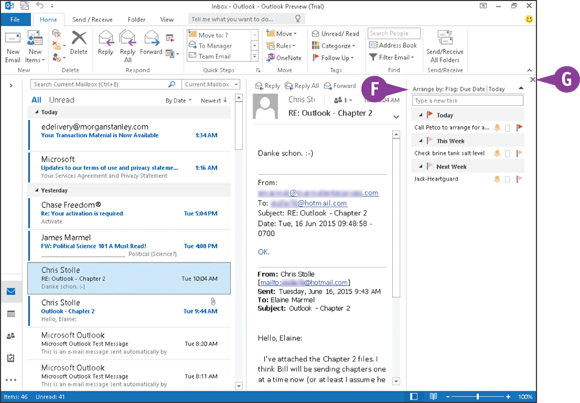
Outlook pins the tasks or appointments to the right side of the current component’s window.
Note: The pinned peek view appears only in the component you were viewing when you pinned it.
You can click the Close button ( ) to unpin the peek view.
Search for Outlook Items
Suppose you need to locate an Outlook item, such as an email message about a project you are working on, an item on your to-do list that you need to review, or the contact record for a co-worker that you need to call. Instead of sifting through your Outlook folders to locate it, you can use Outlook’s Search tool to quickly find it. Each component includes a search box; you simply enter a keyword or phrase, and Outlook searches for a match. You can search a single Outlook component or all of Outlook.
Search for Outlook Items
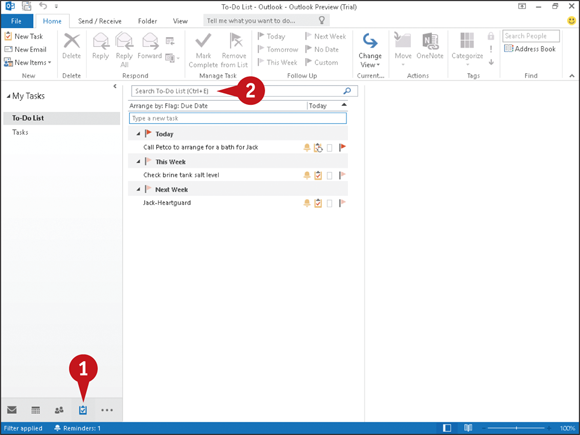
Perform a Basic Search
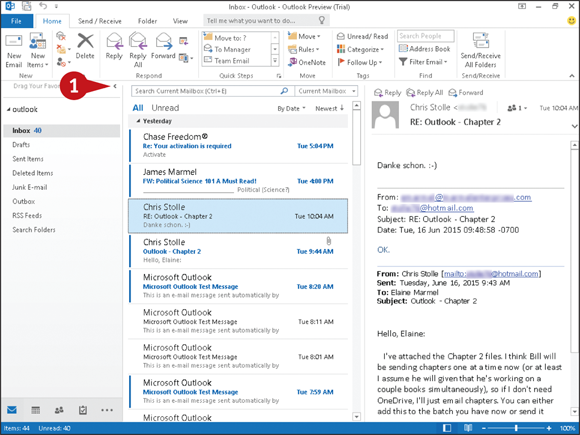
Click the Outlook component you want to search.
Note: This example uses the Tasks component.
Click in the search box.
Outlook displays the Search Tools Search tab, with several search-specific tools.
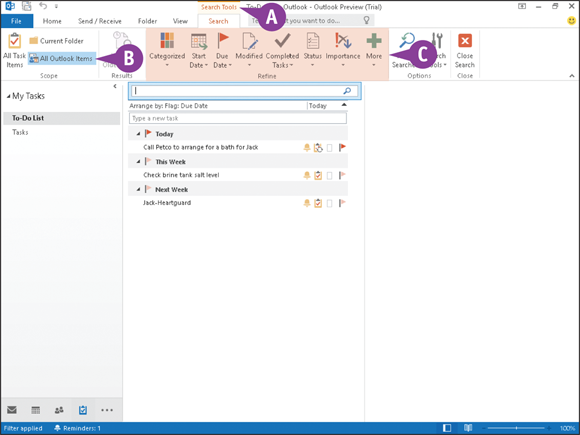
You can click All Outlook Items to search all Outlook folders rather than just the current component’s folder.
These tools change, depending on the component you selected in Step 1.
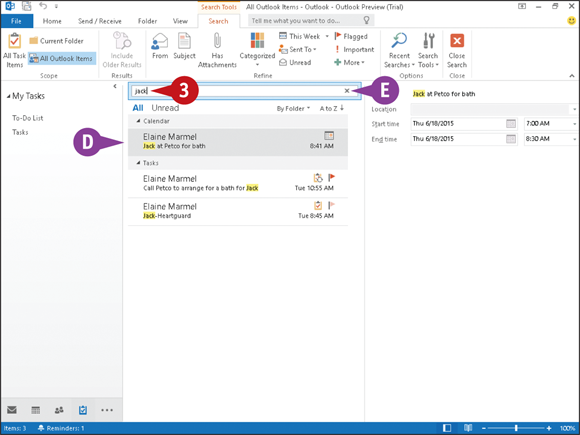
Type your keyword or phrase.
As you type, Outlook displays items that match your entry, organized by Outlook component. Details for the selected item appear in the right-hand pane. You can double-click an item to view it in its own window.
In this example, Outlook displays items in the Calendar and Tasks components.
To cancel a search, you can click in the search box.

Using Advanced Search Criteria
Click in any component’s search box.
On the Search tab, click Search Tools.
Click Advanced Find.
In the Advanced Find window that appears, specify your search criteria at the top of the window and on the Any Items tab. More options appear on the More Choices tab and the Advanced tab.
Click Find Now to search.
Results appear in the bottom of the window.
Click to close the window when you finish.
Work with the To-Do Bar
Outlook’s To-Do Bar can display three elements: a small monthly calendar and appointments for today or the day you select, your favorite contacts, or your tasks. The To-Do Bar appears along the right side of the Outlook window and closely resembles a docked peek view (see the section “Peek at Appointments and Tasks,” earlier in this chapter).
To-Do Bar elements can appear in any Outlook component. Although displaying To-Do Bar elements in one Outlook component does not display them in any other Outlook component, you can display To-Do Bar elements individually in each Outlook component so that they appear in all Outlook components.
Work with the To-Do Bar
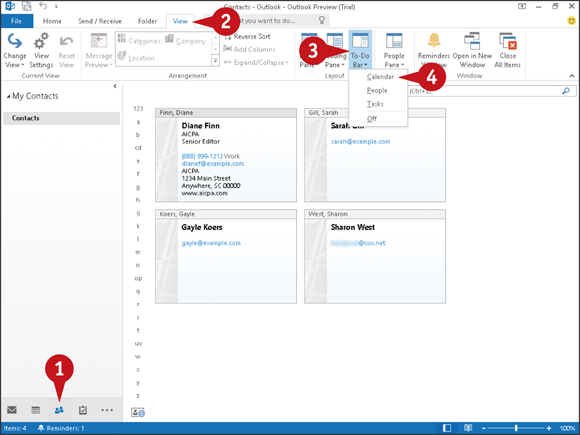
In the Navigation bar, click the Outlook component in which you want to display To-Do Bar elements.
Click the View tab.
Click To-Do Bar.
Click the To-Do Bar element you want to display.
In this example, Outlook displays the calendar.
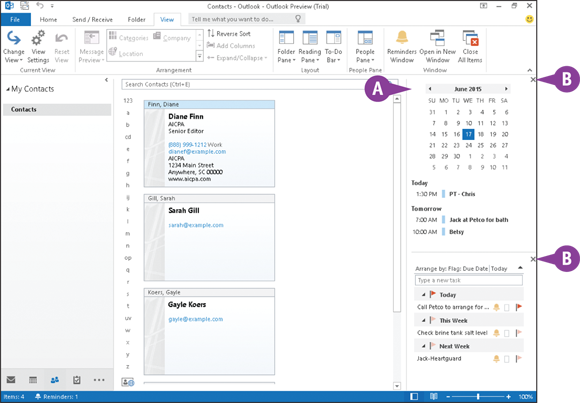
The To-Do Bar appears along the right side of the Outlook window, displaying the element you selected in Step 4.
Repeat Steps 3 and 4 to display another To-Do Bar element.
Repeat Steps 1 to 5 to display To-Do Bar elements in another Outlook component.
To hide an individual To-Do Bar element, you can click for the element.
Note: To hide the entire To-Do Bar in a particular Outlook component, repeat Steps 2 and 3 and then click Off.
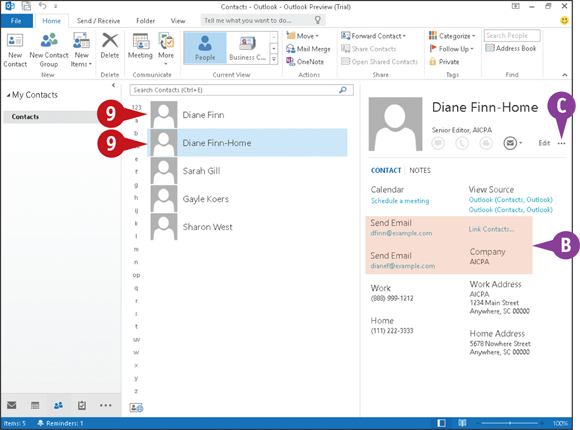
Link Contacts
You can link two contacts so that, in the People view of your contacts, you can see all information for the linked contacts on one card.
For example, suppose that you set up two cards for one contact because you want to be able to easily email that person at two different email addresses. If you link the two cards, you can still email to whichever address you want, but you have the added benefit of viewing all the person’s contact information on one card in the People view.
Link Contacts

Click People ().
Click People in the Current View group.
Click one of the contacts you want to link.
Click the More button ().
Click Link Contacts.
The Linked Contacts dialog box appears.
Type the name of another contact here; Outlook displays possible matches.
Click a contact to link from the possible matches.
Outlook moves the contact you selected into the Linked Contacts section.
Click OK.
Outlook links the contacts.
Click either contact card.
Outlook displays all contact information for the contact on both contact cards.
To unlink the contacts, click the More button () and then click Link Contacts to redisplay the Linked Contacts dialog box; click the contact you want to unlink and click OK.