Each chapter that follows begins with a slightly different dough recipe and, from this ‘parent’ dough, you can bake a vast variety of styles of bread really easily. Just to keep things interesting, I have finished all but the Sweet Dough chapter with a slightly more challenging bread for you to try once you begin to feel comfortable with baking. Though the doughs vary the technique for making each one is identical.
Your very first job is to preheat your oven to its highest temperature (250°C if possible – except for the Sweet Dough chapter, when the oven should start off a bit lower at 220ºC) and put your baking stone or heavy baking tray into the oven. Do this as early as you can, so that not only the oven, but the whole kitchen warms up – you’ll find the dough is more responsive in a warm atmosphere.
For the Aga: with our recent move to Bath I have lost the gas oven in which all the bread for this book was baked and I have had to get used to an Aga. I was initially apprehensive but soon discovered some clear advantages: there is no need to preheat the oven and the kitchen is always at the perfect temperature for baking. To start with I put my baking stone directly onto the floor of the top oven, put an oven thermometer in to give me an accurate temperature reading and then adjust the control until I achieve a temperature of about 250°C. For most of the small loaves this has worked very well. When I tried larger loaves I found that they started to colour too quickly so I solved the problem by opening the door, so it is slightly ajar, to let some of the heat out, and then turning the loaf around a couple of times so it is evenly baked. I will continue to practice so I can include full Aga instructions in the next edition. I’m sure that the more I bake the more I will learn to trust it.
Weighing ingredients
Weigh all the ingredients carefully – I even weigh my water, as it is much more precise than trying to judge volume at eye level. You can see for yourself by measuring 350ml of water, then weighing it. Do it a few times and I bet that every time there will be a slight variation in the weight. In most cooking this would be neither here nor there, but in baking it is important to be accurate about your quantities.
Freezing bread
All of the breads in this book can be frozen, except for the Puff Ball. However, I would recommend you part-bake them first to retain freshness. Make sure the bread is thoroughly cool before freezing, wrap in greaseproof paper and seal in a plastic food bag. To use the bread, put into a cold oven, turned to 200ºC – by the time the oven reaches the temperature (about 12–15 minutes) the loaves should be baked. If you are already using your oven or you have an Aga then just reduce the baking time to about 8–10 minutes. (Keep an eye on smaller breads that may take less time.) As an exception, breads made from sweet dough should always be fully baked before freezing. Defrost them fully at room temperature then reheat in a low oven (180ºC) before serving.
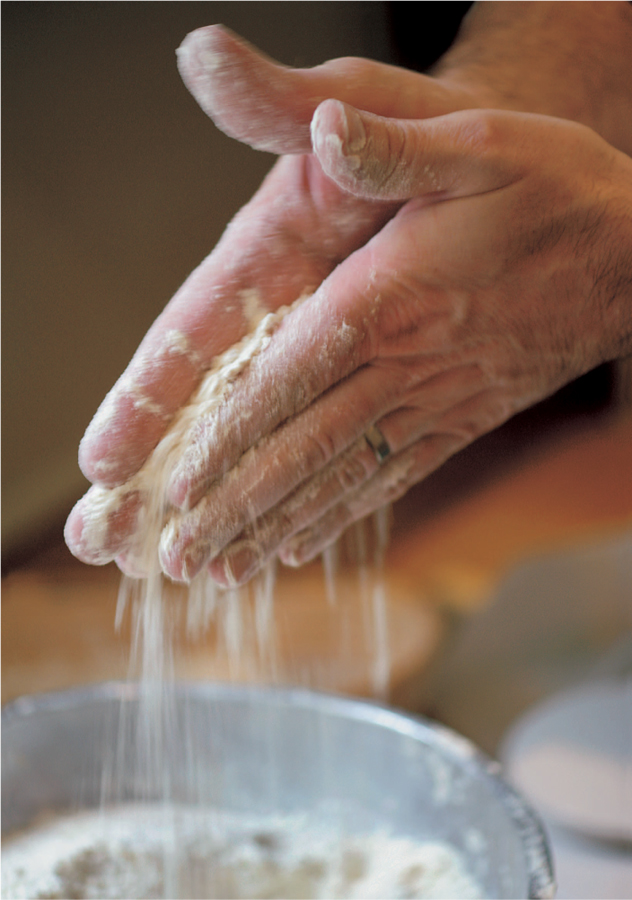
• Rub the yeast into the flour using your fingertips as if making a crumble until it disappears into the flour. Add the salt and then the water. Hold the bowl with one hand and mix the ingredients around with the other (or use the rounded end of your scraper) for 2–3 minutes until the dough starts to form.
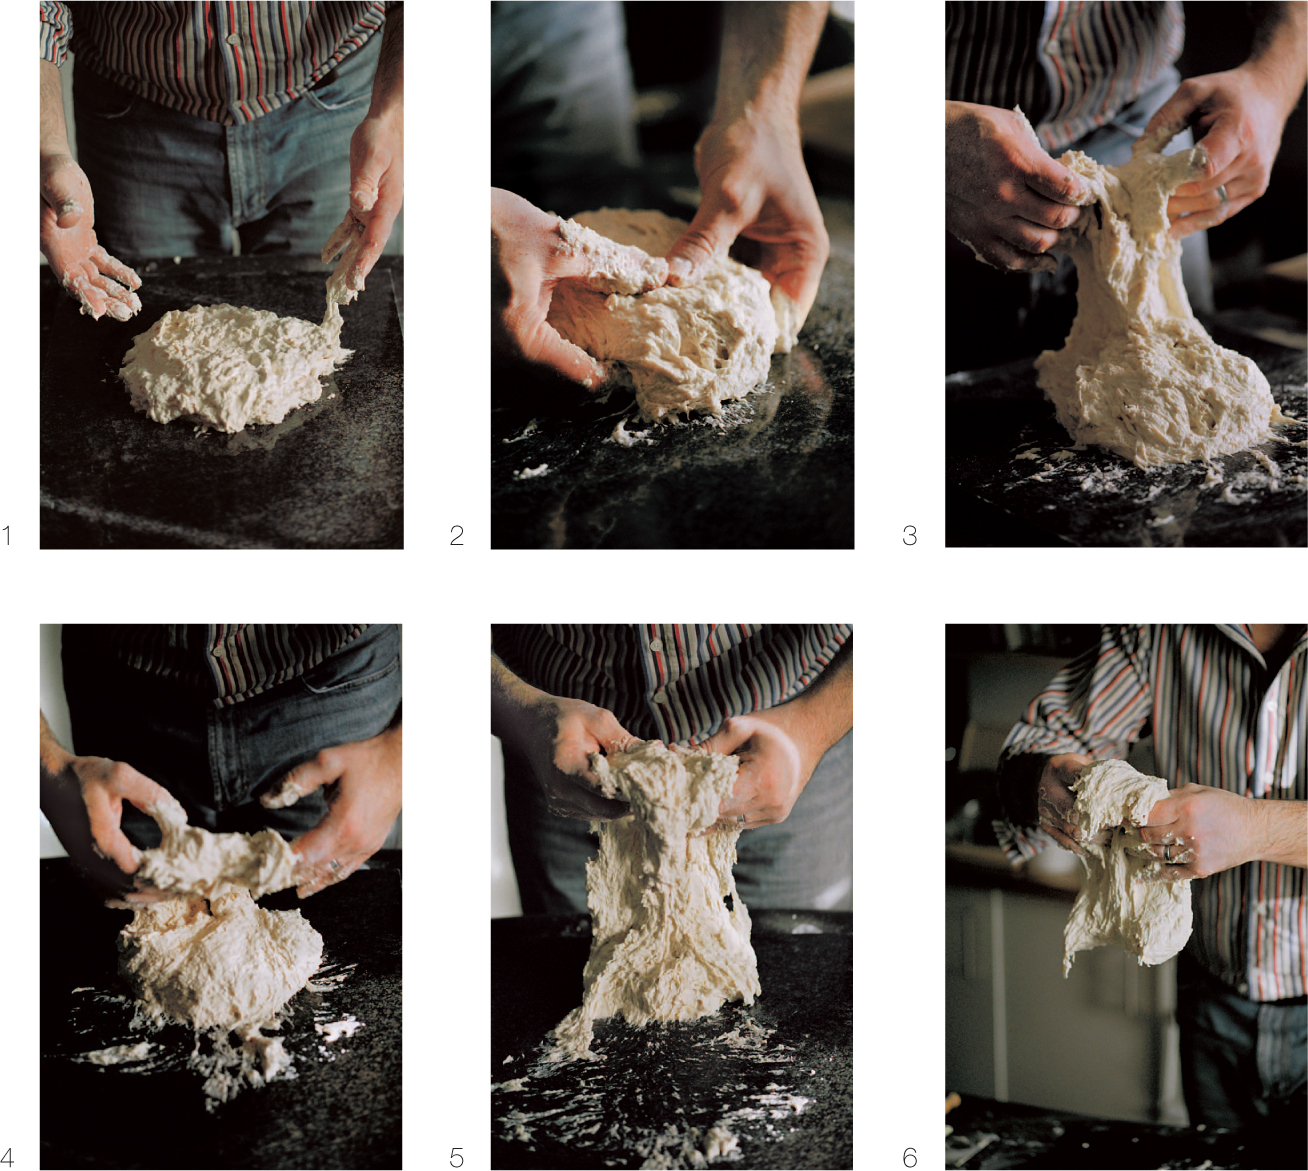
• With the help of your plastic scraper, Iift the dough onto your work surface. Even though the dough will feel quite soft and moist (and look like thick, sticky porridge) do not add any flour to the work surface.
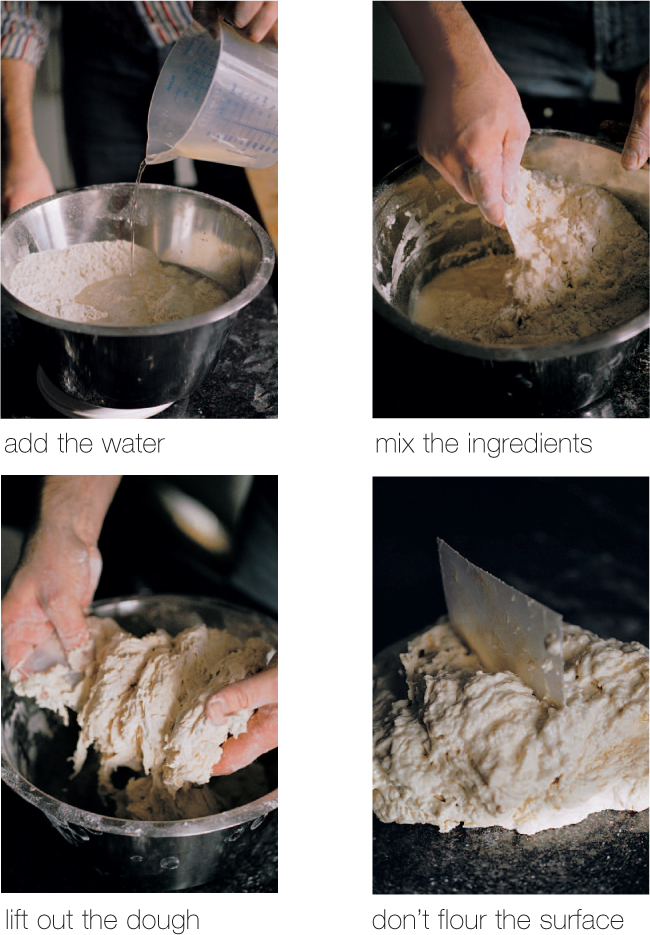
People are always amazed when I tell them that I work the dough by hand without flouring the work surface. Sometimes when I am giving breadmaking classes, to prove the point that you don’t need any flour, I put some extra water into the dough, to make it really sticky. No one believes that it will really come together without flour, yet it does, simply by working it, stretching and folding, to trap the air inside. Think about it: if you continue adding flour at this stage – before you know it you can easily put another 100g into your dough, which will firm it up and change its make-up – then you are far more likely to end up with a ‘brick’. If you work the dough without flour it allows you to keep the dough softer, so the finished bread is lighter, more airy and exciting.
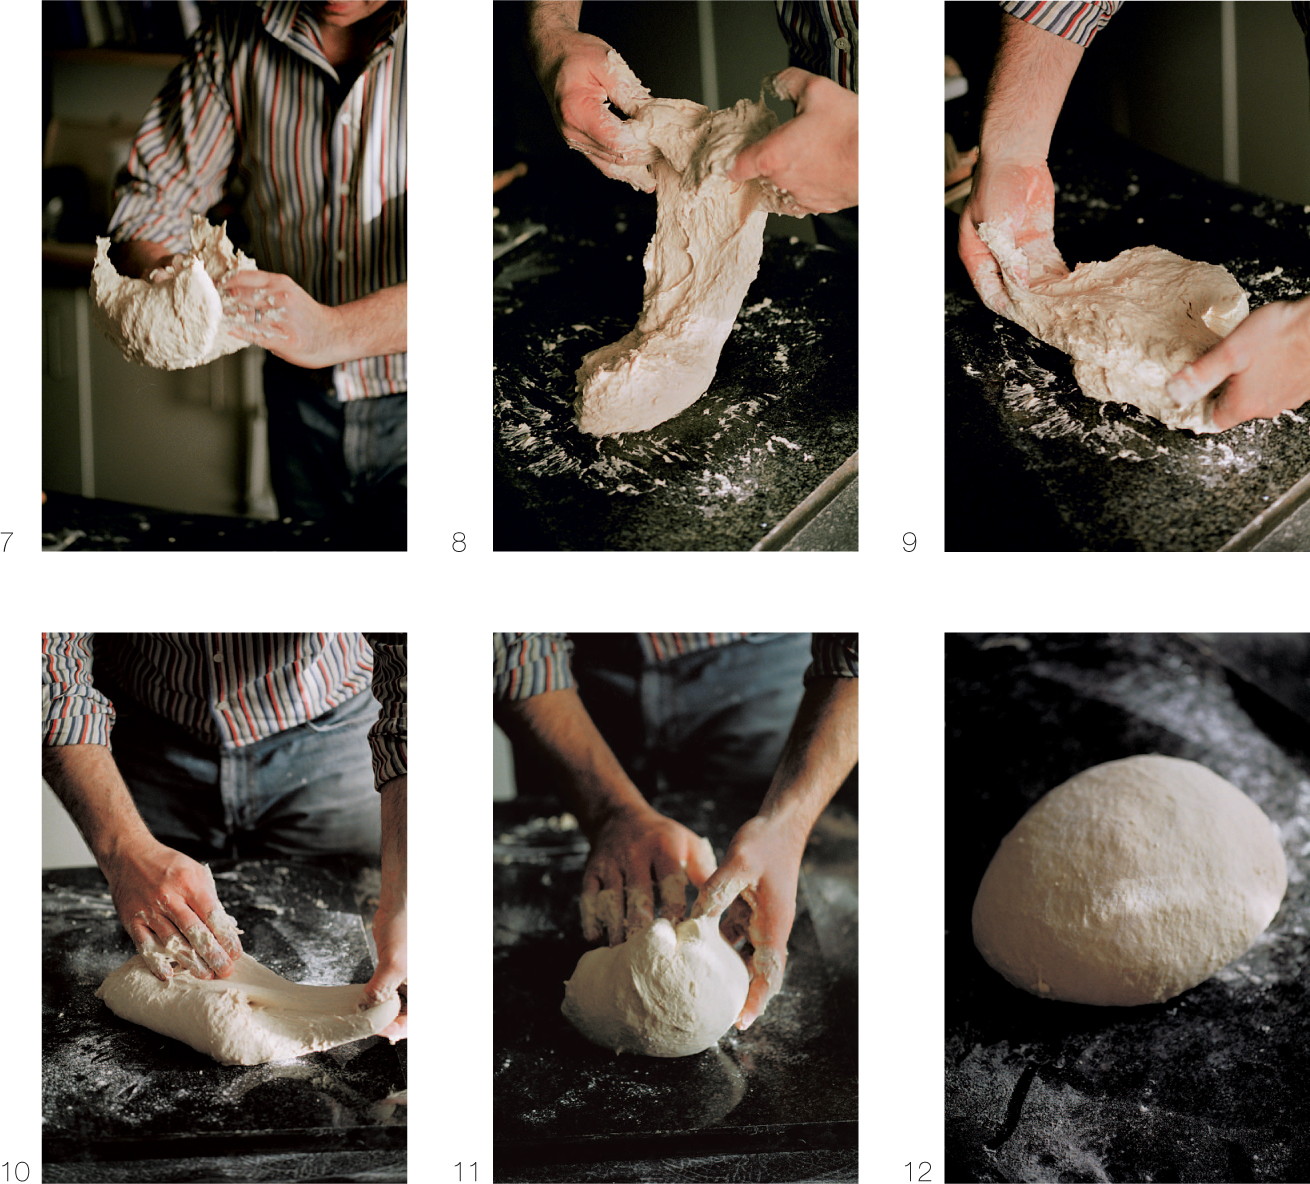
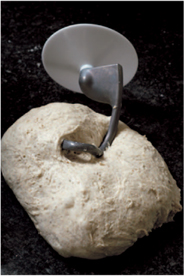
• Begin to work the dough. The idea is to stretch it and get as much air into it as possible. Forget the way you have probably been taught to knead the dough, by pummelling it with the heel of your hands and rotating it. The way to work it is to slide your fingers underneath it like a pair of forks1, with your thumbs on top2, swing it upwards and then slap it back down, away from you, onto your work surface (it will almost be too sticky to lift at this point)3. Stretch the front of the dough towards you, then lift it back over itself in an arc (to trap the air)4, still stretching it forwards and sideways and tucking it in around the edges. Keep repeating this sequence5. At first this might seem to be too much to think about, but once you get the hang of it, you will find that you can work the dough easily in one quick, seamless movement6/7. The DVD will help with this.
• As you work the dough it will start to come together and feel alive and elastic in your hands8. Keep on working it until it comes cleanly away from the work surface9, begins to look silky and feels smooth, firm-butwobbly and responsive – you’ll understand what I mean, when you feel it for yourself. I promise you the fascination with dough starts here! Once you get used to this technique, it should only take around 5 minutes, as opposed to 10–15 minutes of traditional kneading.
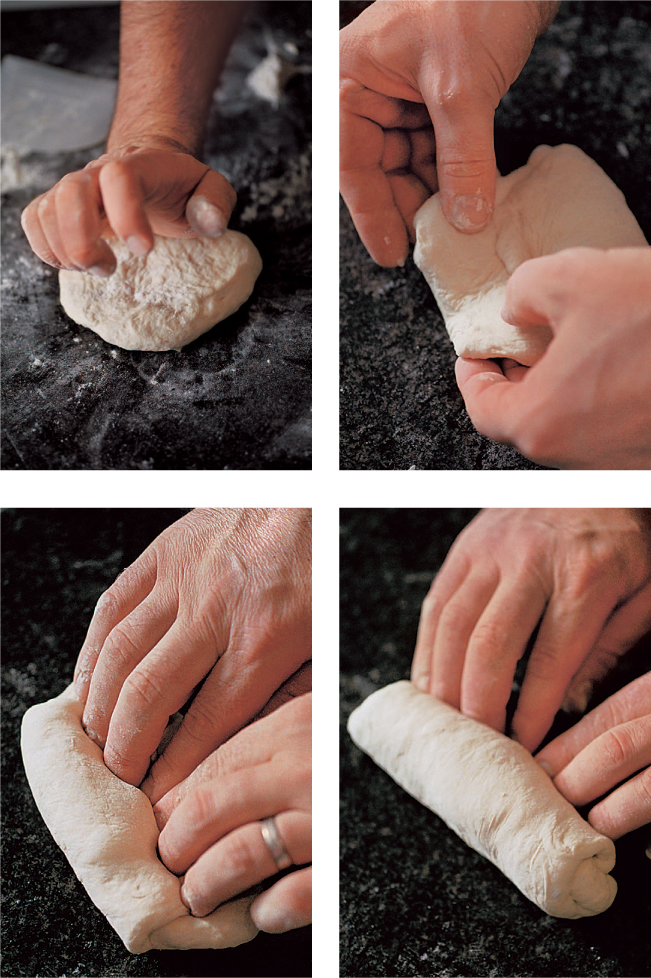
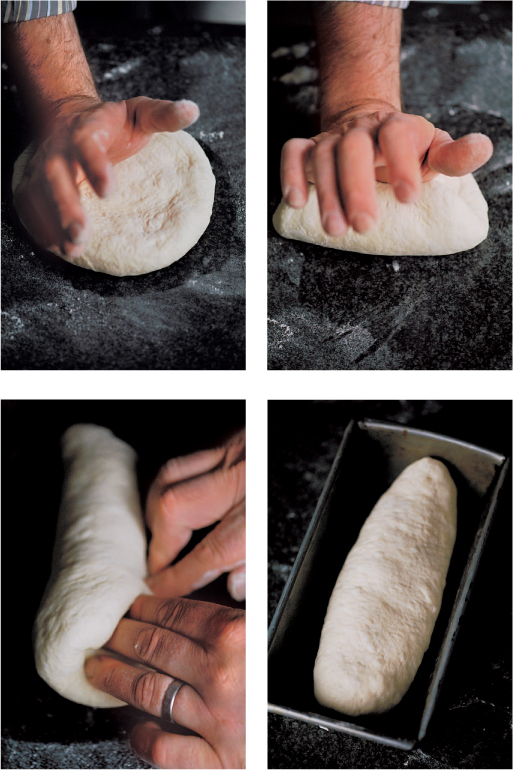
• Now you can flour your work surface lightly, place the dough on top and form it into a ball by folding each edge in turn into the centre10 of the dough and pressing down well with your thumb, rotating the ball as you go11. Turn the whole ball over and stretch and tuck the edges under12. You will come across this technique in various stages throughout recipes – in each case follow this folding method. If the recipe calls for you to make a ‘tight ball’, then fold in a few more times into the centre.
If using a mixer with a dough hook
• Put the flour into your mixer bowl and rub in the yeast. Switch the mixer onto the slowest speed, add the salt and then the water and mix for 2 minutes, then turn up to the next slowest speed and mix for a further 6-7 minutes until the dough becomes smooth and elastic. Remove the dough from the bowl, transfer to a lightly floured surface and mould into a ball.
• Whichever method you use, once the dough has been mixed or worked lightly, flour the inside of your mixing bowl and put the ball of dough into it. Cover with a tea towel and rest in a draught-free place (see here). Leave the dough for around 1 hour, until it is roughly double in volume – don’t worry if this happens a bit quicker or takes a little longer, as the dough will react slightly differently according to the temperature of your kitchen. (A few of the recipes require you to rest the dough for a shorter or longer time anyway, so check before you start.) Once the dough has nearly doubled in volume, you are ready to carry on with whatever recipe you choose.
Note: In some of the recipes for flavoured bread you will need to incorporate extra ingredients – fruit, nuts, spices, etc. – at the end of working the dough by hand or mixing in a mixer, before resting, so check with the recipe you want to make before starting to make the dough. Having made your own wonderful, wholesome dough, make sure that when you flavour it you do it justice, by adding really good-quality ingredients.
If you keep back a 200g piece of dough when you make your first batch of bread, you can leave it in the fridge, ‘refreshing it’ from time to time, to develop its flavour. Then you can add it to your next batch of dough to enhance it, keep back another 200g piece of that dough, and so on… that way you add more flavour and character to your dough and bread every time you bake. When you keep back your dough, put it in a bowl in the fridge, covered with clingfilm, leave it for 2 days, and add the same amount of water (200g) and double its weight of flour (400g). Mix well until you have a firm dough, then put it back in the fridge. If you aren’t going to be baking for a while, refresh it every 7–10 days. To save your fridge from being over-run by growing dough, keep back 200g (throw away the rest) and again add the same amount of water and double the weight of flour and mix it in. Some people say you should leave the dough in ambient conditions, but if you keep it in the fridge you can control the temperature much better. You are in charge, not the dough. And as you become more confident and bake more regularly, you can increase the amount of dough you refresh so you can bake bigger batches of bread. Larger quantities of dough will mature more slowly so you can leave more time between feeding. I keep up to 2kg in my fridge, so if I go on holiday for two weeks I don’t have to worry that it will have ‘died’ in the meantime – or take it with me in my suitcase. Don’t laugh – I know people who have done it. I imagine them checking into their hotel, ‘Yes there is me, my wife, my kids…and my ferment!’
• After you have rested the dough, turn it out onto your surface. Divide into three. Flatten the dough with the heel of your hand into a rough oval shape. Fold one side of the flattened dough into the middle and use the heel of your hand to press it down and seal, then fold the other side into the middle and again press down firmly to seal. Finally fold in half lengthways so you end up with a long sausage shape and seal the long edge. By folding and pressing in this way – a technique that is repeated for many of the breads that are ‘moulded’ (shaped) – you give the dough extra strength and ‘backbone’. Turn over so it is seam-side-down.
• Cut the log of dough into equal pieces as required for each recipe. To make these into small balls, you start off by using the same technique as for forming the worked dough into a ball before resting (see here), i.e. fold each edge in turn into the centre of the dough and press down well with your thumb or fingers, rotating the ball as you go. If the recipe calls for a ‘tight ball’ fold into the centre a few more times. Turn the ball over and roll it in the palm of your hand, smoothing and easing the edges underneath.
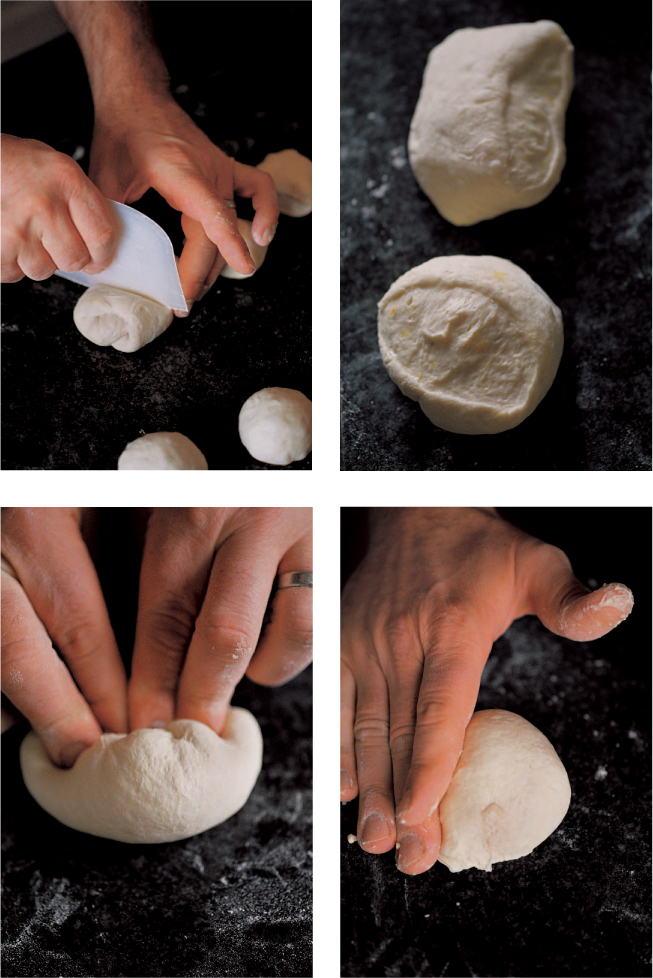
• Form each piece into balls. Flatten each ball into a circle with your fingers, then repeat the folding technique: fold one third into the centre and press down and seal with the side of your thumb, or heel of your hand, whichever feels more comfortable. Fold in the opposite third and seal again. Fold the roll in half lengthwise and seal the two sides together. Finally seal both ends. With the seam underneath, roll the dough evenly with your hands, easing the ends outwards, so that they become pointed.
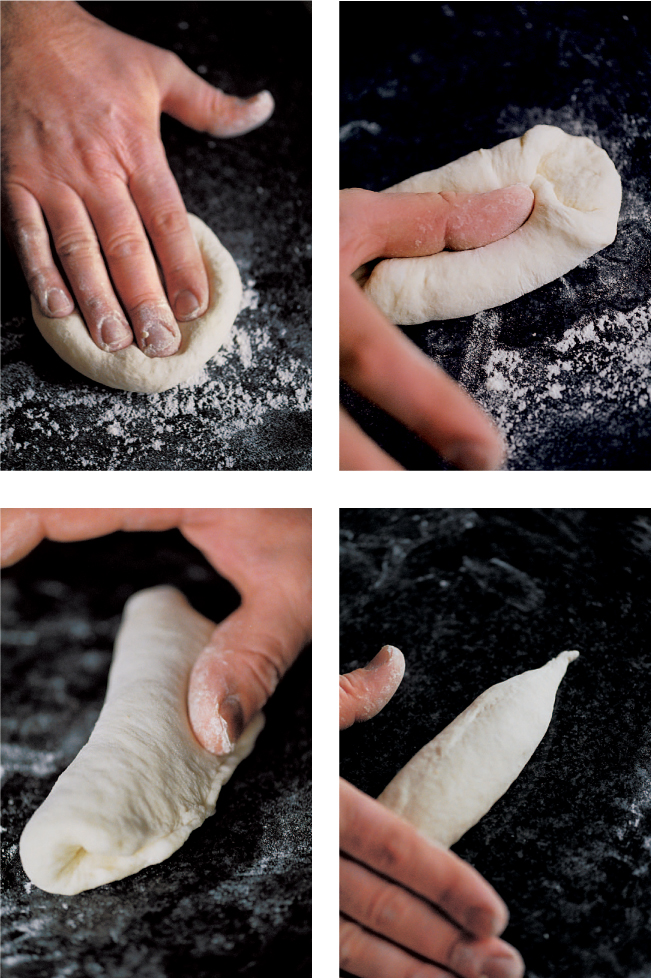
• The technique is the same as for shaping rolls, except you will be using one big ball of dough or two, according to the recipe. First flatten the ball of dough a little with the heel of your hand. Fold one edge into the centre and press down with the heel of your hand. Fold the other edge over into the centre and press down again. Fold over in half and then press down again firmly to seal the edges. Turn over and place (seam-side-down) on a wooden peel or baking tray or in a greased loaf tin according to the recipe.
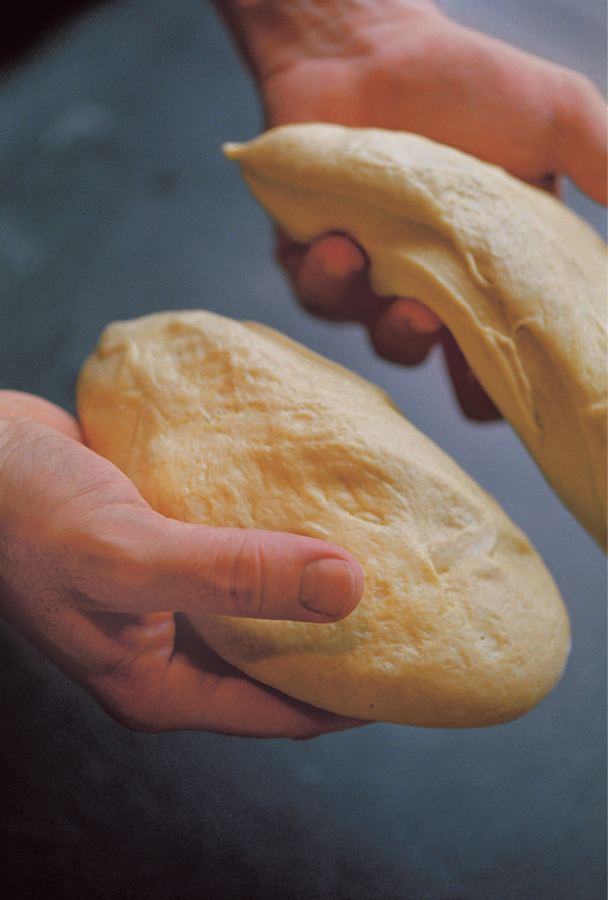
When you make bread for the first time, I always suggest that you try some small breads first because if you make one big loaf and it collapses, you may never give it a go again. Small breads are more fun. So begin with the simplest dough of all, white dough, and I would suggest trying the fougasse – one of the easiest breads to make, and one of the biggest hits in my bread class.