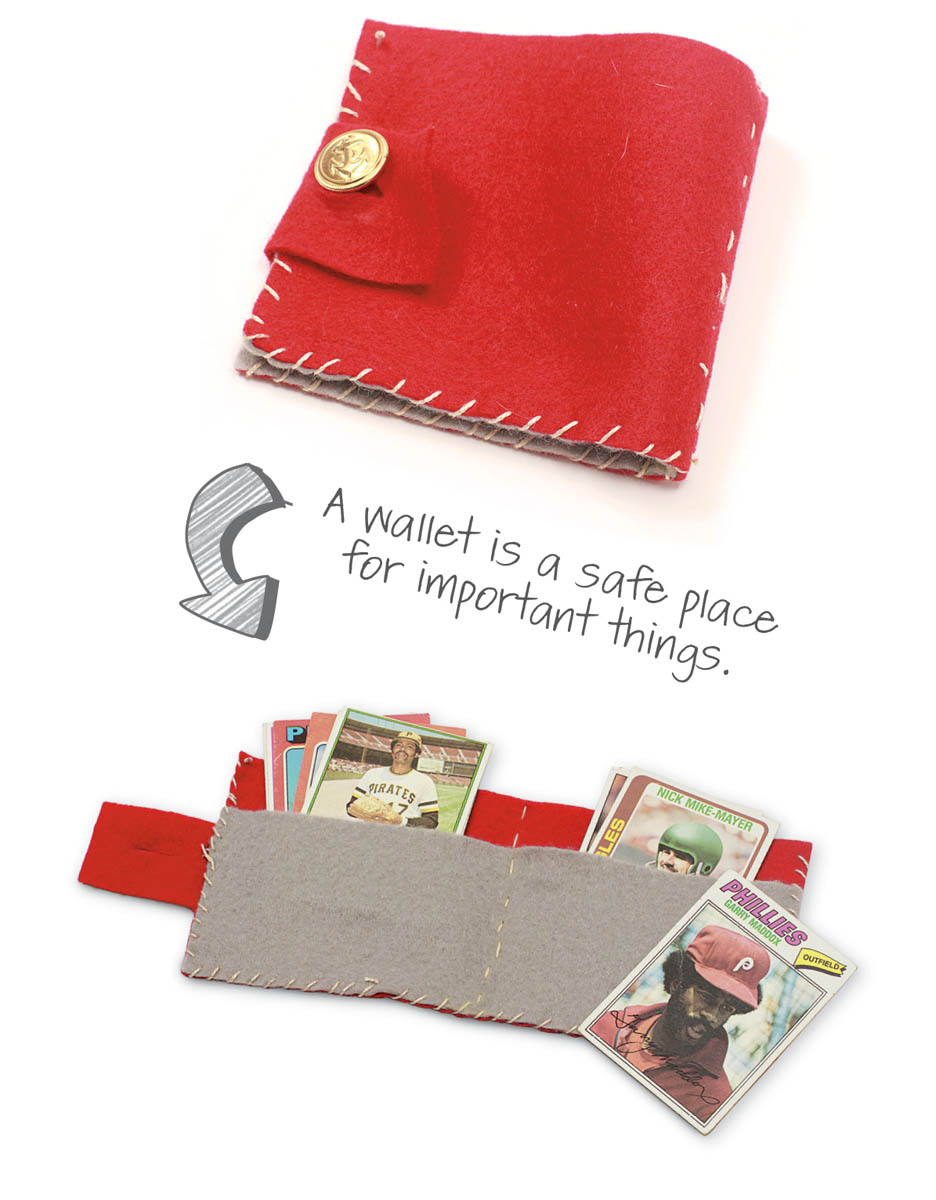
This project is very useful and has many variations. Young sewers might need help sewing on the button. Sewing at the tab can be confusing at first, too.
Instructions
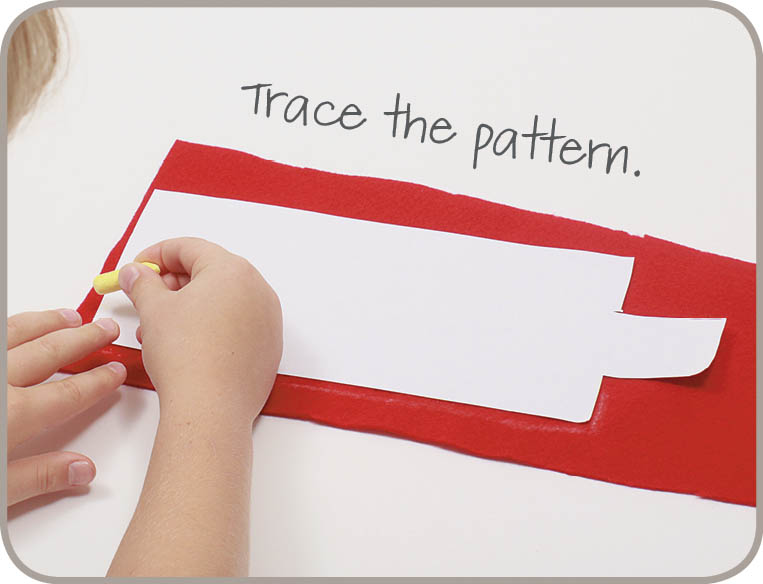
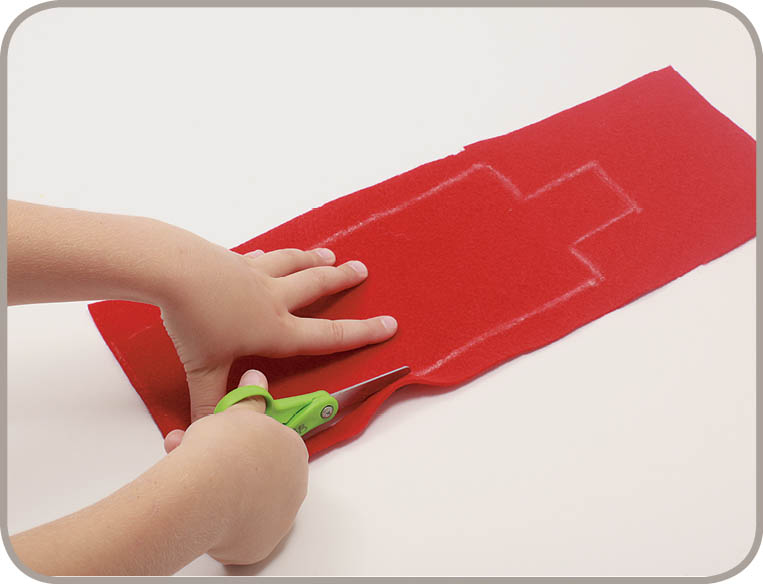
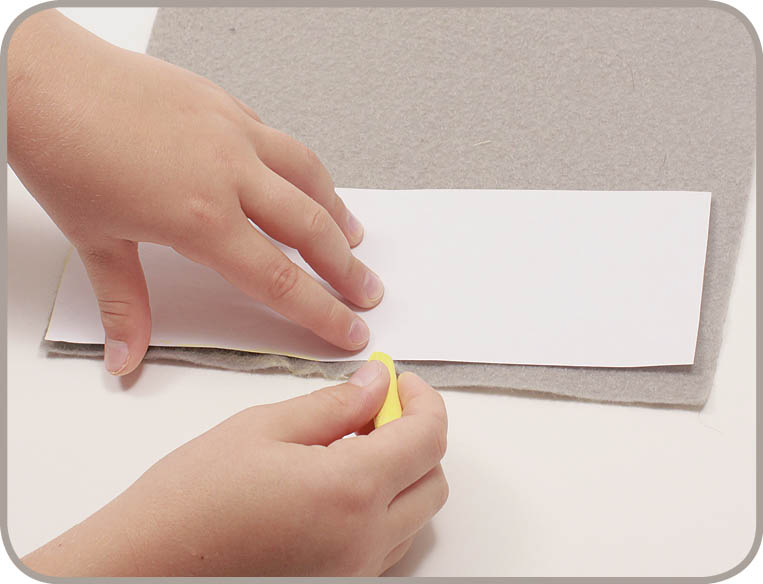
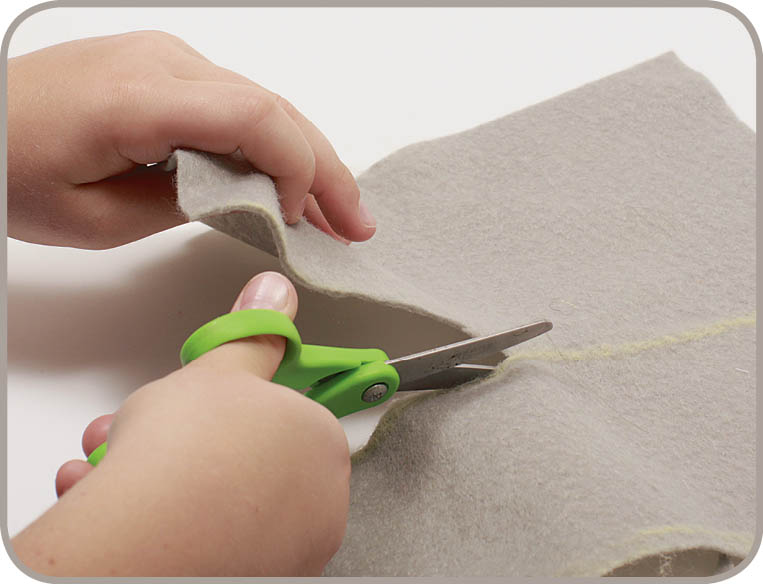
1. Print and cut out the pattern pieces. Use chalk to trace the out-side wallet pattern onto the felt one time.
2. Cut out the felt piece. This is the outside of the wallet.
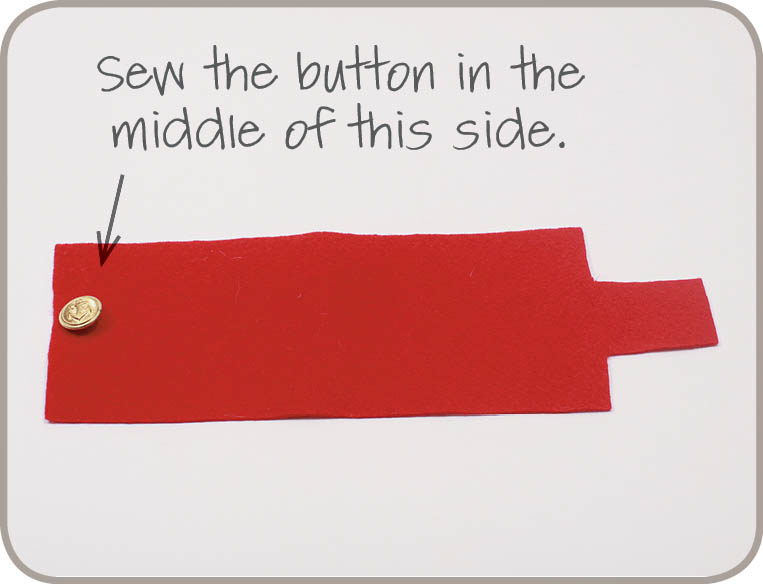
3. Sew the button to the middle of the side without the tab. Put it near the edge of the fabric.
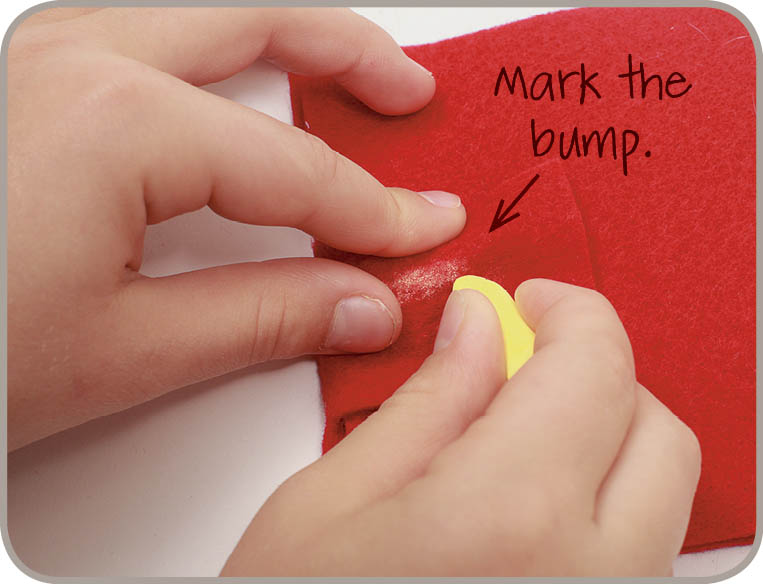
4. Let’s make a buttonhole. Fold the wallet in half. Now fold the wallet so that the tab goes over the button. Feel where the button is under the tab. Mark the bump the button makes with a chalk line.
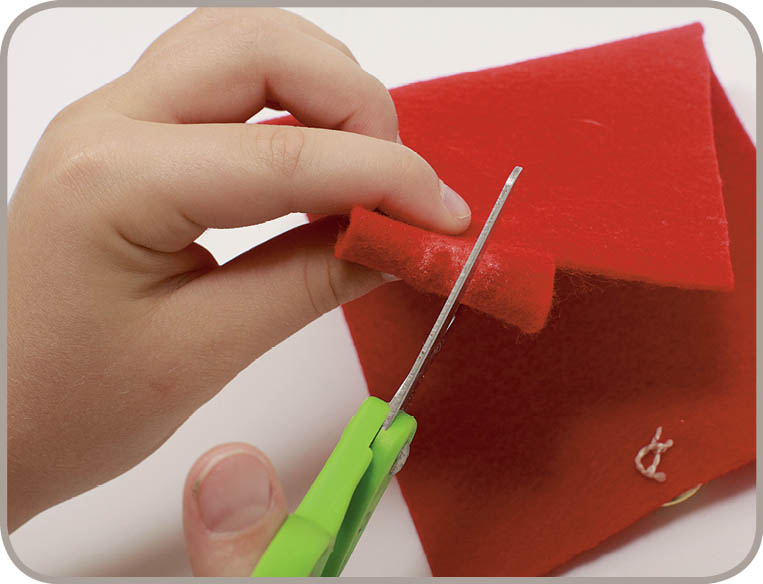
5. Fold the tab in the middle of the chalk line. Then cut along the chalk line to make a buttonhole.
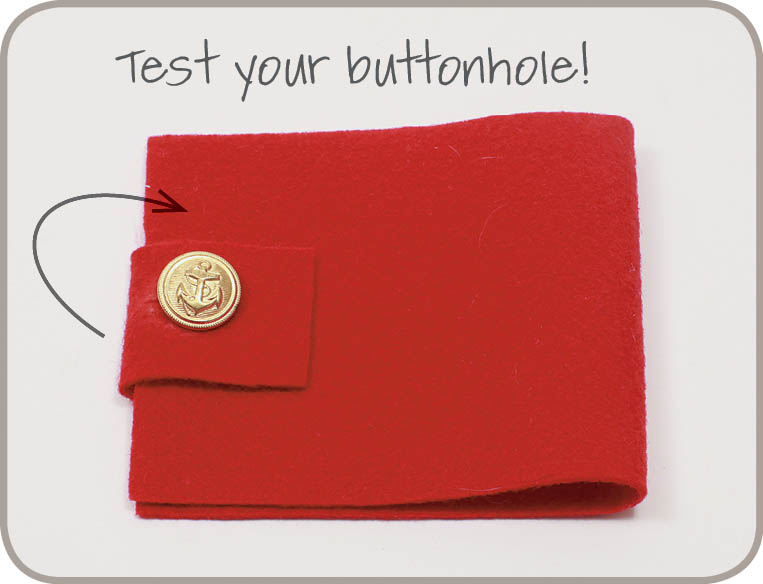
6. Button up! If the buttonhole is too small, cut it bigger.
7. Trace the inside wallet pattern onto felt one time.
8. Cut out the felt piece.
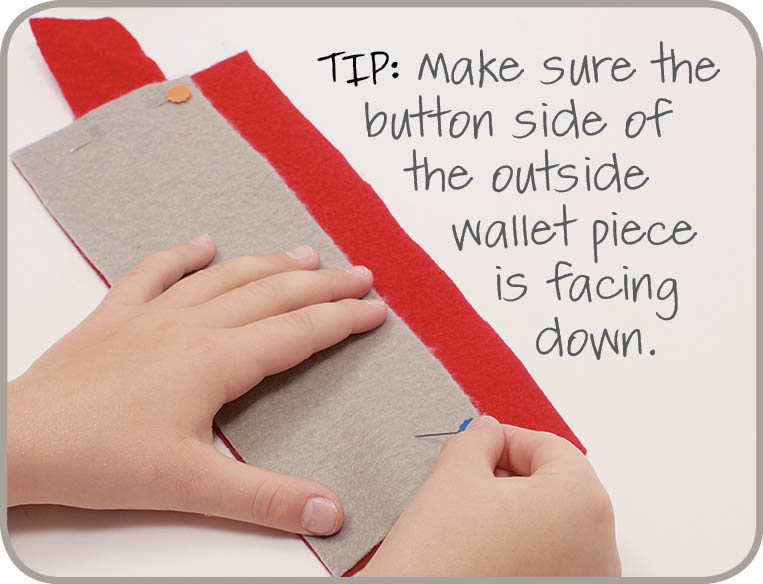
9. Pin the inside wallet piece to the outside wallet piece.
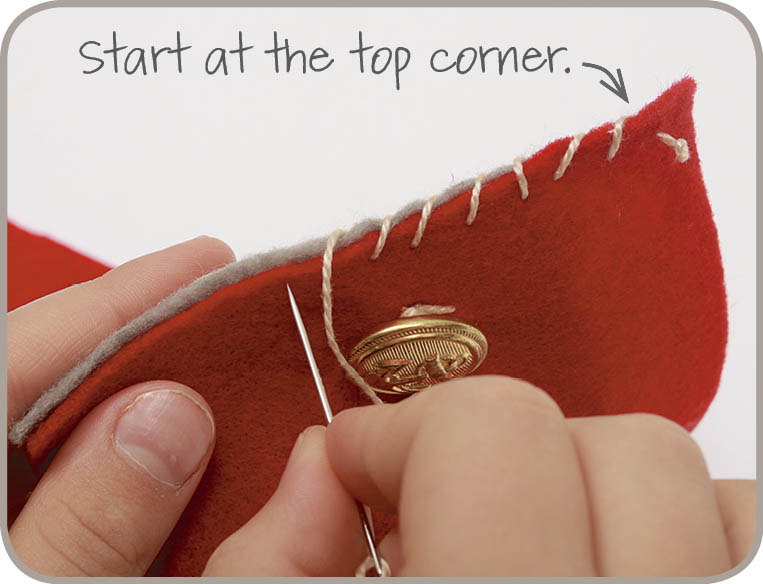
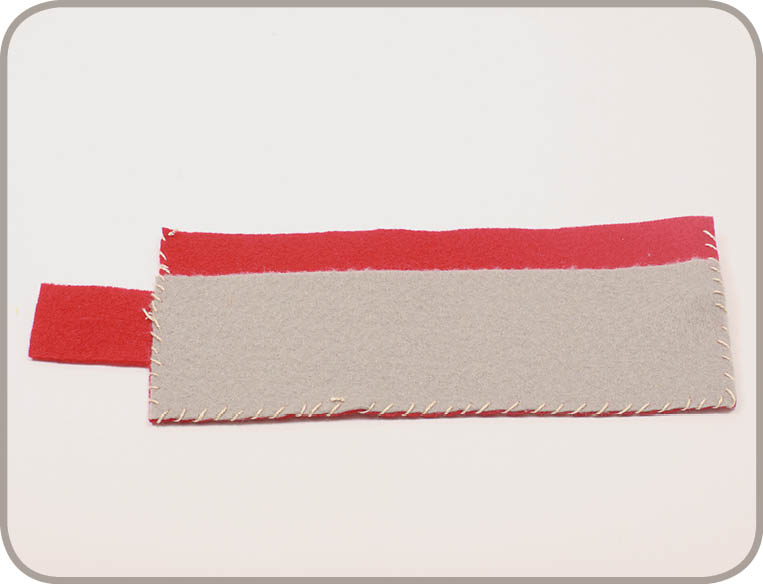
10. Time to sew! Start at the top corner. Use a whipstitch to sew the outside and inside pieces together along the edges on three sides.
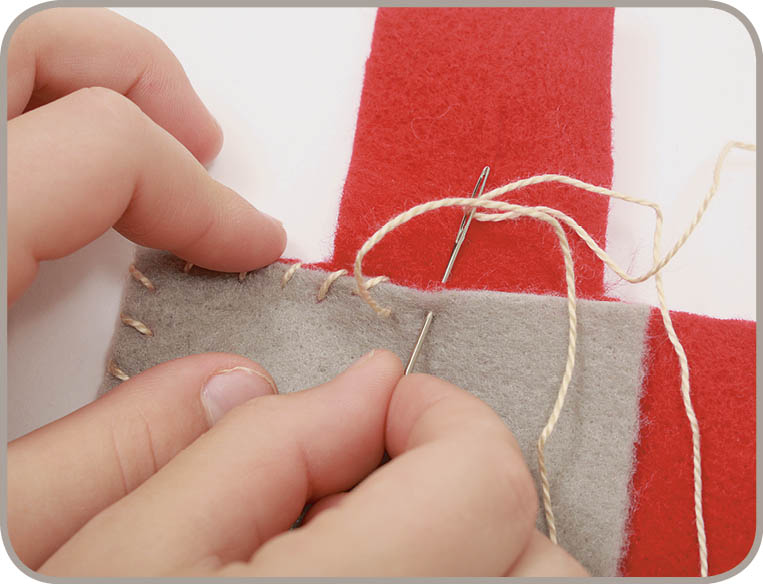
11. At the tab, keep sewing a whipstitch. Push the needle into the outside piece and up through the inside piece.
12. All sewn! Don’t forget to make a knot. Then cut the thread near the knot. Remove the pins.
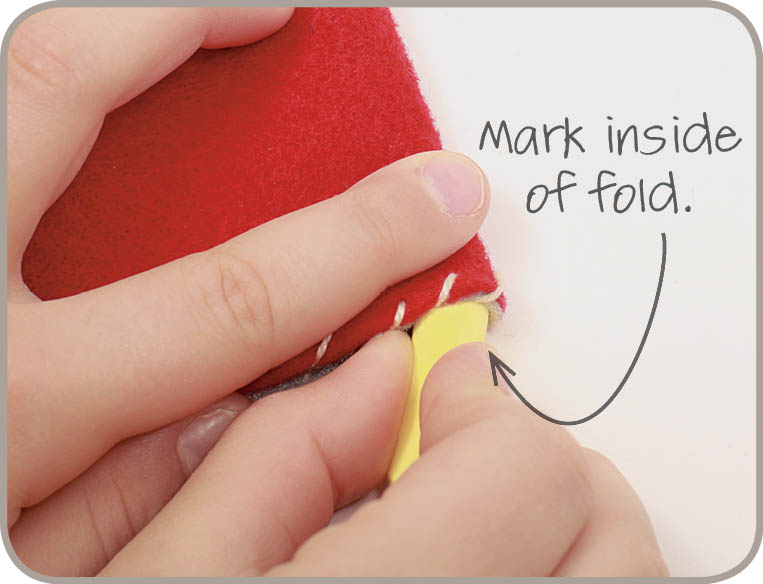
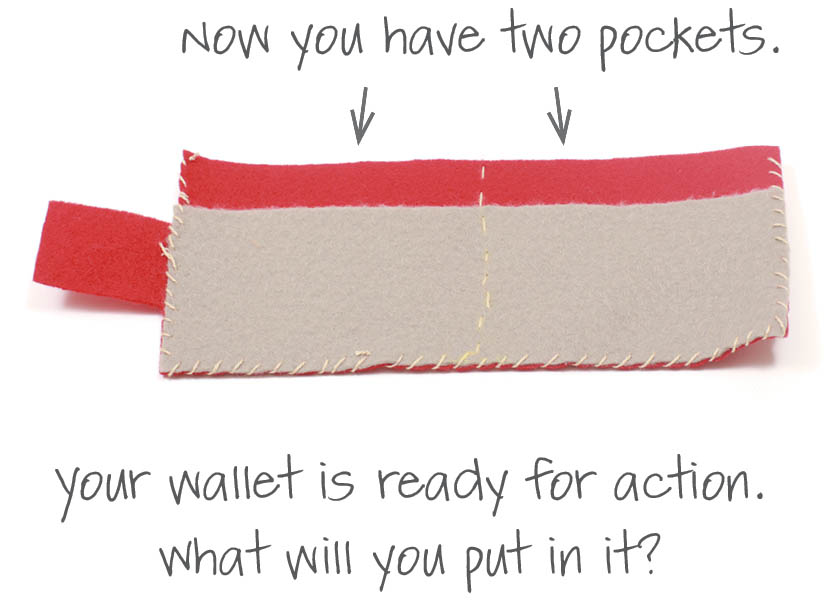
13. Now make two pockets. Fold the wallet in half. Mark the inside of the fold with chalk.
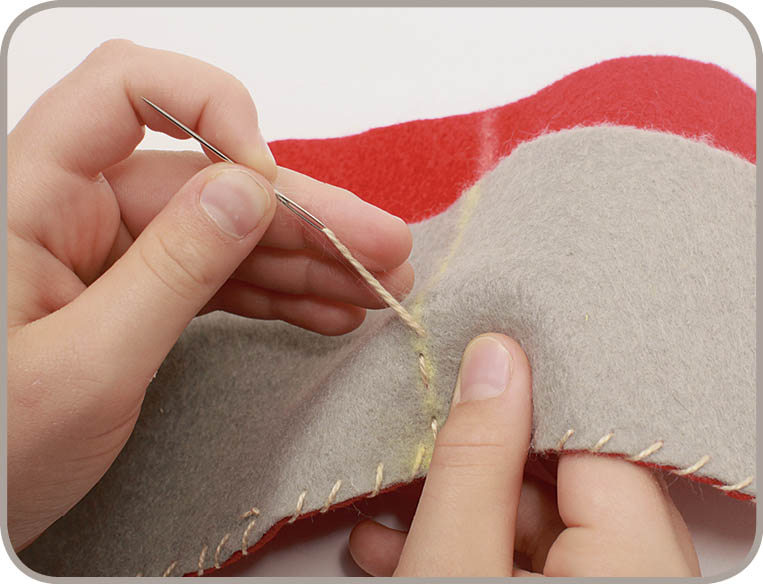
14. Find the mark. Then draw a chalk line up the middle inside the wallet. Sew a running stitch up the middle on the chalk line.
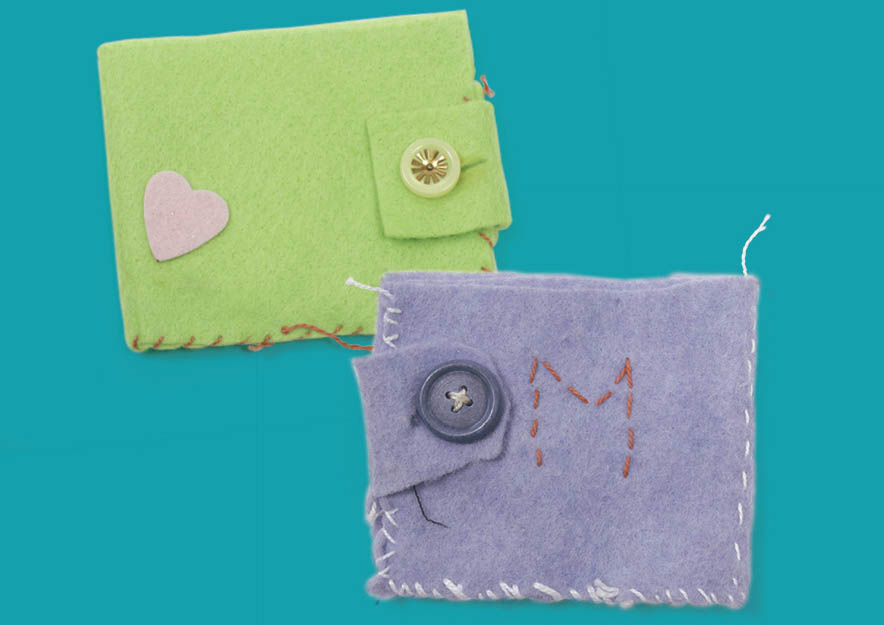
MAKE IT YOURS
Decorate the outside of the wallet with your name, embroidery, or felt shapes.