IN CHAPTER 3, YOU LEARNED HOW YOU CAN USE JAVASCRIPT TO CHANGE HTML. You can also use JavaScript to change CSS styles. And the process is very similar.
In this chapter, we’ll use CSS and JavaScript to make Douglas dance!
PROJECT 5
IN CHAPTER 3, YOU LEARNED HOW YOU CAN USE JAVASCRIPT TO CHANGE HTML. You can also use JavaScript to change CSS styles. And the process is very similar.
In this chapter, we’ll use CSS and JavaScript to make Douglas dance!
The first step in changing CSS using JavaScript is to locate the element you want to change. In Chapter 3, we showed you how to give an HTML element an id attribute and how to locate that unique ID using getElementById. For example, to select Douglas’s left eye, you can use the following code:
document.getElementById("lefteye")
This code searches the HTML to locate the element with the ID of lefteye that we created in Chapter 3:
<div class="eye" id="lefteye"></div>
After JavaScript has located the element to change, you tell JavaScript what part of that element you want to change.
In Chapter 3, in order to tell JavaScript to change the HTML, we used .innerHTML:
document.getElementById("message").innerHTML = "Coding is Fun!";
The inner HTML of an element is everything between the starting and ending tags.
Just as elements have inner HTML, which you can changing using .innerHTML, elements also have style, which you can change using .style.:
document.getElementById("lefteye").style
After you’ve told JavaScript that that you want to change a style, you need to tell JavaScript what property you want to change.
 CSS properties let you change things like the size, color, font, and position of HTML elements.
To change the background color of Douglas’s left eye, you use the backgroundColor property:
document.getElementById("lefteye")
    .style.backgroundColor
You then tell it what the new value of the property should be. To change the style property of backgroundColor to the value of purple, we use this code:
document.getElementById("lefteye")
    .style.backgroundColor = "purple";
JavaScript style properties are not always spelled the same as CSS style properties. JavaScript style properties use camelCase capitalization instead of dashes to separate multiple words.
Table 5-1 shows some common CSS properties along with their JavaScript counterparts.
TABLE 5-1 CSS PROPERTIES AND JAVASCRIPT STYLE PROPERTIES
CSS Property |
JavaScript Style Property |
margin |
margin |
font-size |
fontSize |
border-width |
borderWidth |
text-align |
textAlign |
color |
color |
To see a complete list of JavaScript style properties, visit www.w3schools.com/jsref/dom_obj_style.asp.
Modifying CSS using JavaScript makes it possible for the look and position of elements to change in response to your actions.
We’ll make Douglas dance in a little bit, but first let’s get some practice with making style changes to him using JavaScript:
Log into JSFiddle and find the project titled Chapter 5 – Changing CSS with JS – Start.
You see the Douglas Robot project pretty much as we left it at the end of Chapter 3, as shown in Figure 5-1.
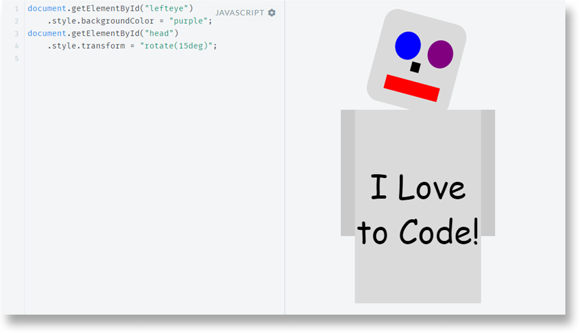
document.getElementById("lefteye")
    .style.backgroundColor = "purple";
Click Run to see the result.
Douglas’s left eye will change to purple, as shown in Figure 5-2.
document.getElementById("head")
    .style.transform = "rotate(15deg)";
Click Run to see the result.
Douglas now is tilting his head to his left, as shown in Figure 5-3. He looks ready to start dancing!
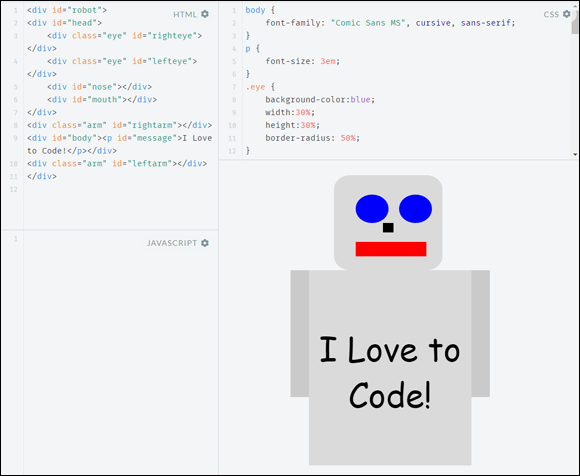
Figure 5-1: Douglas, the unanimated JavaScript robot.

Figure 5-2: Douglas’s left eye is now purple.
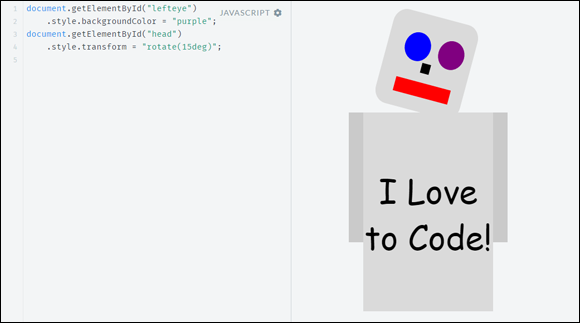
Figure 5-3: Douglas is ready to dance!
There are a lot of possibilities for customizing Douglas using JavaScript’s style properties. To get started experimenting with a few, try adding each of the following statements to the JavaScript pane and then running them:
// Put a 2-pixel-wide, solid black border around his body.
document.getElementById("body")
    .style.border = "2px black solid";
// Round the corners of his mouth.
document.getElementById("mouth")
    .style.borderRadius = "4px";
// Put yellow dots around his right eye.
document.getElementById("righteye")
    .style.border = "4px yellow dotted";
// Change his left arm's color.
document.getElementById("leftarm")
    .style.backgroundColor = "purple";
// Change the text color.
document.getElementById("body")
    .style.color = "red";
// Give Douglas hair.
document.getElementById("head")
    .style.borderTop = "5px black solid";
 Notice the lines of text that start with // before the JavaScript statements. These are comments. They’re there just to tell you (or other programmers) what the JavaScript code does. JavaScript doesn’t even look at them. You can use comments in your own code by typing // anywhere you want to leave a note. Everything that follows the // and that is on the same line as them will be ignored.
Figure 5-4 shows what Douglas looks like with all these changes made.
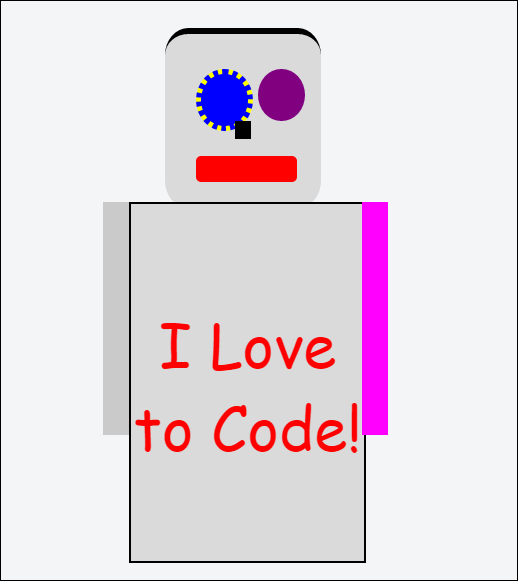
Figure 5-4: Douglas with crazy-looking style changes!
Now it’s your turn. Can you figure out how to make each of the following changes using JavaScript? If you need help with any of these, visit our public dashboard on JSFiddle and look for the program named Chapter 5 – Changing CSS with JS – Finished.
 Keep in mind that JavaScript is very sensitive. If you have a typo, or forget a period, or spell getElementById wrong anywhere in the JavaScript pane, none of the lines of JavaScript will run.
Now that you know how to change CSS using JavaScript, let’s put that knowledge to good use and make Douglas more animated!
https://jsfiddle.net/watzthis/fwdh1gdy and click the Fork button in JSFiddle.You’ll see a new fiddle with some code in each of the three code panes — HTML, CSS, and JavaScript — as shown in Figure 5-5.
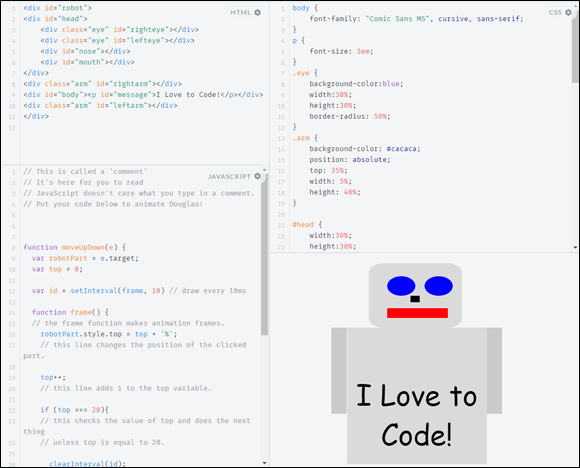
Figure 5-5: The start of the Dancing Douglas project.
Now you have a new fiddle for the new and improved dancing Douglas, and you can still get to the previous, nondancing Douglas from your public dashboard.
Douglas isn’t the greatest dancer, but he does have a few moves that he’s very proud of. The first is one he calls the “eye bounce.” His eye makes a quick movement upward and then floats back into place. Trust us, when he does it to the beat, it’s almost hypnotic.
Figure 5-6 shows Douglas in the middle of one of his signature eye bounces.
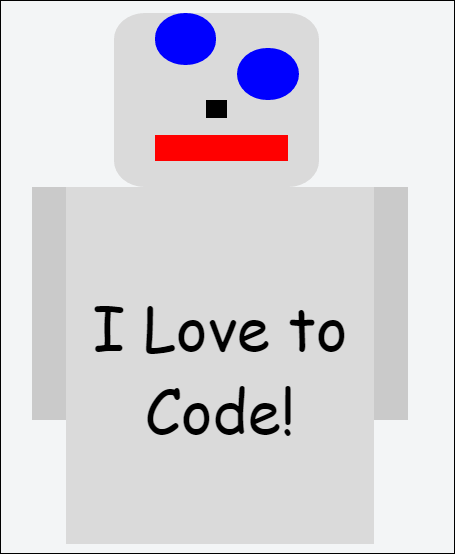
Figure 5-6: Douglas doing the eye bounce.
In this program, you’re going to control Douglas’s dancing by clicking his different parts to animate them. We start with programming his right eye to bounce when you click it.
var rightEye = document.getElementById("righteye");
This variable declaration creates a shortcut for us to refer to the right eye. Now that this has been created, every time you need to refer to Douglas’s right eye in the rest of the program, you can just use the variable named rightEye.
rightEye.addEventListener("click", moveUpDown);
This statement is what’s called an event listener. Here's how it works.
First, it locates an element — in this case, the rightEye, with the ID of "righteye"
var rightEye = document.getElementById("righteye");
Once it knows what element you’re talking about, it adds an event listener to that element. The job of an event listener is to wait until something happens and then take an action. In this case, it’s waiting for you to click your mouse on the selected element (rightEye).
Once it detects that you’ve clicked the rightEye element, it will take an action. In this case, the action it will take is called moveUpDown. We’ve already created the moveUpDown action, which you can see in the JavaScript window.
Another name for an action is function. Just like a toaster has an action it can do (toast bread), Douglas has a function he can do, which is called moveUpDown.
Here’s the JavaScript code for Douglas’s moveUpDown function:
function moveUpDown(e) {
  var robotPart = e.target;
  var top = 0;
var id = setInterval(frame, 10) // draw every 10ms
  function frame() {
    robotPart.style.top = top + '%';
    top++;
    if (top === 20){
      clearInterval(id);
    }
  }
}
We’ll tell you how this function works in a minute, but first let’s talk about how animation works.
Computer animation, like film and video animation, is a trick. The trick is to show a series of pictures very quickly so that the images appear to move.
Some of the very first uses of animation were called flipbooks or kineographs (see Figure 5-7), and they first became popular in 1886. Flipbooks are made by drawing a slightly different picture near the edge of each page of a notebook or a stack of springy pieces of paper. You can then flip through the book to see a cartoon.

Source: https://commons.wikimedia.org/wiki/File%3ALinnet_kineograph_1886.jpg
Figure 5-7: An early form of animation.
If you have a stack of index cards or a notebook, you can make your own flipbook. Figure 5-8 shows a picture of a flipbook animation that we made of Douglas the Robot dancing.
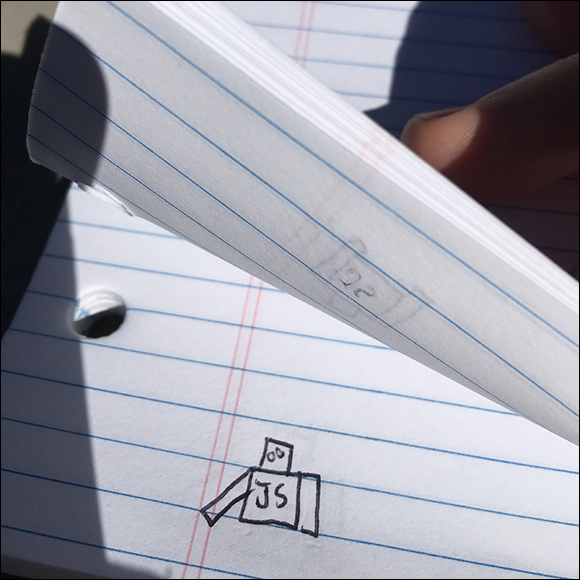
Figure 5-8: Our flipbook animation of Douglas the Robot dancing.
Today’s animation works the same way as flipbooks, but we use computers and programming to create each picture instead of stacks of paper.
Each single picture in an animation is called a frame. The way Douglas’s eye-bounce animation works is by showing his eye in a slightly different place, every 10 milliseconds (one-tenth of a second). When you click his eye, it jumps to the top of his head and floats back down to its starting point.
Figure 5-9 shows the position of the eye at various points during the animation.
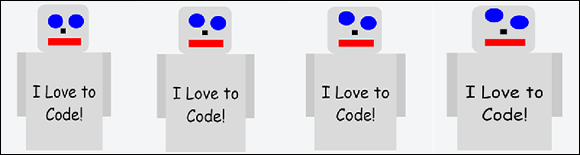
Figure 5-9: Douglas’s eye at various points in the animation.
Now let’s look closely at the code for the moveUpDown function and see how it’s created. The first line gives the function its name:
function moveUpDown(e) {
The next line creates a statement that finds out what part of the robot (or element) you clicked:
var robotPart = e.target;
It stores the information about that element in a new variable called robotPart.
This next statement creates a new variable called top and gives it a value of 0:
var top = 0;
This top variable is what we use to change the position of the eye in each frame of the animation.
The following line uses a command called setInterval to make the animation happen:
var id = setInterval(frame, 10);
The setInterval command makes JavaScript do something repeatedly. How fast it does the repeated action is set using a number — in this case, the number 10.
This number is the number of milliseconds (thousandths of a second) to wait before doing the thing again. One thousand milliseconds equals one second. The larger this number is, the slower the animation will appear to be moving.
Next, we create a new function that belongs to Douglas’s moveUpDown function. The purpose of this new function is to create each frame of the animation, so we call the function frame:
function frame() {
If you’d like to look at the frame function in more depth, visit https://jsfiddle.net/watzthis/fwdh1gdy and read the comments inside the JavaScript pane.
Now that we’ve written the moveUpDown function to animate one eye, animating the other eye is a simple matter of adding another event listener.
var leftEye = document.getElementById("lefteye");
leftEye.addEventListener("click", moveUpDown);
Now, clicking either the left eye or the right eye will cause the moveUpDown animation to happen on the clicked element.
Douglas has at least one more dance move besides the eye bounce. He calls this one the “arm sweep.” This classic move involves a smooth movement of the left arm from the right to the left across Douglas’s body as his eyes stare straight ahead.
Before we create the arm sweep animation, we’ll make a couple CSS changes so that Douglas’s left arm is extended, rather than just hanging at his side.
#leftarm {
  position: absolute;
  left: 70%;
}
Add a new width property and a height property to the left arm styles. Set the width to 30% and set the height to 7%.
The finished leftarm styles will now look like this:
#leftarm {
    position: absolute;
    left: 70%;
    width: 30%;
    height: 7%;
}
Now you’re ready to create the arm sweep animation. To create the arm sweep animation, we’ll add a third event listener.
var leftArm = document.getElementById("leftarm");
leftArm.addEventListener("click", moveRightLeft);
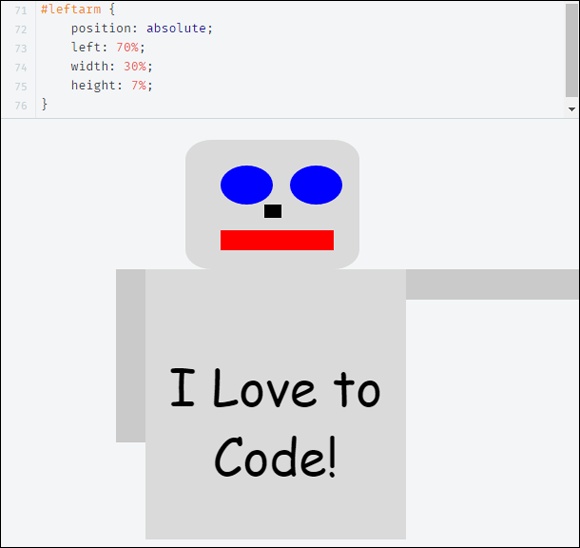
Figure 5-10: Douglas is pointing and ready to do the arm sweep.
This new event listener will watch for you to click Douglas’s left arm, and then it will make him to do the moveRightLeft action (or function).
We’ve already written the moveRightLeft function for you. It works pretty much the same as the moveUpDown function, but we modified it slightly in order to animate the arm from right to left instead of from top to bottom.
Here’s Douglas’s moveRightLeft function:
function moveRightLeft(e) {
  var robotPart = e.target;
  var left = 0;
  var id = setInterval(frame, 10) // draw every 10ms
  function frame() {
    robotPart.style.left = left + '%';
    left++;
    if (left === 70){
      clearInterval(id);
    }
  }
}
To save your work and test out the new animation, click Update. When you click Douglas’s left arm now, you’ll see the moveRightLeft animation work.
The completed code in the JavaScript pane should now match the following:
var rightEye = document.getElementById("righteye");
var leftEye = document.getElementById("lefteye");
var leftArm = document.getElementById("leftarm");
rightEye.addEventListener("click", moveUpDown);
leftEye.addEventListener("click", moveUpDown);
leftArm.addEventListener("click", moveRightLeft);
function moveUpDown(e) {
  var robotPart = e.target;
  var top = 0;
  var id = setInterval(frame, 10) // draw every 10ms
  function frame() {
    robotPart.style.top = top + '%';
    top++;
    if (top === 20){
      clearInterval(id);
    }
  }
}
function moveRightLeft(e) {
  var robotPart = e.target;
  var left = 0;
  var id = setInterval(frame, 10) // draw every 10ms
  function frame() {
    robotPart.style.left = left + '%';
    left++;
    if (left === 70){
      clearInterval(id);
    }
  }
}
Now it’s your turn to have some fun making Douglas dance! Start out by turning on some music and clicking his eyes and arm to the beat! Next, try adding some new event listeners to animate different parts of Douglas, such as his nose, his mouth, or his right arm!
In this chapter, you used all the tools you learned in the previous chapters, plus some brand-new ones, to make your animated robot dance. This is only the beginning of what you can do with HTML, CSS, and JavaScript. Keep exploring and playing and be sure to email us at info@watzthis.com if you have questions or want to share your creations with us.