Lighting is the photographer’s most important tool. More than any other single factor, lighting is what makes the difference between a bad photographer and a great photographer. In this chapter, we’ll mainly be looking at light sources and how to use them to create the look you want. First, however, we need to consider why you might pick one look over another, based on the model you’re working with, the purpose of the image, or the mood you want to communicate to your viewers.
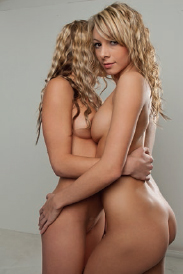
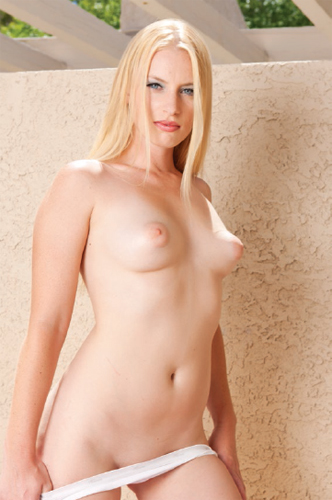
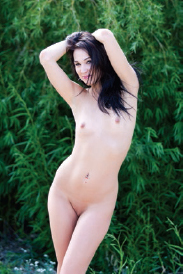
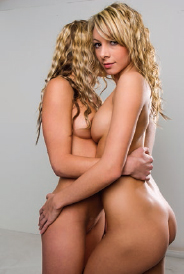
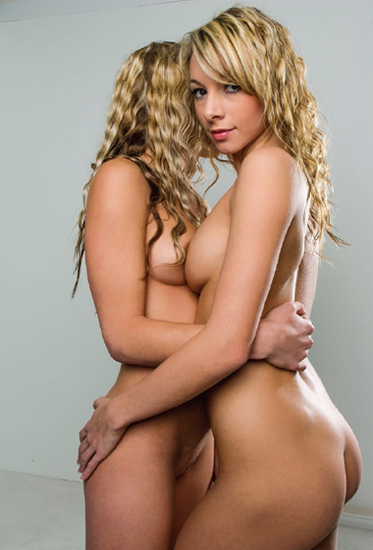
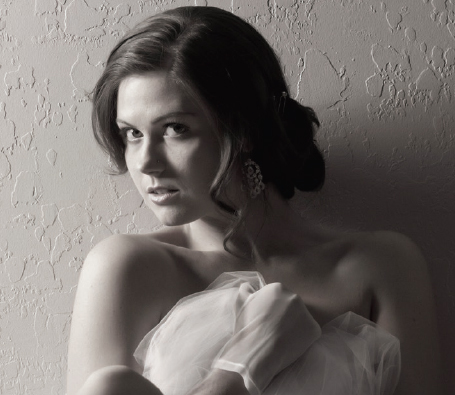
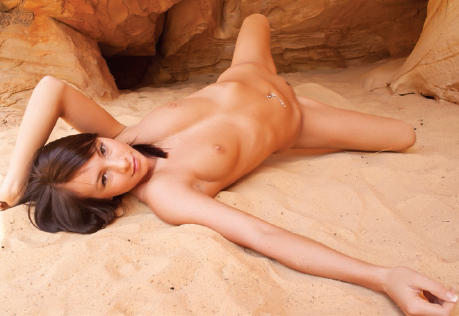
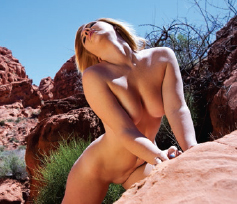
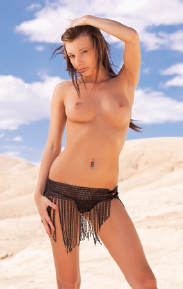
Soft lighting from a high angle coordinates well with a model who has a natural look and is shown in a natural setting.
Match the Lighting to the Model
While it’s easy to explain the science of light in concrete terms, it can be more challenging to explain the practice of lighting—why a photographer did something or how the light falls on a model. However, it is also extremely important to consider and discuss these more subjective factors. They will make all the difference in your images.
It can be challenging to explain the practice of lighting—why a photographer did something . . .
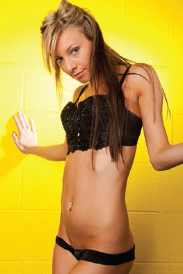
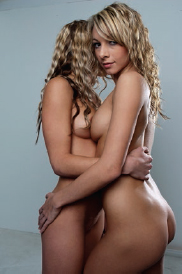
Often, I see lighting on models that simply doesn’t match. Let me explain. If you have a model who is covered in tattoos, has large breast implants, and sports bright blue hair, does it make any sense to use soft, gossamer lighting on her? Yes, we can probably all imagine some scenario where this would make sense, but generally you wouldn’t do it because it wouldn’t fit her personally. This is one of the major problems many photographers have an issue with—pairing the model and the lighting appropriately.
Think about it: you don’t see supermodels with pink hair and tattoos down their arms, because it doesn’t fit. Similarly, it’s okay for a boxer like Mike Tyson to have a facial tattoo, but it would seem totally out of place on the CEO of a Fortune 500 company. They have different personalities and our minds expect them to look (or not look) certain ways.
Lighting needs to be approached with the same thing in mind: you pick the lighting to match the model. If you select the wrong lighting style for the model, you may get good images, but they will never feel quite right. It will look like something is missing.
There is no magic trick or formula for picking the right light.
Unfortunately, there is no magic trick or formula for picking the right light, but you’ll feel it when you see it. Every type of lighting conveys a feeling—it is visceral. As you read through the following sections and review the images throughout this book, take a moment to consider the lighting and how it coordinates with the look of the model.
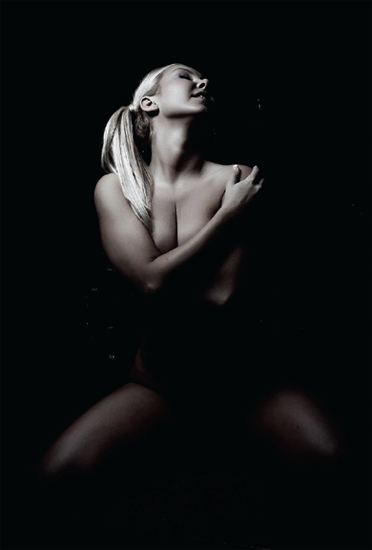
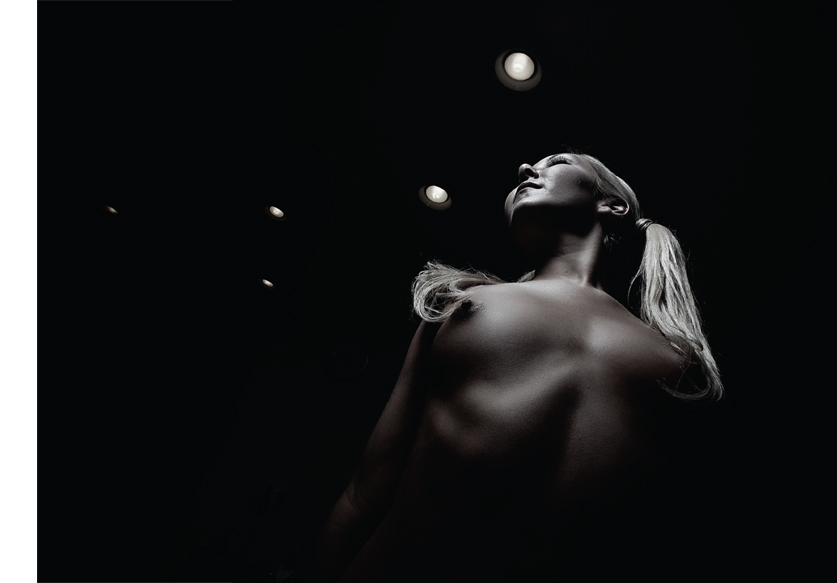
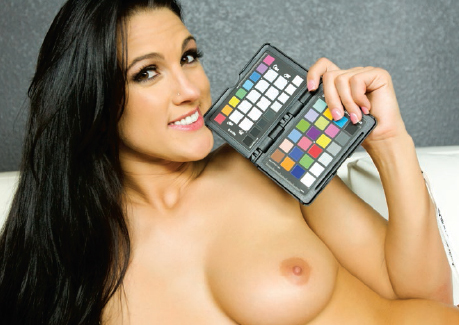
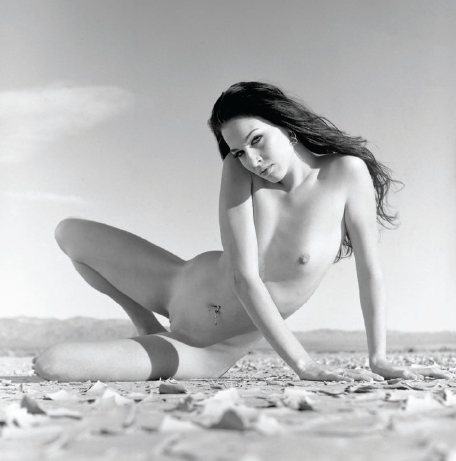
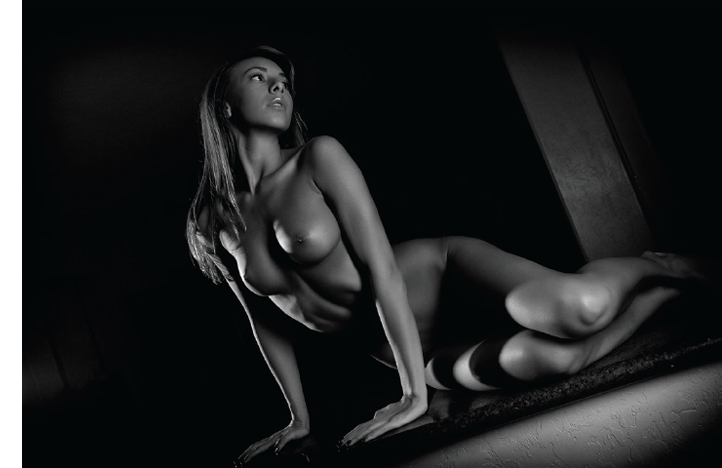
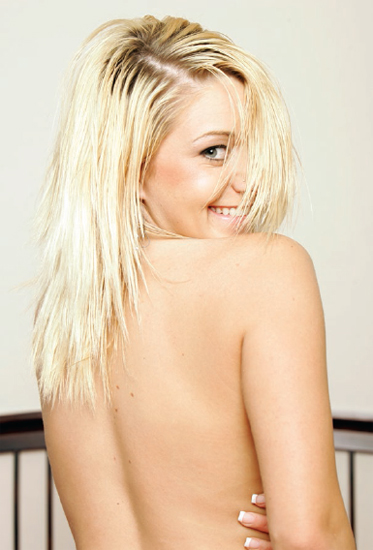
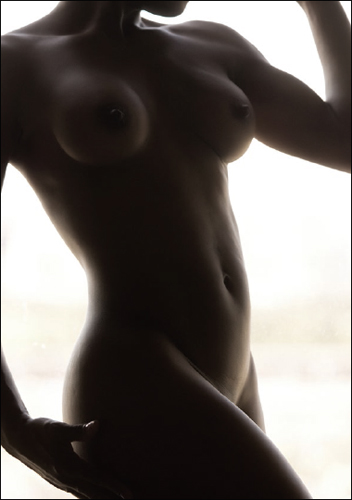
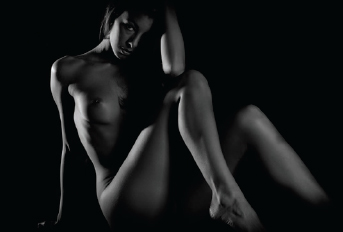
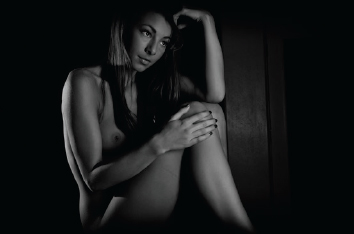
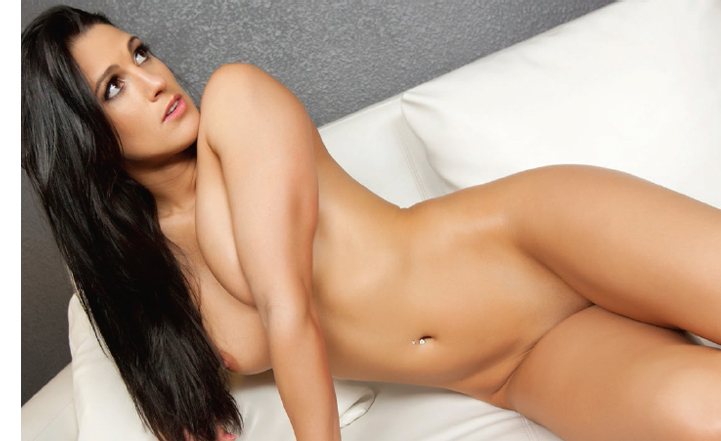
As seen in the shot to the right, the black & white images below were all created with a strip softbox mounted above the model for simple, clean lighting. One light, one model—simple! 
![]() second, f/13, ISO 50, 16–35mm lens at 16mm.
second, f/13, ISO 50, 16–35mm lens at 16mm.
Capturing a frame of the model with a color checker chart gives you an easy point of reference for the postproduction color-balance adjustment of all images created with that setup.
Color Balance. Visible light contains wavelengths of three colors: red, green, and blue. When these are in perfect balance, the light appears to be neutral white. When they’re not, the light has a color cast that can be recorded in your images. For example, household incandescent light bulbs emit light with a yellow/orange color cast. Fluorescent bulbs, on the other hand, tend to have a green color cast.
If you shoot in RAW, you can easily fine-tune the white balance of your images . . .
The human eye has evolved to neutralize these imbalances (cool, I know) so that colors look consistent no matter what light sources illuminate them. That’s why a sheet of white paper looks white to our eyes whether we see it outdoors under sunlight or indoors under an incandescent bulb.
Using white balance adjustments, today’s digital cameras can do the same thing—but they’re not as good at it. In the previous chapter, I mentioned that it’s advantageous to select a camera that lets you shoot RAW files, and dealing with the issue of white balance is one of the reasons. If you shoot in RAW, you can easily fine-tune the white balance of your images during the postproduction process. The cheapest way to do this is to include a sheet of white paper in a test shot. That gives you a known value to which subsequent images (in the same light) can all be balanced. A slightly better, and still budget-friendly, way to do this is to purchase a gray card and use it in the same way. At the upper end of the price scale are devices like the X-Rite ColorChecker Passport; whether you’re shooting JPEG or RAW, these devices will help you get a perfect (or near perfect) white balance.
This image shows how the RAW file looked with no color adjustment.
Here’s what happened when I opened the image in Adobe Camera Raw and simply hit “auto.”
It’s possible to white balance on a white wall or paper. This works in a pinch but it shouldn’t be something that happens often. Objects that may appear to be white to the human eye are not always white to the camera.
This image was white balanced off a Whi-Bal checker, so I know it is free of any color casts from the wall or lights. Printers, monitors, and other output devices can change the color of an image, so starting with the most pure color is important for achieving deep, rich colors that still look natural.
Light Functions. When lighting people, there are two primary light positions to consider—and these remain constant whether you are shooting with sunlight, window light, flash, studio strobes, or any other light source.
A fill source is added to reduce the darkness of the shadowing on the model.
The first light function to consider is the main light (sometimes called the key light). This is the light that creates the visible pattern of highlights and shadows on your subject. The quality of this light source, whether it’s hard or soft, and its direction relative to the subject (more on this in the next section) will have a profound impact on the look of your portrait.
Once you have found/placed your main light source, you can consider adding a secondary light source for fill. A fill source is added to reduce the darkness of the shadowing on the model. This creates a softer look and is often required to keep the overall tonal range on the subject within the limits of what can be captured by the camera. We’ll look at this in more detail as we proceed through the chapter.

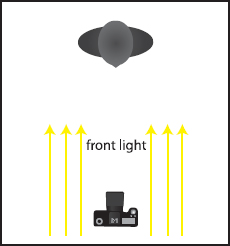
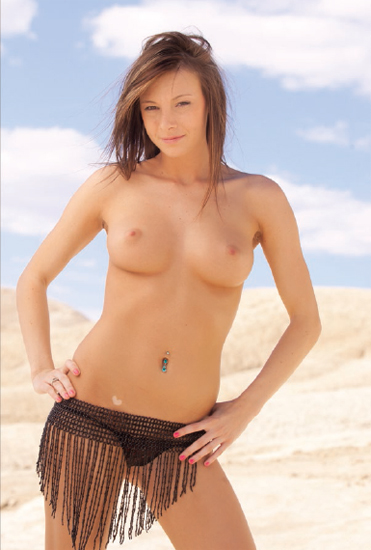
Light from the camera position creates a smooth, even look on the model’s skin.
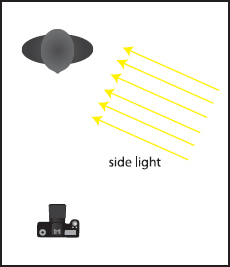
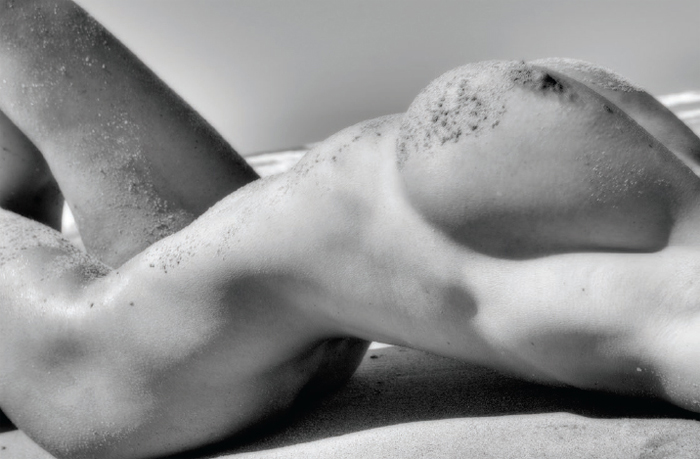
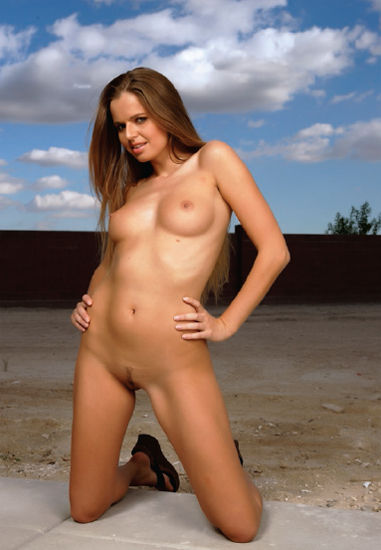
Side lighting creates shape-revealing shadows that are good for emphasizing a model’s contours.
Direction. The direction of the main light is an important consideration in any scenario. How is the light hitting the model? When shooting with natural/available light (as we’ll be doing for many of the images in this book), adjusting the model’s position in relation to the direction of the light will be our means of controlling how the light falls on her.
The direction of the main light is an important consideration in any scenario.
Front lighting is often used in glamour photography, but with bright sunlight it can be uncomfortable for a model to look directly into the sun. If the image concept allows, one solution is to have the model wear sunglasses. Another trick I use is to have the model keep her eyes closed and only open them briefly when I am ready to take the shot.
Side lighting skims across the model from an angle—up to 90 degrees from the model. Using this style of lighting is very dramatic. While it doesn’t always look good on the face, it usually looks great on the body, creating highlights and shadows that reveal contours.
“You don’t take a photograph, you make it.”
—Ansel Adams
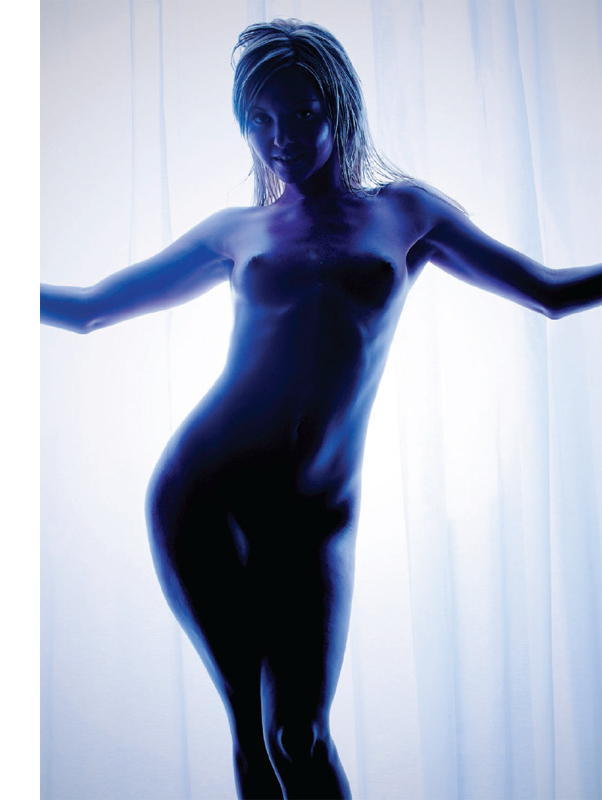
Backlighting can be used in a few different ways. First, it can be used to hide the model’s face (or body) in shadow, giving a sense of mystery to the image. It can also be used to add some lens flare to an image. I use backlighting quite often when I am shooting with window light (covered in detail later in this chapter).
For thousands of years, artists have been using natural light to create art. It is what we are used to seeing, so it makes perfect sense to our minds. Natural light is also free to use, which is great. The sun is in the sky, ready to work, so you don’t have to turn it on or off—and you don’t have to pack it up and take it with you. Especially in nude photography, the sun can be a fantastic tool because most models love to be naked in the sun. It feels good and natural on the skin, which can help set the mood for a shoot. I can’t stress enough the importance of using the light. It is natural, free, available, and waiting for you. Let’s look at some important factors to consider when working with natural light.
For thousands of years, artists have been using natural light to create art.
Color Temperature. The sunlight can change color based on any number of things. For example, if the sun goes behind a cloud, then the color of the light changes. If the model walks into open shadow (shadow cast by a large object), the color of the light changes. This is important to remember. If you are shooting on a cloudy day (or under other conditions where the light on the model is changing) you might have to use your gray card more than once or twice during the shoot.
Intensity. One of the great things about using the sun as a source of light is that, on a clear, sunny day, the intensity of the light is always about the same. Whether you’re at the top of a mountain or deep in a valley, if the light from the sun in unobstructed, it will be at a consistent intensity. This makes shooting much easier, because the exposure is the generally the same.
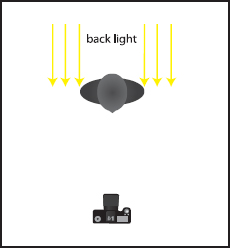
Light that strikes the model from behind can produce a partial or complete silhouette, giving the image an intriguing look.
Learning to light with only the sun is one of the most important things a photographer can do.
Understanding HDR (high dynamic range) imaging can be helpful for natural-light photography. This image is actually a composite of three captures, which let me maintain detail from the deepest shadow to the brightest highlight.
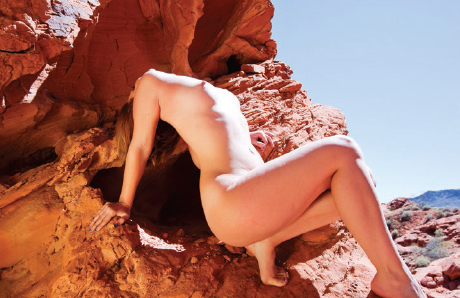
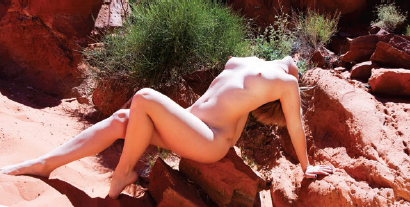
A few years ago, I started a personal photography project documenting nude models in remote locations using the simplest tools I have: a 30-year-old medium format camera (a few hundred dollars on eBay), a model, and the light from the sun. I have had great success with this project.
Having worked with many of the models on other projects, it’s been interesting to see how differently they act and pose when shooting outdoors with natural light and an “old school” camera.
For one thing, the models have to hold each pose more carefully, since the camera is slow (if they move, the image will blur). The feeling of the images I produce using only natural light and an old film camera is very different from when I work with them indoors with a DSLR camera and strobes.
There is something very natural when models work outside under the sun.
Two images from this project are shown on the facing page.
The sun can be a beautiful source of light if you know how to use it effectively.
The intensity is so predictable, in fact, that there’s a simple rule to get you to the right camera settings. This is called the Sunny 16 Rule. It states that, when shooting at f/16 in bright sunlight, the correct exposure is obtained by setting your shutter speed at the inverse of the ISO setting (
![]() ). So if you are shooting at f/16 and ISO 100, you’ll get a good exposure at
). So if you are shooting at f/16 and ISO 100, you’ll get a good exposure at 
![]() second—or your camera’s closest equivalent, which could be
second—or your camera’s closest equivalent, which could be 
![]() second, for example. If you switch your ISO to 500, you’d need to change your shutter speed to
second, for example. If you switch your ISO to 500, you’d need to change your shutter speed to 
![]() second. (Note: You don’t have to shoot at f/16 for this to work. There is a reciprocal relationship between apertures and shutter speeds. So, if you choose a 1-stop wider aperture, you can compensate with a shutter speed that is 1 stop faster and maintain the same exposure level.) This is a simple and direct approach—and it works.
second. (Note: You don’t have to shoot at f/16 for this to work. There is a reciprocal relationship between apertures and shutter speeds. So, if you choose a 1-stop wider aperture, you can compensate with a shutter speed that is 1 stop faster and maintain the same exposure level.) This is a simple and direct approach—and it works.
Time of Day. The time of day is really important when using natural light because it will affect the direction, intensity, and color of the light. When choosing the time of day to shoot, consider the style of lighting you are planning to use. For example, if the sun is high in the sky, it’s really hard to create backlit images.
While many photographers avoid shooting at midday, the sunlight from high in the sky can be used effectively.
When the sun is high in the sky, the light has deep, dark shadows and very bright highlights. As a result, many photographers will not shoot at this time of day. I don’t follow them in their thinking, however. I know what sunlight looks like at noon and I plan certain styles or looks that fit this lighting. Midday lighting can be used to your advantage if you plan carefully.
When the sun is high in the sky, the light has deep, dark shadows and very bright highlights.
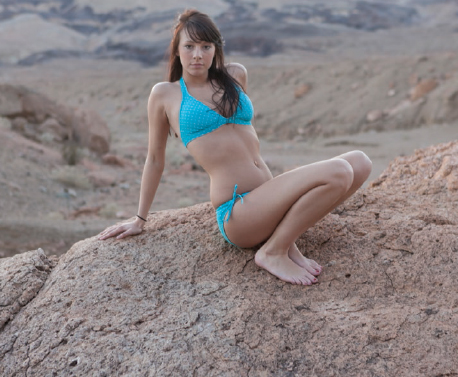
One of the best times of day to shoot with sunlight is about an hour before sunset and an hour after sunrise (too early for you?). At these times, when the sun is close to the horizon, the light strikes the model from a pleasing angle. It’s also warm in color and more diffused because it has to travel though more of the atmosphere before reaching your subject. This makes the light wrap around the model, reducing the contrast for a soft, warm look. It is the most amazing sunlight you can get. For that reason, photographers often call these times of day the “Golden Hours.”
This image was created on-location as we waited for the Golden Hour lighting.
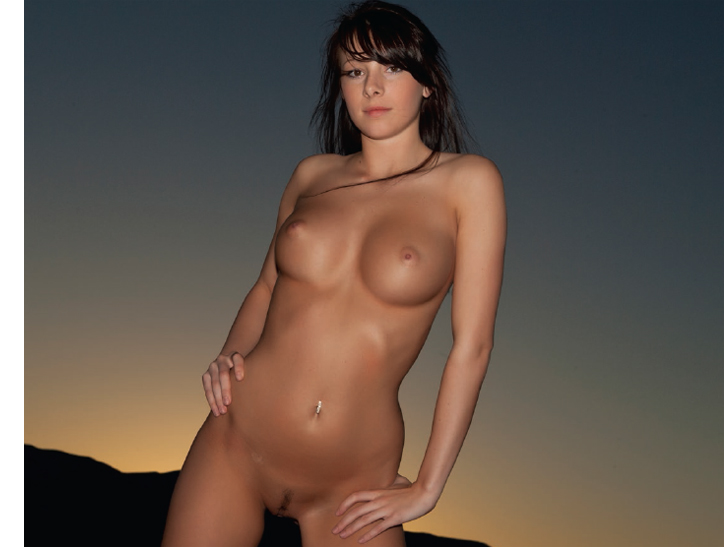
Just a little while later, the light was beautiful.
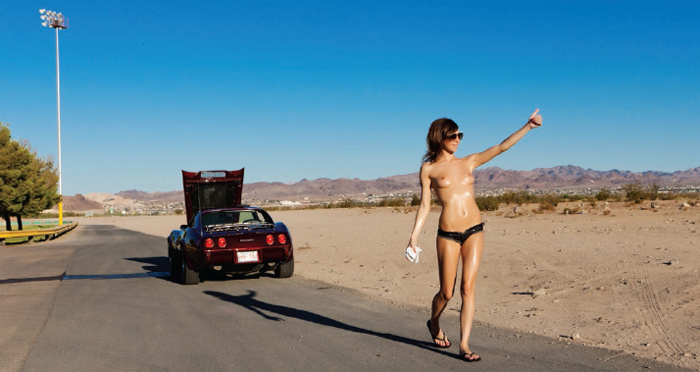
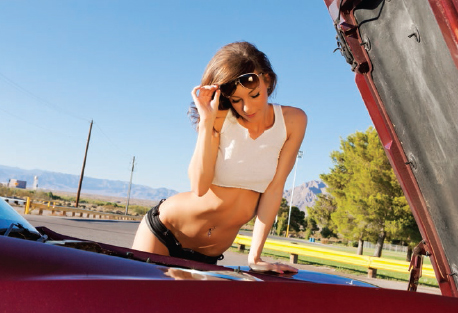
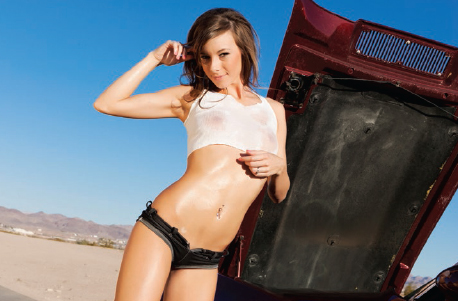
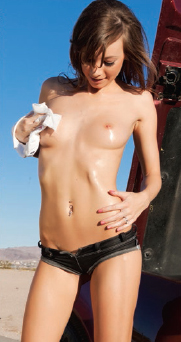
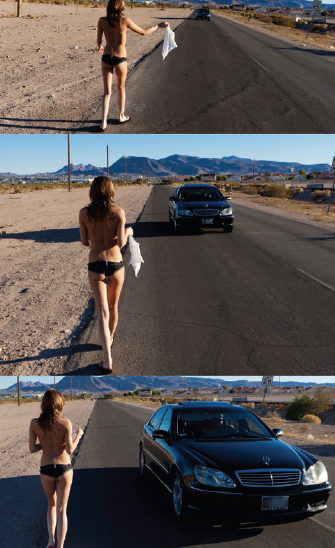
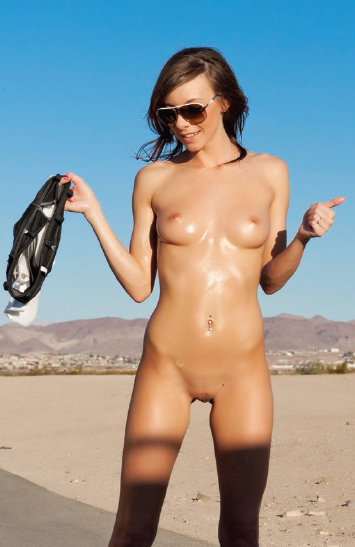
Telling a Story with Natural Light
All of the images in this story-telling sequence were created using only natural light and a reflector. For more details on this shoot, flip ahead to chapter 9 and read the “Gonzo Shooting” section.


Window light is great because you have all the benefits of working with sunlight, plus the control and comfort of shooting inside. Simply have a model stand or sit by a window and you will get some really amazing images. These images often convey a very romantic and soft feeling. It’s one of the cheapest and greatest light sources you can use for photographing female nudes.
Simply have a model stand or sit by a window and you will get some really amazing images.
Light Intensity. While window light is natural light, its intensity will be much different than direct sunlight, so you should expect to use longer exposures and to meter frequently. Because the light’s intensity drops off rapidly, even small distance changes between the model and the window can make a big difference in the exposure level and overall contrast in the image. For the brightest, most even lighting, place the model as close as you can to the window.
Size of the Window. Large windows or glass doors can be used successfully to capture full-body shots of a model. Smaller windows can be used as a hair lights or sidelights, adding highlights to your image.
Backlighting a subject, limiting the light on the front of her body, will make the model seem like a shadow. Because she is underexposed, you can’t see her face—only the shape of her body. Many of my models love this type of lighting and it is very easy to do.
Shooting directly into a window produces a pleasing flare effect.
I love the soft, romantic look that can be achieved with window lighting.
The direction the window faces isn’t as important as the time of day you are planning to shoot . . .
Direction of the Window. Painters and photographers often praise north-facing windows for their soft, even lighting, but the direction the window faces isn’t as important as the time of day you are planning to shoot and how you plan to use the light. Some testing will let you know what to expect. For example, I have a glass door that gets direct sun from about 4PM to 7PM. I have shot at least thirty different models in that location, so I know how all different types and styles of models will look in that location and at that time of day. Test the window light. How does a light-skinned model look? How does a dark-skinned model look? How does a blond look? How about a brunette?
Test the window light. How does a light-skinned model look? How does a dark-skinned model look?
Placement of the Model. The position of the model relative to the window will control the direction from which the light falls on her. One option to consider is backlighting. Shooting directly into a brightly lit window will create a nice flare effect. Not only does it hide the identity of the model, it also adds a bit of romance and style to the image.
Window Coverings/Glass. The light from bare or open windows, with no blinds or no shades, is often too hard for glamour photography. However, it can be great for fine-art nude images where you want a strong lighting effect. You can also add a reflector (as covered later in this chapter) to capture some really nice bodyscapes.
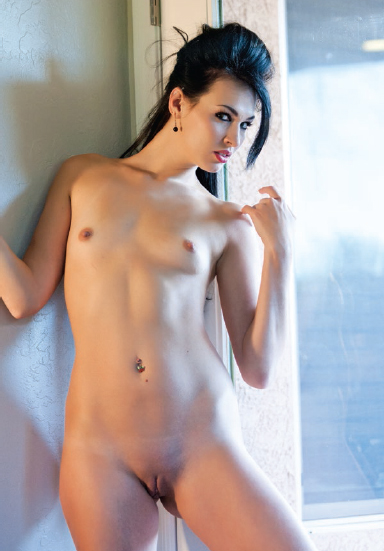
Large windows or glass doors can illuminate the length of the model’s body.
Collapsible reflectors are inexpensive and easy to store.
I love windows with blinds because they cast nice shadows on the body and give depth to the image. If your window has blinds, use them to your advantage. Figure out what time of day the sun directly hits that window and then do some test shooting.
A clean window is not always a good window. If you want more diffused light that wraps around the model, leave the glass dirty. The dirt will scatter the light, making it much softer. If you are shooting into the window, however, it really should be super clean. Wash it the morning of the shoot if you can.
When working with direct sunlight, adding a little smoke in the room (simply lighting a cigarette will do the trick) creates a gossamer look, giving some depth and suspense to the image.
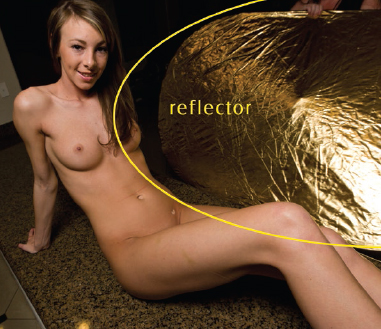
When using natural light—especially during the middle of the day or when sun is high in the sky—it is often necessary to reduce the contrast of the images you are creating. If you don’t, you will have highlights that are too bright and shadows that are too dark.
One of the cheapest and easiest ways to fix this is by using a reflector. A reflector is a device that you add to a setup to bounce light onto the subject. On Amazon, you can purchase large photographic reflectors for less than $50. These collapsible models are particularly easy to pack and carry. You may even find an existing reflector in your environment; a bright white building can act as a reflector, as can white sand, or even buildings that have reflective windows on them. (For another budget-friendly option, see chapter 12.)
A reflector is a device that you add to a setup to bounce light onto the subject.
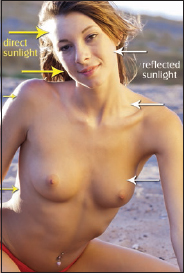
Direct sunlight was paired with reflected light to illuminate the model evenly.
Surface. Reflectors come in several different colors, with white, gold, and silver being the most popular. White reflectors are used to create a soft, diffused, and gentle look in the shadows. Silver reflectors provide more bounce light than white ones, but the light is also more focused and harder. A silver reflector will also produce a cooler color on the model’s skin. Like silver reflectors, gold reflectors provide more bounce light than white—but they also add a warm coloration that makes the model’s skin look more tan.
White reflectors are used to create a soft, diffused, and gentle look in the shadows.
Placement. To add light to the shadow areas (reducing the overall contrast), place the reflector in direct sunlight and near where the shadow of the model falls. As you move it closer to the model, you’ll see the level of fill light increase (making the shadows less dark); if you take a few steps back with the reflector, you’ll see the level of fill light decrease (making the shadows darker). What level of fill you choose to use depends on the look you want to create.
What level of fill you choose to use depends on the look you want to create.
The one problem with most reflectors is that you need someone to hold them if you are shooting on location. While you can use a stand to hold them when shooting indoors, there is generally too much wind outdoors to mount the reflector on a small stand. I generally recruit my wife, makeup artist, escort, or any other able-bodied person I can find to hold the reflector in position.
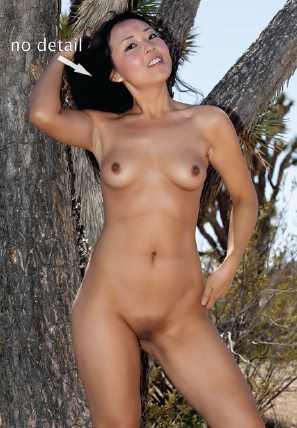
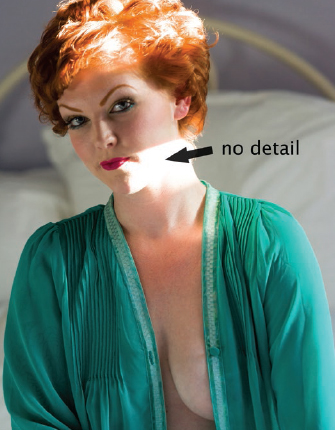
When the light produces too much contrast, there are two common problems to worry about. If the highlights (the brightest parts of the subject) record as white without detail, the image will look “blown out.” Conversely, it’s a problem if the shadow areas of the subject record as black with no detail. This frequently happens with brunette models, whose hair is brown but records as black in the image. Adding fill light or diffusing the light with a scrim (as covered in later in this chapter) can help to remedy these issues.
Using a single light makes for a quick setup. By adding reflectors, you can easily refine the lighting to capture great bodyscapes and fine-art images. Anyone can create images like this. One model, one light, one reflector—great shoot! I photographed these images at my home on my breakfast bar using one light. Refer back to the image on page 49 to see where I placed the reflector.
A scrim is a piece of translucent fabric (usually on a frame) that is placed between the light and the subject. As it passes through the fabric, the light becomes softer. This reduces the exposure ratio between the highlights and shadows, producing a more balanced image. It also causes the light to wrap around the subject more, which gives your images a better sense of depth. As you can see in the accompanying images, positioning a scrim between the model and a too-harsh light source greatly improves the look of the lighting—and it is just as simple and cost-effective as adding a reflector.
This reduces the exposure ratio between the highlights and shadows, producing a more balanced image.
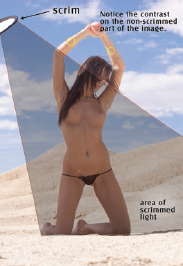
Adding a scrim transforms hard, direct sunlight into softer, more flattering light.
This image was created with a mix of strobe and natural light.
Most point-and-shoot cameras (and some DSLRs) have a built-in flash. These flashes aren’t super powerful—but they are not meant to be. They are meant to add fill light, not to light the room. If used correctly, these flashes are great. They work, they don’t require additional batteries, and you don’t have to invest any extra money. Plus, the flash is attached to the camera, so there’s nothing extra to carry (or forget to pack).
But what do I mean by “correct use”? When and why should you use built-in flash (or even a small external flash) in photography? That is really the million-dollar question. I often see photographers using flashes instead of studio strobes to save money. Sometimes it works, but more often it produces more problems than it solves. Flashes have a purpose and studio strobes have a purpose (more on strobes in the next section); sometimes they overlap and other times they don’t. That is why it’s important to select the correct tool from the start.
In the majority of my nude photography, I avoid using small flash units. However, when I’m shooting outdoors (or in places where I don’t have access to power), these sources can provide good fill on a subject with strong backlighting or side lighting. However, I know the limitations—especially in terms of working distance—and I plan my composition so the flash works perfectly.
I am a big fan of studio strobes. However, many photographers struggle with them. After learning to use natural light, I think learning to use strobes is the second most important thing you can learn do as a photographer. Let’s start our look at studio strobes by covering the gear itself.
Brands. There are countless brand choices in the studio strobe market, but the big decision boils down to this: should you invest in a budget-friendly system (like those from AlienBees) or go all-out on a higher-end system from another company? You will see thousands of great images shot with lower-end lights—and just as many shot with their more expensive counterparts. In my experience, strobes from the lower end of the price spectrum will work well on 80 percent of the jobs you’ll encounter. Personally, I upgraded to a higher-end system because I wanted that extra 20 percent.
That said, an inexpensive strobe is better than no strobe. Additionally, if you blow your lighting budget on the strobes themselves, you won’t be able to invest in good light modifiers. These devices help you change the light’s quality and spread, so they’re extremely important tools for taking control of your lighting. We’ll look at them in more detail later in this chapter.
If you blow your lighting budget on the strobes themselves, you won’t be able to invest in good light modifiers.
Types of Strobe Systems. There are two main classes of studio strobes, and each has advantages and disadvantages.
Monolights are the most popular type of studio strobes for both semiprofessional and professional photographers. These are basically complete lighting units all in one package. Each light has its own power source and controls.
The other option is to use a power-pack system. With this type of system, the individual heads (lights) are each connected to a centralized device that powers and controls them. Each power pack can support two to eight heads. The advantage to this is that, because they contain fewer electronic components, the individual heads for these systems are less expensive. While these systems used to be the standard for studio photography, today they are slowly dying out and being replaced with monolight systems. There is one exception, though: when a battery-powered lighting system is required, power-pack systems are still the standard.
A monolight strobe and strip softbox were used to create this image.
Lights require power, so if you are someplace without electrical outlets and have only monolights, you’re out of luck. Happily, over the last five to ten years there have been many advances in battery-powered strobe systems, which consist of a battery/power pack and one or more heads (usually purchased in a combo deal). These are great when you need power in a remote location and don’t have access to electricity. With these systems, you can light a model and create professional-looking images in the middle of nowhere. The main problem is that they don’t have a lot of power. The majority of these packs will give you around two-hundred shots (at full power). If you are going to be out shooting all day in multiple locations, that is not a lot of images.

The high power output of strobes makes them the system of choice for studio situations.
You’re Committing to a System. With studio strobes, you are buying into a system. People understand this with cameras (if I buy a Canon camera I need to buy a Canon lens, or at least a Canon-compatible lens), but they often overlook that the same is true with strobe lighting. Years ago, when I started starting shooting more indoors, I looked at all the different types of lighting. White Lightning products were what I could afford, so I bought one light and a simple diffusion panel, and it worked. Over time, I purchased more lighting equipment (softboxes, reflectors, additional lights, etc.) all of which coordinated with my system.
When my needs outpaced that first system, I purchased Elinchrom lights. Sadly, most of the light modifiers I owned didn’t work on the new equipment. In fact, the only thing that did work was the diffusion panel, which is just placed in front of the light, rather than being attached to it. Therefore, upgrading required a substantial investment beyond the lights themselves.
Owning that first system was useful in my learning process, but it was also a costly learning experience. If I’d known then what I know now, I would have done it differently. I would have started looking for a used light to buy, but one within the system I eventually want to use. For example, if I wanted to buy into Broncolor lights, instead of looking for brand new, super-expensive lights, I would start looking at lights that were a bit older, cheaper, and maybe not as powerful. Then I would buy into the system and upgrade as needed. This approach will save money over the long run.
Studio lighting offers you a refined level of control to make your image concepts come to life.
Understanding what your lights can do will help you make the most of them in any situation.
Comparing Systems. One of the challenges with shopping for studio strobes is finding a good way to compare them. The rating term you will see most often is watt seconds (Ws), as a measure of the strobe’s power output. Strobe A is listed as 1200Ws, while strobe D is rated at 600Ws, for example. Unfortunately, the watt second is a poor way to compare lights because it has very little to do with the amount of light on a subject. One of the major problems is that some companies will list the strobe as 800Ws—but if you read the fine print, that turns out to be only the effective power. The actual power might be more like 320Ws. So when a light is listed as 600Ws, who knows what that really means? It could easily be more powerful than another light listed at 800Ws.
One of the challenges with shopping for studio strobes is finding a good way to compare them.
The best way to measure the output of a strobe is by the guide number (GN). This tells you the value of the light (in f-stops) at a certain distance and ISO setting—a more “real life” understanding of a light’s power. While this number is often hard to find in manufacturer’s marketing materials, it can be calculated using a simple equation: GN = distance X f-stop. Using the specifications from an online shopping site, I did just that for a range of studio strobes that were all listed as 300Ws lights. These calculations revealed GNs ranging from 197 down to 165—and, again, that’s for lights listed with identical watt-second ratings.
What does this mean in practice? Well, if I buy a strobe with a GN of 165, and I have a model 10 feet away, I should be able to shoot full power at f/16.5 (165 ÷ 10 feet = f/16.5). Now, f/16 is a lot of light—but adding a softbox reduces the power by a stop (or more). So now you are down to f/11. You may want to move the light back some, and you’ll likely turn the power down a bit (shooting at full power means long recycle times). At this point, you are going to be shooting around f/2.8 to f/4. Maybe that’s just fine . . . but if you’d started with a “300Ws” strobe that actually had a GN of 197 (rather than 165), you’d have more options at this point—if you wanted to stop down a bit, or move the light back, or add a second baffle on your softbox, that extra output could make all the difference.
Strobes have been the workhorses of professional photographers for years. Even ten years ago, most professional photographers used only strobe lighting. Today, however, we’re in the midst of a paradigm shift, where some of the more progressive photographers are using continuous lighting.
Continuous lighting refers to any type of light source that emits a constant beam of light (it doesn’t pop or flash like a strobe). There are so many different types of continuous light sources—LED, compact florescent, HMI, tungsten, incandescent—that I would suggest you do some research into what will work best for you before investing in anything.
I shot this image using two Kino Flo (four-bank) continuous light kits. 
![]() second, f/4.5, ISO 800, 16–35mm lens at 27mm.
second, f/4.5, ISO 800, 16–35mm lens at 27mm.
A big advantage of shooting with continuous light is that you see what you are capturing before you shoot. Studio strobes have modeling lights that simulate how the strobe light will look, but they’re not perfect. With continuous light, you know exactly what you’re getting because you see it on the subject.
Do some research into what will work best for you before investing in anything.
The second huge advantage of continuous light—and this is what is really spurring the change—is that it can be used to create video. In the past, photographers took pictures and videographers took videos. With all the advances in camera technology, many photographers are now doing double-duty as videographers. And when you shoot video, strobes simply don’t work; for continuous video footage, you need continuous lighting sources.
Light modifiers (used to soften, focus, direct, or restrict the light) are the key to controlling the light from your strobes and creating the looks you have envisioned for your models. Learning to use light modifiers will help establish your style, defining what makes you different from all of the other photographers.
Standard Reflectors. Reflectors, sometimes called “pans,” are the shiny, bowl-shaped, silver devices that usually come standard with your strobes. Reflectors can be used to create a hard shadow or they can be used to create a narrow beam of light.
Grids. Adding a grid to the standard reflector allows you to narrow (focus) the beam of light, constraining it from spreading out at the edges. Grids act much like snoots (see below) but are still a bit less focused than a snoot. I love using grids, and I don’t see a lot of people using them on reflectors for some reason.
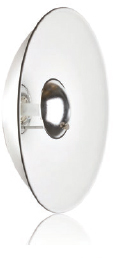
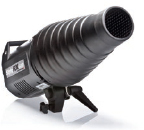
Beauty dish (top) and snoot (bottom) from Elinchrom. Images courtesy of Elinchrom.
Snoots. Snoots take the light from a strobe and push it though a long tube, tightly focusing the light—much like a cheerleader uses a megaphone to direct her voice.
Beauty Dishes. A beauty dish is essentially a modified version of the standard reflector. It is larger in size and features a central reflector that pushes the direct light from the strobe out onto the concave surface of the dish. From that surface, it is reflected onto the subject. This produces light with a directional look, but without the harsh shadows seen with reflectors and grids.
Umbrellas. Umbrellas were one of the first types of light modifiers I learned to use, and I have a love/hate relationship with them. I love the fact that umbrellas are lightweight, quick to set up, and provide a soft look. However, I don’t like that they throw light everywhere (and are often overused by new photographers).
Softboxes. Softboxes are the most common modifiers used in modern photographic lighting. They come in a vast assortment of sizes and shapes, but generally consist of a fabric box that is black on the exterior (to prevent unwanted light spill) with a translucent panel on the front. As it passes through this front panel, the light from the strobe is diffused for a soft look. Some softboxes have internal diffusion material, grids, or other specialized features to further adjust the quality of the light.
When working with light modifiers, it is sometimes hard to envision how the light will hit the model. So, let’s use water as an example. A standard reflector on a strobe is akin to a garden hose with no attachment—the water is focused but not overly focused. Adding a grid to that reflector is like placing your thumb over the end of the hose; the stream becomes somewhat more focused. If you add a jet water attachment to it, you’ll get a very focused stream—pretty much like adding a snoot to your strobe. Working with a beauty dish is more like the shower setting on the garden hose, giving you a gently diffused spray of water. With an umbrella, the effect is similar to rain; water goes everywhere. There is some direction, but not as much as with any of the modifiers noted above. Finally, a softbox is closer to a bucket of water being thrown on the model; the light hits the subject (and the background) in a way that is often more closely targeted than with an umbrella.
When we looked at guide numbers (GNs) for strobes, we touched on the fact that the distance of the light to subject has an effect on the intensity of the light on them. However, the distance of the light to the subject will also change how your light modifiers work. A reflector placed a few inches away from a model will create a very focused light that only covers a small part of her body. If you move the same reflector back 10 feet, the light will cover her whole body.
Manufacturer’s Modifiers vs. Third-Party Modifiers
For most systems, you have the option to purchase light modifiers made by the strobe’s manufacturer or those offered by a third party. Generally, but not always, the manufacturer’s equipment will work better because it has been designed, tested, and built to work specifically with that brand of strobe. One advantage, however, of using third-party modifiers is you can switch from one brand of strobe to another and not have to re-buy the whole device; you can just change adapters to use them on your new lights. Additionally, third-party modifiers tend to be less expensive. One of the best ways to tell if something is going to work the way you want it to is to do some research. Talk to working professionals who are using the product you’re interested in buying, or read reviews of the product on Amazon to see if you can find real-life examples of other photographers’ experiences using the product you are considering.
One of the most important things to do when you begin working with light is to start with something simple. Grab one light and a reflector, take a white-balance shot, then shoot twenty frames. How do they look? Add a reflector, take another white-balance shot, and shoot another twenty frames. How did this change things?
Now, point your light at the wall and bounce it onto the subject. Experiment with moving the model closer to the wall and then further away from the wall. Notice the difference? How does the light wrap around the model?
Now, point your light at the wall and bounce it onto the subject.
Once you really master lighting and can control how the light is hitting the model, then you should add another light—but take baby steps. You should be able to produce attractive bodyscapes and some good-looking glamour/fine-art images with just one light and a reflector.
A grid focused the light, creating a natural vignette effect and hard shadows.
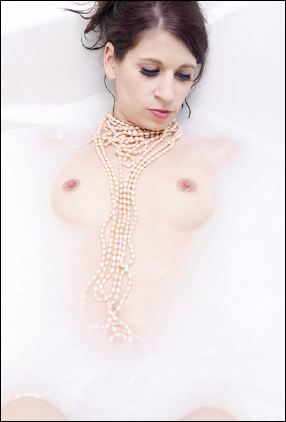
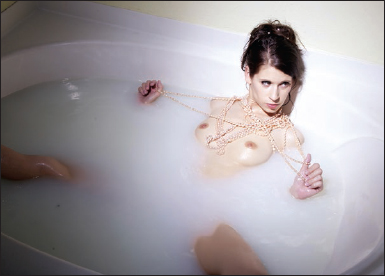
With bounce light, there are no shadows. The lighting is so soft that it’s hard to see where the water meets the model’s body.
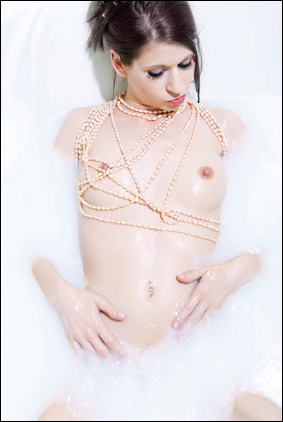
With a softbox, the shadows are softer than with the grid, but still well-defined. There is a clean line where the water touches the model.