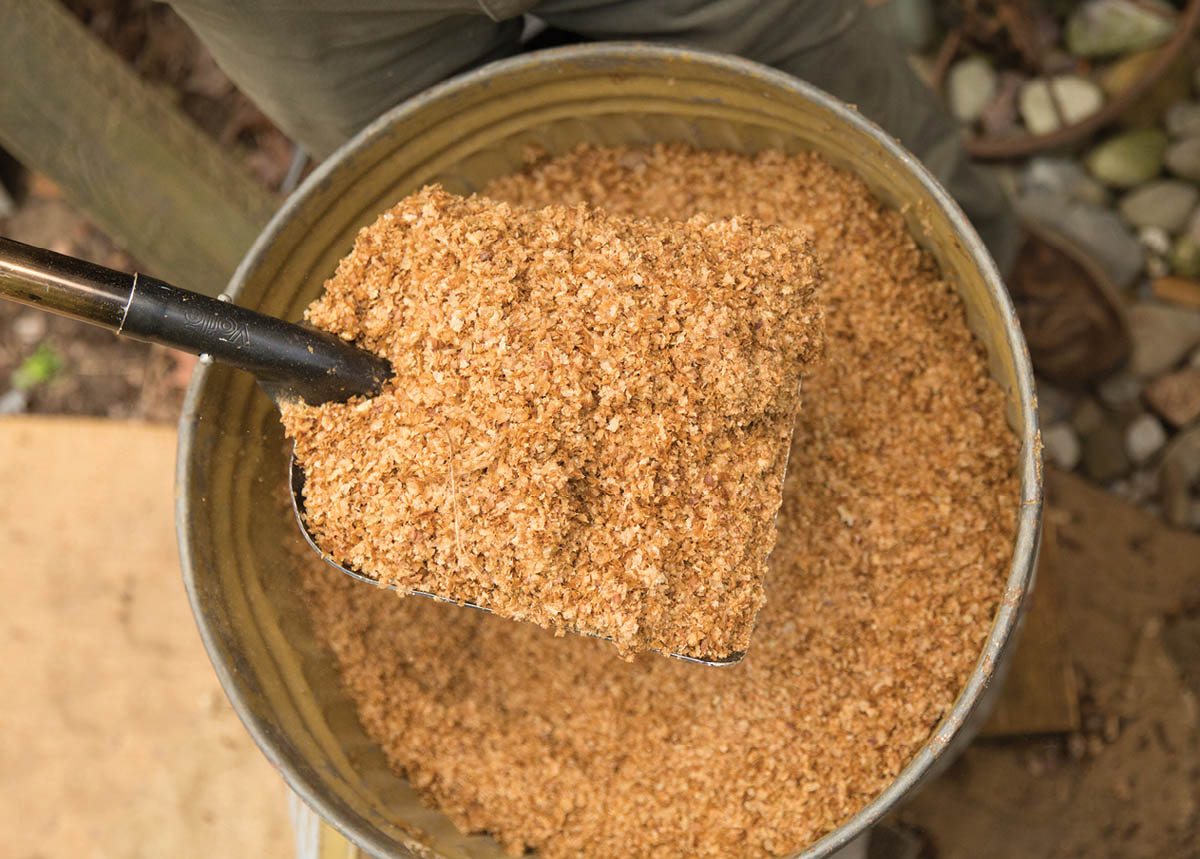
Coffee chaff
We’ve talked about putting good things in the coop; now we must talk about getting not-so-good things out of the coop. This is where some people drop out of backyard chicken-keeping because conventional practices take too much time or are too messy.
But if you use the ideas described here, with no wheelbarrow to push, no trays to carry, no poop congealing on a wire floor, your coop will be clean, your hens happy, and you’ll find plenty of time for enjoying cocktails and watching Hen-TV.
This may come as a surprise to you, but chickens are busy pooping 24/7. Yes, even in their sleep. Since they spend 8 out of 24 hours sleeping, about a third of their poop will show up in the coop, mostly right beneath their roosts.
That poop gives off moisture and ammonia. A modest amount of either is not a problem in the coop, especially if it is well ventilated; however, if either builds up, then your chickens may suffer respiratory illnesses that are hard to treat. For the health of your birds, you’ll want to get the droppings out of there on a regular basis. But that “regular basis” doesn’t have to be so often that it becomes a tiresome chore.
We rely on four components to manage the waste and the smell:
For the health of your birds, you’ll want to get the droppings out of there on a regular basis. But that “regular basis” doesn’t have to be so often that it becomes a tiresome chore.
There are several choices for bedding, but they are not all created equal:
Coffee chaff
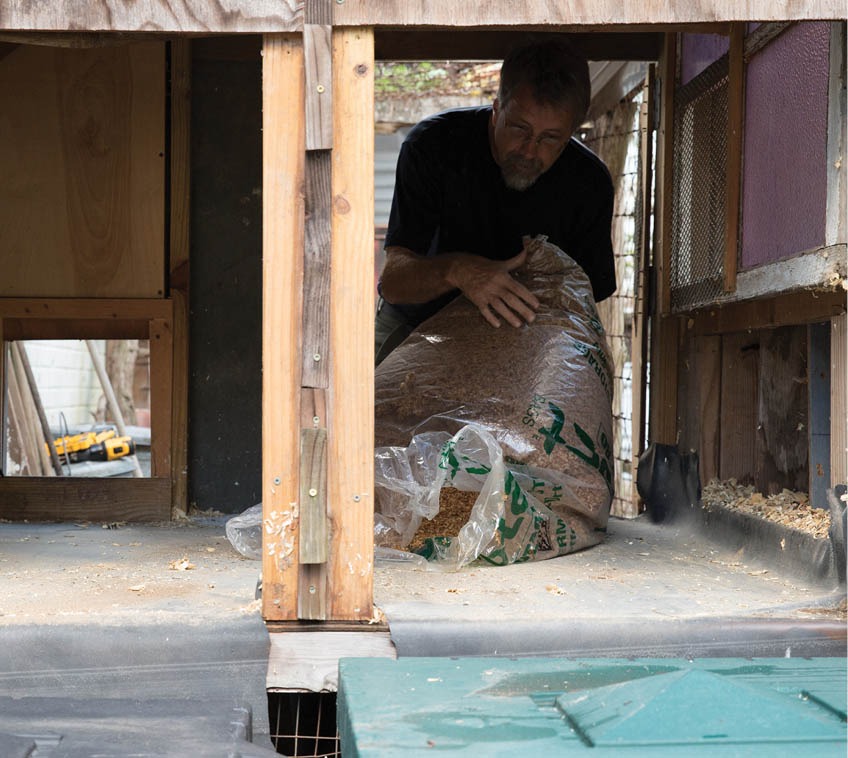
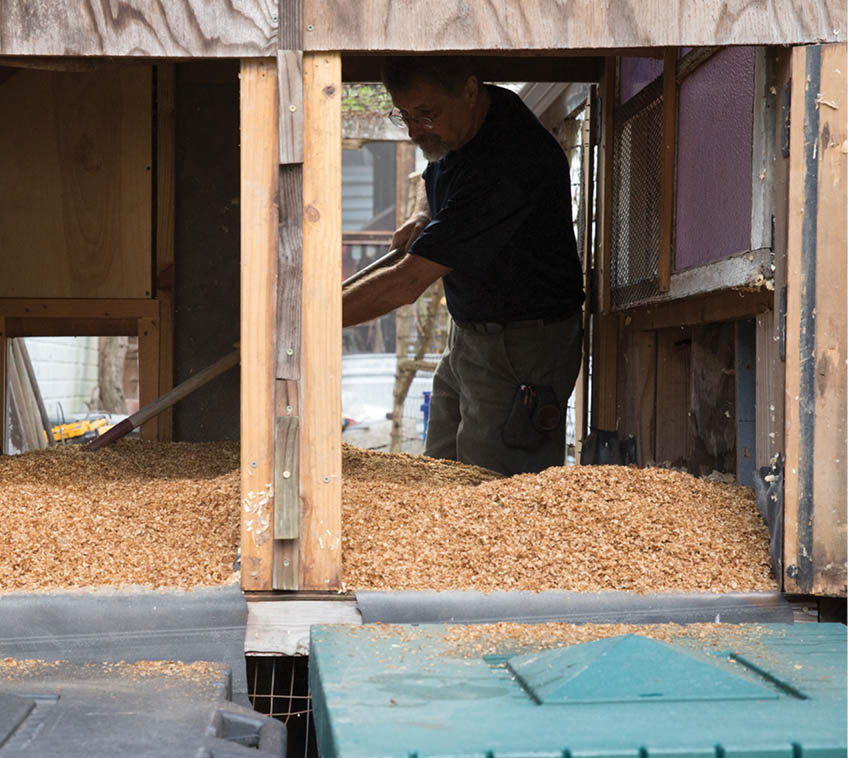
Whatever bedding material you choose, a 4" layer should be enough to manage moisture in most coops.
So how often do you have to clean this stuff out? With seven hens, we scoop the poop from our coop maybe twice a year. Usually that’s at the beginning of summer and the end of summer when we start to smell the ammonia. (Some people reduce the smell of ammonia by scattering charcoal in the coop, but I haven’t tried that yet, so can’t speak to it.) Every other year we completely clean out everything and add all-new bedding. A bale of pine shavings lasts a while that way. With more hens, you may need to clean things out more often.
Some folks fastidiously replace all the bedding frequently, but I think this is akin to dumping your cat’s litter box rather than just scooping the poop. Even the most fastidious cat owners I know simply rake out the cat poop periodically and leave the litter in place until it can no longer absorb moisture. This is a good approach for chicken-coop bedding management, too. In any event, the ammonia smell and damp air will take a long time to build up if you have good ventilation.
Some folks recommend something called deep-layered bedding. The idea is to complicate the construction of the coop by allowing a 12" layer of bedding on the floor. Then you throw some chicken feed in the bedding to encourage the birds to scratch around. This distributes the poop in the bedding and supposedly encourages the poop and bedding to compost. Color me dubious as to whether this is worth the additional effort and cost.
First, poop doesn’t naturally compost inside the coop; rather, it dries out. To get poop to compost inside the coop, you’ll have to add a measured amount of water. Too much, and the inside will get damp and moldy; not enough, and the poop won’t compost. In fact, I don’t recommend putting water in the coop.
Second, composting requires above-freezing temperatures. A compost bin benefits from the fact that the ground in winter is often warmer than the air. The compost bin will be much warmer than the bedding on the raised floor of a coop in the depths of winter: warm air rises and escapes a ventilated coop, and the cold air under a coop will extract any remaining warmth through the floor.
Using a deep litter method just allows you to put off cleaning the coop for a longer period by using a lot of pine shavings. Foot-deep bedding for a 32-square-foot coop (for 10 chickens) would require a small pickup-truck load of pine shavings.
My advice to all chicken-keepers is to keep the coop simple and the bedding about 4" deep, and to place the poop in a compost bin more than once a year.
My advice to all chicken-keepers is to keep the coop simple and the bedding about 4" deep.
I’d say the most conflicted bit of advice in the poultry literature is the recommendation to provide ventilation but not drafts. Most sources don’t explain the difference between the two things, much less how to have one without the other.
The difference hinges on the season. Good ventilation removes the ammonia smell and moist air from the coop year-round. In summer, drafts are a good thing: they remove hot air from the coop during the day and cool your hens’ bodies at night. In winter, drafts of cold air will try to suck the heat right out of your birds: they all will need to eat more food just to stay warm, and older birds might get sick and die.
Although that sounds dire, remember that chickens have a thick layer of feathers, and at about 106°F (41°C), their normal body temperature is higher than ours. They have been surviving harsh winters in unheated coops in northern climates in Europe and Asia for a couple of thousand years. Your hens will likely survive winter even in a badly designed, drafty coop. But if you can sustain enough ventilation to move ammonia gases and excess moisture out in winter, without letting cold air blow over your chickens, then even your oldest and weakest chickens should survive the cold season.
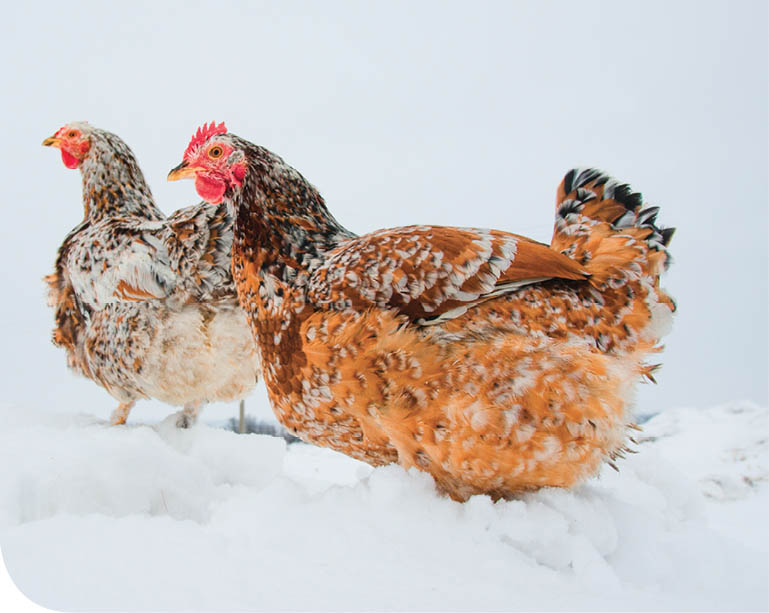
For millennia, domesticated chickens around the world have survived harsh winter weather without needing a heat source in their coops. After all, they have down jackets.
Here’s how it’s done. Think of your coop as having three levels or zones from bottom to top:
When you are constructing your coop, rather than covering the gables (the triangular spaces under both ends of the roof) with a solid siding like wood, I recommend just screening them with hardware cloth, regardless of climate. Predators will be locked out, and the constant cross-ventilation will draw out ammonia and moisture without creating cold drafts.
I also recommend filling the gaps between the roof rafters (where they rest on the walls) with chicken wire, which is more flexible than hardware cloth. This is best done before laying down the roof itself. Alternatively, use chicken wire to wrap the bottom ends of the rafters (where they protrude outside the walls). This can be done either before or after installing the roof. Cut the hardware cloth and chicken wire up to 1 inch wider than the openings they cover, and secure them with 3⁄4" fence staples.
To sum up: Ventilation at the bottom level? No. At the middle level? Maybe in summer, but not in winter. At the upper level? Yes, definitely, always.

Our hens roost on small tree branches set about 18" above the floor. Chickens are not egalitarian, but with everyone on the same level there’s less henpecking.
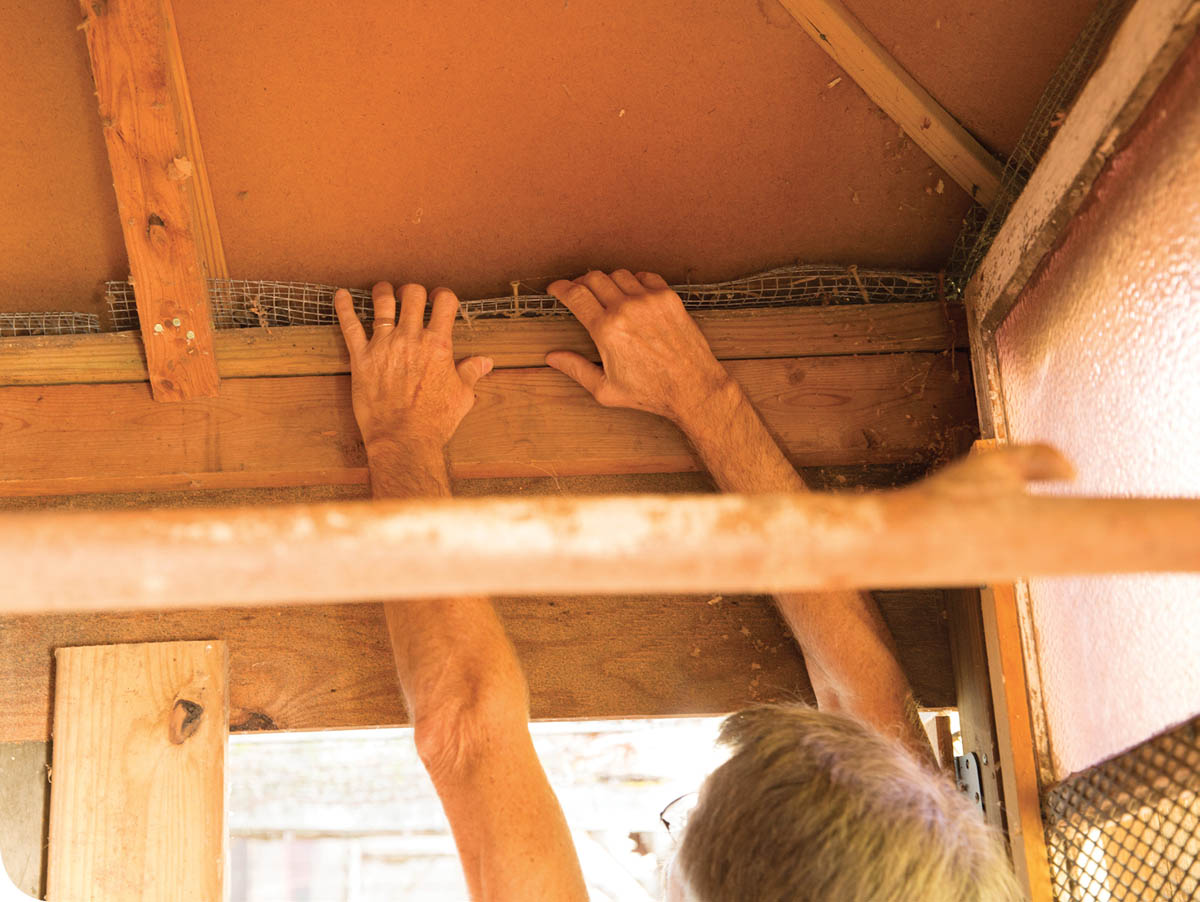
Cover any gaps between rafters, roof, and walls with small rolls of chicken wire. Hold the rolls in place with a couple of short screws. This allows hot, humid air to be vented out yet keeps critters from getting in.
Eventually you will have to clean the coop, so you’ll want floors and doors that make the process easy. For the floor, the goal is to have a layer that won’t let moisture soak into the wood. Wet wood can grow mold. You also want a surface that’s smooth enough to sweep out easily and waterproof enough to allow you to hose down the floor on the rare occasion a total cleanout is warranted.
For the floor, the goal is to have a layer that won’t let moisture soak into the wood.
Some sources recommend using hardware cloth as a floor, based on the mistaken idea that all the poop will just magically fall through to the ground, where it will decompose. But chicken droppings will just stick to the hardware cloth and clog it up, creating a stinky mess. Any poop that does fall to the ground will not decompose, since it’s too dry under the coop.
Other sources recommend installing a removable tray on the floor of the coop. That sounds like too much work to do and too many chances to decorate your clothes with last night’s poop.
I prefer the relatively painless process of installing a waterproof liner on the coop floor. The best choice is a pond liner, which usually costs about $1 per square foot at a retail store. You may get one cheaper from a landscaper or nursery that installs ponds; a pond builder may even give you some scraps for cheap or for free. (You can also use plastic tarps or a heavy-duty vinyl shower curtain, but they may not last as long.) It doesn’t matter what type of liner you use as long as it is waterproof.
To fasten the liner in place, spread a layer of exterior-grade adhesive on the coop floor and lay the liner on top. (Or cut the liner a bit oversize, bring the edges up the bottom of the walls, and staple it there.) Allow a “tongue” to extend out the cleanout door. When cleanout day arrives, the tongue can be positioned to bridge the gap between the doorway and the compost bins and function as a chute to channel the poop and spent bedding.
No cleaning hardware cloth, no lifting heavy trays, no wheelbarrow loading or unloading: the cleanout process is over before we know it.
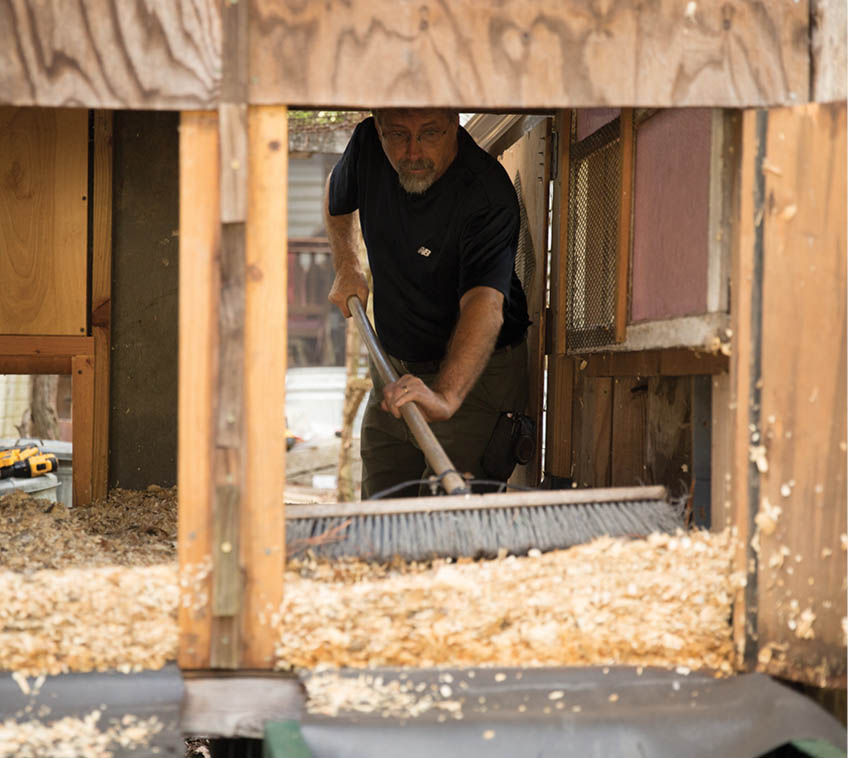
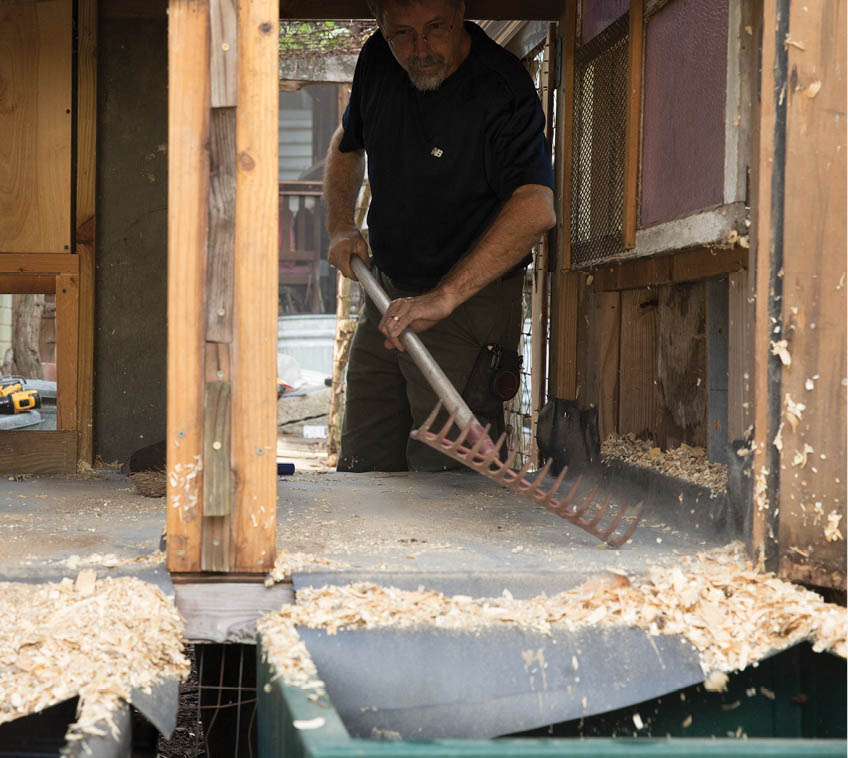
When Chris and I need just to quickly scoop out some piles of poop and spent bedding, we can open one or both cleanout doors and position the pond-liner chute. With a plastic scoop, small shovel, or gloves (all of which we store on hooks inside the coop), we can gather the goods and drop them straight into the compost bins positioned next to the cleanout doors, and top up the coop with some fresh bedding.
When we need to do a more thorough expulsion of all the bedding, we open the keeper-access door as well as the two cleanout doors. From the keeper-access door, it’s easy to use a push broom to expel everything out the cleanout doors, over the pond-liner chute, and into the compost bin. No cleaning hardware cloth, no lifting heavy trays, no wheelbarrow loading or unloading: the cleanout process is over before we know it.
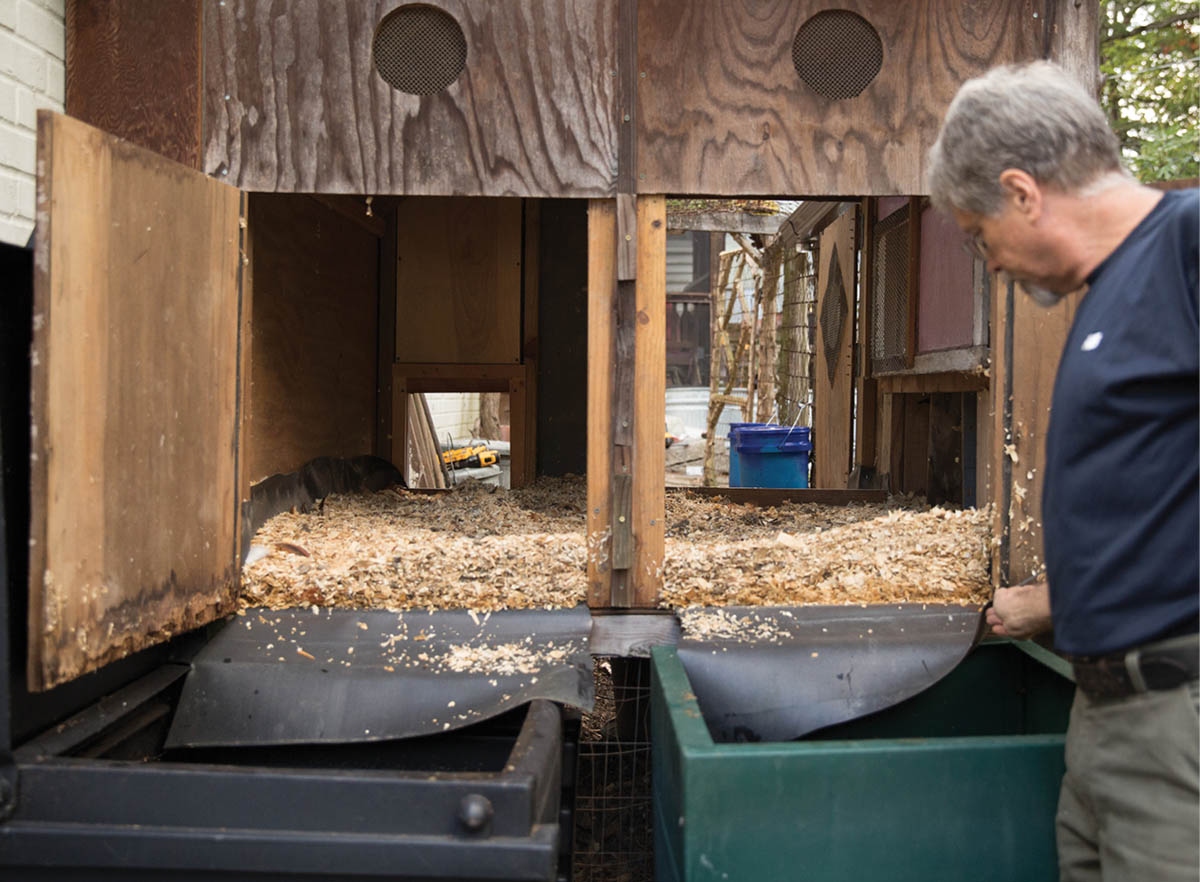
The matching coop cleanout doors are as wide as the wall. On the opposite wall, I have a keeper-access door (see chapter 5).
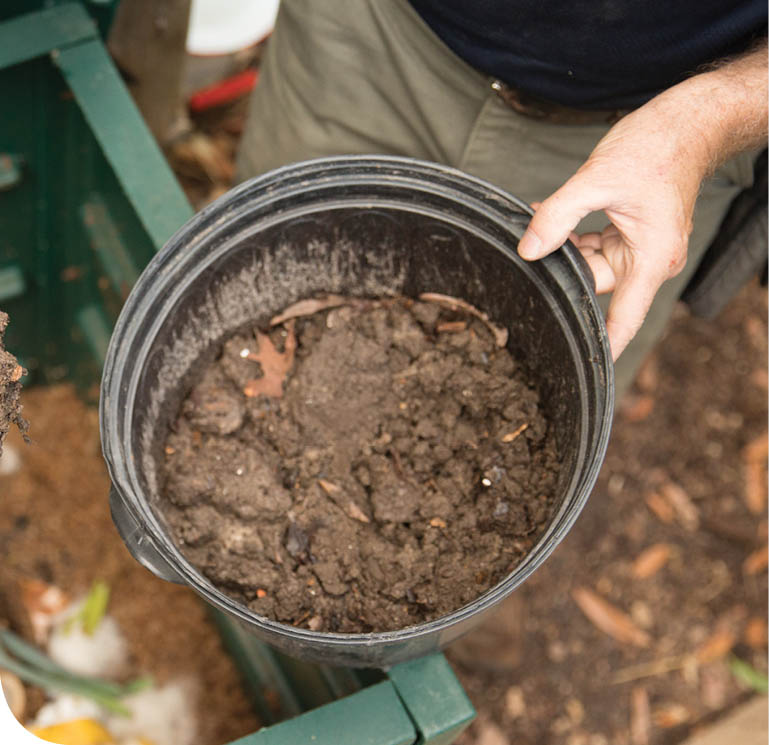
Having chickens means having plenty of chicken manure for composting, a handy thing if you’re a gardener as well as a chicken-keeper. You can forget, however, almost everything you’ve read or heard about composting. Much of the information out there is simply wrong or makes the process unnecessarily complicated. And almost none of the existing compost bins on the market are appropriate for backyard composting. If, like me, you want a compost system that (1) never needs turning, (2) never smells bad, (3) doesn’t spawn fleets of flies, (4) doesn’t attract vermin, and (5) delivers grade A compost for every spring and fall planting, then follow my Don’ts and Dos of Composting.
What if you don’t need compost in your own yard? Let a neighbor harvest it in exchange for edibles and/or flowers or some other barter. Even if you can’t make that kind of arrangement, composting will still reduce the volume of waste your coop produces as part of its natural process.
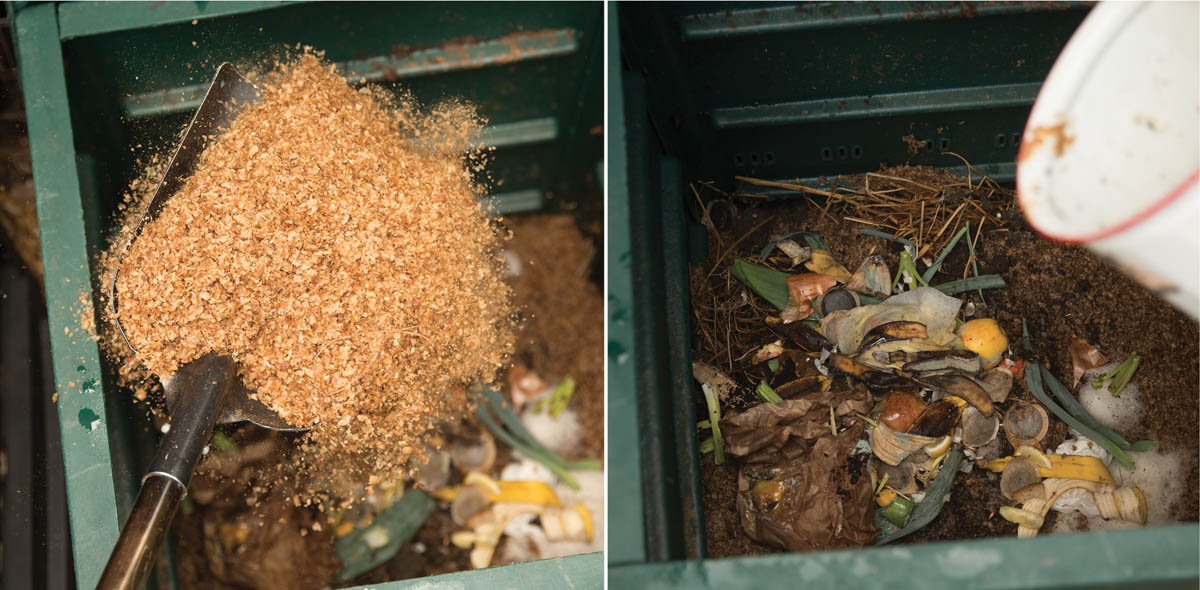
Save time and effort by putting a pair of compost bins next to the coop. Also store a large amount of “brown” material nearby and a small amount of garden soil that contains composting bacteria.
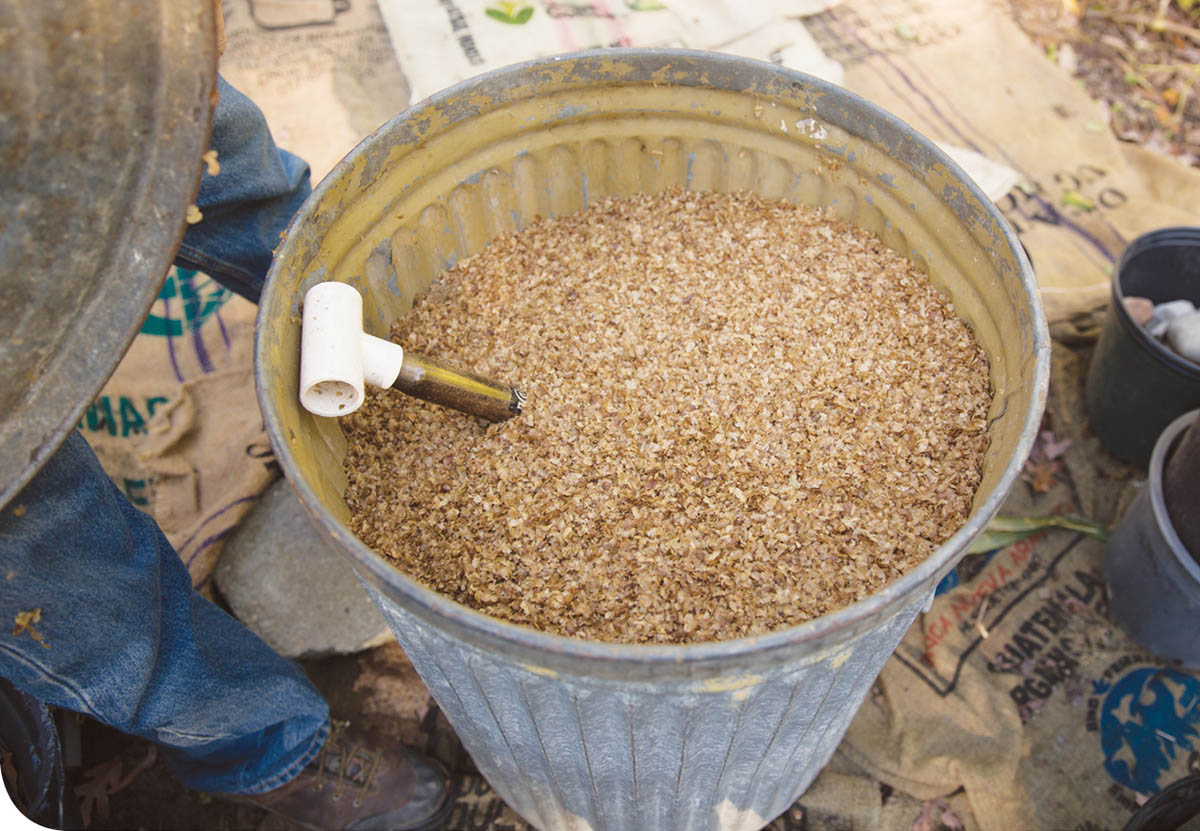
Keep chaff from getting wet by storing it in a water-proof container like a garbage can. Keep a shovel nearby for scooping a layer over the chicken poop or kitchen and garden scraps in the bins.