CHAPTER 3
Pierced Brooches Without Stones
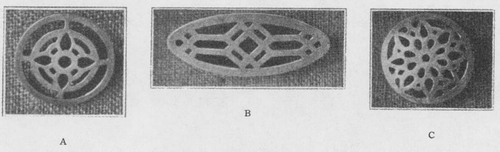
FIGURE 5. Problem 1
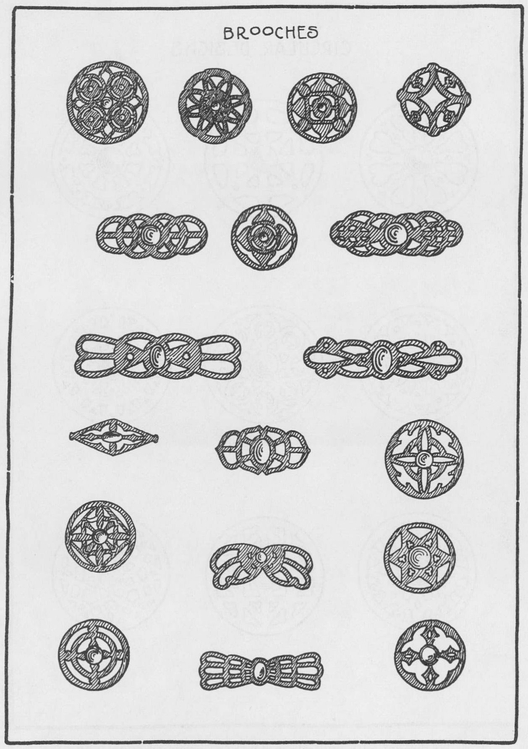
PROBLEM 1. For the first problem we will describe the making of a brooch or breast pin, fig. 5A, one that requires only the use of the saw and files, confining the process to piercing. For the first one we will select a design that does not have too many details. A good design may be ruined if poorly executed and, on the other hand, a poor design is not improved by good workmanship. The design is then of first importance. Page 14 gives a variety of suggestions and page 16 shows several that have been executed. The student, of course, will not copy any of the illustrations given, as the greatest benefit comes only when the idea is thought out from the beginning to the end. After several sketches have been made to choose from and, the one to be carried out has been decided upon, a drawing is made in pencil outline and then a tracing carefully made from the drawing. It is of the utmost importance that this tracing be accurately made, as the least deviation from the original drawing will change the original form and design as the problem is carried out. After the tracing is made we take a piece of twenty gauge silver a little larger than the design calls for. A drop of liquid glue is placed on the metal and, after diluting it by adding two or three drops of water, it is spread over the surface of the metal and made quite thin. The thinner the glue the greater the adhesion. The tracing is then placed on the silver and allowed to dry. Paste is not satisfactory. The tracing should not be pulled either one way or the other as it tends to stretch and distort the design.

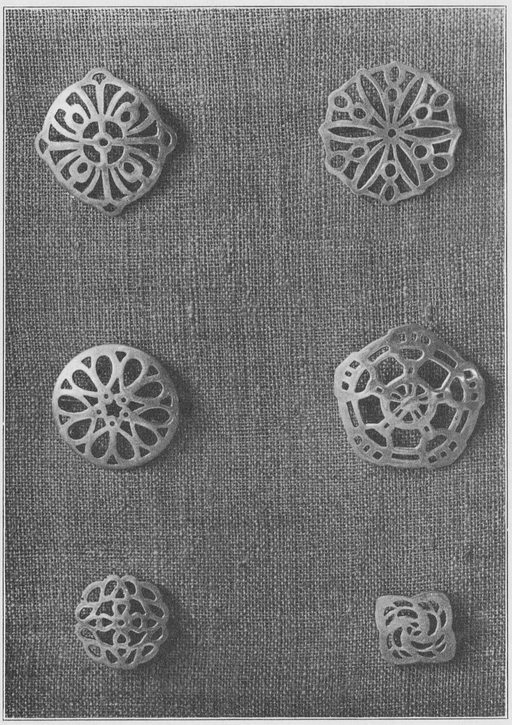
Perforated silver brooches with simple patterns
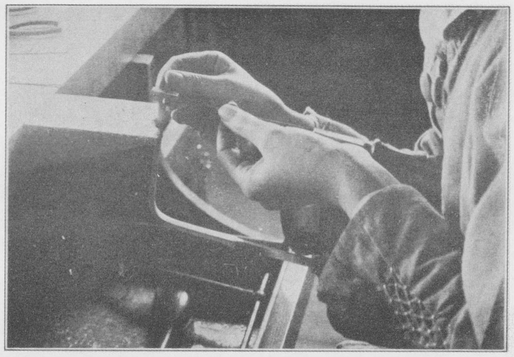
FIGURE 6. Position of saw frame while inserting the saw blade
After the tracing is dry, a center punch is used to make small depressions in each of the openings to be pierced as a start for the drill. A drill of the right size for the opening is then selected and placed in the chuck and the holes made to admit the saw. The saw frame is held as shown in fig. 6 and a No. 0 saw is fastened in the end of the frame nearest the handle so that the teeth of the saw are on the upper edge and point toward the handle of the frame. The saw is then allowed to pass through one of the holes in the piece of metal and the other end of the saw is securely fastened (fig. 7). The tracing should be kept on the top side of the metal. The saw is given an up and down motion cutting on the downward stroke (figs. 8, 9, 10). A little practice in the use of the saw in this way will soon enable the beginner to do creditable work. After learning to control the saw the lines in the design are followed as closely as possible, being very careful not to cut into the line. After all the interior openings have been sawed out, the outline of the brooch is followed in the same way. An assorted set of 5½″ needle files is now necessary to true up the rough edges left by the saw. The half-round file is useful although there are times when other shapes will be needed (fig. 11). When all of the details have been carefully trued up with the files, the tracing may be removed by soaking in water for a minute or two and, when this has been done, the sharp edges of the openings may be removed by holding the file at an angle and going over the edges rather lightly. A strip of very fine emery cloth No. 000 may be used to finish the piercings. A large flat file is used to true up the outline of the brooch if it is regular in outline as fig. 5A.
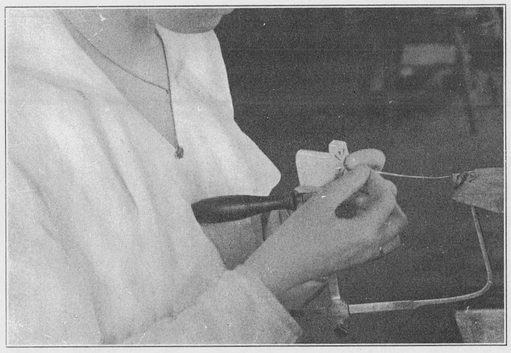
FIGURE 7. Blade of saw is passed through holes in metal and fastened to the frame next to the handle
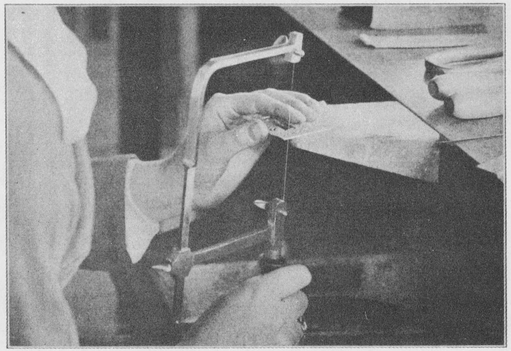
FIGURE 8. Correct position of frame for sawing
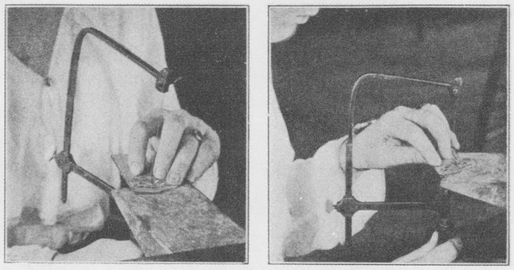
FIGURES 9 AND 10. Sawing with an up and down motion of the saw frame
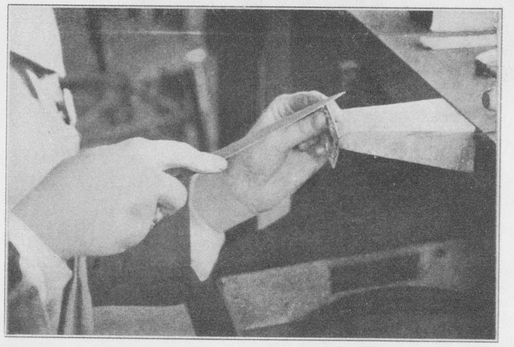
FIGURE 11. Truing up the edges of the work with a half-round file
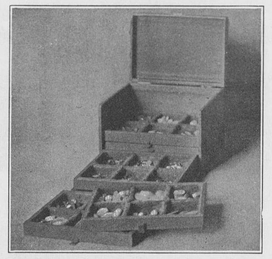
A convenient way to keep a collection of stones
Perforated designs for elliptical and circular brooches
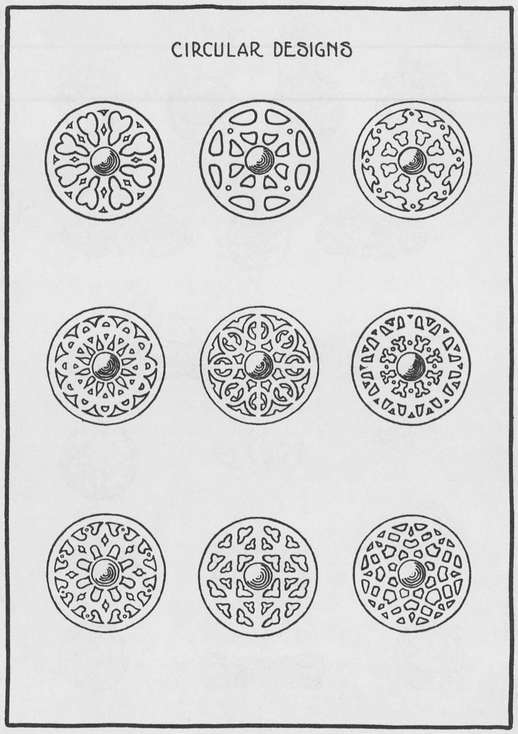
Circular designs with multiple perforations prove an opportunity for acquiring precision and accuracy. Suggestive designs for Problem 2