CHAPTER 4
Pierced Brooches With Stones
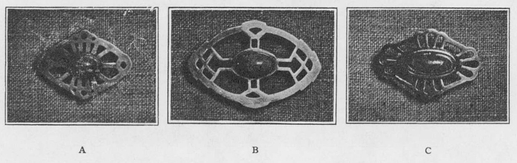
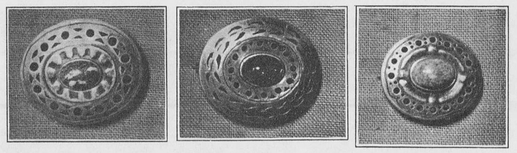
FIGURE 12. Silver pierced brooches showing variations between openings and metal
PROBLEM 2. We will leave problem 1 at this point and take up problem 2 which is to be a repetition of problem 1 except that it has a stone set in the center of the brooch (fig. 12) The piercing is done in the same way as in problem 1. When we have carried this to the point where we left problem 1 we next take up the making of a setting to hold the stone. This setting is called a bezel and is made of a strip of No. 24 or 26 gauge metal about one-eighth of an inch wide and long enough to go around the base of the stone. The ends are filed square and, with a pair of pliers, it is shaped around the base of the stone till the ends make a perfect union. The ends are then held in place by a piece of fine iron binding wire. The next step is to solder the ends together.
THE SOLDERING PROCESS
A borax slate, a piece of borum junk, a small soft hair brush and a piece of silver solder will be necessary to start (page 24, fig. 13) A little water is placed in the slate and the borum junk is ground in the water until it becomes milky. A fluid flux for hard soldering may be used in place of the borum junk if desired. The more care exercised in keeping borax and work clean, the more successful the results will be. Now take the bezel and with a small brush, coat the parts to be soldered, being careful to use no more borax than is necessary. Solder may be obtained in sheets any thickness, but No. 26 or 28 gauge is suitable for most purposes. It is cut in small pieces as shown in fig. 14.
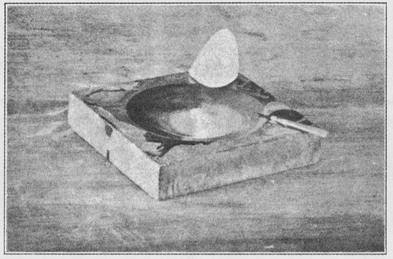
FIGURE 13. Borax slate, borum junk, and borax brush
First, scrape the sheet of solder with a scraper on both sides at the place about to be cut; second, make short parallel cuts evenly distant and about the same length. Now hold the solder between thumb and second finger with the first in front of cut edge of solder. Next, cut at right angles to set of cuts already made. This releases the solder and it will lay on the finger which keeps it from flying about. This is continued until the required amount of solder is cut.
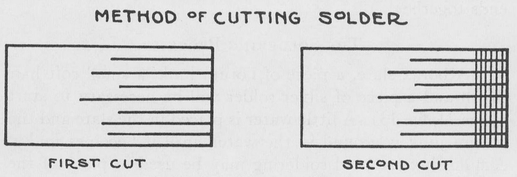
FIGURE 14. Method of cutting solder the easy way
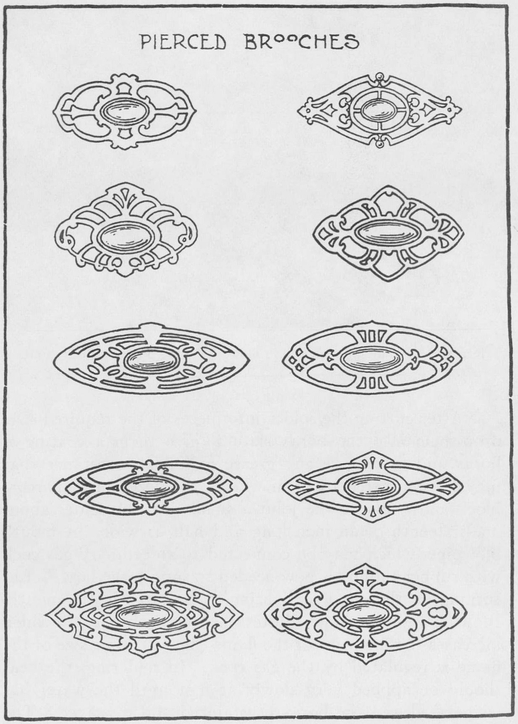
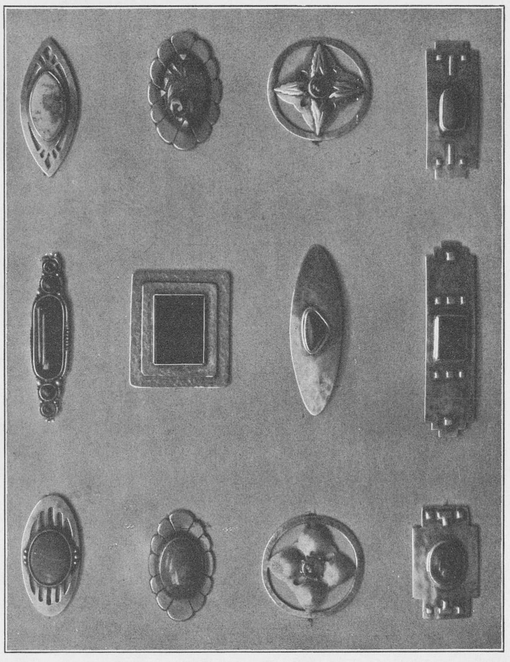
Designs for pierced elliptical brooches with stones, Problem 2
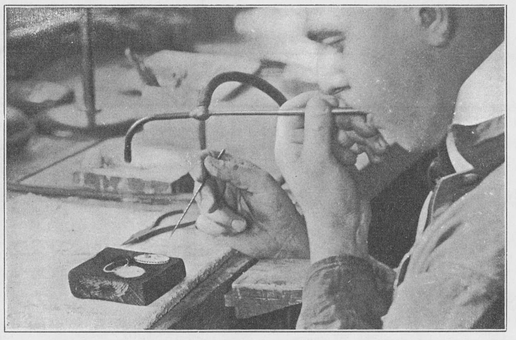
FIGURE 15. Soldering with mouth blowpipe, using poker to steady units
After cutting the solder into pieces of the required size, drop them into the borax slate to give them a coating of borax and to remove any grease or foreign substance that may have adhered to them. Place the bezel on a charcoal block and apply to the joint a small piece of solder about one-sixteenth of an inch long and half as wide. A mouth blowpipe, which may be connected to an ordinary gas cock with rubber tubing, is now needed to supply the heat—after turning on the gas and lighting, it is placed in the mouth. Blowing into the tube dilutes the gas with the air which increases the intensity of the flame (fig. 15) The size of the flame is regulated by the gas cock. In soldering, the heat should be applied very slowly at first until the water has evaporated and the borax crystallized and dissolved. The flame may then be applied more directly and the bezel brought to the soldering heat. If the heat is applied too quickly it will throw off the solder, and if heated hotter than necessary it is liable to melt or burn the parts being soldered, so the process demands very close attention from the start. Instead of using a mouth blowpipe, a foot bellows and blowtorch may be used. This type of equipment is satisfactory for the more advanced student. After allowing the bezel to cool, remove the wire. If the binding wire should become soldered to the silver, which often happens, it can easily be pulled off with a pair of pliers. Copper or brass wire will not do for binding purposes. The bezel is now pickled or cleaned.
THE PICKLING PROCESS
The solution called pickle is made of one part of sulphuric acid to eight parts of water. This solution may be used cold but is more effective if used hot. When used hot a copper pickle pan is necessary (fig. 16) The pickle is kept in a pickle pitcher (fig. 17) The object is placed in the pickle pan with enough pickle to cover it, then held over a gas burner and allowed to come to a boiling heat. The pickle is then poured back into the pickle pitcher and the object rinsed in clear water and dried in clean sawdust.
After pickling the bezel, the joint is filed inside and out to remove any surplus solder. It is then placed over an oval arbor and tapped lightly with a wooden, horn or rawhide mallet to make it perfectly oval. These types of mallets are used to prevent stretching. It may be that, when the stone is tried in the bezel, the bezel is a little small; if such is the case, it can be stretched by tapping it with a metal hammer while it is on the arbor. The bezel is now filed flat on one side only, using the 6″ flat file. This can be done by holding the file in the left hand, resting one end on the bench pin, and holding the bezel between the thumb and fingers of the right hand, rubbing it up and down the file. A burr will form on the edge of the bezel and should be removed either with a small file or a scraper.
FIGURE 17. Pitcher for keeping pickling solution
FIGURE 16. Copper pickle pan

We are now ready to solder the bezel to the brooch; but before soldering, to improve the appearance of the brooch, it may be modeled or domed a little. This can be done either on a block of lead about 2″ x 4″ x  ″ or on a sand pad (page 30, fig. 18) If the lead is used, a small depression is made first by using a punch that will give the desired result. A chasing hammer is used to strike the punch, but if a larger depression is wanted, the sand pad is used and a wooden mallet with a domed end.
Now place the bezel on the brooch exactly in the center and mark on the brooch close to the bezel with a scratch awl or a sharp-pointed tool. Next, with the scraper, scrape on the inside of this line, making a bright surface about  wide. Borax the edge of the bezel filed flat and the surface of the metal just scraped. Be sure the bezel is exactly centered and then bind the bezel to the brooch with wire. Place small pieces of solder on the inside of the bezel and, with the blowpipe, apply heat as before, although this time care must be exercised to heat the larger piece first. When the bottom piece has been heated, the flame is directed over the work till the solder outside of the bezel is brought to the fusing point. Again, care must be exercised not to concentrate the flameon the seam of the bezel; the work should be turned so that the seam is away from the direction in which the flame is applied. After the solder has fused and the joint nicely flushed, the flame is quickly removed; and, after it has cooled, the wire is taken off and the piece of work pickled to remove the borax.
Silver brooches and flat surfaces set with semiprecious stones

FIGURE 18. Lead block and sand pad for doming flat metal
We are now ready to apply the joint and catch at the back. Both problems, Nos. 1 and 2, may be prepared and soldered at the same time. The joint and catch may be made by hand or a commercial one may be used. As this part of the problem is not important we will use the commercial one. On close examination of these two pieces, it will be found that they have slight burrs along the edges that turn over; these must be filed off in order to leave a perfectly flat surface. Scrape the places on the brooch where these are to be soldered. The joint is always placed on the right while the catch is placed on the left with the opening facing down when worn. They should be placed as close to the edge as possible. If the brooch is very much domed, the joint must be modified slightly. This is done by bending down on the part upon which the pin tongue is to rest. The joint and catch are set in place slightly above center, and a piece of solder is placed next to each. It is always advisable, when soldering catches and joints, to prop work up from charcoal block so that the flame can be directed under the brooch. When soldering these, the flame can be directed under the brooch and the flame should be applied very gradually. After the moisture in the borax has evaporated, the flame can be directed under the brooch so that it may become heated first. If the flame were directed on top, the small pieces would heat before the larger and the solder would flow upon the catch or joint. For this reason both parts should be brought to the soldering point at the same time. The flame should be directed from the side opposite that on which the solder is placed. This will draw the solder toward the flame, hence in under the catch and the joint. This is easily done by directing the flame under the brooch until it is hot, then over it. When cool, the brooch should be thoroughly pickled.
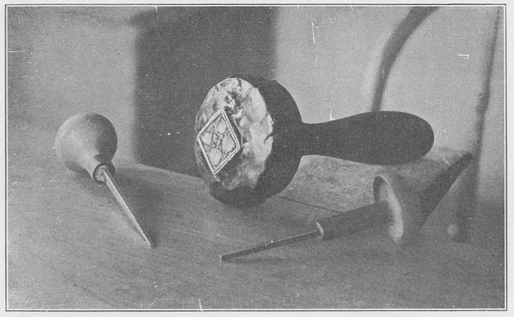
FIGURE 19. Flat graver, shellac stick, and stone setting tool
SETTING THE STONE
After the joint and catch have been soldered in place and the brooch has been pickled and cleaned, preparations are made for setting the stone. In the first place, we must provide a way to hold the brooch firmly while the stone is being set. To do this, take a file handle and a circular block of wood, 2½ inches in diameter and ¾ inches thick, and fasten together as shown above (fig. 19.) On this, place dry orange shellac and melt it with the flame from the blowpipe (fig. 20) Repeat this operation until there is about one-quarter of an inch of the shellac on the top of the block. While it is still soft, press the brooch into the shellac until the upper part of the brooch has a firm bearing. The shellac is allowed to harden, and this takes but a few minutes. This holds the brooch firmly while the stone is being set.

FIGURE 20. Melting dry orange shellac on the circular plinth block
The bezel is now filed down to the proper height (which is determined by the height of the stone), leaving just enough metal to cover the edge of the stone and to hold it firmly in place. The stone is next put in place and the bezel burnished over the edge. This is done by a small tool with a square end called a pusher. With this tool the setting is pushed toward the stone (page 33, fig. 21) first at the four points corresponding to the ends of the diameters. This is repeated at the intervening spaces until all parts of the setting touch the stone. A tool called a burnisher may be used to rub or burnish the bezel perfectly smooth. A smooth file will finish the sides of the bezel and a No. 40 engraving tool is used to finish the top edge (page 33, fig. 22)
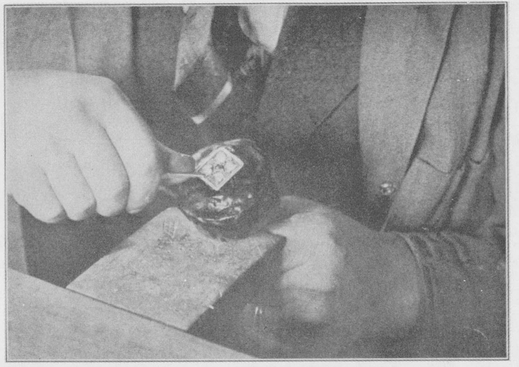
FIGURE 21. Setting the stone with stone setting tool

FIGURE 22. Finishing the top edges of bezel with flat graver
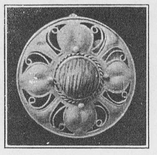
Effective designs produced by drilling
The shellac is now warmed a little with the blowpipe and the brooch lifted from the block with the tweezers. Care must be taken not to heat the stone, as semiprecious stones will discolor or burn if heated. When the brooch is taken from the shellac block, some of the shellac will adhere to it. This is removed by placing the brooch in a small dish and covering it with alcohol for a few minutes. The polishing and final finishing is done next and then the pin tongue is inserted in the joint. It is often necessary to open the joint a little, and this can easily be done with the chain pliers. After the pin tongue is in place, the sides of the joint are pressed together with the pliers. If the pin is too long it can be cut off with the shears and repointed. The point should project a little beyond the catch.
The above illustrations show how the drill may be used to produce effective results in the pierced brooch.

Flat wire edges give completeness to the design