It is easy to appreciate the wonder of birth. When we propagate plants from seed, we get to play midwife. Plants can also reproduce in ways that are harder for humans to relate to, generating entire new entities from bits and pieces. Even though we may comprehend the process, asexual propagation seems supernatural —for now.
Scientists have recently managed to produce genetically identical animals —clones —without the benefit of a sexual union. Yet plant clones are as old as plants themselves.
Single-celled bacteria produce clones by division. Vines sometimes scamper along the ground and root where their stems touch moist soil. In time, entire plants grow from these spots, pushing out new shoots of their own. A desert succulent might have one of its leaves broken off by a careless lizard. The leaf falls to the sand, the wound heals, and new roots begin to grow through the callus. Soon a tiny plant emerges, using the moisture in the leaf until it becomes established on its own new roots.
Knowing what we know about the tenacity of plants, we can play a very active role in making more from what we often call “cuttings,” in the process known as vegetative propagation.
Why is this form of reproduction so valuable? For one thing, plants made from cuttings will be larger and more mature than their counterparts started from seed. Within a few weeks, a 6-inch-long stem cutting of an elderberry, for example, will have pushed new roots. In a month longer, it may be ready to go into the garden. In a few years, it could be 5 feet tall, flower, and fruit. A seedling grown in this same time frame might be 12 to 18 inches tall, but it would not be mature enough to flower for quite some time.
Vegetative propagation is a way to perpetuate nature’s “accidents.” A number of factors might produce a fascinating anomaly such as a side shoot with gold leaves on an otherwise all-green plant. The accident may never happen again, but an offspring produced from a golden cutting would carry on the colorful characteristic.
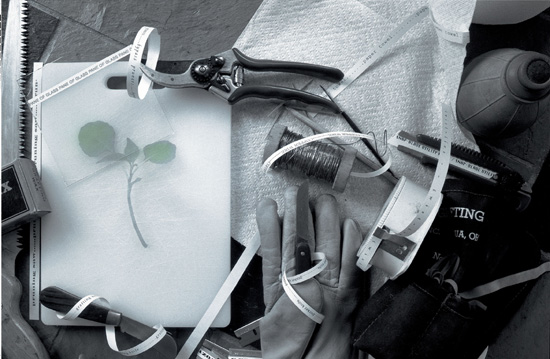
The tools are made ready for asexual reproduction.
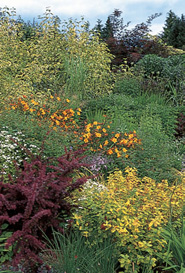
Gracious mirrored borders, surrounded by dignified hedges, barely hint of the craft that goes into producing this scene: the hedges were grown from cuttings, as were many perennials that also have to be divided to rejuvenate clumps or to make more.
Even though taking stem cuttings may be the most frequently used method for reproducing plants asexually, this is only the beginning. There are herbaceous stem cuttings, softwood cuttings, and hardwood ones to harvest from woody plants when they are dormant in winter. Within the stem cuttings, there are variations such as nodal, internodal, leaf-bud, and basal cuttings. Stems can be grafted together, and even bits of one plant can be fused to parts of another; roses, for instance, are passed around the world as twigs with dormant leaf buds to harvest and graft onto established rootstocks.
Modified, fleshy stems that grow underground —tubers, bulbs, and rhizomes —can be cut into sections to make more plants. When scales from a lily bulb are gently removed and placed in an appropriate environment, tiny new bulblets will grow from their bases. Even leaves may be cut to propagate certain plants.
Many herbaceous perennials need to be divided every few years to keep them at peak performance. Division is also the most frequently used method to reproduce perennials, and the easiest. When clumps are cut—right through the crown—the divisions grow quickly. A good-size Hosta lancifolia, for instance, can be dug up in early spring, cut into three sections, and replanted; by summer, the new plants will be nearly as large as the original.
Growers often make tiny root cuttings when large numbers of herbaceous-perennial clones are needed. A perennial can be lifted in the spring, root-pruned, and replanted. The lush new roots that form —full of sugars and starches and primed to grow —will produce vigorous new plants when cuttings are taken in the autumn.
My grandmother rooted summer rose cuttings under jars. She set the slips in moist, sandy soil in the shelter of shrubs, where the cuttings were protected from the burning rays of the sun but had enough bright light to continue photosynthesis and grow roots. There was no air circulation inside the jars, however, and the cuttings could easily have rotted. This is where my grandmother’s intuition came into play. She sensed the moment to take the cuttings —when the tissues were most resistant to disease and would root without rotting.
What my grandmother may have guessed, I have learned. Gardeners have to observe growing plants and then seize the moment to take and make more.
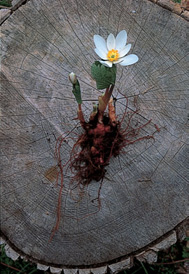
New plants can be made from sections of rhizomes, and in the case of bloodroot (Sanguinaria canadensis), the rhizome can also be scored in situ—a small incision behind the growing shoot causes multiple buds to develop.
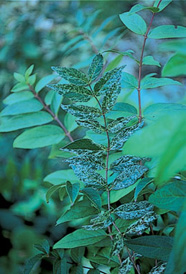
In order to perpetuate a sport with a distinctive characteristic, such as this chance variegated branch of a deutzia, it has to be grown from cuttings.
Crown division is the primary means of propagating herbaceous perennials—an annual ritual at the Bellevue Botanical Garden in Washington State.
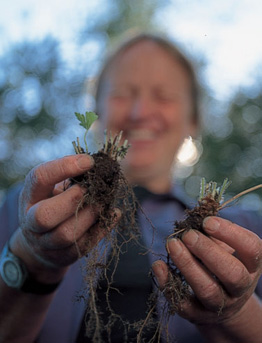
Cranesbill connoisseur Robin Parer divides a geranium by breaking and pulling apart sections of the crown with roots. She pots up the pieces and grows them on until they are ready for sale through her nursery, Geraniacaea, in Kentfield, California.
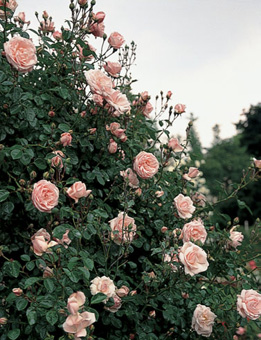
In 1930, rose breeder Dr. W. Van Fleet noticed that a branch growing on a former introduction—the pale-pink-flowered, 20-foot-tall rambler that bears his name—continued to produce flowers after its initial flush. The reblooming “sport” became ‘New Dawn’, the first rose to be issued a U.S. patent and granted protection from propagation without license for seventeen years.
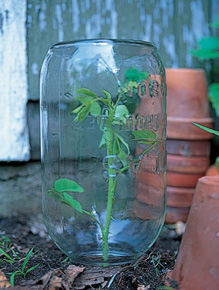
Nearly everyone seems to have a tale about grandmothers starting (prepatented) rose cuttings under glass jars. The method works if we discover what our ancestors may have sensed: the right time and place to “strike” and “stick” the cuttings.
Detached parts of a plant have the same basic needs as whole ones do. But they are all missing something: roots, leaves, or stems. The most important job of the propagator is to reduce stress by making up for the losses, so the plants-to-be can focus on growing new cells and use their energy to become self-sufficient.
Without roots to take up water immediately, leafy cuttings, for example, will wilt long before they can grow new roots. The cuttings still need light to carry on photosynthesis, but the searing direct rays of the sun will overheat and dry out the cuttings. In order to help keep the tissues turgid, there must be moisture coming up from below and in the air all around the cuttings. Air filled with water vapor will draw less moisture from the leaves or stems, and any droplets that settle on the surface of these parts and do evaporate will cool them. The cuttings will need to be placed in “intensive care units” that provide for their special requirements.
What you choose to use for these controlled environments will depend on the needs of your plants and the scale of the project, along with the scope of your ambition and, as always, your budget. Plants grow faster in warm temperatures, but raising the thermostat speeds up transpiration —the loss of moisture through the pores in the leaves. In most situations, the relative humidity will be maintained at a high level because an artificial closed environment is fabricated. In some cases, though, you’ll need to add moisture to the air via pebble trays, mechanical humidifiers, or even a cloud of water vapor from a misting system.
The cuttings will need a temporary substitute for natural earth for the roots they will produce. The medium must provide physical support, close contact, moisture, and air. Once plants have roots and shoots and leaves to carry them on, they must be moved into another medium that will promote further development.
Plants will need assistance adjusting from protective custody to the drier air of the window garden, or a more strenuous transition to a permanent spot in the outdoor garden.
The atmosphere under the glass jar was a small-scale version of the best place for making cuttings, a greenhouse. The Enid A. Haupt Conservatory at the New York Botanical Garden is the embodiment of a great glass house, but at any size, the elements of the controlled atmosphere are the same: light, temperature, and, most of all, humidity.

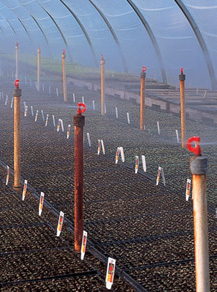
Cuttings must remain turgid. Tissues lose moisture through their surfaces, but they can also absorb it, so a high relative humidity is imperative while the cuttings produce roots to restore water in the conventional way. Providing warmth, especially from below the medium, speeds the formation of roots, but as the temperatures rise the leaves and stems transpire even more quickly. One method to keep the humidity high also keeps the tissues above the medium cooler—frequent misting from devices such as these nozzles above a mist bench in a commercial greenhouse.
In the best of all possible propagation worlds, there would be bright light all day long, and warm, steamy air —even in the winter. The humid air would swirl around the plants, moving just enough to inhibit disease and to toughen the cuttings’ tissues. Electric heating cables or perhaps steam pipes beneath wire mesh counters would warm up sterilized medium in gracious polypropylene flats. The synthetic soil that fills the flats would hold air and moisture, and also firmly grasp stem cuttings —practically tickling them into making new roots. In other words, the utopian ICU is a propagation bench in a warm greenhouse. Well, almost.
A greenhouse has a few problems. One, it is hard to keep cool in late spring and summer when we need it most. Two, when the greenhouse ventilation system is working well, the temperature will drop, but so will the humidity. The fans create a great deal of air movement, which can dry out the cuttings. A solution to this problem could be to have indoor rain showers at regular intervals —in other words, a misting system. Someday you may have the perfect greenhouse and misting system. But there are plenty of alternatives right now.
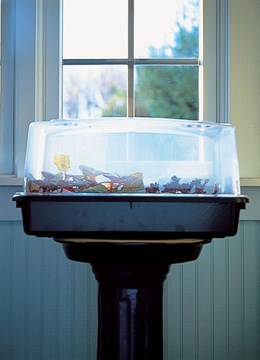
The humidity of a flat covered by a clear plastic dome encourages rooting; but pathogens grow, too. Fungicides are available, though cracking the lid for air circulation prevents problems.
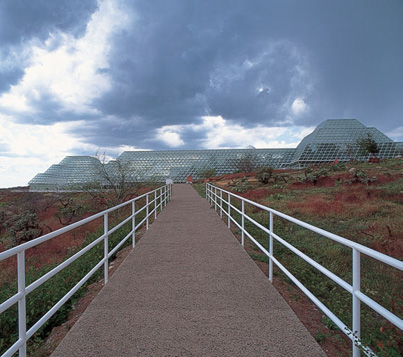
The most important requirement for rooting many cuttings is a controlled environment. Cuttings of tender and hardy herbaceous plants, and of the seasonal growth of woody ones between spring and late summer, demand high relative humidity. The recommendation to make a miniature greenhouse with a plastic bag, placed open end down over cuttings in a pot, didn’t work for me. My plants frequently had problems in this confined space, which was more like Biosphere II than a working greenhouse. If mold didn’t grow on the cuttings in short order, it ultimately did when the bag collapsed onto the leaves and stems. Then they rotted where condensation collected at the points of contact. The hint to insert wooden sticks into the medium to hold the bag upright didn’t fix the problems, since the sticks got moldy as well. Perhaps it was just too moist and humid.
A modified version of the plastic-bag greenhouse starts with a 4-inch round plastic pot and a gallon-size, heavyweight food-storage bag with a zipper closure. Fold the zipper edge out, like a cuff, and lower a pot with medium and cuttings into it. Then pull the sides back up around the cuttings. These sturdy bags usually stand upright on their own, but if one seems to be folding over, a rubber band placed around the bag and pot just below the pot’s rim will pleat the plastic for extra stability.
By opening and closing the zipper, you can adjust the humidity in the bag. Start with the zipper about halfway open, which makes just a slight slit in the top. If there is quite a bit of condensation on the sides of the bag, so much that you can’t see the cuttings, increase the size of the “vent.” If the cuttings wilt, close the vent some more. Once the cuttings have roots, you can open the bag completely to begin to acclimatize them to lower levels of relative humidity.
An advantage of the single pot is that cuttings of the same size and species or variety can be placed together and monitored closely. They should root at corresponding rates and can be taken out of the bag at the same time. Several of these setups could be placed on a bright windowsill in late winter to mid-spring. But most stem cuttings that need high humidity are taken from the garden in the spring, and there may be hundreds of them. For these cuttings, which can be rooted with controlled humidity and light outdoors, a larger version of the plastic bag-and-pot will be more suitable.
Plant diseases were just some of the challenges faced by Biosphere II in the Arizona desert, where microorganisms and macroorganisms (people) shared a giant terrarium.
Opening the top of a zipper-lock bag moderates humidity and discourages mold.
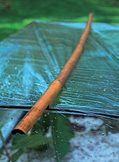
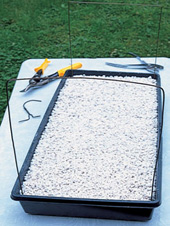
If needed, a brace can be made from a bamboo stake notched to spread the wire hoops and keep them in place. Customize the sweatbox to meet your needs.
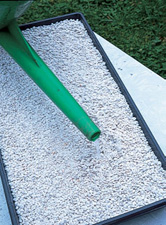
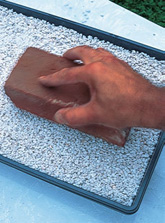
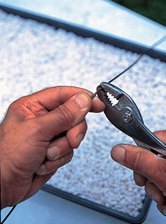
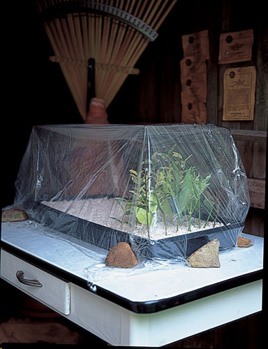
Making a homemade sweatbox begins by pouring rooting medium into a flat with drainage holes. Moisten the medium with clean water. Tamp the medium very hard with a clean brick or similar tool. Fashion two U-shaped supports from a wire clothes hanger. Insert the points into the corners of the flat and slip it into a dry-cleaning bag or lay a piece of thin plastic-film drop cloth over the supports. The plastic can be closed with a wire tie or a clothespin, or anchored with rocks.

A “propagator” takes the concept of the inverted plastic bag one step further. These units, often imported from England, consist of plastic flats with clear, rigid dome covers. Although they have adjustable vents to control humidity and allow hot air to escape, a lack of air circulation seems to make these propagators better at growing mold than helping stems produce roots. I have had much greater success with a homemade “sweatbox” which keeps humidity high, but allows for an exchange of a bit of air.
By the time the lilacs are in full bloom, mid-May in my region, the “sweatbox” is up and running. Early herbaceous perennial cuttings are already under the plastic tent of the sweat-box. Since softwood cuttings of lilacs are taken from fresh, nonblooming growth, they will soon join the herbaceous ones.
Each spring, I construct a new box. Building the box is not a weekend project —once the materials are assembled, it takes just an hour or two. The base consists of a plastic flat with drainage holes, filled with rooting medium and fitted with a frame made out of bent coat-hanger wire to support a covering of thin plastic film —such as a dry cleaner’s bag. I cut the seam of the bag to produce a single sheet and lay the plastic over the frame. When the sweatbox is placed in its propagation site, I fold the plastic sheet as if making a bed. Small rocks or wood blocks will anchor one side of the sheet to make access quick and easy.
While the plastic cover keeps the relative-humidity levels high, it also is not sealed tightly enough to stop an exchange of some of the air inside and out —it “breathes.” The loose tent cover flexes, since I set the box in an area where gentle breezes brush by. The movement of the air inside the box seems to toughen tissues a bit and, since there is some evaporation, cool the cuttings as well. If the surface of the medium is warm or dry to the touch, I add water by misting the cuttings and medium with a spray bottle, perhaps once a week. The spray also helps to wash the cuttings clean.
In the next two or three months, the outdoor temperature will soar. But in the sweatbox —tucked into a cool, shaded spot —the cuttings’ tissues should not overheat. The temperature there is generally between 75 and 80 degrees F (23.5 degrees and 26.5 degrees C) during the day, with a drop in the cool evening.
By the end of summer cuttings will be rooted and potted up, and the sweatbox will be retired. The plastic film will be discarded. If the flat is in good condition, it will be cleaned for reuse. The medium —perlite —can be recycled for potting mixes. Starting fresh each spring with new materials and medium provides another deterrent to disease.
The sweatbox finds a comfortable spot with very bright light and a breeze, but away from direct sunlight and the full force of the wind.
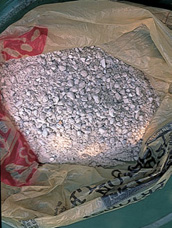
A rooting medium should hold water and air and be able to come in close contact with the cutting. Coarse white pumice is a superb rooting medium but difficult to come by. For economy’s sake, it can be extended with perlite.
Plants such as this begonia may be too small for the plug’s cube’s premade hole, but it can be pushed in the side to root quickly. Other plants, however, find foam cubes too moist, so there must be some experimentation.
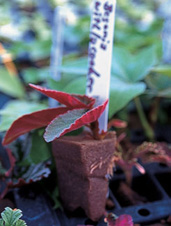
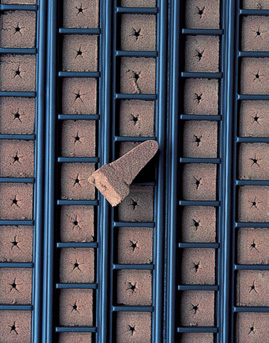
Absorbent foam produced for flower arrangements, such as Oasis brand, has a dense texture (like watermelon flesh when moistened) and is now being made as plugs set into customized flats. The plugs come with or without a hole.
The best rooting medium is sterile, makes close contact with the stems, and holds both water and air. And while the white roots that sprout from pussy willow stems in a jar of water are a testimonial to plants’ ability to regenerate tissue, water is not a good medium for vegetative propagation. The thick, smooth roots that develop to absorb air in the low-oxygen medium of water are brittle.
To find ideal media, growers in England are using blocks of rock-wool insulation, and in the United States, commercial propagators are trying preformed individual plugs made of Oasis —florist’s foam in specially designed flats. A cutting placed into the material makes perfect contact, receives moisture and air, roots fast, and can be potted plug and all.
Some gardeners recommend two parts perlite to one part pumice; others swear by a fifty-fifty blend of peat moss and perlite, or peat moss and sand. Pure, very coarse sand is a popular choice. Perlite is made of grains of volcanic glass that are heated until they explode —like puffed cereal —with hundreds of spaces to hold air and water. It is slightly alkaline in pH (a consideration when rooting acid-loving plants, such as rhododendrons and heathers).
Once cuttings have rooted, they are removed to individual pots. Most potting will happen in warm weather and can be done outdoors, but keep the young plants out of direct sunlight. Work in a comfortable spot, on a table or bench.
The recipe for the medium is three parts coarsely sieved moistened humus —peat moss, homemade compost or leaf mold, composted tree bark, or almost any processed vegetable-based material, even coir from the outer husk of the coconut. Add one part drainage material, such as perlite mixed fifty-fifty with coarse grit or horticultural sand. Add more humus for plants that like a moist medium or more drainage material for those that would appreciate a drier mix.
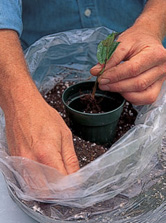
If the medium is in a bag, open up the bag and roll the top edges down to make a low-sided container. Place the empty pot in the middle of the medium in the bag. Hold the cutting gently by a few leaves or the stem so that the crown —the place where the new roots emerge from the stem —is even with the pot rim. Scoop up some of the potting medium with your other hand, and pour it into the pot so that it fills in around the new roots; rotate the pot and pour in more medium until it is close to the top.
As the pot fills, tap it on your table or bench. Add more medium if necessary, tap again, add more, and press gently with your fingers to create about a ½-inch water reservoir between the medium and the pot rim. Label the plant by name and include information such as the date that the cutting was made or the source.
As you go, set each newly potted plant into a pan of water about 2 inches deep. Take the pots out of the pan when they feel heavy or moisture begins to darken the surface of the medium.
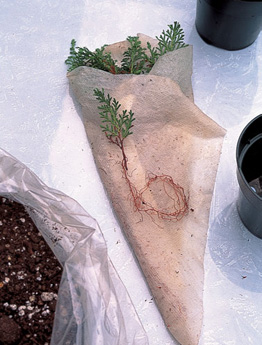
After they have rooted, all cuttings will need to be potted in individual containers. The roots must be kept moist during the process. An easy way to do this is to place the roots on a moist paper towel and fold it back and forth between layers.
Potting begins by turning over the edge of a plastic bag filled with just-damp growing mix, setting a pot in the center, and holding a cutting in position over the pot. Scoop up medium with your free hand and pour it around the roots, making sure all the spaces are filled. The potting mix can be brought up to the rim and gently but firmly pushed down to make good contact, removing any air pockets and leaving a shallow reservoir at the rim for future watering. Water the newly potted cutting the first time by placing it into a tray with an inch or so of water for a half hour or until the surface feels cool and barely moist.
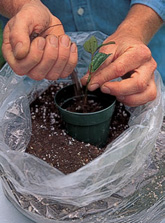
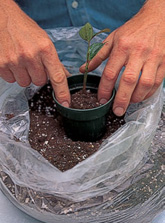
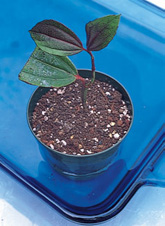
Rooted and potted hardy herbaceous plants, woody deciduous plants, and evergreens will live in pots for weeks to months to a year depending on their size and hardiness and your plans for their use. Indoor tender plants will be potted in small containers —just large enough to accommodate their roots. Place houseplants in bright light but out of direct sun for several days.
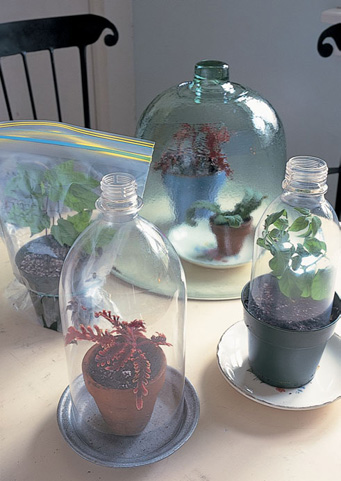
If plants wilt when they are removed from the sweatbox and potted, slip them into an open plastic bag or cover them with a cloche —a small portable transparent cover that can be used indoors or out. There are several homemade versions, such as a large, clear glass bowl propped open on a block of wood, or a cloche made out of a plastic soft-drink bottle. Remove the label from a one-or two-liter bottle, cut off the bottom, and place it over the pot or rest it on the medium surface. Removing the cap produces a chimney to help dissipate extra moisture and allow for a bit of air movement.
Cuttings of hardy plants that are potted in late spring can be placed in a protected shady spot for a few weeks. After four to six weeks, herbaceous plants can be planted in the garden. Woody plants may have to spend their first winter in a nursery area and if you plan to grow them there until they reach a good size, transplant them into the soil. Otherwise, sink the pots into the nursery-bed soil all the way up to the rim to keep the medium moist and cool.
Some nurseries, even in extremely cold climates, place young hardy herbaceous perennials in gallon containers close together on the ground and then cover the entire area with a spun-bonded polyester insulation blanket.
Plants that were rooted late in the season will go to the cold frame. After all danger of frost has passed, the plants can be removed from the frame and planted in the garden or nursery bed; however, since they might still appreciate some shelter, drape row-cover fabric over hoop supports for the first few weeks.
A burlap tent tempers the sunlight as transplants of tender perennials adjust in their first week in the garden.
Tiny, portable “greenhouses,” called “cloches,” such as the blown-glass, bell-shaped cover, can be purchased for use indoors or outside, where the glass cloche will have to be propped open on sunny days. Similar equipment can be fashioned from materials at hand; for instance, a zipper-lock storage bag indoors, or a cut plastic carbonated beverage bottle. With caps removed, the bottles have a ready-made chimney for ventilation.
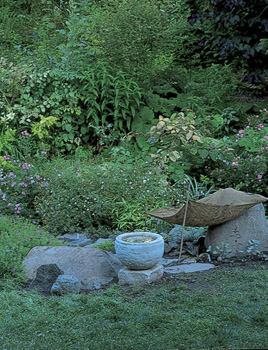
A row cover or similar screen or shield is a good temporary device to shelter a rooted cutting from direct sunlight, wind, and low temperatures as it adjusts to transplantation in an open spot. The cover can be made of special spun fiber, burlap, woven plastic, corrugated cardboard, or as in this case, a recycled polyester sheer curtain over wire hoops.
My first activity in the new garden was to make a nursery bed. Four years later, the sunny bed was empty, but splinter nurseries of baby plants are still tucked throughout the landscape.
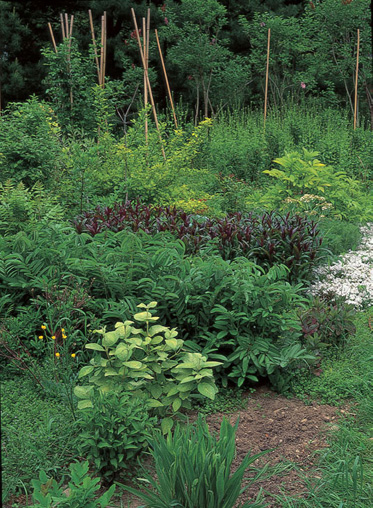
Along with a compost area, a nursery bed can be one of the most useful places in any garden. There, small plants can be grown on to good size for later use. You can tuck the bed out of view behind some shrubs perhaps, or it can become a destination on your garden tour, where visitors can see and judge your latest acquisitions.
When you bring home new plants, you won’t have to shoehorn them into little crannies in the garden. Instead, they can go into the nursery while you plan and make room in the garden. Some of these plants can be left in their containers for a year, buried to the rim. Other newcomers can be divided to make more plants before they are placed in the nursery.
The nursery bed is like a vegetable garden with paths between rows of carefully labeled plants. Site at least one bed in full sun. Low-growing plants should be set on the sunny side so they are not shaded by the taller ones. If you are planning only one nursery, create a shady area with a row cover or cloth. A burlap screen can be used to shield young broad-leaved evergreens from winter wind. The whole bed should be covered with a thick layer of mulch to retain soil moisture and limit weeds.
Where winters are severe, young plants should be covered with additional loose, lightweight mulch of whole oak leaves or evergreen boughs after the ground is frozen. Pine boughs, without tinsel, from discarded neighborhood Christmas trees are ideal. In early spring, pull back some of the mulch to check the plants. If more cold weather is expected, gently replace the mulch of evergreen branches.