When autumn brings shorter days and chilly winds, gardeners usually welcome the intermission in the fast-paced gardening year. By January, we’ve had enough inaction. The seed catalogs arrive just in time to stave off cabin fever for a week or two. Finally, we get to sow seeds indoors, and welcome spring—weeks before the first warm days outside.
A windowsill garden can help bring the cold, dark season to an earlier end. Houseplants perk up in the new year, and their reawakening has a profound effect on us gardeners. The heady perfume of the first citrus flowers fills the house and rouses our need to garden.
Cultivating a batch of seedlings may seem daunting at first. Like new parents, we do not know quite what to expect. Then there is a blessed event, when seedlings appear as a green haze above their pots. Eventually, necessity and desire lead every gardener to master the process of sowing seeds.
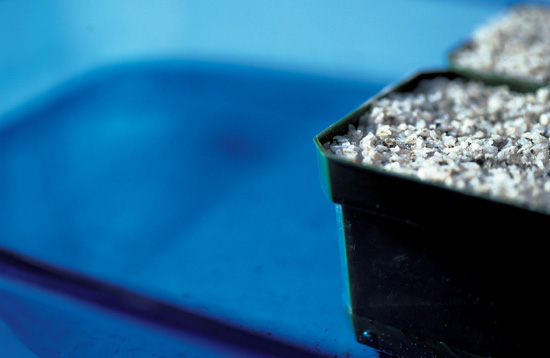
Square plastic pots of sown seeds in a shallow pan of water.
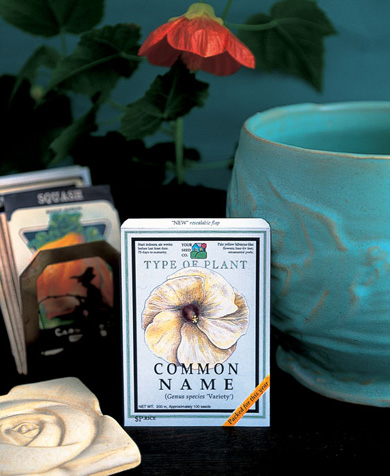
The propagator’s year begins in winter with packets sorted by sowing date (under Oncidium ‘Sweet Sugar Angel’).
Timing, as with every aspect of propagation, is crucial. Short-lived perennials and biennials can be sown in situ as they ripen in summer. Seeds of hardy perennials can be sown outdoors in the autumn to take advantage of the natural fluctuations in temperature, light, and moisture. If seeds of hardy perennials from dry fruit are properly stored, they can be sown outdoors up until midwinter. But those of moist fruits and ones purchased from catalogs or received in plant-society exchanges in winter and then sown outdoors may lie in wait an entire year or longer before sprouting. Many of these may benefit from controlled conditioning indoors.
Tender annuals have to be sown indoors at a precise moment —not too early or too late —in order to be healthy seedlings when the time comes to transplant them outdoors. If seedlings are started indoors too early, high temperatures and a lack of sunlight will cause them to etiolate, to become tall and spindly, barely strong enough to hold themselves up. Sowing hardy annuals indoors, on the other hand, may produce no results. In temperate climates, the seeds of these annuals should be scattered “au naturel” in winter, as if they had fallen from the stalks of their parents’ dried pods and capsules.
Creating a sowing calendar is helpful for tracking propagation activities. To calculate the date to sow a tender annual indoors, for instance, determine the number of days or weeks that the plant needs from the time it’s sown until the danger of frost has passed and it can be planted outdoors. (The back of a commercial seed packet usually provides this information, along with the estimated days from sowing to germination.) The common lilac’s full flush of flowers could be a sign, but the best way to determine the planting date —the average last day of possible local frost —is to call the Cooperative Extension Service, listed in the phone book under the state university.
For instance, the marigold Tagetes tenuifolia ‘Lemon Gem’ needs four to six weeks before the seedlings can be placed outdoors. If the last frost date in your area is May 15, subtracting the weeks puts the sowing date around April 1.
Pretreatments, such as scalding, chilling, nicking, and soaking (noted in chapter 4), must also be factored into the sowing dates. (See the Plant Propagation Guide.) Your sowing calendar could become a permanent journal in which you note the results of your own experiments and experience, and refer to for years to come.
Information on a commercial seed packet may include a plant’s common, Latin, and cultivar names; color; whether annual, biennial, perennial, etc.; hardiness; garden uses; height; indoor sowing requirements; days to germination and sowing before transplanting; depth and spacing in the garden; and ongoing culture.
Before seed sowing can begin, the proper environment must be prepared —one with light, predictable temperatures, moisture in the air, and a suitable medium. Pretreated and indoor-stratified seeds will go under fluorescent lights or into the greenhouse at the appropriate times. But some of the first seeds to be sown will be the fresh ones of hardy perennial plants that do well locally. These seeds can be sown outdoors to experience the temperature fluctuations for natural conditioning, and where precipitation and light are provided.
In nature, most hardy plants produce an enormous quantity of seeds in the hope that one new plant will survive. Hailstorms, torrential rains, desiccating winds, or foraging animals are obstacles that reduce the percentage of success. The simplest assemblage calls for pots set in a plastic flat with an open grid bottom, and the same kind of flat used for a cover. The best method for sowing the seeds of hardy ornamental plants outdoors is not simply to abandon them in vegetable-garden-type rows but to create special places.
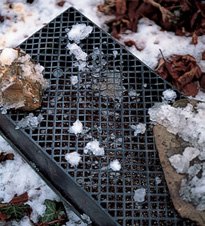
Hardy seeds should be sown in pots and can be placed in a screen-covered box located in a protected spot, perhaps right up against the east side of the house, where they will receive some sunlight, moisture from rain and melting snow, and the temperatures they need, without being subjected to high winds —and be in a convenient spot for monitoring. Screen or an open mesh plastic flat prevents critters from digging in the pots and also breaks the force of heavy rains.
You can easily make a permanent screened box from readily available materials. First determine a manageable box size, perhaps 2 feet by 3 feet and 1 foot tall. The box must be open on the top, but it can be open to the ground below, or set on pavement; if you’re using a found box, drill holes in the bottom for drainage. Place the screen in the bottom of the open box to keep worms from entering pots, and add coarse sand to a depth of 1 to 2 inches to stand the pots in, which will keep them upright and help them stay cool and moist.
An old window screen makes a fine cover, and you can size the box you’re constructing to match. If you’re using a found box but don’t have an old screen, you can use artist’s wooden canvas stretchers to make a lid with wire or plastic screen stapled over the edges.
If the weather cooperates and you’ve chosen a good spot, you will not have to water the pots until the seedlings are up and growing in spring. But some seeds sown the previous winter will not appear the first spring, so resist the temptation to unearth them. Seedlings of tiny plants such as dwarf conifers, and long-lived perennials that may develop slowly, such as peonies, are best left undisturbed. They will transplant more successfully with sturdier root systems. These seedlings will do well if sown sparsely and left in their original containers as long as their needs for moisture are met. As hot weather approaches, bury the pots in a special nursery area, and bring soil up to the rims to keep the roots and medium cool and moist.
Seeds of hardy plants can be sown outdoors in protected sites, such as a cold frame with open sashes glazed with fiberglass panels.
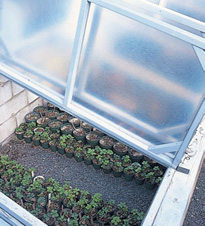
This wooden-box frame has a screen cover that has been pulled back to show pots of sown seeds.
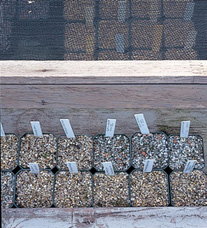
A flat of medium with a mass sowing of primrose seeds is placed in a sheltered spot outdoors and covered with an upside-down grid-bottom nursery flat and weighted in place by rocks.
Nearly all of the tender plants we want to grow in the garden from seed can be started early in a warm and bright environment. Indoor-sown annuals such as begonias, Mexican sunflowers, and other frost-sensitive plants bloom weeks to months earlier than they would if they were planted outdoors in warm weather.
Owning a greenhouse is every gardener’s dream. The environment in the glass or plastic-covered structure allows us to alter the growing season. Depending on the temperature range chosen, tropical plants can bloom through the winter, subtropical plants can be kept at the ready to provide yearly additions to the outdoor garden, and even food crops, such as leaf lettuce, can be grown nearly year-round. Having a greenhouse, however, is demanding on your time and your finances. Maintenance is one issue, space is another. As with just about every garden creation —from lily pond to planting bed —bigger is better, and for a greenhouse gardener eager to start plants from seed, bigger also means more expensive to heat. Although there are energy-saving designs for greenhouses —double glazing, pit houses set halfway underground, and passive solar systems with barrels of water stacked high up the north wall—building costs are steep. On the other hand, there is no better aid to the gardener’s passion for propagation, and in December, money spent to be able to putter about in the greenhouse may seem more attractive than a Caribbean cruise.
If a greenhouse is not an option for you, a greenhouse window is a second choice. These structures are like bow or bay windows, with glass tops as well as sides, and can be attached to a building in place of a regular window. These greenhouse windows, made with energy-efficient glass and insulated floors, are great additions to any home, and with glass shelves provided, they are terrific for growing all sorts of houseplants. Specialty gardening catalogs offer these windows, and most window manufacturers sell versions of them as well.
A south-facing window of the house could be your next best choice. The windows and greenhouse windows must face south, and there can be no shadows from buildings or evergreen trees. Even then, several cloudy days in a row could be the death knell for seedlings. But there are other potential problems, such as drafts next to the windowpanes, which may thwart the germination process. A quick fix is to slip a few sheets of newspaper between the glass and pots of seeds each evening, removing the sheets early in the morning. The newspaper task may seem daunting, but an even greater difficulty may be maintaining high relative humidity —at least 40 percent —since the average moisture content of the heated air in winter is around 10 percent (about the same as in the Sahara desert).
Clear plastic domes —supplied with several commercial sowing flats —raise the humidity, but they impede air circulation and facilitate the growth of diseases. A humidifier might help if placed close to the window or inside the greenhouse window, but that points out another problem: lack of space. There is very little room for flats of pots in the window and greenhouse window, let alone for the burgeoning crop of potted-up seedlings. Fortunately, there is another choice for home gardeners.
Besides being the greatest place on a winter’s day, the greenhouse bench, with heat source below, offers high humidity and bright light for starting seeds and nurturing cuttings.
A greenhouse window would be the next-best source of natural light, and a south-facing window is another location. But even in the brightest window, hours of light are fewer in winter and skies can be overcast for days.
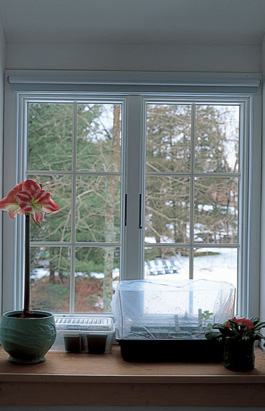
High humidity and a way to apply water from below—which is necessary for growing seedlings indoors—can be provided by a commercial flat with a clear plastic cover.
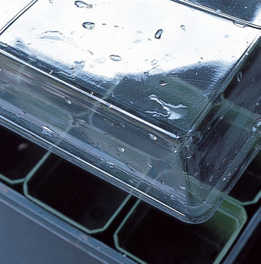
A homemade version, such as a flat with a wire frame loosely tented with plastic film, may have the benefit of some air movement and exchange.
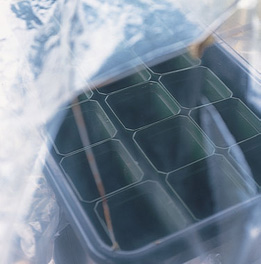
Elaborate yet inexpensive “automated” units are available. This one of insulating polystyrene foam has various components stacked to provide the essentials. The bottom is a water reservoir with a red bob moisture indicator. The next tray holds a capillary mat that absorbs water from below and makes it available evenly to the cell-like chambers in the flat above for medium and seeds. The top is covered by a clear plastic lid.
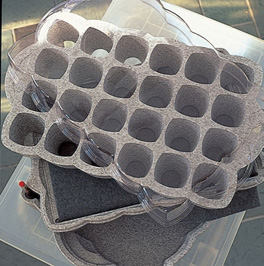
Seeds sown indoors do require some heat, usually from below, with appliances such as electric cables or heat mats, and in commercial situations, hot-water or steam pipes set in moist sand to uniformly transmit the warmth.
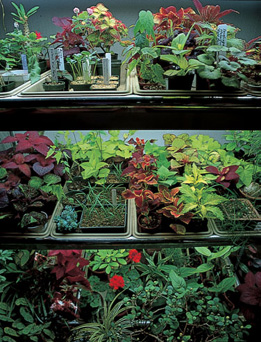
Although energy-efficient fluorescent lights do not provide the brightest illumination, they run cool, and seedlings can be placed as close to the tubes as 2 inches. “Full-spectrum” tubes approximate the colors of noontime sunlight, but “cool white” and violet “grow lights” work well, too. The light output diminishes in a year or two, so they will need to be replaced for optimal illumination.
Although simple fixtures and tubes are inexpensive, endless tinkering and suffering with homemade lighting rigs of fixtures, shelves, wires, and chains led me to purchase a commercially manufactured unit, often called a “floral cart.” The unit has three fixtures, four 40-watt tubes each, that can be raised or lowered over shelves with sturdy removable trays. A vinyl tent keeps humidity contained, and a small fan circulates the air. The unit is plugged into a timer that keeps lights on for 18 hours each day. With this unit, any properly prepared seeds will germinate and thrive.
Most seeds germinate more quickly if warmth is delivered as “bottom heat,” simulating the temperature of dark soil absorbing sunlight in spring. For most seeds, the ideal temperature of the medium should range from 70 to 80 degrees F (21 to 26.5 degrees C). Even if the room temperature is comfortable, evaporating water in the medium lowers the temperature in the root zone, so an extra heat source is needed.
In commercial greenhouses, steam pipes are installed under the benches. Some growers adapt modern residential radiant-heat systems, such as hot water in flexible hoses set in moist sand to conduct the heat. The pots or flats of pots are set on top of the sand. For years, home gardeners have used insulated wire heating cables, a spaghetti tangle of wires that resist electrical current and become warm. The cables are placed in a large flat or wooden box and covered with moist sand. Some of these wire devices come with preset, in-line thermostats, but the wires are unwieldy.
Rubber heat mats, similar to old-fashioned electric heating pads, are available, and a modern version is a thin plastic sheet that is about the same dimensions as a plastic flat. The reasonably priced sheet combines a transformer with a grid of electrically resistant wire. With a floral cart, supplying heat is simple. The warm light fixtures, which are under all but the bottom shelf, serve as an excellent source of “free” heat for the seedlings on the shelves above them.
Let there be light—regardless of the source. The effects of light on plants are cumulative; bright, uniform artificial illumination over a long period may have the same effect as direct sunlight for a short time. But tungsten light-bulbs produce too much heat for seedlings.
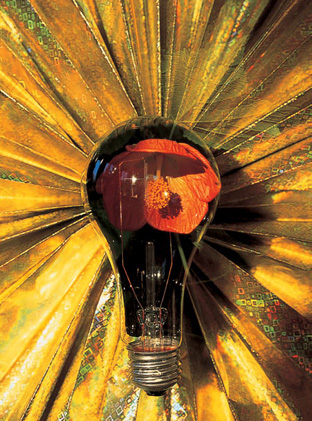
Fluorescent lights produce the most light with the least heat and energy use; the floral cart has adjustable fixtures and shelves.
Soil is the foundation upon which all gardens are built. Plants rely on soil for stability, moisture, oxygen, and nourishment. Good garden soil is alive; it is a mixture of sand, clay, organic material in various stages of decomposition (humus), and varying amounts of nutrients (elements and dissolved minerals), along with a myriad of organisms —some beneficial, some not —such as fungi, bacteria, diseases, worms, and insects. It may be tempting to use some of this “black gold” for sowing seeds indoors, but leave it in the garden where it belongs. In the warm and still conditions of the indoor nursery, the organisms that break down organic matter in soil may attack the seeds as well. Confined to a pot, indoors or out, where the free forces of nature cannot act on it, the soil may become an impenetrable block. The best approach when sowing seeds is to buy or create a medium suited to the nursery.
Most commercial sowing media in the United States, usually labeled seed-starting mix, are categorized as “soilless” or “peat-lite” —blends of peat moss, perlite, and vermiculite. It is quite easy to make your own medium, but easier still to adjust or amend a purchased one. Peat moss is a renewable resource, but it takes some 250,000 years to renew. If ethical concerns prohibit you from using peat moss, use compost that has been sifted through ¼-inch mesh and sterilized following directions below.
If you buy a premade starting mix, improve it by adding one part drainage material to three parts prepared mix. Use coarse horticultural-grade sand (similar to parakeet gravel) or fine grit. Grit is flaked stone —usually granite —manufactured for the poultry industry as a feed additive.
An easy way to blend the medium is to place the ingredients on a table or in a box and fold them together. You can also put the materials in a tightly closed plastic bag and roll the bag over several times. Then dampen the mix if necessary. The moisture content of the medium has to be “just right.” The mix should be light but not dry enough to rise in the air if you blow on it. It should feel cool to the touch, with about as much moisture as a wet sponge that has been thoroughly wrung out. Pour a bit of warm water on the mix in the bag. Roll it over or fold, feel the medium, and add a little more water if necessary. Go slow —the medium must not be sodden either.
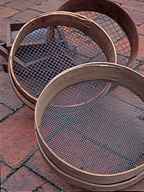
Riddles can be used to sift media. Many kinds are available, including new plastic or antique wood hoops. Wire mesh in various sizes (industrial screen, hardware cloth, chicken wire) can be fitted over a simple square wood frame and stapled in place to make a riddle for sifting material, from fine to coarse.
There is almost nothing more frustrating or disheartening than to carefully select, gather, and sow seeds only to watch them wither from disease shortly after sprouting. There are a series of fungal diseases that can plague seed propagators. Collectively termed “damping-off,” these diseases cause a new seedling’s stem to discolor and collapse. Once damping-off strikes, even before the seedlings keel over, the outcome is unstoppable, and an entire flat of seedlings can be leveled in a matter of hours.
The ideal sowing medium must be virtually sterile. Fresh, store-bought soilless mix is usually disease-and pest-free. If the medium has been sitting around in an opened bag, or if any sources from the garden are being used, the mixture should be heated to kill lurking pathogens. Professionals either process their medium in a steam sterilizer or treat it with toxic fumigants. I have come across a book with a dubious reference to using the kitchen pressure cooker for sterilization, but most references for amateurs suggest baking the medium in a roasting pan in an oven set at 300 degrees F (150 degrees C) for about two hours. This baking —while smelling up the house —heats the medium to about 140 degrees F (60 degrees C), which purports to eliminate the “bad” organisms (and weed seeds, if present) and leave the “good” ones —those that keep the medium active, open, and “alive.” Higher temperatures, however, provide greater security and alleviate the need for pesticides and fungicides.
A faster and completely odorless method is to place the medium in a plastic, heat-proof roasting bag in a microwave oven. (The bag also provides a handy way to mix and store the medium.) If the medium is not already moistened as described above, dampen it evenly, and twist the top of the bag closed, leaving plenty of room for the contents and tumble to mix. Tie the bag closed with string, and heat it in the microwave at full power for about ten minutes. Open the bag, and insert an instant-read thermometer. The temperature in the center of the medium should be at least 180 degrees F (82 degrees C); if it is lower, zap it for a few minutes more. The same temperature can be reached in a conventional oven, of course. In all situations, take precautions to avoid burns.
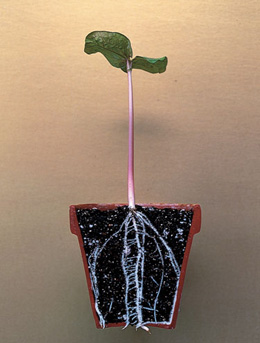
A perfect sowing medium holds moisture and air and has a fine yet open texture that promotes and supports healthy roots, such as those of a castor bean. A homemade medium using a humus source such as compost must be sifted through ¼-inch mesh.
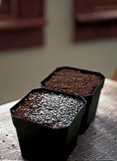
Horticultural sand has been used to top-dress these square, 3¼-inch plastic pots. The square shape provides more surface for sowing, and if set into a flat, the pots are less likely to fall over than round ones.
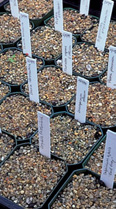
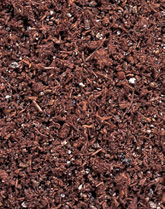
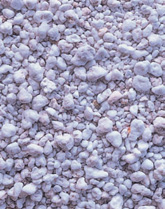
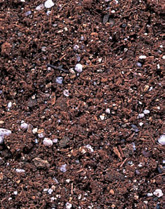
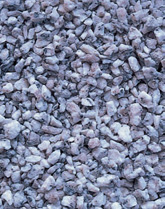
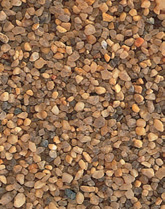
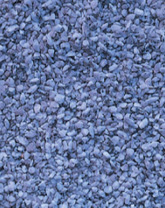
A variety of ingredients can be used in a growing medium. Some of the materials and mixed media that one may encounter include: commercial seed-starting mix; perlite (exploded volcanic rock); commercial humus-based potting mix; number 2 or grower (medium) chicken grit; horticultural sand (coarser than beach or construction-grade sand); number 1 or starter (fine) grit.
Plastic and clay can both be washed and reused, but durable, non-porous pots offer advantages. Clay pots, however, can be recycled for other garden uses, as Georgia designer Ryan Gainey discovered.
Traditional sowing steps: Terra cotta is permeable, so gasses flow through a clay pot (1), but moisture is also lost. (If seeds or seedlings dry once they have absorbed moisture they will perish, so nonporous plastic is often chosen for easier care.) Pour moistened medium into a scrupulously clean pot until it overflows (2). Skim off the excess (3) with a stick or striker (this one is a concrete float). Tamp the medium down to remove air pockets (4) (a fence post finial is shown but the bottom of another pot will work). Jack-in-the-pulpit seeds (5) are ready to be distributed evenly (6). Then comes more medium to cover the large seeds, a gentle tamping (7), and a shallow layer of grit (8). Because of the large seeds and pot, the seedlings and tubers that developed were allowed to grow through their second year before transplanting (9).
A thin layer of fine or medium granite chicken grit is nearly always added and brings the medium up to the pot rim. There may be some settling, but since water is absorbed from below or occasionally misted from above, there is no need to provide extra space for a reservoir as with a potted plant. The grit prevents disease and keeps the medium from being disturbed if sprinkled.
Now that plastic stands in for nearly every organic material, even money, it isn’t surprising that synthetics are everywhere in the garden too —even the garden of a nature lover. Many horticulturists sow seeds in 12 by 20-inch, easy-to-clean plastic flats that can hold thousands of seeds of one plant type. (Sowing seeds of several kinds of plants in one flat creates problems because the seeds germinate at varying rates and are difficult to handle.) Pots made of non-porous plastic keep moisture in the medium, and are easier to wash than ones made of clay.
However, there is no question that clay pots are better looking than plastic, and they are also better for plants. If you have the time and patience to tend seedlings in terra-cotta containers, which dry out quickly, by all means do so. The exchange of gases through the walls of the pots is beneficial to plants. On the other hand, plastic is inexpensive, lightweight, and durable. Outdoors, plastic pots hold up to the elements longer than the more attractive terra cotta, which can crack from freezing and thawing. Ultimately, though, ultraviolet light, temperature fluctuations, and even the heat of the indoor nursery will break down plastic —nothing really lasts forever.
While a flat is useful for mass sowings, in most cases, square, 3-inch plastic pots are the most efficient choice for home gardeners. Square pots make the best use of space and hold more medium and seeds than round ones of the same size. Square plastic pots also fit snugly into flats so they can be moved without toppling.
Everything that comes in contact with the seeds must be impeccably clean. If you are using recycled pots, wash each one thoroughly. Use dish soap, dishwasher detergent, or a 5 percent dilution of bleach in water. Scrub off any crusty salt deposits from fertilizers with a fingernail brush. Rinse the pots thoroughly, and drip-dry them on a rack.
The last step before actually sowing seeds is to fill the pots, and here comes the crocking controversy. Common practice calls for placing extra drainage material such as broken clay pot shards placed concave side down, pebbles, or gravel in the bottom of containers for drainage and weight. Adequately prepared medium, however, composed of similar particle sizes and aggregate, should provide enough drainage and heft to propel the medium in a single mass out of a pot when it comes time to dump the contents. Another reason not to add crocking is that if a capillary mat is used as the primary watering system or for maintaining moisture when the gardener is away, the medium must touch it. Pots sit directly on the mat, and moisture is transferred by direct contact with the medium in the containers.
Tiny nicotiana seeds are removed from their envelope and, because of their size, are sprinkled on top of a thin layer of grit.
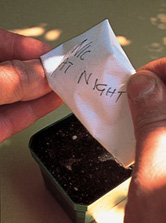
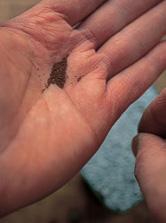
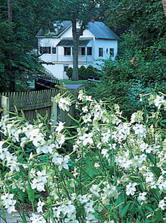
The seeds—about one hundred in a 3½-inch pot—settle in between the spaces of the grit. This one pot produced a brilliant show, with flowers that opened in the evening and filled the air with their fragrance.
Seeds are distributed in a logical manner. Larger herb seeds are given space to accommodate the larger seedlings that will follow. Tiny seeds can be sown more densely (top).

The preparations are nearly complete, and according to your sowing calendar, it is time to begin. Start by filling each pot to overflowing with the medium. Strike the surface by scraping a tool or flat stick across the rim, then firmly rap the pot on the table or potting bench to settle the medium and fill all air gaps. If necessary, add more medium and rap the pot again. The surface of the medium should be nearly even with the pot rim for tiny seeds and just below for larger seeds.
The density of the sowing depends on the size of the seeds as well as the size of the seedlings-to-be. Most seeds will range between the size of a poppy seed and those of a pumpkin. Medium-size seed, for example, a lemon’s “pip,” should be sown one or two per square inch —about a dozen in a 3-inch pot. In contrast, fifty to one hundred columbine seeds fit in the same size container. Helpful hints for achieving an even distribution include sprinkling in plaid grid patterns, but practice is what you’ll need.
Most books recommend covering seeds with a depth of medium equal to twice their thickness, often to keep seeds from light. While some seeds do need darkness to germinate, as some need light, most will sprout in either condition. Unless noted, cover seeds to assure them of a moist environment.
Large seeds can be evenly set on the medium and pressed into place with a tamper. More medium can be added as needed to cover the seeds. Tap the pot gently to level the surface. Then cover the medium with a fine layer of grit. (If you can’t obtain grit or a substitute such as parakeet gravel, use additional medium.) The grit should be flush with the pot rim.
Although bringing the grit or medium to the top of the container counters the tendency to leave a reservoir for watering, it will prevent the obstruction of air movement or the collection of airborne microorganisms, which could attack emerging seedlings.
Medium-size grit, which has particles about ⅛ inch across, is good for most applications. The smallest grade (number 1, or starter) can be used for the smallest seeds. The very tiniest seeds, which often require light for germination, can be sown on top of a very fine layer of grit or sand. Tiny seeds roll into the spaces between the grains, receive light, and are kept moist by the damp flaked rock or coarse sand.
To sprinkle the grit, fill a pint-size plastic tub half full, and then tip and carefully tap it. With practice, you’ll be able to make a layer two or three particles thick.
Commercial suppliers often pack the tiniest seeds in little sealed foil or paper envelopes inside normal-size packets. Take out the inner packet, carefully cut it open with scissors, form a crease on one side, and tap it very gently so that the seeds arrange in single file along the crease and drop one by one onto the grit. Another method is to mix tiny seeds with fine “play” sand, take a pinch, and sprinkle the mixture lightly onto the surface.
Note: To assist gardeners, some companies sell difficult-to-handle, nearly microscopic seeds individually coated in a shell of nutrients and inert material to create larger “pelleted” seed.
For review, see Sowing Summary.
There seems to be some confusion about the proper method for watering from a rose attachment on a watering can. The holes face up, not down, so that when the can is righted, the excess returns to the container and doesn’t continue to dribble. Begin watering with the can in front of the pot.
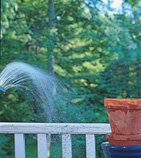
Draw it over the container.
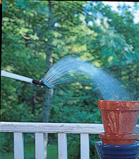
Keep going, and right the watering can past the pot so extra water can’t splash the medium.
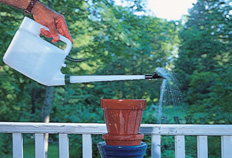
The next procedure ensures that the medium will contain just the right amount of moisture for the seeds. Initially, the best way to water is to fill a dishpan or a flat without drainage holes with 1 to 2 inches of room-temperature water, place the pots in it, and allow the medium to soak up the moisture from below. If the water source has been chemically softened or treated, or if the water is known to be naturally very hard, use distilled water. When placing the pots in the flat, take care not to let water douse the surface of the individual containers and dislodge the seeds.
The absorption process may take a half hour or so, depending on the temperature of the water and the temperature and initial dampness of the sowing mix. The medium has absorbed enough moisture when the grit on the surface turns from near-white to pale gray, or when the light brown medium darkens. If all the water in the tray is absorbed before this color change happens, add more. As soon as the surface has changed color, remove the first pots, add more water, and insert other pots.
Next, place the moistened containers into a flat with drainage holes. Note how heavy the pots feel at this time; become accustomed to judging this weight. Lifting the pots is about the best way to tell if the seed mix or seedlings need more water. In many cases, the pots will not have to be watered again until the seedlings are up, possibly even later.
This first watering from below ensures that the medium and seeds are not jostled, which can happen when water is poured from above. However, if the mix in the pots begins to dry, water can be sprinkled from above with a rubber bulb mister or a spray bottle. Later seedlings may be moistened with a watering can fitted with a very fine “rose” attachment.
Perhaps the most demanding task a propagator faces is to monitor the medium’s moisture content religiously. Once seeds have absorbed water, they must never be allowed to dry out. During the weeks between germination and preparing plants for their permanent homes, if you need to be away for more than a few days, plan to have a neighbor come over to check the moisture in the pots, following your written instructions, or consider installing an inexpensive capillary mat. One edge of this sheet of absorbent, feltlike fabric is placed in a trough of water, and the rest is laid beneath the pots. Water is wicked into the mat and transferred to the pots by osmosis. The mat is not a cure-all, nor is it an alternative to attendance.
The first watering was performed by setting pots with newly sown seed in shallow water for about half an hour until the grit darkened with moisture. Water can subsequently be sprinkled when needed from above with a device such as an old-fashioned bulb mister, which is still sold today.
Germination occurs when the seed leaves emerge above the medium, as with these nicotiana seedlings from the sowing demonstrated here.
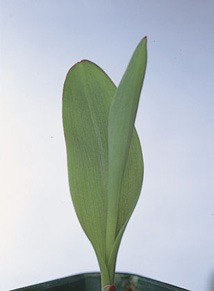
Corn is a monocotyledon, so its first leaf is a single blade, followed shortly thereafter by another.
Dicotyledons, such as these impatiens, first produce coupled, semicircular seed leaves.
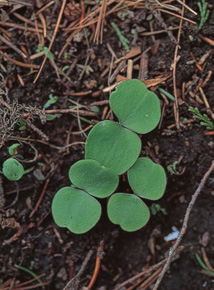
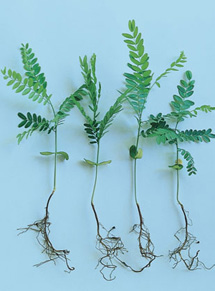
The twin cotyledons are followed by sets of true leaves that resemble those of older plants, as seen with these honey locust seedlings.
When the seeds are newly planted, the pots are brought to the greenhouse, south window, or should be placed so that the rims are approximately 4 inches beneath the center of the fluorescent tubes (the light in the middle of the tubes is much brighter than at the ends). As the seedlings emerge, the lights have to be raised to maintain a 4-inch distance from the leaves. When all the seedlings do not come up or advance at the same rate, things become complicated. To accommodate the different seedlings, plan to stage the pots using clean, inverted flowerpots to raise individual pots or trays.
At last, the miracle happens, and a green haze appears above the grit in the pots. Most seeds started indoors with warmth from below will germinate in two to six weeks —which can seem like an awfully long time to the eager gardener. But soon, tiny, new sprouts develop with seed leaves, or cotyledons. Monocotyledons resemble a blade of grass; dicotyledons hold two semicircles atop a little stem. These seed leaves are followed by the first true leaves: monocots sprout a second blade; dicots, two diminutive replicas of mature ones.
Seed packets give instructions for thinning out the crowd either by pulling some or decapitating half with scissors. Thinning makes sense when hundreds of carrot seeds are sown outside in the kitchen garden, but sacrificing precious seeds of unusual perennials, some of which come fifteen to a packet or less, is not necessary.
Potting up seedlings for more root and elbow room takes the place of thinning outdoors.
Once the seedlings have developed their first set of true leaves, it’s time to move them into larger quarters. It is too early to transplant indoor seedlings outdoors, even if the weather is mild; the tender seedlings would perish in the sun, wind, and lower humidity. However, if left in their pots, the young plants would become overcrowded and their roots would grow into a tangled mass. “Potting up” or “potting on” involves transferring seedlings from the original pots into their own containers. Most seedlings appreciate personal space and will take off, growing larger and sturdier, in just a few days.
Seedlings of hardy herbaceous and woody plants may have to remain in individual pots for up to a year, so they should be moved into sturdy containers. Seedlings that are destined for transplanting to the garden in a month or so can be moved into flats made of flexible plastic.
If you’re growing annual bedding plants, 12- by 20-inch flats with drainage holes are handy. If you do not have enough of one species to fill an entire flat, you can mix varieties with similar requirements and rates of growth —perhaps two colors of one kind of marigold. Eventually, the seedlings can be transplanted with a spoon.
Flats with preformed cells or individual compartments that allow each seedling to develop a separate “plug” of roots come in various sizes with as few as 12 cells or as many as 120. At planting time, the seedlings will recover quickly if their roots are disturbed as little as possible, and it’s easy to pop the plugs out of their cubicles by pushing up from below.
When seedlings have their first set of true leaves, they will have to be transplanted either to individual pots or flats with room to grow. One method, to “prick out” each seedling from the medium, is most useful for mass sowings of seeds in communal flats; the other calls for easing the entire contents out of the pot at once and pulling off seedlings one by one. To prick out, hold each seedling by its first true leaf and use a sharp stick, plant label point, or a pencil to pry the roots up and out of the medium.
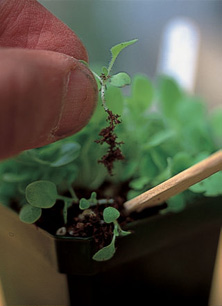
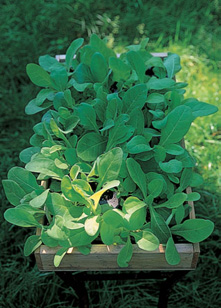
These nicotiana seedlings were transferred to a flat with seventy-two cells and were ready in three weeks to be hardened off for planting outdoors.
A good potting medium for seedlings is coarser than the one for sowing. Again, homemade is preferable to store-bought mixes. Commercial “potting soils” vary from poor-draining, loam-based soils to light peat-based mixes. The best choice contains humus—homemade compost or leaf mold—sieved through a ¼- to ½-inch mesh. For drainage material, use perlite, coarse sand, grit, or a mixture of these. By volume, use three parts humus to one part drainage material. Plants from shady woodland environments need a moist mix with less drainage material. Species native to prairies or deserts prefer a faster-draining mix with more perlite and grit. The medium should be just damp —cool to the touch—not wet enough to stick in clumps.
Aside from the practical benefits of a homemade mix, feeling the medium is part of the experience. So much of the pleasure in gardening comes from tactile sensations. A gardener learns to sense if a homemade mix is right by the look and feel of the blended materials. (See here for media ingredients.)
After preparing the potting medium, fill a flat to overflowing, skim the excess off, and gently tamp down the medium. A section of branch or a child’s block can make a good tamping tool.
Potting Up: To transplant seedlings, assemble a flat with or without compartments, potting medium, striker, tamping tool such as a section of dowel or tree branch, labels, pencil, Popsicle stick or similar tool, and watering can or bulb mister. Pour medium into the flat (1), such as this one with twelve six-packs, and smooth to fill every cell (2). Strike the surface even (3) and tamp each receptacle (4). Bring the seedlings to the flat (5), invert the pot, shake it gently until the medium begins to slip free (6), and “dump” the contents on its side. Drill a hole in the medium with a pencil. Peel a seedling from the top of the pile while holding it by one true leaf (7) and lower it into the hole. Push the medium back in place (8). Large seedlings may be set in place while pouring a thin stream of water to settle the mix (9). Transfer the label to the flat.
Some sources suggest pricking out individual seedlings one at a time from the pot. There is an easier way to transplant an entire batch all at once. Dump the pot of seedlings out sideways into your hand and lay the clump on its side. (If you need to leave this task midway, cover the pile with a wet paper towel —the roots must be kept moist at all times. Keep the seedlings out of the sun or drafts.)
Make a hole in the center of the cell, new individual pot, or corner of a flat with your pencil. Lift one seedling at a time, holding it by one of its true leaves, not its cotyledons or stem, and peel it from the top of the clump. If the true leaf is damaged, the plant will survive, but the plant will not survive if the seed leaf or stem is torn. Lower the seedlings one by one into their spaces in the medium.
Roots will not grow in pockets of air, so snug the medium gently but thoroughly with a Popsicle stick or your fingers. If the roots are extra long or wide, “water-in” the seedling by holding it in one hand over the hole and lowering it while pouring a fine stream of water from a small can. Stop as soon as the seedling seems able to stand upright. Try not to overwater.
Seedlings need a great deal of light as they grow, but they no longer require bottom heat. In fact, after seedlings have emerged, high temperatures will cause them to become leggy, and they may be useless by the time it is safe for them to go outside. (The bottom shelf of the floral cart has no light below it so it is a cool, bright spot.)
Keep a sharp eye on moisture by judging the weight of the pot or feeling the medium. The mix should feel cool and slightly damp about half an inch down. If the medium becomes too wet, mold and fungus gnats may appear. These tiny, swarming, black insects do little harm, and the problem can be corrected by allowing the medium to dry a bit more between waterings. Apply a water-soluble fertilizer, such as fish emulsion or a liquid organic fertilizer diluted to about one-quarter of the recommended rate for full-grown plants, every other time you water.
If the seedlings seem to be pale, examine the leaves for pests. Red spider mites are microscopic, but you may see what appears to be dust on the undersides of the leaves and, in the worst cases, webs around the foliage. Whiteflies are tiny mothlike insects barely 1/16 inch long that take flight if you disturb the leaves. You can vacuum them up as you shake the plants, but don’t get too close and suck up seedlings as well. Yellow sticky cards also work.
If caring for the seedlings seems overly demanding, they may have been started too early. Note this on your calendar or journal.
John Mapel of the Tower Hill Botanic Garden, Worcester, Massachusetts, makes a cold frame out of seven 8-foot-long and seven 4-foot-long pieces of aged, pressure-treated 2 x 12 lumber. (No food crops will come in contact with the wood.) I chose recycled glass sashes, but John recommends durable acrylic or fiberglass. A 4- by 8-foot rectangle was made by butt-joining the lumber with galvanized deck screws. One 4-foot-long piece was ripped diagonally to create the slanted top, which will face south for the most sunlight. Two more rectangles were built and lengths of 1-by 3-inch lumber were cut. These pieces will be fastened to wrap around the outside of the rectangles, covering the seams and serving as bracing. Two more pieces were cut that will fit inside the box for the sashes to rest upon when closed.
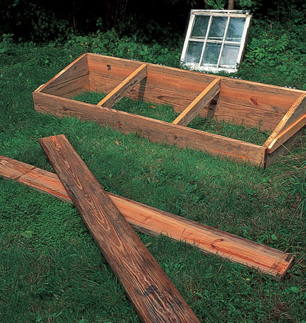
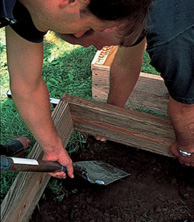
Steve Labuda helps by digging a trench 1 foot deep.
The first rectangle is laid in the hole and John lifts the corners as Steve cuts the soil or fills in to level the frame’s wooden foundation.
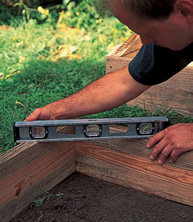
John checks the level one last time. The next rectangle is set on the first and, finally, the slanted top. The rests and braces are added, and last the sashes are attached to the back of the frame with hinges.
Eventually, seedlings of outdoor ornamental plants have to leave their pampered life indoors, but the transition must take place gradually. About two weeks before the date the plants are to be set into the garden (the last possible day of frost), they must be “hardened off.”
This process acclimates new plants to direct sunlight, wind, changeable relative humidity, and cooler temperatures. Gardeners are often advised to take the seedlings outdoors to a protected spot, for one hour the first day, adding an hour of exposure each day. This regime may work well, but it is not practical for most people.
Cold frames make the necessary process of hardening off much easier. One portable version, of thin, corrugated, white plastic, is available from mail-order suppliers. The bottomless frame is shipped flat and can be stored that way when not in use. Set up the frame on soil or a paved patio, perhaps in a spot that receives just a few hours of direct sun. Place your flats of seedlings into the frame.
If the air temperature during the day is 65 to 70 degrees F (18 to 21 degrees C) or higher, prop the lid open 6 inches. At night, or if a cold snap is predicted, leave the top closed. After a week, open the frame fully all day but continue to close it at night. In two weeks the seedlings will be ready for transplanting into the garden.
Someday, you’ll want a permanent frame (see captions). These are set in full sun and will need a filter of sheer cloth or a temporary coat of whitewash.
For insulation, dry leaves can be sprinkled over the plants in the frame. One or two layers of bubble wrap can also work. The plastic can be stapled to the inside of the frame. Rigid foam insulation can be placed on top of the sashes and tied or weighted in place when the coldest weather is predicted. But as with all parts of a garden in the North, nature’s insulation—snow—is best of all. Under the cover of this airy white blanket, plants stay cozy until spring.
