When human beings started to collect, save, and sow seeds of the plants that their animals ate, their nomadic life was over and civilization began. Plants put down roots and so did people. Stationary communities formed, and over the next few thousand years, pastures turned into farms, and, sometimes, farms became gardens created simply for pleasure.
The notion of hunting and gathering for sustenance is far from our minds today. But most of us hunt through plant-catalog pages, and we might gather some interesting propagation possibilities inside fruits bought at the farmer’s market. More often than not, however, the seed we harvest will come from our own plants and those of friends. Picking seeds from private property, parks, or (perish the thought) a public garden is out of the question; however, it may be acceptable to collect a few seeds of plants in the “wild” when their habitat is threatened.
It is customary to cut wildflowers from the roadside, even de rigueur, but if everyone did it, there wouldn’t be any flowers left. The same goes for picking seeds. As a general rule, take no more than one in ten seeds that you come upon, and if there are only nine, do not take any.
There are organizations dedicated to native plants, such as the New England Wild-flower Society, which offers a yearly seed list of native plants.
These groups do the collecting for you and also carry the responsibility of harvesting only from their nursery-propagated stock. If you are interested in specific types of plants, look to associations such as the North American Rock Garden Society or the Hardy Plant Society (see Resources, here). Often there is a yearly seed exchange featuring seeds that may not be available from any other source. Members who collect and donate seeds to the plant society’s exchange have first pick from the season’s offering.
There’s always something “new and improved” offered on the colorful pages of the commercial seed catalogs. To find seeds of plants that are less refined, not quite so well bred, subtler, and in keeping with a low-key, sophisticated aesthetic, look to the less flashy catalogs. Mom-and-pop seed companies that have catalogs without color pictures, or even just lists of species or old-fashioned varieties, can become enticing sources for rare, unusual, or curious plants.
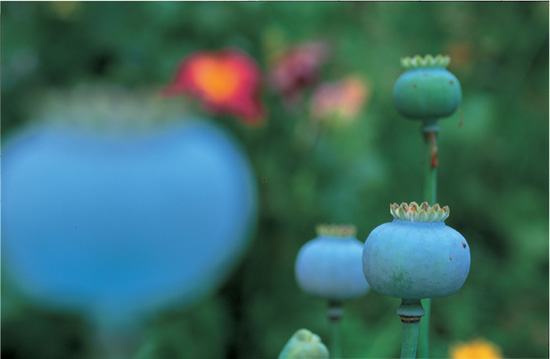
After the opium poppies’ petals fall, ornamental blue-orb fruits are revealed—filled with next season’s seeds.
The shapes, sizes, and colors of fruits are nearly as varied as those of flowers—a fact wonderfully illustrated by capsules of species in the single genus Eucalyptus.
Although you will rarely be collecting from the wild, you will want to collect seeds from plants that are “originals” —species, that is —not commercial hybrids or cloned selections. Exceptions would be heirloom varieties, cultivars that “come true,” and the seeds of your own cross-pollination experiments. Seeds sown from most hybrids will not reproduce their parent; they will “revert to type” and resemble one or more of their previous ancestors. Some hybrids may even be sterile, as are many daffodils whose swollen fruits are barren. You should also avoid harvesting fruits from weak or diseased plants. Those plants that are deformed or weakened by viruses may pass on this condition to their progeny.
When collecting seeds, consider the general environment. Was the seed from a tree that lives in a cold climate or from an indoor vine native to the tropics? What was the vessel like that held the precious cargo —in other words, the fruit? Was it a dry fruit with a papery shell or a moist fruit with seeds encased in juicy flesh? The physiological characteristics of a fruit offer valuable hints to its source’s culture.
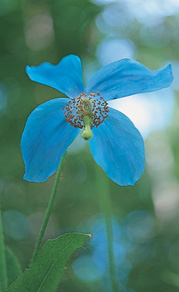
Seeds of rare plants, such as Meconopsis grandis, can be “harvested” through the mail from plant-society seed exchanges, which is often the only way to procure the rarest plants.
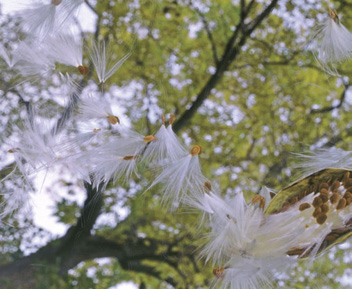
In order to collect the seeds of many plants, a gardener has to be in the right place at the right time. Milkweed seeds take flight the moment their ripe dehiscent fruits split open.
It isn’t always easy to know the best moment to collect fruits and seeds from a plant. The generalization is to get them when they are ripe. If the fruit is ripe, then it can be assumed that the seeds inside are fully matured. But when is that perfect moment?
You can check the fruits of a certain plant each day, only to discover that the moment you thought they would be ready, some animal had a similar notion and collected the seeds before you were able to. Then there are plants with explosive fruits; when you want to harvest these, a minute late is too late. Witch hazel, impatiens, and rhododendron capsules all “shoot” seeds, and once scattered, they are impossible to find. These fruits have to be removed before they open and release their seeds.
Elm and other seeds with papery wings are ripe for harvest and ready for specific sowing treatments as soon as they turn papery brown. Maple seeds are ready to harvest when their winged helicopter-like fruits spin to the ground.
Food crops, forestry trees, and ornamental annuals have been studied extensively, and information on harvest dates can be found in agricultural journals and books. But far less documentation exists for ornamental trees, shrubs, and perennials. Nonetheless, help is available. A public garden’s library, or one at an arboretum, may have the information needed.
When you come across a fascinating but uncommon plant that you’re eager to sow from seed, carefully observe the plant and its fruits. A moist fruit is most likely ripe when it turns color and yields when pressed. As a dry pod begins to shrivel and also changes color from green to brown, it will probably be ripe enough to harvest. When the pinecones are heavy and the conifer’s branches seem to weep with their weight, it is time for the harvest. After harvesting, the next step is cleaning the seeds before either storing them, sowing them, or beginning the treatments that will lead to germination.
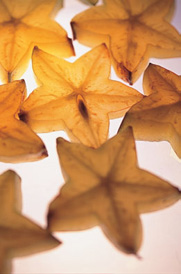
Following fertilization in flowering plants (angiosperms), structures containing developing ovules swell. These vessels with seeds are fruits—whether moist and succulent like a melon or dry like a vanilla bean. The gymnosperms (with naked seed) have no fruit. The conifers, for instance, have ovules within the overlapping spiral layers of their dry cones. Examples of seed sources include: the moist berry of star fruit (Averrhoa bilimbi), which when sliced makes the origin of its common name clear.
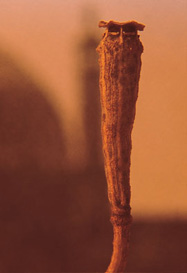
The dry capsules of Papaver atlanticum are reminiscent of minarets with “portals” at the top from which seeds spill as the papery fruits lean in the breeze.
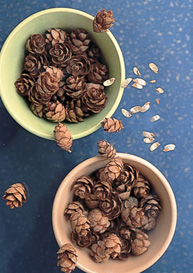
Little winged seeds slip out from the scales of the hemlock’s tiny cones.
Fresh is usually best. The seeds of jack-in-the-pulpits germinate quickly when they are harvested and immediately processed, but those I receive from society seed exchanges, which have been dried for shipping, do not. Even after a 24-hour soak, some take six to eighteen months to germinate. It is possible that chemicals known as “germination inhibitors” (discussed in chapter 4) are formed at the end of a fruit’s developmental cycle. Perhaps some seeds will have better germination if they are harvested and sown just before the fruits are completely ripe.
Seeds harvested from the ripe, red fruits of trillium species can take one to two years to germinate. But some trillium enthusiasts have experimented with seeds taken before the fruits are ripe, when they were full-size but still green. These seeds germinated almost at once.
How does one know to “suspect” a plant’s seeds should be harvested green? A few gardeners have been led to try plants by their own intuition, by trial and error, or perhaps by guessing that similar plants may do well when harvested and sown the same way.
Dry brown pods should not be thought of as the detritus of fall, but as gems in intricate parcels. When you are looking for seeds, a walk through the autumn garden becomes a treasure hunt. Suddenly, a faded flower doesn’t represent the end of the season but signifies the beginning of next year’s garden.
Pods and capsules, sheaths and spiny orbs —papery, brittle coverings containing seeds —are all dry fruits. There are two general types: dehiscent and indehiscent. Dehiscent fruits burst open when the walls of their ovaries dry, and their contents, the seeds, pour out. When a pea pod dries, for example, one side splits along its seam and the halves open. With dehiscent fruits, you have to be diligent to garner a respectable crop before things pop, slip, or spill. Some indehiscent fruits can also get away. Just consider the dandelion’s parachute or the maple’s double-winged schizocarp. Those seeds have to be chased. On the other hand, an indehiscent fruit, such as a pecan, which stays shut, still must be watched. Although there may be a bounty of nuts, some furry creature may beat you to the harvest on collection day.
Harvesting dry fruits requires diligence. Fruits won’t split until they are dry, and animals rarely take seeds until they are completely ripe. The early signs that ripening is occurring in herbaceous plants may show in the stems. For example, the stem of a plant such as a sunflower will visibly toughen—the ridges becoming pronounced as the fleshy tissues shrink. Fruits begin to desiccate, showing a few wrinkles, but the most obvious sign is when pods or capsules lose their vivid green color. They may become pale or start to turn tan, brown, or gray.
Even experienced gardeners sometimes miss the moment. Annuals started from seed indoors under lights mature and present ripe seeds earlier than the same species sown later outdoors. An individual plant might ripen earlier because it occupies a warmer spot in the garden, perhaps in brighter sunlight or near a wall that radiates heat. Obviously, you cannot be everywhere at the perfect moment, so you will need to adjust your tactics to reap in order to sow.
The maple samaras can be cut off the trees in a cluster, if you can reach them with a ladder. Sometimes a stick or pole might be necessary to knock a few fruits free (without damaging the tree, of course). Cones may also have to be collected this way. Spread a sheet of plastic or a tarp on the ground beneath the tree or tall shrub to catch and gather a few cones.
If you’ve had a go at creating your own daylily hybrid as described here, you’ll be anxious to collect its seeds. When the flower fades, the ovary at the base of the pistil begins to swell. Shortly thereafter, the pod will stop enlarging and will turn pale green. That’s the moment to slip an inverted paper bag over the fruit, close the open end, and secure it around the flower scape with wire or string. Daylily fruits are dehiscent, and without the bag, the seeds would be lost. When the flower stalk below the bag turns brown, the fruit is ready for harvest. Cut the stem and bring the bag to a protected spot before carefully tearing it open to retrieve the split pod and the half-dozen or so seeds of the new hybrid daylily.
Columbine seeds are even easier to miss. The ripe fruits spill their contents without warning. To ensure a harvest, these seeds can be contained, just like the daylily’s. The bag containing the columbine fruits should not be opened outdoors, however. When the stem turns tan, cut it with the bag attached and hang the package, fruit side down, in an airy spot indoors. When the fruits are ripe, you can hear hundreds of loose seeds rattling in the bag. Fruits of other plants harvested this way may not open up inside the bag, but you can tell they’re ready when the stalk sticking up out of the bag dries. Carefully open the paper sack to check if the seed heads and their contents are dry.
As for the sunflower, its succulent head could rot if it were covered with a bag. But if it were left to dry outdoors, birds might harvest the seeds first. When the ribs along the stem of the sunflower become pronounced and the nearly ripe seeds are beginning to dry, cut the stems about a foot below the heads, tie a string around the severed ends, and hang the stems upside down in an airy spot indoors. You could also lay them across a slatted rack, such as the kind used for drying cloths. When the dry seeds are ready to harvest, you can easily rub them off the head with your thumb. Save what you’ll need, and toss what is left out for the birds.
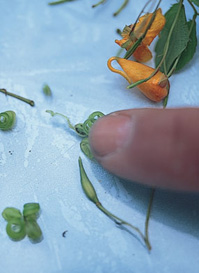
Some seeds must be harvested before their fruits “explode.” Impatiens fruits are filled with water to the breaking point;
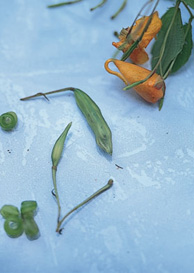
Any contact can split their seams violently, shooting seeds up to 15 feet—suggesting one common name: “touch-me-not.”
A magnolia’s scarlet seeds should be harvested before their fruits reveal them; but these slow-to-sprout seeds could be sown “green,” not completely ripe, a strategy that works in a few cases.
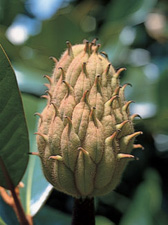
Louis Bauer uses a coffee filter to harvest seeds because he can hold the cone open with one hand and bend the fruits over to safely pour the contents into the paper funnel.
When green dehiscent fruits of Nicotiana alata turn brown, the cover dries and opens, making ½-inch-long chalices ready to cast their seeds to the ground.
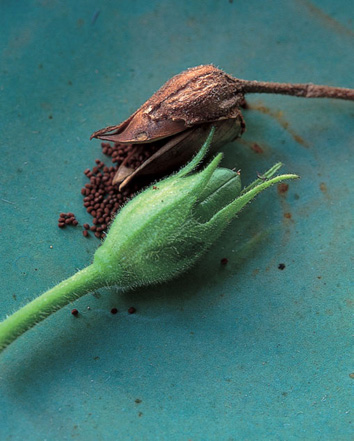
Most dry fruits collected before they are completely dry must finish the process before their seeds are extracted, stored, or sown. But if you cut a ripe milkweed pod, for example, and brought it into the house, the warm and dry conditions indoors would cause the pod’s cells to desiccate, the tissues would shrink, and the fruit would split apart at its seams. One morning you would wake up to a house full of tumbling, silky fluff.
If a seed head is of the explosive kind, put it in a box to dry or in a paper bag. As for the columbine and other flower stems bagged outside and cut, simply lift the stalks out of the bag one by one, tapping the stems as you go. Tip the bag to gather the seeds, make a crease in the side of the bag, and pour them into a labeled envelope for storage. Fading flower stalks of primroses can be cut and placed upside down in a bag. If any debris and bits of dried fruits are present, the contents may be poured through a coarse sieve that lets the seeds pass through and captures the refuse.
Other plants do not, however, always give up their seeds as graciously. Strawflower seeds, for instance, must be hand-separated. Winnow the dried flowers from the seeds by rubbing them between your fingers repeatedly and gently blowing away the chaff, or grate them on a coarse screen sieve to separate the seeds from their scaly petals. (Be sure to wash your hands before eating or drinking, since ingesting parts of some plants can be harmful.)
Many seeds —especially dry seeds —can remain viable for years, decades, or perhaps centuries. There are many tales of archaeologists finding two-thousand-year-old seeds in a Pharaoh’s tomb that still germinated and grew. But the point is clear —seeds retain their optimal physical condition with consistent low temperatures and in a dry environment. Luckily, there are alternatives to stone tombs in the Egyptian desert. Cleaned dry seeds can be stored in 2½-by 4-inch translucent, oil-and moisture-resistant, glassine envelopes, sold through camera shops or stationery supply stores; regular paper envelopes; or polyethylene bags.
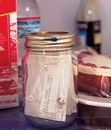
Record the species name and harvest or storage date on the sealed packets, then slip them into a glass jar with a tight-fitting lid. Place the jar on the top shelf of the refrigerator, where it will be kept at an even temperature of about 40 to 45 degrees F (4.5 to 7 degrees C). The relative humidity should be below 40 percent. The small packets of silica gel that are found in vitamin bottles or new camera equipment can be dropped into the jar to absorb moisture. Some gardeners sprinkle powdered milk or cornstarch into the bottom of the jar for this purpose.
Some seeds do not part with their contents so easily. When the time comes, remove the dried flower stems of plants such as pearly everlasting from their bags.
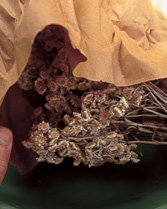
Rub the flowers between your fingers.
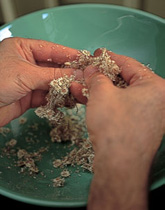
The flowers may have to be held over a sieve to catch the seed or scraped across the screen to shred the fibers, which can then be winnowed by sprinkling seeds and chaff over a bowl and gently blowing across the falling debris.
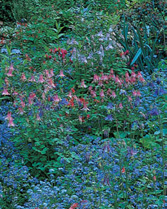
Columbine flowers are beautiful in the garden, and frequent sowings guarantee a yearly show from this short-lived perennial.
As soon as the fruits turn brown, seeds shake free. In order to have seeds for other places in the garden, they must be captured, which is easily accomplished by covering one plant with a paper bag.
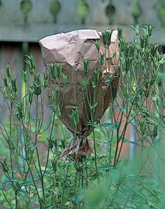
As the stems (and nearby columbine fruits) begin to brown, cut the stalks, invert the bag, and hang it in an airy spot indoors.
Envelopes from rare-plant societies may contain as few as five or six seeds. On the other hand, commercial packets may be sold by weight, and when the contents are tiny seeds from a prodigious producer, the bounty may be passed along to the consumer. Ask yourself if you really need 200 or 300 common foxglove plants. If you buy too many seeds (and you will), you can store the extra seeds by folding the packet closed, taping it shut, and placing it in the closed jar.
Seed-gluttony —overordering and overplanting —is a problem when your eyes for the future garden are bigger than the space in which you can grow the seedlings. Seeds are tiny, and so are seedlings, but not for long. Picture the results of sowing nicotiana, for example: after six weeks, one hundred seeds in one 3-inch pot will become one hundred 6-inch-tall plants needing attention.
Rather than thinning seedlings as most books recommend or saving too many seeds, go in on your seed order with a few friends. Consider sharing seedlings rather than seeds. You might assign yourself all the plants that should germinate at a similar time, grow to a consistent size, or require the same temperature. Ultimately, you will be able to have more different plants than sowing space and conditions could allow.
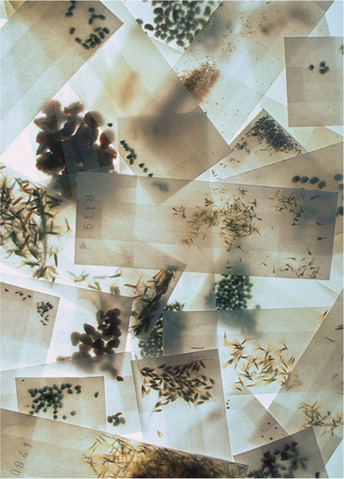
Cleaned, dry seeds may be stored in small plastic bags, folded sheets of paper, or glassine envelopes, such as the ones shown here from a plant-society seed exchange. These envelopes, similar to the sleeves used for photographic negatives, have been stamped with the society’s numerical code for plant varieties. The packages should be resistant to moisture and oils and translucent, if possible, to allow viewing of the contents.
The envelopes themselves are placed in an airtight container, such as a glass jar, and stored on an upper shelf of the refrigerator, where they will stay freshest without freezing.
The seeds of several kinds of deciduous trees —especially those with a high moisture content —should not be stored as described above. This may seem odd, since the casings of these seeds seem quite dry. The seeds of chestnut, beech, maple, ash, and some other trees must be stored with moisture. For example, if a maple’s seed dries, germination will be delayed at best; at worst, prevented altogether. Put the seeds in a wad of damp whole sphagnum moss slipped into a plastic bag, and place that in the refrigerator. Label the bag with the date and the source.
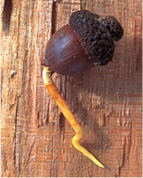
Some seeds, such as acorns and chestnuts, may sprout inside the refrigerator and will need to be watched. In early spring, or sooner if you have a cool greenhouse, pot up the seeds, with the usual regard to gravity—root pointing earthward.
Tree seeds with a high moisture content may sprout a root in the cold of the refrigerator. This is rarely a problem. Just pot up the presprouted seeds at the appropriate time, making sure the root points down.
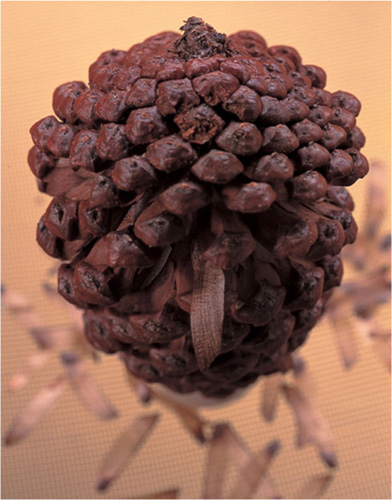
Cones come in all sizes, from the hemlock’s tiny ones to the Coulter pine’s—nearly a foot long. Animals, including humans, eat pine “nuts,” piñole, such as the pinion pine seeds on the tile.
Gathering all seeds is an act of trust, an investment in the future. Never is this more obvious than when standing in the center of a forest of towering firs, gazing at a small blue circle of sky far above. It is nearly unfathomable that conifers such as 300-foot-tall sequoias or ten-thousand-year-old bristlecone pines started from tiny seeds, but they did. Few people ever see conifer seeds in nature, but everyone knows their carrier —the cone.
Neither dry nor moist fruits’ cones are scaly bracts with seeds inside. The seed-collection process, however, begins as it does for most plants, by harvesting the receptacles in which the seeds are held. You’ll find some cones lying on the ground in autumn. If they’re on the trees, be sure that the cones are plump and that their color has changed from green or silvery blue to shades of tan and brown —the more familiar dry-cone colors. Most important, the cones should still be tightly closed.
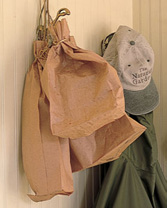
Cones are usually covered with a sticky tar, so disposable gloves will be useful. If you’re collecting more than one kind of cone, bring a separate paper bag for each species, and write the plant’s name on the bag.
If the collected cones are dry, keep them in the paper bag. When you get back home, place the bag in a warm spot and in a few days, shake it to free the seeds and gather them for sowing or storage. If the plump cones were not completely dry or open, roll a band of paper or cut a section of an empty paper-towel roll, to act like an eggcup to support the cone while it is drying. Try to set the cones in the same orientation in which they grew on the tree—pointing downward, for example. Place the paper collar and cone on a screen in a warm, sunny place with good air circulation, perhaps by a radiator or in an oven with a pilot light. As the cones dry, the scales will begin to open, at which point you can put the cones back into a paper bag to shake and collect the seeds, or leave them on the screen, where you can watch the winged seeds slip from between the layers of open scales.
Gather up the seeds with an index card or brush them onto a piece of paper. Hold the seeds over a bowl and rub them between your fingers to separate them from their wings. The cleaned seeds can be stored in a labeled envelope with other dry-fruit seeds in the refrigerator—a potential forest housed in the space of a thank-you note.
To extract seeds, place a fresh, moist cone in a warm spot with good air circulation and at the same orientation that it grew on the tree. A paper collar makes a helpful stand. As the cone dries, scales rise and winged seeds fall.
Partridgeberry, doll’s eyes, fuchsia, lowbush blueberry, false Solomon’s seal, holly, magnolia, sand cherry, and shadblow are all ornamental plants, but they have another characteristic in common: succulent fruits. These plants have evolved fruits attractive to animals that will help in seed dispersal. When a bird plucks a wild cherry, for example, the fruit (drupe) travels through its digestive system. The nutritious pulp is dissolved by the bird’s stomach acids, and the seeds are excreted by the bird in its travels. Microorganisms may also be attracted to the moist fruit when it falls to the ground and perform a similar service. Indoors, these same agents would not be welcome; they might destroy the seed or emerging seedling as well.
Most of the fruits from plants we grow for their aesthetic value and not for food do not have a great deal of succulent flesh —jack-in-the-pulpit seeds versus a watermelon’s, for instance. The jack-in-the-pulpit presents an excellent example to illustrate how the seeds of hardy ornamental plants with moist fruits can be processed. Arisaema triphyllum and its relatives produce club-shaped aggregate fruits covered like a corncob with bright red individual growths (which might be called berries) containing one or two seeds. Horticulturists who have a great number of seeds to clean may start the process by placing the small fruits between a few sheets of newspaper and stepping on them to crush the fruits’ soft outer coating.
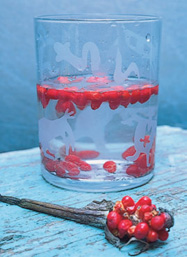
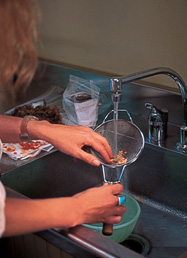
If you are processing small batches, place the fruits in a container of water and let them soak for one or two days. (Seeds with oily fruits, such as holly, often benefit from a few drops of dishwashing detergent in the water.) The jack-in-the-pulpit fruits, and those of most other ornamentals, become soft and plump overnight and sink to the bottom. Fruits found floating after a day or so often do not have viable seeds and can be discarded. After this treatment, place a sieve in the sink and rinse the bloated flesh away. (Note that some plants have toxic parts, so make sure to wash your hands thoroughly after all seed washing. If you need to wash large quantities of seeds, wear rubber or vinyl gloves.)
When the seeds of these hardy plants have been cleaned of all flesh, blot them dry on a paper towel. They will then be ready for the next step, which may be storing, sowing, or conditioning (as you will find out in subsequent chapters). If you are drying the seeds of moist fruits because you need to store them or intend to contribute them to plant-society exchanges, spread the cleaned seeds on a fresh paper towel so that they are not touching, and place them in an open airy spot —on a wire rack or screen. When the seeds are thoroughly dry, seal them in labeled and dated envelopes, and store them in a lidded jar on the top shelf of the refrigerator.
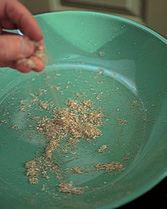
Seeds harvested from plants with moist fruit, such as jack-in-the-pulpit must be cleaned before they can be conditioned, sowed, or stored dry in envelopes.
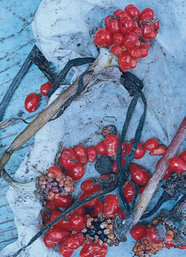
Most moist fruits should be soaked in water for 24 hours after which time a few empty or spoiled ones will float, the viable seeds will sink, and the flesh will be soft.
Press the fruits between paper towels and then wash them in a sieve under running water. When cleaning many seeds, use sheets of newspaper, step on them or crush them with a block of wood, and wear protective rubber or vinyl gloves if washing a large quantity.
Arisaema triphyllum —the stately North American jack-in-the-pulpit—is typified by its T-shaped, three-lobed leaves, hooded spathe, and spadix of tiny flowers within, which if pollinated, will become a club-shaped aggregate fruit.