Imagine if you could lean your elbow on the ground and grow a new you. In a way, that’s what happens when a branch, such as the slender cane of a raspberry plant, arches down to the soil, takes root where it makes contact, and grows.
The contact with moisture and soil stimulates the stem to sprout roots, and then a new stem and leaves. Eventually, a whole new self-sustaining plant develops that can be severed from its parent. Plants evolved this ability to spread and repair themselves to survive, and this tenacity can be exploited by the gardener.
Layering is probably the most elementary kind of vegetative propagation with stems. A layer isn’t exactly a “cutting,” because nothing is removed until the process is complete. To increase the odds for success, gardeners don’t rely on the chance contact of branch to soil. Instead, we intentionally bend a branch down, “damage” the stem tissue, and place moist medium around it. A callus may or may not form, but roots will be produced.
Many of the plants suitable for layering are shrubs that are difficult to root in other ways, such as camellia, winter hazel, daphne, rhododendron, and English holly. Small trees such as the hybrid London plane, shadblow, and even the rare dove or handkerchief tree can be started by layering. If you can convince someone who has a good candidate for layering to do so, a bargain may be struck.
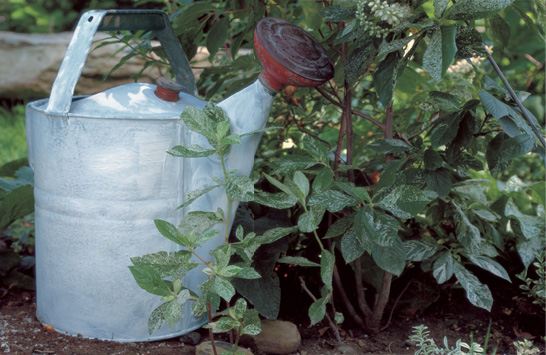
For layering, a branch of a variegated clethra was bent to the ground (to the right of the watering can) and pinned in place.
Woody vines, such as Wisteria floribunda ‘Longissima Alba’, are easy to propagate by layering. This method is so successful because the “cutting” is not severed from the source of its support until after roots have formed.
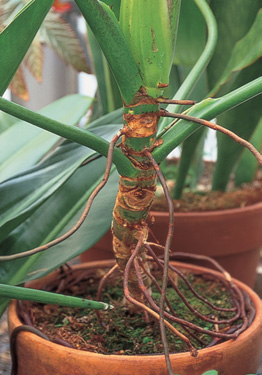
In layering, a stem’s adventitious buds produce roots. A philodendron, which produces aerial roots, is an excellent candidate for air layering.
Simple layering is easy. A stem of a shrub that is up to two years old may be supple enough to be arched to the ground. To keep the stem in place, cover it with a rock or pin it with a U-shaped piece of wire or a landscape-cloth peg. To ensure success, damage the stem when you secure it. The simplest way to do that is to push on the peg until you feel a “crack.” Add the rock to hold the peg in place, keep the spot moist and cool, and make it easy to find later.
Depending on the plant, a layer made in late spring could be ready by late summer. Lift the rock and scratch around the soil surface, and if there are roots, excavate to determine how extensive the root system is. Don’t remove the peg too early; the springiness in the branch may lift it right out of the ground.
When it is sufficiently rooted, the offspring should be pruned away from the parent just before the layering point. Then dig up the root ball and surrounding soil, and move the plant.
Herbaceous plants are layered less frequently because stem cuttings work well, but you can still layer these plants in place. If enough roots haven’t formed by autumn, leave the stem. In late winter, before shoots on the parent plant have emerged, remove the rock. Soon new growth will come up above the layer.
One technique for vines, called serpentine layering, involves pinning every other node to the soil and yields several clematis plants to cut apart and transplant.
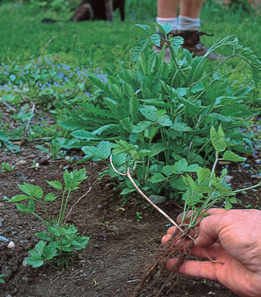
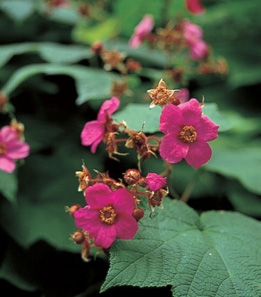
The northeastern U.S. native flowering raspberry (Rubus odoratus) can be tip-layered by burying the terminal growth.
Simple layering: To propagate a plant via simple layering, choose a branch of last year’s growth in late spring (1), such as this gold-leafed ninebark (Physocarpus opulifolius ‘Luteus’). Remove flower buds if present (2). Take a landscape-cloth peg or homemade wire pin (3) and press it into the ground with enough force to feel a “crack” (4). Cover the pinned spot with a bit of soil and/or a flat-bottom rock (5) to secure the layer and maintain moisture. Depending on the source and the stage of growth, roots may develop swiftly under the rock (6). Check by poking around the pinned stem for evidence, but replace the rock if roots are few (the layer can remain in place through the winter). If ample roots have formed, remove the layer with a generous root ball (7) and cut the stem free (8). Once transplanted and watered, the plant may produce new growth (9)—a sure sign of success.
A wound will facilitate rooting. When serpentine-layering a clematis, use a sharp knife to cut into the node that is to be pinned or buried.
Cut off leaves at the damaged nodes and carefully lay the stem over cleared ground next to the parent plant. Gently pin the leafless nodes or cover with stones.
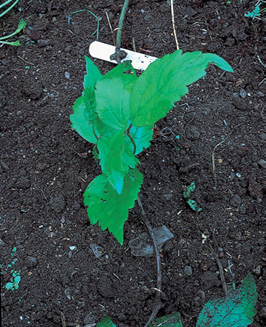
Although the simple “damage” described above is usually sufficient, one method to improve the chances for success with less-eager-to-root plants requires a more precise wound. With a sharp blade, make a ½-inch-long diagonal slice a third of the way through the stem where it will meet the ground. Practicing on some expendable twigs will help give you a feel of how this cut can be made without severing the stem or scoring it so deeply that it snaps off when it is bent to the ground. Bury the damaged area under about an inch of soil, and peg it in place before covering it with more soil or a rock, or both. This technique is more exact than the push-and-crunch method, but it will still yield one plant per branch.
Another variation is serpentine layering, frequently used to propagate vines. The method quickly produces several good-size plants. Select a long shoot of the previous year’s growth that can be lowered to the ground from spring to the fall (fall-struck layers will have to winter over in place). The clematis will serve as an example here. There are several nodes along its stem. First, remove the leaves at every other node, and wound the stem at these places. Start below each leafless node and cut toward it to create the diagonal slice. Peg each of the damaged nodes to the ground, where roots will form. If this layering is done in late spring, the results will be evident fairly quickly. New growth may appear above the pegged nodes or as a flush of new leaves at the exposed nodes. Be sure to check for roots before separating the plants. When the plants are cut apart just below each pegged node, there will be a rooted bottom end to plant and a leafy top.
One garden’s pearl is another one’s peril. While the grass Arondo donax runs amok in Los Angeles, the variegated version in a garden where temperatures dip below 0 degrees F (-17.8 degrees C) just staggers by. On the other hand, the golden ghost bramble behind it hops. Rubus cockburnianus ‘Aureus’ travels as is typical of the genus, a habit that can be exploited to generate a new plant with the freshest golden growth and weed out its predecessor. The perpetual juveniles don’t have a chance to become aggressive.
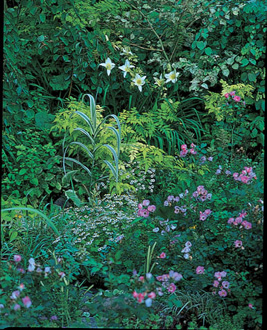
Berry-bearing plants are often layered at the terminal ends of their canes to produce new plants. In late summer, the tip of the new growth is cut back by 3 to 4 inches and buried. The tip will branch and root, producing multiple shoots that can be cut off as individual plants. Nurseries usually place “stock plants” in rows for tip layering, but this method can be used with a trailing, biennially fruiting variety such as purple raspberry or boysenberry.
This isn’t an activity to perform on the wild Rubus allegheniensis; the wild blackberry species can be too much of a good thing. However, fruiting varieties that are slow to reproduce or are in need of rejuvenation, as well as some of their ornamental cousins, could be candidates, such as the lanky hybrid R. ‘Benenden’ with 2- to 3-inch single rose-like flowers.
A basket willow was propagated to provide rooted stems as needed for a soil stabilization project. Various perennials, shrubs, small trees, and small fruits can be propagated by this method. The first step was to “stool” or “coppice” the adult by cutting or sawing the top growth down to a nub or stump (hence, “stool”). Louis Bauer dumps sandy soil over the stool (any well-drained medium can be used, even sawdust).
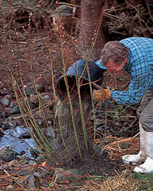
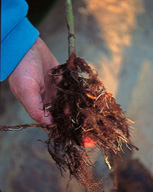
New roots will grow into the medium over time, depending on the species. The willow mounded in late winter had vigorous roots a month later.
The reason for coppicing is not always utilitarian. Willows with colored bark at Wave Hill are cut back, or coppiced, to encourage young shoots with colorful bark for a brilliant winter display. It is likely that the term coppicing shares a derivation with copse. Dormant buds at the base of the woody plants grow into a thicket of straight shoots, suggesting a miniature forest.
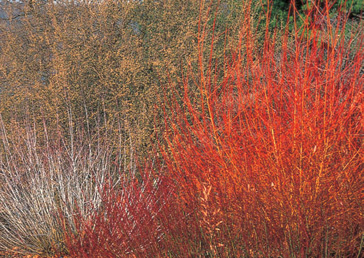
A third method, called mounding, is useful for certain shrubs that have become too big for their location, which would be better served by younger, smaller plants. This technique allows many new plants to be made year after year. Louis Bauer used a quick version to produce willow whips for a steep slope to retain the soil while slower-growing shrubs took hold. The willows will be weeded out when their job is done.
The first step of the process was to cut the willow back to a stump, an operation known as “coppicing” —essentially, cutting back plants to create a little thicket —or “stooling,” because the early result resembles a small stool. (This technique is used on willows to produce a multitude of new, straight stems for making baskets or weaving wattle fence.) In late winter, Louis dumped soil on the bottom of the willow shoots. But a more deliberate procedure could be undertaken with special shrubs, such as smokebush, currant, gooseberry, or quince. Cut these down to just a few inches above ground level. Growers sometimes use moist sawdust, but because this technique takes place in the open, a well-drained loamy soil can be used. When the new shoots are 3 to 6 inches tall, apply loose soil to cover half their height. Repeat the application when the shoots are about 10 inches tall, again halfway up the stems. By late summer, the shoots will be taller still, and additional material may be added to the mound. Mounding is horticultural snake charming, slowly coaxing roots to grow higher and higher through the season.
In autumn, scratch around the surface of the medium to check for roots. In mild climates, the shoots can then be removed if enough roots have formed to support the cuttings. Otherwise, and in colder climates, wait until the following spring. Use a stream of water from the garden hose to wash the roots clean and find the point where the shoots attach to the stool. Cut the stems as low as possible beneath the sprouting point and place them in a nursery bed, or transplant into the garden if they are large enough to thrive without frequent watering. One mound can produce dozens of plants. If that is not enough, you can remound the stool after removing the shoots and more plants will be produced for several seasons.
Many plants can be layered in midair—a fact that did not escape the ancient Chinese. Their method of air layering, also called Chinese layering, employed two halfpots bound together and filled with medium. As with all layering procedures, the new plant is sustained while it develops roots and will ultimately be cut off to go it alone.
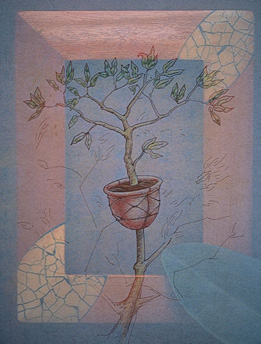
Air layering is an ancient practice formerly called “Chinese layering.” Perfect in simplicity and ingenuity, air layers are made in midair on plants such as Dieffenbachia, Monstera, ficus, citrus, Mahonia, rhododendrons, and even magnolias. For centuries, Chinese propagators used two halfpots, placing them on either side of a wound on a vertical branch. They tied the pots together so that the lower end of the branch poked through a hole at the bottom of the pot and the terminal growth stuck out of the top of the container. The pot was then filled with soil. When enough roots had grown to support the branch, it was cut off the parent —pot and all —to become a new specimen. We now use modern materials, but the process has otherwise changed little.
The allure of air layering is its ease and success rate. The operation lets you observe the project and, as with all layering, produce a cutting without first removing it from the main plant. The classic patient to air-layer is a tall, leggy rubber plant (Ficus elastica) that has outgrown its corner of the indoor garden and needs to be rejuvenated as one or more shorter, fuller plants. A sharp tool such as a single-edged razor blade, a toothpick or matchstick, whole sphagnum moss, plastic film, and rubber bands will be needed. Rooting hormone is an optional ingredient that will accelerate results.
To impede the flow of moisture, carbohydrates, and natural hormones, and to initiate roots at the damaged area, there are two approaches you can use to make cuts into the stem. In the first, ring or girdle the stem by etching two shallow cuts through the bark, about ¾ of an inch apart, completely around the stem. Then make a shallow slit to connect the first two cuts, and peel away the bark. Scrape off the green phloem layer, just under the dry bark, and most of the cambium layer beneath that. Powdered rooting hormone or a liquid diluted to softwood-cutting strength may be applied to the cuts with a paintbrush.
The second method is demonstrated here. Cover the wound with a wad of moss centered over the cut point in the stem. (On plants with stems thinner than the rubber plant’s, make smaller wounds and consider placing a stake in the pot and tying the wad to it for support. You can also place a splint right up against the stem, straddling the wound, and tie it above and below the cut before mossing and dressing.)
After completely enclosing the stem, wrap a 6-inch-square piece of clear polyethylene film (or plastic cut from a clear, heavyweight food-storage bag) around the moss, and secure it at the top and bottom with cut rubber bands tied in a knot. Although other materials such as aluminum foil are also effective, with clear plastic growing roots are visible and you can see if the moss is becoming lighter in color, which means it is too dry. Wire twist-ties are sometimes used to secure the plastic, but rubber bands work best because they can be stretched open at the top to pour a bit of warm water into the moss.
When roots are visible, remove the plastic and cut the rooted stem below the layer. Center the stem’s roots and moss in a flowerpot just large enough for the new plant to stand up in when potting medium is added. The original plant will branch at the stub, and when it appears well proportioned again, set it out on the curb on a day when it won’t be collected as trash —there’s a gardener born every minute, so it will most likely find a nice new home.
As plants grow older, they become more difficult to air-layer, and it takes much longer. Ideally, woody plants with shoots that are one to two years old should be air-layered in the spring. Indoors, with a subtropical woody plant, roots will form in as little as three months. If a shoot of the previous season’s growth is air-layered in the autumn, the process will work, but take up to a year. On even older growth of semiwoody plants such as the ficus, rooting will be slow, and fewer roots may develop. Conversely, tall indoor plants that have softer growth, such as those in the genera Dieffenbachia (dumb cane) and Aglaonema (Chinese evergreen), might show roots on mature trunks in a month or less.
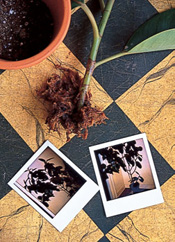
The last remnant of your first apartment, a towering rubber tree (shown in Polaroid snapshots), is brought down to size by air layering. One stem is shown rooted and ready to be potted. After the air layers are removed, the old topless stems can be cut back further and will eventually sprout one or more shoots (or, nostalgia notwith-standing, the plants can be discarded).
High hopes: Two slits are made by rocking a single-edged razor ½ inch upward and 3/16 inch into the stem (1). Pieces of toothpicks are inserted (2) to keep the wounds open. If hormone is used, either brush the wound with powder (3) or dip a few strands of sphagnum in a solution to pack into the cuts. Ready a square of plastic film. Take a handful of wet moss and squeeze out the water. Place the plastic in one hand with the wad of moss on top (4). Wrap the moss around the wound (5), followed by the plastic (6). Secure above and below with rubber bands (7). If water has to be added, the top band can be stretched open (8). When roots can be seen, the layer is ready (9). Cut below the wad for potting, moss and all.
Tender tropicals with visible adventitious buds are easy to air-layer. The buds on a wrapped Dieffenbachia stem begin to grow into the moist moss at once. The new plant will be ready in about four weeks.
After you’ve tried air-layering tropical or subtropical plants indoors, air-layering outdoors could be the next challenge. Most air layers of woody plants are made in late autumn or spring on the low sections of vertical shoots, or “water sprouts,” on shrubs or trees such as magnolias. Use either cutting method. Dust the wound with rooting hormone powder before covering it with a wad of whole sphagnum moss, or soak the moss in liquid hormone. Then wrap with plastic as with indoor air layers.
During the following growing season, add water to the moss wad and pick off some leaves to reduce moisture stress through hot weather. The layer may have to be left attached to the parent for two growing seasons or longer.
For the refurbished Ficus elastica, short and stocky is a complimentary description befitting its new stature.
