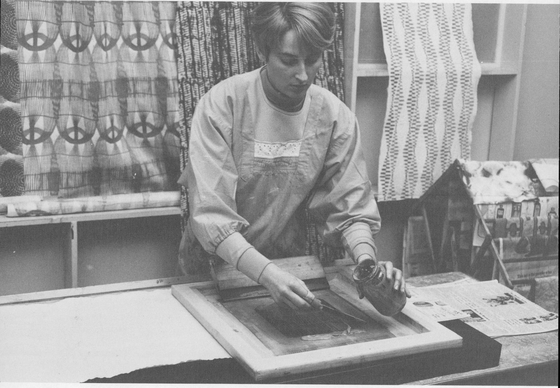
Fig. 5-1. Textile designer Patricia Mansfield gets ready to print a piece of fabric. Some of her finished fabric designs are hung on the wall behind her and on the drying rack at right.
5. MAKING A FABRIC PRINT
‘The Textile Printing Frame and Printing Board
Textile printing frames are constructed in exactly the same manner as are the frames used for serigraphs. Even the cardboard box with organdy described in Chapter 3 can be used by a child for simple textile printing. The difference between the two processes is primarily the way in which the printing frame is used. While the serigraphic printing frame is stationary and hinged on a flat board, the textile printing frame is moved along a long padded board as each unit of the design is printed, guided by gauge bolts on a key rail.
The printing board (Fig. 5-2) is constructed with a piece of Masonite nailed and supported on an under-framing of 1- by 2-inch clear pine lumber; then it is padded and covered. Cotton flannel sheets or flannel summer blankets provide good padding as long as you use a double thickness. Cut to size and stretch a double layer of cloth over the surface of the board and staple it at the edges. Cover the padding with vinyl or oilcloth of a dark color, preferably black, stretching it very tightly and smoothly and stapling it down at the outside edges. The spacing on the key rail is adjusted by pouncing some powdered chalk through the screen, and a dark background color is needed so that the chalk print can be seen (Fig. 5-3).
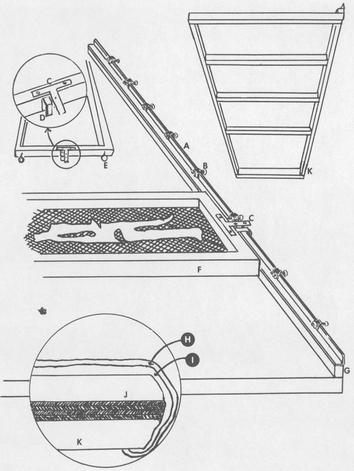
Fig. 5-2. The diagram shows the basic construction of a textile printing board. The frame in the upper right-hand corner is a firm supporting base of 1-by-2-inch lumber for the board. The basic parts of the board are: key rail (A); key bolts (B); T bar (C); J bar (D); screw eyes (E); printing frame (F); 1-by-2-inch lumber that raises the key rail to the proper height (G); surface covering of oilcloth or plastic, preferably black or a dark color (H); padding made of felt or flannel sheeting (I); Masonite board (J); 1-by-2-inch support for the Masonite (K).
Since Masonite is sold in 4-foot widths, printing boards are usually 24 or 48 inches wide. They should be at least 5 or 6 feet long. The narrower board is portable and convenient to store and use, particularly for people in small apartments. It is adequate for printing small pieces of fabric and short pattern runs. However, many more repositionings of both the screen and the fabric are needed if longer or wider textiles are to be printed. The wider board allows you to print the full width of most fabrics without repositioning. The longer the board, the longer the piece of textile that can be printed with one positioning. Professional textile printing tables are often 100 to 200 feet long. The board should not be wider than 48 inches because the printer must be able to reach easily past the middle of the board. If a screen covers the full width of the printing board, then two printers are necessary, one on each side to pass the squeegee between them.
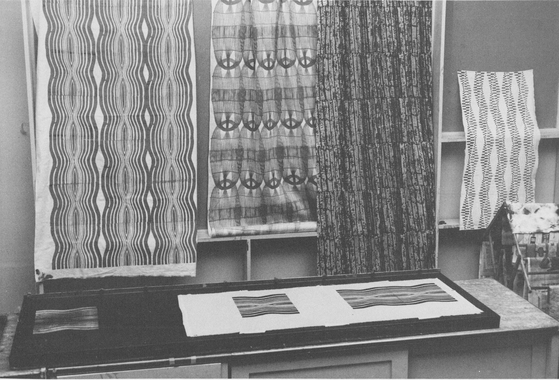
Fig. 5-3. A chalked test print for keying the gauge bolts shows up on the dark printing board. The fabric at right has been partially printed.
A metal angle iron (¾ by ¾ inches) must be screwed along the entire length of one side of a 24-inch printing board and along both long sides of a 48-inch board to serve as a key rail. Ideally, the key rail should be as high as the side of the printing frame. The rail may need to be elevated on a small piece of wood nailed to the printing board for higher printing frames.
The interior dimensions of the wooden printing frame should be at least 3 inches wider and 6 inches longer than the size of the largest design unit you expect to print. Each printing frame should have a metal T plate screwed at the center of one end (Fig. 5-4) to act as a contact point with the gauge bolt on the key rail.
To hold the frame firmly against the key rail, a metal J bar is fastened on the edge of the printing frame next to the T plate (Fig. 5-5). You will not be able to purchase such a bar, but one can be bent easily in a vise with a hammer. Buy an ordinary small flat metal reinforcing bar along with the T plate. Near each end of the side of the printing frame holding the T plate, drill a small hole (to prevent the wood from cracking) and screw in two fairly large screw eyes. These will be screwed in and out to keep the printed units parallel with each other. The screw eyes rest against the key rail in the printing process. Gauge bolts set in place along the key rail allow the screen to be placed at accurate intervals when a continuous run is being printed. They are easily adjusted by a turn of the screw. Gauge bolts (called stair gauges and usually sold in pairs), T plates, screw eyes, and the flat metal bar used in making the J bar are available in hardware stores.
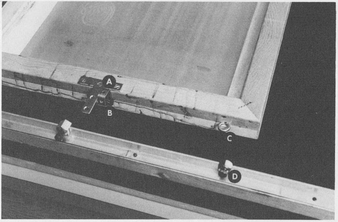
Fig. 5-4. A closeup look at the printing frame clearly shows the arrangement of the T plate (A), J bar (B), screw eye (C), key rail and gauge bolt (D).
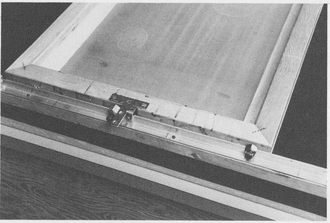
Fig. 5-5. During printing, the J bar (immediately to the right of the T bar) holds the frame in place against the key rail.
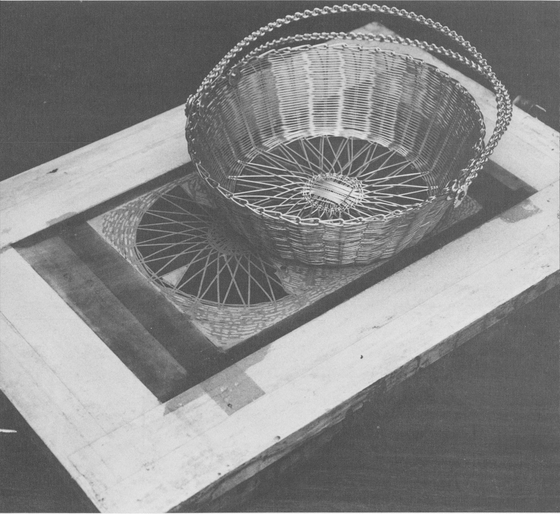
Fig. 5-6. Even the bottom of a wire basket can create an interesting design pattern for a light-sensitive emulsion resist.
Preparing a Stencil Using a Light-Sensitive Gelatin Emulsion
All methods for producing a stencil resist that we have discussed so far can be used in screen-printing textiles. Just follow the directions given. Now we will discuss the production of a light-sensitive gelatin stencil and show you some of its uses in textile printing. This process can also be used in the printing of serigraphs. Nylon screens must be used with this emulsion.
There are three means of preventing the light from reaching portions of a sensitized emulsion in order to produce a stencil. First, there are actual objects and materials. These could be cord, bits of metal or wire, or other objects picked up where you happen to be (Fig. 5-6). They are placed directly on the screen, and their opacity blocks out the light reaching the emulsion. The second method is to use a sheet of acetate upon which designs have been painted with black opaque paint. Even press-type letters can be adhered to the acetate. The third is a photographic negative or positive taken with a camera. Many ordinary negatives do not have enough contrast and have to be printed or enlarged on an orthochromatic high-contrast film like Kodalith, which gives very interesting effects. However, if you want to retain a halftone effect, a halftone screen will have to be used in exposing the Kodalith.
The first thing you must do is carefully prepare the solution sensitizer and the gelatin emulsion. Future difficulties will be avoided if you keep all pans and containers clean and carefully follow all directions.
Solution sensitizer. Mix 1 tablespoon of ammonium bichromate (available from a screen-process supply house) in ½ cup of cool water. Wear rubber or plastic gloves: the solution is quite toxic. It will keep for several months, if carefully sealed, in a dark cabinet in a dark bottle. Since only 2 tablespoons are used each time, the above quantity will produce a number of stencils. Keep this solution cool: preferably never above 60 degrees.
Gelatin emulsion. This will make enough emulsion to cover one large screen (about 20 by 30 inches) with three coats. Since the emulsion will not keep, mix it up as needed. It must be used in a darkened room.
Heat 1 cup of water, but not above 167 degrees. It is very likely that the water coming from your hot-water tap will be hot enough. While preparing and using the emulsion, keep it hot by setting the mixing can in a larger container of hot tap water. Add 1 teaspoon of Keltex. Beat the mixture with an egg beater after adding each of the ingredients to ensure that the emulsion will remain smooth. Add a scant ½ teaspoon of Calgon (sodium hexametaphosphate). Next add ½ teaspoon of dark fabric dye (purple, green, or blue) to make it easier to see the stencil on the printing screen. Then add 2 tablespoons of ordinary granulated household gelatin.
You must now darken the room, although it does not have to be completely dark. The light from a 25-watt yellow insect lamp can be used for illumination. The emulsion is then made light-sensitive by adding 2 tablespoons of the liquid ammonium-bichromate sensitizer mixed earlier. Beat it with an egg beater.
If you are not going to use the screens right away, you may find it more convenient to apply the unsensitized emulsion to the screen fabric. The screen can then be stored for an indefinite period. When you wish to use the screen, coat it with the sensitized emulsion on both sides. This must be done very evenly so that the emulsion does not wash off the previous coat (which is water soluble before being exposed to the light). A wide brush can be used with a light, quick touch. A scooper coater (available from screen-process supply houses) can also be used. The screen can be sensitized in a light room, but avoid direct sunlight or intense light. The screen will not be fully light sensitive until the emulsion has dried. Dry the sensitized screen in a flat position. A vertical or slanted position will cause certain portions of the emulsion to dissolve with the flow of the sensitizer.
A sensitized emulsion must be applied to the screen fabric in the darkened room. (Again use the insect bulb for illumination. The unsensitized emulsion does not require a dark room during application.)
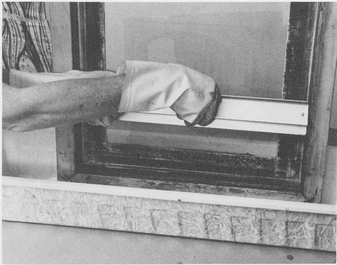
Fig. 5-7. Coating the screen with a light-sensitive photo emulsion is easy with this specially constructed scooper coater, but a stiff piece of cardboard can also be used.
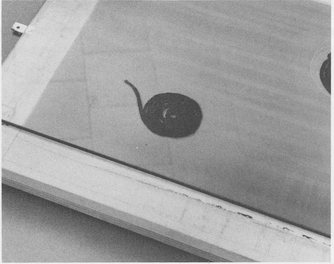
Fig. 5-8. A spiral of black yarn laid out on the light-sensitive emulsion and held down flat with a heavy piece of plate glass is now being exposed to the light.
Prop the screen up at a sharp angle and place the bottom of the frame on old newspapers or in a tray to catch overflow (see Fig. 5-7). Pour some of the prepared emulsion in a scooper coater. Tilt the scooper and quickly pull it upward over the screen, coating the entire surface. Turn the screen around and repeat the procedure on its other side. Any excess emulsion that has gathered around the edges can be wiped away with soft cleansing tissues. Do not touch the screen area with the tissues. Allow the frame to dry. The drying must take place in the darkened room or storage space if the emulsion has been sensitized. The drying may be speeded up with an electric fan or hair dryer.
After drying the first coat, repeat the process with a second coat on each side of the screen. If the first two coats are thin, you may need a third coat on each side.
While the scooper coater is an inexpensive, laborsaving device, it is not absolutely essential. You can coat the screen by placing it flat on a table propped up so that the screen mesh does not touch the table. Pour a little emulsion in one end of the frame and carefully scrape it across the screen with a cardboard until the screen is coated evenly. Turn the screen over and repeat on the other side. Allow this to dry (in the darkened room if your emulsion is sensitized) and when dry, repeat the process.
After the screen has dried, arrange resist materials (in Fig. 5-8, a coiled piece of heavy black yarn is used) on the surface of the sensitized screen. Hold it in place with a heavy sheet of plate glass. A sheet of black paper placed under the screen prevents the light from bouncing up on the gelatin and exposing it in the wrong areas. Expose the screen to a No. 2 photoflood lamp hung about 3 feet from the emulsion surface. You will have to experiment with your material to find the correct exposure time, but you might begin with an exposure of 30 minutes. When the light is turned off, uncover the screen.
If the emulsion has been properly exposed, you will see a faint brown image on it. Move the screen to the sink and wash or spray it carefully with lukewarm water (90 to 115 degrees). A rubber shower spray is inexpensive and can be attached to most faucets. Wash or spray the warm water on both sides of the screen. Avoid a hard spray, which will damage the soft gelatin. If the screen is properly exposed, the areas protected from the light by the resist materials will wash away, leaving clear areas to form the stencil. If the entire image washes away, one of three things could be wrong: the exposure has not been long enough; the water is too hot; the spray has too much pressure. If the image does not wash out, one of two things could be wrong: the water is not warm enough; the exposure has been too long. When the stencil has been washed clean, rinse it with cold water to harden the gelatin and set it aside to dry.
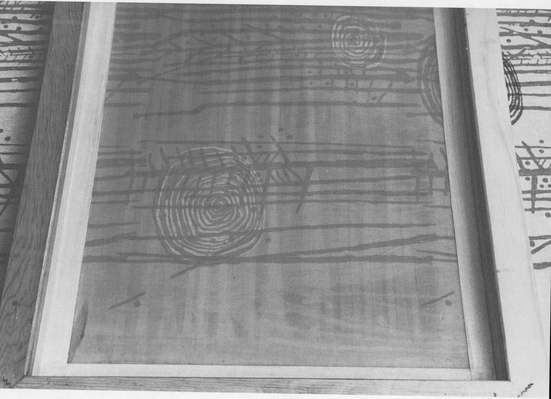
Fig. 5-9. The unexposed part of the emulsion on the screen washes out and the spiral pattern of the yarn becomes evident. It is being overprinted on another pattern already on the fabric.
When dry, the stencil should be checked for pinholes or damage. If you saved the emulsion that you had left over, use it with a small brush for patching areas and holes in the screen. If it is too thick, warm it by setting it in a pan of hot water. It can be applied in ordinary light since you want it to harden anyhow. When the stencil has dried, it is ready for printing.
If you do not wish to make your own emulsion, excellent ones are available from the screen-process supply companies. If you follow the manufacturer’s directions for sensitizing the emulsions, quantities as small as one ounce can be mixed. The sensitized emulsions will keep for a period of several weeks if stored in a cool, dry place.
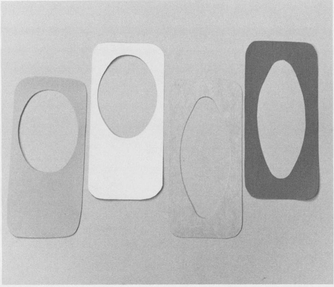
Fig. 5-10. Tops cut from cleansing tissue boxes form a pattern to be exposed on a light-sensitive emulsion. The final design printed on corduroy is made more interesting with a buglike form printed in a second color with a second stencil.

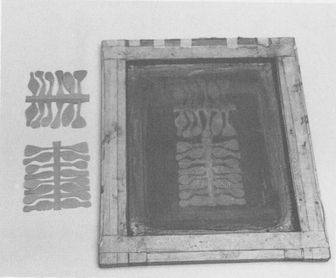
Fig. 5-11. Folded cut paper is basic to this design for a light-sensitive gelatin-emulsion resist, which is shown printed in a number of ways. The textured section was made on another screen by exposing a remnant of fabric with many threads pulled out. (By Carole Bansemer)
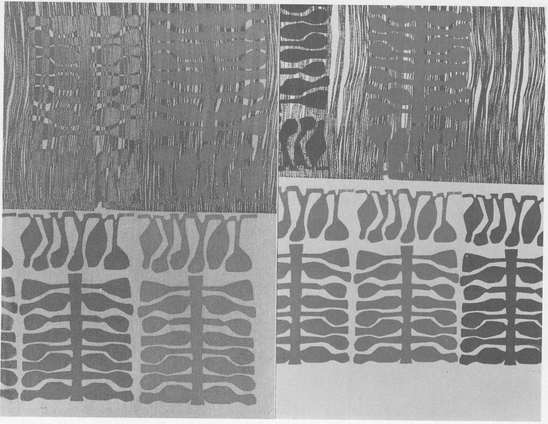
Fig. 5-12. A design is painted on a piece of clear acetate (right), which is then placed on a presensitized emulsion film, exposed to light, developed, and adhered to the screen (left) ready for printing.
Using a Presensitized Commercial Photo-Stencil Film to Print Textiles
There are a number of presensitized gelatin films that can be used in place of the gelatin-emulsion stencil just described. They are all easier to use, but they are considerably more expensive. Each of the films has different characteristics as to film speed, permanency, kind of detail resolution, and development. Choose the type best suited for your purpose and then follow the manufacturer’s directions carefully.
First, mix the chemical or chemicals used in the developing process. Then paint the design in black on an acetate sheet (Fig. 5-12). Expose it to light with the sensitized film, develop the film, then wash out the unexposed parts of the film and adhere it to the screen according to the manufacturer’s directions. Nylon screen must be used for some light-sensitive films; others can be used on silk. Check the directions before choosing your screen mesh. After the film stencil has been adhered to the frame and dried, check it for pinholes. These holes and any open parts of the screen around the outside edge of the stencil are blocked out with lacquer. All types of stencils can be repaired or blocked out with lacquer.

Fig. 5-13. (Reproduced in full color between pages 16 and 17.) Two strikingly different effects are achieved in basically the same way. Seed pods, dried stalks of grain, and cut paper were used to make the designs on light-sensitive resists, and overlapping in the printing process built up the pattern sequences. (Top, by Barbara C. Knollenberg; bottom, by Patricia Zuzinec)
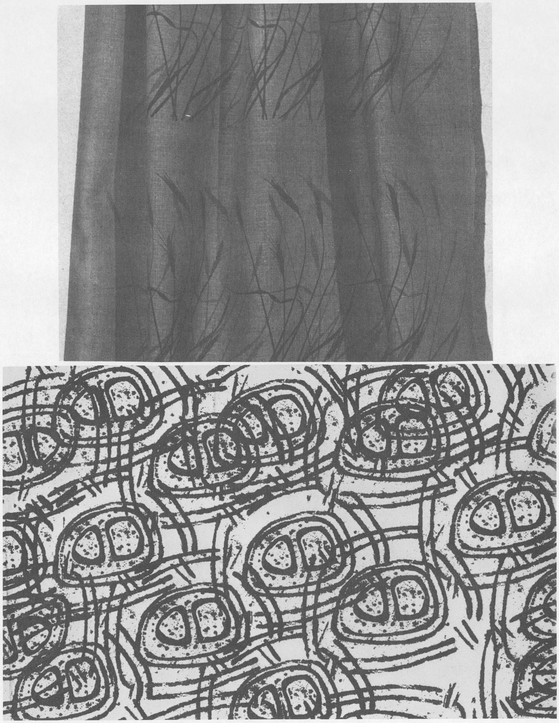
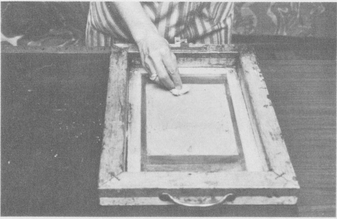
Fig. 5-14. The placement of the frame for printing the design is tested by rubbing white carpenter’s chalk through the screen onto the surface of the printing board.
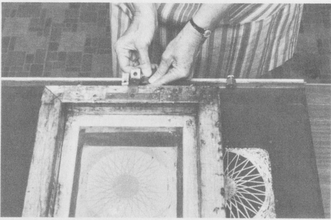
Fig. 5-15. Positioning of the gauge bolt on the key rail so that the screen will properly print the second unit of the design is also experimental and must be tested with chalk.
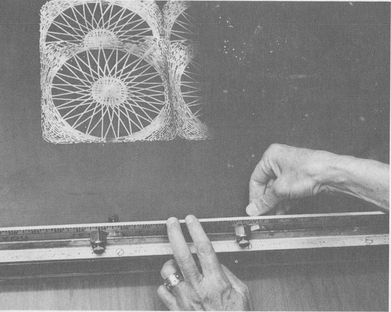
Fig. 5-16. After the first two gauge bolts have been properly positioned, the distance between them is measured and set on a gauge stick.
The easiest way to experiment with placement and adjustments in spacing a textile pattern is with chalk (Fig. 5-14). Place the dried screen as close to the end of the printing board as possible and fasten a stair gauge to the key rail snug against the left edge of the T plate. Let the screw eyes rest firmly against the key rail. The three points of contact will automatically assure a consistent placement of the stencil when a repeat pattern is desired. Lightly rub or pounce chalk powder through the stencil openings onto the dark printing board. (If powdered chalk is not available at your hardware or paint store, powdered tempera paint will work, but it is not as finely ground and does not give as clear an image.)
Lift the stencil frame, check the chalked image, and then experiment with the placement of a second image. Trial areas can be chalked and erased to see how the design will fit together—whether it should overlap, interlock, or have a space between. When the final placement of the image has been determined, fasten a second stair gauge to the key rail (Fig. 5-15). Again place it snug against the left side of the T plate. A gauge stick can be improvised by slipping a pair of gauge bolts onto an ordinary yardstick or a strip of thin lumber and matching the distance between them to the distance between the two bolts attached to the key rail on the printing board (Fig. 5-16). This gauge stick will allow you to place the rest of the gauges along the length of the key rail to give the precise points for setting your screen down for each pattern unit (Fig. 5-17). When the pattern has been chalked lightly along the whole length of the printing board (Fig. 5-18), use strips of masking tape to indicate the location of the print for placing the cloth (Fig. 5-19). The chalk must be brushed and pounded out of the frame. Be certain to wipe out all chalk dust (but do not moisten) before adding printing paint.
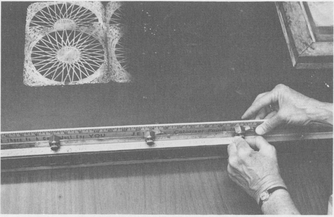
Fig. 5-17. Using the gauge stick makes easy work of setting the remaining gauge bolts along the key rail.
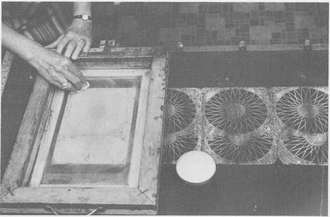
Fig. 5-18. When all of the gauge bolts are placed, it is a good idea to test the accuracy of the alignment of the design along the entire length of the printing board with chalk.
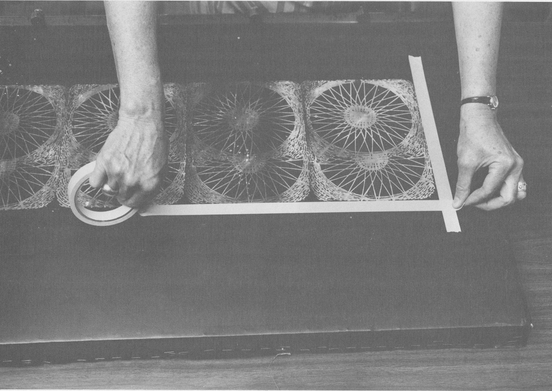
Fig. 5-19. A band of masking tape along the beginning edge and one side of the chalk design will help in positioning the fabric for printing. Before placing the fabric, remove the chalk on the board with a dry rag.
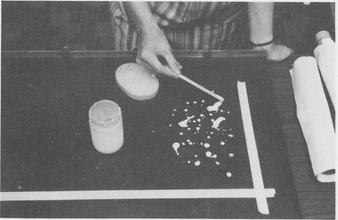
Fig. 5-20. To hold the fabric in place, a small amount of casein glue thinned with water is dribbled on the board.
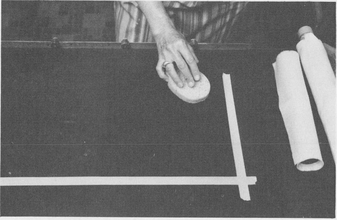
Fig. 5-21. A damp sponge spreads the glue evenly and thinly on the surface. Since the glue dries rapidly, only a small area of the board should be done before you start laying out the fabric. The surface of the board should be slightly tacky.
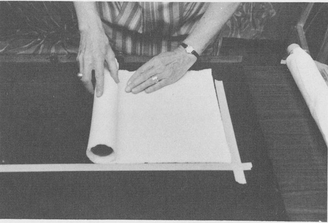
Fig. 5-22. The fabric must be very carefully rolled smoothly and evenly onto the area of the board just covered with glue.
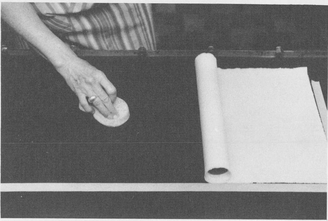
Fig. 5-23. Alternate gluing the board and unrolling the fabric until the length of fabric to be printed is laid out.
The fabric to be printed should now be placed in position and its distance from the edge of the key rail measured. If the pattern is not a very complicated one, or if it is to be printed in no more than one color, or if the cloth is very firm and heavy, the fabric to be printed can simply be taped to the printing board with masking tape. However, to ensure a register accurate enough for multicolor designs, complicated patterns, and sheer fabric, the cloth should be lightly glued to the surface of the board. Mix one part white casein glue to one part water until the water becomes slightly sticky between the fingers.
Have your roll of fabric ready. Starting at one end of the printing board, sprinkle a few drops of this glue-and-water solution over the surface (Fig. 5-20). With a damp sponge, spread the solution over the board’s width for 12 or 15 inches, until the surface is slightly sticky to the touch (Fig. 5-21). Standing glue must be sponged up or it may color the cloth. Should you inadvertently get a little too much glue somewhere on the fabric and a spot develops, do not worry about it; it will probably disappear when it dries, but try to avoid this. Unroll about 12 to 15 inches of the fabric. Lay it in position on the printing board (Fig. 5-22) and press it firmly, smoothly, and carefully onto the section of board on which you have just spread the glue. Continue until the entire fabric has been adhered (Fig. 5-23). Keep the edges of the cloth parallel to the edges of the printing board as you go. With skill, you will be able to glue sheer silk to the printing board with little or none of the glue showing.
You are now ready for the printing. Textile dye or paint is placed in one end of the frame, and (if yours is a full-width 48-inch board) the squeegee is pushed across the board and rhythmically and smoothly passed over to a second printer on the other side (Fig. 5-24). This takes a little practice but can be learned fairly easily. Contrary to the printing of serigraphs, where the squeegee is pulled over each paper only once, the squeegee in textile painting may have to be pulled back and forth as many as four or five times in each direction. Fabric is much more absorbent than printing paper, and more dye or paint must be forced into the fibers. The thicker, coarser, more absorbent fabrics like homespun require more pulls of the squeegee. On very sheer fabrics such as silk one pull may be adequate. Ordinary percale requires three passes of the squeegee in each direction. Only printing experience with many different fabrics will give you the skill and knowledge you need for this.
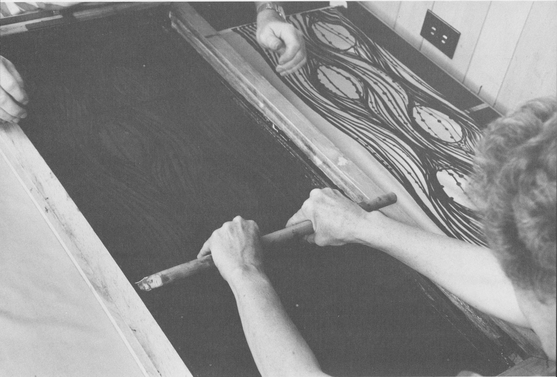
Fig. 5-24. Having two printers to pass the squeegee back and forth from one side of the board to the other is virtually a necessity if you are printing on a full-width board.
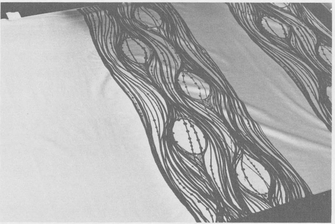
Fig. 5-25. Backprinting is avoided by printing every other unit along the length of the board first.
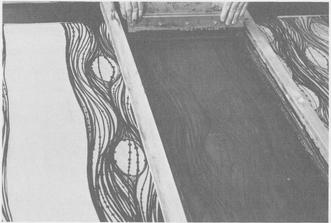
Fig. 5-26. If the first units are not yet dry when the intervening units are printed, cover them with clean newsprint so that you do not pick up any of the design from them and transfer it with the screen.
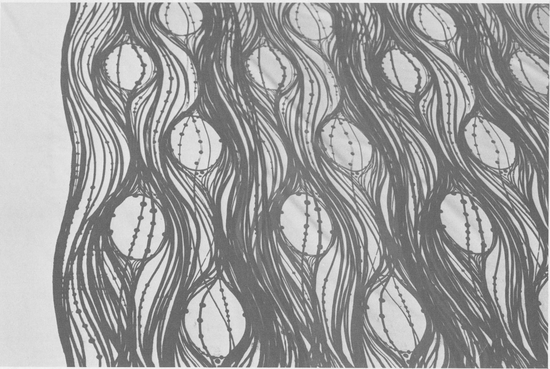
Fig. 5-27. Each unit of the final print used previously as an example is partially overlapped, and the designer has alternated red and black design units. This gives an interesting overlay effect in the transparent colors.
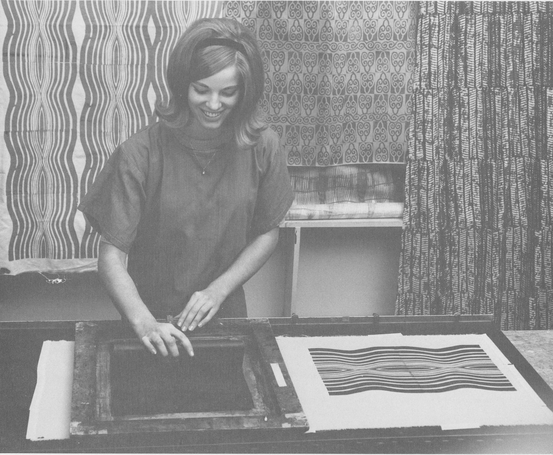
Fig. 5-28. With a small apartment-sized printing board it is possible for one person to do the printing job without assistance.
It is wise to print alternate design units (Figs. 5-25 and 5-26): units one, three, five, for example, should be printed first; then return to print units two, four, and six. In long runs, the paint of the first run is dry before the second run is started. In short runs, the printed image will still be wet, so sheets of newspaper cut to the size of the design unit should be readily available. Cover the wet units with this newspaper when printing adjacent to them to avoid “backprinting.” A backprint is the result of ink picked up on the underside of the screen leaving an undesired print when the screen is laid down the next time. These unwanted images can be avoided by using newspaper or by wiping the wet ink from the underside of the screen each time.
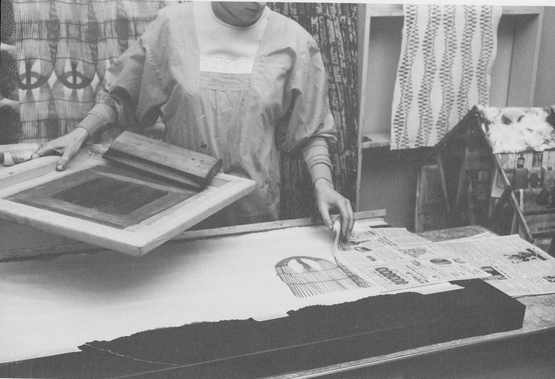
Fig. 5-29. Each recently printed design unit should be protected with clean newsprint while the unit next to it is being printed.
If you wish to print a short piece of fabric on a half-width board (2 by 6 feet), first tape the cloth in the proper position. One hand keeps the frame from slipping while the other operates the squeegee. If you are printing a long piece, have an assistant hold the screen firmly in place, freeing you to use both hands with full consistent pressure on the squeegee stroke. On short boards the pattern units must be printed in succession and the cloth shifted along as you go. Remember to protect a wet unit with newsprint while the next one is being printed (Fig. 5-29), then pick it up so that drying of the design is not impeded.
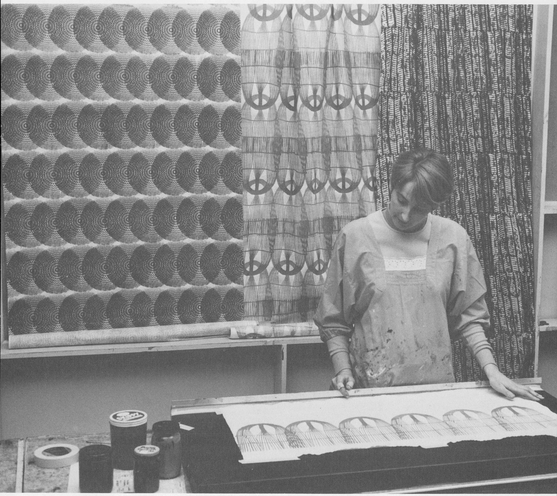
Fig. 5-30. A textile designer evaluates a print she has just completed.