
Chapter 1: Beginners can save a lot of time, energy, and money by listening to basic advice from the champs, and seasoned backyard veterans might also learn a tip or two. After a combined total of at least 100 years of barbecue experience between us, one thing we know for sure is that, like all else in life, you never know it all—there’s always more to learn.
When we asked the champs for backyard barbecue tips, a few commonsense constants emerged, plus some new ideas. We’ll begin with the constants.
COMMONSENSE BACKYARD BARBECUE BASICS
Gear, Gadgets, and Extras
On the circuit, the pros use a variety of cookers, from custom-made to commercially manufactured. Fifty-five-gallon drums made into cookers; cinder block pits—above or below ground—with grates and steel plates for lids; brick pits with carousel grates; “aquarium” pits with glass walls; stainless-steel pits fueled with gas, wood, electricity, or wood pellets; and large steel custom-made pits are what we’ve seen most often.
The barbecue industry is booming, with many companies offering grills that range from inexpensive to very expensive, but you don’t need fancy or expensive equipment to cook like a pro. In fact, we know a backyard barbecuer in the Missouri Ozarks who gets by perfectly with a home-built pit made of cinder blocks, fencing, and an inverted steel wheelbarrow hood. It’s not for everyone, but it’ll do. If you don’t already have a grill, we recommend starting with the low-tech and inexpensive icon of backyard cooking, the kettle grill. As competition barbecuer Donny Teel of Buffalo’s Bar-B-Q tells us, “One of my favorite pieces of equipment is a 221⁄2-inch Weber grill. You can buy one for $100 or less, and it works great for direct or indirect heat.”
It’s a good idea to think about and write down your barbecue lifestyle before choosing the best grill for your needs and your backyard. How often do you cook outdoors? What do you like to cook? How many people do you generally cook for? How much are you willing to spend, or does price matter? Knowing yourself, your wants, and your needs will lead you to making the best selection, and you may want to take your list of needs to a specialty barbecue store if you’re buying your first grill.
Paul’s standard advice is to figure out how and how many you are cooking for and get the cooker that’s the next size up. The reason: you will get so hooked on how great your barbecue is that you will be throwing bigger parties. It’s much cheaper to get the next size up than to buy two pits.
Finally, as Kelly and Roni Wertz of 4 Legs Up BBQ remind us, “Know your cooker. If you are getting a new smoker or grill for the big party, get it a few weeks or a month ahead of time. Practice those dishes on your new cooker so you will know what temperature they need to run at to make everything work in your time frame.” Or, as Clint Cantwell of Smoke in Da Eye puts it, “Be one with the grill. The more you use it, the more comfortable you’ll be trying items other than hamburgers and hot dogs on the grill. By knowing its hot spots, how temperatures react when you open and close the lid, and other nuances, you’ll be cooking up grilled pizzas and rack of lamb in no time.” And by all means, make sure to invite us over!
Charcoal Grills
The recipes in this book are from professionals, and they almost always use charcoal grills instead of gas, but you can use what you have and what you’re comfortable with. The results may not be exactly the same, but you’ll still end up with some great barbecue. Whatever you use, study the owner’s manual for basic guidance and tips.
Charcoal grills are more affordable than gas grills, and they can reach higher temperatures. A charcoal grate holds coals on the bottom, and a grill rack above the coals holds the food. Vents on the bottom and in the lid help control temperature (on most models).
When cooking on a gas grill, bring depth of flavor by wrapping a handful of wood chips in a double layer of heavy-duty aluminum foil, poking a few holes in the foil, and placing the packet under the grates. The chips will slowly smolder, releasing flavorful smoke from this inexpensive “smoke bomb” while ensuring a quick cleanup.
—Clint Cantwell, Smoke in Da Eye

Charcoal grills are pretty easy to maintain. Keep the grill rack clean, and after the grill cools, remove the ashes to ensure proper air flow the next time you grill. When the grill is completely cool, wipe the inside and outside surfaces of the grill with a soft cloth and warm, soapy water. Rinse with clean water and wipe dry. To help protect the body from the weather and minimize white spots and oxidation, use a paper towel to apply a light coating of vegetable oil to the outside of the grill while it’s cool. You can also buy a water-resistant cover to protect your grill when not in use.
Gas Grills
Gas grills are quick to preheat—10 to 15 minutes. Multiple burners allow you to control the heat better than a charcoal grill. Gas grills are also less messy—no charcoal or fire starters—and they burn longer than charcoal. One 20-pound tank lasts for 12 to 14 hours. It’s easier to maintain higher temperatures on a gas grill than on a charcoal grill, but if you’re cooking for long periods of time, you’ll use a lot of gas.
Gas grills use lava rocks or ceramic briquettes. Ceramic briquettes don’t burn completely as charcoal does. Lava rocks and metal plates are more similar alternatives to charcoal. Lava rocks can be used many times but eventually need to be replaced.
Simple maintenance adds years to the life of a gas grill. Check the gas fitting for leaks each time you connect and disconnect by using a mixture of soap and water. Bubbles indicate a leak. You’ll also want to periodically check the tubes connecting the propane tank to the grill to ensure there are no cracks or holes. Regularly empty the grease catch pan to prevent flare-ups and fires. Store the tank outdoors, not in an enclosed space, and detached from the grill.
After every use, turn your grill on high for 10 to 15 minutes with the lid closed. Turn off the grill and let it cool slightly. Loosen the residue from the grill rack with a brass-bristle brush. This not only prevents sticking but also helps to prevent flare-ups. When the grill is completely cool, wipe the inside and outside surfaces of the grill with a soft cloth and warm, soapy water. Rinse with clean water and wipe dry.
An offset smoker is nice to have if you do a lot of smoking on your gas grill, but if you smoke food only occasionally, you can purchase an accessory metal smoker box, a small perforated metal container placed on a gas grill’s lava rocks or ceramic briquettes to hold wood chips and provide smoke. If you don’t want to purchase a smoker box, you can put soaked wood chips in heavy-duty foil, seal and poke holes in the top, and place on the hot briquettes, rocks, or coals.
Gadgets
Some say America is gadget-obsessed. If there’s a problem that needs fixing, there’s a gadget to fix it. Some would add that there are gadgets to fix problems that didn’t exist before a gadget was created to fix it. Gadgets may or may not be an obsession, but they’re here and they’re strong. How do they play out in the world of championship barbecue—in contests and at home? They range from simple devices used to handle meat—flip it or grip it—to complex devices such as remote-control monitoring and adjustment equipment.
High-tech vs. low-tech separates the champs on the question of essential gear and gadgets. Then again, low-tech champs have been known to love their smart phone or iPad, but not be enamored of high-tech grilling gear and gadgetry. That said, the champs we talked with will allow that your backyard barbecue is more likely to be a success if you have the following items on hand:
• fire-starter chimney
• welder’s or griller’s gloves
• thermometers—for your grill and for your meat
• long-handled tongs and spatulas
• basting mops and brushes
• spray bottles for basting meat and taming flare-ups
• drip pan
• water pan for smoking
• ABC fire extinguisher
• sharp knives
• cutting boards
There are essential gadgets and there are favorite gadgets. Here’s what some of our champs said when asked to name their single favorite gadget:
Chris Capell, Dizzy Pig: The coolest gadget to come out in the last 15 years is the BBQ Guru (a temperature controller). It equals sleep, and that’s priceless.
Bruce Langseth, Pigs in Peril: The Taylor countdown timer. It lets me know when it’s time for things like wood chips, basting, and turning without having to look at a clock every five minutes.
Mike Wozniak, QUAU: Thermopen is something no cook should be without. It’s extremely quick and accurate. The BBQ Guru is also great. It is bliss knowing that when I go to sleep for a few hours at a competition the temperature I set the Guru to will be the exact pit temperature when I wake up.
Kevin Huls and Scott Larson, Mope & Dope Smokers: Our barbecue smokers. We couldn’t do what we do without them.
Gabriel Antunez, BBQ Freaks: We couldn’t do without our BBQ Guru DigiQ.
Jose Bengoa, Yolanda Bolivar, BBQ Freaks, and Steve Renfro, Flyboy BBQ: My pigtail turner. It’s great for moving chicken around in a smoker. It gives you good reach, and it’s easy to use.
Doug Pierce, Bonnie Q: I don’t go without my antique bellows. I use it to keep my coals hot!
Kelly Wertz, 4 Legs Up: What our kids call Mr. Flippy—a spatula/tong combination for turning meat. It’s great because it does not poke the meat, and you can get a grip on several burgers at once or make sure you don’t drop that steak!
Direct vs. Indirect Grilling
Direct grilling is a method of quickly cooking food by placing it on a grill rack directly over the heat source. It works best with smaller portions of food and foods that require short cooking times, such as burgers and well-trimmed steaks and chops. It is faster than indirect cooking because the intense heat cooks fast and browns the outside of foods. Food is often cooked uncovered on a charcoal grill but covered on a gas grill.
Indirect grilling is a method of grilling slowly, to one side of the heat source, over a drip pan, in a covered grill. It is ideal for larger cuts of meat that require longer cooking times. Hot air circulates around the food, much as it does in a convection oven. This is the style of cooking commonly referred to as “barbecuing,” and most of the recipes in this book use it.
While most people insist on poking, twisting, and flipping grilled items every 15 seconds, resist the urge and limit turns to no more than two per side. Meat, fish, or poultry that normally sticks to the grates will release naturally, while the food will be able to absorb all the great color and flavor the grill has to offer.
—Clint Cantwell, Smoke in Da Eye
MAKE THAT A CHIMNEY, NOT A CHIMINEA!
Before we competed in our first contest, the Bricktown in Oklahoma City, we went online to get a list of equipment we’d need. We bought everything on the list, including a chiminea, and hauled it to the contest. As luck would have it, we were assigned a space right next door to Mike and Debbie Davis of Lotta Bull BBQ—one of the winningest teams around! Talk about feeling intimidated. As it turned out, they were friendly and helpful and not intimidating at all once we got to know them. I noticed some puzzled looks on their faces when they glimpsed at our chiminea. We ended up not using the chiminea. At the end of the contest we loaded it up and took it home. Later, when I took another look at the equipment list we had used, I noticed it said “chimney,” not “chiminea.” After we got to know Mike and Debbie better, I told them the truth about the chiminea, and they haven’t let us live that down yet!
—Darian Khosravi, Kosmo’s Q

SOME OF OUR FAVORITE GRILLING AND SMOKING TIPS
Using lighter fluid is a very popular way to light your fire, but we agree with the BBQ Freaks of San Juan, Puerto Rico, when they advise, “Never, ever use lighter fluid. It just doesn’t taste good.” It adds a chemical taste to your food.
To use a chimney starter, stuff the bottom with paper, turn the chimney over, put it on the fire grate, fill it with briquettes (around ninety-two in a standard chimney), and set the paper on fire. The fire then moves to the coals, and once the coals are ash gray (20 to 30 minutes), use a fireproof glove or mitt to grasp the chimney handle and dump the hot coals on the fire grate.
A drip pan can tame the mess during indirect cooking. You can buy a disposable aluminum pan or improvise one using a sheet of heavy-duty aluminum foil about two and a half times as large as the food you will be cooking. Fold the foil in half; then fold up the edges to make 2-inch-high sides. Crease the corners to seal.
To make a water pan for smoking, place an aluminum bread pan (or larger size) in the bottom of your cooker next to the coals and fill it with water.
You can help keep your meat moist while cooking by spritzing it with apple juice, which won’t change the flavor of the finished meat.
Don’t be afraid to make adjustments based on your observations. If the recipe says to cook for 20 minutes a side, and the meat is getting browned after 3 minutes, lower the heat. If the meat is not starting to brown after 5 minutes, raise the heat. If you see your food is browning unevenly across the grate, move it around. Just pay attention and use all your senses. When something starts to burn, you can smell it. You can see the smoke change color. You can hear the sizzling. You can tell if the meat is done by touching it. You can also feel how hot the coals are.
—Chris Capell, Dizzy Pig
Finding ways to take tougher cuts of meat over the top is central to the art of grilling and barbecue. But despite having the perfect recipe and the perfect execution, your brisket, flank steak, or flat iron steak is still going to taste like a dry, chewy shoe if you don’t slice it across the fibrous grains that run through the meat.
—Clint Cantwell, Smoke in Da Eye
Do not sauce too early; it burns easily on the fire.
—BBQ Freaks
Cleaning Your Grill Grates
It’s easiest to clean your grill grates after you’ve used them, when they’re still warm. Scrub stainless-steel grates with brass-wire brushes, and scrub cast-iron grates with stainless-steel brushes. You can also use crumpled pieces of foil to remove buildup.
Another way to clean them is to turn up your gas grill to high or build a hot fire in a charcoal grill and cover the entire grate with heavy-duty foil, weigh it down with bricks or rocks, cover the grill, and let it burn for about 10 minutes. Remove the foil with tongs and dispose of it. Hit the grate with a long-handled brush and the charred bits will turn to powder that will fall off into the fire.
Charcoal for Grilling or Smoking
You can buy two different kinds of charcoal. Charcoal briquettes made of compacted ground charcoal, coal dust, and starch are most common. They come in standard and easy-lighting. Easy-lighting briquettes are pretreated with a lighting solution for a quick start and need to burn for only 10 minutes before they are ready for grilling. They can be a real time-saver, but we don’t recommend them because they can lend a petrochemical flavor to whatever you are grilling or barbecuing. You can also use lump charcoal, the carbon residue of wood that has been charred, usually in the form of lumps.
Woods for Smoking
Natural wood chips and chunks can be added to a fire to impart a smoky flavor to food as it cooks. Alder, apple, cherry, hickory, maple, mesquite, oak, and pecan are commonly used.
The chips are soaked in water for about an hour, drained well, and added to a fire just before putting food on the grill. In kettle grills or gas grills, water-soaked wood chips or dry smoke pellets work best. For charcoal cookers, just dump them on top of the hot coals or flames.
For gas grills, place the soaked chips in heavy-duty foil, make a package, seal the edges, poke holes in the top, and place the package on the hot burner or lava rock. Use tongs to remove and dispose of the package afterward when cool. Large cookers with a firebox on the side take well to wood logs or chunks. Follow the manufacturer’s directions.
We encourage all cooks, indoors and out, to think local and cook local. This applies to where you get your meat, your produce, your beverages, and any other essentials needed to host a backyard barbecue. That also means it is best to smoke with local hardwoods. In the Pacific Northwest, that would be alder. In Texas it’s mesquite or oak—red, white, or post oak, depending on where you live in Texas. In the Northeast, maple. Hedge apple wood is used by some Kansas cooks, who say it burns as hot as mesquite. Midwesterners and many southerners also have an abundant supply of hickory, oak, apple, pecan, and other wood from fruit trees that make excellent cooking and smoking woods. Floridians have orange tree wood statewide, as well as several varieties of oak, persimmon, and other hardwoods suitable for smoking. Find out what woods are abundant and available in your area and experiment with small samples of meat to see what works best—or doesn’t work at all—for you. If you’re partial to a certain wood that isn’t local, barbecue woods of any variety can be shipped worldwide from a variety of suppliers.
If you’re using a large cooker that takes wood chunks, use seasoned wood that was split and dried for at least 6 months prior to cooking. The moisture in fresh wood creates creosote and gives the meat a bitter taste. Also use different types of wood to layer flavors on the meat. Fruitwoods go well with chicken, pork, and fish. They can also give a nice color to the meat. Pecan wood is great on brisket.
—Paul Schatte, Head Country II

Testing Grill Temperature
Most grills have thermometers, and you can also purchase one. If you plan to do a lot of barbecuing, it’s a good investment. If you don’t have a grill thermometer, you need to be able to judge how hot the heat is that’s coming from your grill. Hold your hand, palm down, where your food will cook and at the same height as the food that will be grilled. Count each second you can hold your hand there.
1 second (or less) = Very Hot Fire—600°F or higher
2 seconds = Hot Fire—550°–599°F
3 seconds = Medium-Hot Fire—500°–549°F
4 seconds = Medium Fire—400°–499°F
5 seconds = Low-Medium Fire—301°–399°F
6 seconds (or more) = Low Fire—300°F or less
These are rough estimates and can vary depending on where you place your hand. For example, there may be more heat in one location than another.
An easy way to modify your grill to fit a grill thermometer is to take a wine cork and drill a hole the diameter of your thermometer through the middle, from top to bottom. Fit the cork into one of the top grill vents and push the thermometer through the hole in the cork. That way you can constantly monitor the internal temperature and your thermometer won’t touch the metal of the grill, which could give you an inaccurate reading.
Avoiding Flare-Ups
Sometimes meat juices drip into the coals, briquettes, or rocks, causing flare-ups that can burn your meat and wreck a great meal in seconds.
To avoid flare-ups, place the meat opposite the heat source. This creates a cool zone so that you can move meat back and forth from flames to cool zone as necessary. Trimming excess fat from the meat also helps prevent flare-ups. You can also try lowering the heat by raising the grill rack and spreading the coals so there is more space between them. Or you can remove some of the coals or cover the grill.
For excessive flare-ups in a charcoal grill, you may need to remove the meat from the grill and mist the flames with a water-spray bottle. Once the flames die down, you can return the food to the grill and resume grilling. Our friend the late Giancarlo Giannelli and many other Tuscan chefs kept a bowl of salt near the grill for tossing on excessive flare-ups.
Do not mist flare-ups on a gas grill. Simply close the lid and wait for the flare-up to die down. Some lava rock systems can collect grease that may result in flare-ups, so be especially watchful when using them and change them once a season if you use your grill a lot. When you open your propane tank valve, it might help to give it only one turn so that you can shut it off in a hurry in the event of a flare-up.

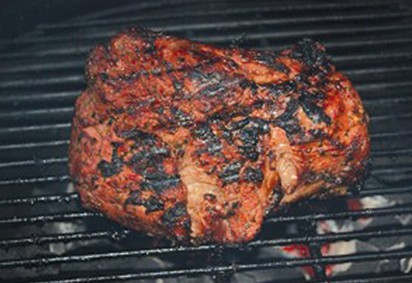
Testing for Meat Doneness
A meat thermometer guarantees perfectly cooked meat every time. Insert the meat thermometer into the center of the thickest part of the uncooked meat, not touching any fat, bone, or the grill. This chart gives suggested doneness temperatures for a variety of meats.
Just because your beautiful steak or pork chop is done grilling doesn’t mean it’s finished cooking. Due to carryover heat, internal temperatures will increase roughly 10 more degrees after being removed from the heat, meaning a medium-rare steak should be pulled at 125° to 130°F rather than the desired 135° to 140°F.
—Clint Cantwell, Smoke in Da Eye
Some pros prefer not to use a meat thermometer because, as Bill Gillespie of Smokin’ Hoggz puts it, “One of the worst things you can do to a piece of meat is to start jabbing it with a probe to see if it is done. You’ll let all of the juices out and end up with a dry piece of meat.” Instead, Bill uses what he calls the finger test:
RAW: Open the palm of your hand. Relax the hand. Take the index finger of your other hand and push on the fleshy area between the thumb and the base of the palm. Make sure your hand is relaxed. This is what raw meat feels like.
WELL DONE: Now gently press the tip of your pinky and your thumb together. Again feel the fleshy area below the thumb. It should feel quite firm. This is what well-done meat feels like when you press on it.
MEDIUM: Press the tip of your ring finger and your thumb together. The flesh beneath the thumb should give a little more. This is what meat cooked to a medium doneness feels like.
MEDIUM-RARE: Gently press the tip of your middle finger to the tip of your thumb. This is medium rare.
RARE: Press the tip of your index finger to the tip of your thumb. The fleshy area below the thumb should give quite a bit. This is what meat cooked to rare feels like. Open up your palm again and compare raw to rare.
Chef Paul likes to go by feel too, but until you get your bearings, he suggests using a meat thermometer for safety. For a list of suggested temperatures for meat doneness, see the following chart.
After some practice, a meat thermometer becomes almost like the toothpick-in-a-cake method of checking doneness. When the thermometer probe slides easily into the hunk of meat, you get a feel for doneness. (But until you get that feel, read the temperature on the dial.) A meat hook is also helpful. It allows you to pick up and move meat easily on the smoker.
—Paul Schatte, Head Country II
| FOOD | DONENESS | INTERNAL TEMPERATURE ° F |
| BARBECUED PORK | Sliceable and Chopped | 180°F (82.2°C) |
| SHOULDERS, PICNICS | Sliceable, Pullable, and Chopped | 185°F (85° C) |
| BOSTON BUTTS | Pullable | 195° to 205°F (91° to 96°C) |
| BARBECUED BEEF BRISKET | Sliceable | 185°F (85°C) |
| BEEF STEAKS | Rare Medium-Rare Medium Medium-Well Well Done |
135°F (57°C) 140°F (60°C) 145°F (63°C) 160°F (71°C) 170°F (77°C) |
| BEEF ROAST | Rare Medium-Rare Medium Medium-Well Well Done |
130°F (54°C) 140°F (60°C) 145°F (63°C) 160°F (71°C) 170°F (77°C) |
| CHICKEN Whole or Pieces Breast |
Done |
170°F (77°C) |
| CORNISH HEN | Done | 170°F (77°C) |
| DUCK | Done | 170°F (77°C) |
| GROUND MEAT | Medium | 165°F (74°C) |
| BEEF, PORK, LAMB | Well Done | 170°F (77°C) |
| HAM Fully Cooked Not Fully Cooked |
Well Done |
140°F (60°C) |
| LAMB CHOPS AND RACK | Rare Medium-Rare Medium Medium-Well |
120°F (49°C) 125°F (52°C) 130°F (54°C) 140°F (60°C) |
| LAMB ROAST | Rare Medium-Rare Medium Medium-Well |
115°F (46°C) 125°F (52°C) 130°F (54°C) 140°F (60°C) |
| PHEASANT | Well Done | 165°F (74°C) |
| PORK CHOPS | Medium-Rare Medium Medium-Well |
130°F (54°C) 140°F (60°C) 150°F (66°C) |
| PORK TENDERLOIN | Medium-Rare Medium Medium-Well |
135°F (57°C) 140°F (60°C) 150°F (66°C) |
| SAUSAGE | Well Done | 170°F (77°C) |
| Turkey Whole Breast Dark Meat |
Done (Check Thigh) |
175°F (79°C) |
| Veal Chops & Roast | Medium-Rare Medium Medium-Well |
125°F (52°C) 140°F (60°C) 150°F (66°C) |
| Venison | Medium | 160°F (71°C) |
WHETHER YOU ARE NEW TO BARBECUING OR A SEASONED PRO, YOU ARE NOT IMMUNE TO DISASTERS. ALWAYS KEEP THIS IN MIND AND TAKE PRECAUTIONS TO AVOID PREDICTABLE DISASTERS. IT’S ALSO A GOOD IDEA TO LEARN FROM THESE BAD DAY PIT STORIES:
Early in my barbecue career, during the Christmas holidays, all my family was visiting. I loaded my Lang 84 with fifteen slabs of baby back ribs. Most of the family was upstairs watching football. My wife and three nieces were shopping. It was raining very steadily, so I had my 10- by-10 E-Z UP over the smoker. I had failed to notice that a 6-foot folding table and a plastic tote full of charcoal were sitting in the back of the trailer next to the firebox. Needless to say, when you place fuel and combustible items next to an uninsulated firebox, they will catch on fire!
The wife and girls returned and frantically honked the horn. I thought, What the heck does she want? I rushed outside in the rain to find 10-foot flames shooting up through what used to be my E-Z UP. Fortunately, the rain prevented me from setting the neighborhood on fire. But the E-Z UP, table, and the rest of the items on the trailer were history. My brother-in-law and I managed to get the fire put out without having to call the fire department. The good news was that the ribs were fine and our holiday dinner was saved. Moral of the story: always check your area before firing up your pit!
—Scott Burton, South Pork BBQ Team
I invited the entire family and neighborhood over for smoked ribs. I was experimenting with a new smoker and got the heat shot up way too high. So I shut the drafts and closed the chimney damper. “Creosote anyone?” The bones had smoke rings!
—Bruce Langseth, Pigs in Peril
As a competition cook, it’s probably best never to acknowledge that there might have been a disaster at some point. Truth be told, all of us have been there, and some of the best tales around concern hotshot barbecue cooks who have had a less-than-great day.
Many years ago, a buddy and I were cooking for a party of about fifty people. We had two Weber Ranch Kettles, and on one of the grills we had a large whole halibut stuffed with herbs, good olive oil, garlic, salt, and pepper. We had fired up just one corner of the grill to cook with indirect heat.
The kitchen was close to the backyard, and we made several trips inside to attend to other parts of the meal. As the tempo picked up near mealtime, I wanted to go outside and take a last look at the progress of the halibut. We were busy, but we had control, and the last thing I was worried about was how the fish was getting along.
There were a lot of people in the backyard, and as the evening temperature had cooled down, many of them were crowding around the grills. I worked my way through the crowd, taking questions about the meal, and in general enjoying myself. I squeezed in near the grill, opened it, and was met by a wall of heat unlike anything I’d ever experienced.
Apparently one of the guests had decided they didn’t like all that smoke coming out of the grill’s vent, and had closed it, causing the heat to build up inside. After I opened the lid, I realized something smelled funny—and it wasn’t the halibut. It was my now nonexistent eyelashes and parts of my eyebrows. Fortunately none of the guests were injured, and the halibut and the rest of the food turned out great, so the disaster was at least not of the gastronomic kind. Eyelashes grow back, and since then I have never failed to check my vents before lifting the lid on a grill.
—Craig Whitson of Norway
I was waiting for the food editor of the Toronto Star to do an article on barbecue and grilling. She had interviewed me before, and we got chatting about different things. While we talked, the caramel apple pizza perfection that I had so carefully prepared on the grill burned to a crisp. Luckily the top didn’t show too many burn marks, so the photographer still took a picture and the article ran.
—Danielle Dimovski, Diva Q BBQ
Letting Meat Rest
When the meat reaches the desired doneness, remove it from the grill. Let it stand, covered with a tent of aluminum foil, for 10 to 15 minutes before slicing. This will allow the juices to redistribute and make the meat easier to slice.
I like to hold meat for 20 to 30 minutes in a clean, dry ice chest (without ice) to allow the moisture to be reabsorbed by the meat. The resting period also allows the meat to firm up for better slicing. Remember, your guests will eat with their eyes first. Go for appearance and the WOW factor!
—Paul Schatte, Head Country II
Backyard Barbecue Planning Checklist
As with all checklists, treat this one as a starting point to use in building your own.
If a checklist is too over the top for you, there’s nothing wrong with spontaneous, unplanned events. As Diva Q told us, “The best backyard barbecues are the ones that are not planned down to the last minute—the ones that are spontaneous.”
What to Do Ahead of Time
• Check the weather forecast before you set the date and invite guests. Mother Nature can be fickle, but at least you can try to better your odds of avoiding inclement weather on the day of your event.
• Prepare your invitation list and invite guests at least a week ahead, but preferably two.
• Have a backup plan for what to do if the weather turns bad on the day or evening of your event. Set up a tent for just-in-case? Dine in the garage? Dine in your house? Call the guests and tell them the venue has changed to Famous Ken’s Ribs & Butts, your treat?
• Plan the menu and decide who is responsible for each item on the menu. Are you providing all the food and beverages?
• Make a list of all the food and supplies you’ll need. Do this as far ahead as possible. You’ll think of stuff to add as time goes on. Basic items on the list will be:
1. meat (1⁄4 pound raw product per diner as a rule of thumb; when in doubt ask your local butcher or meat cutter)
2. plates, cups, silverware, napkins, paper towels, tablecloths
3. beverages to make or buy ahead
4. ice
5. washcloths you can wet with warm water so each guest can clean his or her hands from hands-on dining such as rib eating
• Develop a timetable. What can be made ahead of time? What has to be made the day of the event? Chart out cooking times and temperatures. Chart out serving time with a backup time and a plan to keep everyone occupied and satisfied in case of delays.
• Make a to-do list of everything you can accomplish before the guests arrive. A good host will give guests as much undivided attention as possible instead of running around doing stuff that could have been done ahead of time.
• Plan ahead for insect and varmint control. Uninvited guests such as mosquitoes and ants can put a damper on everyone’s fun.
• Plan where guests will congregate when they arrive and when it’s time for the main course. Will you have appetizers and beverages at a serve-yourself station, or will you and cohosts serve them? Do you expect guests to eat and run or make a day or evening of it?
• Make a welcome sign that also directs guests where to go if you’re not at the front door to greet them: “Welcome! Come on in” or “Welcome! Please come in to the backyard.”


