Puma Shadows
Raw umber +
Payne’s gray
Tip of Nose
Alizarin crimson +
cobalt blue + white
Darkest Shadows
Raw sienna + burnt sienna + raw umber
Nose Bridge/ Back of Neck
Cobalt blue + raw sienna + white
Iris
Chromium oxide green + raw umber + raw sienna + white
Pupil
Raw umber + Payne’s gray
STEP ONE I prefer to paint on untempered hardwood board, as it allows a bit more control than canvas does for painting details. After priming my board with several coats of gesso, I carefully transfer my sketch. Then I outline the puma with raw umber and a small flat brush.
STEP TWO Next I establish the variations in value, always painting in the direction of the fur’s growth. First I block in the midtone values with raw umber and a medium flat brush. Then I add a bit of Payne’s gray to the raw umber and block in the shadow areas.
STEP THREE Now I continue to develop the deepest shadows, still using the mix of raw umber and Payne’s gray. Next I switch to white mixed with a little raw umber to establish the highlights. As you paint, keep in mind that working with acrylic requires some patience; although the paint dries quickly, it can take several layers of paint to achieve more opaque colors. At the completion of this stage, I’ve developed a map of the puma’s main values.
STEP FOUR Because this puma is going to be a warm color, I keep the background cool to add depth and contrast. I paint the green background with a large filbert and chromium oxide green, using long, horizontal strokes. Then, with a medium flat brush, I apply a thin wash of raw sienna to the puma to warm up its overall color. With the same brush, I block in the tree trunk with diagonal strokes and an equal mixture of Payne’s gray and cobalt blue.
STEP FIVE I continue to work with the Payne’s gray and cobalt blue mix, both building up the opacity and deepening the shadows on the tree trunk. And I also build up the background; for the lighter areas, I add white to chromium oxide green. Next I add highlights of the tree, using white mixed with the Payne’s gray and cobalt blue mix.
STEP SIX Next I apply three washes: white over the tree, white and raw sienna over the background, and raw sienna over a few highlights on the cat. Then I load a flat brush with raw sienna and white, splaying the bristles to paint the fur. I paint the ears and white fur with a mix of Payne’s gray and white. For shadows, I use a cobalt blue and Payne’s gray mix.
STEP SEVEN I even out the puma’s color with both a wash of raw sienna and white over the darker areas and a wash of raw sienna over all but the highlights. With a small round brush, I paint the tip of the nose, adding more white for the highlight. Next I apply a thin coat of cobalt blue to areas that need a grayer cast, mixing in raw umber for the ears. I wash burnt sienna sparingly around the eye area and neck and darken the underside of the chin with a mix of Payne’s gray and white. After refining the white areas of fur, I mix equal parts of Payne’s gray and raw umber to paint the darkest areas of the cat, such as the small crevices in the neck fur. To finish the puma, I add the whiskers with white and a small round brush; then I use the same brush to complete the eye. The final touch on the tree is a thin wash of white mixed with raw sienna.
Bear Shadows
Raw umber + Payne’s gray
Bear Midtones
Raw umber + raw sienna
Tongue
Alizarin crimson + cerulean blue + white
Rock Shadows/ Midtones
Payne’s gray + cerulean blue + white

Light Foliage
Cadmium yellow medium + chromium oxide green + white
Foreground Tree Texture
Raw umber + Payne’s gray + cerulean blue

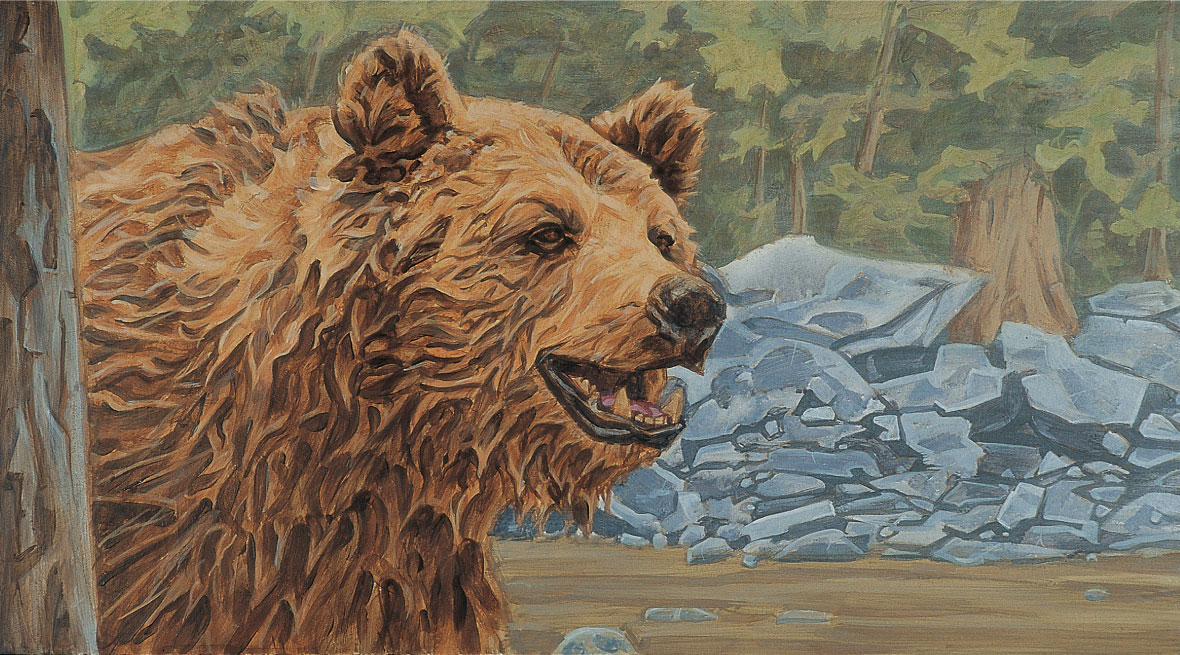
STEP ONE First I paint the basic outlines of the scene in raw umber. For the bear, I use a small flat brush; for the background, I use a small round brush. Next I block in the bear’s basic values with raw umber and a medium flat brush. For the smaller areas of the eyes and mouth, I use a small round brush.
STEP TWO Next I apply a Payne’s gray and cerulean blue wash over the rocks. With a medium flat brush, I stroke chromium oxide green and raw umber over the foliage in the background. To add texture, I wash uneven vertical strokes of raw umber over the trees, again using my medium flat brush. Then I paint over the river with a mix of chromium oxide green and raw sienna.
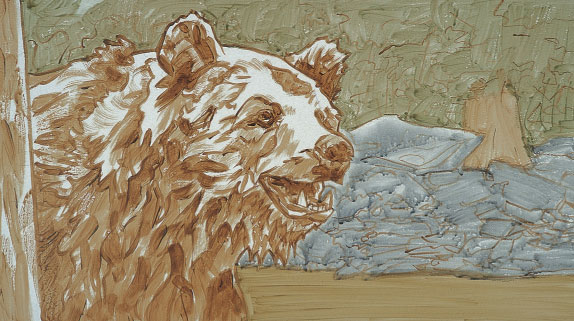
STEP THREE With a medium flat brush and the same colors, I add more layers to the river. Then I define the trees with a mix of chromium oxide green and raw umber, adding cadmium yellow medium and more green for lighter vegetation. I wash raw sienna over the bear’s coat; then I wash a mix of Payne’s gray and cerulean blue over the left tree; the bear’s lips, nose, and eyes; and the rocks. I also add strokes of raw umber to the trunk on the right.
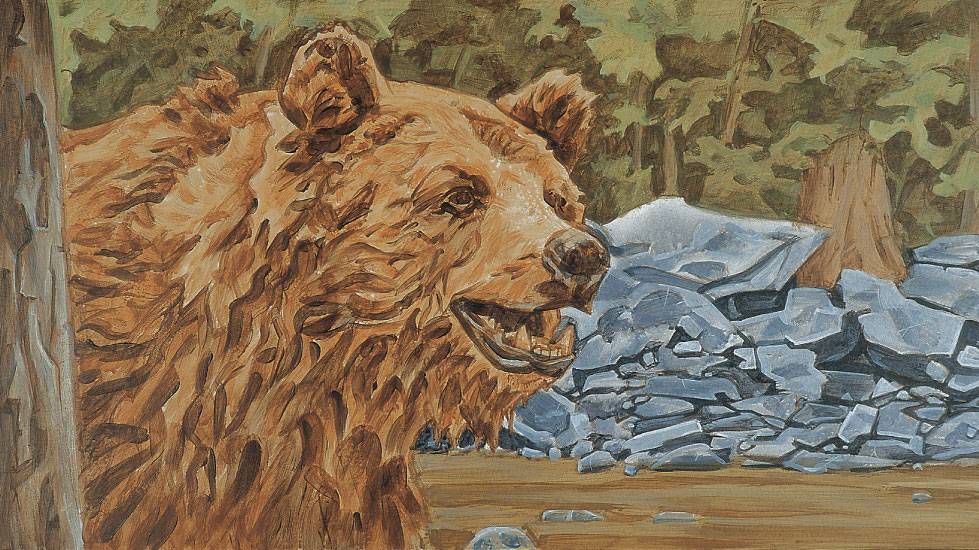
STEP FOUR I continue to build the tree shadows with the chromium oxide green and raw umber mix, adding white for midtones. I paint the thin trunks with raw umber, chromium oxide green, and white. Next I move on to the rock shadows and midtones, using a small flat for the dark crevices between the rocks. Then I fill in the bear’s nose and mouth with a Payne’s gray and cerulean blue mix, and I create texture on the foreground tree with a large flat and varied strokes.
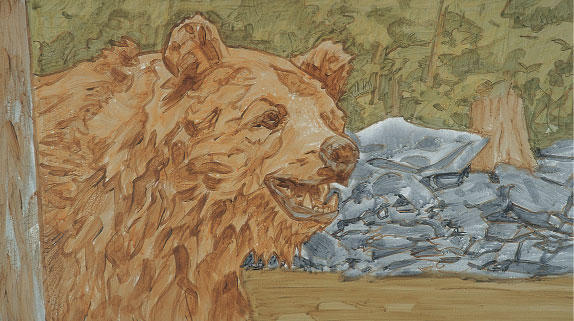
STEP FIVE I paint the lightest rocks with the midtone mix plus more white; then I build the shadows with darker gray. (See the samples on page 48). I layer more chromium oxide green and raw sienna mix on the river, adding white for highlights. I render the dark tones of the foreground tree with raw umber mixed with cerulean blue, adding white for the lighter tones. I also stroke some raw sienna onto the trunk and cerulean blue over the shadows. Next I push the background into the distance with a thin wash of white plus chromium oxide green. With a small round, I define dark areas of the bear’s coat and delineate the lighter areas with a raw sienna and white mix, adding more white for the highlights. With a Payne’s gray and cerulean blue mix, I also paint the bear’s nose, mouth, and eyes.
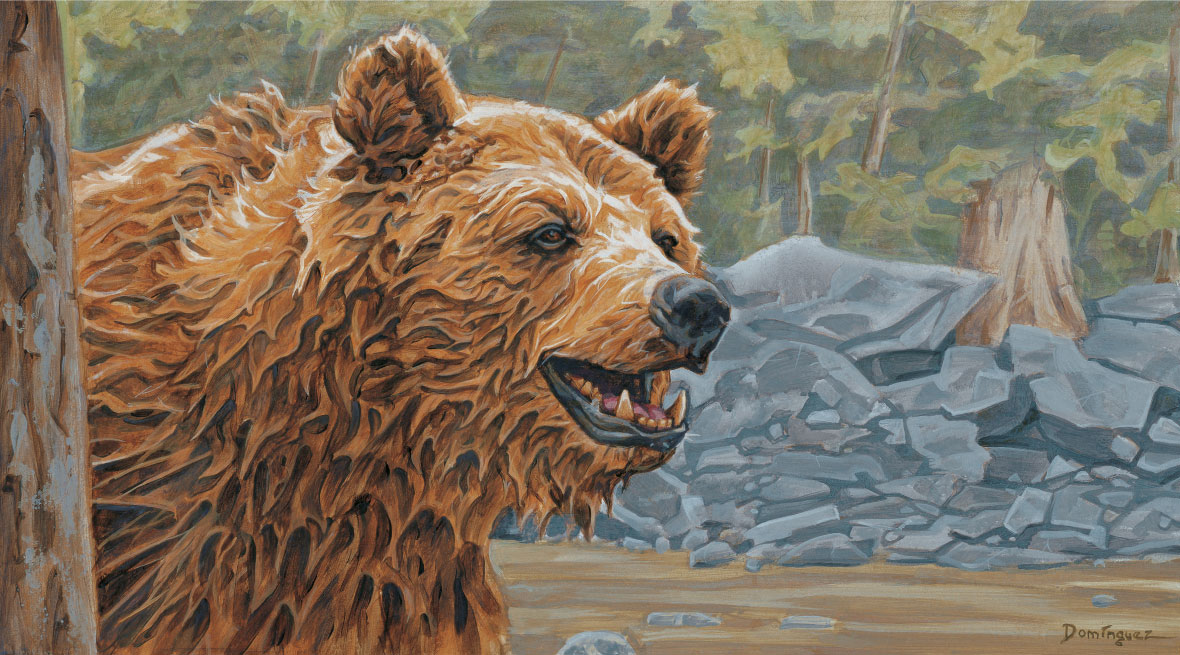
STEP SIX Next I wash raw sienna over the bear with a medium flat. Then I define shadows in the fur by deepening the edges near the lighter tips of the fur to create contrast. With raw umber and cerulean blue, I tone down the lighter sections of fur that fall in the lower, shadowed area of the bear’s coat. I then paint a thin raw sienna and white wash over the darker fur in the sunlit parts of the coat. I use my small round brush to pick out the tips of the fur with white and a dab of raw sienna. To further detail the lips, eyes, and nose, I combine cerulean blue, Payne’s gray, and white, following with a raw sienna wash over a few sections of the nose and lip. Finally I paint the teeth with cadmium yellow medium, raw sienna, and white and a small round brush, adding the dark areas with a mix of raw umber and cerulean blue. My last touch is to add a wash of cerulean blue over the foreground tree.
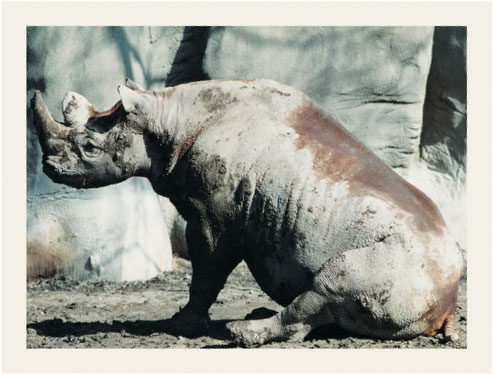
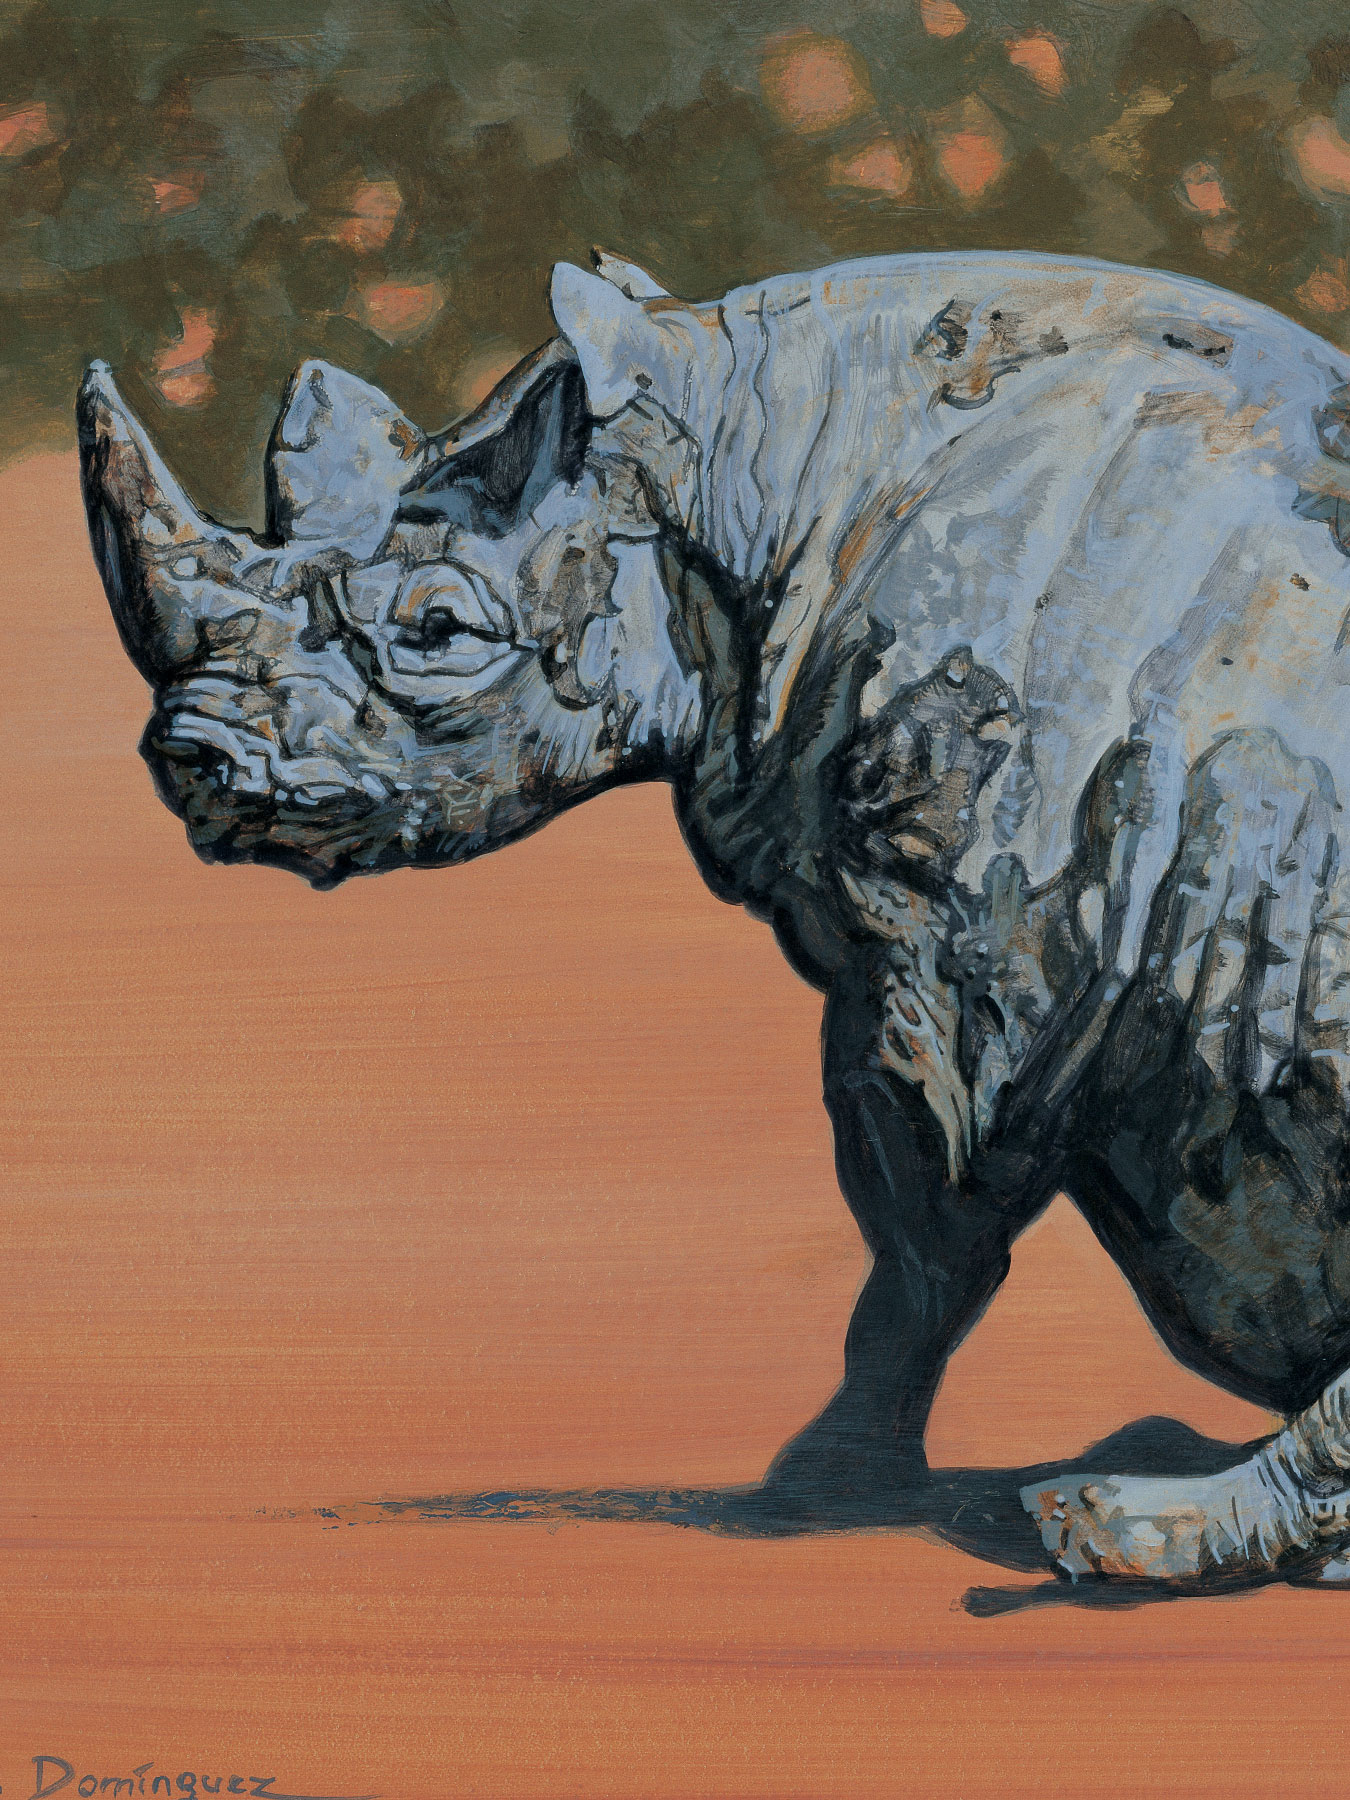
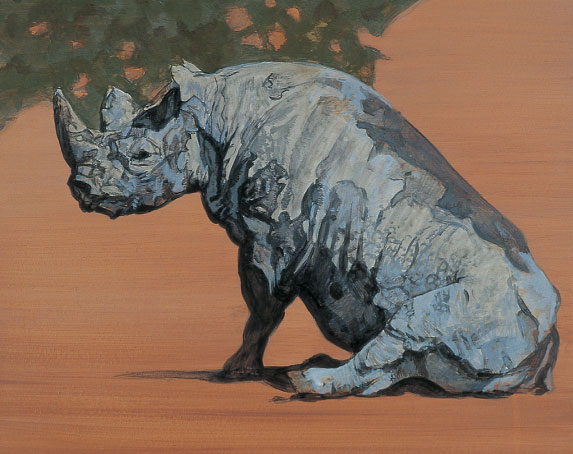
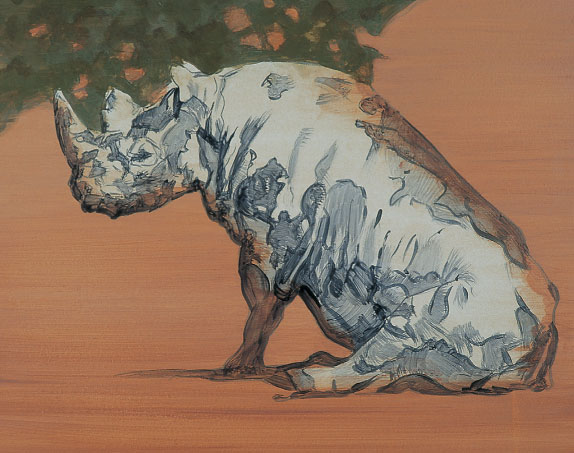
Sparking an Idea I was attracted to this photograph because of the rhino’s unusual pose. He is pictured seated, having just risen from a roll in the mud and dust to rid himself of ticks and other parasites. This seemed an appropriate pose for a rhinoceros spending a lazy day in a hot, dry climate.
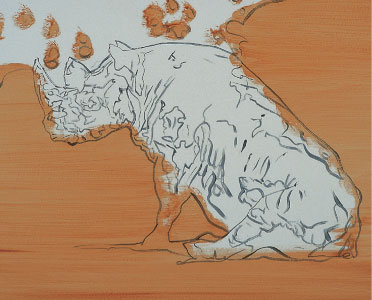
STEP ONE Because there is enough detail in the rhino’s texture to keep the eye busy, I use a simplified background, using only the overhang from an acacia tree. I paint the outlines with a mix of Payne’s gray and cerulean blue. Then, with a mix of raw sienna and burnt sienna and a large filbert, I paint the background with sweeping horizontal strokes.

STEP TWO I continue working on the background, layering two to three more applications of the same paint mixture from step one and allowing the paint to dry between layers. This warm color will help create a sense of dryness in the background; it will also contrast nicely with the cooler colors of the rhinoceros. Next I paint in the overhanging tree with the large filbert, using chromium oxide green mixed with raw umber.
STEP THREE I build the background with a mix of raw sienna, burnt sienna, and white. Then I develop the tree with the chromium oxide green and raw umber mix, adding white for highlights and strokes of raw umber for shadows. Next I mute the colors of the background by applying a watery white. When dry, I block in the rhino with a mix of Payne’s gray and cerulean blue.
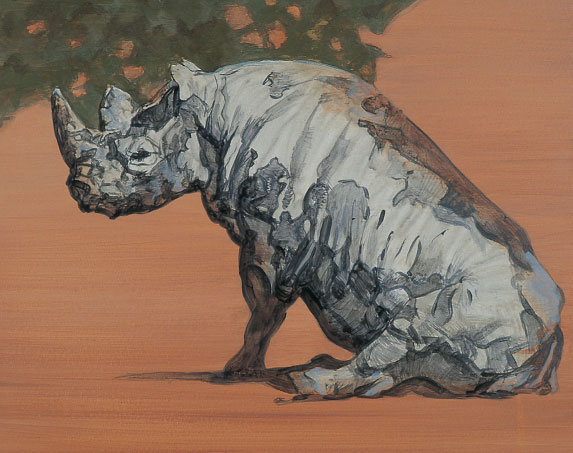
STEP FOUR In this step, I continue to refine the rhino’s hide texture using a mix of ivory black and cerulean blue. I use a small flat brush, varying the direction of the strokes to follow the contours of the rhino’s body. Then I add white to the mix to paint the lighter areas of the hide.
STEP FIVE Now I further develop the texture of the rhino’s body with the small flat brush and a mix of ivory black, cerulean blue, and Payne’s gray for dark tones, with white added to the mix in varying degrees to paint midtones and highlights. I detail smaller areas with a small round brush, paying close attention to my reference material to capture the texture.
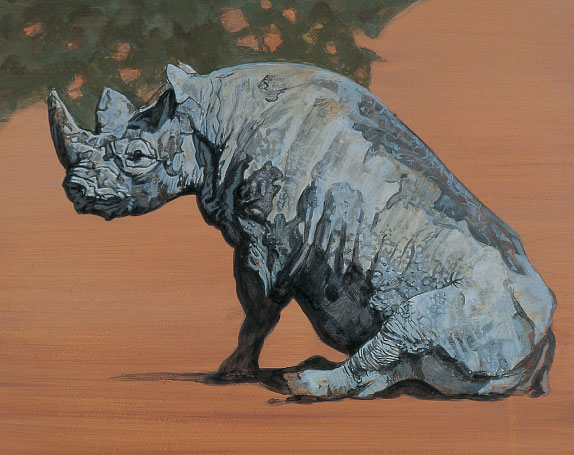
STEP SIX Switching to a medium flat, I apply a wash of raw umber to suggest dust on the rhino. Next I use a small flat and a mix of ivory black, raw umber, cerulean blue, and a small amount of white to deepen the shadows on the rhino, as well as to establish the shadow cast on the ground. Then I continue developing texture on the rhino with the small round.
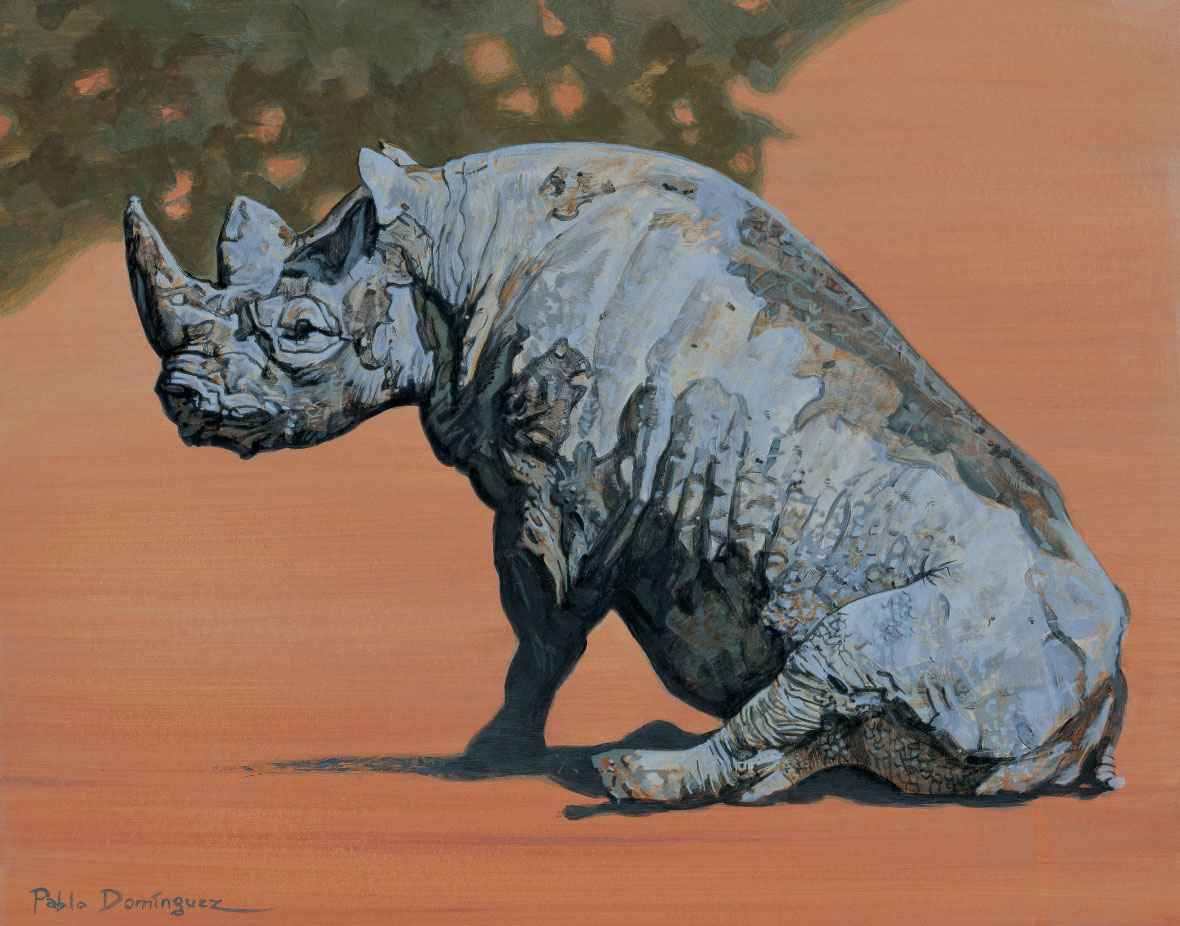
STEP SEVEN I finish building up the detail on the rhino using the previously mixed colors from my palette; I enhance the crevices, cracks, and bumps on its hide with the small round. I also dab a few spots of raw sienna on the rhino’s back. Then I touch up any gaps between the rhinoceros and the tree by filling them in with a mixture of chromium oxide green, raw umber, and white. Finally, using a large flat brush, I mix a bit of white with ivory black to create a dark gray; after removing most of this color from my brush with a paper towel, I drybrush the remaining color on the base area of the rhino’s legs and its cast shadow to lighten them slightly.
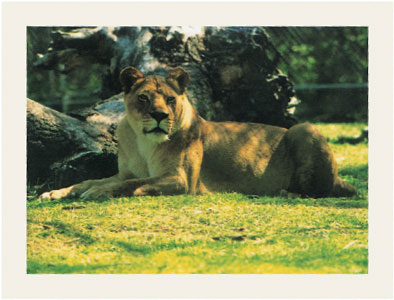
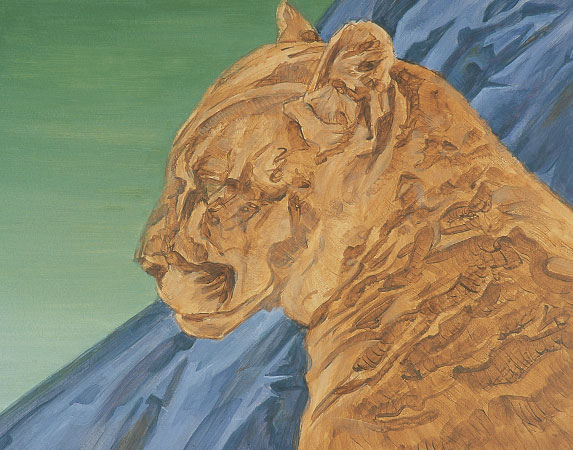
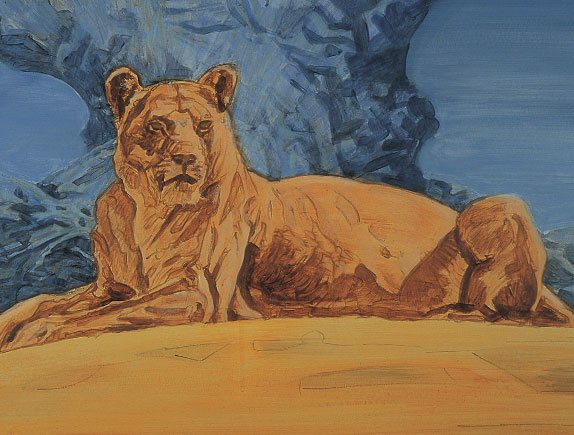
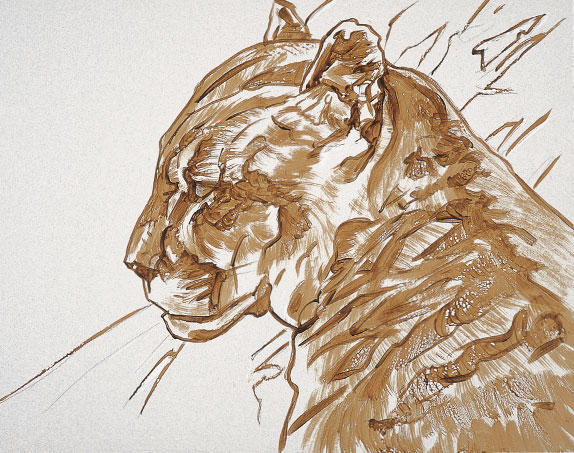
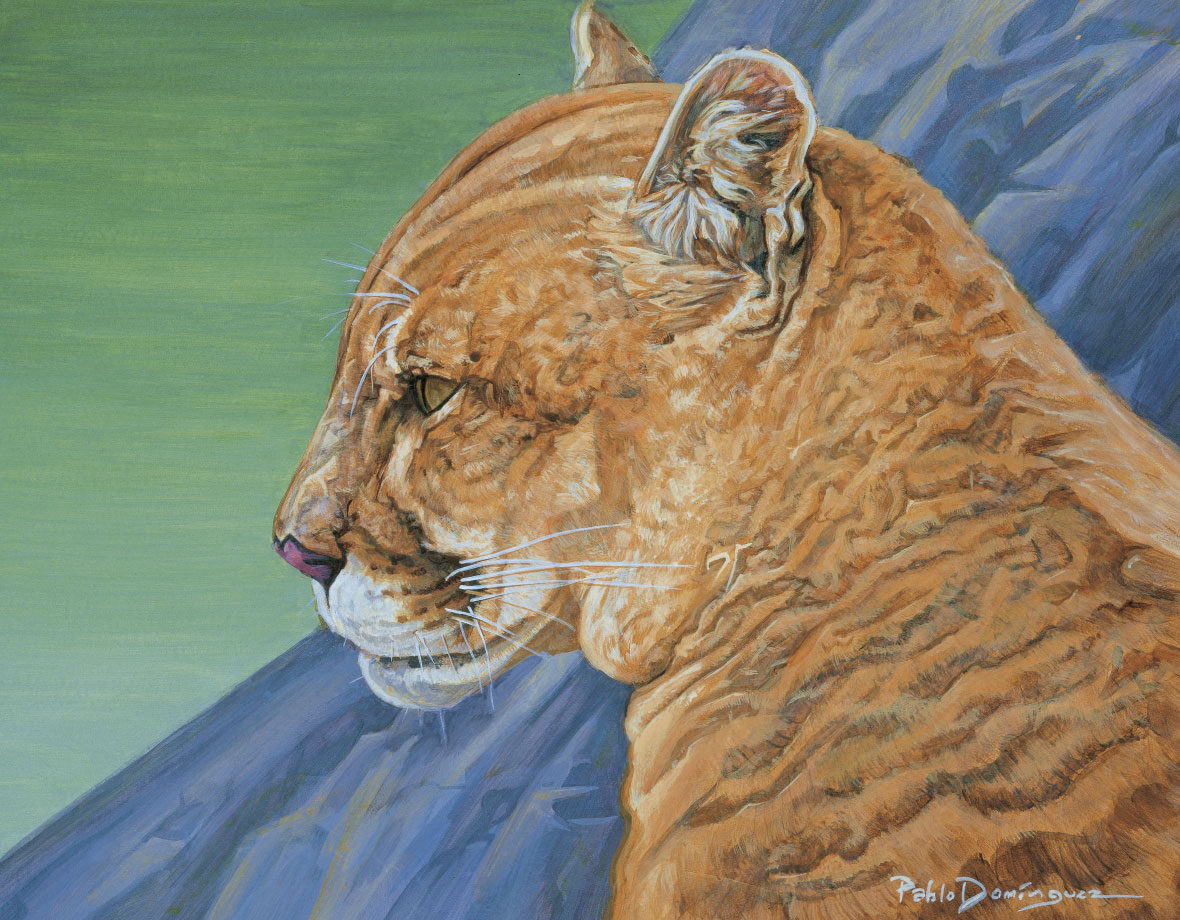
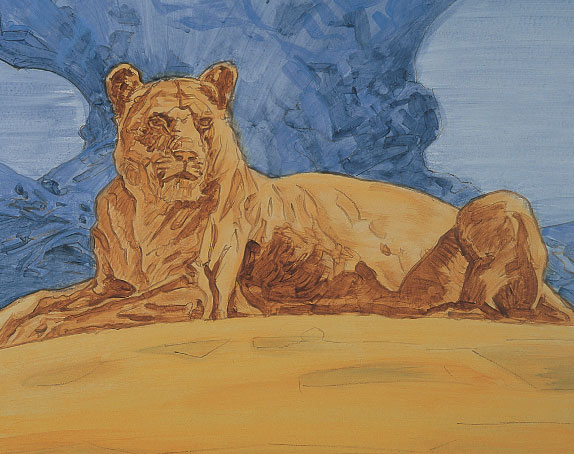
Taking Artistic License I photographed this lioness at a zoo as she responded to the sound of the zookeeper approaching with her meal. For a more exciting painting, I decided to take artistic license and change the background elements and colors. Don’t be afraid to adjust your painting to suit yourself; you don’t need to be a slave to your references.
Tree Trunk
Cerulean blue + Payne’s gray + white
Lioness Midtones/ Shadows
Raw umber + cadmium yellow medium + burnt umber

Lioness Highlights
Raw sienna + white
Lioness Darks
Payne’s gray + raw umber

Eyes
Chromium oxide green + raw sienna
Lioness Darkest Areas
Raw sienna + raw umber + Payne’s gray

Chin Highlight
White + raw sienna + cadmium yellow medium
Nose
Alizarin crimson + cerulean blue + white

Eye Refinement
Chromium oxide green + raw umber + raw sienna
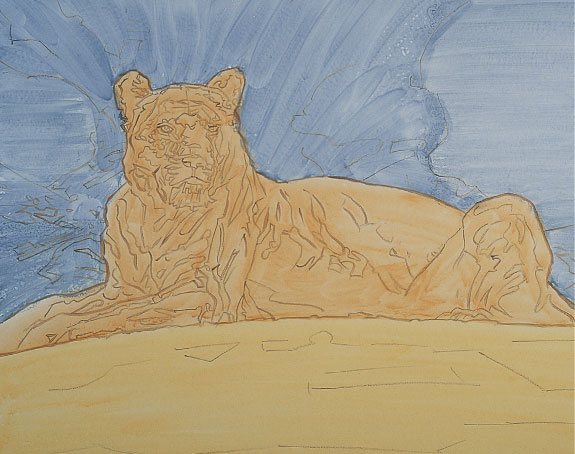
STEP ONE Using raw umber, I paint the outline of the lioness with a small flat brush and the other lines with a small round brush. Then I apply a raw sienna and cerulean blue mix over the background. I also wash a mix of raw sienna, cadmium yellow medium, and white over the foreground, using long, horizontal strokes. I paint the lioness with raw sienna and a large filbert, keeping the paint thin so that the underdrawing remains visible.
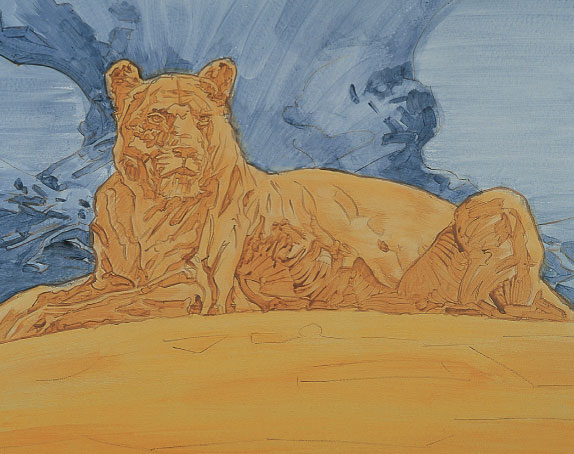
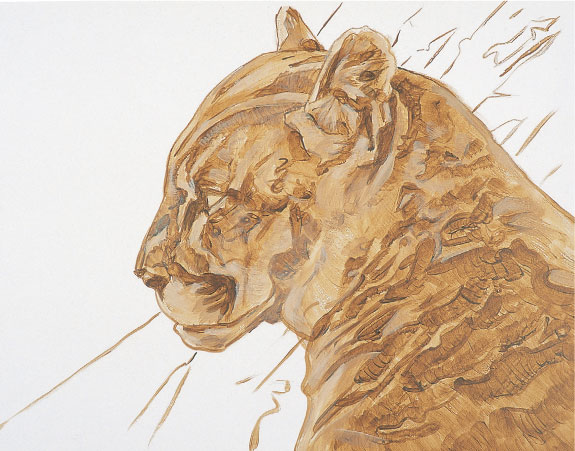
STEP TWO Now I begin developing values in the tree trunk, applying mixes of cerulean blue, Payne’s gray, and white with a large flat brush. I establish light and dark values in the lioness with mixes of raw umber, cadmium yellow medium, and raw sienna. Next I add a raw sienna and cadmium yellow medium mix under the lioness and apply it in a thin wash over her body.
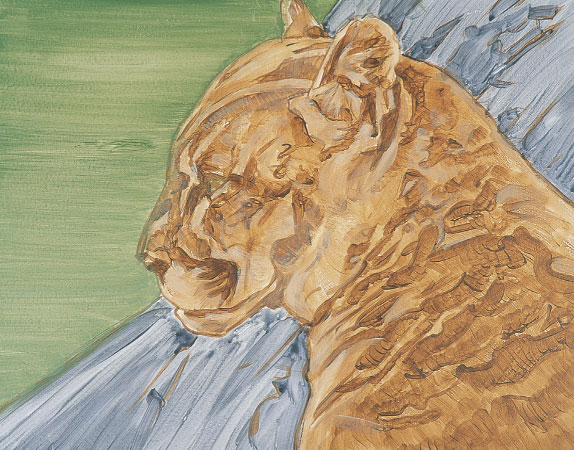
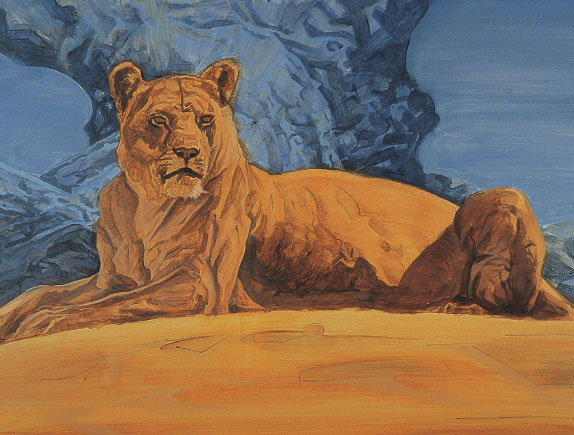
STEP THREE Next I paint chromium oxide green into a few shadows on the lioness with my large filbert. I also continue refining the tree trunk with a mix of Payne’s gray and cerulean blue, using a large flat brush. Then I concentrate on the midtones and shadows on the lioness (see the samples above); I use a small flat brush for the facial features and a medium flat brush for all other areas.
STEP FOUR With the trunk mix, I add blue-gray to the background and begin refining the tree. I then apply a wash of alizarin crimson over shadow areas on the trunk, and I wash over the lioness with raw sienna. Next I add highlights and darks to the lioness, followed by another raw sienna wash. Then I apply a thin layer of raw umber below the lioness and fill in the eyes.
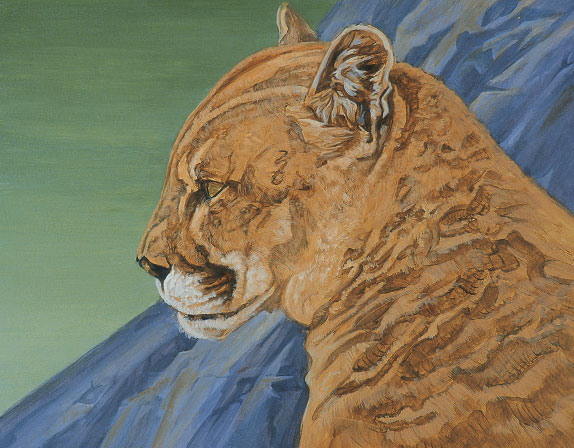
STEP FIVE I further define the highlights on the lioness using a medium flat brush. For the shadows, I use a mix of Payne’s gray, cerulean blue, and raw sienna. Then I add a thin raw sienna and cadmium yellow medium wash over the highlights. Finally I apply a lighter value of the trunk mix to the tree’s light areas and a Payne’s gray and cerulean blue mix to the midtones and shadows.
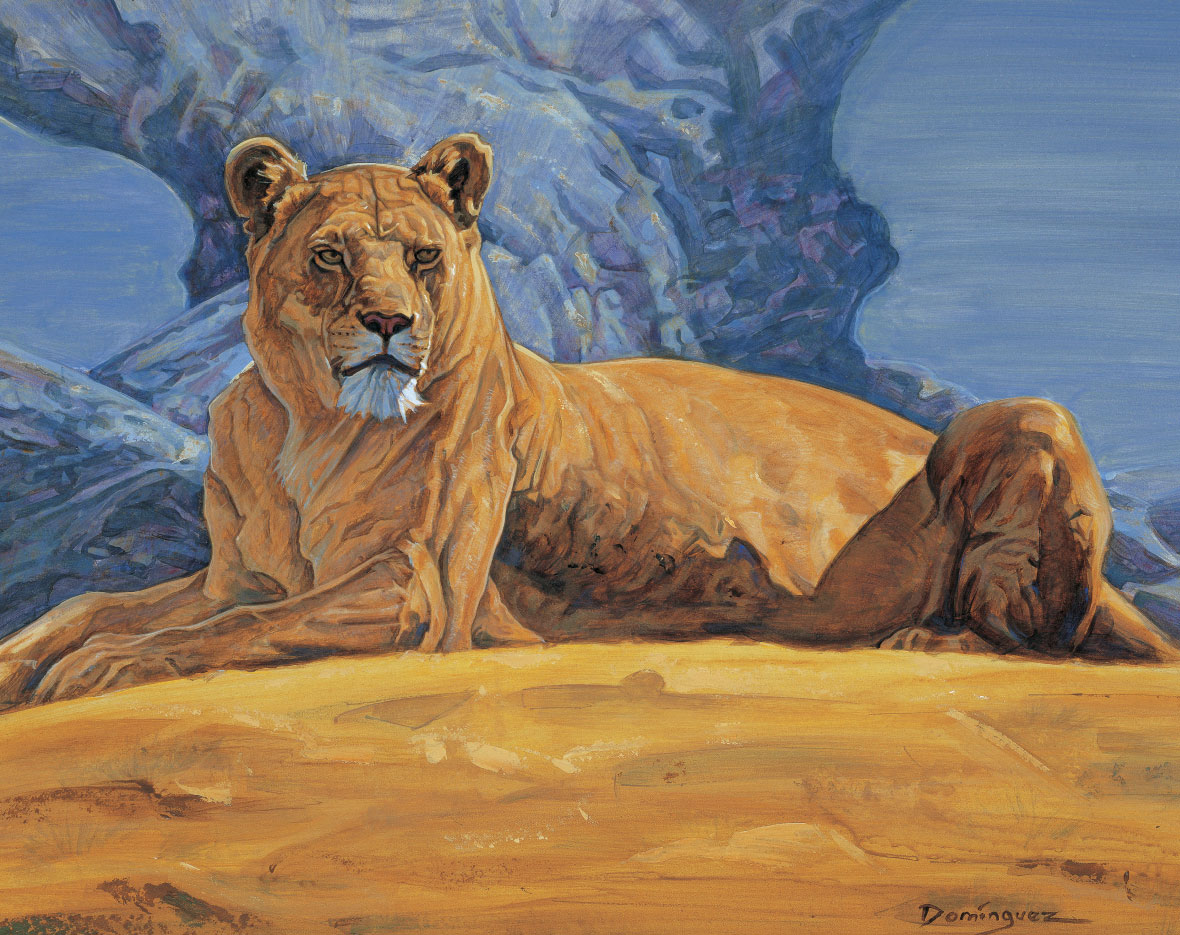
STEP SIX I refine the lioness with mixes of raw sienna, raw umber, and Payne’s gray for the darks; raw sienna and raw umber for the midtones; and raw sienna, cadmium yellow medium, and white for the highlights. I paint the muzzle with a mix of Payne’s gray and white, highlighting the chin. Then I dab chromium oxide on a few midtone areas before retouching lighter areas with a raw sienna and cadmium yellow medium wash, pumping up the highlights with a raw sienna and white mix. I also fill in the nose, and I paint the pupils with Payne’s gray. Moving to the background, I add detail to the tree using a mix of Payne’s gray, cerulean blue, and white, followed by a wash of alizarin crimson over a few midtone areas. Finally I wash a mixture of raw sienna and white over the entire background.
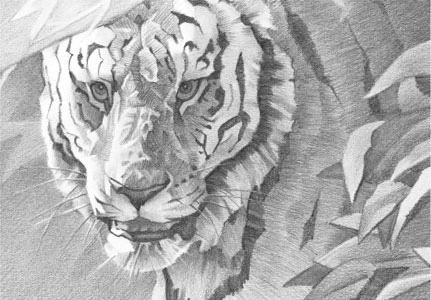
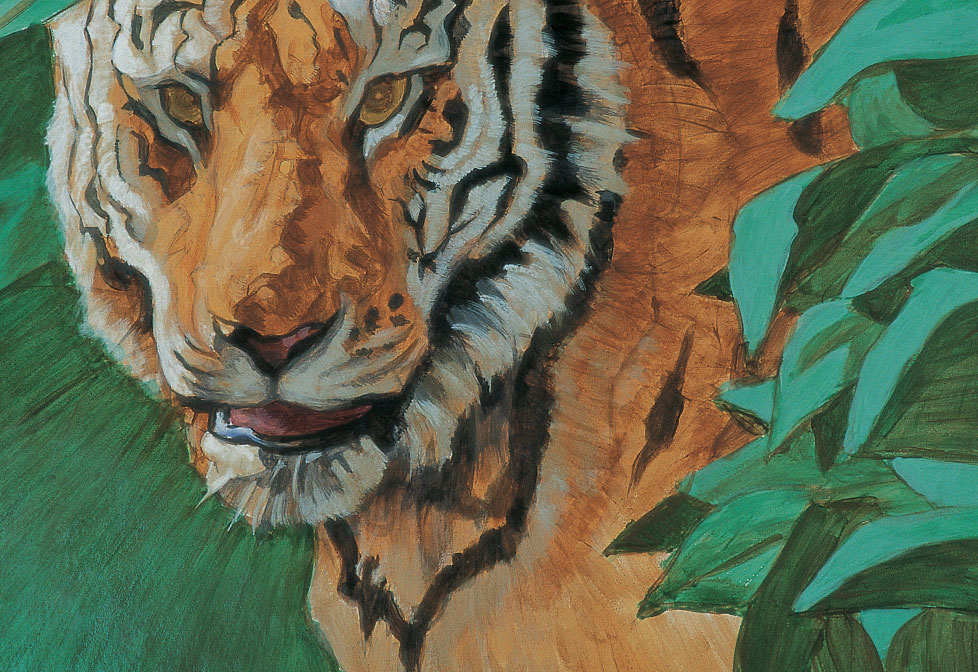
Establishing Values To see the variations in value of your subject, try beginning with a black-and-white pencil sketch. The sketch can help you plan your use of color.

Face Highlights
Raw sienna + cadmium orange + white
Eyes
Chromium oxide green + raw sienna + cadmium yellow medium
Leaf Reflections
Chromium oxide green + phthalo green + raw umber

Wash for White Fur
Raw sienna + burnt sienna + white
Tiger’s Back
Raw sienna + burnt sienna + raw umber + Payne’s gray
Leaf Highlights
Chromium oxide green + cadmium yellow medium + white
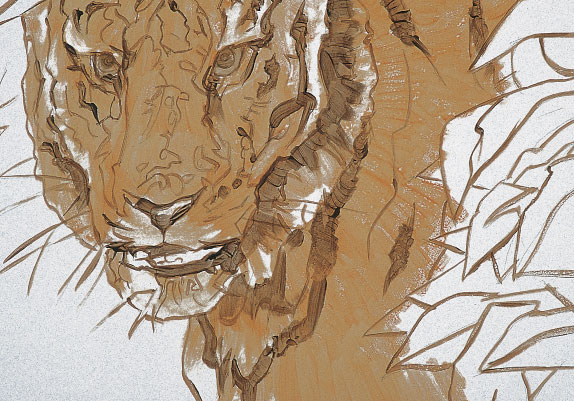
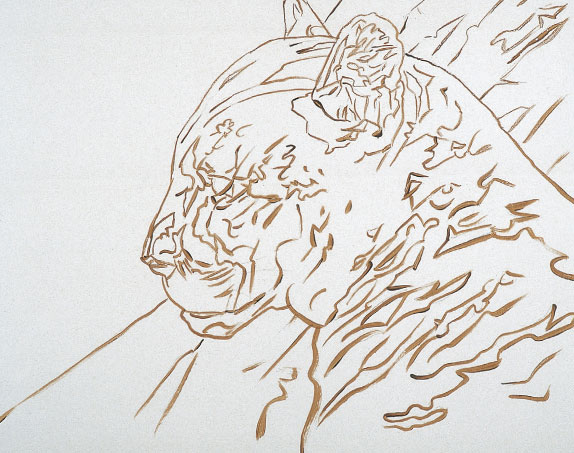
STEP ONE After transferring my drawing to the painting surface and going over the pencil lines with raw umber, I apply a thin mixture of raw sienna, burnt sienna, and cadmium yellow medium to establish the base color of the tiger’s coat. For this step, I use a medium flat brush and paint with short strokes that follow the direction of the fur. Then I block in the dark stripes with a mix of raw umber and Payne’s gray, using the same medium flat brush. Switching to a small flat brush, I establish the eye color with a mix of raw umber and chromium oxide green.
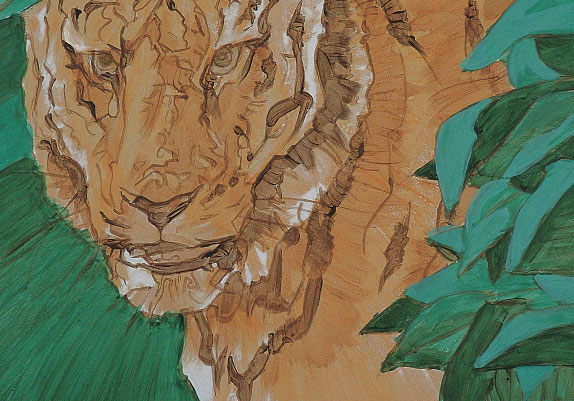
STEP TWO I block in the background with a mix of chromium oxide green and phthalo green, using a large flat brush and diagonal strokes. Using the same brush, I add raw umber to the mix and fill some of the background shadow areas. I also add the midtone to the tiger with raw sienna, burnt sienna, raw umber, and cerulean blue. To finish this step, I apply a mix of chromium oxide green, phthalo green, and raw umber to the shadow areas and a mix of chromium oxide green, phthalo green, and white to the highlights—all with the large flat.
STEP THREE Using a medium flat brush for this entire step, I first return to the tiger to deepen the midtones with a mix of raw sienna, burnt sienna, raw umber, and cerulean blue. I paint the darkest sections of the tiger, including the stripes, with raw umber plus Payne’s gray. Then I paint the white of the tiger’s coat with a mix of white and a little Payne’s gray. Next I apply another layer to the midtone areas using raw sienna, burnt sienna, raw umber, cadmium yellow medium, and cerulean blue.
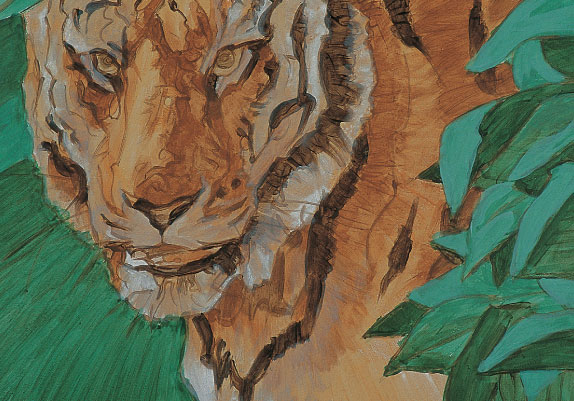
STEP FOUR I continue to paint the white areas of the tiger with a mix of white and Payne’s gray, adding more gray to the mix for shaded areas of the fur. Next I use a darker gray to paint the dark stripes, nose, and mouth. I fill in the tongue with a mix of cerulean blue, alizarin crimson, and raw umber, adding white to the mix to paint lighter areas. Then I fill in the eyes with a raw umber and chromium oxide green mix. With raw sienna, burnt sienna, cadmium yellow medium, and white, I paint the highlights in the tawny areas of the face. To finish this step, I deepen the dark green background with a mix of chromium oxide green and raw umber.

STEP FIVE To finish, I wash orange over the tawny fur. I then wash a tawny mix over some of the white fur, stroking a green wash over other white areas. Next I define the tiger’s chin and nose, darken its eyes and mouth, and add the teeth and whiskers. I apply a mix of white and raw sienna behind the tiger, and I also darken the foreground leaf edges using a Payne’s gray and raw umber mixture; I add white to the tips and some of the edges. Now I highlight the foreground leaves, deepening the undersides with a Payne’s gray and cerulean blue mix. Finally I wash cadmium yellow medium mixed with green over the leaves.