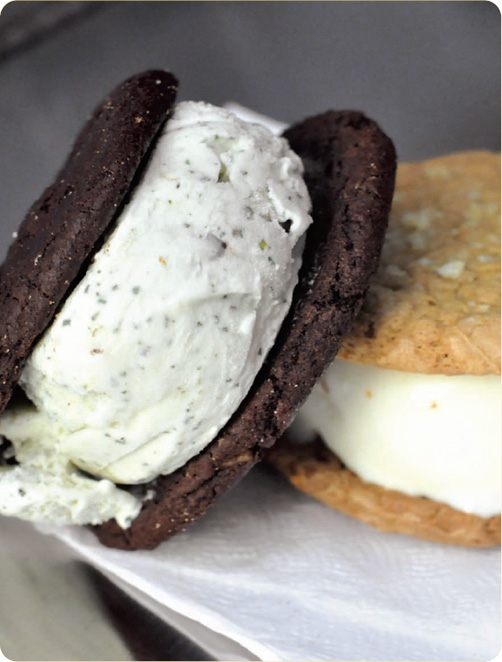
Of all the new-wave food trucks roaming the streets of New York, Coolhaus, an inventive ice cream sandwich truck, is one of the few with roots outside the city. The brainchild of architect Natasha Case and real estate developer Freya Estreller, Coolhaus combines two of their great passions. “Our actual company name is farchitecture: food plus architecture,” says Natasha. Architecture lovers can geek out at the triple entendre in Cool-haus—it’s a play on the Bauhaus modern design movement; Remment Koolhaas, an influential Dutch architect and theorist; and the actual product. You pick out the cookies (“floor” and “roof ”) and choose your own ice cream “walls” for a made-to-order ice cream sandwiches.
The concept first came to Natasha her senior year at Berkeley. Her senior project was about extruding land and using the striations of land as different floors. “My professor’s criticism was that my building looked like a layer cake, and I remember being like, he’s saying that like it’s such a bad thing. What’s wrong with layer cakes? Layer cakes are awesome.” For the next round of the model, she actually baked it as a layer cake. “I could sort of see my peers, they were just paying attention in a different way—when food is involved it brings people together.” Natasha began to look for ways to incorporate food into architecture, and she nurtured the idea through grad school, trying to figure out how she could make it into a viable career. It wasn’t until she started working at Walt Disney in hotel and master planning, her first job out of school, that she began laying the foundation for Coolhaus. “I was baking cookies and making ice cream and naming the combinations after architects for friends at work. It was a total hobby thing just to lighten everyone up, and I met Freya around that time.” At Disney they had an annual craft fair where employees could bring their homemade products to Disney and sell them. Freya helped Natasha prepare to sell her ice-cream sandwiches. “People liked the architecture niche of it and the product itself—people were reacting in an obsessed way that made you think, maybe there is something in this project that is worth exploring more.”
At that point, Natasha was “more of the creative ideas person,” while Freya had all the business background as a real estate developer. “We had the common interests of design and architecture and food, but she was able to take what I really thought of as an art project and make it a business,” Natasha says. With the recession setting in late 2008, a brick-and-mortar shop wasn’t an option. They went on Craigslist and found a postal truck that was so beat up that they had to have it towed to L.A. With no formal cooking background, the roommates started perfecting the recipes in their apartment kitchen through a process of trial and error. “Actually I think baking is a lot more difficult than ice cream,” says Natasha. “If you have a decent machine and you kind of get food, you can get pretty good at it, actually. You figure out the basic infrastructure.”
They were looking for a way to launch, and Coachella—an annual three-day arts and music festival in Southern California—was coming up. “We thought, let’s go big or go home.” For Coachella, they started out with just a few flavors: vanilla bean; their now classic “Dirty Mint,” (page 153) made with brown sugar and flecks of real mint leaves; Meyer Lemon, complete with bits of lemon zest; a homemade strawberry known as “FrankBerry”; and a peanut-butter flavor called “I. M. Peanut Butter”—along with a few different types of cookies: chocolate, chocolate chip, peanut butter, and sugar.
While preparing for Coachella, Natasha realized that there was no way that the two of them could just stay up and make ice-cream sandwiches for 10,000. “We realized we would have to have co-packers, which is still what we do and why we’re able to expand. We can give our recipe to a manufacturer to make and buy it back wholesale.” With co-packers in place, they towed the truck to the festival and set up a booth next to it. They could only get into the campgrounds to sell, and the buzz built slowly. By the last day, people were starting to get excited. “We really, really started with nothing at all. Coachella led to publicity, mainly viral through blogs.… It created a demand. When we came back to L.A., we had clients. People wanted to book us.”
Early on, they had New York in their sights. “There’s so much connection between L.A. and New York. So many of the brands we had done events for or catering or promotions had an L.A. and New York office.” Natasha’s mom is originally from New York, and she’s spent a lot of time there. Natasha felt that she understood the market and “the sophistication of the typical New Yorker that they would get the puns and the kind of flavors … you’re in a place where people aren’t afraid to say, well, that’s maybe a little expensive, but it’s probably worth it.” As predicted, New Yorkers have embraced Coolhaus, and during the warm months, the lines stretch down the block. Ambitious eaters can attempt to conquer the “Skyscraper”—a tower consisting of seven cookies and six scoops of ice cream. If you finish it in under ten minutes, it’s free. Otherwise plan on ponying up $25.
“I want to bring food into whatever I do in some fashion, even if it’s architecture, because it’s a common language.”
From a rickety postal truck, the 2012 Dessert Vendy finalist has grown to a fleet of nine slick pink and silver trucks: four in L.A., two in New York (plus a cart), two in Austin, and one Dallas, in addition to a storefront in Culver City with a Pasadena location on the way. When Coolhaus expands to a new market, they seek out local businesses to partner with for co-packing. These days, they have an executive pastry chef who helps them develop their seasonal flavors and goes to the co-packers to train them to prepare their recipes.
Natasha and Freya are very much involved with the day-to-day business right down to developing new flavors. While Natasha is glad they started with the baking and making the ice cream, she admits, “I’m more of an entrepreneur. I want to grow a brand. I’m interested in exploring different cities. If I were baking and making ice cream all day, I wouldn’t be able to do that—there’s no way. I do most of the PR, pretty much all of marketing.”
When expanding their menu, they try keep a pulse on the trends and try to stay ahead of the curve. Recent menu additions include: fried chicken and waffles ice cream; red velvet ice cream and cookies; pistachio and black truffle ice cream; a vegan-friendly rice milk and cardamom sorbet; and Peking duck, a sweet plum ice cream with pieces of candied orange and crispy candied duck skin. “At Coolhaus, we want to be more on the cusp of that, set the trends and try to predict the next step.”

Adapted from Natasha Case’s recipe
Coolhaus’s Dirty Mint Ice Cream was born of a happy mistake. “The reason why it’s called ‘dirty mint’ is because it has brown sugar, which makes it more earthy. Basically we ran out of the sugar, so we had to use half and half. So many recipes through history start as accidents,” says co-owner Natasha Case.
1 small bunch fresh mint (about 2 ounces), picked and cleaned
3 cups whipping cream
1 cup half-and-half
¾ cup granulated sugar
 teaspoon Kosher salt
6 egg yolks
½ teaspoon cornstarch
½ cup dark brown sugar, firmly packed
½ cup mini semisweet chocolate chips
Finely chop the mint and place in a large bowl. Set aside.
In a medium saucepan, warm the cream, half-and-half, granulated sugar, and salt over medium heat. In a separate bowl, whisk together the egg yolks, cornstarch, and dark brown sugar.
Once the cream mixture is warm and beginning to bubble around the edges, remove from heat and slowly pour about half of the mixture, a tablespoon at a time, into the yolk mixture, whisking constantly. Once all of the cream mixture has been combined with the yolk mixture, scrape it back into the saucepan, return to medium-low heat, and cook, stirring constantly with a heat-proof utensil, until the custard thickens and coats the spatula. The mixture should register 170°F to 175°F; do not allow mixture to overheat.
Immediately strain the custard into the bowl with the chopped mint.
Rest the bowl of mint custard in an ice bath, and stir until cool. Cover and refrigerate overnight to chill thoroughly and to allow the mint to steep into the base.
Remove custard from refrigerator, then whisk to evenly distribute the mint. Pour into ice-cream maker, then churn according to the manufacturer’s instructions. Remove ice cream from the machine, fold in the mini chocolate chips, and freeze at least 3 to 4 additional hours to set. Serve as ice cream sandwiches with Double Chocolate Cookies (page 154).
Fill a large bowl with 2 trays worth of ice cubes. Add enough water so the ice cubes float, about a cup of water. Fit bowl with custard over ice bath and whisk until custard has cooled—the custard bowl should fit so no water leaks into the custard during whisking.
Adapted from Natasha Case’s recipe
These dark chocolate cookies were one of Coolhaus’s first recipes and remain among their most popular cookies.
2 cups all-purpose flour
¼ cup cocoa powder
½ tablespoon salt
1 teaspoon baking soda
½ pound (2 sticks) unsalted butter, room temperature
2 cups light brown sugar, firmly packed
2 large eggs 2 teaspoons vanilla extract
16 ounces semisweet chocolate chips
Set oven rack to middle position and preheat oven to 325°F.
In a medium bowl, whisk together the flour, cocoa powder, salt, and baking soda. Set aside.
In a large bowl or the bowl of an electric stand mixer, beat butter on medium speed until light and smooth. Add the light brown sugar and continue to beat until creamy. Add in eggs, ½ tablespoon water, and vanilla extract, and beat until mixture is thoroughly combined.
Add the flour mixture, and mix until dough comes together. Fold in chocolate chips.
On a large baking sheet or jelly-roll pan lined with parchment paper, drop a heaping tablespoon of dough per cookie, allowing a couple inches space for spreading on all sides. You should be able to fit 9 cookies on a tray.
Bake for 8 minutes, rotate the pan 180°, bake for an additional 6 to 8 minutes, until the edges and tops of cookies are slightly firm and dry. Remove from the oven and cool in the pan for 2 minutes. Then transfer to a wire rack to cool completely. Store in an airtight container for up to 1 week.
Adapted from Natasha Case’s recipe
In recent years, bacon has taken the dessert world by storm. The bacon fat lends a smokiness to the browned butter ice cream, and there’s plenty of candy bacon pieces here to ensure a little sweet and salty combo with every bite. Adding the maple syrup gives this a distinct breakfast-for-dessert vibe.
½ pound bacon, sliced into ½-inch pieces
½ cup light brown sugar, firmly packed
4 tablespoons unsalted butter
2 cups whipping cream
1 cup whole milk 6 egg yolks
teaspoon kosher salt
½ cup granulated sugar
¼ cup light brown sugar, firmly packed
2 tablespoons maple syrup
2 tablespoons bacon fat (from the candied bacon recipe, above)
½ teaspoon vanilla extract

Place a skillet over medium heat. Add the bacon and begin browning. Once the bacon is about three-quarters crisped, strain off the bacon fat and reserve. Add the brown sugar to the pan, stirring to coat and melt the sugar. Continue cooking bacon until it’s fully browned and candied. Remove from heat and allow to cool for 15 minutes.
Once cooled, transfer to a cutting board and finely chop the bacon. Set aside.
Over low heat, in a heavy-bottom, stainless-steel saucepan, melt the butter down and slowly allow it to brown, stirring occasionally. Timing will vary according to your stove and cookware, so watch the butter closely as it begins to foam. It will change in color from yellow to a golden brown that’s flecked with browned bits. Remove from heat and set aside to cool for at least 15 minutes.
Combine the cream and milk in a medium saucepan over medium heat.
Bring the liquid to an almost-boil—you will see tiny bubbles begin to form around the edges of the pot. Remove from heat.
Whisk together the yolks, salt, sugar, and brown sugar in a separate bowl.
Gently add about a cup of the hot liquid, 1 tablespoon at a time, whisking until smooth.
Slowly add the egg mixture to the remaining cream mixture, whisking until smooth. Whisk in the maple syrup, bacon fat, browned butter, and vanilla.
Strain through a fine-mesh strainer.
Cool mixture to room temperature over an ice bath (see page 153), stirring constantly. Add the mixture to an ice cream machine, and prepare according to the machine’s instructions. Once the ice cream is complete, fold in the cooled candied bacon pieces, and transfer to a 2-quart bowl or container. Cover with a lid or plastic wrap and freeze overnight to set. Serve as ice cream sandwiches with Butterscotch Potato Chip Cookies (page 158).
Adapted from Natasha Case’s recipe
If you love salty and sweet combos, these cookies will make you swoon. The extra bit of crunch from the potato chips makes for a perfect counterpoint to the soft cookie.
½ pound (2 sticks) unsalted butter, room temperature
1½ cups brown sugar, firmly packed
1 teaspoon Kosher salt
1 large egg plus 1 egg yolk
1 teaspoons vanilla extract
2 tablespoons whole milk
2 cups all-purpose flour
1 teaspoon baking soda
2 cups butterscotch chips
1 cup lightly crushed kettle-style potato chips
Move oven rack to middle position and preheat oven to 325°F.
In a bowl of a stand mixer, using the paddle attachment, combine the butter, brown sugar, and salt. On low speed, mix until smooth, scraping the sides of the bowl, as necessary, to fully incorporate.
Add in the egg, yolk, vanilla extract, and milk, mixing to combine. The dough will appear a little “broken.”
Add in the flour, baking soda, and butter-scotch chips, mixing on low to combine, being careful not to overmix.
On a sheet pan, scoop 1 tablespoon of dough for each cookie, spacing them about 1½ inches apart. Lightly smoosh about 1 or 2 teaspoons of crushed potato chips on top of the cookie dough.
Bake 4 minutes, then rotate pans 180°, then continue baking for 4 to 6 more minutes or until cookies are golden brown. Remove from the oven and cool on the pan for 1 to 2 minutes. Then move cookies to a wire rack to cool completely. Store in an airtight container up to 3 days.
Note: Because of the potato chips you’ll get the maximum crunch factor when fresh.