FISH AND SHELLFISH
Introducing Grill-Smoked Salmon
Building a Better Shrimp Cocktail
FISH EN PAPILLOTE
KEITH DRESSER, March/April 2009
Cooking en papillote—where the food is baked in a tightly sealed, artfully folded parchment package to essentially steam in its own juices—may seem as outdated as Beef Wellington and Pheasant under Glass. But there’s a reason the technique has held its own through countless culinary fads and fashions. It’s an easy, mess-free way to enhance delicate flavor, particularly that of fish, leaving no odors to linger in the kitchen. The fish cooks quickly in such a moist environment, and because there’s no water added to dilute flavors, it’s a more flavorful method than ordinary poaching. It requires little additional fat and, if you throw in vegetables, adds up to a light but satisfying “one-pouch” meal.
When done correctly, that is. Without the right blend of flavorings, the fish can taste so lean and bland, you might as well be dining on diet food. Not all vegetables pair well with fish, and careful consideration must be given to their size and whether precooking is necessary, or you can wind up with overcooked fish surrounded by undercooked vegetables. I wanted to create an approach worthy of this technique’s haute roots, with moist, flaky fish and tender-firm vegetables flavored by the rich, aromatic goodness of their mingled juices.
FOILED AGAIN
All the classic recipes call for cutting parchment paper into attractive shapes such as teardrops, hearts, and butterflies, then creasing the seams into painstakingly precise little folds. But just looking at the illustrations made my thumbs throb. I wanted to get dinner on the table as quickly as possible—not create origami. I went directly to aluminum foil, sandwiching the fish between two 12-inch squares and crimping the edges to create an airtight seal that would lock in steam. This was admittedly not as glamorous as an intricately folded parchment packet, but definitely serviceable.
My next step was to figure out what type of fish worked best in this dish and how long it would take to cook. After trying a variety of fish fillets, I quickly determined that tasters favored flaky, mild fish like haddock and cod over more assertively flavored fish like salmon or tuna. In the moist atmosphere of the foil pouch, these oilier fish had a tendency to overpower the flavors of the vegetables (for the moment I was simply placing the fish on a bed of sliced zucchini); better to save them for sautéing or searing.
We use foil, not parchment paper, and the right blend of vegetables and flavorings to create a satisfying one-pouch meal.
Since the goal of cooking en papillote is to create enough steam from the food’s own juices, most recipes recommended cranking the heat way up, even as high as 500 degrees. Though a wet method like this one is more forgiving than a dry approach like roasting, 500 degrees seemed excessive. And it was. When I opened the foil after just 15 minutes for a “nick and peek,” my 1-inch fillets were chalky white and well-done (and the zucchini was slightly underdone). Cooking at this temperature for less time didn’t work either—the food was barely in the oven long enough for steam to form, leaving both fish and vegetable undercooked. After more experimentation, I arrived at 450 degrees for 15 minutes as the ideal temperature and cooking time—hot enough to produce steam relatively quickly but not so hot that the food overcooked. Placing the packets on the lower-middle rack of the oven, close to the heat source, helped concentrate the exuded liquid and deepen its flavor.
VEGGIN’ OUT
With the cooking time and temperature nailed down, I could now turn my attention to selecting the vegetables. I quickly winnowed my options. Dense vegetables such as potatoes, even when parcooked, failed to cook evenly in the foil packets. Vegetables with an absorbent structure, like eggplant, simply cooked into mush in all the moisture. Others, such as broccoli, overpowered the delicate fish flavor. Beyond these considerations, the most important aspect was how the vegetables were prepared before they went into the packets. I found that carrots and leeks could be added to the packets raw, provided they were cut into matchsticks. The zucchini was much improved—and the juices in the packet less diluted—if I salted it first to get rid of excess moisture.
While tasters liked these fish and vegetable pairings, many felt that the components lacked harmony and overall the dish tasted a little too lean. A dash of vermouth, which was absorbed by the fish and vegetables, boosted flavor but not quite enough. What if I created a topping to flavor the fish as it cooked? A tomato, garlic, and olive oil “salsa” added kick to my zucchini variation, while a compound butter flavored with garlic, herbs, and zest enlivened the main recipe. These toppings basted the fish as it cooked and mingled with the wine and juices given off by the vegetables, leaving behind an aromatic, full-flavored sauce that perfectly complemented the fish. Each recipe was so light, fresh, and easy to prepare, it couldn’t be more contemporary.

Cod Baked in Foil with Leeks and Carrots
SERVES 4
Haddock, red snapper, halibut, and sea bass also work well in this recipe as long as the fillets are 1 to 1¼ inches thick. Open each packet promptly after baking to prevent overcooking, and make sure to open packets away from you to avoid steam burns.
4 tablespoons unsalted butter, softened
2 garlic cloves, minced
1¼ teaspoons finely grated lemon zest, plus lemon wedges for serving
1 teaspoon minced fresh thyme
Salt and pepper
2 tablespoons minced fresh parsley
2 leeks, white and light green parts only, cut into 2-inch-long segments, halved lengthwise, washed thoroughly, and cut into ⅛-inch-thick matchsticks
2 carrots, peeled and cut into 2-inch-long matchsticks
¼ cup dry vermouth or dry white wine
4 (6- to 8-ounce) skinless cod fillets, 1 to 1¼ inches thick
1. Combine butter, 1 teaspoon garlic, ¼ teaspoon lemon zest, thyme, ¼ teaspoon salt, and ⅛ teaspoon pepper in small bowl. Combine parsley, remaining garlic, and remaining 1 teaspoon lemon zest in second small bowl and set aside. Place leeks and carrots in medium bowl, season with salt and pepper, and toss to combine.
2. Adjust oven rack to lower-middle position and heat oven to 450 degrees. Cut eight 12-inch sheets of aluminum foil; arrange 4 sheets flat on counter. Divide leek-carrot mixture in center of foil sheets and sprinkle with vermouth. Pat cod dry with paper towels, season with salt and pepper, and place on top of vegetables. Divide butter mixture among fillets, spreading over top of each fillet. Place second foil sheet on top of cod, crimp edges together in ½-inch fold, then fold over 3 more times to create packet about 7 inches square. Place packets on rimmed baking sheet, overlapping slightly if necessary. (Packets can be refrigerated for up to 6 hours before baking. If packets are refrigerated for more than 30 minutes, increase cooking time by 2 minutes.)
3. Bake packets for 15 minutes, then transfer to individual plates. Open carefully (steam will escape) and, using metal spatula, gently slide contents onto plates, along with any accumulated juices. Sprinkle with parsley mixture. Serve immediately, passing lemon wedges separately.
variation
Cod Baked in Foil with Zucchini and Tomatoes
SERVES 4
1 pound zucchini, sliced ¼ inch thick
Salt and pepper
2 plum tomatoes, cored, seeded, and chopped
2 tablespoons extra-virgin olive oil
2 garlic cloves, minced
1 teaspoon minced fresh oregano
⅛ teaspoon red pepper flakes
¼ cup dry vermouth or dry white wine
4 (6- to 8-ounce) skinless cod fillets, 1 to 1¼ inches thick
¼ cup chopped fresh basil
Lemon wedges
ASSEMBLING FOIL PACKETS

1. Arrange vegetables on foil first so they will be closest to heat source; drizzle with vermouth to deepen flavor. Top vegetables with fish and spread compound butter or topping over it for increased richness.

2. Top with second piece of foil and crimp edges together in ½-inch fold, then fold over 3 more times to create airtight packet about 7 inches square.
1. Toss zucchini with ½ teaspoon salt in bowl, transfer to colander, and let sit for 30 minutes. Pat zucchini dry thoroughly with paper towels, pressing firmly on each slice to remove as much liquid as possible. Meanwhile, combine tomatoes, oil, garlic, oregano, pepper flakes, ¼ teaspoon salt, and ⅛ teaspoon pepper in bowl.
2. Adjust oven rack to lower-middle position and heat oven to 450 degrees. Cut eight 12-inch sheets of aluminum foil; arrange 4 flat on counter. Shingle zucchini in center of foil sheets and sprinkle with vermouth. Pat cod dry with paper towels, season with salt and pepper, and place on top of zucchini. Spread tomato mixture over fish. Place second foil sheet on top of cod, crimp edges together in ½-inch fold, then fold over 3 more times to create packet about 7 inches square. Place packets on rimmed baking sheet, overlapping slightly if necessary.
3. Bake packets for 15 minutes, then transfer to individual plates. Open carefully (steam will escape) and, using metal spatula, gently slide contents onto plates, along with any accumulated juices. Sprinkle with basil and serve immediately, passing lemon wedges separately.
A BETTER WAY TO POACH FISH
DAN SOUZA, March/April 2012
If your experience with poached fish is limited to the lean, bland preparation you might be served at a wedding or a weight-loss spa, a technique popular at high-end restaurants will permanently change your perception—and serve as a reminder as to why poaching became a classic approach to cooking fish in the first place. The key perk: Submerging fish in liquid and gently cooking it at below simmer temperatures—anywhere from 130 to 180 degrees—renders the delicate flesh silky and supple. In this case, however, there is one major amendment to the technique that elevates it above the usual poached fish: Rather than the usual lean bath of water, wine, broth, or some combination thereof, the poaching liquid is olive oil.
On paper, cooking delicate fish fillets in a pot of fat sounds like a greasy recipe for disaster, but when I tried it the results were stunning—lighter, moister, and more fragrant than any traditionally poached fish I’d ever tasted—and they explained why this technique has become so popular in top restaurants. Another plus: The flavor-infused poaching oil can be whirred into a rich, glossy emulsion and drizzled over the fish as a sauce. The dish, I realized, would make elegant fare, provided I could get around one obvious challenge: the cost—and mess—of heating up a large amount of olive oil for just one meal. I would have to figure out how to scale the oil way back.
OIL EMBARGO
My first decision was to go with skinless fillets since the oil would never get hot enough to crisp the skin. I settled on cod for its firm, meaty flesh and clean flavor. As for the amount of oil, I reasoned that the smaller the surface area of the cooking vessel, the deeper the liquid would pool, so I reached past my trusty 12-inch nonstick skillet for its 10-inch sibling. Unfortunately, this setup still demanded about 1½ cups of oil to cover the four 6-ounce fillets. My only other idea was to displace some of the oil by placing half an onion in the skillet and arranging the fillets around it—a trick that worked but got me down only another ¼ cup. Clearly, I needed a more drastic solution.
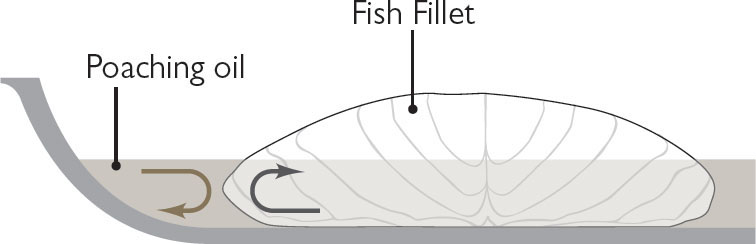
That’s when I started to wonder if completely immersing the fillets in oil was necessary. The alternative—pouring enough oil into the pan to come roughly halfway up the sides of the fish (about ¾ cup)—would mean flipping the fish partway through poaching to ensure that it cooked through. But that seemed a small price to pay for significantly cutting my oil dependence. I gave it a shot, basting the exposed half of each fillet with a few spoonfuls of oil (to prevent evaporation), popping a lid on the pan, and placing the skillet over the lowest burner setting. The good news was that the method worked; the fillets were supremely moist and tender—considerably more so than any water-poached fish, and not at all oily.
The bad news was that it was fussy. With relatively little oil in the pan, the temperature spiked quickly and required that I constantly fiddle with the burner knob to keep the oil in my target range (140 to 150 degrees), which would slowly bring my fish to an ideal internal temperature of 130 degrees, with little risk of going over. Placing a homemade heat diffuser fashioned from a ring of aluminum foil over the burner didn’t reliably tame the flame. What I needed was a steadier, less-direct heat source, and for that I turned to the oven.
I figured that I could simply bring the oil to 140 degrees on the stovetop, slip in the fish, and then transfer the skillet into a low oven. But it wasn’t quite that easy; the oil temperature immediately plummeted when I added the still-cold fillets, and the temperature recovery time in the oven was slow. But I had an idea: I’d heat the oil on the stovetop to well above my target temperature and then rely on the oven’s more-even heat to keep it in the poaching sweet spot.
After a slew of tests, I hit upon a winning combination: Heat the oil to 180 degrees, nestle in the fillets (each sprinkled with kosher salt), and set the pan in a 250-degree oven. The oil temperature recovered within 15 minutes, by which point the lower half of the fish was cooked. I flipped the fillets, replaced the lid, and returned them to the oven. This batch emerged incredibly moist and velvety, and thanks to my oven method, the process was now largely hands-off. What I had was good—but I wanted to make it even better.
CRUNCH TIME
We often salt meat and allow it to rest before cooking, both to enhance juiciness and to bring seasoning deep into the interior. Why not try this with fish? For my next round of testing, I salted the fillets about 20 minutes before cooking. This technique worked beautifully: Moisture beaded on the surface of the fish, where it dissolved the salt and created a concentrated brine that was eventually absorbed back into the flesh to bolster flavor.
I also wanted something that could serve as a textural contrast to the silky fish. Restaurants often garnish their oil-poached fillets with lightly fried vegetables and fresh herbs, and I reasoned that I could approximate that by crisping something in the oil before cooking the fish. Fried artichoke hearts have always been a favorite of mine, so I defrosted a bag of them, patted them dry, and halved them lengthwise before tossing them with cornstarch (for extra crunch) and dropping them into the shimmering oil with some minced garlic.
Tasters loved the crisp garnish, but after cranking up the heat to fry, I then had to wait more than 10 minutes for the oil to cool to my target of 180 degrees before the pan went into the oven. The solution proved easy: Rather than dump in all the oil at once, I’d fry the garnishes in ½ cup of oil, strain it, and add the remaining ¼ cup of room temperature oil to the pan to speed the cooling. The tweak made all the difference; about 5 minutes after frying, the oil was cool enough for poaching.
DRESSED TO IMPRESS
Frying up a garnish had also left me with an added bonus: flavor-infused oil to use for a sauce. I poured ½ cup into the blender and whirred it with whole cherry tomatoes (for bright sweetness), half a shallot, sherry vinegar, and salt and pepper. After a quick spin on high speed and a pass through a fine-mesh strainer, I had a silky-smooth vinaigrette.
Dressed up with the sauce, the crispy artichoke garnish, a few slices of fresh cherry tomato, and a sprinkle of chopped parsley, my elegant plate was complete—not to mention plenty simple to pull off at home.
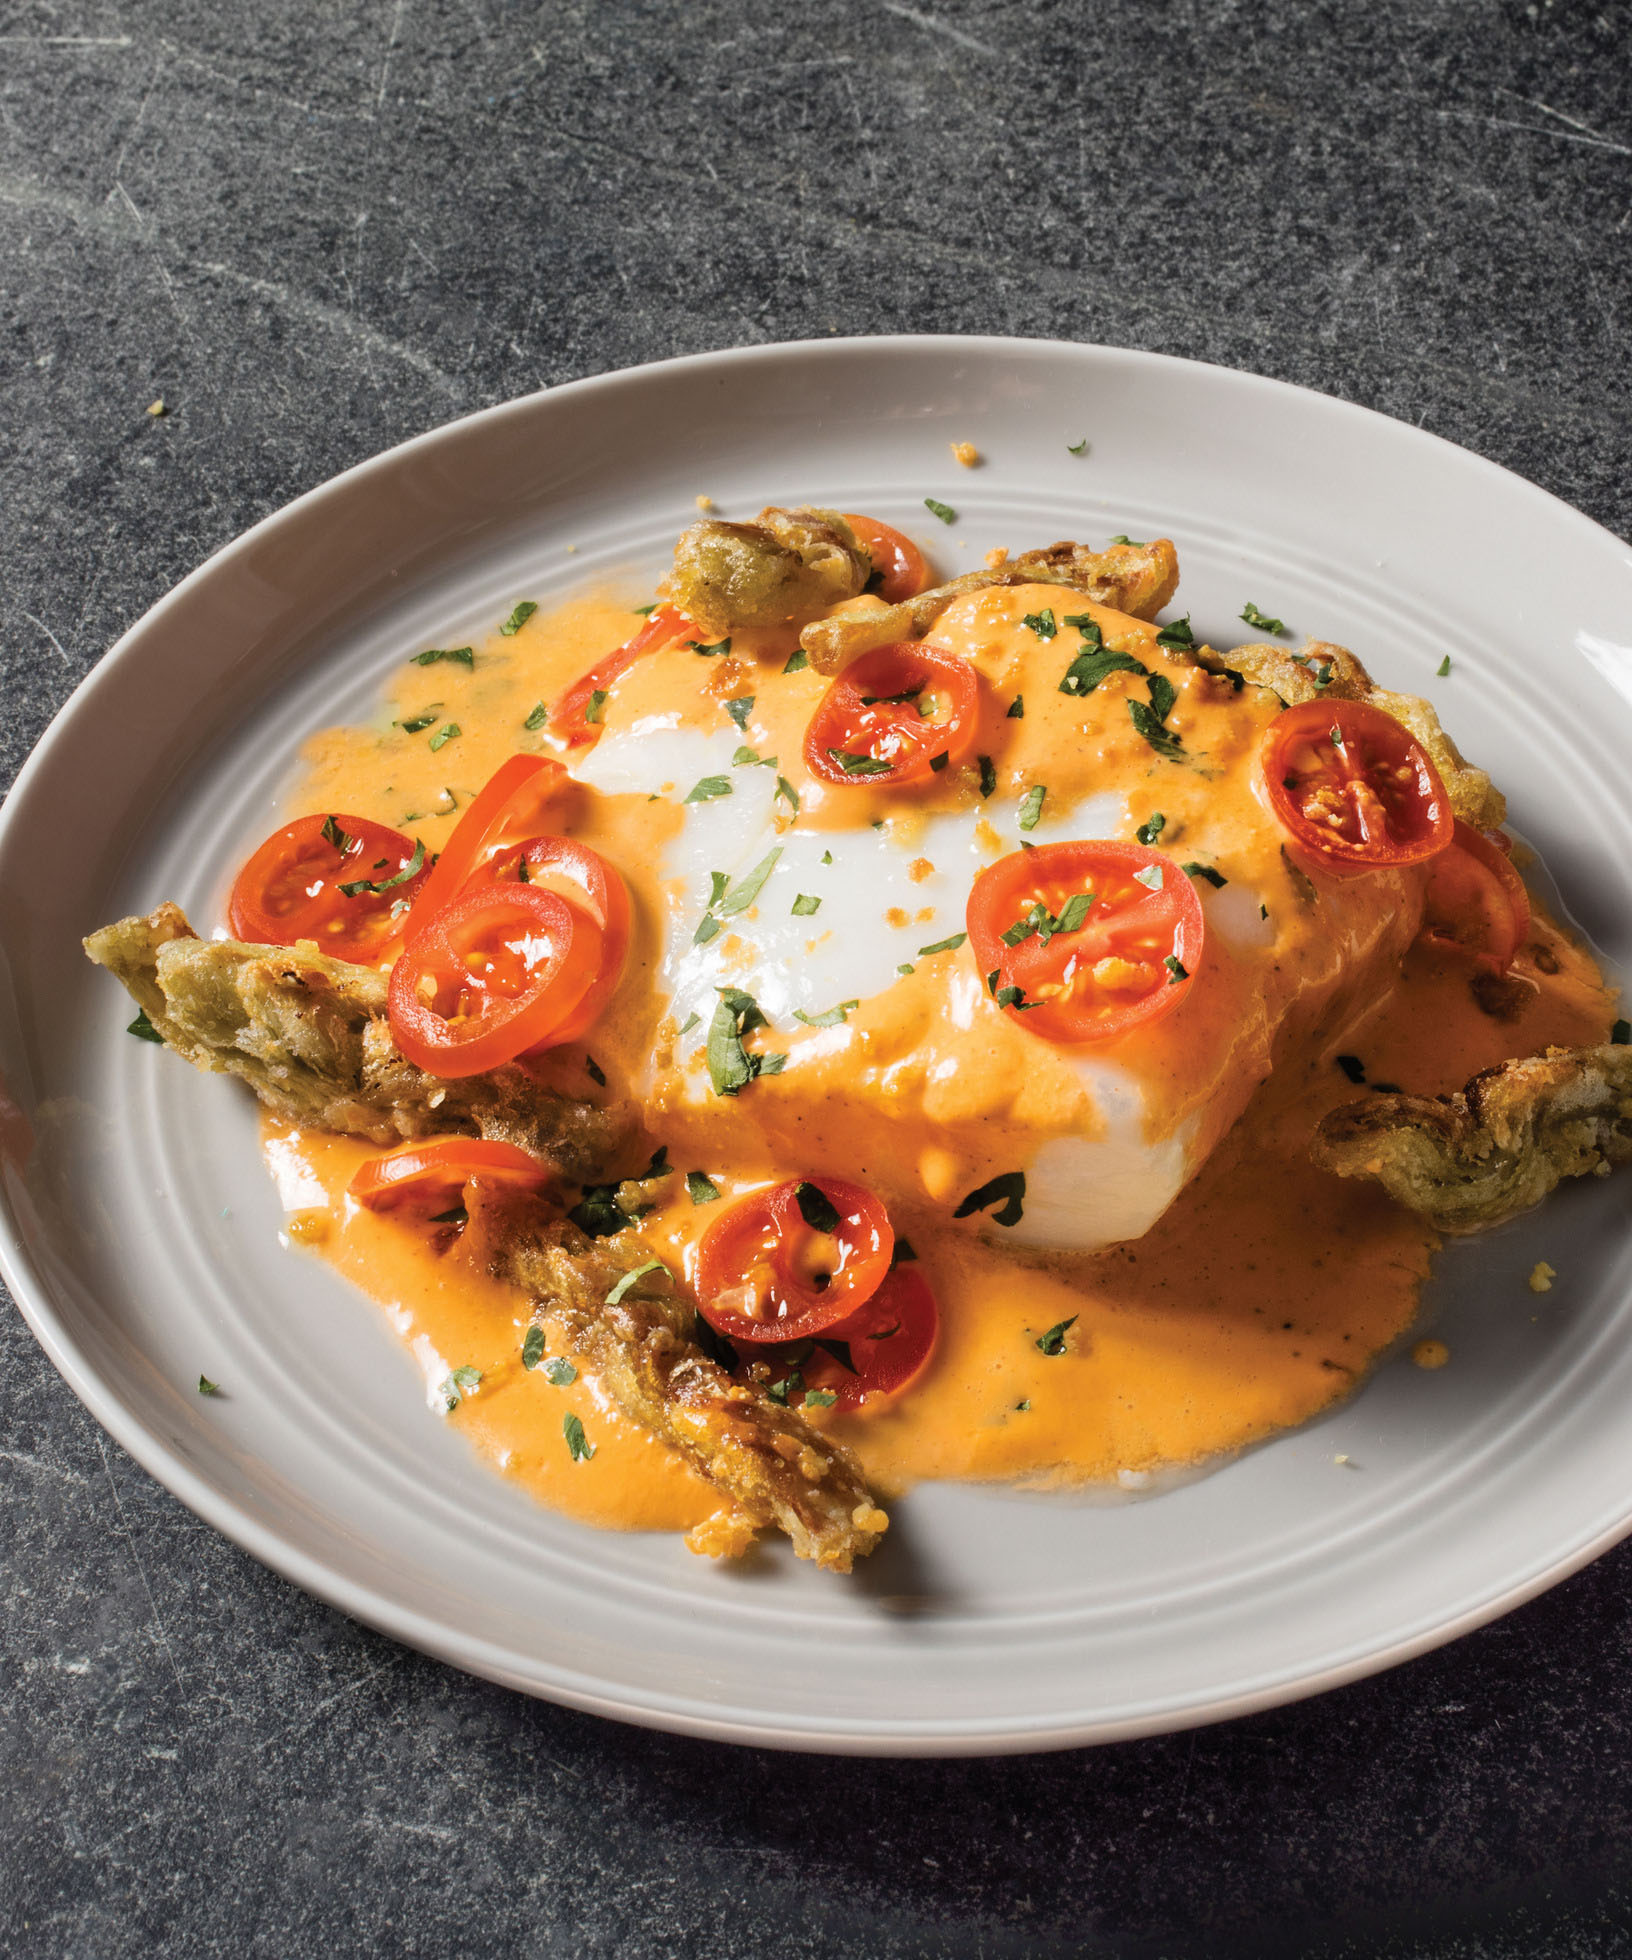
Poached Fish Fillets with Sherry-Tomato Vinaigrette
SERVES 4
Fillets of meaty white fish such as cod, halibut, sea bass, or snapper work best in this recipe. Make sure the fillets are at least 1 inch thick. A neutral oil such as canola can be substituted for the pure olive oil. A 4-ounce porcelain ramekin can be used in place of the onion half in step 3. Serve with couscous or steamed white rice.
Fish
4 (6-ounce) skinless white fish fillets, 1 inch thick
Kosher salt
4 ounces frozen artichoke hearts, thawed, patted dry, and sliced in half lengthwise
1 tablespoon cornstarch
¾ cup olive oil
3 garlic cloves, minced
½ onion, peeled
Vinaigrette
4 ounces cherry tomatoes
½ small shallot, peeled
4 teaspoons sherry vinegar
Kosher salt and pepper
1 tablespoon minced fresh parsley
2 ounces cherry tomatoes, cut into ⅛-inch-thick rounds
1. For the fish: Adjust oven racks to middle and lower-middle positions and heat oven to 250 degrees. Pat fish dry with paper towels and season each fillet with ¼ teaspoon salt. Let sit at room temperature for 20 minutes.
2. Meanwhile, toss artichokes with cornstarch in bowl to coat. Heat ½ cup oil in 10-inch nonstick ovensafe skillet over medium heat until shimmering. Shake excess cornstarch from artichokes and add to skillet; cook, stirring occasionally, until crisp and golden, 2 to 4 minutes. Add garlic and continue to cook until garlic is golden, 30 to 60 seconds. Strain oil through fine-mesh strainer into bowl. Transfer artichokes and garlic to ovensafe paper towel–lined plate and season with salt. Do not wash strainer.
3. Return strained oil to skillet and add remaining ¼ cup oil. Place onion half in center of pan. Let oil cool until it registers about 180 degrees, 5 to 8 minutes. Arrange fish fillets, skinned side up, around onion (oil should come roughly halfway up fillets). Spoon a little oil over each fillet, cover skillet, transfer to upper rack, and cook for 15 minutes.
4. Remove skillet from oven. Using 2 spatulas, carefully flip fillets. Cover skillet, return to upper rack, and place plate with artichokes and garlic on lower rack. Continue to cook fish until it registers 130 to 135 degrees, 9 to 14 minutes longer. Gently transfer fish to serving platter, reserving ½ cup oil, and tent fish with aluminum foil. Turn off oven, leaving plate of artichokes in oven.
5. For the vinaigrette: Process cherry tomatoes, shallot, vinegar, ¾ teaspoon salt, and ½ teaspoon pepper with reserved ½ cup fish cooking oil in blender until smooth, 1 to 2 minutes. Add any accumulated fish juices from platter, season with salt to taste, and blend for 10 seconds. Strain sauce through fine-mesh strainer; discard solids.
6. To serve, pour vinaigrette around and over fish. Garnish each fillet with warmed crisped artichokes and garlic, parsley, and tomato rounds. Serve immediately.
variation
Poached Fish Fillets with Miso-Ginger Vinaigrette
For fish, substitute 8 scallion whites, sliced ¼ inch thick, for artichoke hearts; omit garlic; and reduce amount of cornstarch to 2 teaspoons. For vinaigrette, process 6 scallion greens, 8 teaspoons lime juice, 2 tablespoons mirin, 4 teaspoons white miso paste, 2 teaspoons minced fresh ginger, and ½ teaspoon sugar with ½ cup fish cooking oil as directed in step 5. Garnish fish with 2 thinly sliced scallion greens and 2 halved and thinly sliced radishes.
WHY POACH IN OIL?
Poaching in oil allows fish to retain more of its juices than poaching in wine or broth, leading to remarkably moist, velvety results. This is because cooking in oil is inherently more gentle than cooking in water. And while you might expect that fish poached in fat would be greasy, it actually absorbs very little oil. Why? In order for oil to penetrate the fish, moisture must exit first. But because oil and water repel each other, it’s very difficult for moisture inside the fish to readily enter the oil. Hence, more of the juices stay in the fish. In fact, in our tests, oil-poached fish lost just 14 percent of its weight during cooking, while water-poached fillets lost 24 percent.
OIL AND WATER DON’T MIX
Poached salmon seems like the ideal stovetop recipe: It’s fast, it requires just one pot, and there’s no splattering oil to burn yourself on or strong odors to permeate the house. And, when done right, the fish has an irresistibly supple, velvety texture delicately accented by the flavors of the poaching liquid. Add a simple sauce and the dish is even more flavorful. But when done wrong, which seems to be the usual case, the fish has a dry, chalky texture and washed-out taste that not even the richest sauce can redeem.
The classic method for poaching salmon is to gently simmer an entire side of fish in a highly flavored broth called a court-bouillon. The salmon is cooled and served cold, often as part of a buffet. But I wasn’t looking for a make-ahead method for cold salmon to serve a crowd. I wanted to produce perfectly cooked, individual portions of hot salmon and a sauce to go with them—all in under half an hour.
FINESSING FLAVOR
My first objective was to achieve great texture and flavor in the salmon itself; after that I’d focus on the sauce. First consideration: the cooking liquid. A classic court-bouillon is made by filling a pot with water, wine, herbs, vegetables, and aromatics and boiling it all very briefly (court-bouillon is French for “short-boiled stock”). After straining the solids, you’re left with an intensely flavored liquid in which to poach your fish. The broth’s strong flavors are absorbed by the fish, which helps compensate for all the salmon flavor that leaches out into the liquid.
For velvety poached salmon, we use a small amount of liquid and elevate the fish on lemon slices.
This method certainly did produce flavorful results. However, there was just one annoying little problem: To cook dinner for four, I’d just prepped a slew of ingredients (onions, carrots, celery, leeks, parsley) and bought still others (bay leaves, tomato paste, peppercorns, and white wine), only to dump them and the stock down the drain at the end. This waste isn’t bothersome when you’re preparing a side of fish to feed a group, but it’s hardly worth it for a simple Tuesday night supper at home.
What if I used less liquid? At the very least, this would mean I’d have to buy and prep (and waste) fewer ingredients; plus, using less liquid would likely mean less flavor leaching out of the salmon. I poached the salmon in just enough liquid to come half an inch up the side of the fillets. Flavor-wise, this was my most successful attempt yet. In fact, the salmon retained so much of its own natural flavor that I wondered if I could cut back even more on the quantity of vegetables and aromatics I was using in the liquid. A couple of shallots, a few herbs, and some wine proved to be all I needed. But nailing the flavor issue brought another problem into sharp relief—dry texture.
SEEKING SUPPLE TEXTURE
Like all animal flesh, salmon has a certain temperature range at which it is ideal to eat. The proteins in salmon begin coagulating at around 120 degrees, transforming it from translucent to opaque. At around 135 degrees, the flesh is completely firm and will start to force moisture out from between its protein fibers. Any higher, and the salmon becomes dry as cardboard (like a well-done steak). I had been using an instant-read thermometer to ensure that the centers of my salmon fillets were exactly 125 degrees (medium) before removing them from the poaching liquid. But testing the temperature of various parts of the fillet showed that by the time the center was 125 degrees, most of the other thinner sections registered higher temperatures. I was concerned that the texture of these thinner areas would be dry, but found their higher fat content kept them moist.
With high cooking temperatures, the exterior of a piece of meat will cook much faster than the interior. This is great when pan-searing the skin of a salmon fillet or a beef steak, when you want a browned exterior and rare interior, but it’s no good for poaching, where the goal is to have an evenly cooked piece all the way through. The most obvious solution was to lower the cooking temperature. For the next batch, I placed the salmon in the cold pan with poaching liquid and brought the liquid barely up to a simmer, then reduced the heat to its lowest possible setting and covered the pan until the salmon cooked through. Then I realized a new problem that I’d unwittingly introduced when I reduced the amount of cooking liquid: Since the salmon wasn’t totally submerged in liquid, it relied on steam to deliver heat and flavor. At such a low temperature, even with a lid on, not enough steam was being created to efficiently cook the parts of the fish sticking out above the liquid. Was there a way to create more steam without increasing the temperature?
Thinking back to high school chemistry, I remembered that adding alcohol to water lowers its boiling temperature: The higher the concentration of alcohol, the more vapor will be produced as the liquid is heated. More vapor, in turn, means better heat transfer, which leads to faster cooking, even at temperatures below a simmer. I also knew that alcohol could increase the rate at which proteins denature. Therefore, if I used more alcohol in the cooking liquid, it would theoretically be able to cook the fish faster and at a lower temperature. I increased the ratio of wine to water, going from a few tablespoons of wine to ½ cup. Acid also helps fish protein denature (in addition to improving flavor), so I squeezed a little lemon juice into the liquid before adding the salmon. My hopes were high as I opened the lid to a burst of steam and salmon that appeared perfectly cooked. Everything was fine until my fork got to the bottom of the fillet. Even though the top, sides, and center were now just right, the bottom, which had been in direct contact with the pan, was still overcooked.
I knew I wasn’t the first person to ever have this problem—in fact, a solution already exists: a fish poacher. This specialized pan comes with a perforated insert that elevates the fish, allowing it to cook evenly on all sides. But I wasn’t about to go out and buy an expensive new pan for a technique that I’d only use a few times a year. Then I realized that I had the solution literally in my hand. Instead of squeezing lemon juice into the poaching liquid, I sliced the fruit into thin disks and lined the pan with them. By resting the salmon fillets on top of the lemon slices, I was able to insulate the fish from the pan bottom while simultaneously flavoring it. This time the salmon came out evenly cooked all the way through.
SETTLING THE SAUCE
It was time to focus on the sauce. Ticking off the list of ingredients in my super-concentrated poaching liquid, I realized I had the foundation of a beurre blanc, so I didn’t have to make a separate sauce. This classic French sauce is made by reducing wine flavored with vinegar, shallots, and herbs and then finishing it with butter. I would need only to reduce my poaching liquid and whisk in the butter. But since a few tablespoons of butter per serving would push this dish out of the “everyday” category, I developed a vinaigrette-style variation in which I used olive oil instead of butter; tasters liked the oil version as much as the original.
This salmon-poaching method guarantees moist and delicately flavored fish and produces just the right amount of poaching liquid for a great-tasting sauce—all without boiling away any flavor or pouring ingredients down the drain.

Poached Salmon with Herb and Caper Vinaigrette
SERVES 4
To ensure uniform pieces of salmon that cook at the same rate, buy a whole center-cut fillet and cut it into four pieces. If a skinless whole fillet is unavailable, remove the skin yourself or follow the recipe as directed with a skin-on fillet, adding 3 to 4 minutes to the cooking time in step 2. This recipe will yield salmon fillets cooked to medium-rare.
2 lemons
2 tablespoons chopped fresh parsley, stems reserved
2 tablespoons chopped fresh tarragon, stems reserved
1 large shallot, minced
½ cup dry white wine
½ cup water
1 (1¾- to 2-pound) skinless salmon fillet, about 1½ inches thick
2 tablespoons capers, rinsed and chopped
2 tablespoons extra-virgin olive oil
1 tablespoon honey
Salt and pepper
1. Line plate with paper towels. Cut top and bottom off 1 lemon, then cut into eight to ten ¼-inch-thick slices. Cut remaining lemon into 8 wedges and set aside. Arrange lemon slices in single layer across bottom of 12-inch skillet. Scatter herb stems and 2 tablespoons minced shallot evenly over lemon slices. Add wine and water to skillet.
2. Use sharp knife to remove any whitish fat from belly of salmon and cut fillet into 4 equal pieces. Place salmon fillets in skillet, skinned side down, on top of lemon slices. Set pan over high heat and bring liquid to simmer. Reduce heat to low, cover, and cook until sides are opaque but center of thickest part of fillet is still translucent when checked with tip of paring knife and registers 125 degrees (for medium-rare), 11 to 16 minutes. Off heat, use spatula to carefully transfer salmon and lemon slices to prepared plate and tent with aluminum foil.
3. Return pan to high heat and simmer cooking liquid until slightly thickened and reduced to 2 tablespoons, 4 to 5 minutes. Meanwhile, combine capers, oil, honey, chopped parsley and tarragon, and remaining minced shallot in medium bowl. Strain reduced cooking liquid through fine-mesh strainer into bowl with herb mixture, pressing on solids to extract as much liquid as possible. Whisk to combine and season with salt and pepper to taste.
4. Season salmon with salt and pepper to taste. Using spatula, carefully lift and tilt salmon fillets to remove lemon slices. Place salmon on serving platter or individual plates and spoon vinaigrette over top. Serve, passing lemon wedges separately.
A FISH (ALMOST) OUT OF WATER
Our improved poaching method produces salmon with better flavor and texture by using a lot less liquid.

STANDARD POACH
The classic poaching method calls for submerging salmon completely in liquid in a deep pan, which causes flavor to leach out and leads to dry, flavorless fish.

SHALLOW POACH
In our method, small amounts of liquid allow the salmon to cook at a lower temperature, preserving flavor. Lemon slices under the fillets keep their bottoms from overcooking.
Salmon is a surefire crowd-pleaser, but it’s not always easy to make for a crowd. Many cooks shy away from poaching, and our favorite indoor cooking method—pan-searing individual portions—can get cumbersome with too many pieces of fish. Our preferred outdoor cooking techniques—hot-smoking and straightforward grilling—can accommodate larger pieces of fish, but for denizens of the North, among whom we count ourselves, cooking outside is impractical, if not impossible, for almost half the year.
So we set out to beat the odds: to find the best way of cooking a whole side of salmon, enough to feed eight or more guests, in the oven. We wanted fish that was moist but not soggy, firm but not chalky, and nicely crusted, with golden, flavorful caramelization over its flesh. If we could work some interesting flavors and contrasting textures into the bargain, all the better.
CRUST IS KEY
Creating some flavorful caramelization on the flesh of the fish was a key goal, so we focused right away on high-heat cooking. Baking, though it seemed like a natural choice, was out because it implies cooking in a moderate, 350-degree oven, which would never brown the fish. Heating things up from there, we tested roasting at oven temperatures of 400, 450, and 500 degrees. To our surprise, none of them worked well. Even at 500 degrees on a preheated pan, the fish remained pale, owing to the necessarily short 16-minute cooking time (any more time in the oven and the fish would overcook). Another source of consternation was moisture—not the lack of it, as we might have expected, but an excess. The abundance of fat and collagen in the farmed Atlantic salmon we were using melted during cooking, giving the fish an overly wet, slippery texture and fatty mouthfeel.
Broiling was the next step up in heat, and here we met with some success. The salmon browned nicely under the intense broiler heat and, as a result, developed better flavor. Some of the copious moisture evaporated, leaving the fish with a much-improved texture, drier and firmer yet still juicy. None of the broiling and roasting combinations we went on to try topped broiling from start to finish. We were on the right track to be sure, but plain broiled salmon was not terribly inspiring. If we were going to serve this to a crowd of people at a weekend dinner party, a flavor boost and some textural interest would be absolutely necessary.
TOPPING ANTICS
The addition of an interesting topping for the fish could, we thought, achieve both goals. Dried bread crumbs came immediately to mind—and left almost as quickly once we tasted them. The flavor was lackluster and the texture akin to sawdust. Our favorite panko bread crumbs were judged too light in flavor and feathery in texture. Fresh bread crumbs were a crisp improvement, and toasted fresh bread crumbs laced with garlic, herbs, and butter were better still. But there were more avenues to explore. Dry spice rubs, similar to what we might apply to grilled fish, met with mixed results. Glazes and spice pastes won praise for their flavor, but since they were wet, they added little texture.
Potatoes were another topping possibility. Potato crusts on fish are typically engineered by laying paper-thin slices of potato on the fish and sautéing it on the stovetop. Testing proved that the slices would not form a cohesive crust without the direct heat of a hot pan. In addition, we couldn’t slice them thin enough without the help of a mandoline. But because tasters loved the potato flavor, we tried some other methods. A crust of grated raw potatoes remained too loose and crunchy. Sautéing the grated potato before applying it to the fish helped some, but not enough, while completely precooking the potatoes robbed them of both flavor and texture.
We use crushed potato chips for an ultracrisp crust, and wait until partway through broiling to add them so they don’t burn.
As we clung tenaciously to the notion of potato flavor while groping for another way to build a crisp, crunchy texture, a fellow test cook smirked and suggested, half in jest, that we try crushed potato chips. Everyone in the test kitchen at the time laughed, but after settling down, we looked at one another and said, practically in unison, “Let’s try it.” Imagine our astonishment, then, at the chips’ overwhelming success. Though a bit greasy and heavy on their own, they offered just what we were looking for in a crust: great potato flavor and crunch that wouldn’t quit. After lightening the chips by mixing in some fresh toasted bread crumbs and adding dill for complementary flavor, we found ourselves with an excellent, if unorthodox, topping. We also found that the chips made a rich foil for some of the other flavors we wanted to add.
Because the chips brown under the broiler in just a minute—literally—we broiled the fish until it was almost cooked through before adding the topping. This gave us just the texture we wanted. After adding a flavorful wet element (mustard) to help the crumbs adhere to the fish, we knew we had it: a quick, oven-cooked, well-flavored, texturally interesting—and rather surprising—salmon dinner for eight.
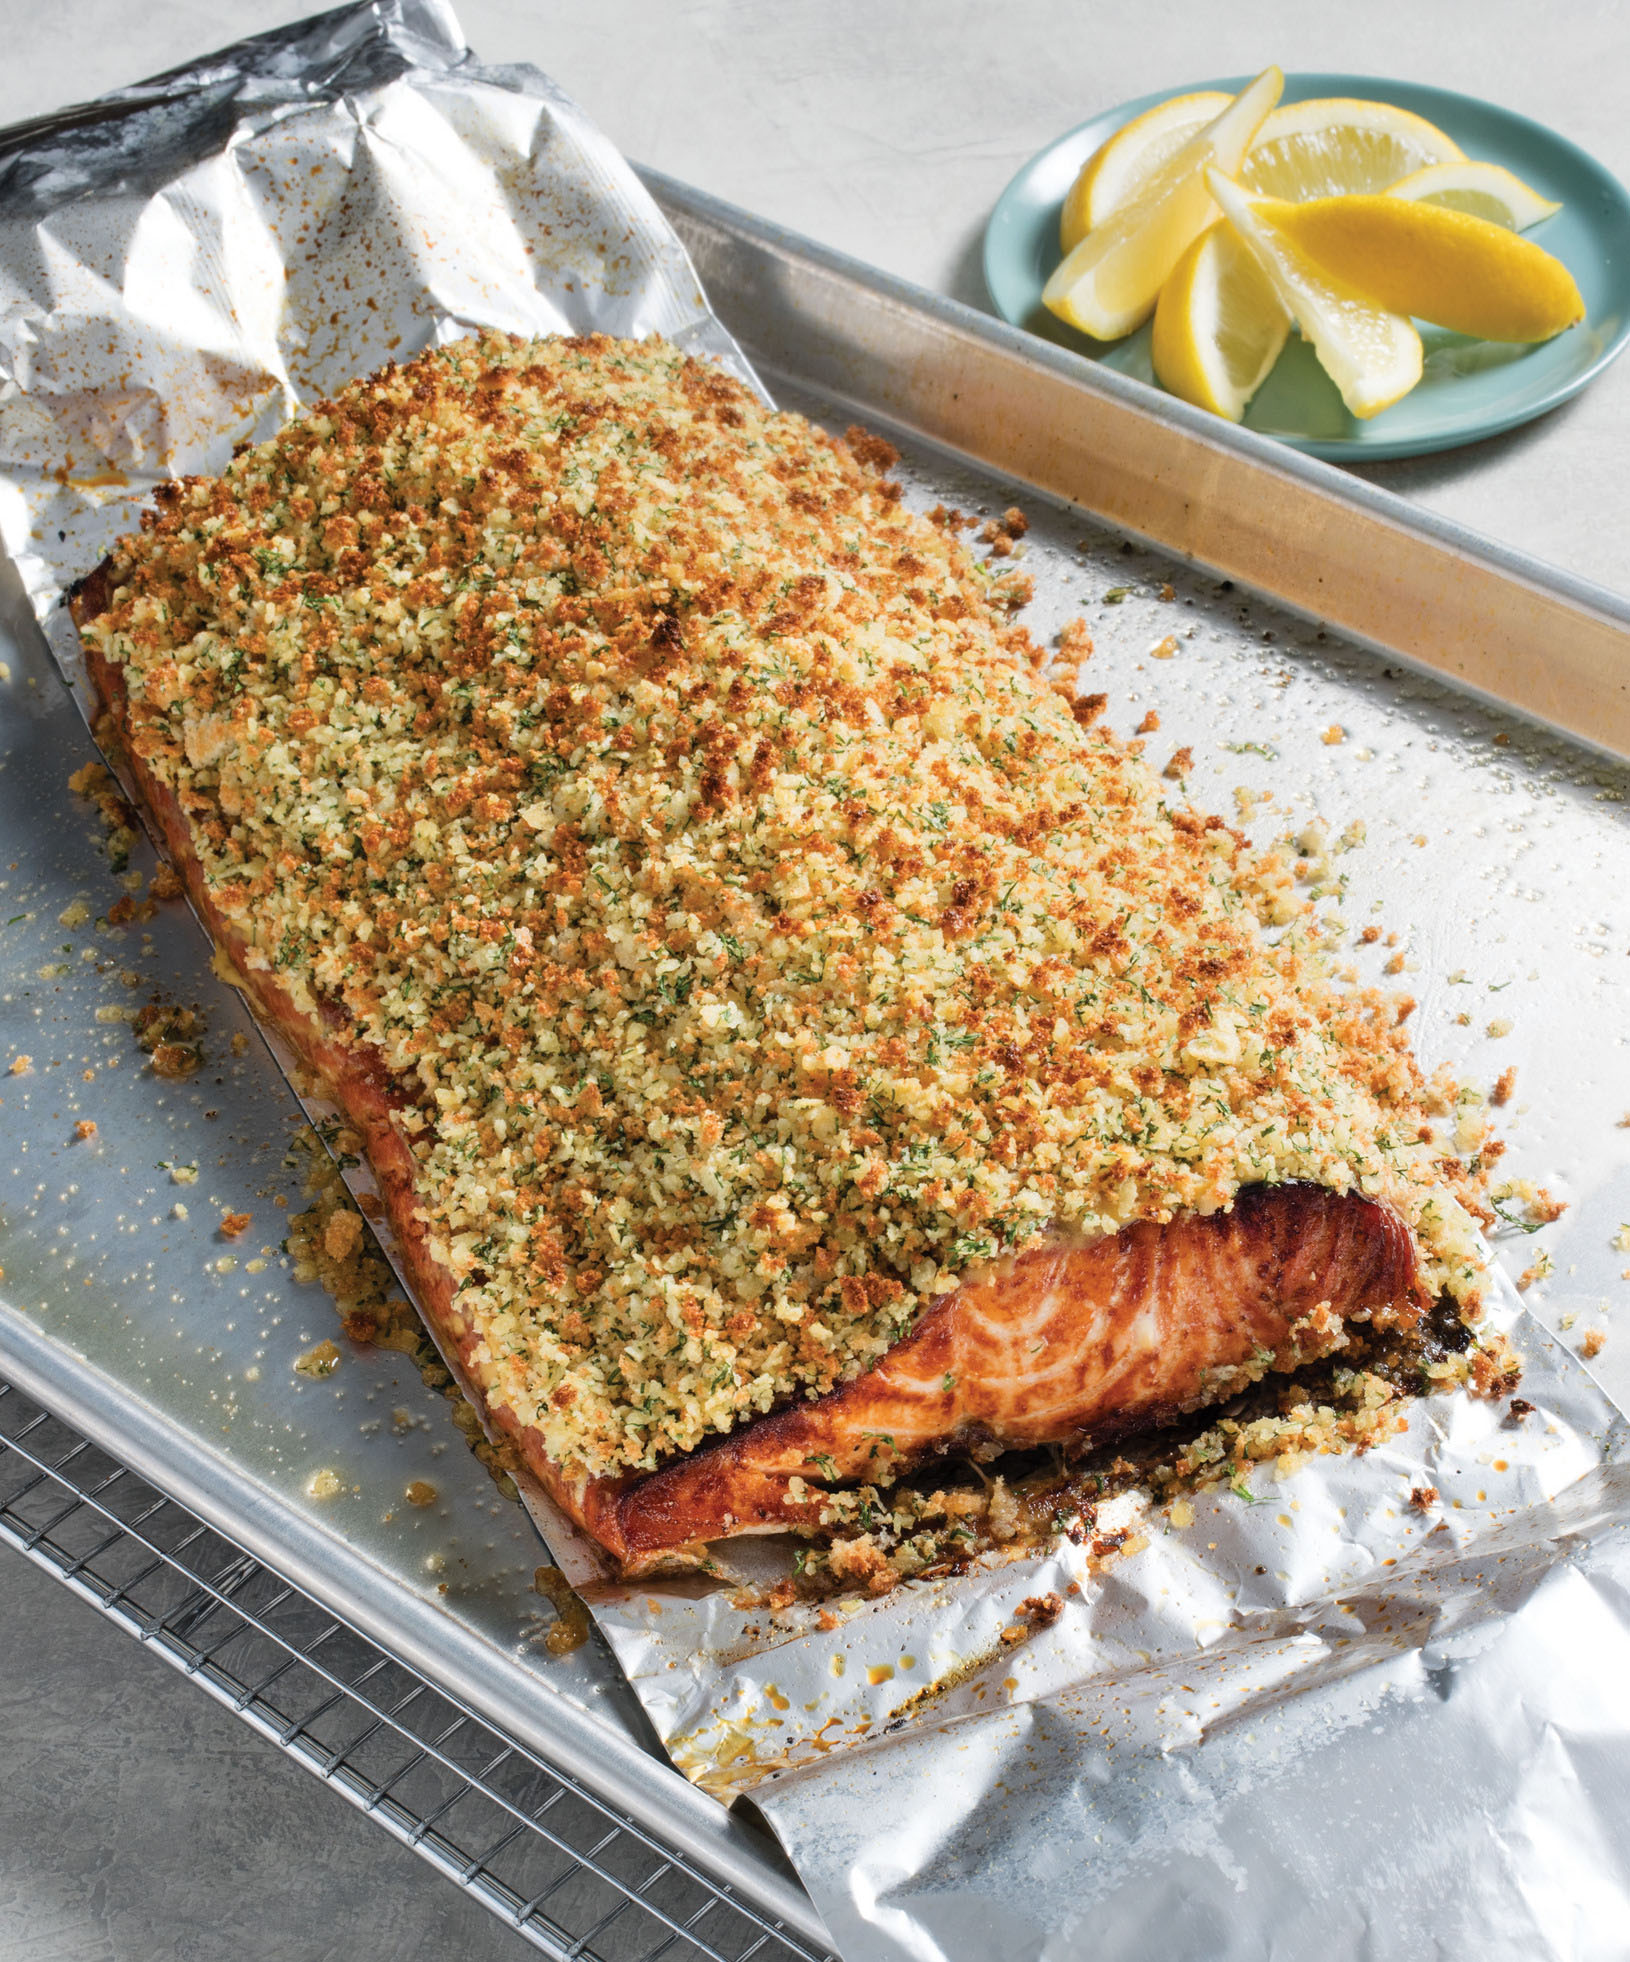
Broiled Salmon with Mustard and Crisp Dilled Crust
SERVES 8 TO 10
Heavy-duty aluminum foil measuring 18 inches wide is essential for creating a sling that aids in transferring the cooked side to a cutting board. Use a large baking sheet so that the salmon will lie flat. If you can’t get the fish to lie flat, even when positioning it diagonally on the baking sheet, trim the tail end. If you prefer to cook a smaller (2-pound) fillet, ask to have it cut from the thick center of the fillet, not the thin tail end, and begin checking doneness a minute earlier. We prefer thick-cut and kettle-cooked potato chips in this recipe; ridged chips will work in a pinch.
3 slices hearty white sandwich bread, crusts removed
4 ounces high-quality potato chips, finely crushed (1 cup)
6 tablespoons minced fresh dill
1 (3½-pound) skin-on side of salmon, pinbones removed
1 teaspoon olive oil
Salt and pepper
3 tablespoons Dijon mustard
Lemon wedges
1. Adjust oven rack to middle position and heat oven to 400 degrees. Pulse bread in food processor to even ¼-inch pieces, about 10 pulses. Spread crumbs evenly on rimmed baking sheet and toast, stirring occasionally, until golden brown and crisp, 4 to 5 minutes. Combine toasted crumbs, crushed potato chips, and dill in bowl.
2. Adjust oven racks 3 inches and 6 inches from broiler element and heat broiler. Cut piece of heavy-duty aluminum foil to be 1 foot longer than side of salmon, then fold lengthwise in thirds. Lay foil diagonally across rimmed baking sheet. Lay salmon, skin side down, on foil, rub with oil, and season with salt and pepper. Broil salmon on upper rack until surface is spotty brown and center is still translucent when checked with tip of paring knife and registers 125 degrees (for medium-rare), 9 to 11 minutes.
3. Remove fish from oven. Working quickly, spread evenly with mustard, then press bread-crumb mixture onto fish. Return salmon to lower rack and broil until crust is deep golden brown, about 1 minute.
4. Using foil sling, transfer salmon to cutting board (or serving platter). Run spatula underneath salmon to loosen it from foil. Using spatula to hold salmon in place on cutting board, gently pull foil out from underneath salmon. Serve with lemon wedges.
variations
Broiled Salmon with Chutney and Crisp Spiced Crust
Use a smooth mango chutney for this recipe. If you can find only chunky mango chutney, puree it in a food processor until smooth before using.
Melt 2 tablespoons unsalted butter in 8-inch skillet over medium heat. Off heat, add 1 minced garlic clove, ½ teaspoon ground cumin, ½ teaspoon paprika, ¼ teaspoon ground cinnamon, ¼ teaspoon cayenne, and ¼ teaspoon salt. Set aside. Substitute 3 tablespoons chopped fresh parsley for dill, toss butter-spice mixture into bread crumbs along with potato chips, and substitute 3 tablespoons smooth mango chutney for Dijon mustard.
Broiled Salmon with Spicy Cilantro-Citrus Paste and Crisp Crust
Process 2 cups cilantro leaves, 3 shallots, 2 stemmed and seeded jalapeño chiles, one 1-inch piece peeled fresh ginger, 3 garlic cloves, 2 tablespoons honey, and 2 teaspoons grated lime zest plus 3 tablespoons juice (2 limes) in food processor until smooth, about 30 seconds, scraping down bowl as necessary. Omit dill and substitute ½ cup cilantro-citrus paste for Dijon mustard.
SERVING THE SALMON
To ensure a beautiful presentation, we broil the salmon on a foil sling, which we use to transfer the finished salmon from the baking sheet to the cutting board. Here’s how we get the salmon off the foil neatly and in one piece.
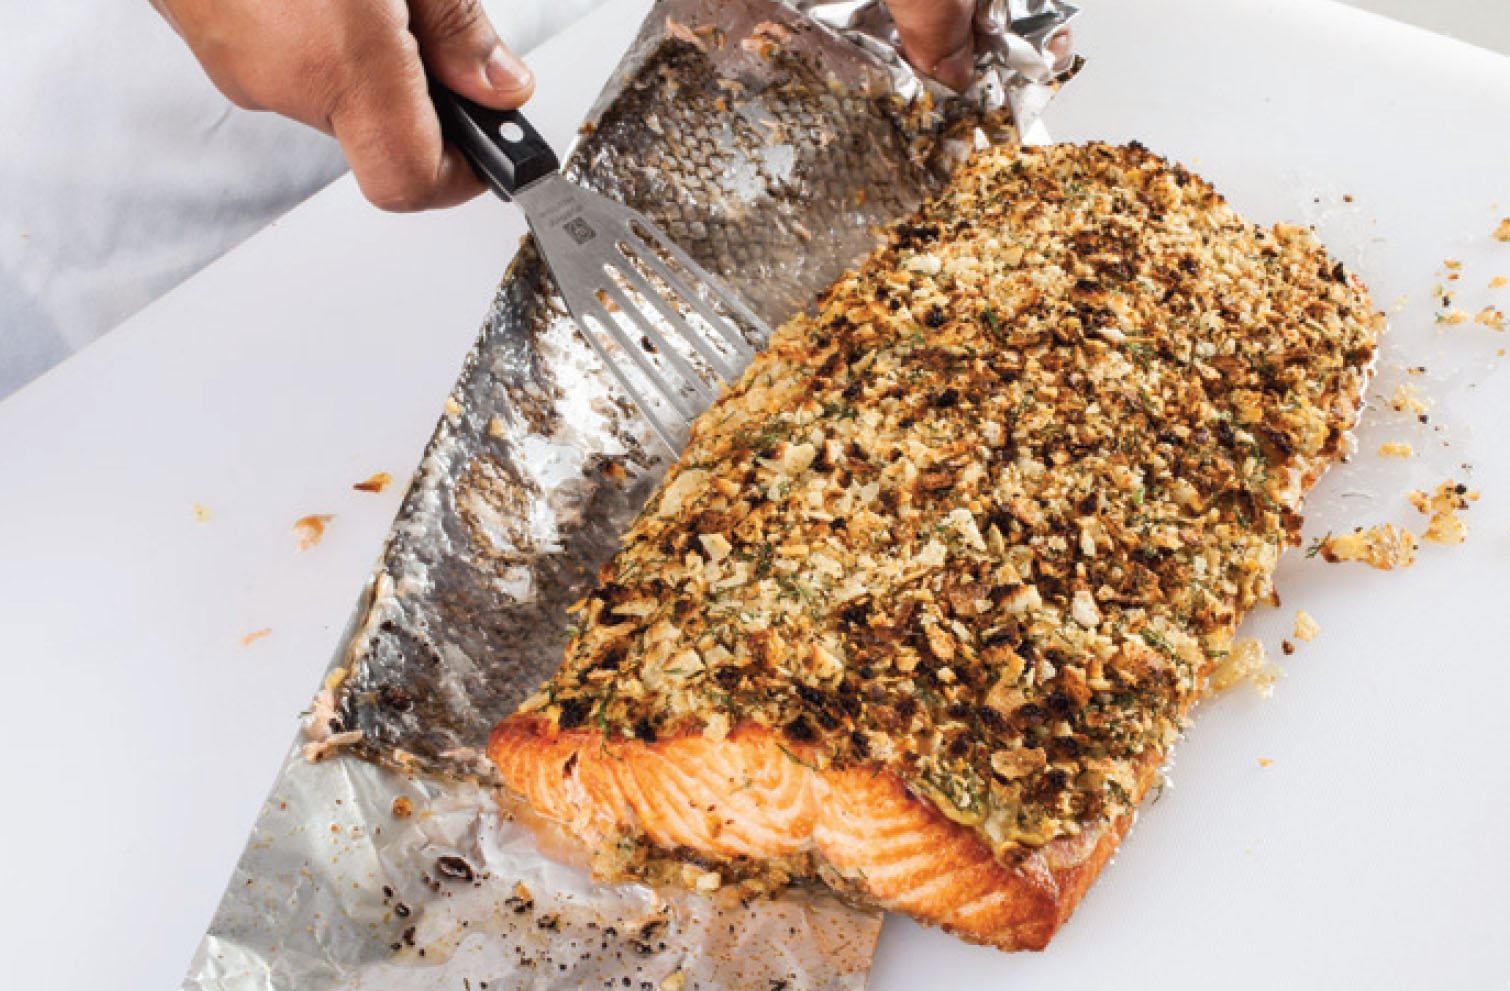
Using foil sling, transfer salmon to cutting board. Run spatula underneath fish to loosen. Use spatula to hold salmon in place and gently pull foil out.
PREPARING THE SALMON

1. Run your fingers over surface to feel for pinbones, then remove them with tweezers or needle-nose pliers.
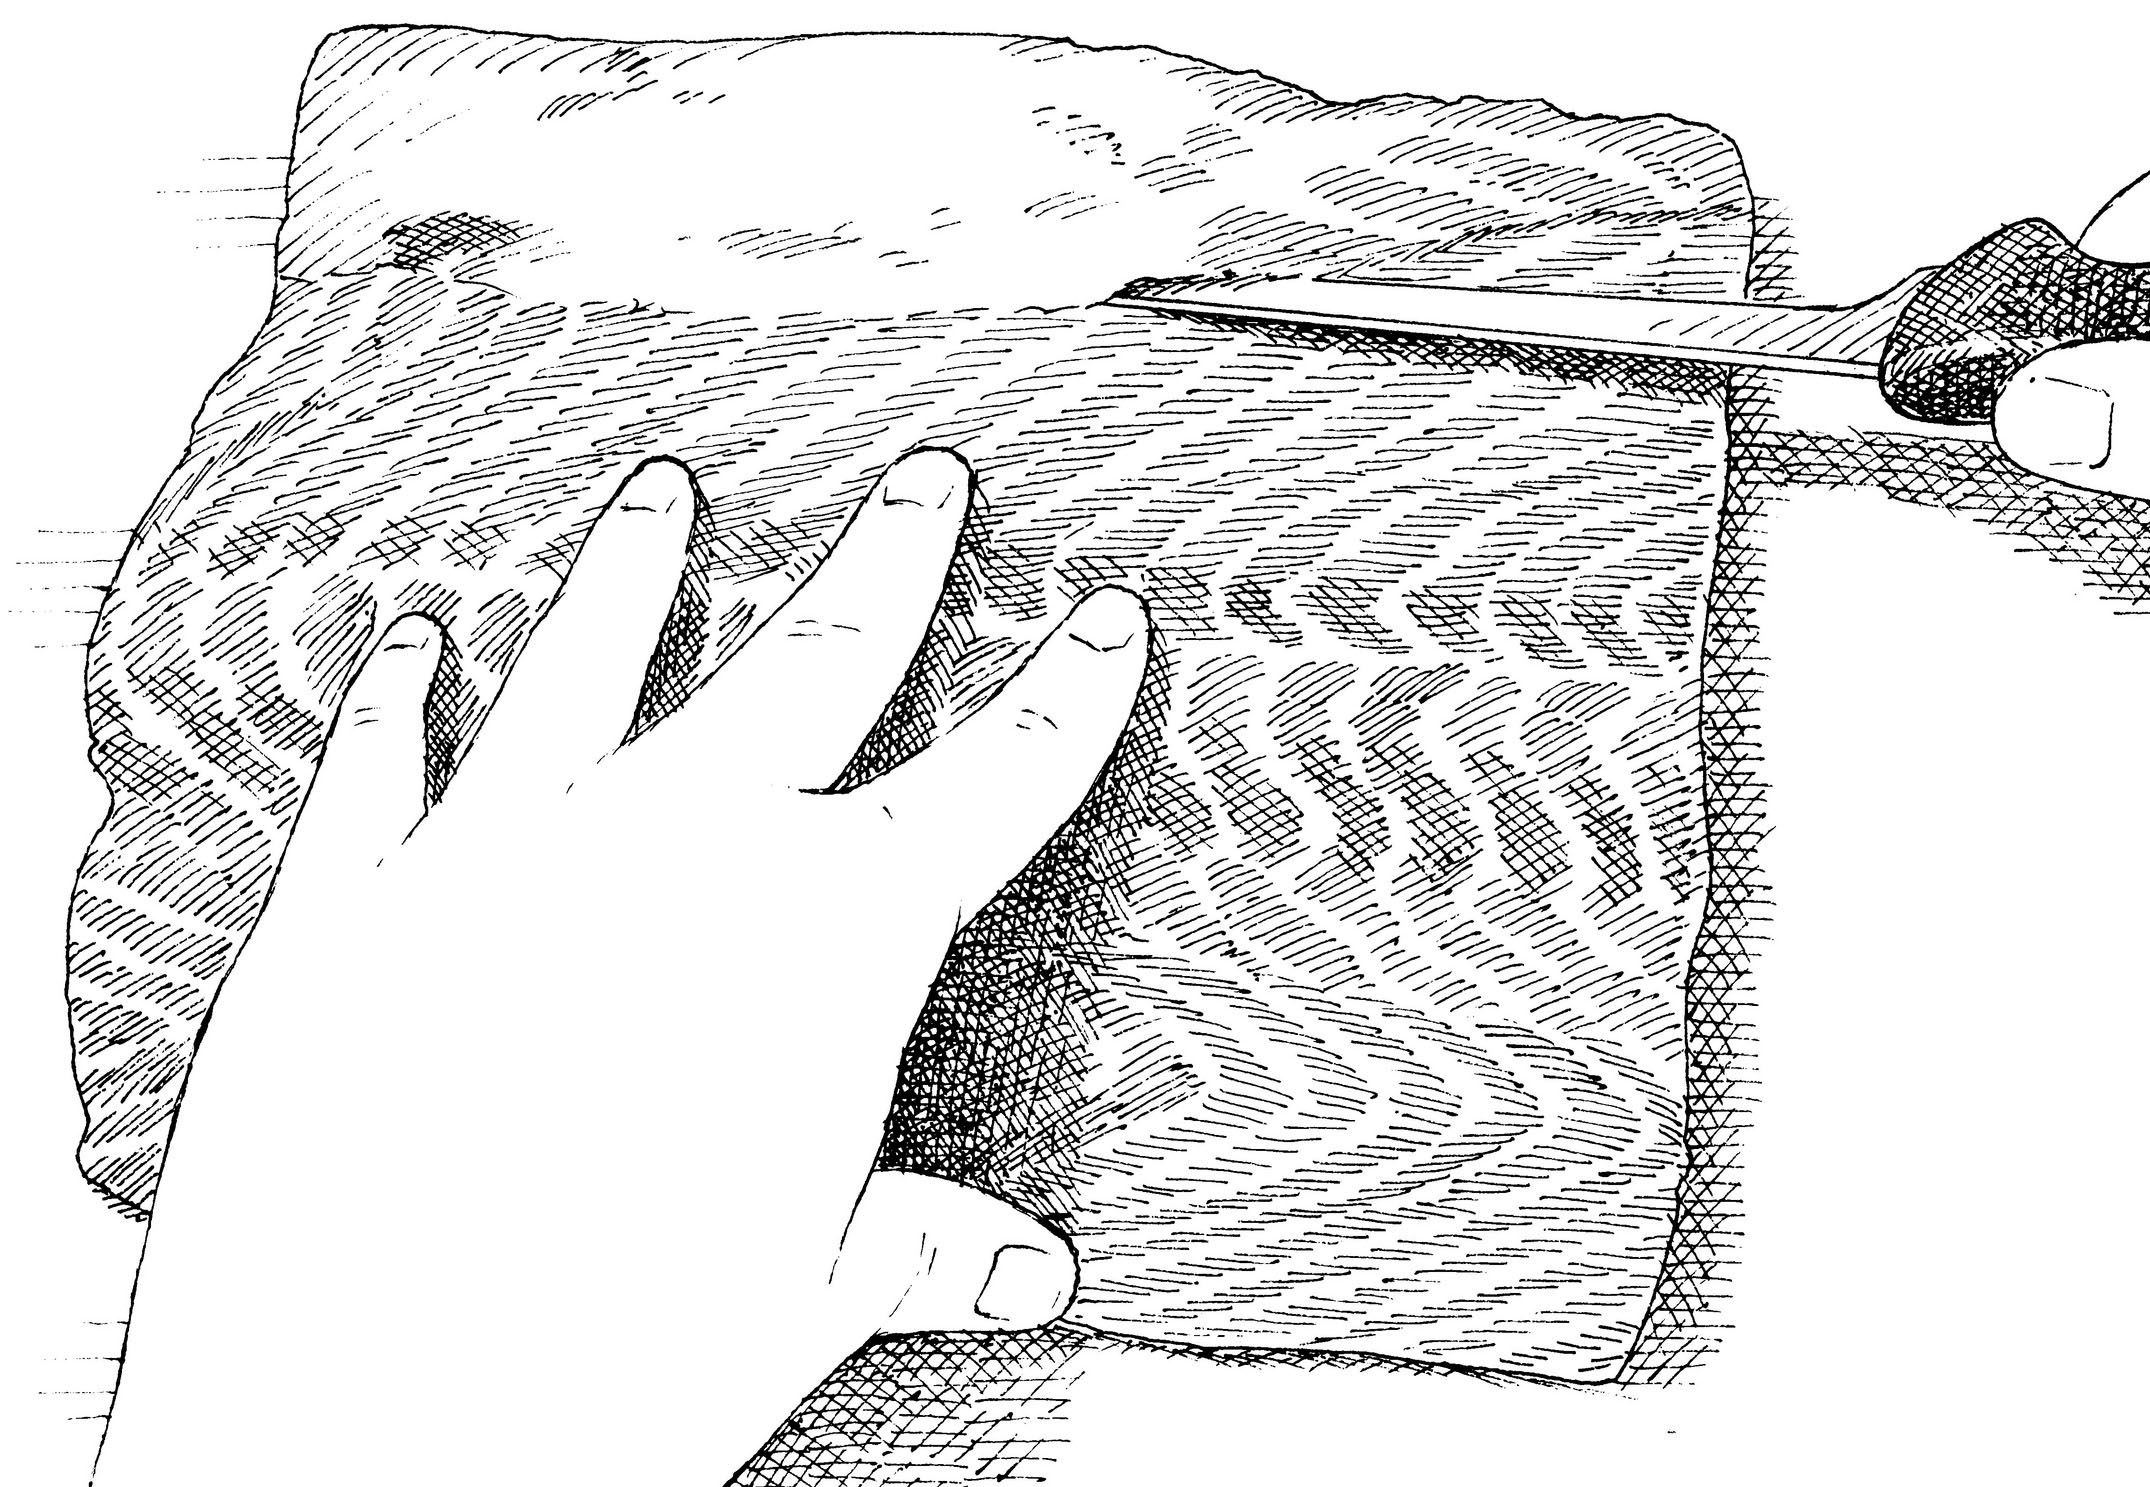
2. Hold sharp knife at slight downward angle to flesh and cut off whitish, fatty portion of belly.
Pan-searing salmon sounds so straightforward that I’ve never given much thought to the technique. Normally, I’d add a little oil to a nonstick skillet, get it good and hot, sprinkle a few skinless fillets with salt and pepper, slide them into the pan, and cook them on both sides until the fish was cooked through and browned on the exterior but still pink on the inside.
But when I gave this approach a more critical look, I could see that it had two flaws. While the fish had a nice rosy interior at its thickest point, it was a bit overcooked and dry at the thinner end. Secondly, the exteriors of the fillets were more tough than crisp. I wanted to take advantage of the intense heat of the skillet to produce a golden-brown, ultracrisp crust on salmon fillets while keeping their interiors moist.
Brining the fish briefly and cooking the salmon with the skin on guarantees moist, not tough, flesh.
The solution to the dryness problem was relatively easy: salt. Either salting or brining would season the flesh and help keep it moist. This being a quick weeknight dinner, I didn’t want to wait 2 hours for salting to do its job. Brining took about 15 minutes, and as long as I patted the fillets dry with paper towels before cooking, I found that the treatment didn’t significantly inhibit browning.
I decided to focus on getting a really nice sear on only the flesh side since it would be facing up when the fillet was plated. Plus, browning both sides could lead to overcooking. Cooking the fish through with the flesh side down the entire time produced a wonderfully crisp crust, but it also left me with an unworkable dilemma: Either the face-up (skinned) side was nearly sushi-raw, or the rest of the fillet overcooked while I waited for the face-up side to cook through. Covering the pan with a lid toward the end helped cook the fish through more evenly, but this trapped moisture, softening the crust.
There was one piece left to tinker with: the heat level. What if I added the fish to a cold pan and then turned on the heat? This would allow the fish to cook through gently as the pan slowly came up to temperature. I’d then flip the fillets over after the skillet was good and hot so they could form a crust and finish cooking through.
I quickly discovered a problem starting with a not-so-hot skillet: No matter how gently I cooked the first side, it tended to dry out and turn tough on the very exterior. When I was skinning the salmon for my next test, I came up with the solution: Leave the skin on. It could serve to protect that first side as it cooked, and I could simply remove it after flipping the fish.
Sure enough, this worked perfectly. Even better, the skin shed enough fat as it cooked that I was able to cook the fish without needing to add a single drop of oil to the pan.
This salmon was excellent with just a squirt of lemon, but a mango-mint salsa was easy to make, and its bright flavor balanced the salmon’s richness.
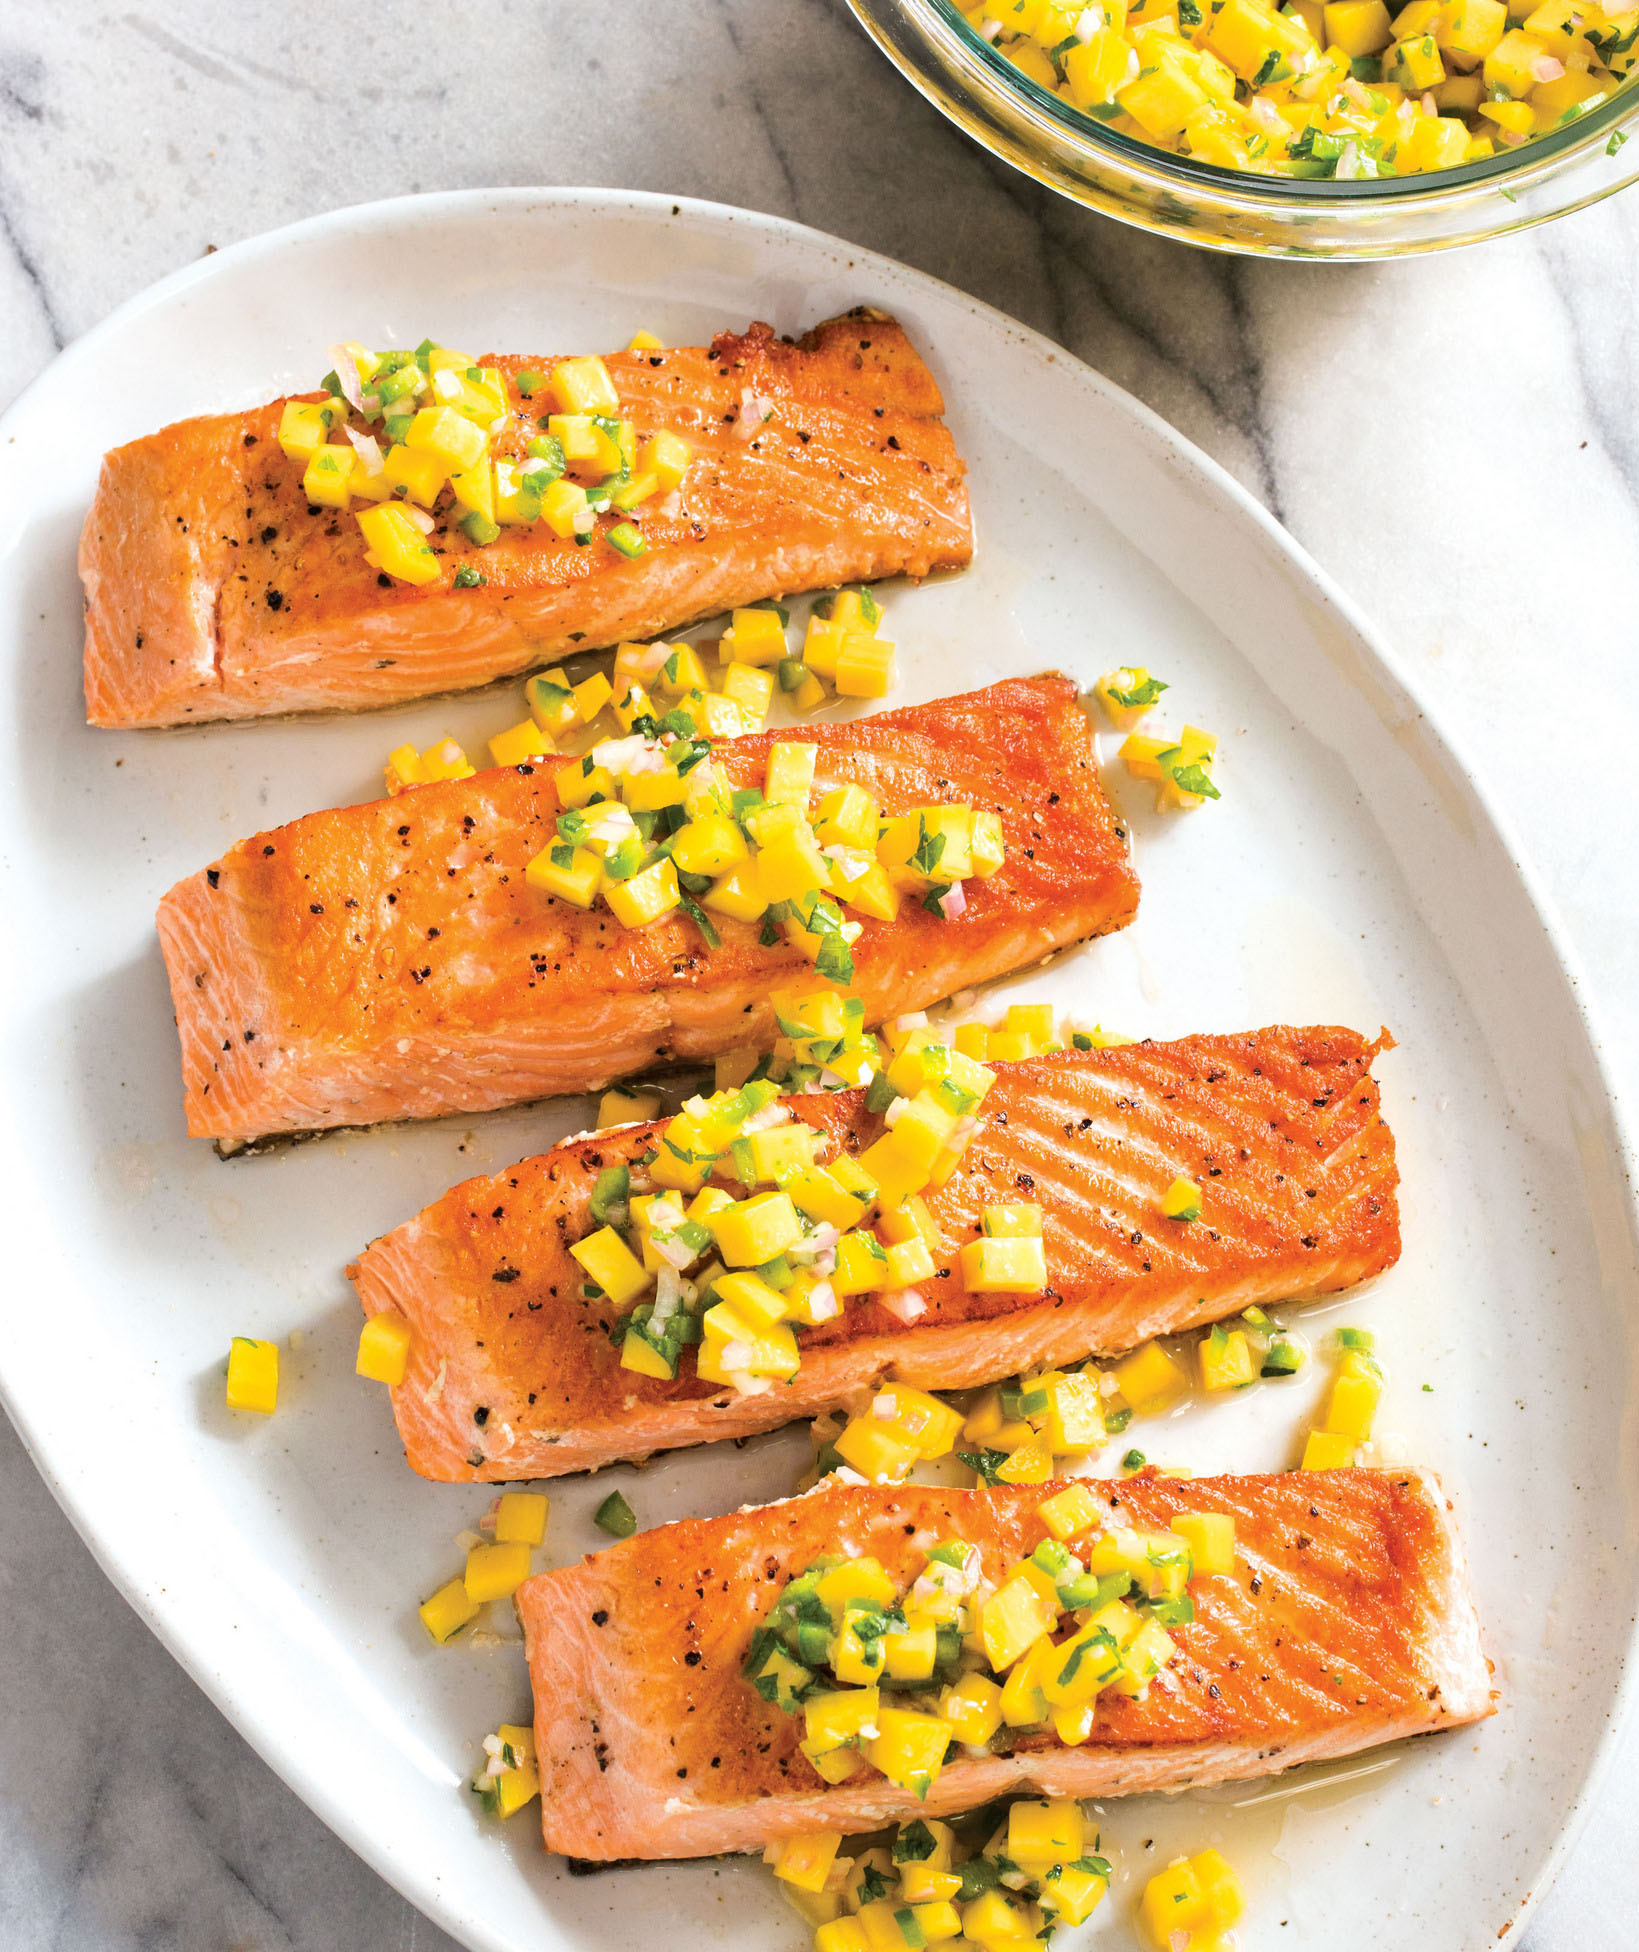
Pan-Seared Salmon
SERVES 4
To ensure uniform cooking, buy a 1½- to 2-pound center-cut salmon fillet and cut it into four pieces. Using skin-on salmon is important here, as we rely on the fat underneath the skin as the cooking medium (as opposed to adding extra oil). If using wild salmon, cook it until it registers 120 degrees. If you don’t want to serve the fish with the skin, we recommend peeling it off the fish after cooking rather than before. Serve the salmon with lemon wedges or with our Mango-Mint Salsa (recipe follows), if desired.
Kosher salt and pepper
4 (6- to 8-ounce) skin-on salmon fillets
Lemon wedges
1. Dissolve ½ cup salt in 2 quarts cold water in large container. Submerge salmon in brine and let stand at room temperature for 15 minutes. Remove salmon from brine and pat dry with paper towels.
2. Sprinkle bottom of 12-inch nonstick skillet evenly with ½ teaspoon salt and ½ teaspoon pepper. Place fillets, skin side down, in skillet and sprinkle tops of fillets with ¼ teaspoon salt and ¼ teaspoon pepper. Heat skillet over medium-high heat and cook fillets without moving them until fat begins to render, skin begins to brown, and bottom ¼ inch of fillets turns opaque, 6 to 8 minutes.
3. Using tongs, flip fillets and continue to cook without moving them until centers are still translucent when checked with tip of paring knife and register 125 degrees, 6 to 8 minutes longer. Transfer fillets, skin side down, to serving platter and let rest for 5 minutes before serving with lemon wedges.
accompaniment
MAKES ABOUT 1 CUP
Adjust the salsa’s heat level by reserving and adding the jalapeño seeds, if desired.
1 mango, peeled, pitted, and cut into ¼-inch pieces
1 shallot, minced
3 tablespoons lime juice (2 limes)
2 tablespoons chopped fresh mint
1 jalapeño chile, stemmed, seeded, and minced
1 tablespoon extra-virgin olive oil
1 garlic clove, minced
½ teaspoon salt
Combine all ingredients in bowl.
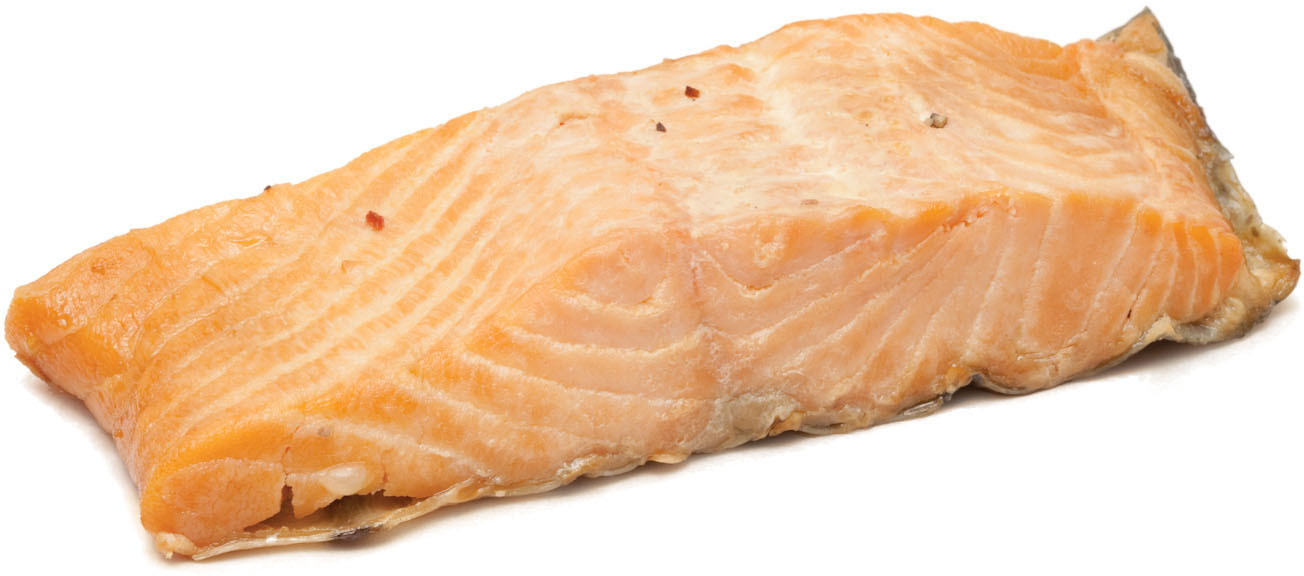
The process of smoking fish over hardwood has a long tradition, and rich, fatty salmon is well suited to the technique. But smoked salmon’s unique taste and texture don’t come easy: The translucent, mildly smoky slices piled on bagels are produced by ever-so-slowly smoking (but not fully cooking) salt-cured fillets at roughly 60 to 90 degrees, a project that requires specialized equipment and loads of time (at least 24 hours and as long as five days). Then there is hot smoking, a procedure in which cured fillets are fully cooked at higher temperatures (100 to 250 degrees) for one to eight hours. The higher heat results in a drier texture and a more potent smokiness, so the fish is often flaked and mixed into dips and spreads.
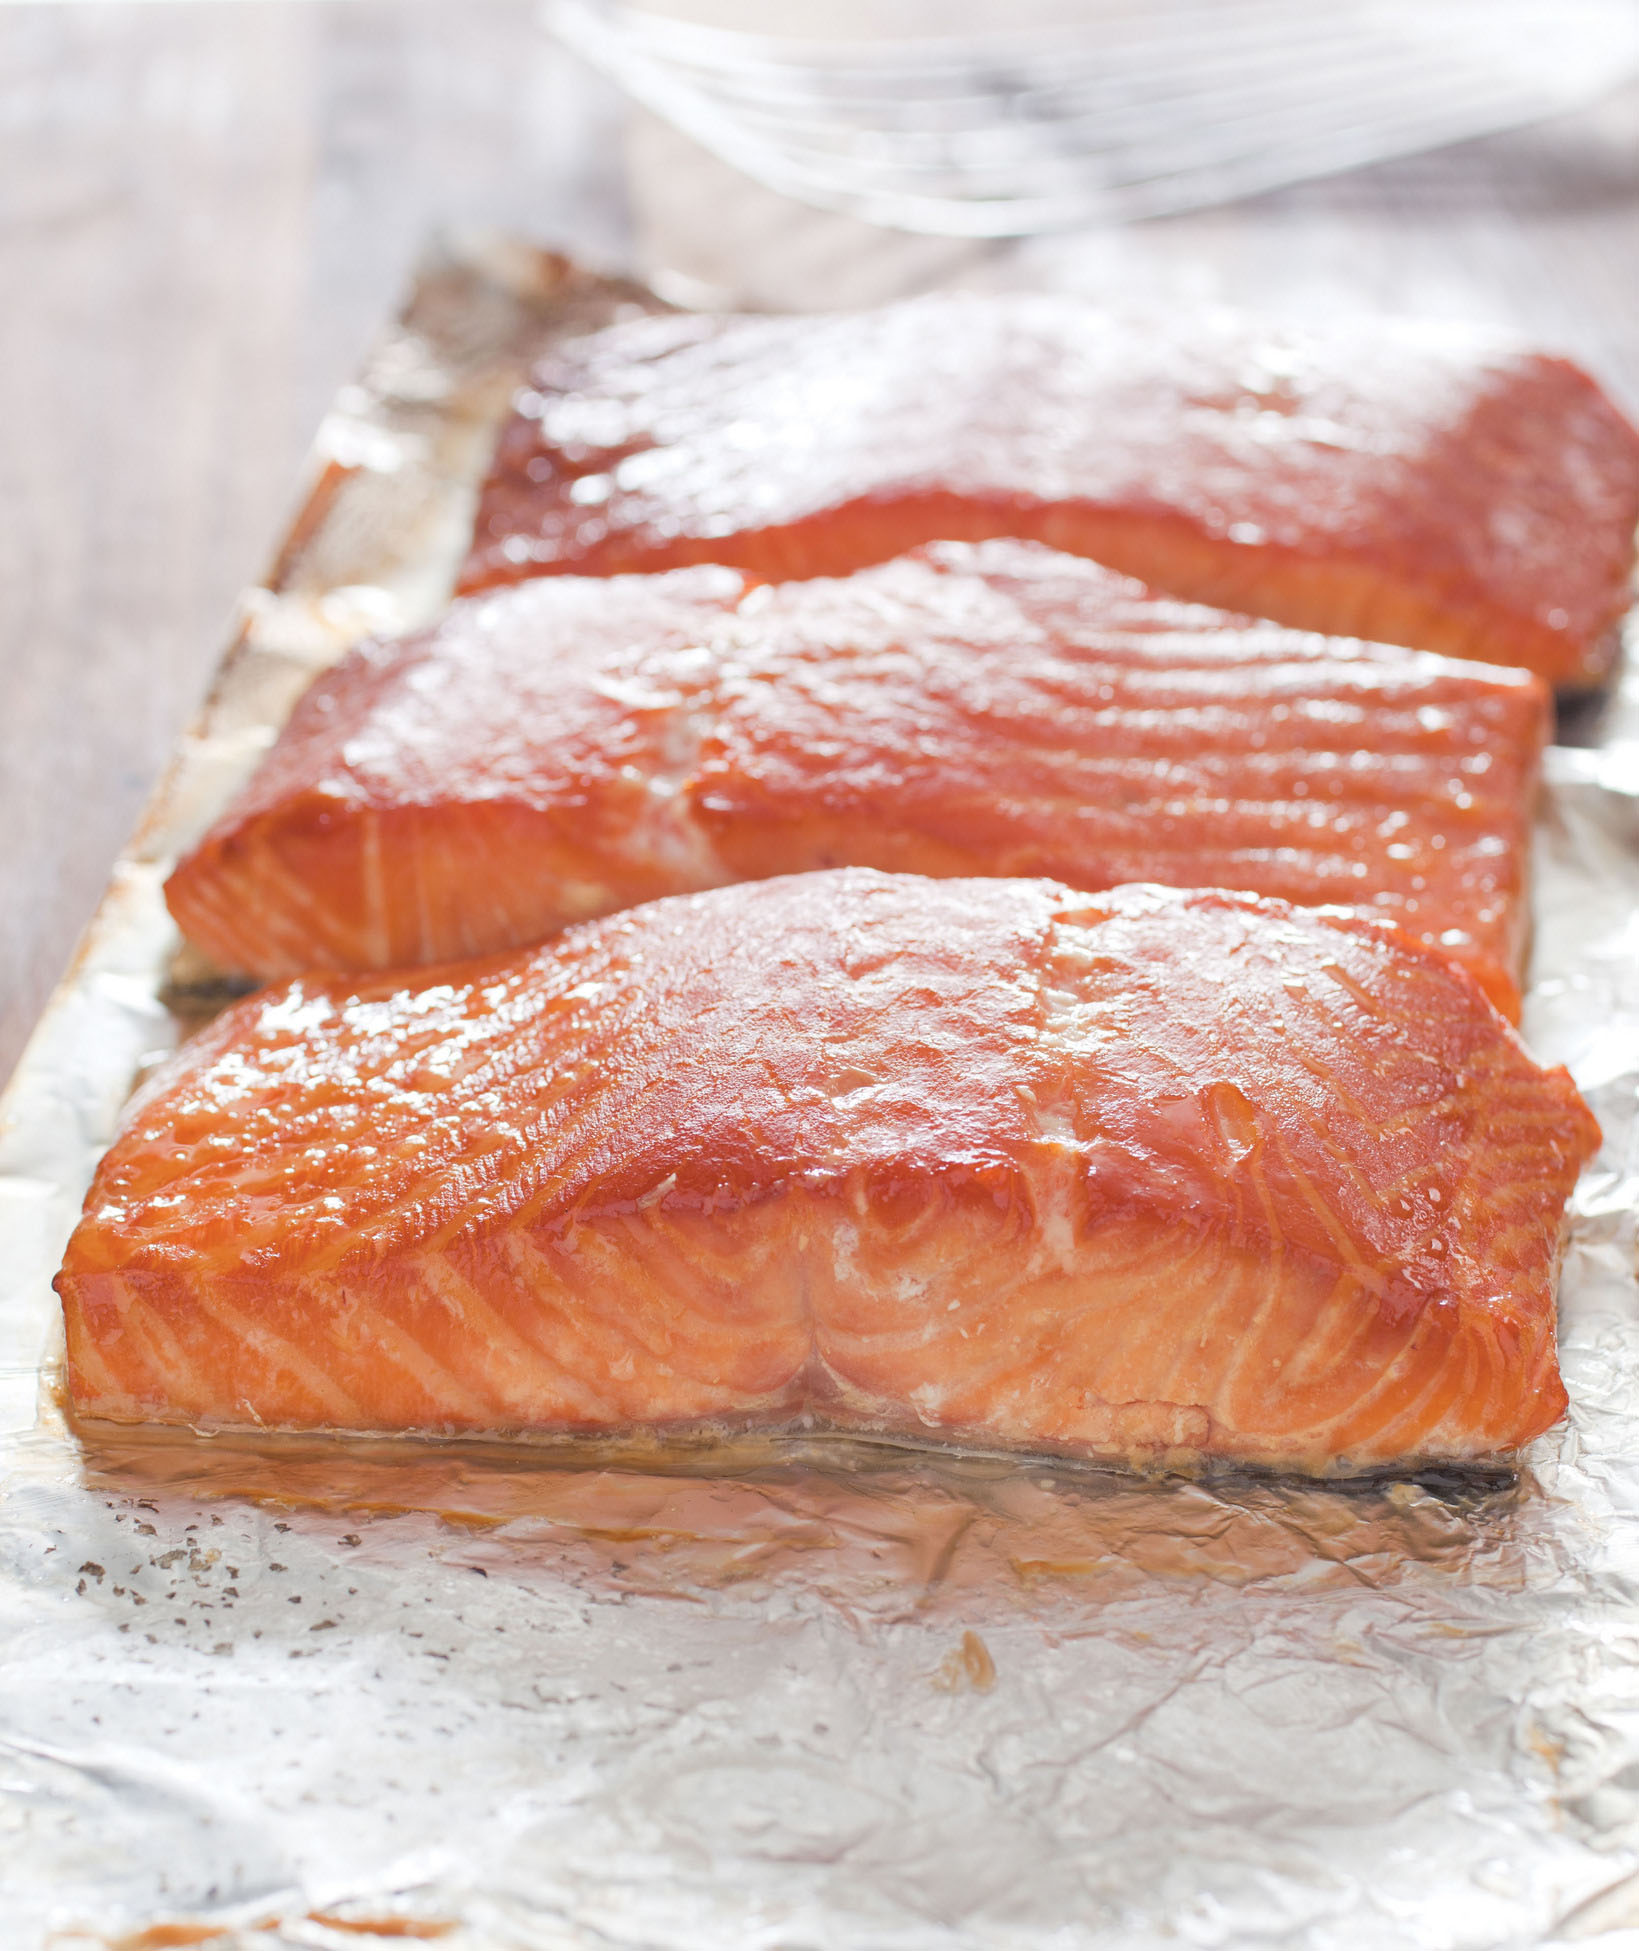
Both approaches deliver terrific results—but are impractical (if not impossible) for a home cook to pull off. Sure, you can impart a touch of smokiness by tossing wood chips onto hot charcoal and quickly grilling fish fillets, but I had also heard of a lesser-known, more intriguing option that captures both the intense, smoky flavor of hot-smoked fish and the firm but silky texture of the cold-smoked type. It’s easy because the fish is cooked via indirect heat on a grill—a familiar and uncomplicated technique. And although the resulting fillets have a distinctive taste, they are not overpoweringly salty or smoky, so they’re suitable as an entrée either warm from the grill or at room temperature.
A salt-and-sugar rub before cooking over an indirect grill fire produces silky, smoky fillets.
To try out these smoky, succulent fillets, I scoured cookbooks for recipes. The typical first step in smoking fish is to cure the flesh with salt; some authors recommended brining, others directly salting the fillet. To keep the preparation time in check, I steered away from recommendations for curing the fish for longer than an hour or two.
The other criteria, smoking temperature and length of exposure–both crucial to the final result—were all over the map. One recipe called for smoking the fish at 350 degrees for a modest 20 minutes; another let it go twice as long at only 275 degrees.
IN TREATMENT
With so many factors at play, I decided to try a simple brine first, soaking a center-cut skin-on fillet (retaining the skin would make it easier to remove the fillet from the grill) in the test kitchen’s usual 9 percent solution of salt and water for 2 hours. For the time being, I used a moderate amount of coals, dumping 4 quarts of lit charcoal on one side of the grill, along with a few soaked wood chips to provide the smoke. I placed the fish on the cooking grate opposite the coals, popped the cover on the grill, and smoked the fish until it was still a little translucent at the center, about 25 minutes.
The result was illuminating if not exactly spectacular. The long stay in the brine had the unfortunate effect of making the salmon terribly bloated; plus, it seemed to highlight the fish’s natural oiliness in an unpleasant way—a far cry from the supple but firm texture I was after.
For my next try, I covered the salmon in a generous blanket of kosher salt—its coarse texture makes it cling to food better than table salt—and refrigerated it uncovered on a wire rack on a baking sheet. After an hour, a considerable amount of liquid had been drawn to the surface of the flesh. I knew that if I waited any longer, the fluid would start to migrate back into the salmon through the process of osmosis, leading to a bloated texture, so I promptly removed it from the refrigerator, blotted the moisture with a paper towel, and took it out to the grill for smoking. This sample was considerably better than the brined fish: incredibly moist yet still firm—and not at all soggy. It wasn’t perfect, though, since most tasters found it too salty to be enjoyed as a main dish. I tried dialing down the amount of salt as well as salting for a shorter amount of time, but alas, the fish didn’t achieve the proper texture.
Back at my desk, I looked for a solution in the recipes that I’d collected and came across a few that called for adding sugar to the cure. I knew that, like salt, sugar is hygroscopic, meaning it attracts water. Could sugar pull moisture from the salmon as effectively as salt? Not quite: Because individual molecules of sucrose are much larger than sodium and chloride ions, sugar is, pound for pound, about 12 times less effective than salt at attracting moisture. Still, it was a workable option; I just had to do some tinkering. Eventually, I determined that a ratio of 2 parts sugar to 1 part salt produced well-balanced taste and texture in the finished salmon. Using these proportions, the fish firmed up nicely; plus, it was far less salty and the sugar counterbalanced its richness.
SMOLDERING ISSUES
With a reliable curing method in hand, I could finally fine-tune my smoking technique. My current setup was far from ideal: By the time the fish was sufficiently smoky, it was dry and flaky. Conversely, when it was cooked perfectly—still silky and slightly pink in the interior, or about 125 degrees—the smoke flavor was faint. Adding more wood chips only gave the fillet a sooty flavor. Instead, I tried to cool down the temperature of the grill by reducing the amount of charcoal from 4 quarts to 3 quarts. This helped somewhat, since the fish cooked more slowly (a full 30 to 40 minutes) and had more time to absorb smoke.
But the smoke flavor still wasn’t as bold as I wanted. Rather than manipulating the cooking time any further, I turned to the salmon itself, cutting the large fillet into individual serving-size portions. This seemingly minor tweak resulted in big payoffs: First, it ensured more thorough smoke exposure (in the same amount of time) by creating more surface area. Second, the delicate pieces were far easier to get off the grill in one piece than a single bulky fillet. (To that end, I also started placing the fillets on a piece of foil coated with vegetable oil spray.) Finally, I found that I could now use an even cooler fire (produced with a mere 2 quarts of charcoal): The smaller fillets still reached their ideal serving temperature in the same amount of time that the single, larger fillet had taken. Plus, the gentler fire rendered the fillets incomparably tender.
With a smoky, rich taste and a silky, supple texture, my quick smoked salmon recipe was, to put it plainly, smoking hot.
SERVES 6
Use center-cut salmon fillets of similar thickness so that they cook at the same rate. If using wild salmon, cook until the thickest part of the fillet registers 120 degrees. The best way to ensure uniformity is to buy a 2½- to 3-pound whole center-cut fillet and cut it into six pieces. If you’d like to use wood chunks instead of wood chips when using a charcoal grill, substitute two wood chunks, soaked in water for 1 hour, for the wood chip packet. Avoid mesquite wood chunks for this recipe. Serve the salmon with lemon wedges or our “Smoked Salmon Platter” Sauce (recipe follows).
2 tablespoons sugar
1 tablespoon kosher salt
6 (6- to 8-ounce) center-cut skin-on salmon fillets
2 cups wood chips
1. Combine sugar and salt in bowl. Set wire rack in rimmed baking sheet, set salmon on rack, and sprinkle flesh side evenly with sugar mixture. Refrigerate, uncovered, for 1 hour. With paper towels, brush any excess salt and sugar from salmon and blot dry. Return salmon on wire rack to refrigerator, uncovered, while preparing grill.
2. Just before grilling, soak 1 cup wood chips in water for 15 minutes, then drain. Using large piece of heavy-duty aluminum foil, wrap soaked and unsoaked chips together in 8 by 4½-inch foil packet. (Make sure chips do not poke holes in sides or bottom of packet.) Cut 2 evenly spaced 2-inch slits in top of packet.
3A. For a charcoal grill: Open bottom vent halfway. Light large chimney starter one-third filled with charcoal briquettes (2 quarts). When top coals are partially covered with ash, pour into steeply banked pile against side of grill. Place wood chip packet on coals. Set cooking grate in place, cover, and open lid vent halfway. Heat grill until hot and wood chips are smoking, about 5 minutes.
3B. For a gas grill: Remove cooking grate and place wood chip packet directly on primary burner. Set grate in place, turn primary burner to high (leave other burners off), cover, and heat grill until hot and wood chips are smoking, 15 to 25 minutes. Turn primary burner to medium. (Adjust primary burner as needed to maintain grill temperature of 275 to 300 degrees.)
4. Fold piece of heavy-duty foil into 18 by 6-inch rectangle. Place foil rectangle on cooler side of grill and place salmon fillets on foil, spaced at least ½ inch apart. Cover (position lid vent over salmon if using charcoal) and cook until center of thickest part of fillet is still translucent when checked with tip of paring knife and registers 125 degrees (for medium-rare), 30 to 40 minutes. Transfer to platter and serve warm or at room temperature.
accompaniment
“Smoked Salmon Platter” Sauce
MAKES 1½ CUPS
1 large egg yolk, plus 1 hard-cooked large egg, chopped fine
2 teaspoons Dijon mustard
2 teaspoons sherry vinegar
½ cup vegetable oil
2 tablespoons capers, rinsed, plus 1 teaspoon brine
2 tablespoons minced shallot
2 tablespoons minced fresh dill
Whisk egg yolk, mustard, and vinegar together in medium bowl. Whisking constantly, slowly drizzle in oil until emulsified, about 1 minute. Gently fold in capers and brine, shallot, dill, and hard-cooked egg.
NOW WE’RE SMOKIN’
Typically, cold- or hot-smoking salmon requires special equipment and a serious time investment. Our recipe captures the best of both methods and cooks in only 30 to 40 minutes on a regular grill.
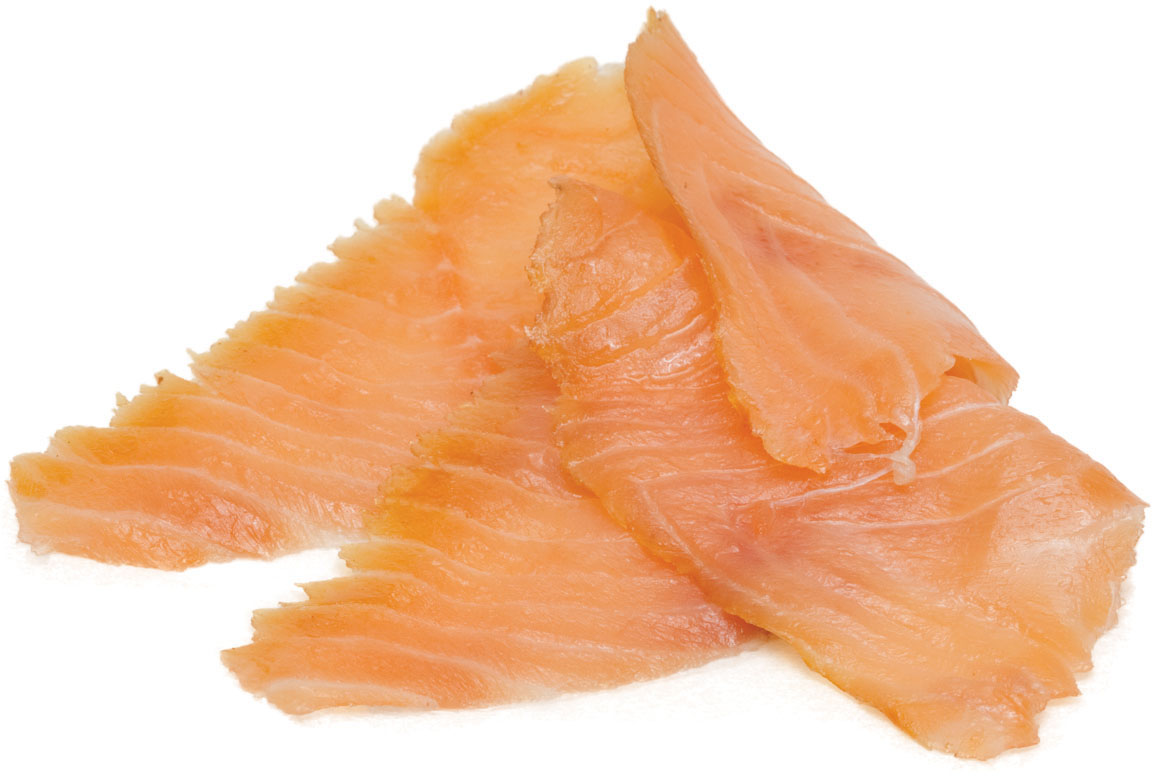
COLD-SMOKED
Slick and silky; mild smoke

HOT-SMOKED
Dry and firm; potent smoke
HYBRID GRILL-SMOKED
Ultramoist; rich, balanced smoke
Nothing is more basic than shrimp cocktail, and given its simplicity, few dishes are more difficult to improve. Yet I set out to do just that this past winter and believe I succeeded.
Shrimp cocktail, as everyone must know, is “boiled” shrimp served cold with “cocktail” sauce, typically a blend of bottled ketchup or chili sauce spiked with horseradish. It’s easy enough to change the basic pattern in order to produce a more contemporary cold shrimp dish; you could, for example, grill shrimp and serve them with a fresh tomato salsa (and many people have done just that). But there is something refreshing and utterly classic about traditional shrimp cocktail, and sometimes it fits the occasion better than anything else.
I saw three ways to challenge the traditional method of preparing shrimp cocktail in order to produce the best-tasting but recognizable version of this dish. One, work on the flavor of the shrimp; two, work on the cooking method for the shrimp; three, produce a great cocktail sauce.
FLAVORING THE SHRIMP
The shrimp in shrimp cocktail can be ice-cold strings of protein, chewy or mushy, or they can be tender, flavorful morsels that barely need sauce. To achieve the latter, you need to start with the best shrimp you can find and give them as much flavor as they can handle without overwhelming them.
If you start with good shrimp and follow a typical shrimp cocktail recipe—that is, simmer the shrimp in salted water until pink—the shrimp will have decent but rarely intense flavor. The easiest way to intensify the flavor of shrimp is to cook them in their shells. But, as I found out, this has an obvious drawback: It’s far easier to peel shrimp when they are raw than once they are cooked.
It’s better, then, to make shrimp stock, a simple enough process that takes only 5 minutes using just the shrimp shells, and a process that can be vastly improved if you make it gradually. To do so, every time you use shrimp for any purpose, place the peels in a pot with water to cover, then simmer them for 5 minutes. Cool, strain, and freeze the resultant stock. Use this stock as the cooking liquid for your next batch of shrimp peels. Naturally, this stock will become more and more intense each time you add to it. Even after one batch of peels, however, it’s infinitely better than plain water for cooking shrimp.
For the best flavor and texture, we poach shrimp in a simple shrimp stock off the heat.
Next, I thought, it would be best to see what other flavors would complement the shrimp without overpowering it. My first attempt was to use beer and a spicy commercial seasoning, but this was a near disaster; the shrimp for cocktail should not taste like a New Orleans crab boil. Next I tried a court bouillon, the traditional herb-scented stock for poaching fish, but quickly discovered that the game wasn’t worth the candle; I wanted a few quick additions to my shrimp stock that would add complexity without making a simple process complicated.
After trying about 20 different combinations, involving wine, vinegar, lemon juice, and a near-ludicrous number of herbs and spices, I settled on the mixture given in the recipe here. It contains about 25 percent white wine, a dash of lemon juice, and a more-or-less traditional herb combination. Variations are certainly possible, but I would caution you against adding more wine or lemon juice; both were good up to a point, but after that their pungency became overwhelming.
COOKING THE SHRIMP
Although I was pleased at this point with the quality of the shrimp’s flavor, I still thought it could be more intense. I quickly learned, however, that the answer to this problem was not to keep pouring flavorings into the cooking liquid; that was self-defeating because I eventually lost the flavor of the shrimp. I decided to try to keep the shrimp in contact with the flavorings for a longer period of time.
I tried several methods to achieve this, including starting the shrimp in cold water with the seasonings and using a longer cooking time at a lower temperature. But shrimp cooks so quickly—this is part of its appeal, of course—that these methods only served to toughen the meat. What worked best, I found, was to bring the cooking liquid to a boil, turn it off, and add the shrimp. Depending on their size, I could leave them in contact with the liquid for up to 10 minutes (even a little longer for jumbo shrimp), during which time they would cook through without toughening, while taking on near perfect flavor.
THE COCKTAIL SAUCE
Here I felt I was treading a fine line. I wanted to make a better sauce, but I still wanted it to be recognizable as cocktail sauce. Starting with fresh or canned tomatoes, I discovered, just didn’t work: The result was often terrific (some might say preferable), but it was not cocktail sauce. It was as if I had decided to make a better version of liver and onions by substituting foie gras for veal liver—it might be “better,” but it would no longer be liver and onions.
I went so far as to make American-style ketchup from scratch, an interesting project but not especially profitable, in that the effect was to duplicate something sold in near-perfect form in the supermarket. Again, there are more interesting tomato-based sauces than ketchup, but they’re not ketchup.
So I decided the best thing I could do was to find the bottled ketchup or chili sauce I liked best and season it myself. First I had to determine which made the better base, ketchup or chili sauce. The answer to this question was surprising but straightforward: ketchup. Bottled chili sauce is little more than vinegary ketchup with a host of seasonings added. The less expensive chili sauces have the acrid, bitter taste of garlic powder, monosodium glutamate, or other dried seasonings. The more expensive ones have more honest flavors but still did not compare to the cocktail sauce I whipped up in 3 minutes using basic store-bought ketchup. In addition, chili sauce can be four to eight times as expensive as ketchup.
My preference in cocktail sauce has always been to emphasize the horseradish. But ketchup and horseradish, I knew, were not enough. Cocktail sauce benefits from a variety of heat sources, none of which overpower the other, and the sum of which still allows the flavor of the shrimp to come through. I liked the addition of chili powder. I also liked a bit of bite from cayenne, but only a pinch. Black pepper plays a favorable role as well (as does salt, even though ketchup is already salty). Finally, after trying high-quality wine vinegar, balsamic vinegar, rice vinegar, sherry vinegar, and distilled vinegar, I went back to lemon, which is the gentlest and most fragrant acidic seasoning. In sum, the keys to good cocktail sauce include: ordinary ketchup, fresh lemon juice, horseradish (fresh is best—even month-old bottled horseradish is pathetic compared to a just-opened bottle), and fresh chili powder. Proportions can be varied to taste.

Herb-Poached Shrimp with Cocktail Sauce
SERVES 4
When using larger or smaller shrimp, increase or decrease cooking times for shrimp by 1 to 2 minutes, respectively.
Shrimp
1 pound jumbo shrimp (16 to 20 per pound), peeled and deveined, shells reserved
1 teaspoon salt
1 cup dry white wine
5 sprigs fresh parsley
1 sprig fresh tarragon
1 teaspoon lemon juice
5 coriander seeds
4 whole peppercorns
½ bay leaf
Cocktail Sauce
1 cup ketchup
1 tablespoon lemon juice
2½ teaspoons prepared horseradish
1 teaspoon ancho chili powder (or other mild chili powder)
¼ teaspoon salt
¼ teaspoon pepper
Pinch cayenne pepper
1. For the shrimp: Bring reserved shells, 3 cups water, and salt to boil in medium saucepan over medium-high heat; reduce heat to low, cover, and simmer until fragrant, about 5 minutes. Strain stock through sieve, pressing on shells to extract all liquid.
2. Bring stock, wine, parsley, tarragon, lemon juice, coriander seeds, peppercorns, and bay leaf to boil in large saucepan over high heat; boil 2 minutes. Turn off heat and stir in shrimp; cover and let stand until firm and pink, 8 to 10 minutes. Drain shrimp, reserving stock for another use. Plunge shrimp into ice water to stop cooking, then drain again. Transfer to bowl, cover with plastic wrap, and refrigerate until chilled, about 1 hour.
3. For the cocktail sauce: Stir all ingredients together in small bowl. Season with additional salt and pepper to taste. Serve with shrimp.
SHRIMP BASICS
BUYING SHRIMP Virtually all of the shrimp sold in supermarkets today have been previously frozen, either in large blocks of ice or by a method called “individually quick- frozen,” or IQF for short. Supermarkets simply defrost the shrimp before displaying them on ice at the fish counter. We highly recommend purchasing bags of still-frozen shrimp and defrosting them as needed at home, since there is no telling how long “fresh” shrimp may have been kept on ice at the market. IQF shrimp have a better flavor and texture than shrimp frozen in blocks, and they are convenient because it’s easy to defrost just the amount you need. Also, shrimp should be the only ingredient listed on the bag; some packagers add preservatives, but we find treated shrimp to have an unpleasant, rubbery texture.
SORTING OUT SHRIMP SIZES Shrimp are sold both by size (small, medium, etc.) and by the number needed to make 1 pound, usually given in a range. Choosing shrimp by the numerical rating is more accurate, because the size label varies from store to store. Here’s how the two sizing systems generally compare:
|
SMALL |
51 to 60 per pound |
|
MEDIUM |
41 to 50 per pound |
|
MEDIUM-LARGE |
31 to 40 per pound |
|
LARGE |
26 to 30 per pound |
|
EXTRA-LARGE |
21 to 25 per pound |
|
JUMBO |
16 to 20 per pound |
DEFROSTING SHRIMP You can thaw frozen shrimp overnight in the refrigerator in a covered bowl. For a quicker thaw, place them in a colander under cold running water; they will be ready in a few minutes. Thoroughly dry the shrimp before cooking.
Shrimp scampi is rarely awful—it’s unusual for things to go terribly wrong when garlic, wine, and butter are involved—but restaurant versions always make me wish I’d ordered differently. I have never been presented with the ultimate scampi, the one that I can almost taste when I peruse the menu: perfectly cooked, briny beauties in a garlicky, buttery (but not greasy) white wine sauce.
When I last made my way through a mediocre rendition, I decided it was time to realize this ideal scampi vision at home. Since shrimp are susceptible to overcooking, which can make them dry and tough, I gave my shrimp (1½ pounds, enough to serve four) a short dunk in a saltwater solution to season them and help preserve moisture. I then heated extra-virgin olive oil in a skillet, sautéed a few cloves of minced garlic and a dash of red pepper flakes, and added the shrimp. Once the shrimp turned opaque, I splashed in some dry white wine and followed it with a chunk of butter, a big squeeze of lemon juice, and a sprinkle of parsley.
My guests and I didn’t go hungry that night, but the scampi was far from perfect. One problem was that the sauce separated into a butter-and-oil slick floating on top of the wine—not ideal in the looks department or for dunking bread into. (While some serve shrimp scampi over a pile of spaghetti, I think it’s best with a crusty loaf.) Then there were the shrimp: Some were a little overdone, while others were still translucent. Finally, the overall dish was shy on both seafood and garlic flavors. For results that I’d be truly satisfied with, some adjustments were in order.
SHRIMP TALES
Back in the test kitchen, I thought about ways to improve the shrimp. Flavorful crustaceans are often thought of as sweet, so would adding sugar to the brine be beneficial? Sure enough, my colleagues agreed that when used judiciously (2 tablespoons of sugar along with 3 tablespoons of salt in 1 quart of water), the sugar subtly boosted the natural flavor of the shrimp. I also found that using untreated shrimp, with no added salt or preservatives, produced the best results.
Another detail to consider was the cooking method. The inconsistent doneness of my first batch had come from crowding the skillet, so I needed to sauté the shrimp in batches. Or did I? What if, instead of sautéing the shrimp and then adding the wine, I gently poached the shrimp in the wine? As it turned out, this approach cooked all of the shrimp just right and in unison, as long as the skillet was covered with a lid to trap steam.
Now that I had flavorful, properly cooked shrimp, it was time to tackle the sauce. I had three items on my to-do list. First: Seriously bump up the flavor. (I’d found that the 5 minutes or so that it took to cook the shrimp wasn’t long enough to impart much of a seafood taste to the dish.) Second: Add extra garlic for a more robust punch. Third: Fix the separated consistency.
WASTE NOT, WANT NOT
A few ladles of stock made from trimmings, bones, or other ingredient scraps can be a great way to infuse flavor into a sauce. Here I could make a stock from the shrimp shells, so I started buying shell-on shrimp instead of the prepeeled type (to save time, I started using the jumbo size so I’d have fewer to peel). To coax out every bit of savoriness, I first browned the shells in a little olive oil and then simmered them in the wine for 30 minutes with a few sprigs of thyme for a little more complexity. But the stock didn’t taste all that shrimpy. My incorrect assumption was that simmering the shells for a longer period of time would extract more flavor from them. A timing test conducted by a fellow test cook debunked that myth, finding that you get more flavor out of shrimp shells if you simmer them for only 5 minutes. This was an easy change I was happy to make.
Next, I doubled the amount of garlic. It worked to boost the garlic flavor but not without a cost: All of those minced pieces gave the sauce a gritty quality. To prevent this, I switched from mincing the cloves to slicing them into thin rounds. But since sliced garlic is milder in flavor than minced (garlic’s bite is created in the act of damaging its cells; the finer it’s cut, the stronger its flavor will be) the switch required that I double the number of cloves, to eight.
Poaching—rather than sautéing—the shrimp in wine enhanced with browned shrimp shells takes this dish from good to great.
All that remained was to bind the fats and wine together into a cohesive sauce. In other words, I needed a stabilizer. I considered my choices: Flour, gelatin, and even pectin would work, but cornstarch seemed like the best option since it would require virtually no cooking to get the job done. I could hydrate the cornstarch in some of the wine, but I decided that it would be more convenient to use the lemon juice I was adding to the sauce for brightness. A mere teaspoon of cornstarch worked like a charm. I stirred the mixture into the sauce before adding the butter, which easily whisked into the rest of the sauce and stayed there, giving it a creamy, silky texture. In fact, it was so rich and creamy that I was able to scale back the amount of butter to 4 tablespoons without anyone finding it too lean. And there it was: the scampi I’d been looking for all along.

Shrimp Scampi
SERVES 4
Extra-large shrimp (21 to 25 per pound) can be substituted for jumbo shrimp. If you use them, reduce the cooking time in step 3 by 1 to 2 minutes. We prefer untreated shrimp, but if your shrimp are treated with sodium or preservatives like sodium tripolyphosphate, skip the brining in step 1 and add ¼ teaspoon of salt to the sauce in step 4. Serve with crusty bread.
3 tablespoons salt
2 tablespoons sugar
1½ pounds jumbo shrimp (16 to 20 per pound), peeled, deveined, and tails removed, shells reserved
2 tablespoons extra-virgin olive oil
1 cup dry white wine
4 sprigs fresh thyme
3 tablespoons lemon juice, plus lemon wedges for serving
1 teaspoon cornstarch
8 garlic cloves, sliced thin
½ teaspoon red pepper flakes
¼ teaspoon pepper
4 tablespoons unsalted butter, cut into ½-inch pieces
1 tablespoon chopped fresh parsley
1. Dissolve salt and sugar in 1 quart cold water in large container. Submerge shrimp in brine, cover, and refrigerate for 15 minutes. Remove shrimp from brine and pat dry with paper towels.
2. Heat 1 tablespoon oil in 12-inch skillet over high heat until shimmering. Add shrimp shells and cook, stirring frequently, until they begin to turn spotty brown and skillet starts to brown, 2 to 4 minutes. Remove skillet from heat and carefully add wine and thyme sprigs. When bubbling subsides, return skillet to medium heat and simmer gently, stirring occasionally, for 5 minutes. Strain mixture through colander set over large bowl. Discard shells and reserve liquid (you should have about ⅔ cup). Wipe out skillet with paper towels.
3. Combine lemon juice and cornstarch in small bowl. Heat remaining 1 tablespoon oil, garlic, pepper flakes, and pepper in now-empty skillet over medium-low heat, stirring occasionally, until garlic is fragrant and just beginning to brown at edges, 3 to 5 minutes. Add reserved wine mixture, increase heat to high, and bring to simmer. Reduce heat to medium, add shrimp, cover, and cook, stirring occasionally, until shrimp are just opaque, 5 to 7 minutes. Remove skillet from heat and, using slotted spoon, transfer shrimp to bowl.
4. Return skillet to medium heat, add lemon juice–cornstarch mixture, and cook until slightly thickened, 1 minute. Remove from heat and whisk in butter and parsley until combined. Return shrimp and any accumulated juices to skillet and toss to combine. Serve, passing lemon wedges separately.
WHEN LESS TIME MEANS MORE FLAVOR
It’s easy to view shrimp shells simply as an impediment to the sweet, briny flesh within, but the shells actually contain lots of flavorful compounds that can be extracted into a stock. We’ve always assumed that, as with beef bones, the longer shrimp stock simmered, the more intense its flavor would be. But was that really true? To find out, we designed a test to determine the optimal simmering time.
EXPERIMENT We simmered batches of shrimp shells in water, covered, for 5, 10, 15, and 30 minutes and then strained out the shells. We asked tasters to evaluate the flavor of each sample.
RESULTS Tasters almost unanimously chose the 5- and 10-minute simmered samples as “more potent,” “shrimpier,” and “more aromatic” than the 15- and 30-minute simmered samples.
EXPLANATION While some of the savory compounds found in shrimp shells are stable (i.e., they stay in the stock, rather than release into the atmosphere), the compounds that we associate with shrimp flavor are highly volatile. The longer a stock is simmered, the more of these molecules will release into the air, and the blander the stock will be.
TAKEAWAY For the most flavorful shrimp stock, simmer shells for just 5 minutes.
ALL ABOUT GARLIC
Garlic is an essential flavor component of our Shrimp Scampi. Here’s everything you need to know about it.
BUYING GARLIC Pick heads without spots, mold, or sprouting. Squeeze them to make sure they are not rubbery or missing cloves. The garlic shouldn’t have much of a scent. Of the various garlic varieties, your best bet is soft-neck garlic, since it stores well and is heat-tolerant. This variety features a circle of large cloves surrounding a small cluster at the center. Hard-neck garlic has a stiff center staff surrounded by large, uniform cloves and boasts a more intense flavor. But since it’s easily damaged and doesn’t store as well as soft-neck garlic, wait to buy it at the farmers’ market.
STORING GARLIC Whole heads of garlic should last at least a few weeks if stored in a cool, dark place with plenty of air circulation to prevent spoiling and sprouting.
PREPARING GARLIC Keep in mind that garlic’s pungency emerges only after its cell walls are ruptured, triggering the creation of a compound called allicin. The more a clove is broken down, the more allicin that is produced. In our Shrimp Scampi, we love a big hit of garlic flavor, but mincing the cloves gave the sauce a gritty texture. Switching to sliced garlic eliminated grittiness but also gave the sauce less garlic flavor, since the cloves were less broken down. Upping the number of cloves to eight gave us the best of both worlds. Also, it’s best not to cut garlic in advance; the longer cut garlic sits, the harsher its flavor.
When I set out to find the best way to make roasted shrimp, I thought I’d hit the jackpot. Quick-cooking shrimp make an easy weeknight dinner, and the idea of roasting them until they develop deep, flavorful browning seemed so natural that I figured there were plenty of good recipes out there to learn from.
Imagine my surprise, then, when the handful I tried produced pale, insipid shrimp that looked as though they’d been baked, not roasted. Some of the missteps seemed obvious, such as crowding lots of small shrimp (tossed with oil and aromatics) on a sheet pan or in a baking dish, where their exuded moisture caused them to steam and prevented browning. Some of the oven temperatures were also strangely low—around 300 degrees. I was sure I could do better, while keeping the technique simple enough for an easy weeknight meal.
THE HEAT IS ON
My challenge was clear from the start: The goals of roasting—a juicy interior and a thoroughly browned exterior—were impeded by the fact that lean shrimp cook through very quickly. Knowing that, I made two immediate decisions: First, I would crank the oven temperature very high to get good browning on the exterior of the shrimp—500 degrees seemed like a fine place to start. Second, I would use the biggest shrimp I could get. That meant skipping right past even the extra-large size and reaching for the jumbo (16 to 20 per pound) shrimp, which would be the least likely to dry out in the heat. Using larger shrimp would also mean that there would be fewer pieces crowding the pan, and their smaller total amount of surface area would mean that less steam would be created—therefore making browning possible. As a test run, I oiled and seasoned 2 pounds of peeled shrimp with nothing more than a little salt and pepper (I’d explore flavorings once I’d nailed down a cooking method) and slid them into the oven on a sheet pan.
I thought the 500-degree blast would get the shrimp good and brown in a hurry, so I hovered around the oven and checked on their color every couple of minutes. Trouble was, the color never came—and while I waited and waited for the browning to kick in, the shrimp turned from tender and slightly translucent to fully opaque. I knew before I plunged a fork into them that they were overcooked. Clearly, high heat alone wasn’t going to cut it, so I started experimenting. “Searing” them by preheating the baking sheet in the 500-degree oven helped, but only a little, since the pan’s temperature plummeted as soon as the shrimp hit. Blasting the next batch under the broiler finally delivered some decent browning to the topsides of the shrimp, but their undersides were still damp and utterly pale.
Butterflying shell-on shrimp allows the heady flavors of garlic and spices to thoroughly coat the flesh.
Part of the problem was air circulation. When we roast beef or pork, we often elevate them on a rack so that hot air can surround them, drying out and browning even the underside of the meat. With that in mind, I tried broiling my next batch of shrimp on a wire rack set in the baking sheet—and finally started to see some real progress.
But the approach wasn’t perfect. The heat of my broiler, as with all broilers, was uneven, which meant that I had to rotate the baking sheet halfway through cooking to prevent the shrimp from scorching under the element’s hot spots, and even then I got a few desiccated pieces. In addition to using jumbo shrimp, the situation demanded a foolproof buffer against the heat, and the obvious answer was to brine the shrimp. The extra moisture that gets pulled into the lean flesh with the salt helps it stay moist even in a hot oven. Thanks to the shrimp’s relatively small size, just a 15-minute soak in brine ensured that inside they stayed nice and plump—not to mention well seasoned throughout. Outside, however, they still shriveled under the broiler’s heat before they had a chance to develop deep “roasted” color and flavor.
AN A-PEELING SOLUTION
I hoped that a thorough coat of olive oil (I’d been lightly glossing my shrimp) might stave off evaporation, but while the extra fat did keep the shrimp a bit more moist, it did nothing to even out browning. The idea of giving the shrimp a protective layer inspired another idea, though: What if I took advantage of the shrimp’s natural protective coating and roasted them in their shells? Surely their “jackets” would prevent the surface of the meat from shriveling and, being drier than the meat, would probably brown quickly, too. The downside would be that shell-on shrimp are messier to eat, but if the results were good, having to peel them at the table would be worth it.
To make deveining and (later) peeling the shrimp easier, I used a pair of kitchen shears to split their shells from end to end without removing them from the flesh, and then I proceeded with my brine-and-broil technique. The results were stunning: shrimp that were moist and plump inside and evenly browned outside. In fact, the depth of the shrimp’s “roasted” flavor exceeded my expectations and prompted me to mention the results to our science editor, who replied with some surprising intel. Turns out that the shells were doing much more than protecting the crustaceans’ flesh: They are loaded with sugars, proteins, and other flavor-boosting compounds that amplify the rich seafood flavor.
Juicy, deeply browned shrimp complete, I moved on to tackle flavorings. I was already splitting the shells across the back and deveining the shrimp, so I took the technique one step further and butterflied the exposed flesh, cutting through the meat just short of severing it into two pieces. Then, to jazz up the oil-salt-pepper base, I added spices (anise seeds and red pepper flakes), six cloves of garlic, parsley, and melted butter (a natural pairing with briny seafood) and worked the flavorful mixture deep into the meat before broiling. Just as brining had seasoned the shrimp throughout, butterflying the pieces and thoroughly coating them with the oil-spice mixture made for seriously bold flavor. And since my tasters instantly gobbled up the shrimp—some of them shell and all—I developed two equally quick, flavorful variations: a Peruvian-style version with cilantro and lime and an Asian-inspired one with cumin, ginger, and sesame.
A great-tasting dish that requires almost no prep work and goes from the oven to the table in fewer than 10 minutes? I knew I’d be making this one year-round.
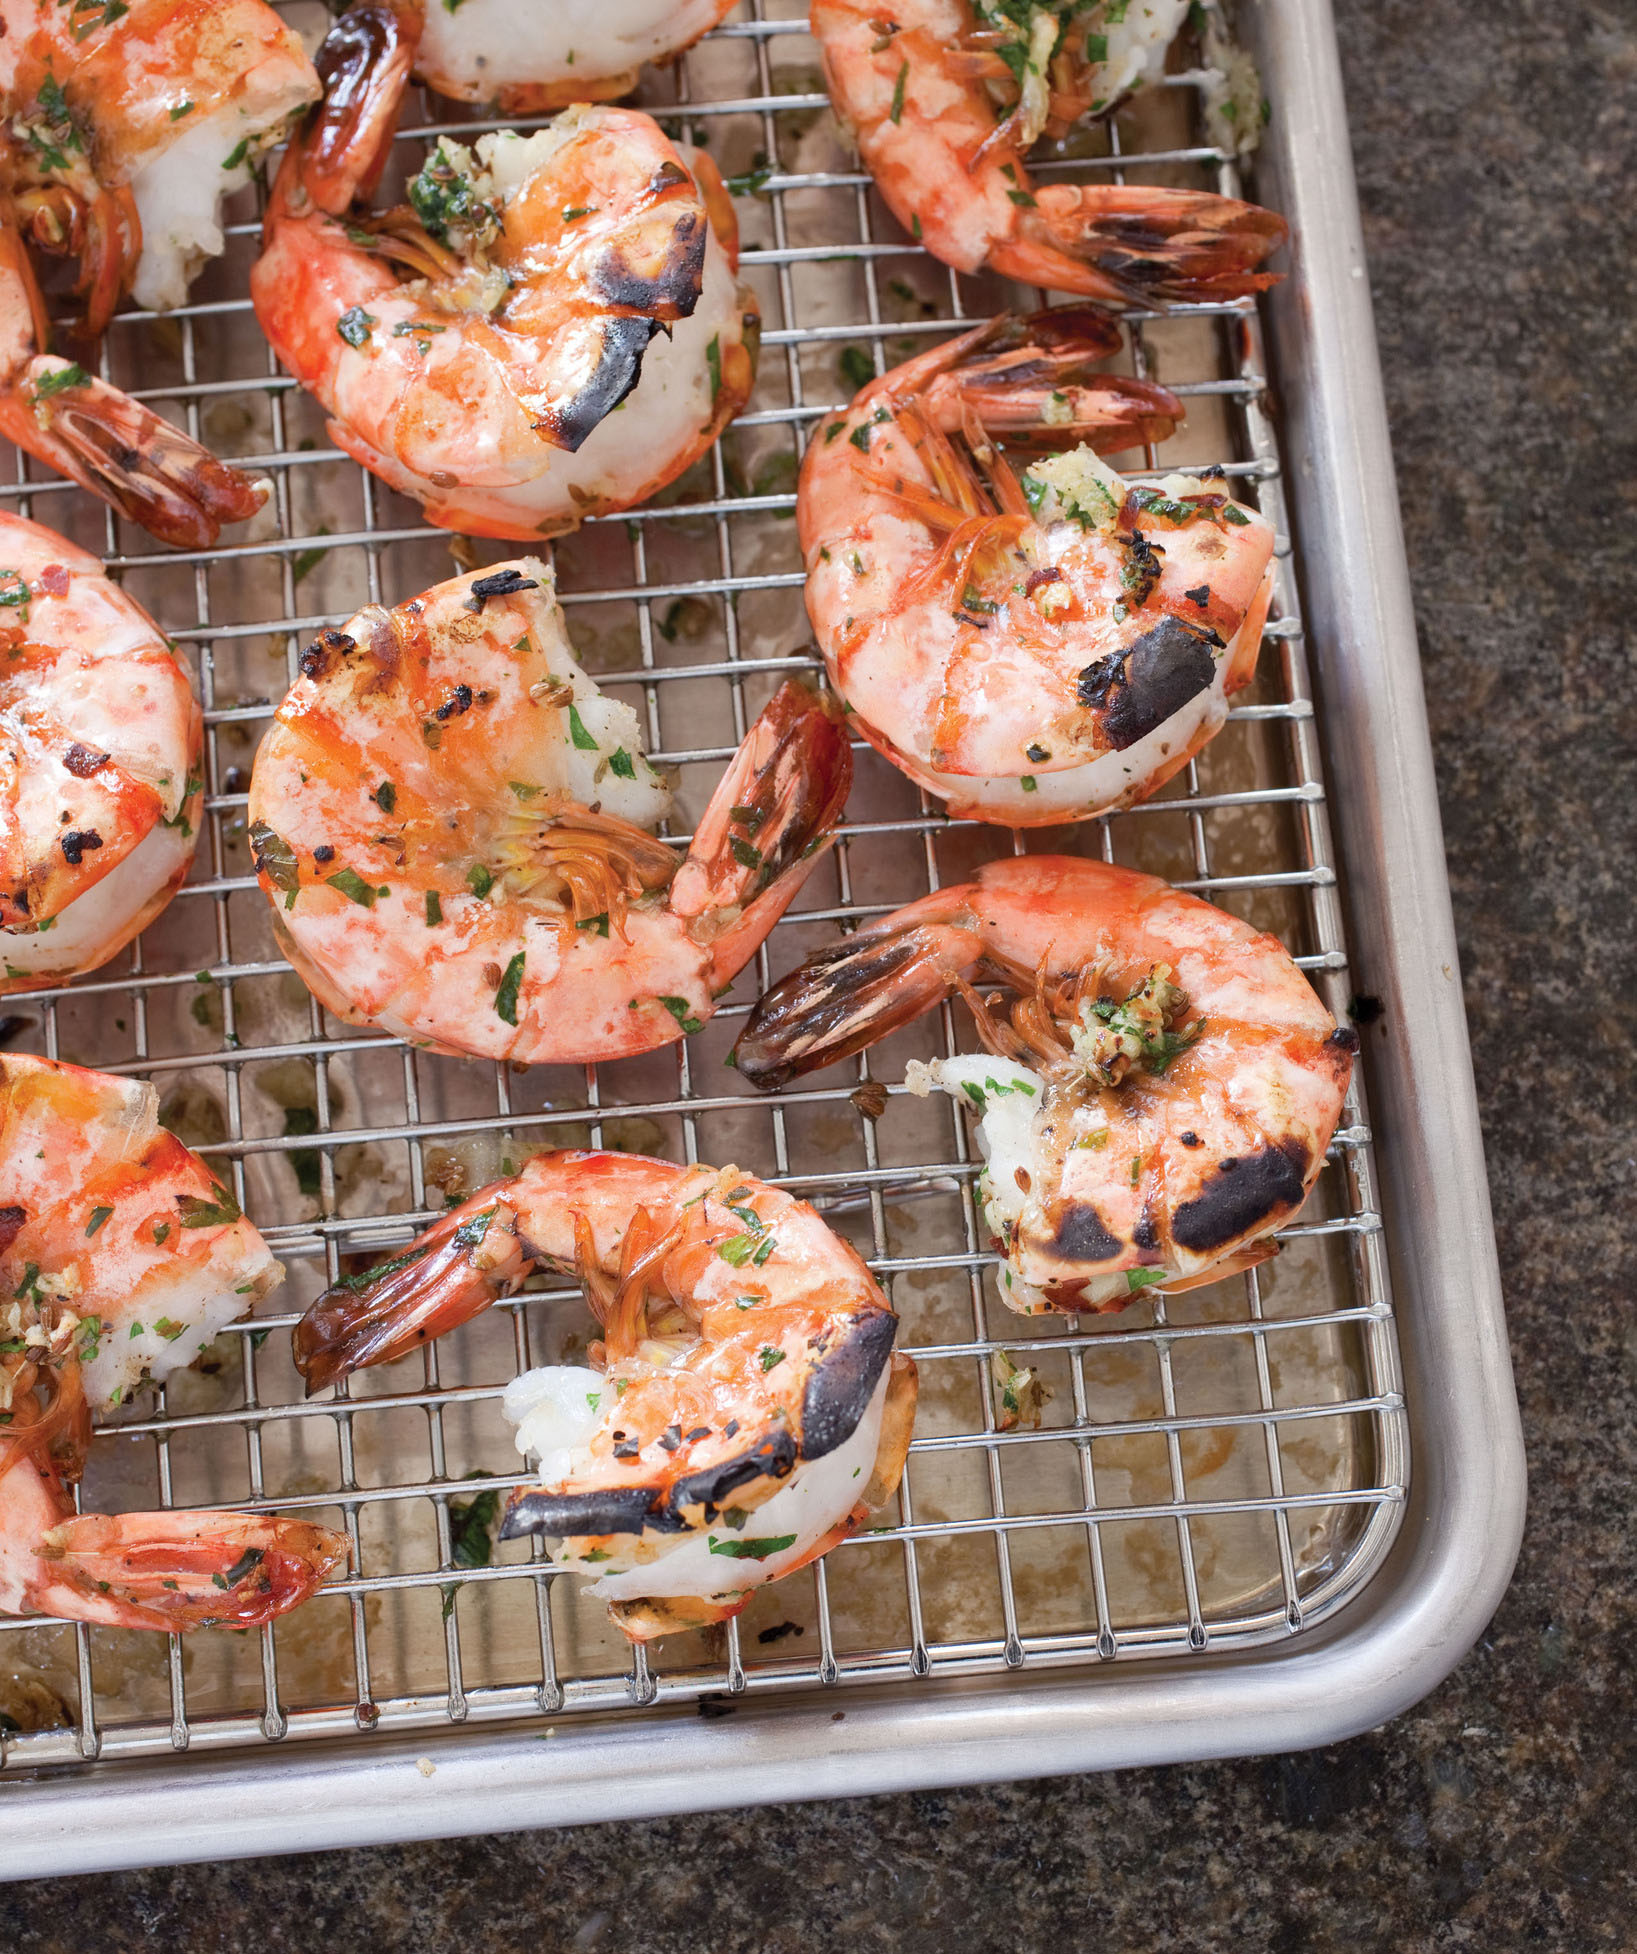
Garlicky Roasted Shrimp with Parsley and Anise
SERVES 4 TO 6
Don’t be tempted to use smaller shrimp with this cooking technique; they will be overseasoned and are prone to overcooking.
¼ cup salt
2 pounds shell-on jumbo shrimp (16 to 20 per pound)
4 tablespoons unsalted butter, melted
¼ cup vegetable oil
6 garlic cloves, minced
1 teaspoon anise seeds
½ teaspoon red pepper flakes
¼ teaspoon pepper
2 tablespoons minced fresh parsley
Lemon wedges
1. Dissolve salt in 1 quart cold water in large container. Using kitchen shears or sharp paring knife, cut through shells of shrimp and devein but do not remove shells. Using paring knife, continue to cut shrimp ½ inch deep, taking care not to cut in half completely. Submerge shrimp in brine, cover, and refrigerate for 15 minutes.
2. Adjust oven rack 4 inches from broiler element and heat broiler. Combine melted butter, oil, garlic, anise seeds, pepper flakes, and pepper in large bowl. Remove shrimp from brine and pat dry with paper towels. Add shrimp and parsley to butter mixture; toss well, making sure butter mixture gets into interiors of shrimp. Arrange shrimp in single layer on wire rack set in rimmed baking sheet.
3. Broil shrimp until opaque and shells are beginning to brown, 2 to 4 minutes, rotating sheet halfway through broiling. Flip shrimp and continue to broil until second side is opaque and shells are beginning to brown, 2 to 4 minutes longer, rotating sheet halfway through broiling. Transfer shrimp to serving platter and serve immediately, passing lemon wedges separately.
variations
Garlicky Roasted Shrimp with Cilantro and Lime
Annatto powder, also called achiote, can be found with the Latin American foods at your supermarket. An equal amount of paprika can be substituted.
Omit butter and increase vegetable oil to ½ cup. Omit anise seeds and pepper. Add 2 teaspoons lightly crushed coriander seeds, 2 teaspoons grated lime zest, and 1 teaspoon annatto powder to oil mixture in step 2. Substitute ¼ cup minced fresh cilantro for parsley and lime wedges for lemon wedges.
Garlicky Roasted Shrimp with Cumin, Ginger, and Sesame
Omit butter and increase vegetable oil to ½ cup. Decrease garlic to 2 cloves and omit anise seeds and pepper. Add 2 teaspoons toasted sesame oil, 1½ teaspoons grated fresh ginger, and 1 teaspoon cumin seeds to oil mixture in step 2. Substitute 2 thinly sliced scallion greens for parsley and omit lemon wedges.

1. Starting at head of shrimp, snip through back of shell with kitchen shears. (This can also be done with very sharp paring knife: Cut from tail end of shell toward head.) Devein shrimp but do not remove shell.
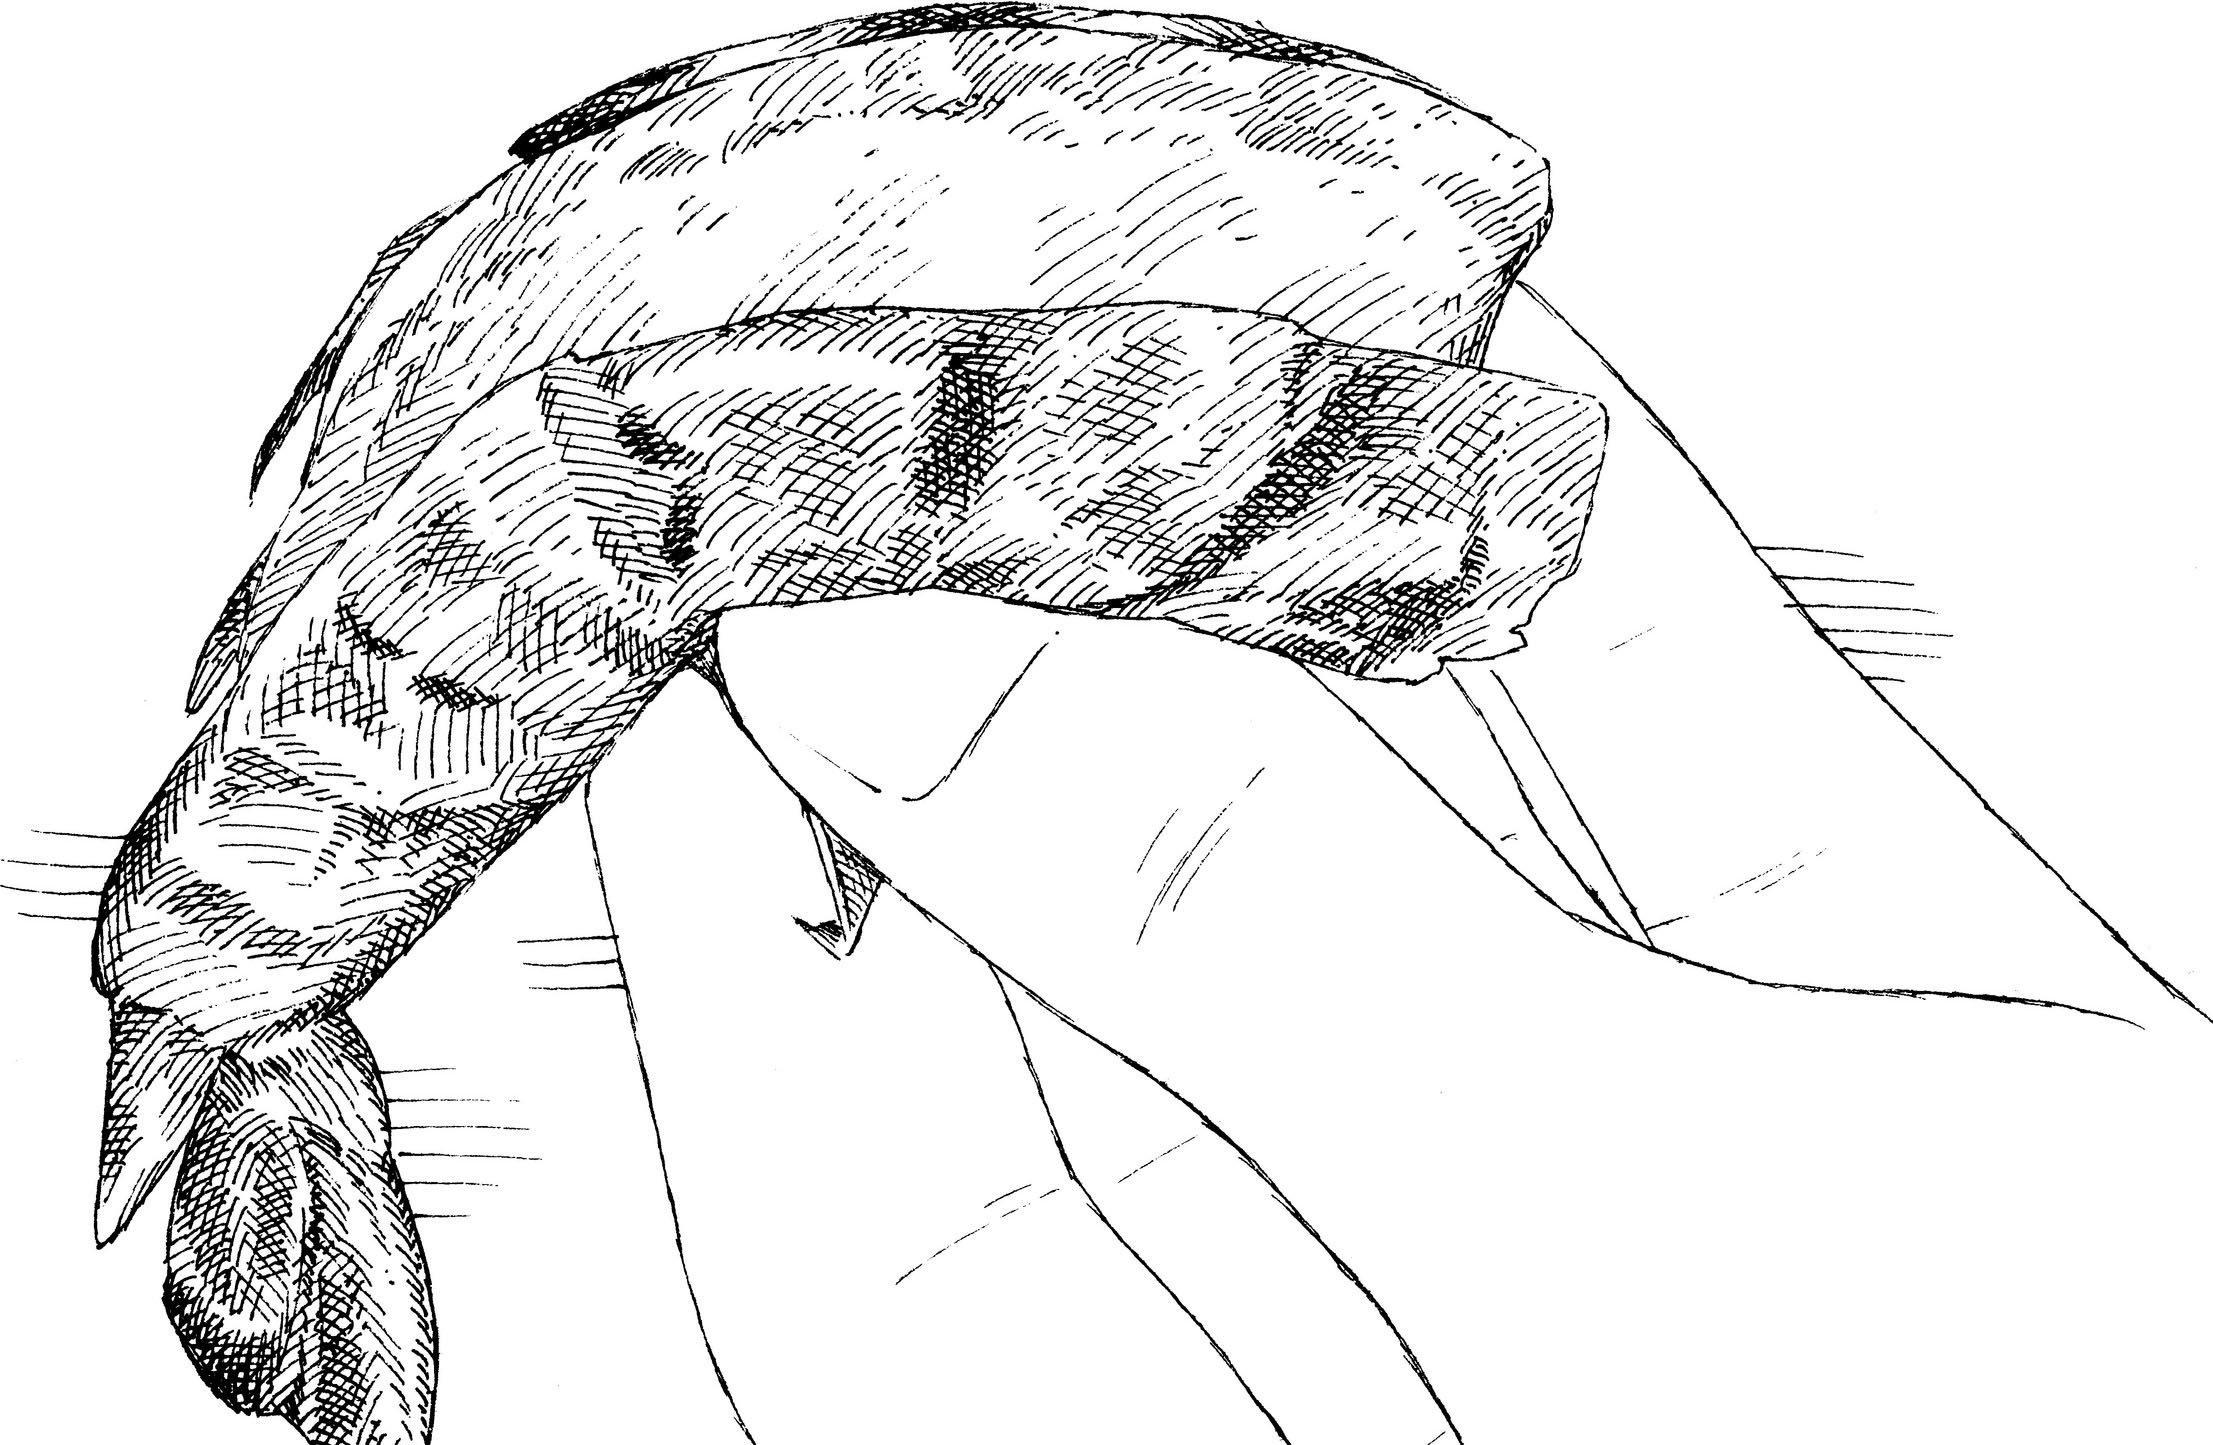
2. Using paring knife, carefully continue to cut ½-inch slit in shrimp, making sure not to split it in half completely.
THE SURPRISING POWER OF SHRIMP SHELLS
We found that cooking shrimp in their shells kept them juicier, but our shell-on roasted shrimp boast such savory depth that we wondered if there wasn’t more to this outer layer than we thought. Our science editor confirmed our suspicions. First, shrimp shells contain water-soluble flavor compounds that will get absorbed by the shrimp flesh during cooking. Second, the shells are loaded with proteins and sugars—almost as much as the flesh itself. When they brown, they undergo the flavor-enhancing Maillard reaction just as roasted meats do, which gives the shells even more flavor to pass along to the flesh. Third, like the flesh, the shells contain healthy amounts of glutamates and nucleotides, compounds that dramatically enhance savory umami flavor when present together in food. These compounds also get transferred to the meat during cooking, amplifying the effect of its own glutamates and nucleotides.
AN EASIER WAY TO GRILL SHRIMP
REBECCA HAYS, July/August 2006
Shrimp can turn from moist and juicy to rubbery and dry in the blink of an eye, a consequence of their small size and lack of fat. Add the unpredictability of cooking over a live fire, and the challenge is magnified. Grilling shrimp in their shells to shield them from the coals’ scorching heat works well, but I’m always disappointed when the seasonings get stripped off at the table along with the shells. I wanted tender, juicy, boldly seasoned grilled shrimp without having to lick my fingers.
I started by preparing the test kitchen’s existing recipe for grilled shrimp, substituting peeled shrimp for shell-on. (I’d investigate flavorings later.) I followed every mandate, plumping the shrimp in a saltwater brine (which helps keep them moist), threading them onto skewers, brushing with oil, then quickly grilling over moderate heat. After a few minutes over the fire, the shrimp were tough and dehydrated—no surprise given their shell-free state. Also problematic was the absence of attractive (and flavorful) char marks.
Suspecting that brining was causing the shrimp to become waterlogged and, thus, hindering caramelization, I grilled a batch of unbrined samples. Sure enough, these shrimp began to pick up the flavor of the grill with a few faint, yet promising, marks.
Having discarded brining, I next built an especially hot fire by banking all the coals on one side of the grill. I seasoned a batch of shrimp with salt and pepper (plus a pinch of sugar to encourage caramelization), set them on the grate, and waited. And waited. Even with a screaming-hot fire, the only way to get sufficient charring was to leave the shrimp on the grill for 4 or 5 minutes, yet each passing minute brought me closer to shrimp jerky and farther from a decent dinner.
Shrimp cook so quickly because of their small size. Jumbo shrimp would afford me a few extra minutes, but with a cost of more than $25 per pound and spotty availability, there had to be a better way.
What if I crammed several normal-sized shrimp very tightly together on a skewer, creating a faux “jumbo” shrimp? Sure enough, this homemade giant shrimp cooked at a slightly slower pace, giving me the extra minutes of grilling time the shrimp needed for charring.
TRIAL BY FIRE
With a decent grilling method at hand, I could finally start investigating flavorings. I tried to add personality with ground spices, but this was a mistake. A flare-up torched the spice paste, turning it bitter. Minced garlic? Scorched. Fresh herbs? Scorched again.
As soon as each shrimp develops an attractive char, it goes into the pan of simmering sauce to finish cooking at a much gentler pace.
Scouring our library shelves, I reviewed every grilled seafood recipe I could find. I eventually happened upon a few recipes in which shellfish was given an initial sear over a hot fire and then transferred to a sauce waiting on the cooler side of the grill. Intrigued, I grilled a few shrimp and slid them into a sauce that simmered in a disposable aluminum pan. These shrimp were a tad overdone but soaked up plenty of the flavorful sauce.
I started transferring the shrimp to the sauce before they were fully cooked. This way, I could get char marks and then switch to a more forgiving cooking method (gentle simmering in the sauce) until the shrimp were done. I finally had an infallible recipe that delivered everything I wanted in grilled shrimp: tender flesh, attractive charring, tons of flavor—and no shells.

Grilled Shrimp Skewers with Chermoula Sauce
SERVES 4
The shrimp and sauce finish cooking together on the grill, so prepare the sauce ingredients while the grill is heating up. To fit all the shrimp on the cooking grate at once, you will need three 14-inch metal skewers. Serve with grilled bread.
Shrimp
1½ pounds extra-large shrimp (21 to 25 per pound), peeled and deveined
2 tablespoons olive oil
Salt and pepper
¼ teaspoon sugar
Sauce
1 small red bell pepper, stemmed, seeded, and chopped fine
⅓ cup finely chopped red onion
¼ cup extra-virgin olive oil
3 garlic cloves, minced
1 teaspoon paprika
½ teaspoon ground cumin
¼ teaspoon cayenne pepper
⅛ teaspoon salt
1 (13 by 9-inch) disposable aluminum roasting pan
⅓ cup minced fresh cilantro
2 tablespoons lemon juice, plus lemon wedges for serving
1. For the shrimp: Pat shrimp dry with paper towels. Thread shrimp onto three 14-inch metal skewers, alternating direction of heads and tails. Brush both sides of shrimp with oil; season with salt and pepper. Sprinkle 1 side of each skewer evenly with sugar.
2A. For a charcoal grill: Open bottom vent completely. Light large chimney starter filled with charcoal briquettes (6 quarts). When top coals are partially covered with ash, pour evenly over half of grill. Set cooking grate in place, cover, and open lid vent completely. Heat grill until hot, about 5 minutes.
2B. For a gas grill: Turn all burners to high, cover, and heat grill until hot, about 15 minutes. Leave primary burner on high and turn other burner(s) to medium-low.
3. Clean cooking grate, then repeatedly brush grate with well-oiled paper towels until grate is black and glossy, 5 to 10 times.
4. For the sauce: Combine bell pepper, onion, oil, garlic, paprika, cumin, cayenne, and salt in disposable pan. Place disposable pan on hotter side of grill and cook, stirring occasionally, until hot, 1 to 3 minutes. Move disposable pan to cooler side of grill.
5. Place shrimp, sugared side down, on hotter side of grill and use tongs to push shrimp together on skewers if they have separated. Cook shrimp until lightly charred, 4 to 5 minutes. Using tongs, flip shrimp and continue to cook until second side is pink and slightly translucent, 1 to 2 minutes longer.
6. Carefully lift each skewer from grill and use tongs to slide shrimp off skewers into disposable pan with sauce. Toss shrimp with sauce to combine. Cook, stirring, until shrimp are opaque throughout, about 30 seconds. Remove disposable pan from grill, add cilantro and lemon juice, and toss to combine. Transfer to platter and serve with lemon wedges.
variations
Grilled Shrimp Skewers with Spicy Lemon-Garlic Sauce
Omit sauce ingredients. Combine 4 tablespoons unsalted butter, cut into 4 pieces; ¼ cup lemon juice (2 lemons); 3 minced garlic cloves; ½ teaspoon red pepper flakes; and ⅛ teaspoon salt in 13 by 9-inch disposable aluminum pan. Just before cooking shrimp, place disposable pan on hotter side of grill and cook, stirring occasionally, until butter melts, about 1½ minutes. Move to cooler side of grill while cooking shrimp and substitute for sauce in step 6. Toss with ⅓ cup minced fresh parsley before serving.
Grilled Shrimp Skewers with Fresh Tomato Sauce with Feta and Olives
Omit sauce ingredients. Combine ¼ cup extra-virgin olive oil; 1 large tomato, cored, seeded, and minced; 1 tablespoon minced fresh oregano; and ⅛ teaspoon salt in 13 by 9-inch disposable aluminum pan. Just before cooking shrimp, place disposable pan on hotter side of grill and cook, stirring occasionally, until hot, about 1½ minutes. Move to cooler side of grill while cooking shrimp and substitute for sauce in step 6. Toss with 1 cup crumbled feta; ⅓ cup kalamata olives, chopped fine; 3 thinly sliced scallions; and 2 tablespoons lemon juice before serving.
Many supermarkets carry easy-peel shrimp. The shells have been split open along the back for easy removal and the shrimp have already been deveined. If you can’t find them, here is how to do the job yourself.
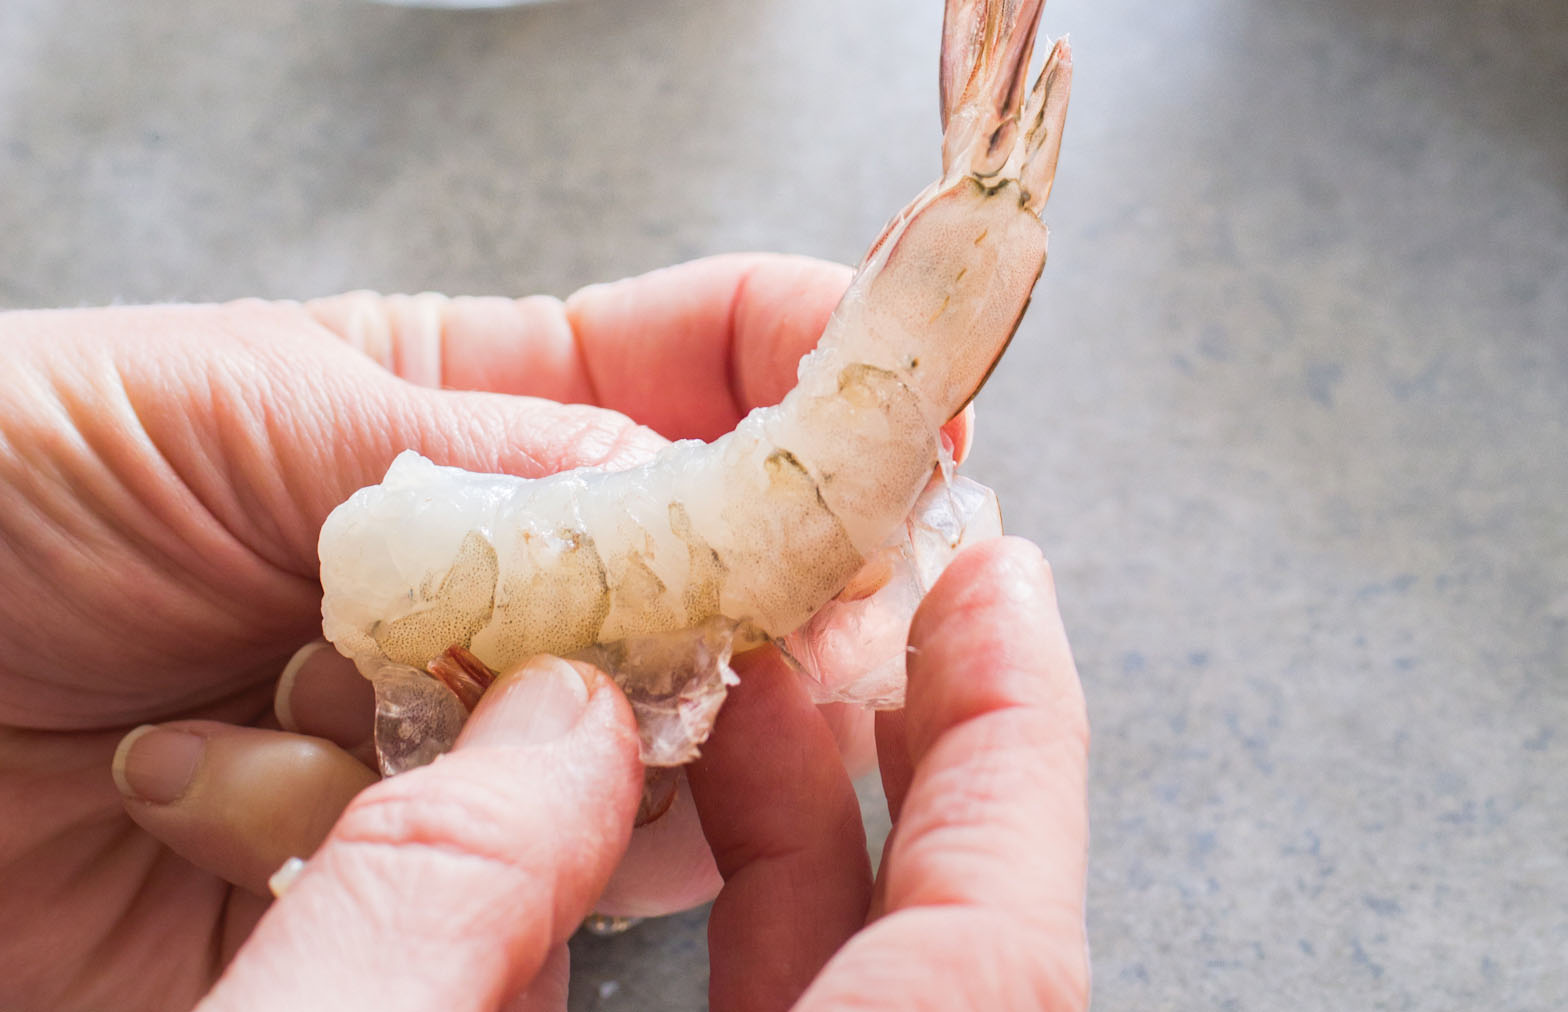
1. Break shell on underside of shrimp, under swimming legs. (The shell comes off the body of the shrimp very easily and the legs will come off as the shell is removed.)

2. Use paring knife to make shallow cut along back of shrimp to expose vein. (Although this vein doesn’t affect flavor, we remove it to improve the appearance of cooked shrimp.)

3. Use tip of knife to lift vein out. Discard vein by wiping knife blade against paper towel.
THE RIGHT SETUP
With grilled shrimp, timing can be tricky. We solved the problem by setting up two cooking zones. On the hotter side, we sear the shrimp over dry heat until almost done. On the cooler side, we keep a disposable pan of simmering sauce, where the shrimp finish cooking at a gentler pace. Crowding the shrimp on the skewers bought us a few extra minutes on the hotter side, giving the shrimp better charring.
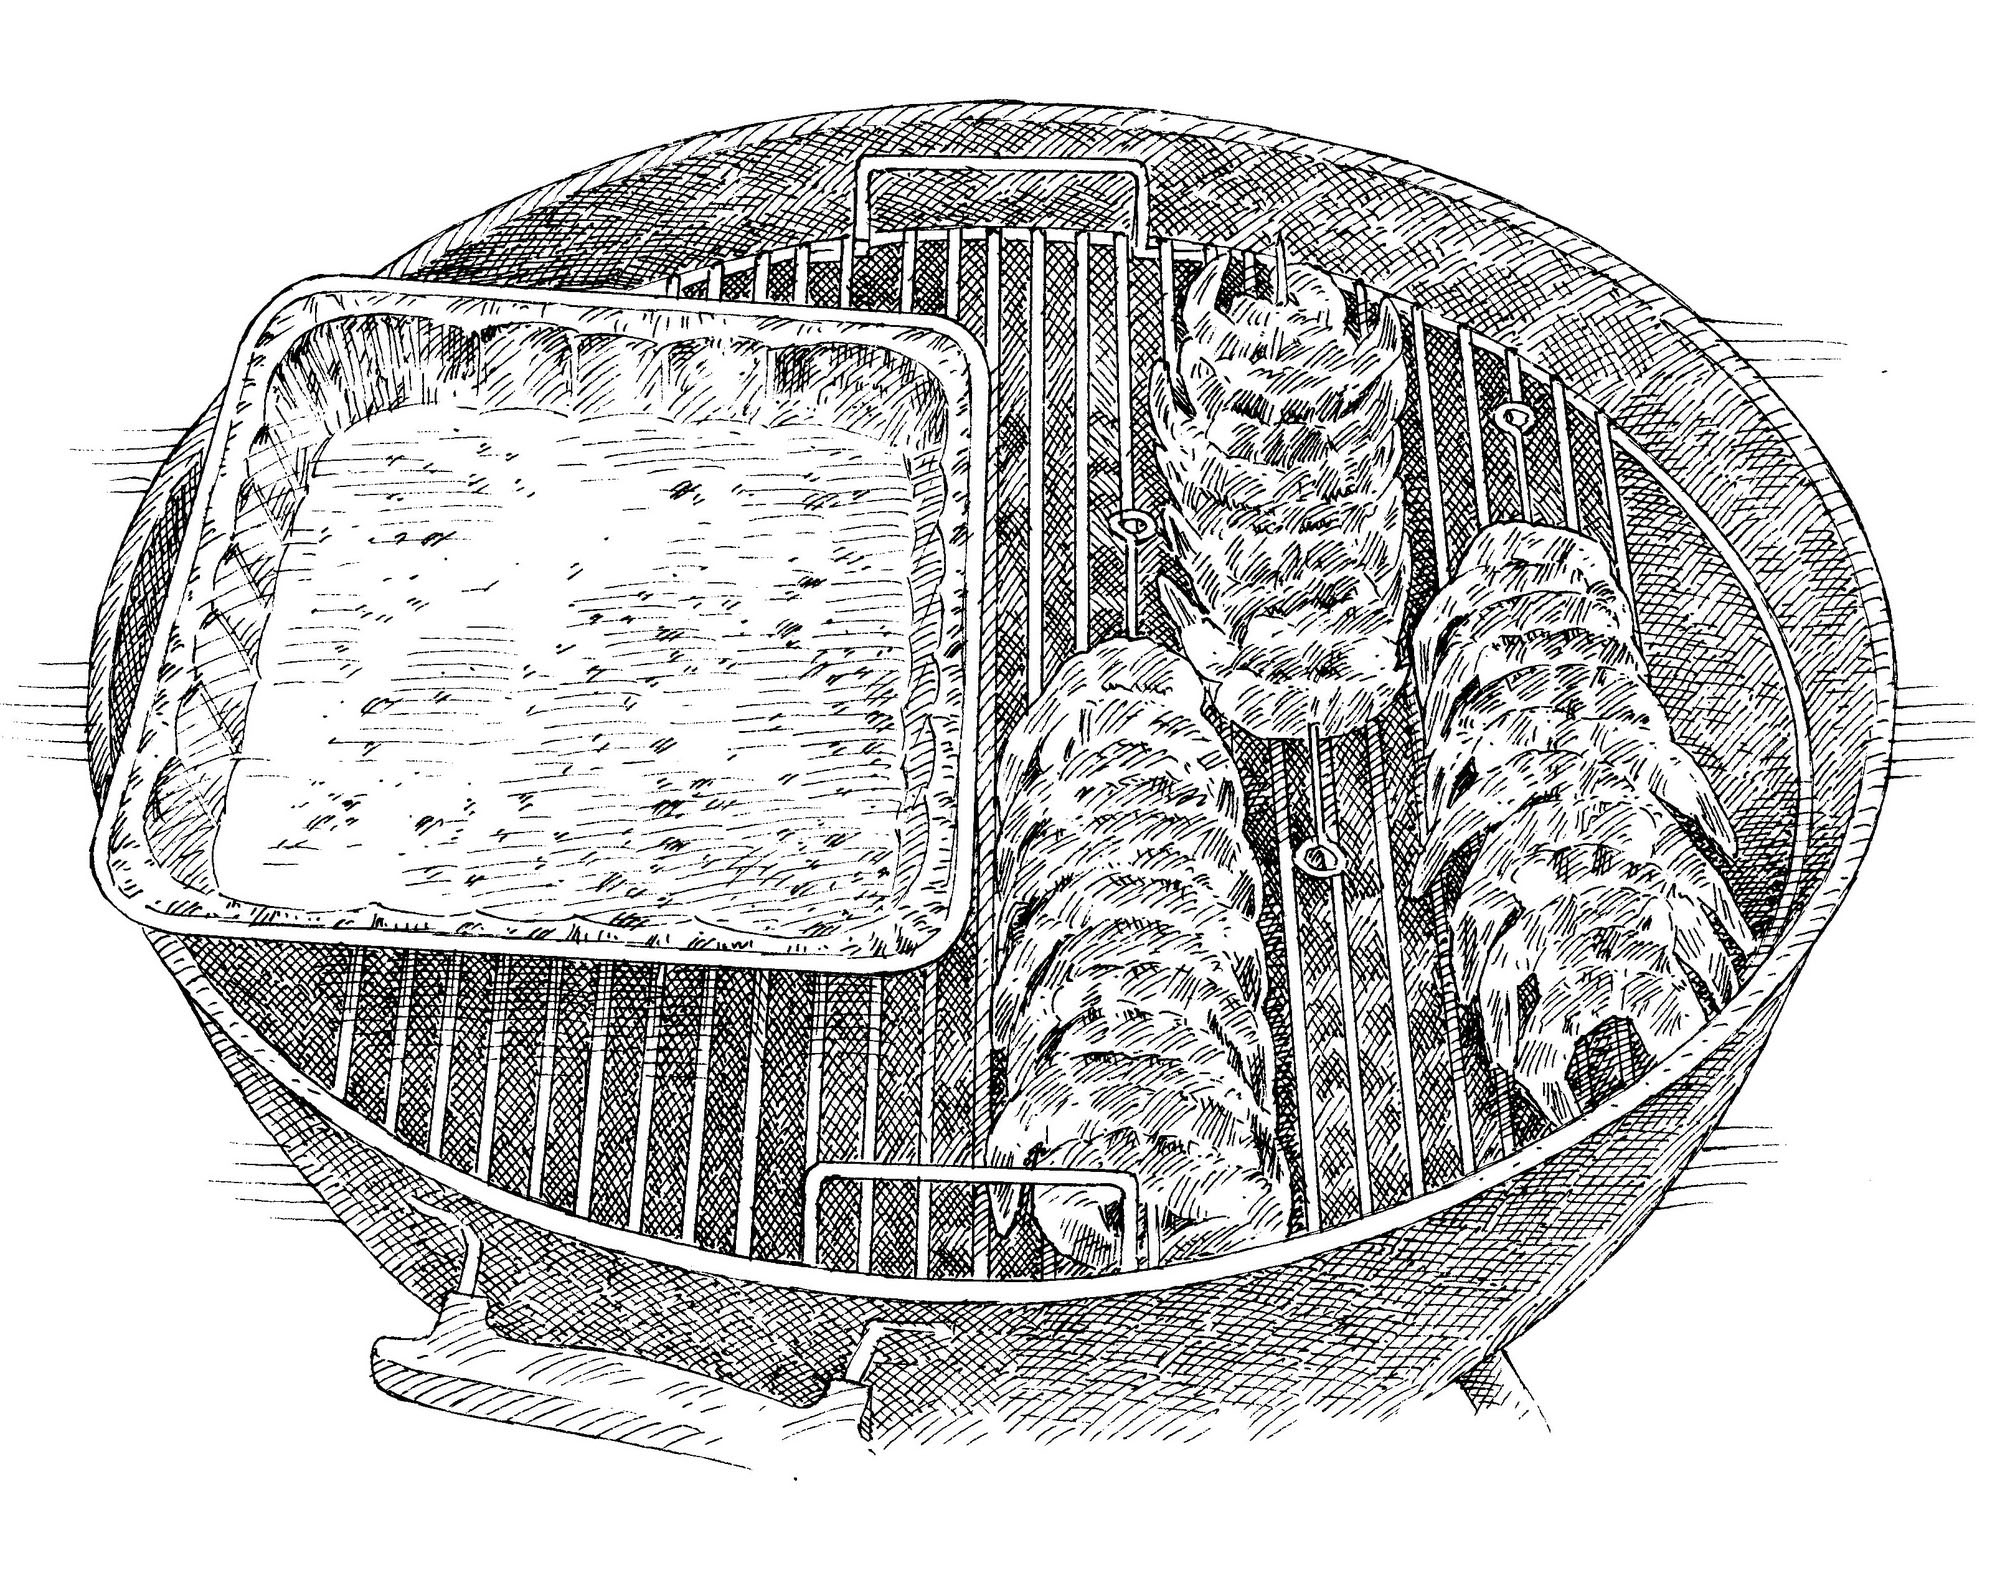
CROWDING SHRIMP ONTO A SKEWER

Pass the skewer through the center of each shrimp. As you add shrimp to the skewer, alternate the directions of the heads and tails for a compact arrangement of about 12 shrimp. The shrimp should be crowded and touching each other.
For a restaurant chef, pan-seared scallops are as easy as it gets: Slick a superhot pan with oil, add the shellfish, flip them once, and serve. The whole process takes no more than a couple of minutes and produces golden-crusted beauties with tender, medium-rare interiors. But try the same technique at home and you’re likely to run into trouble. The problem is that most home stovetops don’t get nearly as hot as professional ranges, so it’s difficult to properly brown the scallops without overcooking them. Moreover, restaurant chefs pay top dollar for scallops without chemical additives, which are known in the industry as “dry.” The remainder, called “wet” scallops—the type available in most supermarkets—are treated with a solution of water and sodium tripolyphosphate (STPP) to increase shelf life and retain moisture. Unfortunately, STPP lends a soapy, off-flavor to the scallops, and the extra water only compounds the problem of poor browning.
To achieve superior pan-seared scallops, I had to find a solution to the browning conundrum. I also had to get rid of the chemical taste of STPP.
WATERSHED MOMENTS
My first stop was the supermarket fish counter. Scallops are available in a range of sizes: A pound of the hard-to-find large sea variety contains eight to 10 scallops, while a pound of the petite bay variety may have as many as 100 pencil eraser–size scallops. Since small scallops are more prone to overcooking than large, I opted for the biggest commonly available size: 10 to 20 per pound. I decided to work with wet scallops first. After all, if I could develop a good recipe for finicky wet scallops, it would surely work with premium dry scallops.
I started by seasoning 1½ pounds (the right amount for four people) with salt and pepper. I heated 1 tablespoon of vegetable oil in a 12-inch stainless-steel skillet, then added the scallops in a single layer and waited for them to brown. After 3 minutes, they were steaming away in a ¼-inch-deep pool of liquid. At the 5-minute mark, the moisture in the skillet evaporated and the flesh began to turn golden. But at this point it was too late: The scallops were already overcooked and tough, and I hadn’t even flipped them.
To dry out the scallops, I tried pressing them between kitchen towels. When 10 minutes didn’t work, I tried a full hour—even leaving a third batch overnight in the refrigerator. The results were disheartening. While slightly drier than unblotted scallops, the pressed batches still exuded copious amounts of liquid in the skillet (and they still tasted soapy; I’d focus on that later). My conclusion: Beyond a 10-minute blot, there’s no point in trying to remove moisture from wet scallops before cooking.
For restaurant-quality scallops, we soak them in a lemon juice–enhanced brine and then baste them with butter after flipping.
It was becoming clear that to dry out the water-logged scallops for good browning, I’d have to get the pan as hot as possible. Without a high-output range, it was important to pay careful attention to technique. I started by waiting to add the scallops to the skillet until the oil was beginning to smoke, a clear indication of heat. I also cooked the scallops in two batches instead of one, since crowding would cool down the pan. Finally, switching to a nonstick skillet ensured that as the scallops cooked, the browned bits formed a crust on the meat instead of sticking to the skillet. These were steps in right direction, but the scallops were still overcooked and rubbery by the time they were fully browned.
BUTTER UP
Would switching from oil to butter help my cause? Butter contains milk proteins and sugars that brown rapidly when heated, so I hoped that it would help the scallops turn golden before they overcooked. But my hopes were dashed when in my next batch, the butter that I’d swapped for oil actually made matters worse: It burned before the scallops were cooked through.
Then I recalled a method I’d used when cooking steaks and chops in restaurants: butter-basting. I gave it a try with my scallops, searing them in oil on one side and adding a tablespoon of butter to the skillet after flipping them. I tilted the skillet to allow the butter to pool, then used a large spoon to ladle the foaming butter over the scallops. Waiting to add the butter ensured that it had just enough time to work its browning magic on the shellfish, but not enough time to burn. The scallops now achieved a deep golden brown crust in record time, and their moist interiors were preserved. They weren’t quite as tender and juicy as dry scallops, but they were darn close.
LEMON AID
Only one problem remained, and it was a big one: the soapy flavor of STPP. I already knew from earlier tests that blotting removes neither excess water nor STPP, but what about the opposite approach: soaking in water to wash out the STPP? It was a flop. No matter how long or carefully I rinsed the scallops, the STPP still remained.
I thought things over and decided that if I couldn’t remove the STPP, I would try to mask it. I thought maybe a saltwater brine was the answer because it would penetrate the scallops deeply. The brine did provide even seasoning, but not enough to mask the chemical flavor. I noted that the phosphate in STPP is alkaline. What if I covered it up by putting acidic lemon juice in the brine? Problem solved. Only the most sensitive tasters now picked up on a hint of chemical off-flavors; most tasted only the sweet shellfish complemented by the bright flavor of citrus.
With my wet-scallop approach established, it was finally time to test my recipe on dry scallops. I skipped the soaking step, which was unnecessary in the absence of STPP, and proceeded with the recipe. The result? Scallops that rivaled those made on a powerful restaurant range, golden brown on the exterior and juicy and tender on the interior. I was happy to serve them with just a squeeze of lemon, but fancier occasions call for a sauce. For those instances, I developed a couple of recipes based on a classic accompaniment: browned butter.
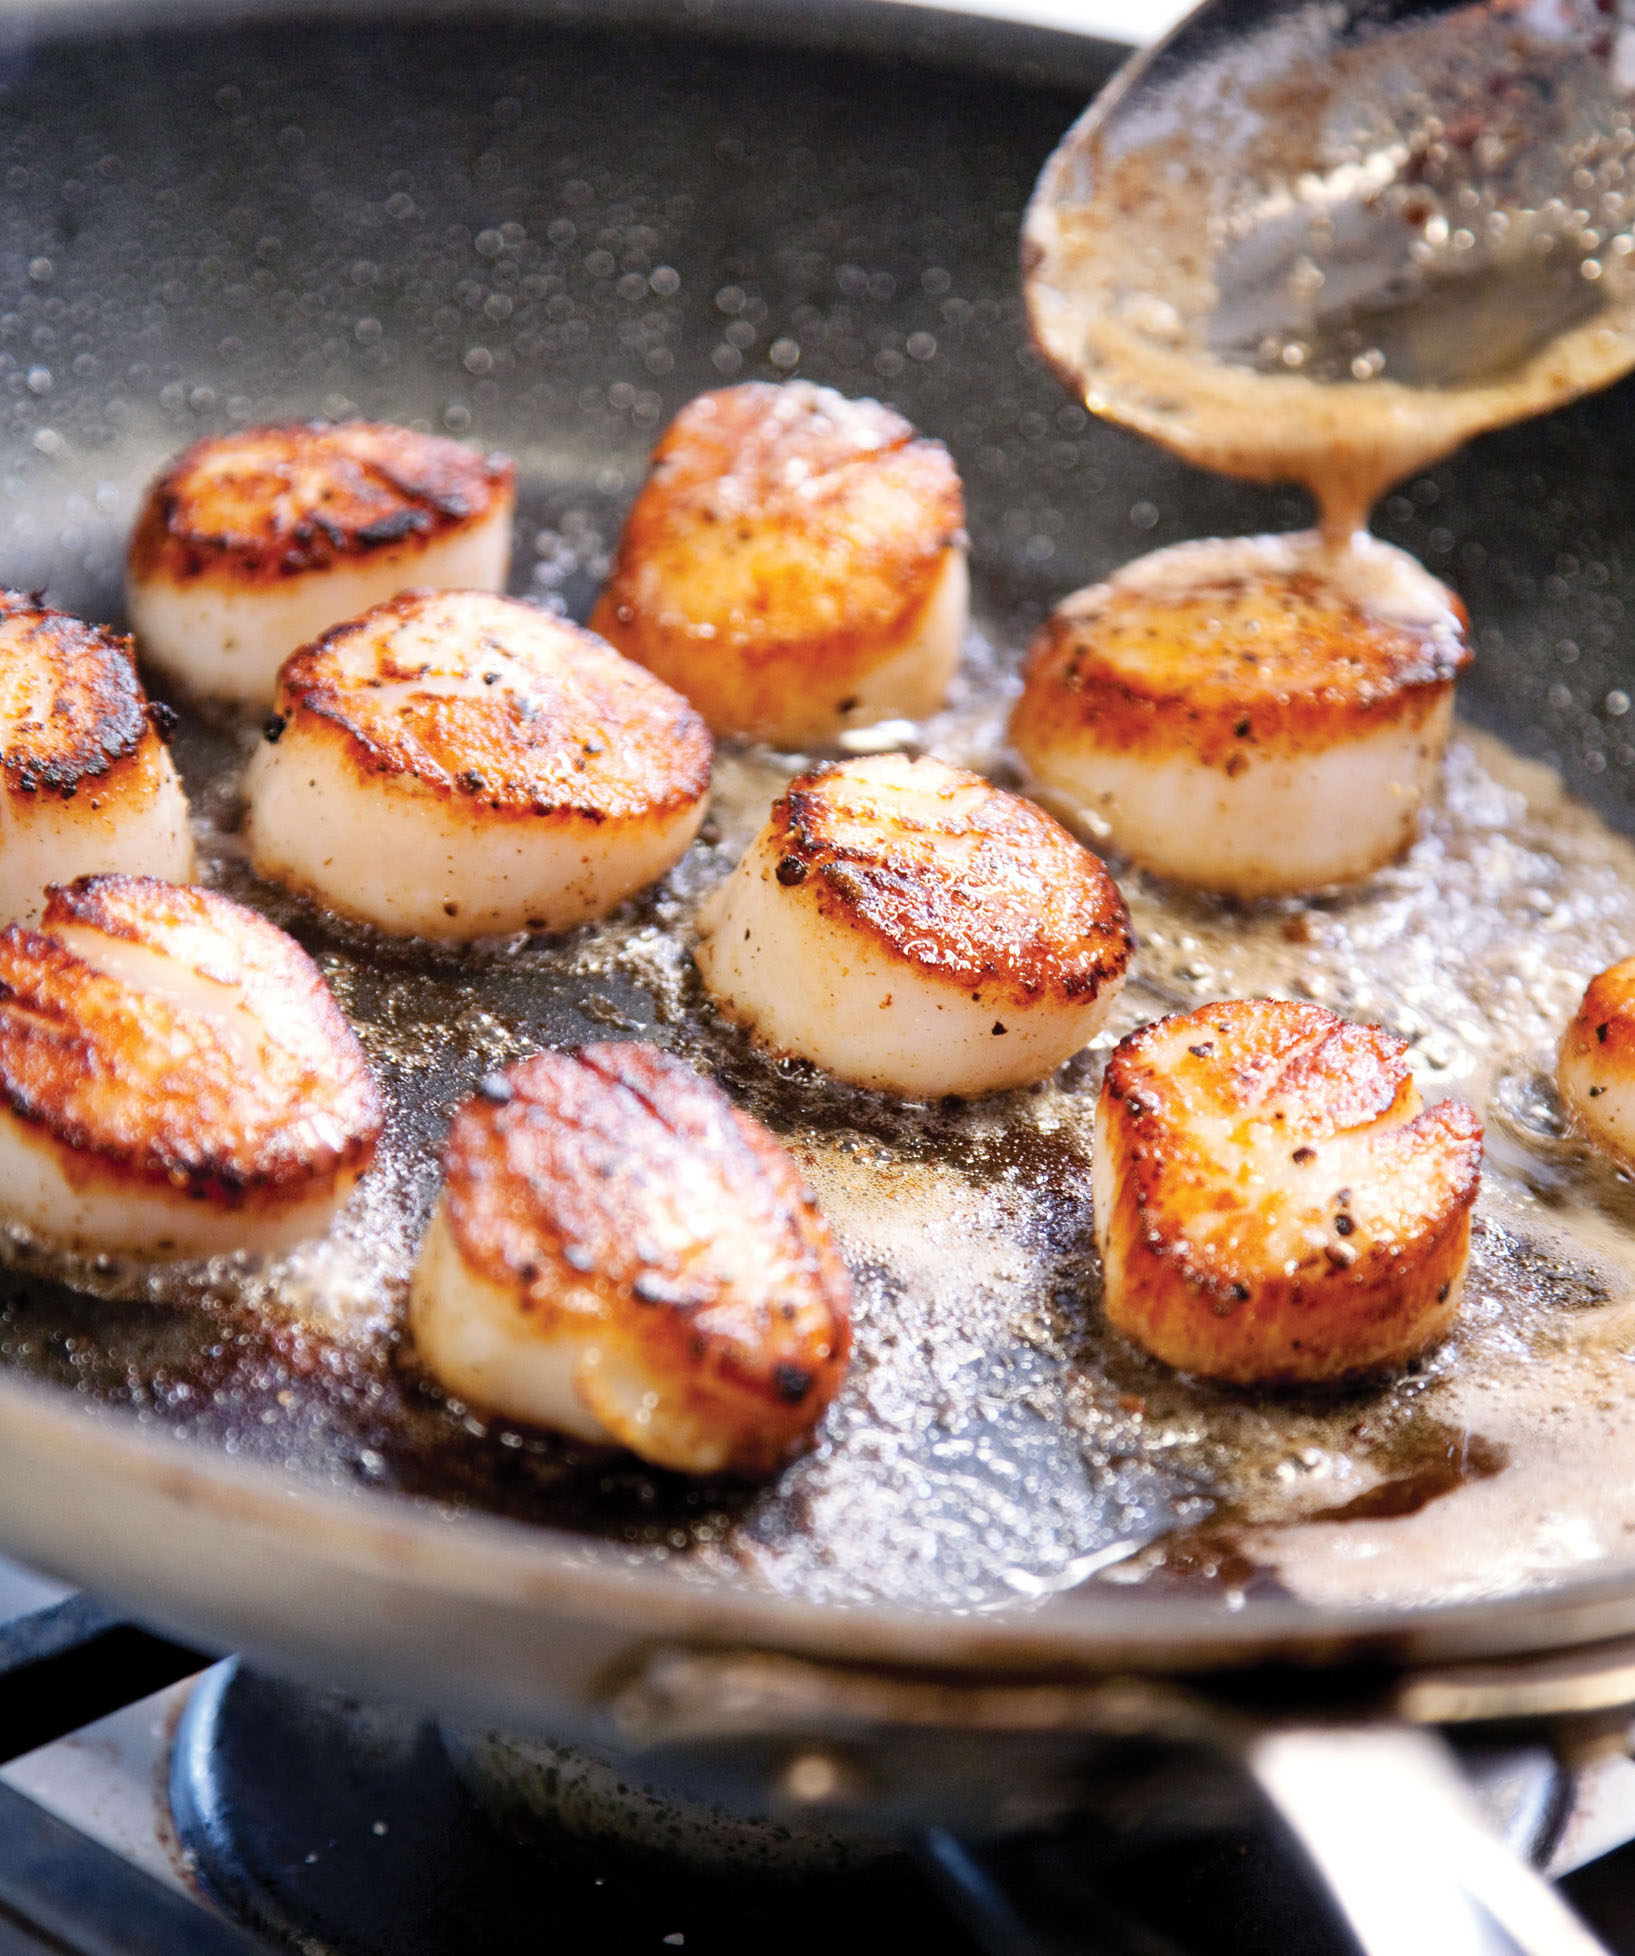
Pan-Seared Scallops
SERVES 4
We recommend buying “dry” scallops, which don’t have chemical additives and taste better than “wet.” Dry scallops will look ivory or pinkish; wet scallops are bright white. If using wet scallops, soak them in a solution of 1 quart of cold water, ¼ cup of lemon juice, and 2 tablespoons of salt for 30 minutes before proceeding with step 1, and do not season with salt in step 2. If you are unsure whether your scallops are wet or dry, conduct this quick test: Place 1 scallop on a paper towel–lined plate and microwave on high power for 15 seconds. If the scallop is “dry,” it will exude very little water. If it is “wet,” there will be a sizable ring of moisture on the paper towel. (The microwaved scallop can be cooked as is.) If serving with a sauce (recipes follow), prepare it while the scallops dry (between steps 1 and 2).
1½ pounds large sea scallops, tendons removed
Salt and pepper
2 tablespoons vegetable oil
2 tablespoons unsalted butter
Lemon wedges
1. Place scallops on rimmed baking sheet lined with clean dish towel. Place second clean dish towel on top of scallops and press gently on towel to blot liquid. Let scallops sit at room temperature for 10 minutes while towels absorb moisture.
2. Season scallops on both sides with salt and pepper. Heat 1 tablespoon oil in 12-inch nonstick skillet over high heat until just smoking. Add half of scallops in single layer, flat side down, and cook, without moving them, until well browned, 1½ to 2 minutes.
3. Add 1 tablespoon butter to skillet. Using tongs, flip scallops and continue to cook, using large spoon to baste scallops with melted butter (tilt skillet so butter runs to 1 side) until sides of scallops are firm and centers are opaque, 30 to 90 seconds longer (remove smaller scallops as they finish cooking). Transfer scallops to large plate and tent with aluminum foil. Wipe skillet clean with paper towels and repeat cooking with remaining oil, scallops, and butter. Serve immediately with lemon wedges.
accompaniments
MAKES ABOUT ¼ CUP
Watch the butter carefully, as it can go from brown to burnt quickly.
4 tablespoons unsalted butter, cut into 4 pieces
1 small shallot, minced
1 tablespoon minced fresh parsley
2 teaspoons lemon juice
½ teaspoon minced fresh thyme
Salt and pepper
Heat butter in small saucepan over medium heat and cook, swirling saucepan constantly, until butter turns dark golden brown and has nutty aroma, 4 to 5 minutes. Add shallot and cook until fragrant, about 30 seconds. Off heat, stir in parsley, lemon juice, and thyme. Season with salt and pepper to taste. Cover to keep warm.
MAKES ABOUT ½ CUP
Watch the butter carefully, as it can go from brown to burnt quickly.
6 tablespoons unsalted butter
1 plum tomato, cored, seeded, and chopped
1 tablespoon grated fresh ginger
1 tablespoon lemon juice
¼ teaspoon red pepper flakes
Salt
Heat butter in small saucepan over medium heat and cook, swirling pan constantly, until butter turns dark golden brown and has nutty aroma, 4 to 5 minutes. Add tomato, ginger, lemon juice, and pepper flakes and cook, stirring constantly, until fragrant, about 1 minute. Season with salt to taste. Cover to keep warm.
GOING FOR A SOAK
So-called “wet” scallops have been treated with sodium tripolyphosphate (STPP), which lends a disagreeable flavor. Could we get rid of the STPP by soaking the scallops in water?
THE EXPERIMENT We prepared three batches of “wet” scallops, soaking the first in a quart of water for 30 minutes, soaking the second for an hour, and leaving the third untreated. We then cooked each batch according to our recipe and sent them to a lab to be analyzed for STPP content.
THE RESULTS The scallops soaked for 30 minutes only had about 10 percent less STPP than the untreated batch, and soaking for a full hour wasn’t much better: Only about 11 percent of the STPP was removed. Tasters were still able to identify an unpleasant chemical flavor in both soaked samples.
THE EXPLANATION The phosphates in STPP form a chemical bond with the proteins in scallops, which prevent the STPP from being washed away.
THE SOLUTION Rather than try to remove the chemical taste from STPP-treated scallops, we masked it by soaking them in a solution of lemon juice, water, and salt.
THE BEST WAY TO COOK MUSSELS
ANDREW JANJIGIAN, September/October 2013
I’m always amazed when I ask friends how often they make mussels—and their answer is “Never.” I love cooking mussels. They’re cheap and quick to prepare, with tender flesh and a briny-sweet built-in broth created by the merging of the mussels and their steaming liquid. Their flavor is distinct but still tame enough to pair with a wide variety of aromatic ingredients.
So why don’t more people make them? My friends all cite the same reasons: Mussels are hard to clean, and it seems a little dicey trying to figure out if they’re safe to eat. Fortunately, these misconceptions are easy to dispel. Most mussels these days need very little cleaning. The vast majority are farmed, which leads to less sand and grit and fewer of the stringy beards that cling to the shell. As for figuring out whether a mussel is safe to cook, this couldn’t be more straightforward. Your first clue is smell: A dead mussel smells very bad, whereas a live mussel should smell pleasantly briny, and its shell (if open) should close when tapped. That’s it. If a mussel is alive before you cook it, it will be safe to eat when it’s done.
We steam mussels in the oven in a covered roasting pan to ensure even cooking.
The real problem with mussels, especially if you’re a perfectionist like me, is that they come in all different sizes. They run from pinky-finger small to almost palm-size large, and buying them en masse—they’re usually sold in multipound bags—makes it virtually impossible to select a group that’s made up of mussels that are all the same size and, therefore, will all cook at the same rate. This means that when steamed, a solid number of mussels will turn out perfectly, with shells open and the meat within plump, juicy, and easy to extract. But inevitably some will remain closed (a sign that they’re undercooked). If cooked until every last one has opened wide, however, an equal number of mussels will turn out overdone—shriveled, mealy, and tough. Could I figure out a way to get more of them to cook at the same rate?
First I needed a basic recipe. Most sources using the classic French method of steaming mussels, or moules marinières, follow this simple model: Sauté garlic and other aromatics in a Dutch oven, pour in wine and bring it to a boil, add the mussels, cover the pot, and cook for 10 minutes or so, until all the mussels have opened. Toss in a handful of herbs, stir, and serve with crusty bread to sop up the broth.
There were differences in the recipes I tried, of course. The more successful ones had you boil down the wine a bit before adding the mussels in order to take the edge off the alcohol and round out the flavors of the finished broth. Ditto for those recipes that added some sort of dairy as a thickener at the end of cooking to give the sauce body and help it cling to the mussels. Finally, although you don’t want to overpower the mussels’ own flavors, a little aromatic complexity is a plus. In the end, I decided that red pepper flakes, thyme sprigs, and bay leaves (along with a generous amount of parsley) were just the right combination.
FLEX MUSSELS
With a good basic recipe in hand, I moved on to the major mussel-cooking conundrum. I wondered if a more gentle approach would prevent those mussels that opened first from drying out before their fellow bivalves caught up. I cooked two batches of mussels in big pots on the stove—one at a simmer and the other at a rolling boil. Not surprisingly, those cooked at a simmer took longer, and tasters found them a bit more moist and tender, but overall there wasn’t a huge difference between the two approaches. If I waited for virtually every mussel to open, I was left with a fair number of tough, overcooked specimens.
But it was during this test that I realized another problem inherent in the traditional method of cooking mussels: the use of a big pot on the stove. With a relatively large number of mussels (at least a pound per person), my pot was nearly full to the brim, which made stirring once or twice to redistribute the mussels unwieldy. Shaking the pot, as other recipes have you do, was not at all effective at moving the mussels around. And if the mussels stay put, this only exacerbates the problem of uneven cooking, since the mussels at the bottom of the pot, whether small or large, are exposed to more heat. I tried cutting the amount of mussels in half so I could stir them more easily to see if that made more of them cook at the same rate. And sure enough, far more mussels opened at the same time so that fewer were overcooked. But how could I mimic this result and still cook the quantity of mussels I wanted? A pot or pan with more surface area—or, better yet, a large roasting pan?
One way we’ve achieved more even cooking in recipes is by using the oven rather than the stove. In the oven, heat surrounds the food on all sides, leading to more even (and gentle) cooking than is possible on the stove, where the heat can’t help but be more aggressive at the bottom of the pan. So for my next test, I preheated the oven to its highest setting. I placed 4 pounds of mussels in a large roasting pan, covered it tightly with foil, set it on the middle oven rack—and waited, fingers crossed. These mussels took a bit longer to cook (even at 500 degrees, the oven is more gentle than a direct flame), but when they were done, I breathed a sigh of relief: Only one or two hadn’t opened and the others were moist and plump.
Now all that was left was convincing my friends to get past their objections to cooking mussels. Once they discovered how unfounded their fears were and tried my method for oven steaming, I knew they’d be as hooked as I am on cooking mussels at home.
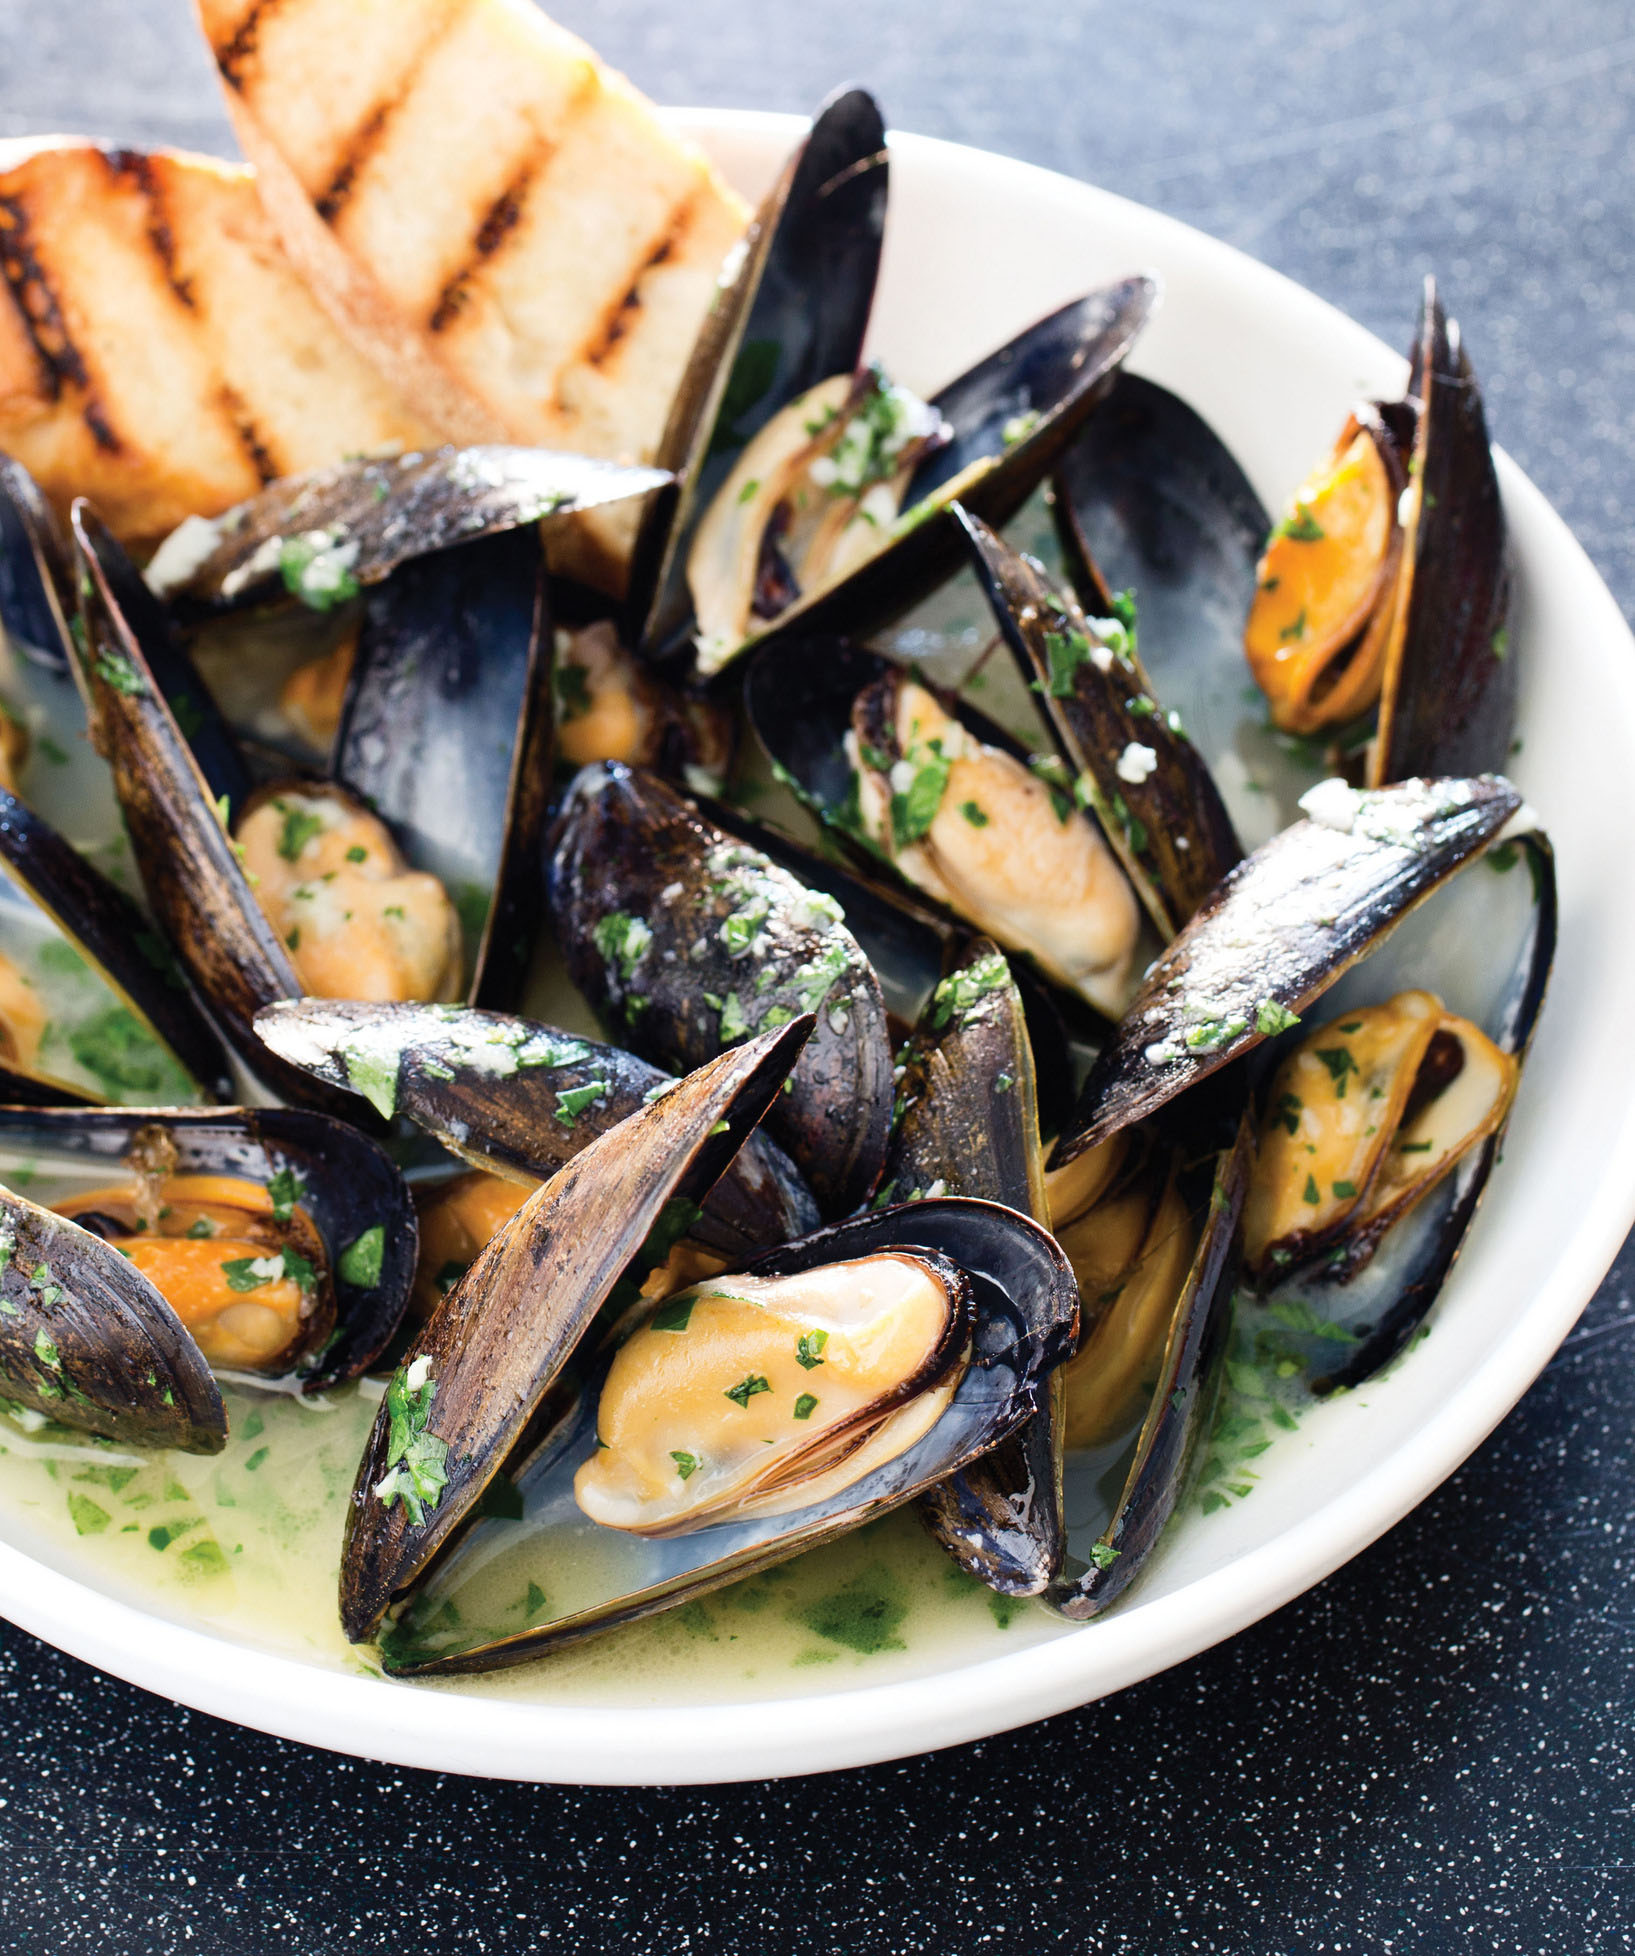
SERVES 2 TO 4
Discard any mussel with an unpleasant odor or with a cracked or broken shell or a shell that won’t close. Serve with crusty bread.
1 tablespoon extra-virgin olive oil
3 garlic cloves, minced
Pinch red pepper flakes
1 cup dry white wine
3 sprigs fresh thyme
2 bay leaves
4 pounds mussels, scrubbed and debearded
¼ teaspoon salt
2 tablespoons unsalted butter, cut into 4 pieces
2 tablespoons minced fresh parsley
1. Adjust oven rack to lowest position and heat oven to 500 degrees. Heat oil, garlic, and pepper flakes in large roasting pan over medium heat; cook, stirring constantly, until fragrant, about 30 seconds. Add wine, thyme sprigs, and bay leaves and bring to boil. Cook until wine is slightly reduced, about 1 minute. Add mussels and salt. Cover pan tightly with aluminum foil and transfer to oven. Cook until most mussels have opened (a few may remain closed), 15 to 18 minutes.
2. Remove pan from oven. Push mussels to sides of pan. Add butter to center and whisk until melted. Discard thyme sprigs and bay leaves, sprinkle parsley over mussels, and toss to combine. Serve immediately.
variations
Oven-Steamed Mussels with Hard Cider and Bacon
Omit garlic and red pepper flakes. Heat oil and 4 slices thick-cut bacon, cut into ½-inch pieces, in roasting pan until bacon has rendered and is starting to crisp, about 5 minutes. Proceed with recipe as directed, substituting dry hard cider for wine and ¼ cup heavy cream for butter.
Oven-Steamed Mussels with Leeks and Pernod
Omit red pepper flakes and increase oil to 3 tablespoons. Heat oil; 1 pound leeks, white and light green parts only, halved lengthwise, sliced thin, and washed thoroughly; and garlic in roasting pan until leeks are wilted, about 3 minutes. Proceed with recipe as directed, omitting thyme sprigs and substituting ½ cup Pernod and ¼ cup water for wine, ¼ cup crème fraîche for butter, and chives for parsley.
Oven-Steamed Mussels with Tomato and Chorizo
Omit red pepper flakes and increase oil to 3 tablespoons. Heat oil and 12 ounces Spanish-style chorizo sausage, cut into ½-inch pieces, in roasting pan until chorizo starts to brown, about 5 minutes. Add garlic and cook until fragrant, about 30 seconds. Proceed with recipe as directed, adding 1 (28-ounce) can crushed tomatoes to roasting pan before adding mussels and increasing butter to 3 tablespoons.
THE PROBLEM WITH THE POT
Because mussels steamed in a pot are crowded on top of one another, it’s difficult to stir (or shake) them around—and cook them evenly. The mussels closest to the heat source cook faster than the ones on top.
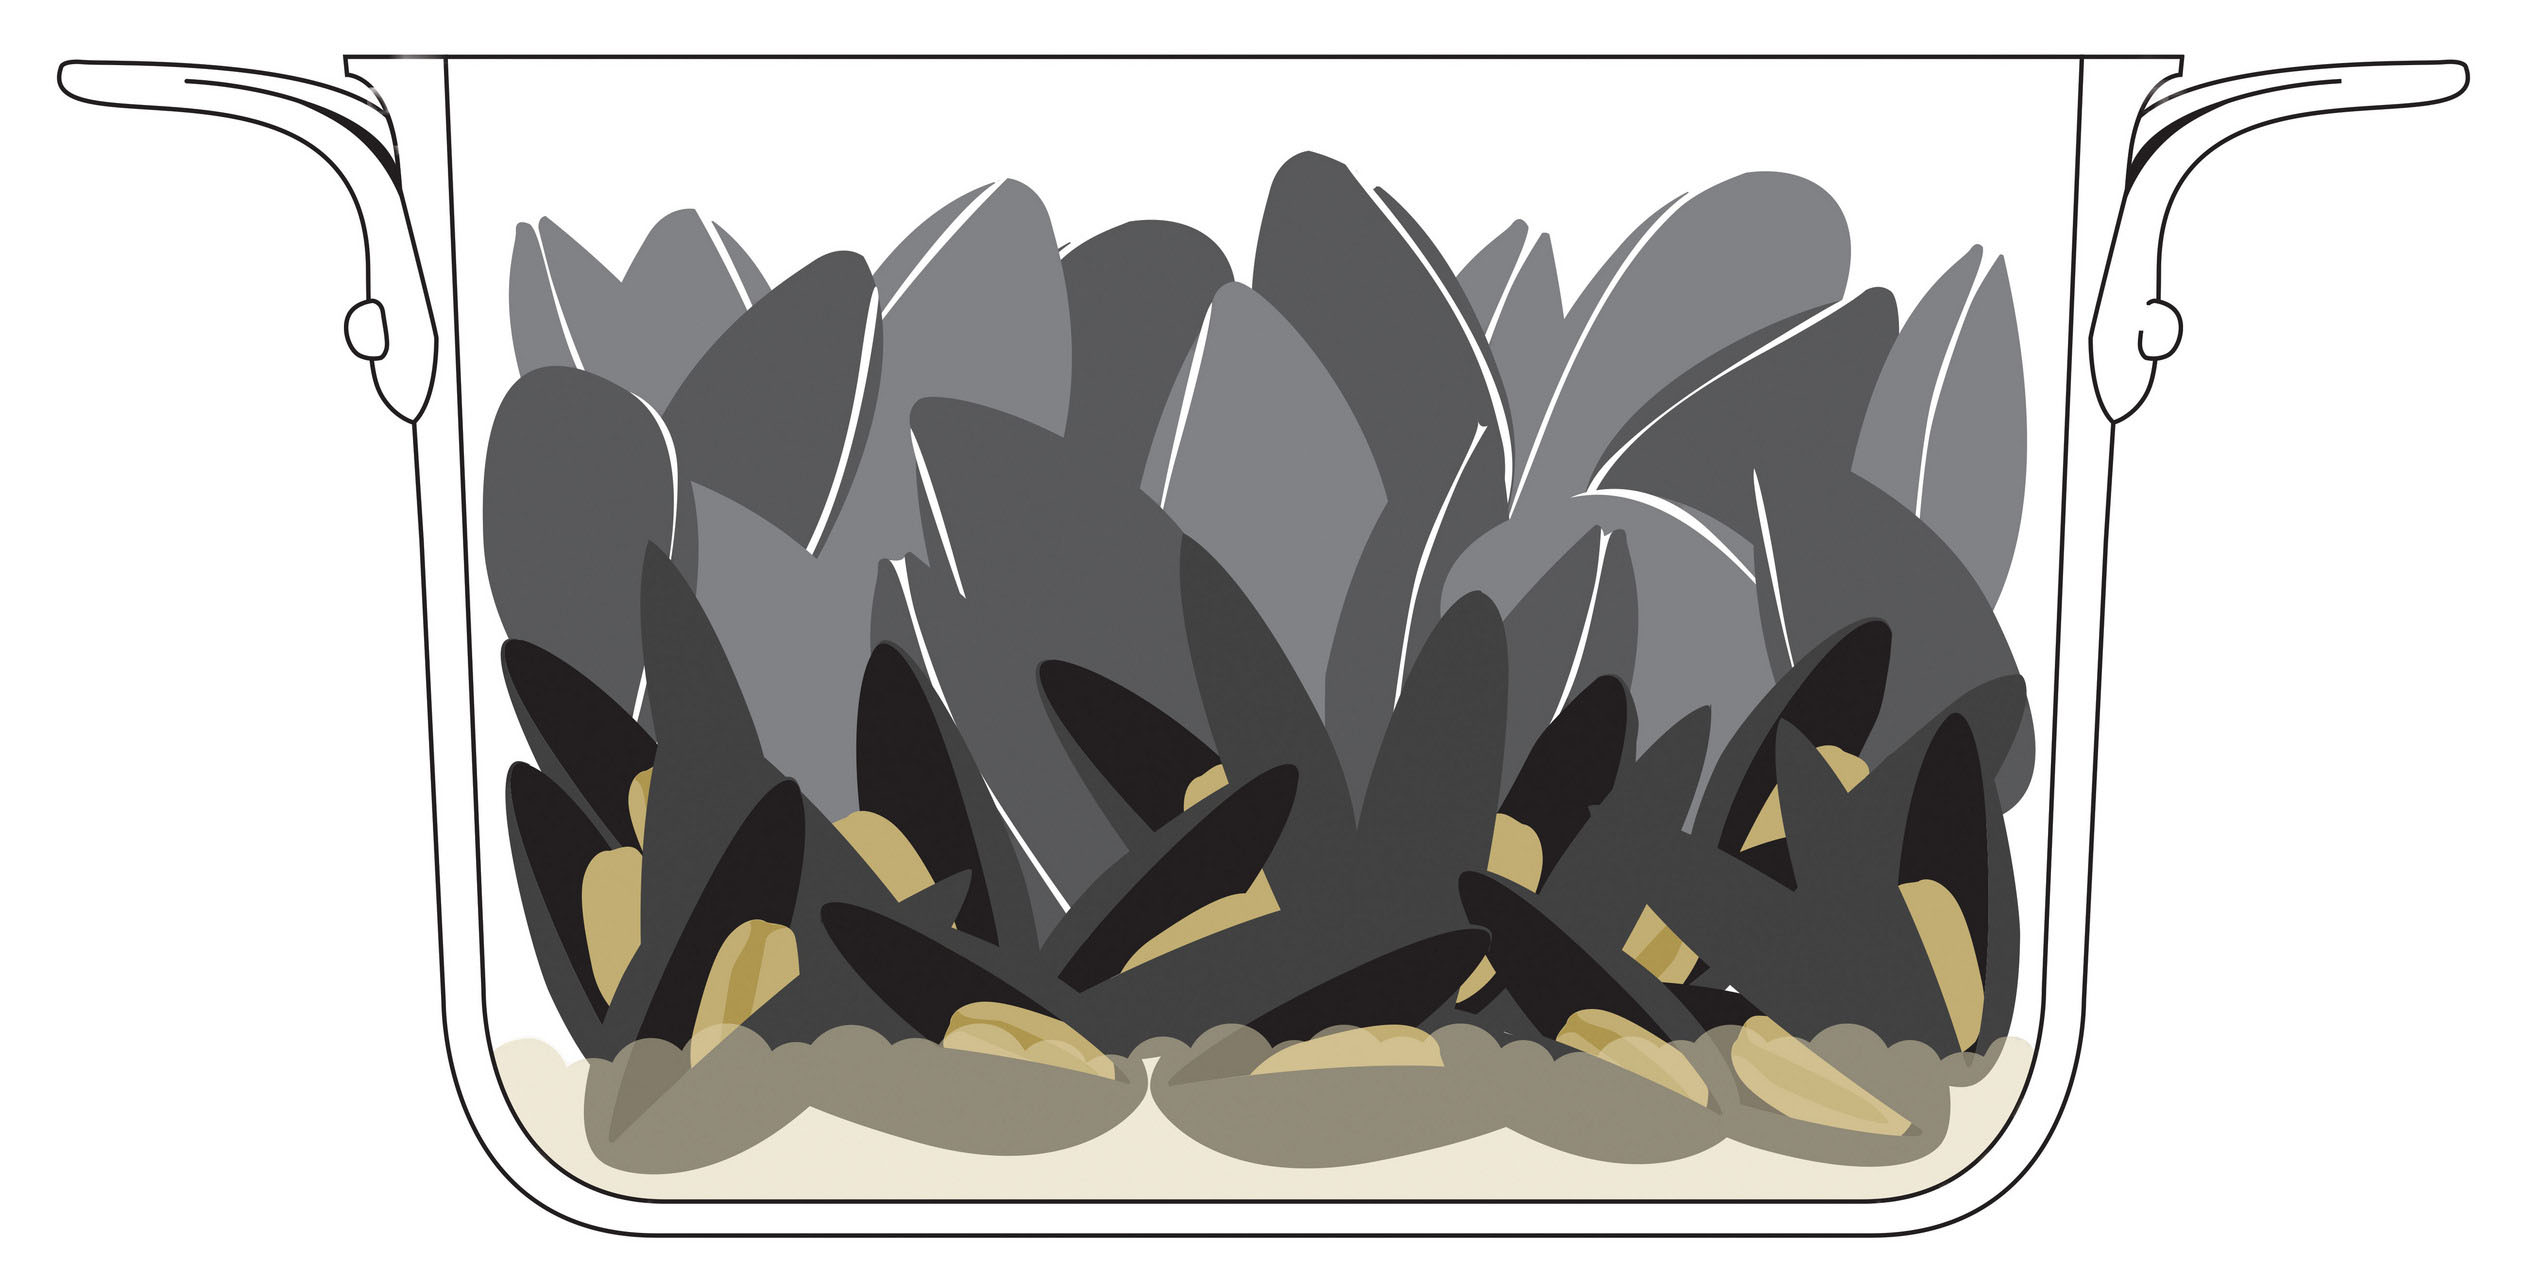
CLOSE AND CROWDED
In a pot, mussels stuck on the bottom open more quickly.
SIX GOOD THINGS TO KNOW ABOUT MUSSELS
1 THEY’RE SAFE TO EAT. Mussels are routinely tested by state and local agencies for the presence of algae-derived toxins. The Monterey Bay Aquarium’s Seafood Watch program calls them a “Best Choice” for environmental sustainability.
2 THEY NEED ALMOST NO CLEANING. Most mussels are cultivated on long ropes suspended from rafts, which leaves them free of sand and grit—and for the most part, beards. In general, all they need is a quick rinse under the tap.
3 IT’S EASY TO TELL WHEN THEY’RE FRESH. A live mussel will smell pleasantly briny. If open, its shell should close up when lightly tapped (but give it a moment; some mussels take longer than others to clam up).
4 IT’S EQUALLY EASY TO TELL WHEN THEY’RE NOT. A dead mussel deteriorates rapidly and will smell almost immediately. Also discard any mussel with a cracked or broken shell or a shell that won’t close.
5 YOU CAN STORE MUSSELS FOR UP TO THREE DAYS. As soon as you bring them home, place them in a bowl, cover it with a wet paper towel, and store it in the fridge.
6 UNOPENED COOKED MUSSELS NEEDN’T BE DISCARDED. A mussel that’s closed after cooking isn’t unfit to eat. It’s a sign that the mussel needs more cooking. To open a reluctant mussel, microwave it briefly (30 seconds or so).
“BEARDED”? DON’T WORRY.

Because of the way they’re cultivated, most mussels these days are free of the fibrous strands, or “beards,” that wild mussels use to hold on to rocks and other surfaces. If your mussel has a beard, simply use a clean dish towel to grasp the beard and then pull it firmly to remove.
REALLY GOOD CRAB CAKES
LAN LAM, May/June 2012
It’s a given that the best crab cakes are made with meat that’s just been picked from the shell. But since fresh crabmeat is usually impossible to come by, I almost never make them at home. That’s a shame, though, because crab cakes are relatively quick and easy to throw together: Most recipes call for simply mixing the shucked meat with aromatics, herbs, spices, and a binder such as mayo or beaten egg; forming cakes and dredging them in bread crumbs; and quickly pan-frying them until they’re golden brown and crisp.
But is fresh-shucked meat really the only acceptable option? As we discovered in a recent crabmeat tasting, a couple of brands of pasteurized crabmeat (available either canned or in the refrigerated section of most supermarkets) are surprisingly good alternatives to the fresh stuff. I decided to make it my goal to come up with the best possible crab cakes—sweet, plump meat delicately seasoned and seamlessly held together with a binder that didn’t detract from the seafood flavor—regardless of whether I was starting with fresh crabmeat.
MILKING IT
The obvious first step: figuring out what type of packaged crabmeat to use. Species aside, all crabmeat is graded both by size and by the part of the crab from which it’s taken. Most crab cake recipes call for plump, pricey jumbo lump or lump, while some suggest finer, flakier backfin crabmeat.
I was pretty sure my colleagues would prefer the meatier texture of jumbo lump or lump, but I made crab cakes with all three grades just to double-check. I put together a bare-bones recipe, mixing 1 pound of meat with mayonnaise and eggs, forming the mixture into eight cakes, rolling them in panko (supercrisp Japanese bread crumbs), and pan-frying them. No contest: Tasters overwhelmingly preferred the cakes made with jumbo lump or lump crabmeat. Flavor was another matter. Not only were the binders dulling the sweet crabmeat flavor, but all three batches tasted and smelled inescapably fishy. When I mentioned the result to our science editor, he suggested soaking the meat in milk to rid it of its unpleasant fishiness. It was a great quick trick. When I submerged the crabmeat in 1 cup of milk, the fishiness washed away after just a 20-minute soak.
IN A BIND
Figuring I’d solved the toughest problem, I moved on to consider more conventional crab cake decisions like flavors and binders. Celery and onion (both briefly sautéed before joining the crabmeat) plus Old Bay seasoning were classic additions that nicely rounded out the rich flavor of the crabmeat. But the flavor-muting binders were a trickier issue. Reducing and/or leaving out the mayo or egg allowed the clean crabmeat flavor to come through. However, the unfortunate (if predictable) consequence was that the binder-free batches fell apart during cooking.
Putting aside the mayo and eggs for the moment, I tried the first two out-of-the-box ideas that came to mind: a béchamel and a panade. Unfortunately, both tests flopped. The former, a combination of milk, flour, and butter, rendered the crab mixture mushy. The latter, a thick paste made from milk and bread that’s often used in meatballs, was sticky and difficult to incorporate without breaking apart the crabmeat. Even worse, the starches and dairy in both binders deadened the crab flavor just as much as the mayonnaise and eggs had.
I was feeling short on ideas when I remembered a product I had used when I worked in high-end restaurants: “Meat glue,” as it’s commonly referred to, is a powdered protein that some chefs use to help bind foods together. Buying this stuff was out of the question here, but what about cobbling together a hack version? I couldn’t turn protein into powder, but I could puree it. More specifically, I could call on another idea from my restaurant days: a mousseline. This delicate, savory mousse is composed mainly of pureed meat or fish and just a little cream. To enhance the briny sweetness and plump bite of the crabmeat, I figured I’d use shrimp. I wouldn’t need much of it, and since the shrimp would be pureed, I could use whatever size was cheapest.
A puree of shrimp and cream holds our crab cakes together without distracting from the seafood flavor.
To that end, I blitzed 6 ounces of shrimp in the food processor with 6 tablespoons of cream, plus the Old Bay, a little Dijon mustard, hot sauce, and fresh lemon juice for punchy flavor. As I’d hoped, the resulting mousse was a great stand-in; in fact, our science editor noted that this was a true meat glue. Pureeing the shrimp released fragments of sticky muscle proteins that delicately held the clumpy pieces of crabmeat together through the breading and cooking process. When tasters raved about the clean crab flavor that I had achieved, I knew this idea was a keeper. Their only quibble: The inside texture of the cakes was a bit too springy and bouncy, and a few stray clumps of crabmeat were falling off during cooking. Scaling back the mousse mixture by a third took care of the bounce, but pieces were still breaking off as I flipped the cakes.
GIVE IT A REST
I had one other, more subtle idea in mind to help make the crab cakes a bit more sturdy: briefly chilling them before cooking, which allows them to firm up, forming a less fragile cake. I ran a side-by-side test, refrigerating one batch for a half-hour before pan-frying, while immediately cooking the other. The chill paid off: These cakes not only felt noticeably sturdier than the unrested batch but also held up considerably better during cooking.
My tasters’ one lingering request concerned the breading. The panko was definitely crispier than traditional bread crumbs, but the flakes soaked up moisture from the cakes, losing some of their crunch and falling off the sides. Color was also a problem, as the only surfaces that browned nicely were those that came in contact with the pan. My two quick fixes: crushing half of the panko to make smaller pieces that would adhere better to the cakes and toasting all of the crumbs before coating to deepen and even out their color and beef up their crunch.
By starting with readily available pasteurized crabmeat and devising a few easy tricks to clean up its flavor and keep the meat neatly bound, I’d created a recipe for crab cakes that I could make even without fresh crabmeat.
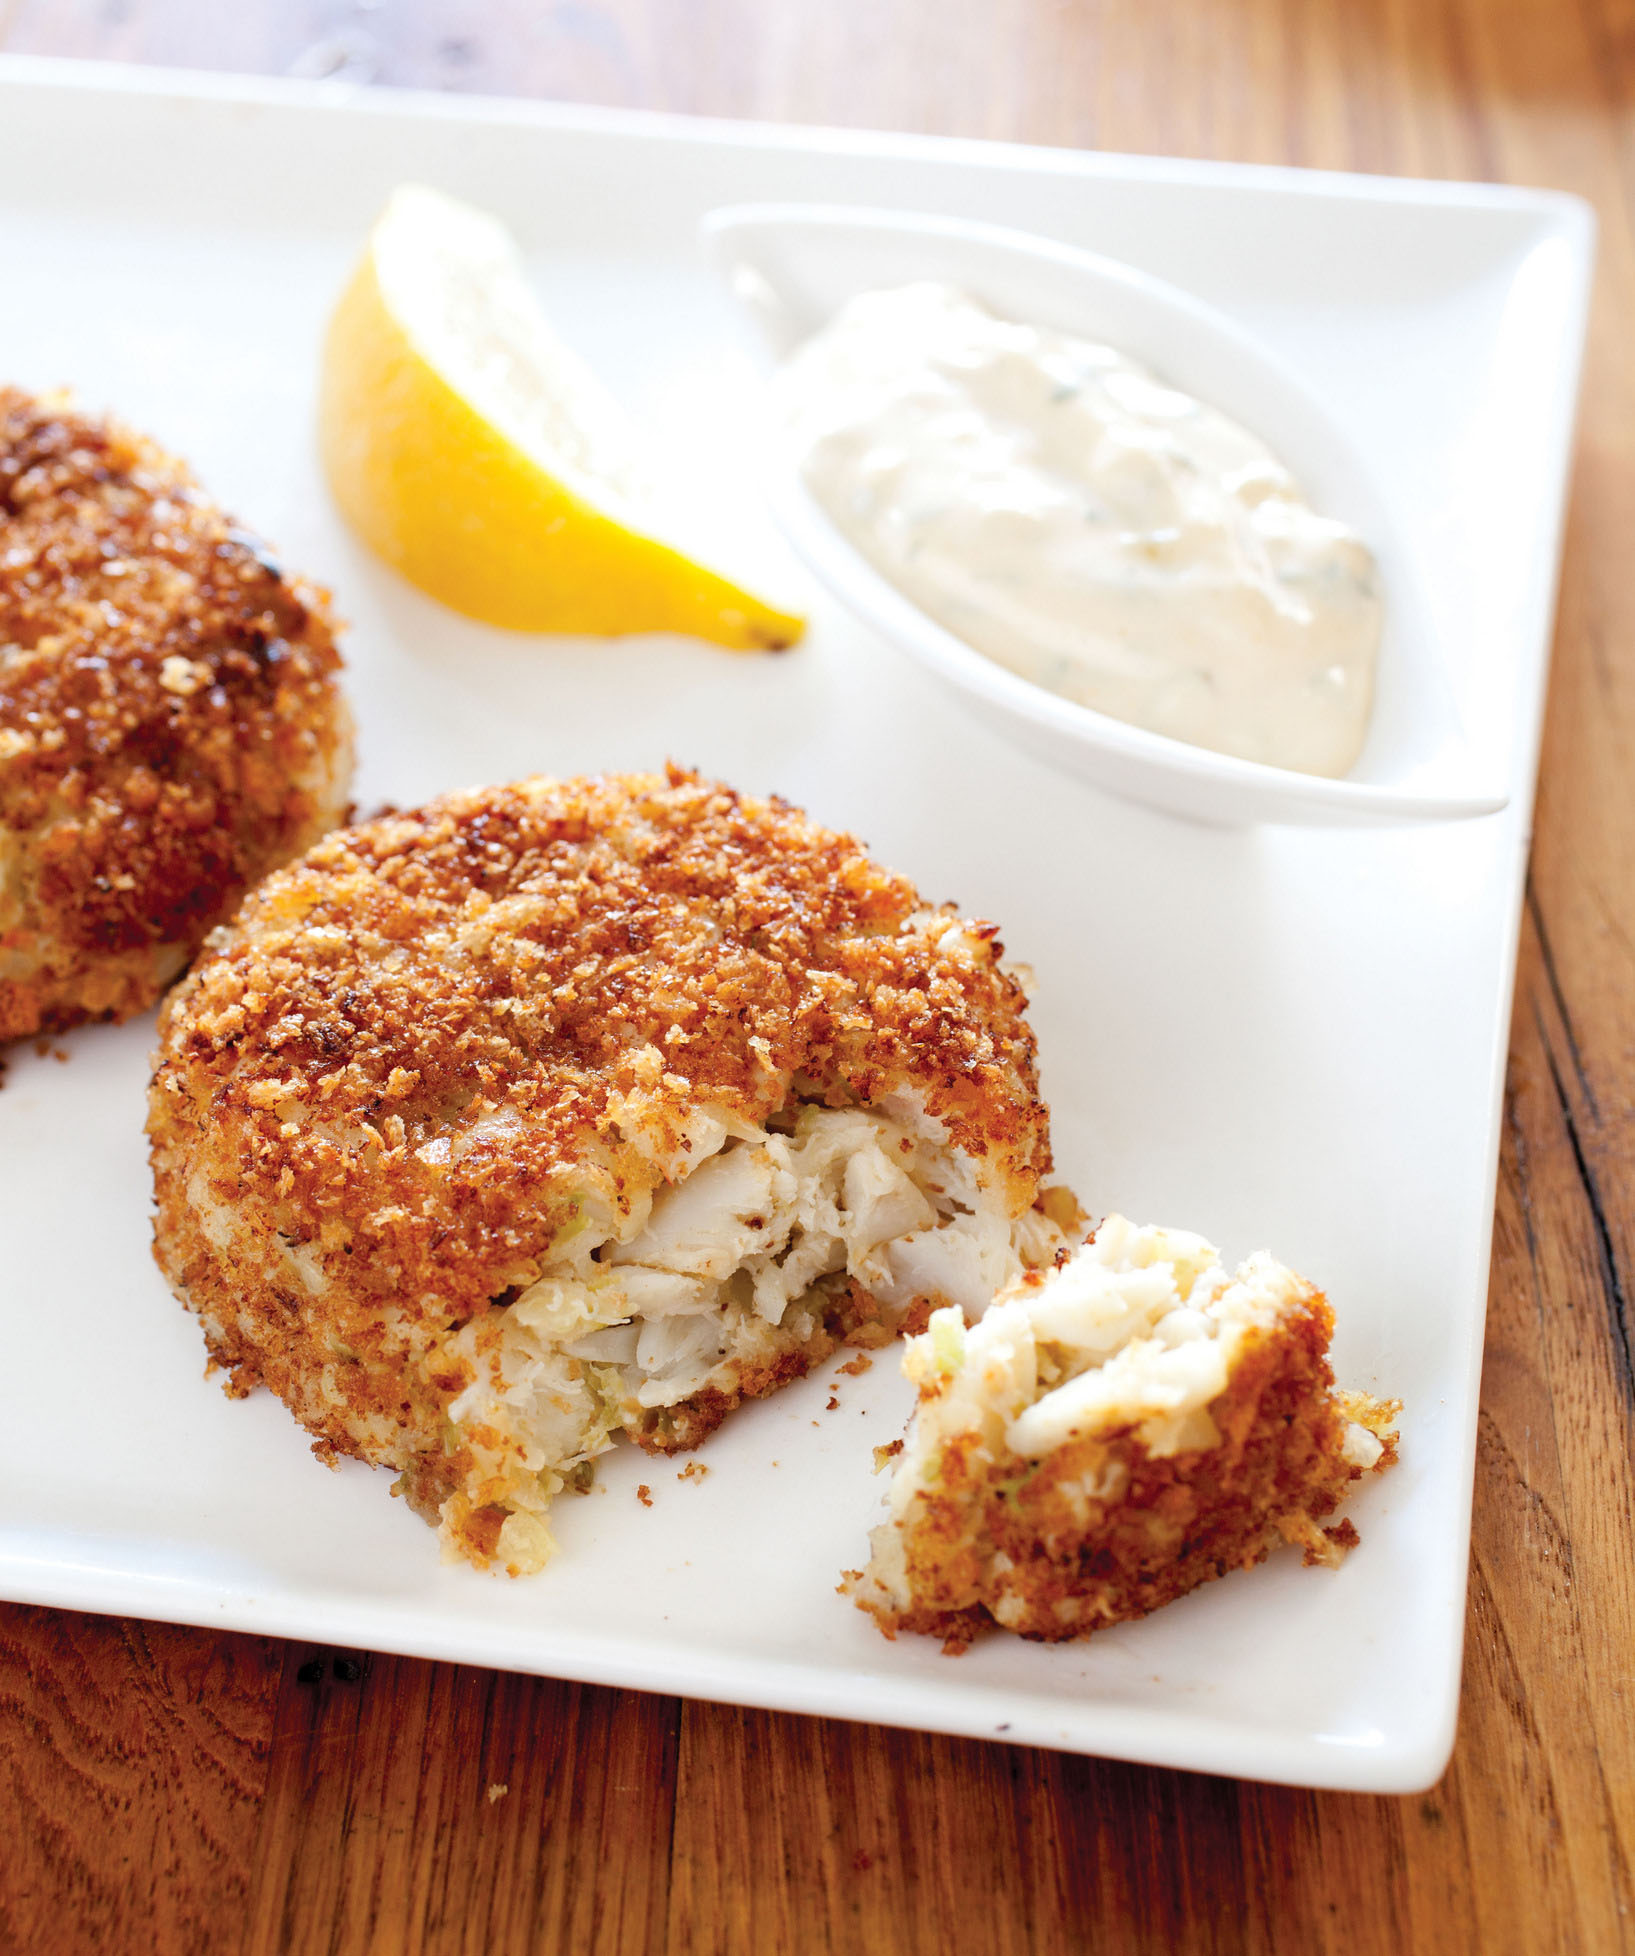
Best Crab Cakes
SERVES 4
Either fresh or pasteurized crabmeat can be used in this recipe. With packaged crab, if the meat smells clean and fresh when you first open the package, skip steps 1 and 4 and blot away any excess liquid. Serve with Rémoulade Sauce (recipe follows).
1 pound lump crabmeat, picked over for shells
1 cup milk
1½ cups panko bread crumbs
Salt and pepper
2 celery ribs, chopped
½ cup chopped onion
1 garlic clove, peeled and smashed
1 tablespoon unsalted butter
4 ounces shrimp, peeled, deveined, and tails removed
¼ cup heavy cream
2 teaspoons Dijon mustard
1 teaspoon lemon juice
½ teaspoon hot sauce
½ teaspoon Old Bay seasoning
¼ cup vegetable oil
1. Place crabmeat and milk in bowl, making sure crab is totally submerged. Cover and refrigerate for 20 minutes.
2. Meanwhile, place ¾ cup panko in small zipper-lock bag and crush fine with rolling pin. Transfer crushed panko to 10-inch nonstick skillet and add remaining ¾ cup panko. Toast over medium-high heat until golden brown, about 5 minutes. Transfer panko to shallow dish, stir in ¼ teaspoon salt, and season with pepper to taste. Wipe out skillet.
3. Pulse celery, onion, and garlic in food processor until finely chopped, 5 to 8 pulses, scraping down sides of bowl as needed. Transfer vegetables to large bowl. Rinse processor bowl and blade. Melt butter in now-empty skillet over medium heat. Add vegetables, ½ teaspoon salt, and ⅛ teaspoon pepper; cook, stirring frequently, until vegetables are softened and all moisture has evaporated, 4 to 6 minutes. Return vegetables to large bowl and let cool completely. Rinse out skillet and wipe clean.
4. Drain crabmeat in fine-mesh strainer, pressing firmly to remove milk but being careful not to break up lumps of crabmeat.
5. Line rimmed baking sheet with parchment paper. Pulse shrimp in clean, dry processor until finely ground, 12 to 15 pulses, scraping down sides of bowl as needed. Add cream and pulse to combine, 2 to 4 pulses, scraping down sides of bowl as needed. Transfer shrimp puree to bowl with vegetables. Add mustard, lemon juice, hot sauce, and Old Bay; stir until well combined. Add crabmeat and fold gently with rubber spatula, being careful not to overmix and break up lumps of crabmeat. Divide mixture into 8 balls and firmly press into ½-inch-thick patties. Place patties on prepared sheet, cover tightly with plastic wrap, and refrigerate for 30 minutes.
6. Coat each patty with panko, pressing firmly to adhere crumbs to exterior. Heat 1 tablespoon oil in clean, dry skillet over medium heat until shimmering. Place 4 patties in skillet and cook, without moving them, until golden brown, 3 to 4 minutes. Using 2 spatulas, carefully flip patties. Add 1 tablespoon oil, reduce heat to medium-low, and continue to cook until second side is golden brown, 4 to 6 minutes longer. Transfer cakes to platter. Wipe out skillet and repeat with remaining 4 patties and remaining 2 tablespoons oil. Serve immediately.
accompaniment
Rémoulade Sauce
MAKES ABOUT ½ CUP
½ cup mayonnaise
½ teaspoon capers, drained and rinsed
½ teaspoon Dijon mustard
1 small garlic clove, chopped coarse
1½ teaspoons sweet pickle relish
1 teaspoon hot sauce
1 teaspoon lemon juice
1 teaspoon minced fresh parsley
Salt and pepper
Pulse all ingredients except salt and pepper in food processor until well combined but not smooth, about 10 pulses. Season with salt and pepper to taste. Transfer to serving bowl. (Rémoulade can be refrigerated for up to 3 days.)
CRAB CAKE CLARITY
Most recipes resort to flavor-dulling binders such as mayonnaise and eggs. Instead, we employ a two-step approach that enhances the meat’s delicate flavor while providing just as much structure.

BIND WITH SHRIMP A puree of shrimp and cream holds the cakes together without dulling the meat’s delicate flavor.
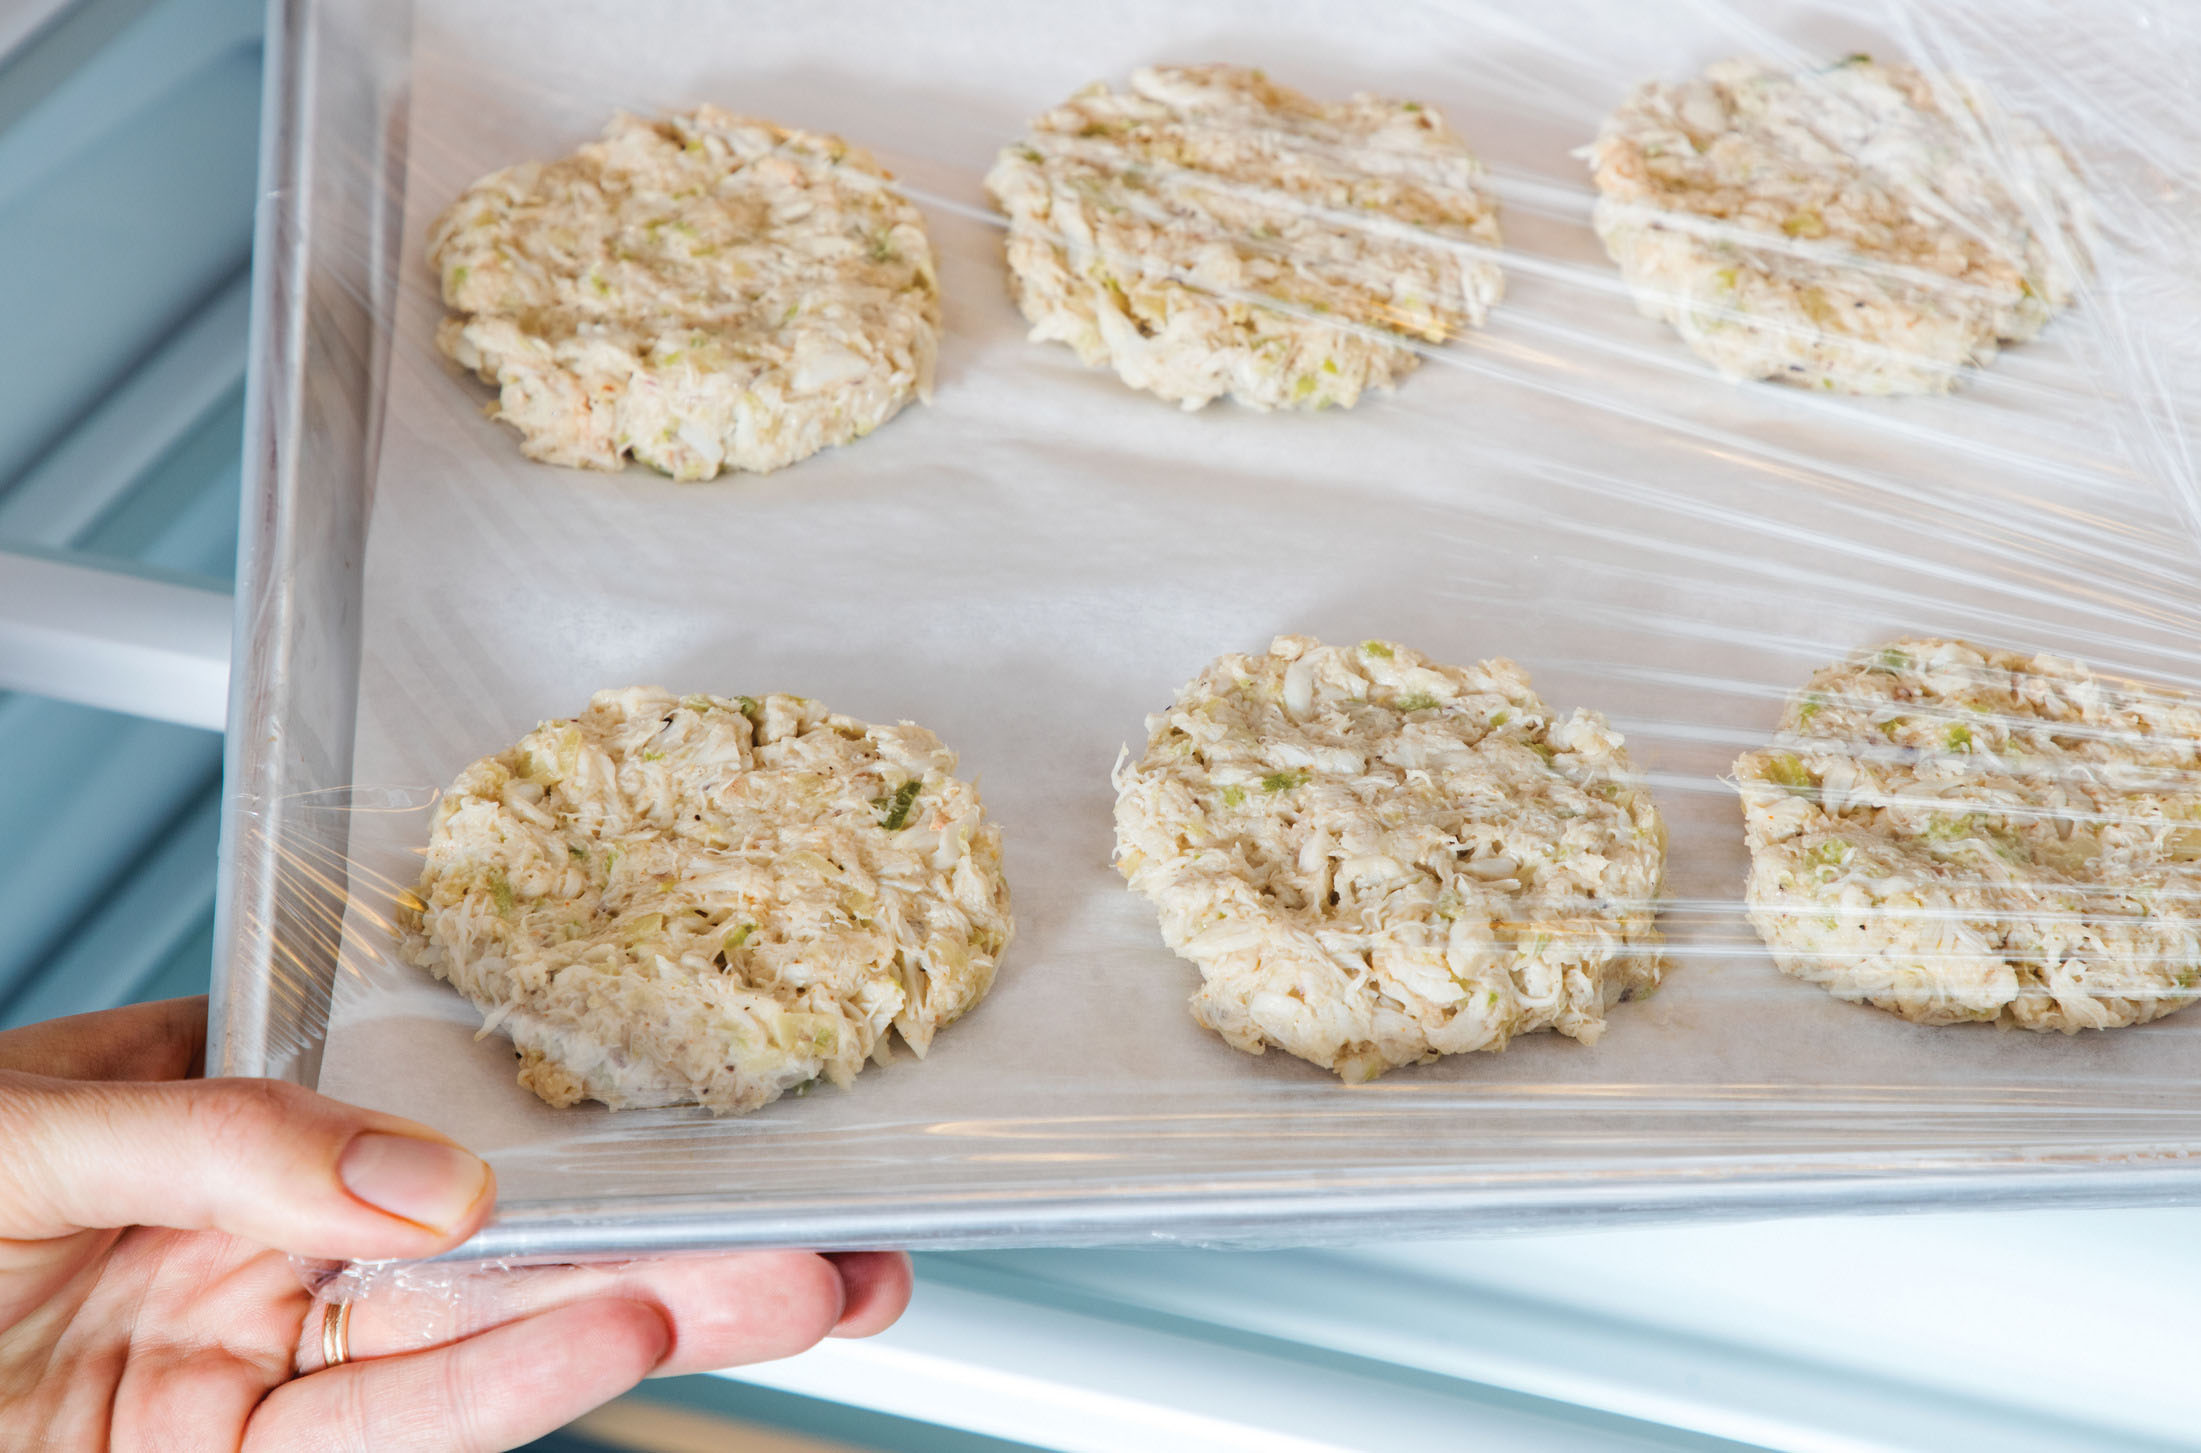
FIRM UP IN FRIDGE Resting the cakes in the refrigerator for 30 minutes helps them set.
If you’ve ever made paella, you probably know that no two versions of this famous Spanish rice dish are prepared the same way. The basic template consists of medium-grain rice cooked in a wide, shallow vessel (traditionally, a paellera) with a flavor base called sofrito, broth and maybe wine, and a jumble of meat and/or seafood. Within this framework, the proteins can be anything from poultry to pork to any species of shellfish; the seasonings may include garlic, saffron, smoked paprika—or all of the above; and the embellishments might be peas, bell peppers, or lemon. As the rice absorbs the liquid, the grains in contact with the pan form a caramelized crust known as socarrat—the most prized part of the dish. The final product is colorful and flavor-packed: a one-pot showpiece that’s perfect for entertaining.
What you might not know is that while most modern recipes are cooked on the stove or in the oven, paella was originally made on the grill, and many Spanish cooks still make it that way today. The live fire gives the dish a subtle smokiness and provides an extra-large cooking surface that encourages even socarrat development—a distinct advantage over a stove’s burners or the indirect heat of an oven, which often yield a spotty or pale crust.
Adding each ingredient at the right time—and in the right place—is key to perfect grilled paella.
But in my experience, grilling comes with challenges of its own. Besides the usual problem—the quicker-cooking proteins overcook while they wait for heartier items to cook through—keeping a charcoal fire alive can be tricky. Plus, most recipes call for a paella pan, which only enthusiasts keep on hand.
The grilled paella I had in mind would feature tender-chewy rice strewn with moist chicken, sausage, and shellfish; a uniformly golden, crisp crust; and an efficient, reliable cooking method.
GETTING SET UP
A paella pan alternative had to be grill-safe, deep enough to accommodate the food (I wanted a recipe that serves eight), and broad to maximize the amount of socarrat. A disposable aluminum pan was large enough, but its flimsy walls made it a nonstarter given the hefty amount of food I was cooking. But a sturdy stainless-steel roasting pan was easy to maneuver, and its surface area was generous—three times as spacious as a large Dutch oven. I worried that the pan’s underside would darken on the grill, but during testing I quickly discovered that the exterior stayed remarkably clean on both charcoal and gas grills.
As for the fire setup, I needed a single layer of coals to expose the pan’s base to even heat, but I also needed long-lasting heat output that wouldn’t require refueling. So I lit 7 quarts (rather than our usual 6 quarts) of charcoal and poured them evenly across the kettle’s surface, hoping that would be enough. (On a gas grill, I’d simply crank the burners to high.)
STAGGERING ALONG
Knowing I’d have to stagger the additions of the proteins to get them to finish cooking at the same time, I first set the roasting pan over the fire and browned boneless, skinless chicken thighs (richer in flavor than breasts) that I’d halved for easier portioning. From there, I pushed the meat to the side, sautéed the sofrito (finely chopped onion, bell pepper, and tomato) until it softened, and followed with minced garlic, smoked paprika, and saffron. Then came the rice. Traditional Bomba and Valencia have more bite than other medium-grain rices, but Arborio is easier to find and made a good substitute. I stirred it in with a mixture of chicken broth, clam juice, and dry sherry that I hoped would highlight the proteins. Once the rice had absorbed most of the liquid, I scattered chunks of slightly spicy, smoky, cured Spanish chorizo; shrimp (seasoned first with oil, garlic, smoked paprika, and salt); and littleneck clams over the top and let the paella cook until the grains were plump and the underside sizzled—the audible cue that a flavorful crust was forming.
My staggering strategy wasn’t quite right. The chicken was a tad dry, while the sausage wasn’t warmed through and the shellfish were just shy of done. Maybe part of the problem was not only when I was adding the proteins but also where I was placing them in the pan. Thinking that the thighs would stay moist if they cooked more gently, I arranged them around the cooler perimeter of the pan. As for the chorizo, shrimp, and clams, they merely sat on top of the rice and received relatively little heat when I added them after most of the liquid had been absorbed. Instead, I partially submerged the shrimp and clams (hinge side down so that their juices could be absorbed by the rice) in the center of the rice after the liquid came to a simmer and then scattered the chorizo over top. As the liquid reduced, all three components would stay warm without overcooking.
DIVIDE AND CONQUER
Back to the heat output: The larger fire almost held out until the rice was cooked. But to completely close the gap between the cooking time and the fuel output, I made adjustments to both.
First, I covered the lit coals with 20 fresh briquettes that would gradually ignite during cooking. Next, I seared the chicken thighs directly on the grates rather than in the roasting pan (they’d still finish cooking at the edges of the pan). They browned in half the time and picked up valuable grill flavor.
Then, I retooled the sofrito to make it quicker. Instead of waterlogged fresh peppers and tomato, I used roasted red peppers and tomato paste—shortcuts to the caramelized sweetness achieved in a long-cooked sofrito. I also divided the sofrito into two parts, sautéing the peppers with the onions in the roasting pan but adding the tomato paste and aromatics (toasted first to deepen their flavor) to the cooking liquids. Finally, I brought the seasoned broth to a boil in a saucepan so that it would quickly simmer when I poured it into the roasting pan.
Finally, the proteins were spot-on, but I took a couple of extra steps to ensure that the rice cooked evenly from top to bottom, periodically shuffling the pan around over the fire to avoid any hot spots and scraping a corner of the rice with a spoon to track the socarrat development. When the grains were almost cooked through, I scattered thawed frozen peas over the surface (they would add sweet pop and color) and covered the grill so that the trapped steam would heat them through and finish cooking any underdone grains at the surface.
The finished paella was a stunner—as impressive to eat as it was to behold. And now that I had the blueprint for making it successfully on the grill, I wasn’t sure I’d ever go back to the indoor version.
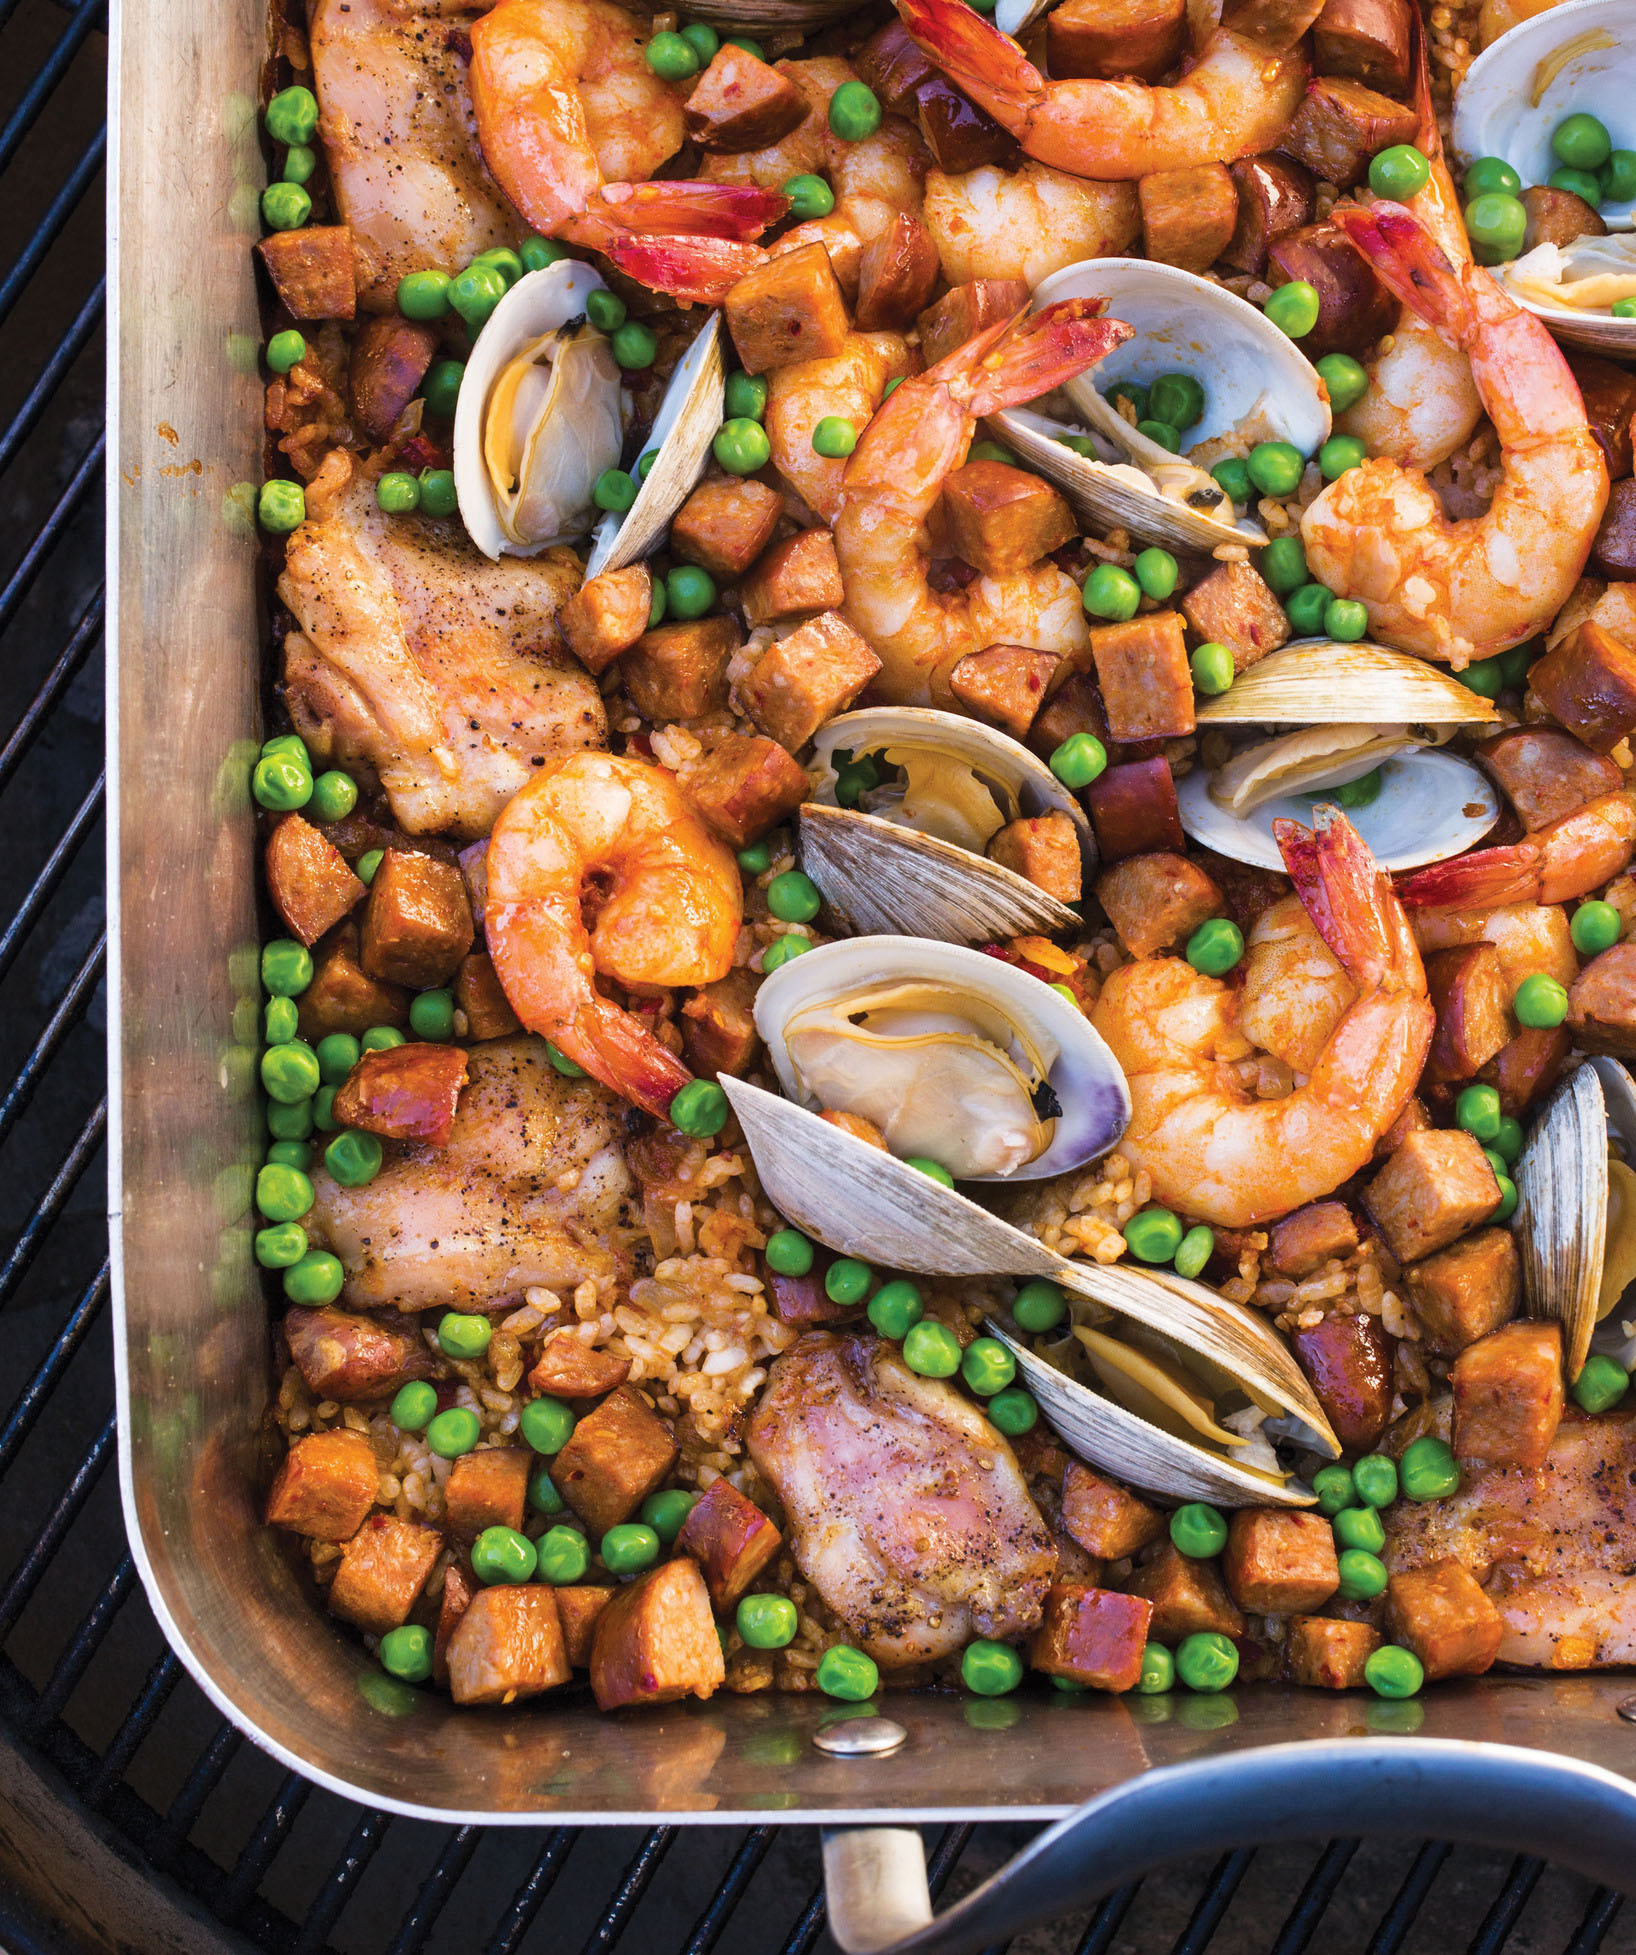
Paella on the Grill
SERVES 8
This recipe was developed using a light-colored 16 by 13.5-inch tri-ply roasting pan; however, it can be made in any heavy roasting pan that measures at least 14 by 11 inches. If your roasting pan is dark in color, the cooking times will be on the lower end of the ranges given. The recipe can also be made in a 15- to 17-inch paella pan. If littlenecks are unavailable, use 1½ pounds of shrimp in step 1 and season them with ½ teaspoon salt.
1½ pounds boneless, skinless chicken thighs, trimmed and halved crosswise
Salt and pepper
12 ounces jumbo shrimp (16 to 20 per pound), peeled and deveined
6 tablespoons extra-virgin olive oil
6 garlic cloves, minced
1¾ teaspoons hot smoked paprika
3 tablespoons tomato paste
4 cups chicken broth
1 (8-ounce) bottle clam juice
⅔ cup dry sherry
Pinch saffron threads (optional)
1 onion, chopped fine
½ cup jarred roasted red peppers, chopped fine
3 cups Arborio rice
1 pound littleneck clams, scrubbed
1 pound Spanish-style chorizo, cut into ½-inch pieces
1 cup frozen peas, thawed
Lemon wedges
1. Place chicken on large plate and sprinkle both sides with 1 teaspoon salt and 1 teaspoon pepper. Toss shrimp with 1 tablespoon oil, ½ teaspoon garlic, ¼ teaspoon paprika, and ¼ teaspoon salt in bowl until evenly coated. Set aside.
2. Heat 1 tablespoon oil in medium saucepan over medium heat until shimmering. Add remaining garlic and cook, stirring constantly, until garlic sticks to bottom of saucepan and begins to brown, about 1 minute. Add tomato paste and remaining 1½ teaspoons paprika and continue to cook, stirring constantly, until dark brown bits form on bottom of saucepan, about 1 minute. Add broth, clam juice, sherry, and saffron, if using. Increase heat to high and bring to boil. Remove saucepan from heat and set aside.
3A. For a charcoal grill: Open bottom vent completely. Light large chimney starter mounded with charcoal briquettes (7 quarts). When top coals are partially covered with ash, pour evenly over grill. Using tongs, arrange 20 unlit briquettes evenly over coals. Set cooking grate in place, cover, and open lid vent completely. Heat grill until hot, about 5 minutes.
3B. For a gas grill: Turn all burners to high, cover, and heat grill until hot, about 15 minutes. Leave all burners on high.
4. Clean and oil cooking grate. Place chicken on grill and cook until both sides are lightly browned, 5 to 7 minutes total. Return chicken to plate. Clean cooking grate.
5. Place roasting pan on grill (turning burners to medium-high if using gas) and add remaining ¼ cup oil. When oil begins to shimmer, add onion, red peppers, and ½ teaspoon salt. Cook, stirring frequently, until onion begins to brown, 4 to 7 minutes. Add rice (turning burners to medium if using gas) and stir until grains are well coated with oil.
6. Arrange chicken around perimeter of pan. Pour broth mixture and any accumulated juices from chicken over rice. Smooth rice into even layer, making sure nothing sticks to sides of pan and no rice rests atop chicken. When liquid reaches gentle simmer, place shrimp in center of pan in single layer. Arrange clams in center of pan, evenly distributing with shrimp and pushing hinge sides of clams into rice slightly so they stand up. Distribute chorizo evenly over surface of rice. Cook (covered if using gas), moving and rotating pan to maintain gentle simmer across entire surface of pan, until rice is almost cooked through, 12 to 18 minutes. (If using gas, heat can also be adjusted to maintain simmer.)
7. Sprinkle peas evenly over paella, cover grill, and cook until liquid is fully absorbed and rice on bottom of pan sizzles, 5 to 8 minutes. Continue to cook, uncovered, checking bottom of pan frequently with metal spoon, until uniform golden-brown crust forms, 8 to 15 minutes longer. (Rotate and slide pan around grill as necessary to ensure even crust formation.) Remove pan from grill, cover with aluminum foil, and let stand for 10 minutes. Serve with lemon wedges.
After being dug, clams are often held on flats submerged in salt water for several days. During this time they expel grit; scrubbing is only necessary to remove exterior sand and grit before cooking.
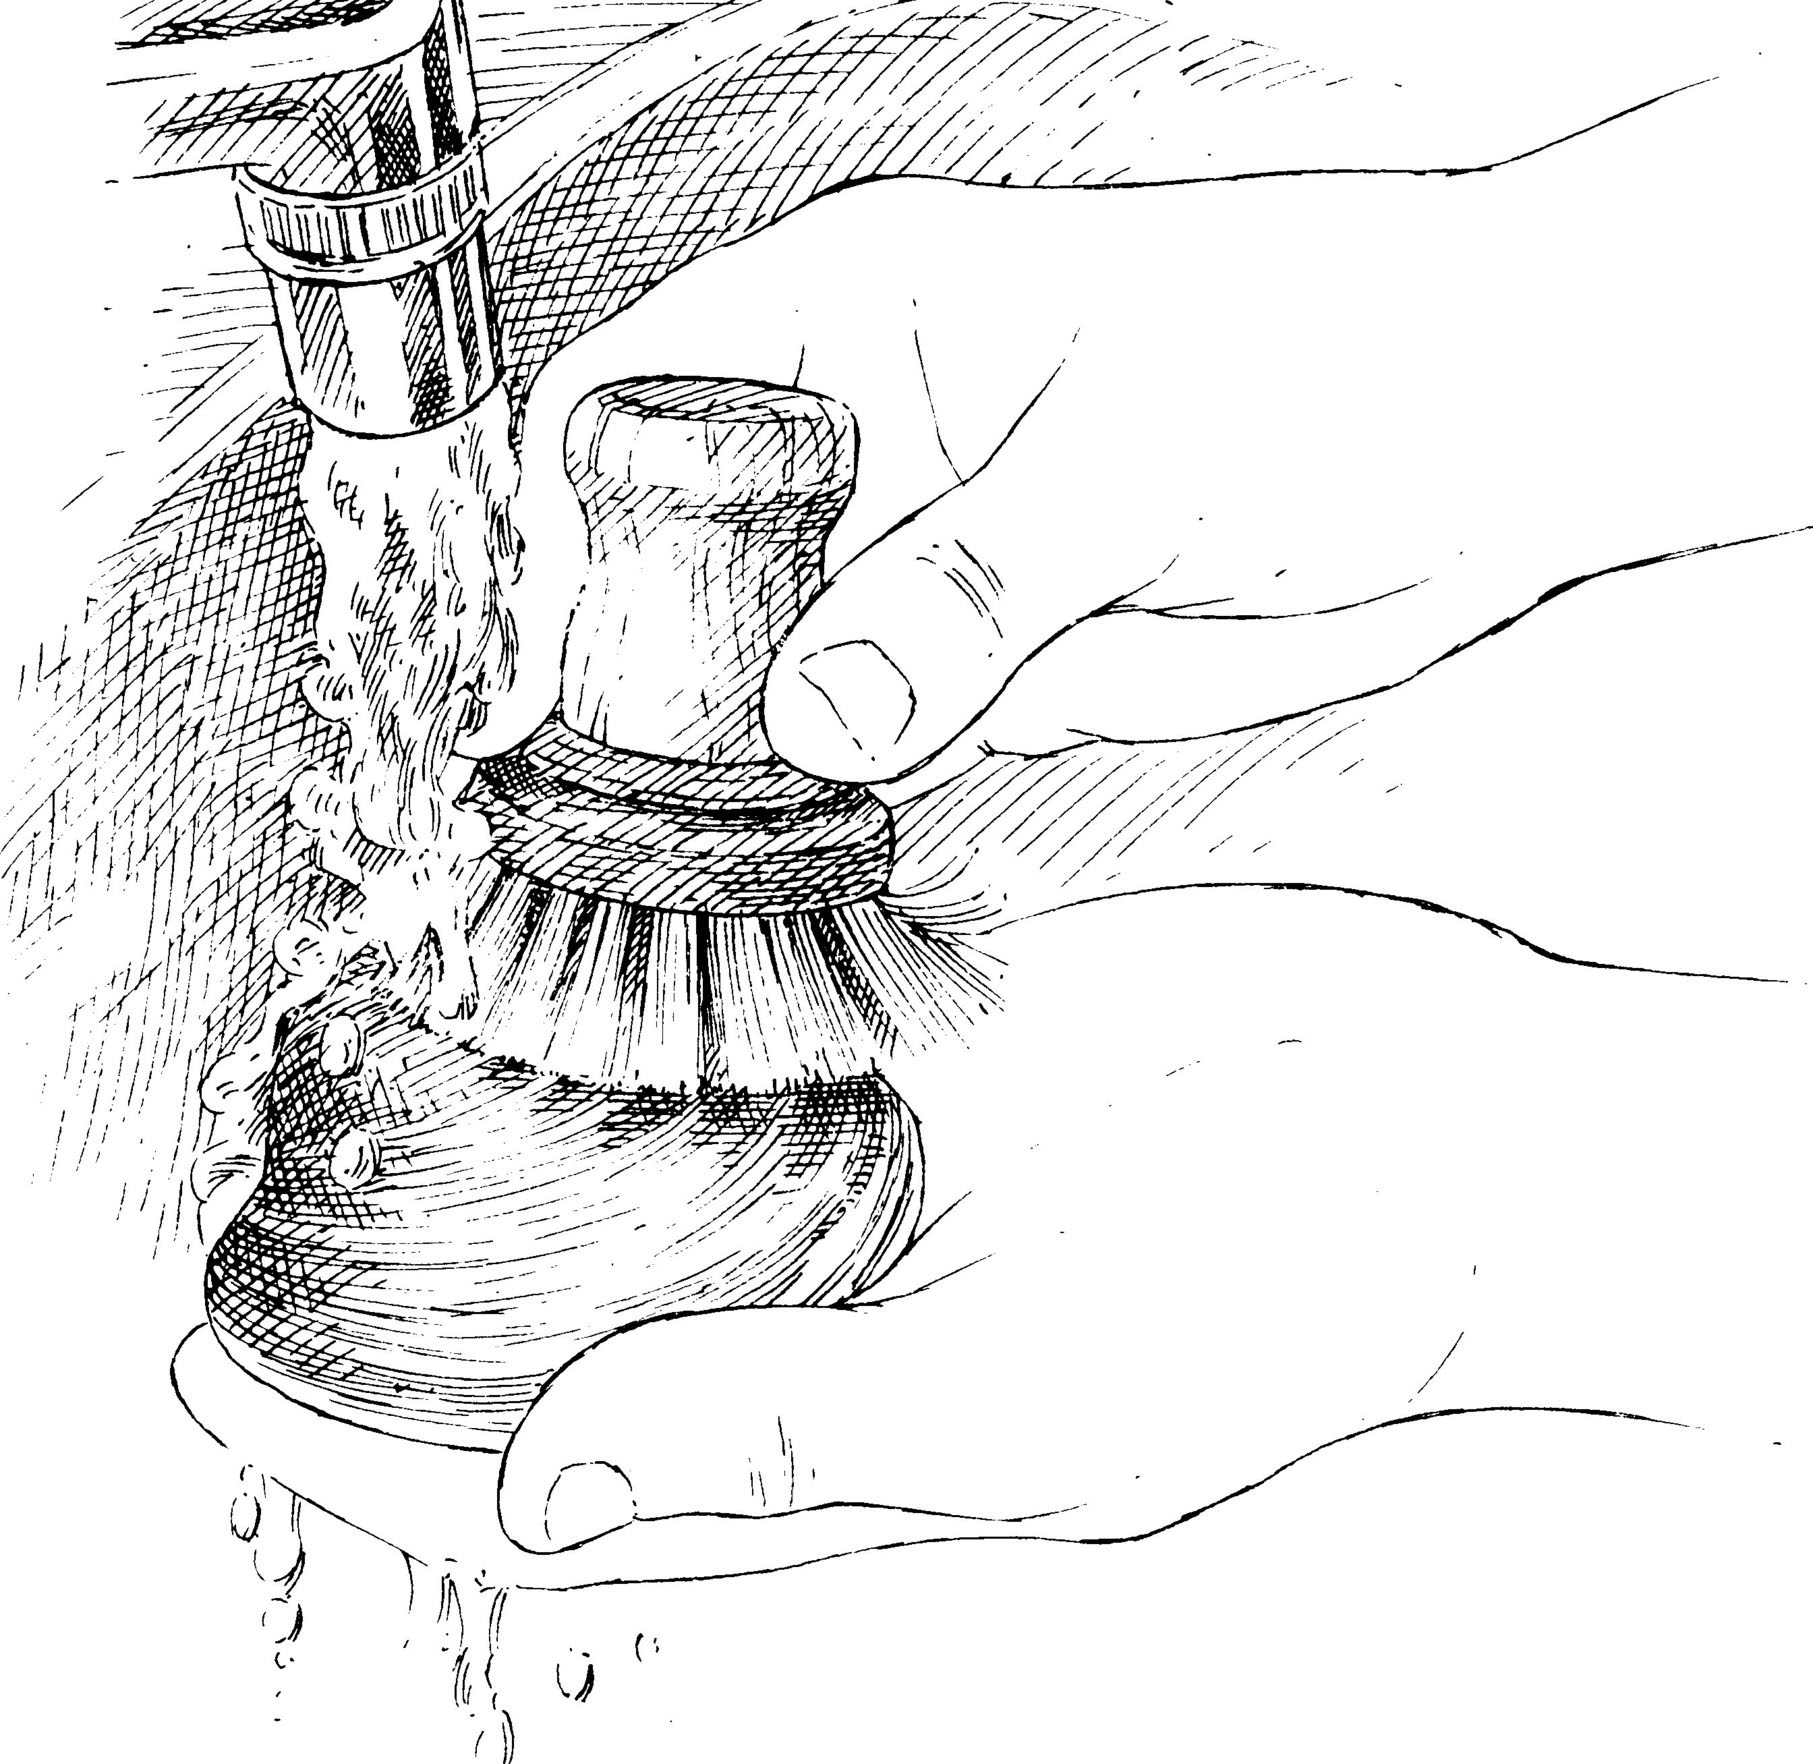
Use soft brush (sometimes sold as vegetable brush) to scrub away any bits of sand trapped in shells.
A BLUEPRINT FOR PAELLA ON THE GRILL
Producing perfectly cooked paella on the grill isn’t hard; it just takes some planning as to exactly where and when to add each element.

WHY START ON THE STOVE?
Most of the cooking for our Paella on the Grill is done outside, but starting on the stove helps to streamline and speed up the recipe.
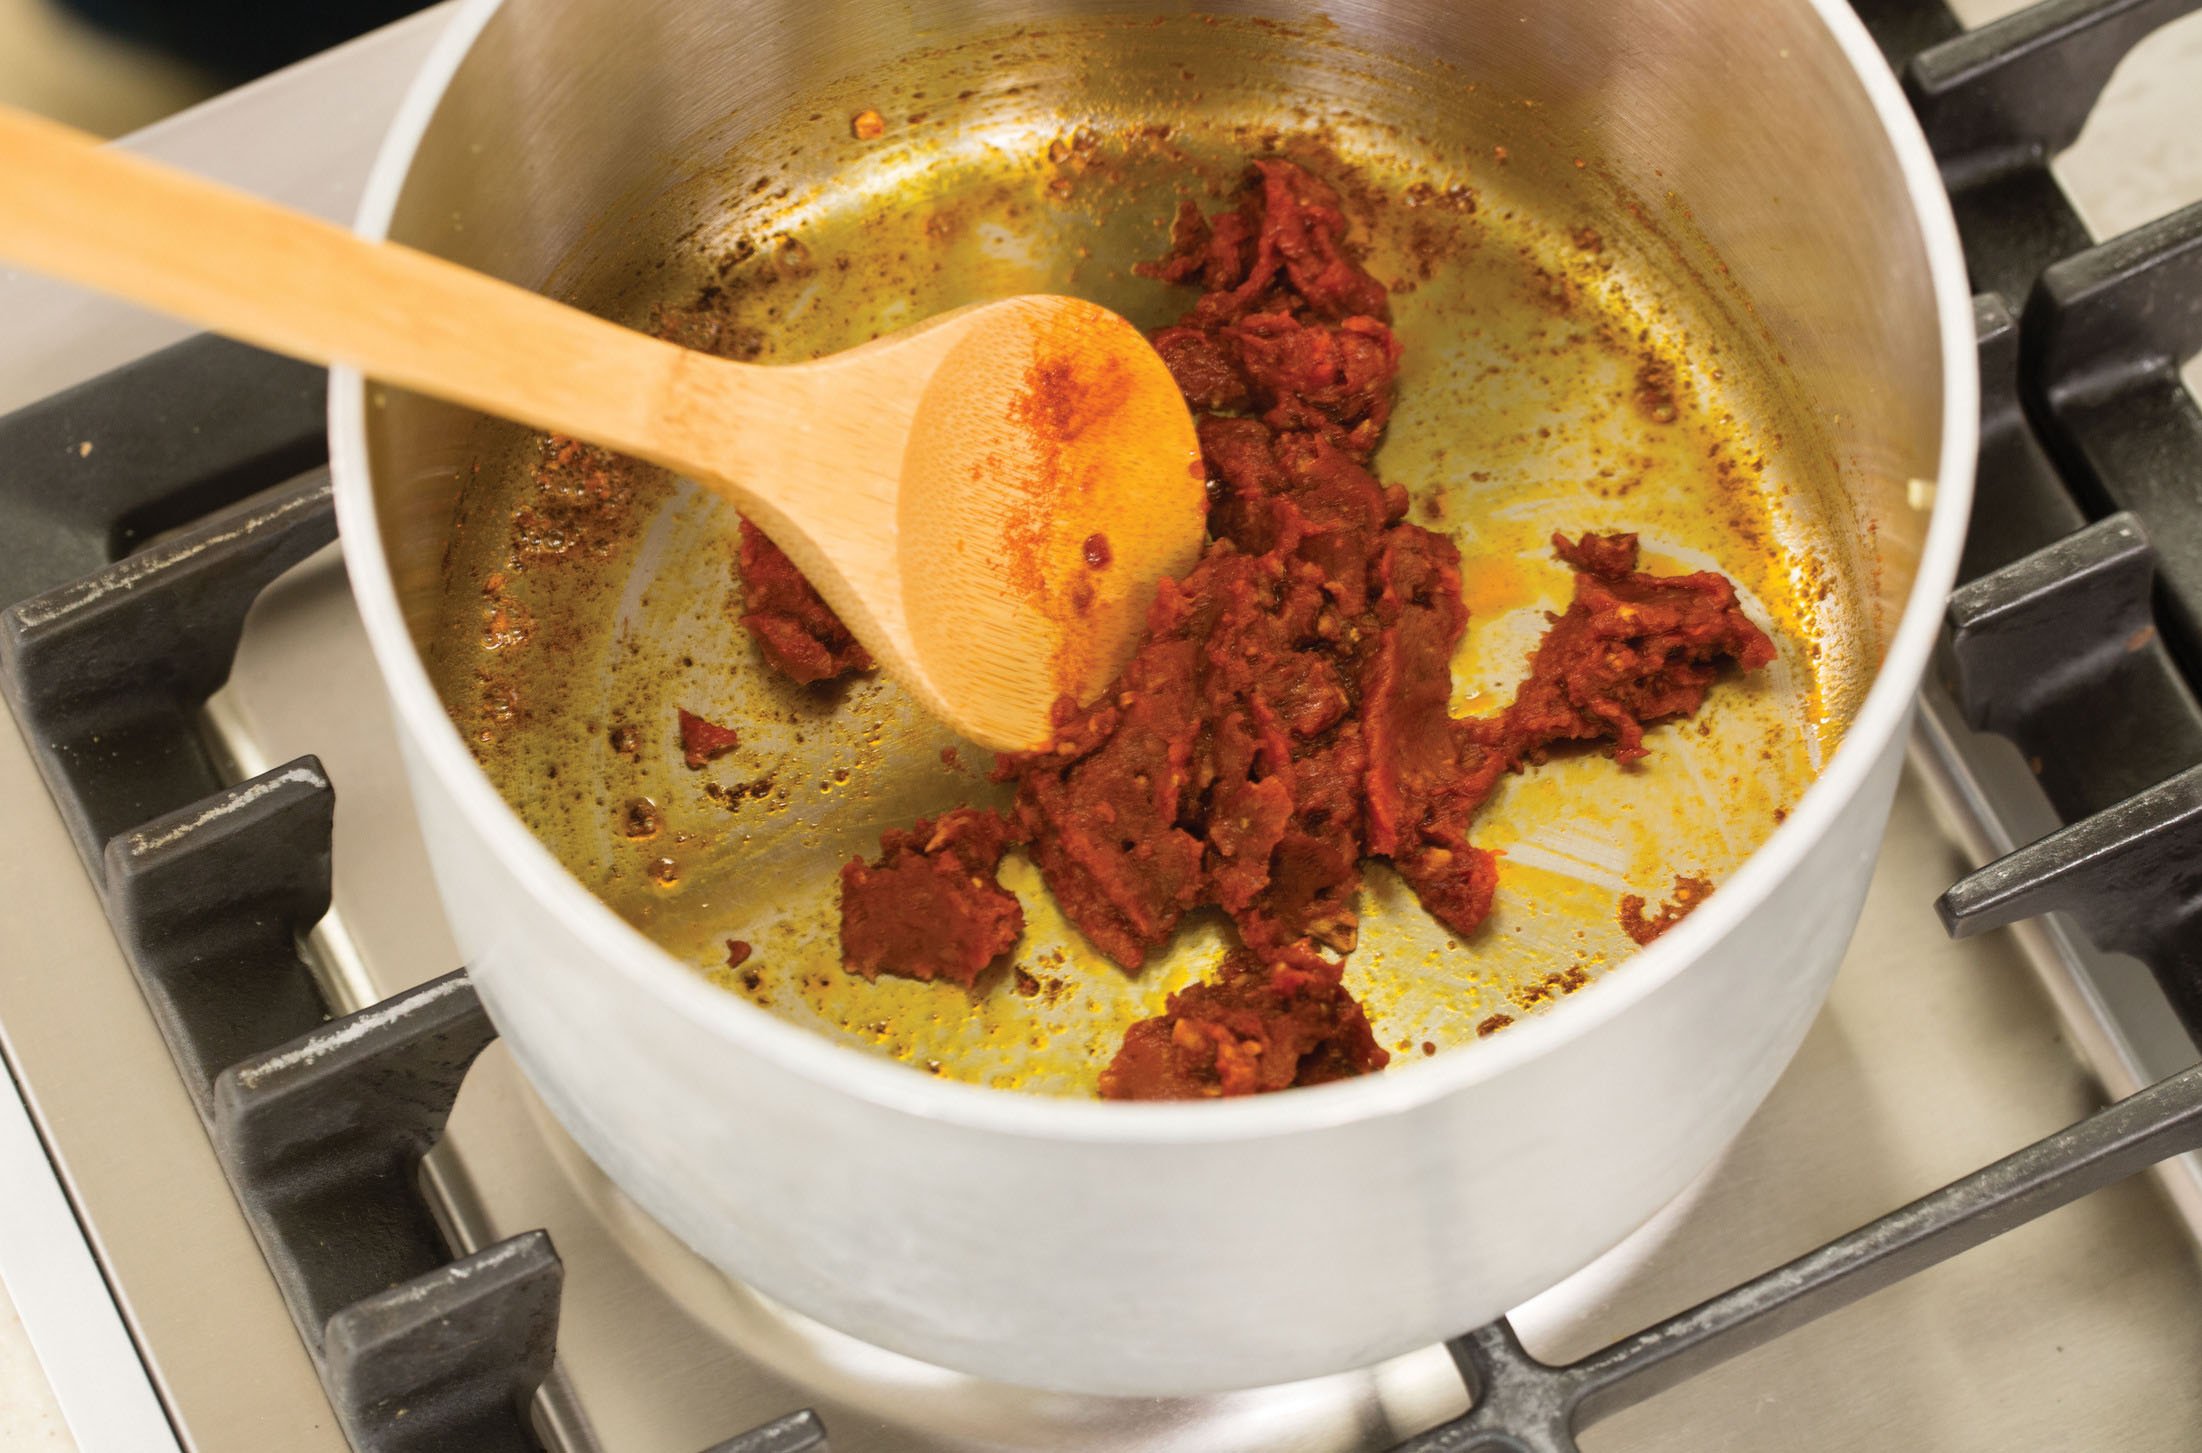
SIMPLIFY THE SOFRITO Tomatoes are an essential part of the sofrito, or flavor base, of paella, but fresh tomatoes contain a lot of liquid that must be cooked off. Instead, we use tomato paste and bloom it on the stove along with the garlic and paprika.

MAKE A WARM, FLAVORFUL BROTH We build a flavor-packed broth by adding chicken broth, clam juice, sherry, and saffron to our tomato paste base. Bringing this mixture to a boil before grilling warms it up so that it simmers quickly once added to the roasting pan.
SETTING UP THE GRILL FOR PAELLA
Our typical single-level fire wasn’t cutting it for our Paella on the Grill. Here’s how we solved the problem.

When using a charcoal grill, we add 7 quarts of lit coals (rather than the usual 6) to the grill, then top the coals with 20 unlit briquettes to keep the fire burning long enough to complete the recipe.
GETTING TO KNOW SAFFRON
A key flavor component in dishes like paella, saffron is sometimes called “red gold,” and is the world’s most expensive spice. It’s made from the dried stigmas of Crocus sativus flowers; the stigmas are so delicate they must be harvested by hand in a painstaking process. (It takes about 200 hours to pick enough stigmas to produce just 1 pound of saffron, which typically sells for thousands of dollars.)
Luckily, a little saffron goes a long way, adding a distinct reddish-gold color, notes of honey and grass, and a slight hint of bitterness. You can find it as powder or threads, but we’ve found threads are more common. The major producers are Iran and Spain; the saffron you find in the supermarket is usually Spanish. Look for bottles that contain dark red threads—saffron is graded, and the richly hued, high-grade threads from the top of the stigma yield more flavor than the lighter, lesser-grade threads from the base.
