PASTA AND NOODLES
Reinventing Macaroni and Cheese
Spaghetti and (Great) Meatballs
One challenge I’ve always wanted to set for myself is figuring out how to make pasta with nothing more than the dough, a rolling pin, and some elbow grease. While mechanical pasta rollers aren’t all that expensive, many home cooks don’t own them. But as anyone who has ever attempted to roll out a block of hard pasta dough by hand knows, it’s no easy task. The dough has a tendency to spring back—and if it isn’t rolled out gossamer thin, the pasta will never achieve the right al dente texture when cooked. So how do Italian cooks manage to pull off this feat? One answer: years of perseverance.
In her Essentials of Classic Italian Cooking (1992), Marcella Hazan devotes no fewer than six pages to the classic hand-rolling technique perfected in the Emilia-Romagna region of Italy. Employing extra-thin, super-long rolling pins measuring 1½ inches in diameter and 32 inches in length, Italians in this part of the country have developed a series of stretching movements that can transform a lump of firm dough into a thin, delicate sheet. Besides the obvious drawback of needing a generous work surface to accommodate the pin, Hazan is the first to admit that this traditional technique must be exhaustively practiced “until the motions are performed through intuition rather than deliberation.”
While I’m typically game for a hard-won lesson in authenticity, even I have limits. I wanted a dough that any cook could roll out with ease on the first try and that would cook up to that incomparably tender, silky yet slightly firm texture that makes fresh pasta so worth making.
ZERO LUCK
In addition to centuries of experience, Italians have another hand-rolling advantage—the best kind of flour for the job: doppio zero, or 00. The name denotes the fine talcum-like grind that gives pasta and baked goods made with the flour an almost creamy mouthfeel. To see what I was missing, I mail-ordered some and mixed up a batch of dough following a typical approach: I put the usual ratio of 2 cups of flour to three whole eggs in a food processor and processed until they formed a cohesive ball. I then turned the dough out on the counter, kneaded it for several minutes, and set it aside to relax for about 20 minutes. Sure enough, the 00 (which has a protein content of 9 percent) produced a malleable dough that was far easier to work with than dough made from all-purpose flour.
Adding extra egg yolks and a little bit of olive oil to our pasta dough makes it silky, supple, and easy to roll out by hand.
To achieve similarly soft dough, my first inclination was to dilute the protein content of all-purpose flour (which boasts 10 to 12 percent protein) by cutting it with cake flour (which has 6 to 8 percent protein). I substituted increasing amounts of cake flour for all-purpose and noted that swapping even a quarter of the all-purpose flour for cake flour had a dramatic impact on both the raw dough and the cooked noodles. With 25 percent cake flour in the mix, my dough was much softer, less elastic, and easier to roll out. Unfortunately, what I had gained in convenience I lost in the texture of the cooked strands, which released a lot of starch into the cooking water and emerged with a pitted, pebbly surface. Our science editor explained why: For noodles to remain intact and leach only a little starch into the cooking water, the starch granules in the flour need to be fully surrounded by a strong network of proteins. But the bleach in cake flour not only weakens the proteins but also makes the starch more absorbent and prone to bursting—a good thing when you want a tender cake but not when you’re making pasta. Clearly, I needed a different strategy for producing softer, more malleable dough, so I turned my attention to the amount of liquid in the recipe.
IS WETTER BETTER?
Traditional pasta dough is about 30 percent water (compared with around 55 percent hydration for a basic sandwich loaf), all of which comes from the eggs. I figured that simply upping the hydration level would create a softer dough that would be easier to roll out, so I experimented with adding plain water to a batch of dough and an extra egg white (the white accounts for 80 percent of an egg’s moisture) to another. Just as I’d hoped, these more hydrated doughs were more extensible—at least initially. But they had their downsides: First, the wetter surface of the dough caused considerable sticking, which required the heavy use of bench flour during rolling and led to cooked pasta with a starchy, gummy surface. Second, by adding more water, I’d allowed for too much gluten development, creating dough that, although easier to roll out at first, developed a greater tendency to snap back to its original shape once stretched out; this also meant pasta that cooked up tough and chewy. Still, I felt I was on to something by increasing the liquid in my recipe. Olive oil is a common addition to many fresh pasta recipes. What if I introduced it instead of water?
I mixed up a few more batches of dough, adding increasing amounts of olive oil. As the oil amount increased, the dough became more supple and easier to roll out. But because fat coats the proteins, inhibiting gluten formation, too much oil once again weakened the dough’s structure, leading to excess starch loss in the water and a compromised texture. I found my upper limit at 2 tablespoons of oil.
I was finally getting somewhere, but this dough was still far from user-friendly.
THAT’S ALL, YOLKS
Up to this point I had tried adding water, protein (from egg whites), and fat to my dough, but I hadn’t experimented with the one ingredient that contains all three: yolks. Many pasta doughs substitute yolks for some of the whole eggs, because while they still contain about 50 percent water, they are also loaded with fat and emulsifiers, both of which limit gluten development. Unlike doughs made with cake flour or excessive amounts of oil, dough made with extra yolks still has plenty of structure thanks to the coagulation of the egg proteins. To 2 cups of flour, two whole eggs (I ditched one whole egg from the traditional formula), and 2 tablespoons of olive oil, I kept adding yolks until I had a truly soft, easy-to-work dough that boiled up nice and tender. The magic number proved to be six extra yolks.
This dough took on a beautiful yellow hue, yielded to gentle pressure with a rolling pin, and cooked up into delicate ribbons with a springy bite. While tasters had been concerned that the pasta would taste too eggy, they needn’t have feared. The sulfurous compounds responsible for the flavor we associate with eggs reside primarily in the whites, not the yolks.
Finally, I turned my attention to finding the best way to rest, roll, and cut the pasta.
A LITTLE R&R
After being mixed, pasta dough is often rested for 20 to 30 minutes to allow the flour to hydrate and the gluten to cross-link into a network and then relax. Would a longer rest be even better? To find out, I let the next batch sit at room temperature for an extended period of time, cutting and rolling out pieces every 30 minutes. After an hour, my dough was significantly more malleable—and it continued to soften over the next three hours (four hours of resting time was ideal, though not critical for success).
This dough was worlds away from the dense blocks I’d struggled with in the past, but it still required a bit of technique to roll out. I knew I needed to avoid using too much bench flour: A little cling is a good thing, as it prevents the dough from springing back too easily. Plus, as I’d already learned, excess flour doesn’t get incorporated into the dough and turns the surface of the pasta coarse and gummy. With all that in mind, I first cut the dough into six manageable pieces. Working with one at a time, I used my hands in combination with a rolling pin to make the dough into a 6 by 20-inch rectangle.
From here, the possibilities were limitless. For ribbon-style pasta, I allowed the sheets to dry on kitchen towels until firm around the edges (a step that enabled me to avoid dusting with more flour) before folding them up in 2-inch intervals and slicing crosswise to the desired thickness.
With dough that’s this easy to roll out and that cooks up into wonderfully springy, delicate noodles, I’d wager that even cooks with pasta machines might be tempted to leave them in the cabinet.

Fresh Pasta without a Machine
MAKES 1 POUND; SERVES 4 TO 6
If using a high-protein all-purpose flour such as King Arthur, increase the number of egg yolks to seven. The longer the dough rests in step 2, the easier it will be to roll out. When rolling out the dough, avoid adding too much flour, which may result in excessive snapback. To make the pasta ahead, follow the recipe through step 5, transfer the baking sheet of pasta to the freezer, and freeze until the pasta is firm. Transfer to a zipper-lock bag and store for up to two weeks. Cook frozen pasta straight from the freezer as directed in step 6.
2 cups (10 ounces) all-purpose flour, plus extra as needed
2 large eggs plus 6 large yolks
2 tablespoons olive oil
1 tablespoon salt
1 recipe sauce (recipes follow)
1. Process flour, eggs and yolks, and oil in food processor until mixture forms cohesive dough that feels soft and is barely tacky to touch, about 45 seconds. (If dough sticks to fingers, add up to ¼ cup flour, 1 tablespoon at a time, until barely tacky. If dough doesn’t become cohesive, add up to 1 tablespoon water, 1 teaspoon at a time, until it just comes together; process 30 seconds longer.)
2. Turn dough ball onto dry counter and knead until smooth, 1 to 2 minutes. Shape dough into 6-inch-long cylinder. Wrap in plastic wrap and let rest at room temperature for at least 1 hour or up to 4 hours.
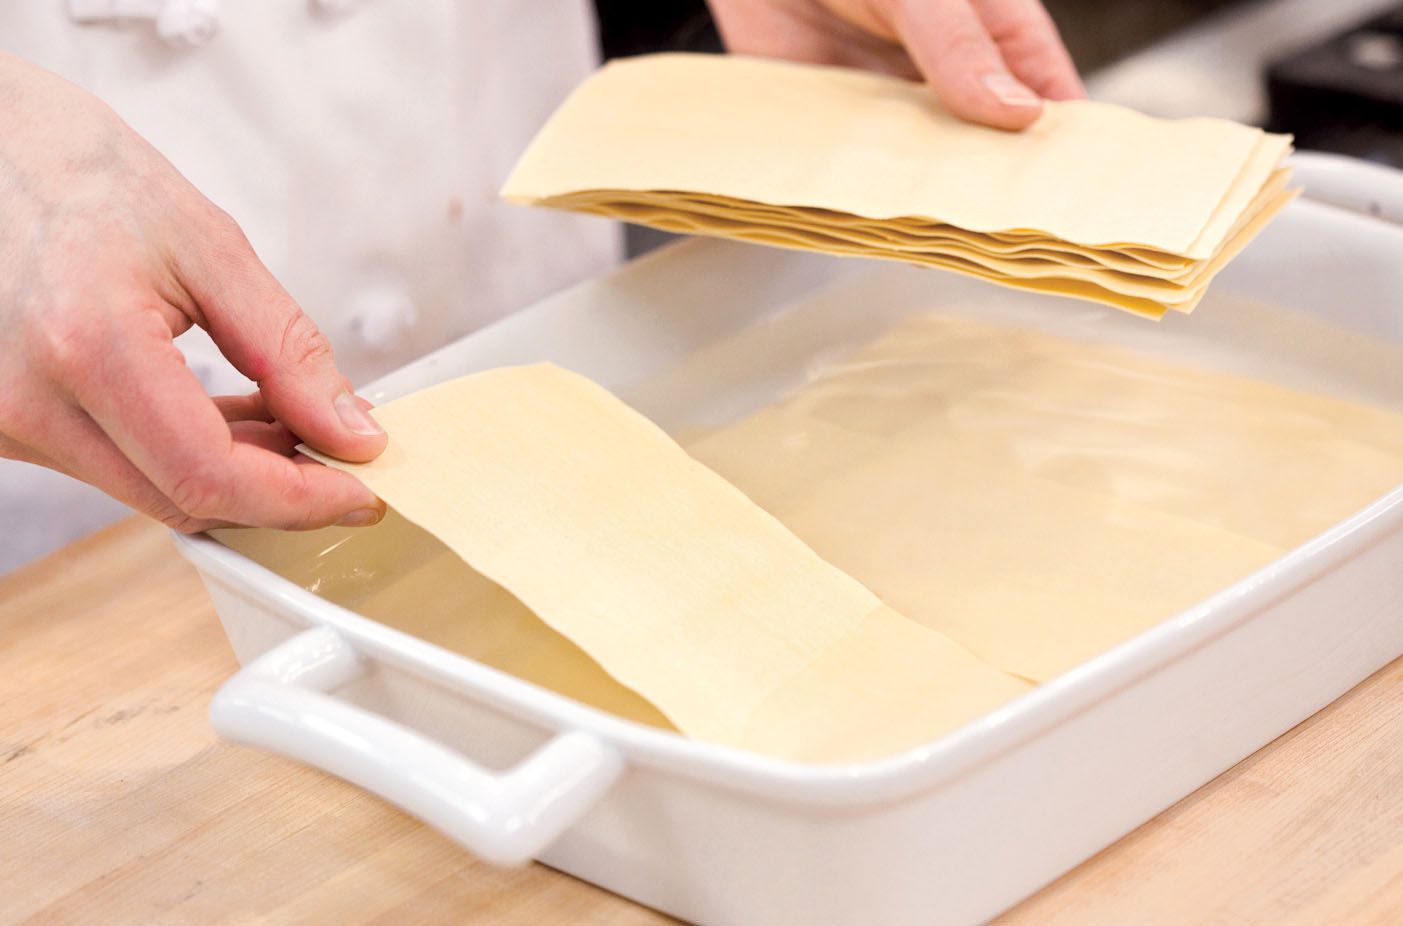
3. Cut cylinder crosswise into 6 equal pieces. Working with 1 piece of dough at a time (rewrap remaining dough), dust both sides with flour, place cut side down on clean counter, and press into 3-inch square. Using heavy rolling pin, roll into 6-inch square. Dust both sides of dough lightly with flour. Starting at center of square, roll dough away from you in 1 motion. Return rolling pin to center of dough and roll toward you in 1 motion. Repeat rolling steps until dough sticks to counter and measures roughly 12 inches long. Lightly dust both sides of dough with flour and continue to roll until dough measures roughly 20 inches long and 6 inches wide, frequently lifting dough to release it from counter. (You should be able to easily see outline of your fingers through dough.) If dough firmly sticks to counter and wrinkles when rolled out, dust dough lightly with flour.
4. Transfer pasta sheet to clean dish towel and let stand, uncovered, until firm around edges, about 15 minutes; meanwhile, roll out remaining dough.
5. Starting with 1 short end, gently fold pasta sheet at 2-inch intervals until sheet has been folded into flat, rectangular roll. Using sharp chef’s knife, slice crosswise into 3⁄16-inch-thick noodles. Use your fingers to unfurl pasta and transfer to baking sheet. Repeat folding and cutting remaining sheets of dough. Cook noodles within 1 hour or freeze.
6. Bring 4 quarts water to boil in large pot. Add pasta and salt and cook until tender but still al dente, about 3 minutes. Reserve 1 cup cooking water, then drain pasta and return it to pot. Toss with sauce and serve immediately.
sauces
Olive Oil Sauce with Anchovies and Parsley
MAKES 1 CUP; ENOUGH FOR 1 POUND PASTA
⅓ cup extra-virgin olive oil
2 garlic cloves, minced
2 anchovy fillets, rinsed, patted dry, and minced
Salt and pepper
2 tablespoons chopped fresh parsley
4 teaspoons lemon juice
1. Heat oil in 12-inch skillet over medium-low heat until shimmering. Add garlic, anchovies, ½ teaspoon pepper, and ⅛ teaspoon salt; cook until fragrant, about 30 seconds. Remove pan from heat and cover to keep warm while cooking pasta.
2. To serve, return pan to medium heat. Add cooked pasta, ½ cup reserved cooking water, parsley, and lemon juice; toss to combine, adjusting consistency with remaining reserved cooking water as needed. Season with salt and pepper to taste, and serve immediately.
MAKES 3 CUPS; ENOUGH FOR 1 POUND PASTA
Watch the butter closely so that the solids don’t burn.
1 (28-ounce) can whole peeled tomatoes
4 tablespoons unsalted butter, cut into 4 pieces
2 garlic cloves, minced
½ teaspoon sugar
Salt and pepper
2 teaspoons sherry vinegar
3 tablespoons chopped fresh basil
Grated Parmesan cheese
1. Process tomatoes and their juice in food processor until smooth, about 30 seconds. Melt 3 tablespoons butter in 12-inch skillet over medium-high heat, swirling occasionally, until butter is dark brown and releases nutty aroma, about 1½ minutes. Stir in garlic and cook for 10 seconds. Stir in processed tomatoes, sugar, and ½ teaspoon salt and simmer until sauce is slightly reduced, about 8 minutes. Remove pan from heat; whisk in vinegar and remaining 1 tablespoon butter. Season with salt and pepper to taste; cover to keep warm while cooking pasta.
2. To serve, return pan to medium heat. Add cooked pasta, ¼ cup reserved cooking water, and basil; toss to combine, adjusting consistency with remaining reserved cooking water as needed. Season with salt and pepper to taste, and serve immediately with Parmesan.
MAKES 2 CUPS; ENOUGH FOR 1 POUND PASTA
1½ cups walnuts
¾ cup dry white wine
½ cup heavy cream
1 ounce Parmesan cheese, grated (½ cup)
Salt and pepper
¼ cup minced fresh chives
1. Toast walnuts in 12-inch skillet over medium heat until golden and fragrant, 2 to 4 minutes. Process 1 cup walnuts in food processor until finely ground, about 10 seconds. Transfer to small bowl. Pulse remaining ½ cup walnuts in food processor until coarsely chopped, 3 to 5 pulses. Bring wine to simmer in now-empty skillet over medium-high heat; cook until reduced to ¼ cup, about 3 minutes. Whisk in cream, walnuts, Parmesan, ¼ teaspoon salt, and ½ teaspoon pepper. Remove pan from heat and cover to keep warm.
2. To serve, return pan to medium heat. Add pasta, ½ cup reserved cooking water, and chives; toss to combine, adding remaining cooking water as needed to adjust consistency. Season with salt and pepper to taste; serve immediately.
ROLLING AND CUTTING PASTA DOUGH BY HAND
To roll pasta by hand, we start with a soft, malleable dough and work with one small, manageable piece at a time.

1. WORK WITH SMALL PIECES Divide rested dough into 6 equal pieces. Working with 1 piece at a time (keeping other dough pieces covered), dust with flour, then press cut side down into 3-inch square. With rolling pin, roll into 6-inch square and dust with flour.

2. ROLL FROM CENTER Roll dough to 6 by 12 inches, rolling from center of dough one way at a time; dust with flour. Continue rolling to 6 by 20 inches, lifting frequently to release from counter. Transfer dough to kitchen towel and air-dry for 15 minutes.
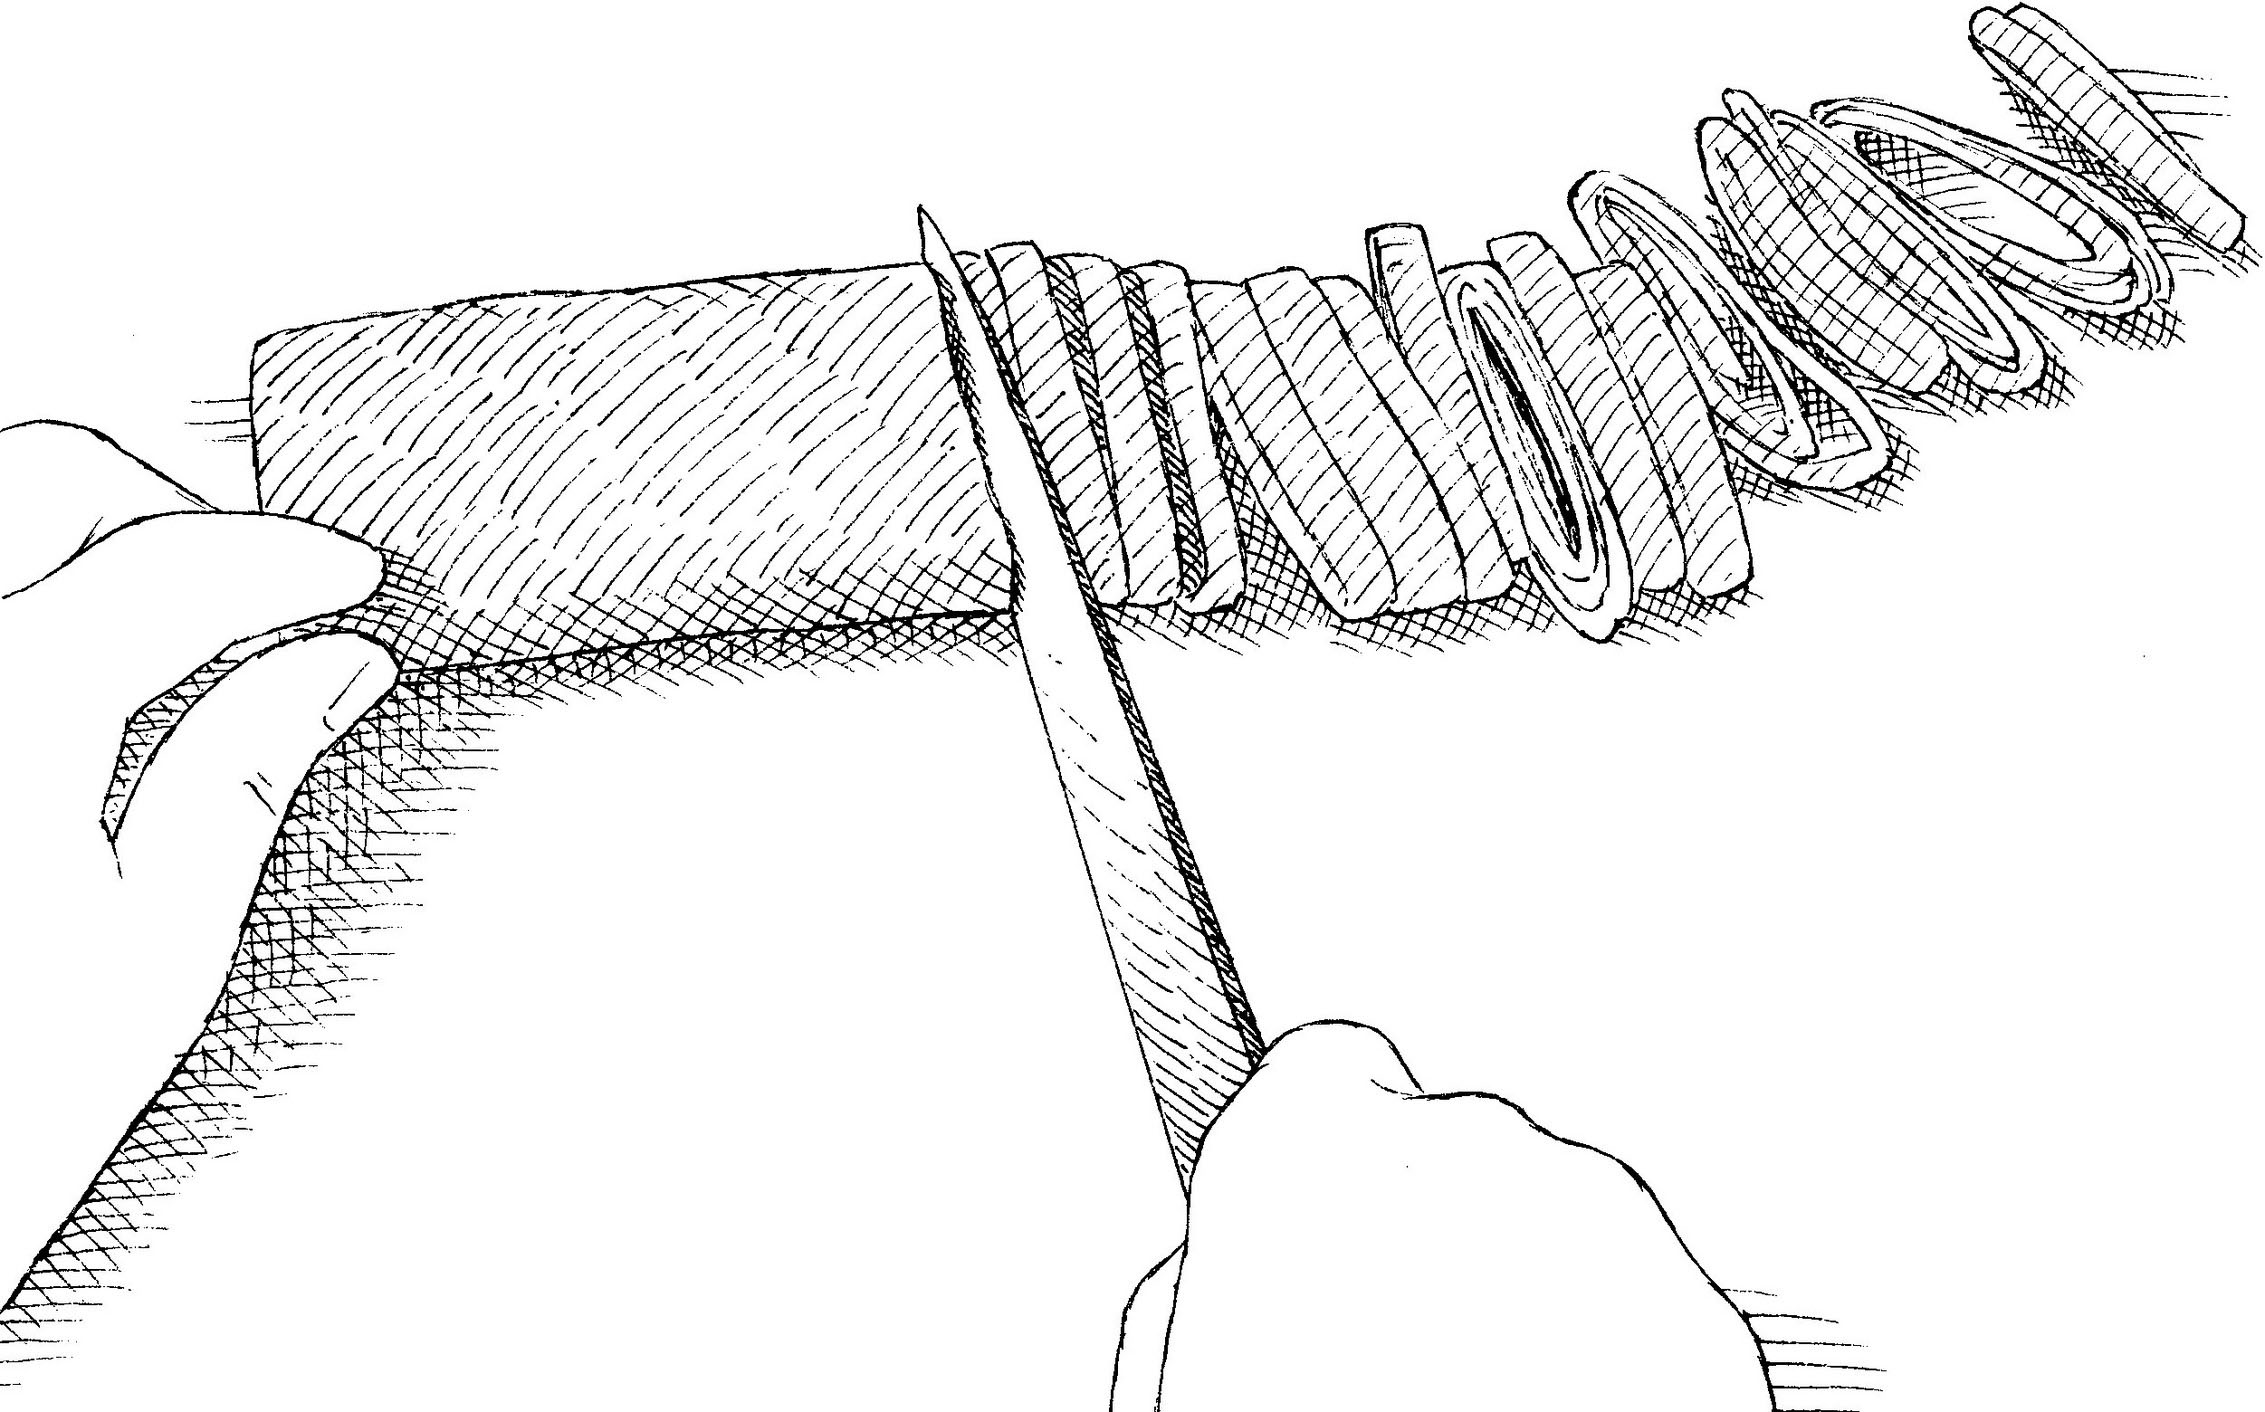
3. FOLD AND CUT INTRO STRIPS Starting with short end, gently fold dried sheet at 2-inch intervals to create flat roll. Slice into 3/16-inch-thick noodles. Use your fingers to unfurl pasta; transfer to baking sheet.
REINVENTING MACARONI AND CHEESE
PAM ANDERSON WITH KAREN TACK, January/February 1997
Macaroni and cheese has always been on my “must-explore” list. It’s just eaten too often in this country for us to ignore it. Kids in particular say yes to macaroni and cheese when they turn up their noses at everything else. Unfortunately, it’s the boxed version, complete with orange cheese powder, that’s made most often.
There are two distinct styles of macaroni and cheese: béchamel-based, in which macaroni is blanketed with a cheesy white sauce, usually topped with crumbs, and baked. The other variety, the kind my mother always made, is custard-based. In this style, a mixture of egg and milk is poured over layers of grated cheese and noodles. As the dish bakes, the eggs, milk, and cheese set into a custard. It can also be topped with bread crumbs, although my mom always sprinkled crushed saltine crackers over hers.
Evaporated milk creates a perfect creamy base for a macaroni and cheese that is almost as quick to make as boxed versions.
This should be a wonderful, satisfying dish, but many of the recipes I looked at seemed tired, leaden, and uninspired. After compiling a bunch of test recipes, I began to wonder if I really did still love this simple dish. Then I read the chapter on macaroni and cheese in John Thorne’s Simple Cooking (1989). “As it happens,” he begins, “I’m very fond of macaroni and cheese, and keep a special spot in my heart for cooks who genuinely love it: they are not that many.” After reading his four-page essay, I suspected that his recipe for macaroni and cheese was the real one, the others mere shadows.
NO COMPARISON
Making the dish confirmed that John Thorne’s macaroni and cheese was the best. I could do our usual in-depth testing, but I knew up front I wouldn’t come up with anything better.
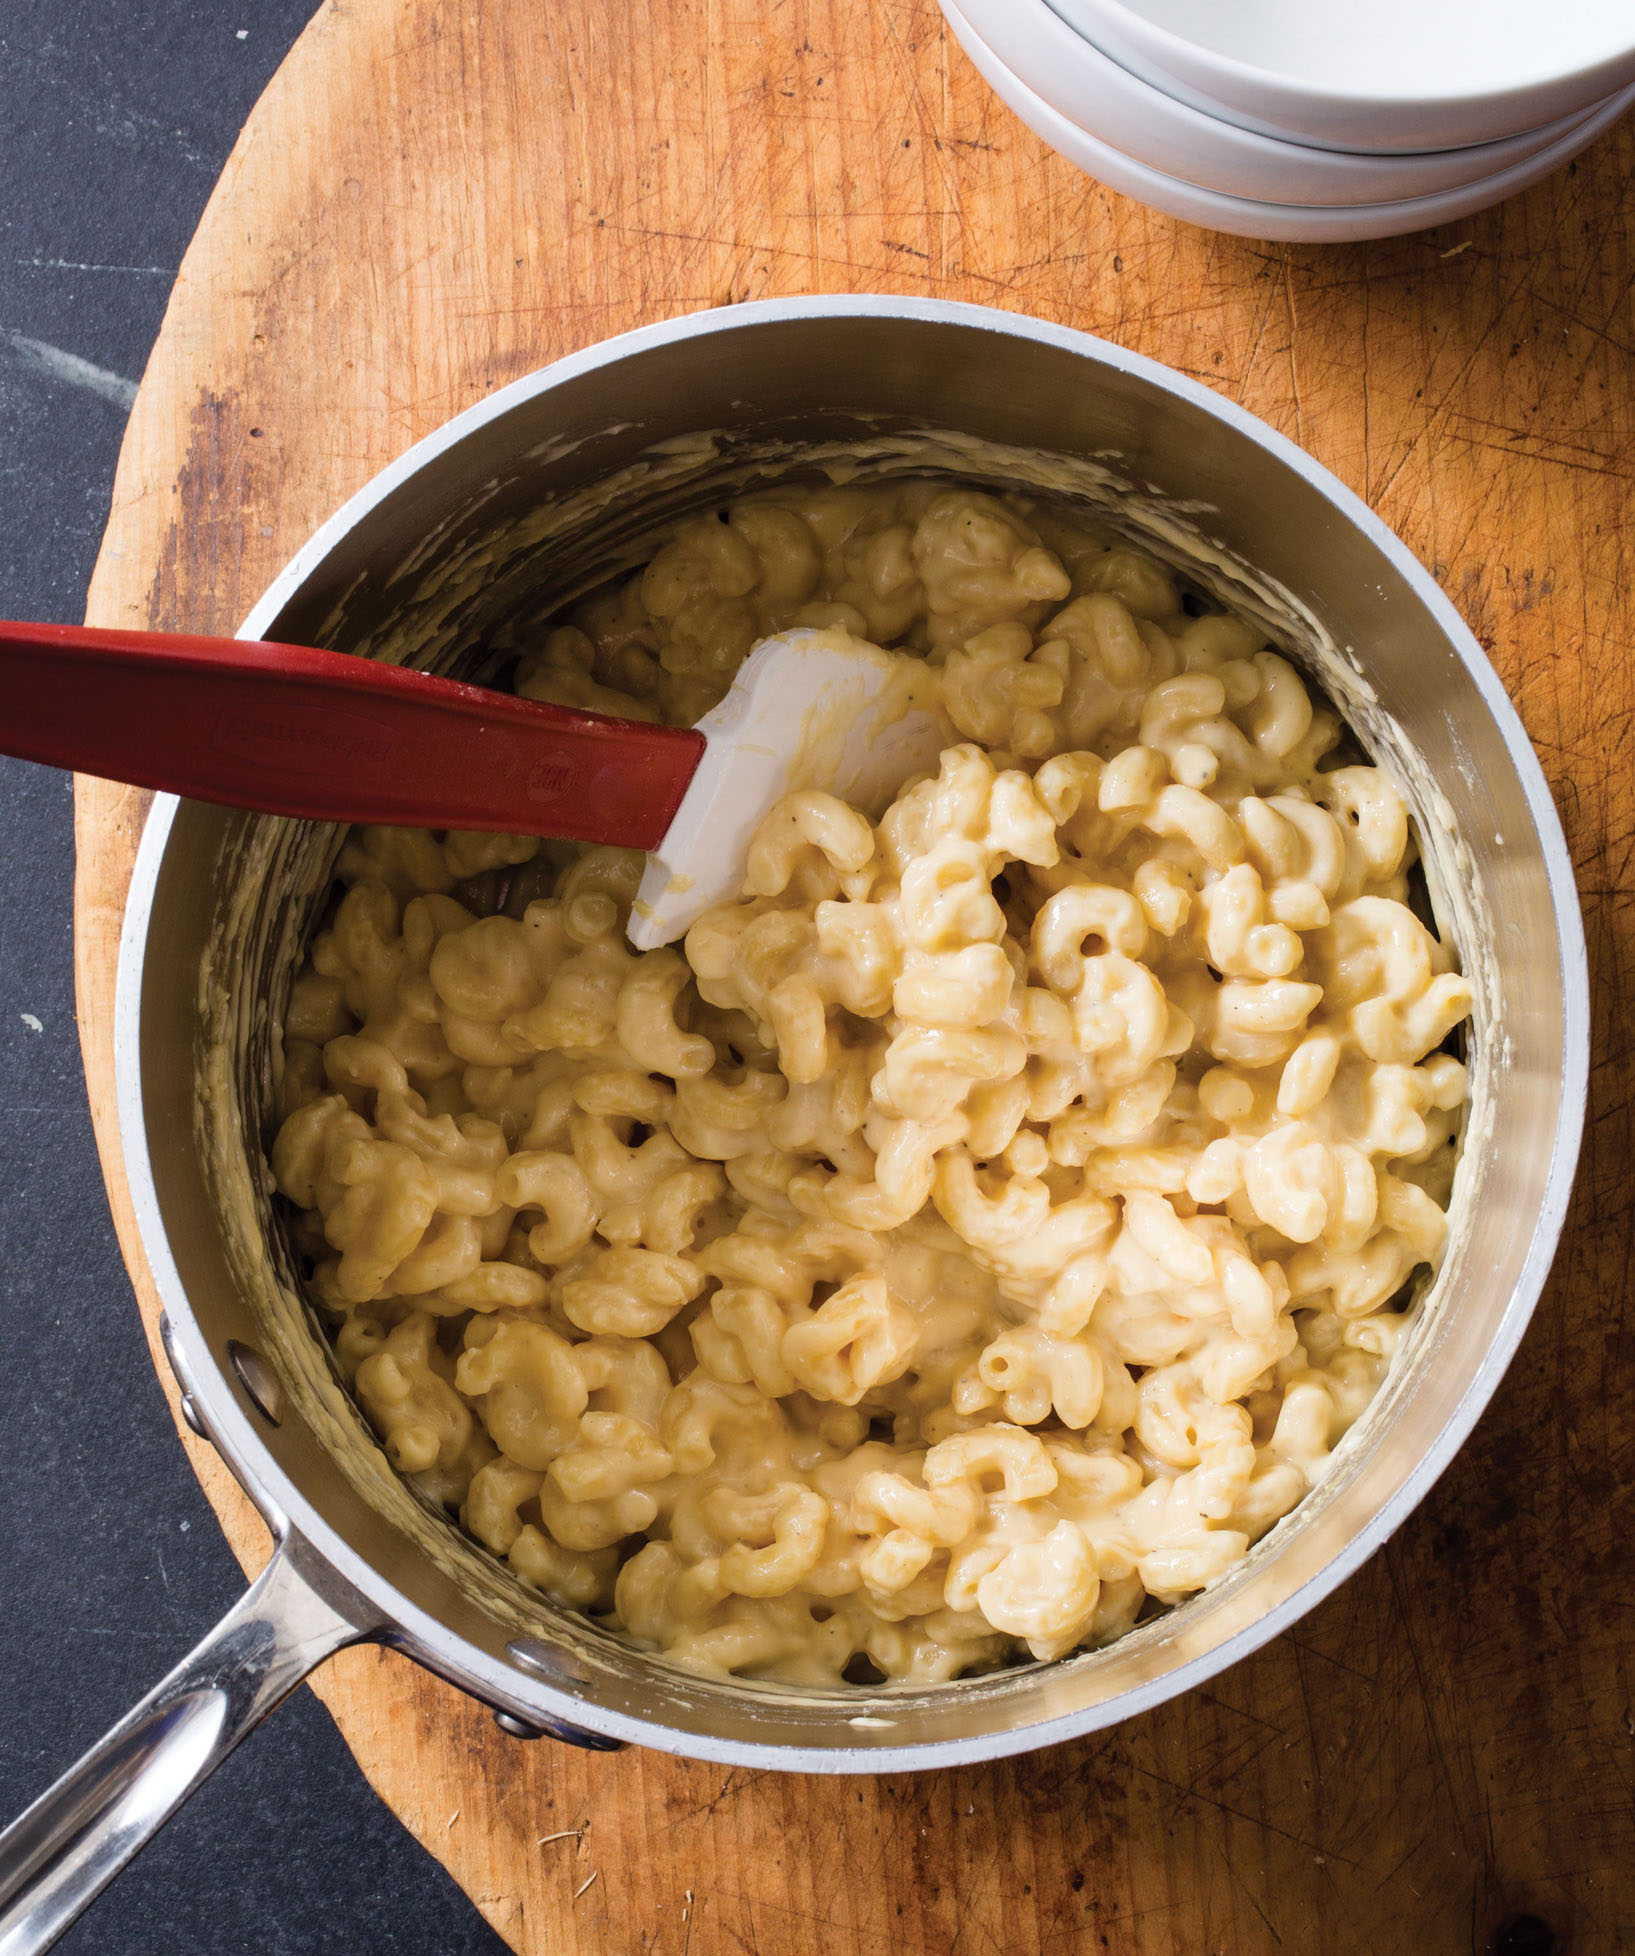
Thorne’s recipe starts with macaroni cooked just shy of al dente and then tossed with butter. Evaporated milk, hot sauce, dry mustard, eggs, and lots of cheese are stirred into the noodles. The combination is baked for 20 minutes, with cheese and milk additions and a thorough stir every 5 minutes. Frequent stirring allows the eggs to thicken without setting, which results in an incredibly silky sauce. During cooking, the sauce settles into the tubular openings, offering a burst of cheese with each new bite. I was delighted. Never had I gotten a dish right on the first try. For once, someone else had done the homework.
Just to confirm my belief, I baked the two styles of macaroni and cheese defined earlier: one with a cheese-flavored béchamel sauce, the other thickened with eggs, milk, and cheese. Neither compared to Thorne’s dish. The béchamel-based version was grainy and tasted exactly as Thorne predicted: not like macaroni and cheese, but “macaroni with cheese sauce.”
Of the two macaroni and cheeses, I preferred the cheesier-flavored custard version. Because this custard-based macaroni and cheese was simply a variant of Thorne’s recipe, I thought I might offer it as an alternative to stirring. A side-by-side tasting proved the two macaroni and cheese dishes to be very different, however, and the stirred version remained superior in my mind. Compared to the luxuriously silky cheese sauce of the stirred macaroni, the baked egg, milk, and cheese formed a dry custard that set around the noodles. Thorne’s recipe was clearly still the best.
PUTTING IT TO THE TEST
The competition ruled out, I moved forward to study Thorne’s recipe a little more closely. Did the dish really require evaporated milk or was this an idiosyncrasy of the late ’30s when the recipe was first published in The Home Comfort Cook Book (1937). Wouldn’t regular milk or half-and-half work equally well? What other cheeses, besides sharp cheddar, would taste good?
I had also thought of a few possible refinements. First, I found that at the end of the 20 minutes of baking, the dish was hot, but hardly piping. By the time a person had consumed his or her portion, the cheese sauce had cooled and set a bit. I also missed the contrasting textures of crunchy bread crumbs and soft noodles and sauce. Thorne’s advice to sprinkle the macaroni and cheese with crumbled common crackers was one possibility, but I was looking for something a little more finished. Although I liked the rich, full cheese flavor Thorne achieved with a whole pound of cheese, I found myself full after only a few bites. I wanted to find out if the dish was just as good with less cheese.
After testing the recipe with whole and low-fat milks and half-and-half, I realized that evaporated milk was not an ingredient thoughtlessly left in. All the macaroni and cheese dishes made with fresh milk curdled a bit, resulting in a chalky, grainy texture. The one made with evaporated milk remained silky-smooth. The evaporation and sterilization process stabilizes the milk, which in turn, stabilizes the macaroni and cheese.
After making the dish with Vermont, New York, and Wisconsin cheddars, I preferred the less sharp Wisconsin variety. Because the recipe calls for such a large quantity, a slightly milder cheese is preferable. Further testing confirmed this point. Macaroni and cheese made with Gruyère was so strong I couldn’t even eat it. To my surprise, highly processed cheeses such as American performed quite well in this dish. Much like evaporated milk, the more processing, the more stable the cheese and the more creamy the dish. For flavor, use cheddar; for texture, buy American. I also found the dish did not suffer with only 12 ounces of cheese compared to the 1 pound called for in the original recipe.
I found that I could not remedy the dish’s lukewarm temperature problem by leaving it in the oven much longer than the suggested 20 minutes. Doing so ran the risk of curdling the eggs, and the dish started to develop a subtle grainy texture. So I tried two solutions, both of which worked. To avoid pouring hot macaroni into a cold dish, I stuck the pan in the preheating oven. By the time the macaroni was ready to drain, the pan emerged from the oven pot-holder hot. Warming the milk a bit before mixing it with the pasta also gave the dish a warm head start.
As suggested by Thorne, crisp common crackers sprinkled over the macaroni and cheese offer a much-needed foil to the rich, unctuous sauce. For a further refinement, I toasted some fresh buttered bread crumbs.
After I shared this recipe with friend and cooking colleague Stephen Schmidt, he reported back his finding that if one used a heavy-bottomed pot and cooked it over low heat, it was possible to forgo the baking step altogether and make the macaroni and cheese on top of the stove in less than 15 minutes. I tried his suggestion and found the stovetop macaroni and cheese to be as good as the baked one. By following his method, it was possible to complete this dish in virtually the same amount of time it would take to make the boxed stuff. And considering the same preparation time and a few dollars more buy you the difference between an institutional experience and the real McCoy, I would call this recipe a no-brainer.
SERVES 4
You can skip the bread crumbs and sprinkle the dish with crumbled common crackers or saltines, if desired.
Bread Crumbs
3 slices hearty white sandwich bread, torn into quarters
2 tablespoons unsalted butter, melted
Salt
Macaroni and Cheese
2 large eggs
1 (12-ounce) can evaporated milk
1 teaspoon dry mustard, dissolved in 1 teaspoon water
Salt
¼ teaspoon pepper
¼ teaspoon hot sauce
8 ounces elbow macaroni (2 cups)
4 tablespoons unsalted butter
12 ounces sharp cheddar, American, or Monterey Jack cheese, shredded (3 cups)
1. For the bread crumbs: Pulse bread in food processor to coarse crumbs, about 10 pulses. Melt butter in 12-inch skillet over medium heat. Add bread crumbs and cook, stirring often, until beginning to brown, 4 to 6 minutes. Season with salt to taste; set aside.
2. For the macaroni and cheese: Mix eggs, 1 cup evaporated milk, mustard mixture, ½ teaspoon salt, pepper, and hot sauce in bowl.
3. Meanwhile, bring 2 quarts water to boil in Dutch oven. Add pasta and 1½ teaspoons salt and cook, stirring often, until al dente. Drain pasta and return to pot over low heat. Add butter and toss to melt.
4. Add egg mixture and three-quarters of cheese to pasta and toss until thoroughly combined and cheese starts to melt. Gradually add remaining evaporated milk and remaining cheese, stirring constantly, until mixture is hot and creamy, about 5 minutes. Serve immediately, sprinkling individual portions with toasted bread crumbs.
variation
Add ¼ cup grated Parmesan cheese to toasted bread crumbs. Adjust oven rack 6 inches from broiler element and heat broiler. Transfer macaroni and cheese mixture to 13 by 9-inch broiler-safe baking dish and sprinkle with bread-crumb mixture. Broil until topping turns deep golden brown, 1 to 2 minutes. Let casserole cool for 5 minutes before serving.
WHAT IS EVAPORATED MILK?
Evaporated milk is merely milk that is gently heated in a vacuum (a process called forewarming) so that 60 percent or more of the water evaporates. The resulting thick liquid is then sterilized and canned. Evaporated milk has about twice the concentration of fat and protein as regular whole milk.
Since evaporated milk is impervious to curdling, it guarantees a silky, smooth texture in our Stovetop Macaroni and Cheese recipe. The reason for this is the process by which this product is made. In regular milk, the main proteins, namely large casein molecules, tend to clump together when exposed to heat. The forewarming process makes the proteins more resistant to curdling. During forewarming, the big casein molecules are surrounded by smaller molecules of whey protein, and the whey proteins get in the way of the clumping of the casein molecules. Salts and other additives also interfere with the clumping of the casein molecules. Salts (disodium phosphate and/or sodium citrate) improve the ability of the proteins in the mix to retain water (the release of water is another symptom of curdling). Carrageenan gum may also be added to the finished product to prevent fat separation during storage.
There’s something great about a quick tomato sauce: fast, furious, and fresh. But what a quick sauce offers in convenience it lacks in the complexity of a slowly simmered tomato sauce, the best known of which may be marinara.
Unfortunately, complexity of flavor means lots of time in the kitchen, which is in short supply on a Tuesday night. My goal was to produce a multidimensional sauce in less than an hour, starting the clock the moment I entered the kitchen and stopping it when dinner was on the table. Weeding through hundreds of marinara recipes, I settled on testing not only a variety of “quick” versions but also some that were cooked for longer than an hour. The differences were readily apparent. The quick sauces were generally thin and lacked depth of flavor. The long-cooked sauces got the complexity right, but most relied on an ambitious laundry list of ingredients to achieve it—not to mention a lot of time. The sauce I was after had to capture some of these robust flavors within the confines of fairly quick cooking.
A TRICK WITH TOMATOES
Because prime fresh tomatoes are available for such a limited time during the year, I opted for canned. But which variety should I choose?
Crushed, pureed, and diced tomatoes offered the ultimate ease in sauce making: Open can, dump contents into pan. But all three options have downsides. Pureed tomatoes go into the can already cooked, which imparts a stale, flat flavor to the final sauce. Crushed tomatoes are generally packed in tomato puree: same problem. With these, my sauces came out tasting like unremarkable homemade versions of the jarred spaghetti sauces sold at the supermarket. With canned diced tomatoes, the problem was texture, not flavor. In the past, we’ve learned that manufacturers treat diced tomatoes with calcium chloride to keep them from turning to mush and losing their shape. That’s fine for many dishes, but for recipes in which a smooth consistency is desired, calcium chloride does its job too well, making the tomatoes harder to break down—and the resulting sauces oddly granular.
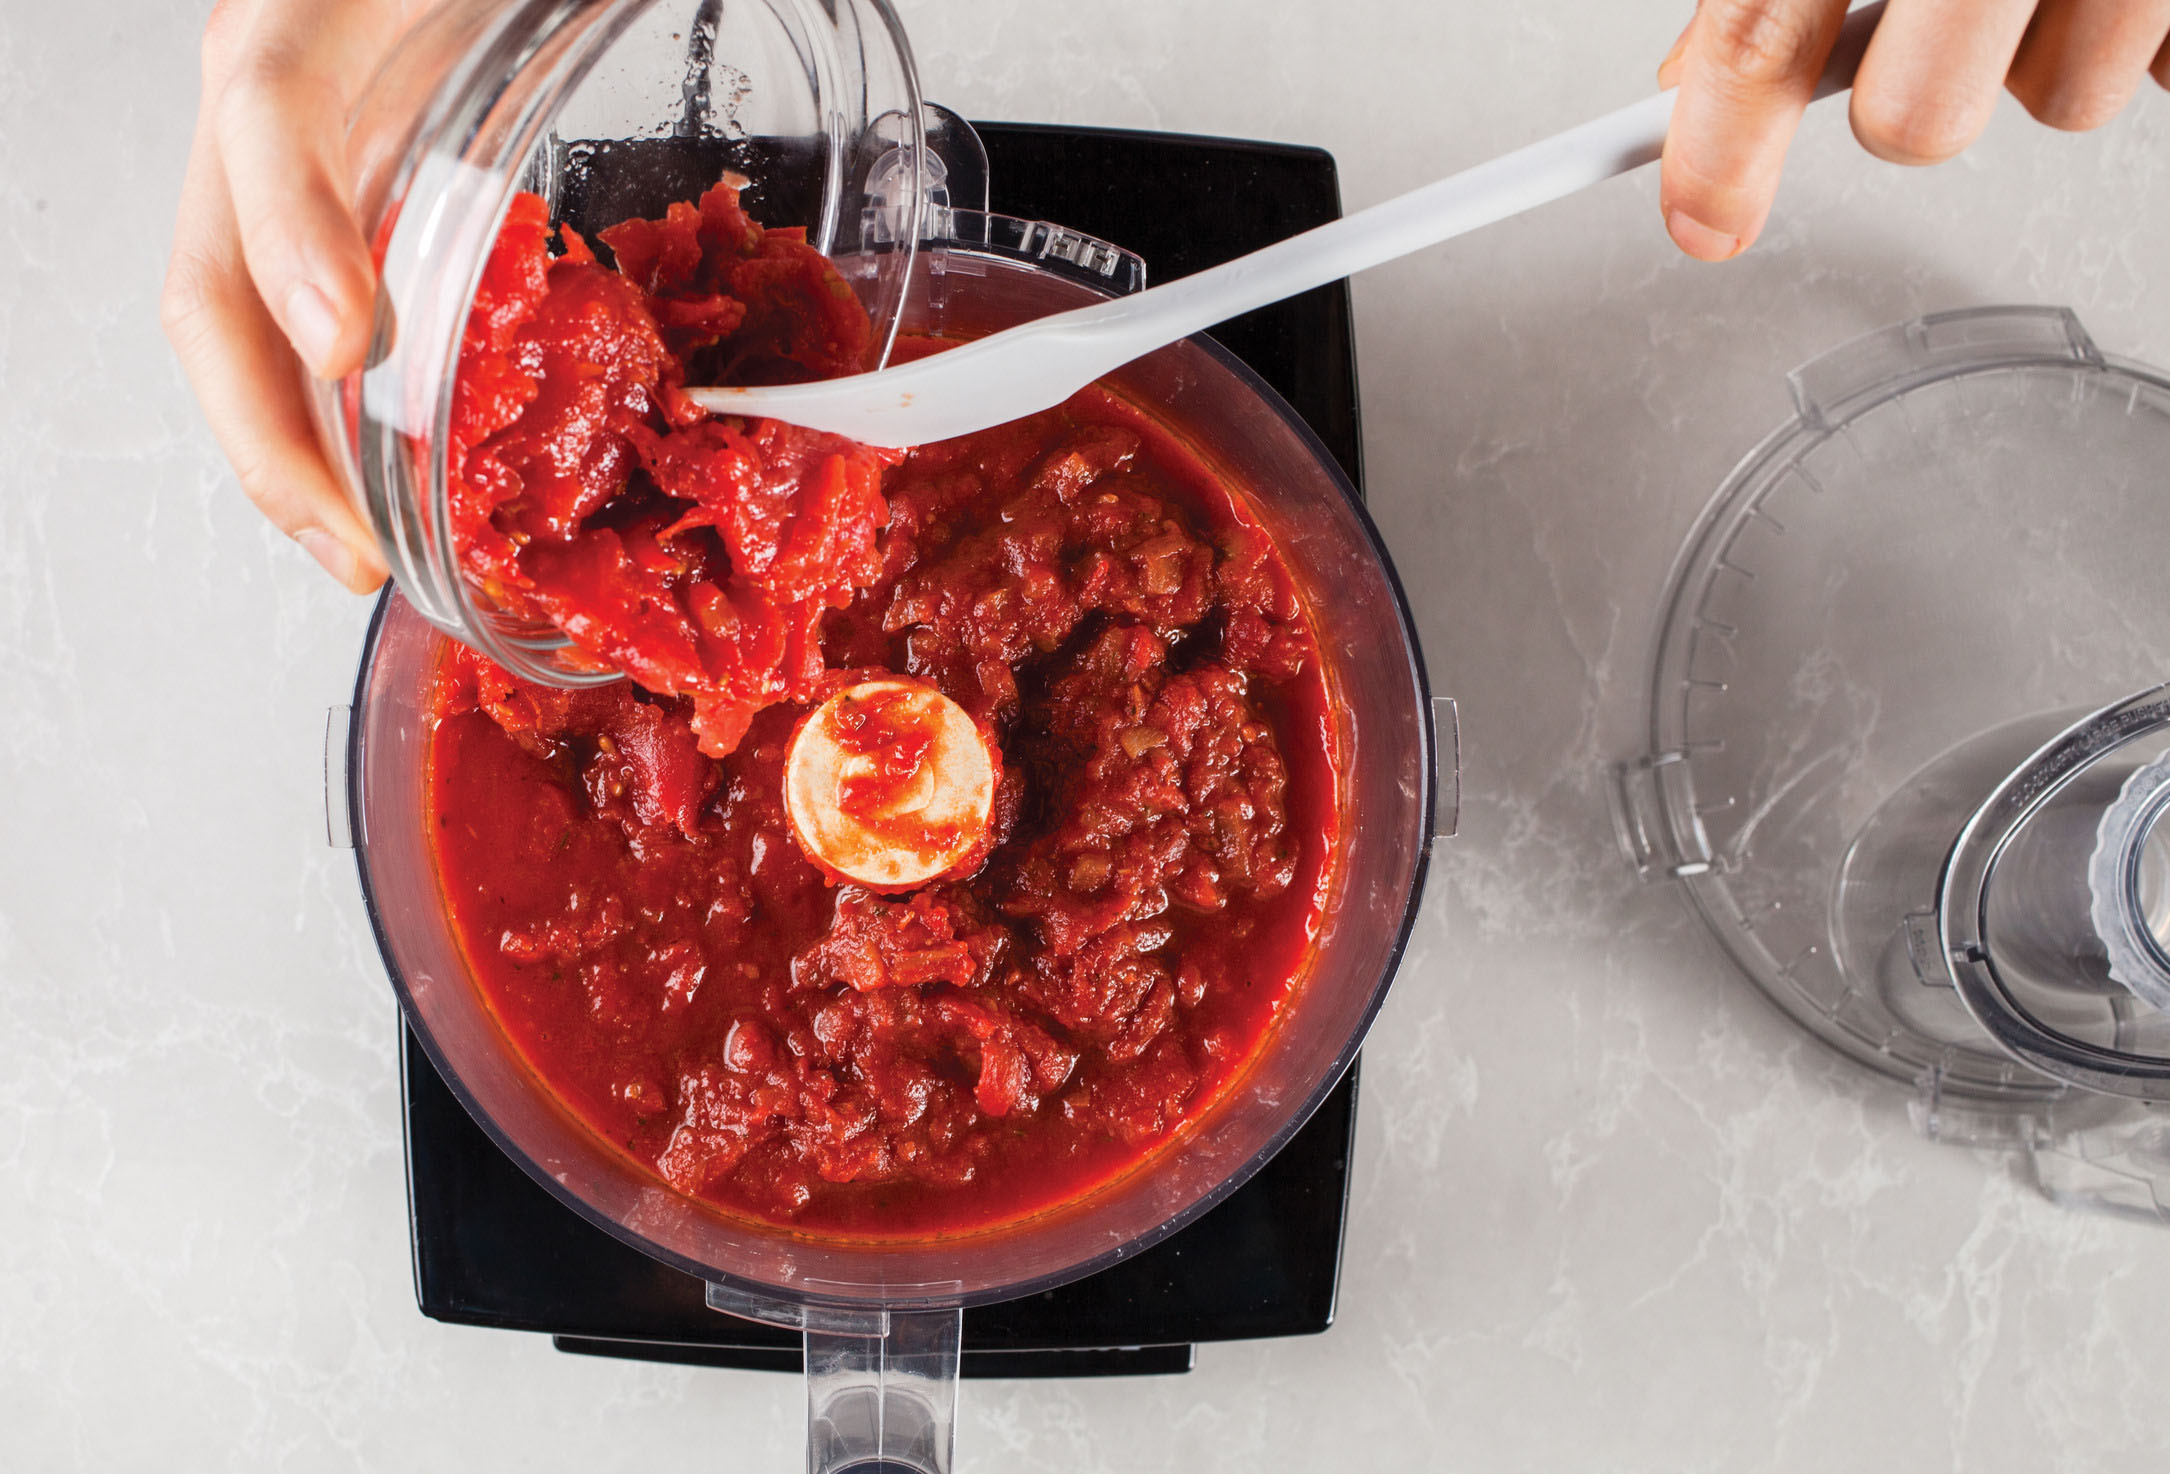
The only choice left, then, was canned whole tomatoes. (While whole tomatoes are also treated with calcium chloride, the chemical has direct contact with a much smaller percentage of the tomato.) The big drawback of using whole tomatoes in a sauce is that they have to be cut up. Chopping them on a cutting board was a mess. The solution was to dump the tomatoes into a strainer over a bowl and then hand-crush them, removing the hard core and any stray bits of skin.
That’s when I made the first of several decisions that would enable me to get long-simmered complexity in a short time. Most marinara recipes call for simply adding a can (or two) of tomatoes to the pot, juice and all—and some even call for throwing in a can of water. Now that I was separating the solids from the juice anyway, why not experiment with adding less of the reserved liquid? The trick worked: By adding only 2½ cups of the drained juice from two cans of whole tomatoes (rather than the full 3½ cups I had collected) and omitting the extra water, I managed to cut the simmering time by almost 20 minutes.
Up until now I had been following the standard marinara procedure of sautéing aromatics (onions and garlic) in olive oil in a saucepan before adding the tomatoes, liquid, and flavorings, then simmering. That’s fine if you have all day, but I had only an hour. So I switched from a saucepan to a skillet, hoping the greater surface area would encourage faster evaporation and, thus, faster concentration of flavors.
It was faster, all right—down to just under an hour—but I felt that the sauce could use gutsier tomato flavor. Not only was the solution simple, but it was the key step in giving my quick sauce the complexity of a long-simmered one. Before adding the liquids and simmering, I sautéed the tomato meats until they glazed the bottom of the pan. Only then did I add the liquids, a normally routine step that, by essentially deglazing the pan, added crucial flavor to my sauce.
BALANCING ACTS
It was time to develop more depth of flavor. Onions added a pleasant sweetness, but carrots added an earthy flavor that diminished that of the tomatoes. Sugar, added at the end of cooking, proved to be the working solution to balance the flavors: too much and my sauce began to taste like it came out of a jar; too little and the acidity overwhelmed the other flavors. Tasters loved the robust, complex flavor of red wine, and a mere ⅓ cup was just the right amount. But not just any bottle: Wines with a heavy oak flavor rated lower than those with little to no oak presence.
We use canned whole tomatoes in our quick marinara, reserving a few to add at the end for brightness.
I now had a good marinara ready to serve in less than an hour—about half the time of many recipes. Could I further bolster the complexity without adding minutes? On a hunch, I tried reserving a few of the uncooked canned tomatoes and adding them near the end of cooking. When I served this sauce alongside the earlier version, tasters were unanimous in their preference for the new sauce; just six tomatoes pureed into the sauce at the end added enough brightness to complement the deeper profile of the cooked sauce.
So far the sauce had little flavor from herbs beyond oregano. Fresh basil, also added at the end, contributed a floral aroma that complemented the sauce’s careful balance of sweet and acid.
Marinara Sauce
MAKES 4 CUPS; ENOUGH FOR 1 POUND PASTA
Because canned tomatoes vary in acidity and saltiness, it’s best to add sugar, salt, and pepper to taste just before serving. Chianti or Merlot works well for the dry red wine. We like a smoother marinara, but if you prefer a chunkier sauce, give it just three or four pulses in the food processor in step 4.
2 (28-ounce) cans whole peeled tomatoes
3 tablespoons extra-virgin olive oil
1 onion, chopped fine
2 garlic cloves, minced
2 teaspoons minced fresh oregano or ½ teaspoon dried
⅓ cup dry red wine
3 tablespoons chopped fresh basil
Sugar
Salt and pepper
1. Pour tomatoes and their juice into strainer set over large bowl. Open tomatoes with your hands and remove seeds and fibrous cores; let tomatoes drain excess liquid, about 5 minutes. Remove ¾ cup tomatoes from strainer and set aside. Set aside 2½ cups tomato juice and discard remainder.
2. Heat 2 tablespoons oil in 12-inch skillet over medium heat until shimmering. Add onion and cook until softened and lightly browned, 5 to 7 minutes. Stir in garlic and oregano and cook until fragrant, about 30 seconds.
3. Stir in strained tomatoes and increase heat to medium-high. Cook, stirring often, until liquid has evaporated, tomatoes begin to stick to bottom of skillet, and brown fond forms around pan edges, 10 to 12 minutes. Stir in wine and cook until thick and syrupy, about 1 minute. Stir in reserved tomato juice, scraping up any browned bits. Bring to simmer and cook, stirring occasionally, until sauce is thick, 8 to 10 minutes.
4. Pulse sauce and reserved tomatoes in food processor until slightly chunky, about 8 pulses. Return sauce to now-empty skillet and stir in basil and remaining 1 tablespoon oil. Season with sugar, salt, and pepper to taste before serving.
GETTING SLOW-SIMMERED FLAVOR FAST
The best marinaras have lots of complexity—and demand lots of cooking time. Here’s how we speed up the process.

DRAIN JUICE A can of tomatoes has more juice than solids. We jump-start flavor concentration by draining off almost a cup of juice beforehand.

CARAMELIZE SOLIDS Caramelizing the tomato solids briskly in a large skillet before deglazing with liquid ingredients further deepens the flavor profile.
ADD RAW TOMATOES Reserving a few uncooked tomatoes to add at the end contributes an extra note of freshness to the cooked sauce.

ADD SUGAR Seasoning the finished sauce with sugar in addition to the usual salt and pepper brings out the complexity of the wine and balances the acidity of the tomatoes.
MATCHING PASTA SHAPES WITH SAUCE
In Italy there is a fine art to matching pasta shapes and sauces, but in the test kitchen, we are a bit freer with the pairing and endorse just one general rule: you should be able to eat the pasta and sauce easily in each mouthful. This means that the texture and consistency of the sauce should work with the pasta shape.
Long strands are best with smooth sauces or pestos or light sauces, such as oil and garlic. In general, wider long noodles, such as fettuccine, can more easily support slightly chunkier sauces than can very thin noodles like spaghetti. Wide pastas like fettuccine or tagliatelle are also well suited to creamy sauces like Alfredo. Short tubular or molded pasta shapes do an excellent job of trapping chunkier sauces. Sauces with very large chunks are best with shells, rigatoni, or other large tubes. Sauces with small to medium chunks pair well with fusilli or penne. Since our Marinara Sauce can be as smooth or chunky as you choose (depending on how many times you pulse it in the food processor), be sure to pair your final sauce with an appropriate pasta shape. If pulsing the sauce eight times as called for in the recipe, we like to use a long-strand pasta like spaghetti.
More light and refreshing than a cream-based sauce or a chunky ragù, pesto makes a top-notch accompaniment to pasta during the sultry summer months. There’s nothing complicated about this uncooked Ligurian sauce, which consists of processed fresh basil, garlic, pine nuts, Parmigiano-Reggiano cheese, and olive oil. And tossing it with hot, just-cooked pasta couldn’t be easier. But numerous issues arise once pesto is added to a pasta salad. The refrigerator dulls the color and flavor of the pesto, which turns greasy and clumpy as the pasta cools.
PERFECTING THE PESTO
I began by trying varying ratios of the five integral ingredients: basil, garlic (blanched briefly to tame its harsh bite), Parmesan cheese, olive oil (extra-virgin), and pine nuts (toasted to enhance their nutty flavor). I had to use a lot of basil (between 3 and 4 packed cups) to achieve decent herbal flavor and enough bulk. But when made even a few hours ahead of time, the basil turned dark and muddy. Adding another green element seemed the obvious solution. Parsley is a common trick, but I needed to use so much that it began to compete with the basil flavor. I’d seen frozen chopped spinach used, but while it turned the pesto a nice, bright green, it also made the texture stringy. The easy solution was to add a small amount of fresh baby spinach, which provided a lovely bright green color and smooth texture without interfering with the basil flavor.
Fresh baby spinach keeps our pesto bright green, and a small amount of mayonnaise provides a luscious texture.
While the relatively thin consistency of traditional pesto might be fine for hot noodles, a thicker, creamier pesto was in order for room-temperature pasta. But no matter how much I fiddled with ingredient amounts, the pesto was always less than optimally creamy. Upping the quantity of cheese and pine nuts thickened the pesto, but also made it salty, gritty, and pasty. Adding more oil to smooth out the mixture only made the pesto greasy.
Since this dish wasn’t exactly an Italian classic, I decided to borrow a standard ingredient used in many American pasta salads: mayonnaise. The creamy condiment served as the perfect binder—so long as it was used in moderation. Six tablespoons was enough to provide a luscious texture.
PREPARING THE PASTA
The best pasta shapes for this dish have a textured surface with a concave nook or two that can trap the pesto and keep it from sliding off. With its indented center and jagged edges, farfalle made an excellent partner. Unlike hot pasta, which should generally be cooked until al dente, the pasta used in salads should cook slightly longer, until tender.
When the pesto was added straight to just-cooked pasta, it took an hour to reach room temperature. The hot pasta also “cooked” the basil, deadening its impact. Rinsing the pasta in cold water cooled it down quickly but made the surface of the pasta too slick to hold on to the pesto. The solution was to let the pasta cool in a single layer on a rimmed baking sheet, tossing it in a splash of oil to prevent sticking.
Finally, I added lemon juice to cut through the richness. An extra ½ cup of toasted pine nuts folded into the pesto-coated pasta added a sweet, nutty note and textural contrast. Small cherry or grape tomatoes contributed color and bursts of freshness. Finally, I had translated a Ligurian mainstay into an American picnic classic.

SERVES 8 TO 10
Other pasta shapes can be substituted for the farfalle.
2 garlic cloves, unpeeled
1 pound farfalle
Salt and pepper
5 tablespoons extra-virgin olive oil
3 cups fresh basil leaves, lightly bruised
1 cup baby spinach
¾ cup pine nuts, toasted
2 tablespoons lemon juice
1½ ounces Parmesan cheese, grated (¾ cup), plus extra for serving
6 tablespoons mayonnaise
12 ounces cherry tomatoes, quartered
1. Bring 4 quarts water to boil in large pot. Add garlic and cook for 1 minute. Remove garlic with slotted spoon and rinse under cold water to stop cooking. Let garlic cool slightly, then peel and chop fine; set aside.
2. Add pasta and 1 tablespoon salt to boiling water and cook, stirring often, until tender. Reserve ¼ cup cooking water. Drain pasta, toss with 1 tablespoon oil, and spread in single layer on rimmed baking sheet. Let pasta and cooking water cool to room temperature, about 30 minutes.
3. Process basil, spinach, ¼ cup pine nuts, lemon juice, garlic, and 1 teaspoon salt in food processor until smooth, about 30 seconds, scraping down sides of bowl as needed. Add Parmesan, mayonnaise, and remaining ¼ cup oil and process until thoroughly combined; transfer to large bowl.
4. Toss cooled pasta with pesto, adding reserved cooking water, 1 tablespoon at a time, until pesto evenly coats pasta.
5. Fold in remaining ½ cup pine nuts and tomatoes. Season with salt and pepper to taste. Serve.
A plate of pasta and a glass of wine are a natural pairing. But I’d long heard references to a dish called spaghetti al vino rosso that exploits their affinity: You cook the pasta in wine instead of water and then top it off with olive oil, a bit of butter, and a sprinkling of cheese. The concept is not without precedent: Cooking rice in a wine-spiked broth transforms it from a blank slate into a complex and wonderful risotto. I figured the same could be true of pasta if I could just pin down a reliable recipe.
Easier said than done. Recipes were hard to track down, and the ones I found were all over the map. One called for boiling the spaghetti in a 50/50 mix of water and red wine that was then (wastefully) poured down the drain. In another, a whole bottle of wine was reduced to a glaze (eliminating all of its pleasant booziness) and used to coat spaghetti cooked separately in water. A third approach resembled risotto-making and seemed the most promising: the pasta was parcooked in water and then transferred to a skillet where about 2 cups of wine were added in increments so that the pasta could absorb the wine as it finished cooking.
Reducing some white wine into a glaze and adding the rest slowly to the pasta as it finishes cooking makes for a balanced dish.
But the dish wasn’t perfect. While tasters liked the pasta’s lively wine kick, they also found the dish tannic. The real deal breaker, though? Its unappetizing purple-gray color.
My research indicated that this was a dish almost always made with red wine. Nevertheless, I wondered what would happen if I swapped the red wine for white, which would get rid of the hideous mauve color. I tried it and found that the switch also solved the tannin problem, since such flavors come from the grape skins, which are removed early in the process of making white wine. But now I had a new issue: The spaghetti wasn’t as robustly flavored.
I thought back to the method that reduced a full bottle of wine in a skillet. I experimented with reducing about a third of a bottle of white wine to a glaze while the spaghetti parcooked in water. Then I introduced the partially cooked spaghetti to the glaze and added the remainder of the bottle gradually, stirring as the spaghetti finished cooking. The glaze provided subtle complexity, but we agreed that this spaghetti was going to need more than just olive oil, butter, and Pecorino Romano to hold its own.
Garlic and red pepper flakes were easily incorporated into the glaze. Crisp, salty pancetta sprinkled over the pasta before serving was also a shoo-in. Arugula’s peppery notes complemented the other flavors perfectly. Pine nuts added textural contrast.
My spaghetti was almost complete, but it seemed a tad dry. I had been stirring in some cold butter along with reserved pasta water at the end, but the resulting sauce was too insubstantial. A little bit of cream was just the thing to bulk it up.

Spaghetti al Vino Bianco
SERVES 4
Use a good-quality dry white wine but avoid a heavily oaked white such as Chardonnay. If the wine reduction is too sharp in step 2, season it to taste with up to 1 tablespoon of sugar, adding it in 1-teaspoon increments.
1 tablespoon extra-virgin olive oil
4 ounces pancetta, cut into ¼-inch pieces
2 garlic cloves, minced
Pinch red pepper flakes
1 (750-ml) bottle dry white wine
Salt and pepper
Sugar
1 pound spaghetti
5 ounces (5 cups) baby arugula
1 ounce Pecorino Romano cheese, grated (½ cup), plus extra for serving
⅓ cup heavy cream
¼ cup pine nuts, toasted and chopped coarse
1. Heat oil and pancetta in 12-inch skillet over medium-high heat; cook until pancetta is browned and crispy, 4 to 5 minutes. Using slotted spoon, transfer pancetta to paper towel–lined plate. Pour off all but 2 tablespoons fat from skillet.
2. Reduce heat to medium-low and add garlic and pepper flakes to skillet. Cook, stirring frequently, until garlic begins to turn golden, 1 to 2 minutes. Carefully add 1½ cups wine and increase heat to medium-high. Cook until wine is reduced to ½ cup, 8 to 10 minutes. Add ½ teaspoon salt. Season with up to 1 tablespoon sugar to taste if needed.
3. Bring 4 quarts water to boil in large pot. Add pasta and 1 tablespoon salt and cook, stirring often, until pasta is flexible but not fully cooked, about 4 minutes. Reserve 2 cups cooking water, then drain pasta.
4. Transfer pasta to skillet with reduced wine. Place skillet over medium heat; add ½ cup unreduced wine and cook, tossing constantly, until wine is fully absorbed. Continue to add remaining wine, ½ cup at a time, tossing constantly, until pasta is al dente, about 8 minutes. (If wine is absorbed before spaghetti is fully cooked, add ½ cup reserved cooking water at a time to skillet and continue to cook.)
5. Remove skillet from heat. Place arugula on top of pasta; pour ¼ cup reserved cooking water over arugula, cover, and let stand for 1 minute. Add ¼ cup Pecorino and cream; toss until sauce lightly coats pasta and arugula is evenly distributed. Season with salt and pepper to taste. Transfer to platter and sprinkle with pine nuts, pancetta, and remaining ¼ cup Pecorino. Serve immediately, passing extra Pecorino separately.
At the end of summer, I inevitably find myself with a glut of beautiful garden tomatoes, both small and large. As a result, I’m always searching for ways to use them beyond salads. Puttanesca, that most boisterous of classic Italian sauces (legend has it that it was invented by Neapolitan prostitutes on break between customers), is one of my favorite tomato-based sauces.
I love the clash of flavors that this sauce presents: Spicy pepper flakes, pungent garlic, and salty anchovies, olives, and capers meet up with clean-tasting fresh herbs and tangy-sweet tomatoes. Putting my harvest to use in this quick sauce would address the generic “cooked” quality that stems from using canned tomatoes, the usual choice for this dish. I wasn’t aiming for a no-cook sauce, but I did want a fresher puttanesca—one that retained the fruits’ clean-tasting sweetness alongside the richer, more assertive flavors that are the essence of this dish.
A FRESH START
My first step was trying several varieties of tomato in a basic puttanesca: minced garlic and anchovies (anchovy paste, for convenience), red pepper flakes, chopped black olives, and capers, all sautéed in olive oil. Juicy larger tomatoes required me to reduce the sauce to avoid a watery consistency, but when I did, its fresh flavor all but disappeared. But low-moisture grape (or cherry) tomatoes, once halved, need very little simmering time to reduce to a sauce-like consistency. Availability was on my side, too: Not only is my garden full of these tomatoes by summer’s end but they’re also consistently decent in supermarkets year-round.
There was a downside: The larger ratio of skin to flesh meant that my sauce was full of chewy skins. Since I wasn’t about to skin dozens of tiny tomatoes, I gave them a quick blitz in a blender, which pulverized the skins completely.
Unfortunately, doing so also caused them to shed more moisture—not as much as big tomatoes but enough that it seemed I would have to revert to a longer simmering time. What if I drained the pureed tomatoes in a strainer before adding them to the sauce? That way, I could discard the exuded liquid.
But I quickly realized my faulty thinking. The majority of tomato flavor resides in the juice, jelly, and seeds, so I’d essentially be throwing away the best part. The better approach was to briefly simmer the juice to concentrate its flavor. Once it had reduced to ⅓ cup, I added the uncooked pulp along with the olives and capers. When the sauce was heated through, the bulk of the tomatoes had softened but still tasted fresh.
To give our sauce lots of fresh tomato flavor without a watery texture, we reduce the tomatoes’ juice and then add the pulp.
SALTY AND SOUR
Now to tame the rowdier ingredients: the olives and the capers. I tested common varieties of high-quality black olives. Salt-cured were too salty, but brine-cured kalamata and Gaeta, both of which were fruity and pleasantly crisp-tender, were equally excellent choices. I chopped them coarsely—any finer and the sauce turned a muddy brown. I did finely chop the capers, however, so that their briny punch hit every bite. A smidgen of dried oregano introduced complexity; ½ cup of minced fresh parsley offered freshness.
One final adjustment: Finding myself out of the standard spaghetti or linguine, I reached for campanelle. Tasters preferred the compact size and convoluted twists of this pasta, since it did a better job of trapping the coarse sauce. Plus, aesthetically it hinted at a summertime pasta salad, giving the dish an overall fresher appeal.

SERVES 4
We prefer to make this dish with campanelle, but fusilli and orecchiette also work. Very finely mashed anchovy fillets (rinsed and dried before mashing) can be used instead of anchovy paste.
3 tablespoons extra-virgin olive oil
4 garlic cloves, minced
1 tablespoon anchovy paste
¼ teaspoon red pepper flakes
¼ teaspoon dried oregano
1½ pounds grape or cherry tomatoes
1 pound campanelle
Salt
½ cup pitted kalamata olives, chopped coarse
3 tablespoons capers, rinsed and minced
½ cup minced fresh parsley
1. Combine oil, garlic, anchovy paste, pepper flakes, and oregano in small bowl. Process tomatoes in blender until finely chopped but not pureed, 15 to 45 seconds. Transfer to fine-mesh strainer set in large bowl and let drain for 5 minutes, occasionally pressing gently on solids with rubber spatula to extract liquid (this should yield about ¾ cup). Reserve tomato liquid and pulp.
2. Bring 4 quarts water to boil in large pot. Add pasta and 1 tablespoon salt and cook, stirring often, until al dente. Reserve 1 cup cooking water, then drain pasta and return it to pot.
3. While pasta is cooking, cook garlic-anchovy mixture in 12-inch skillet over medium heat, stirring frequently, until garlic is fragrant but not browned, 2 to 3 minutes. Add tomato liquid and simmer until reduced to ⅓ cup, 2 to 3 minutes. Add olives, capers, and tomato pulp and cook until just heated through, 2 to 3 minutes. Stir in parsley.
4. Add sauce to pasta and toss to combine, adjusting consistency with reserved cooking water as needed. Season with salt to taste, and serve immediately.
You’d never know that pasta primavera, a pseudo-Italian dish that appears on virtually every chain restaurant menu, actually has roots in French haute cuisine. The usual reproduction—a random jumble of produce tossed with noodles in a heavy, flavor-deadening cream sauce—tastes nothing like spring. Surprisingly, when I dug up the original recipe from New York’s famed Le Cirque restaurant, my colleagues found it wasn’t all that inspiring either, despite taking about 2 hours to prepare and dirtying five pans. First, the vegetables (which had been painstakingly blanched one by one) were bland. Second, the cream-, butter-, and cheese-enriched sauce dulled flavor and didn’t really unify the dish. If I wanted a true spring-vegetable pasta—with a few thoughtfully chosen vegetables and a light, but full-bodied sauce that clung well to the noodles and brought the dish together—I’d have to start from the beginning.
GROWING VEGETABLE FLAVOR
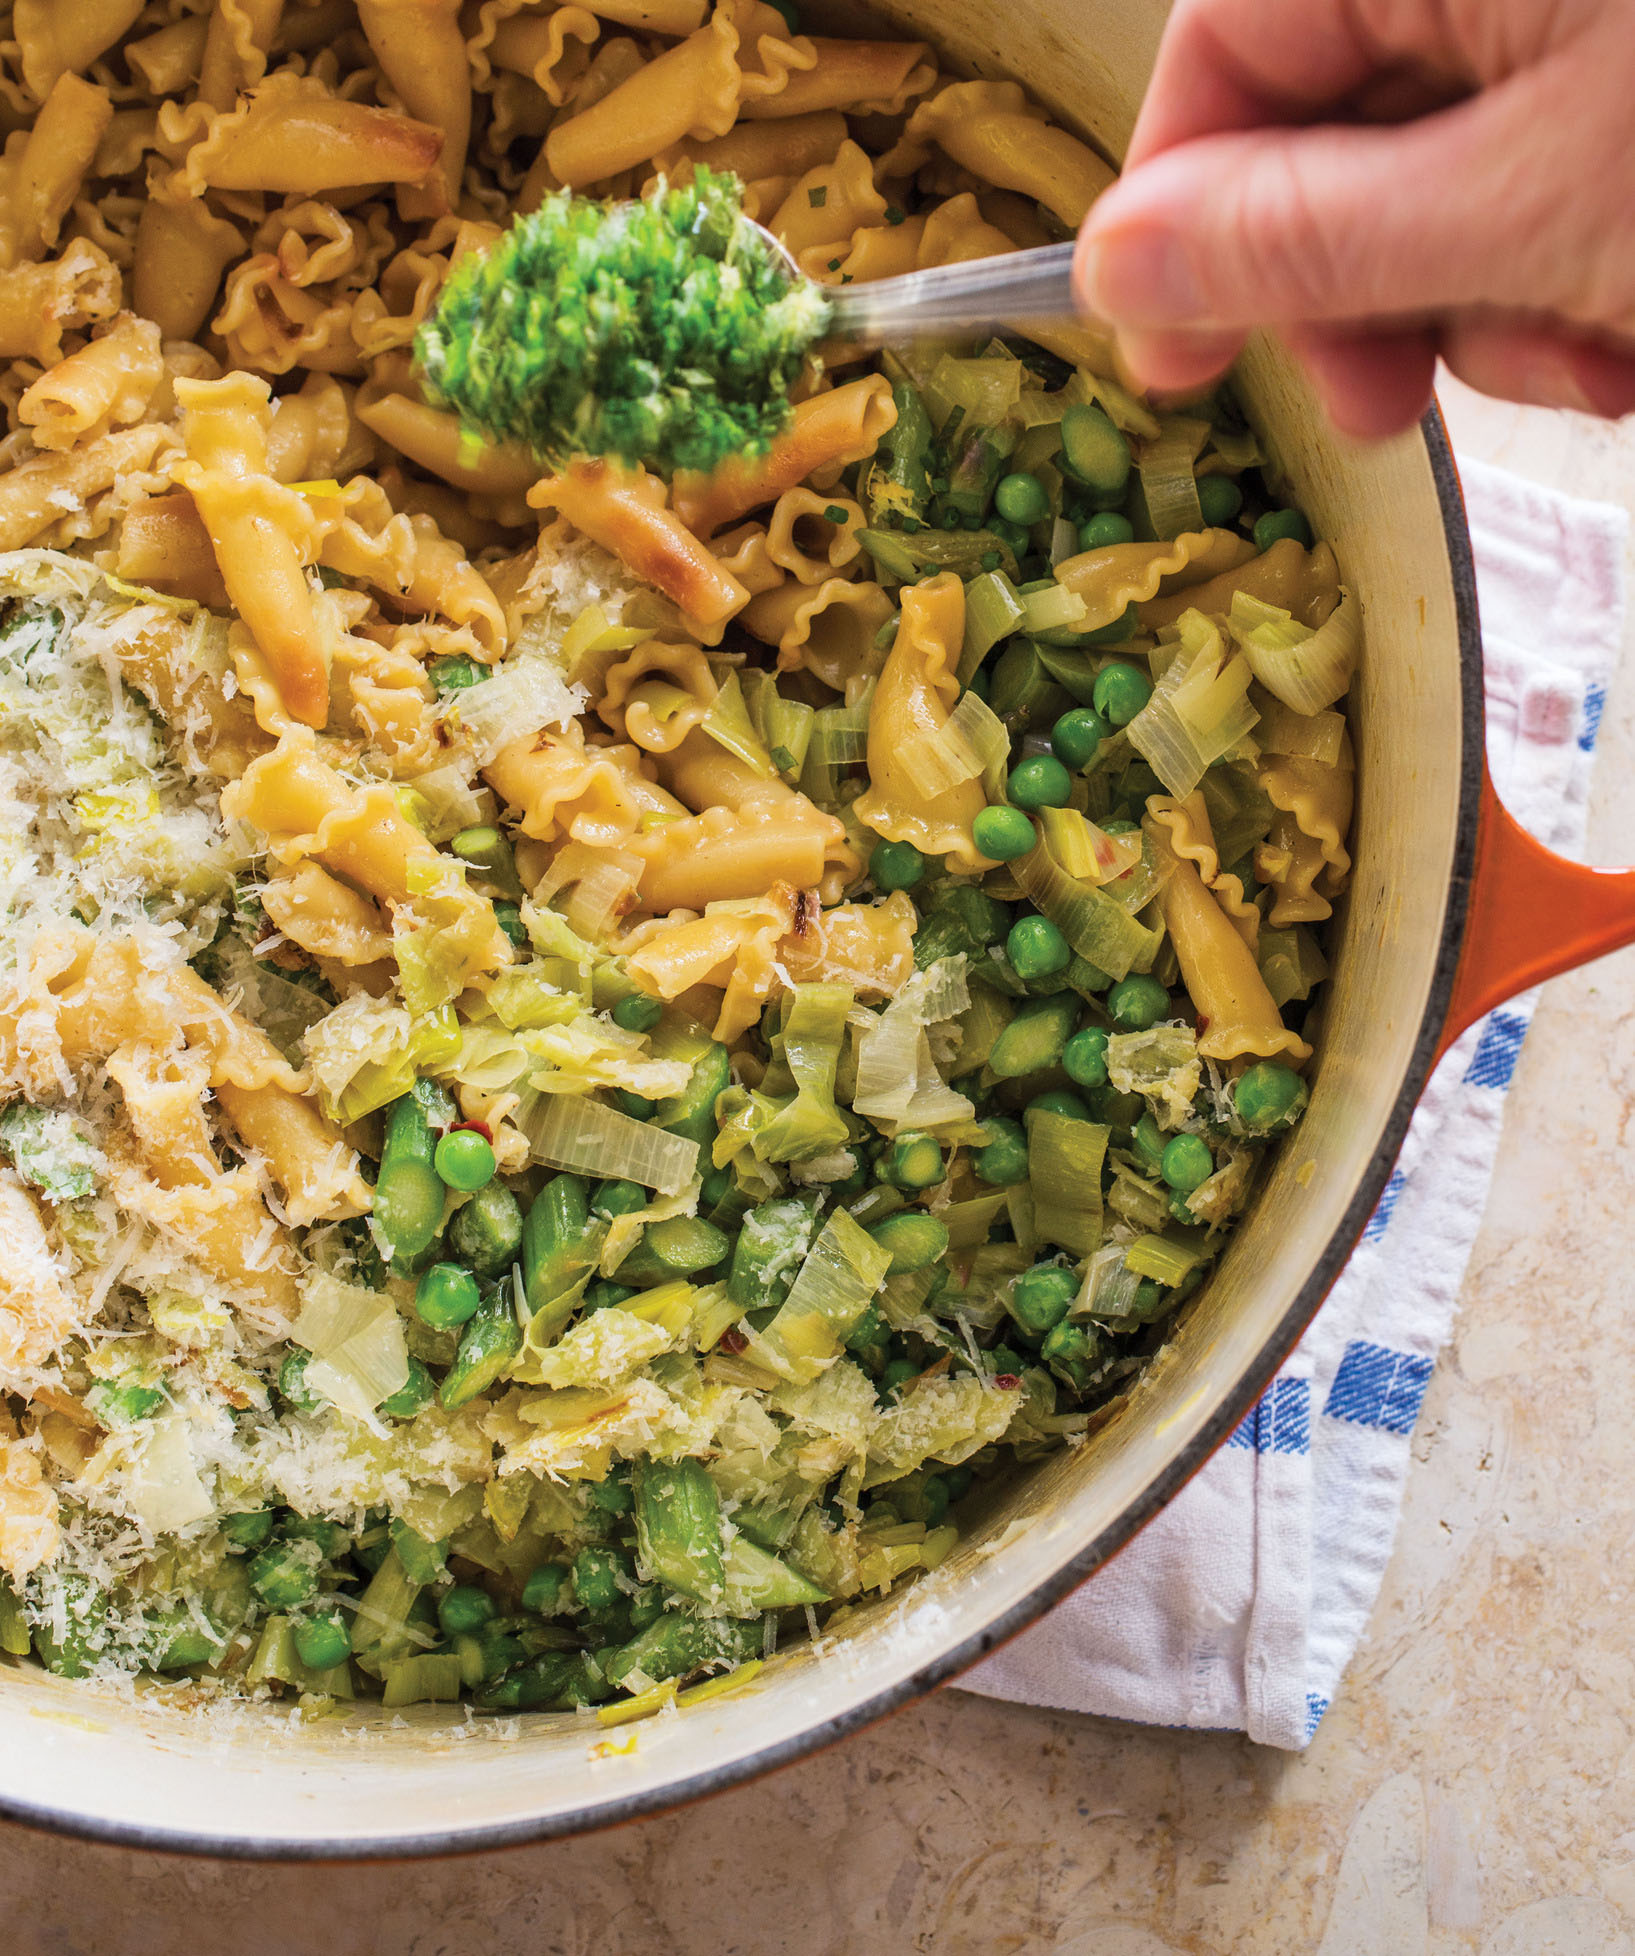
Before I began cooking, I had some produce shopping to do. Freely testing my way through various spring staples, I landed on a pair of classics—asparagus and green peas—plus garlic and leeks for their aromatic depth and sweetness, chives for their fresh bite and onion-y overtones, and mint, a natural match for peas.
Simmering broth with the vegetable scraps and then using the enhanced broth to cook the pasta infuses this dish with flavor.
I also decided at the outset to do away with the tedious blanching step. I found that by sautéing the vegetables in stages in a large Dutch oven, I was able to ensure that each one maintained its crisp-tender texture while taking on a touch of flavorful browning. First went the leeks, followed by the chopped asparagus, the minced garlic, and finally the frozen baby peas, which needed only a minute over the heat to lend sweetness to the mix.
But as I’d learned from the original recipe, simply tossing sautéed vegetables with the pasta didn’t add up to a dish any greater than the sum of its parts. What I needed was a way to tie the dish together and give it depth of flavor—a job that’s usually reserved for the sauce. The chicken broth used in the original recipe didn’t seem like the best way to enhance the vegetable flavor, so I swapped it for vegetable broth. To give it depth, I simmered the broth with the pile of scraps I’d peeled and trimmed away from the vegetables (the green parts of the leeks and the woody ends of the asparagus), along with some extra garlic and peas. But once I’d strained the broth and added the cream and butter—necessary to give the sauce body—any flavor advantage I had gained was lost. I tried cutting back on the dairy, but the result was so thin that it just slid off the pasta. The bottom line: The vegetables alone weren’t enough to give the dish flavor.
THE POT THICKENS
I was thinking of calling it quits when a colleague reminded me that Italian cookery has a tradition of parboiling pasta in water and then letting it finish cooking for a minute or two in whatever sauce is being served. The technique has a twofold benefit: As the pasta cooks, it absorbs some of the sauce and takes on its flavors. In exchange, the noodles release some of their starches into the sauce, which helps build body. It wouldn’t hurt to try this approach. I prepared another batch, this time boiling the pasta (spaghetti, for now) for a couple of minutes in the water, draining it, and then allowing it to finish cooking in my enhanced vegetable broth. Everyone agreed that while this was a step in the right direction, the results were still too subtle.
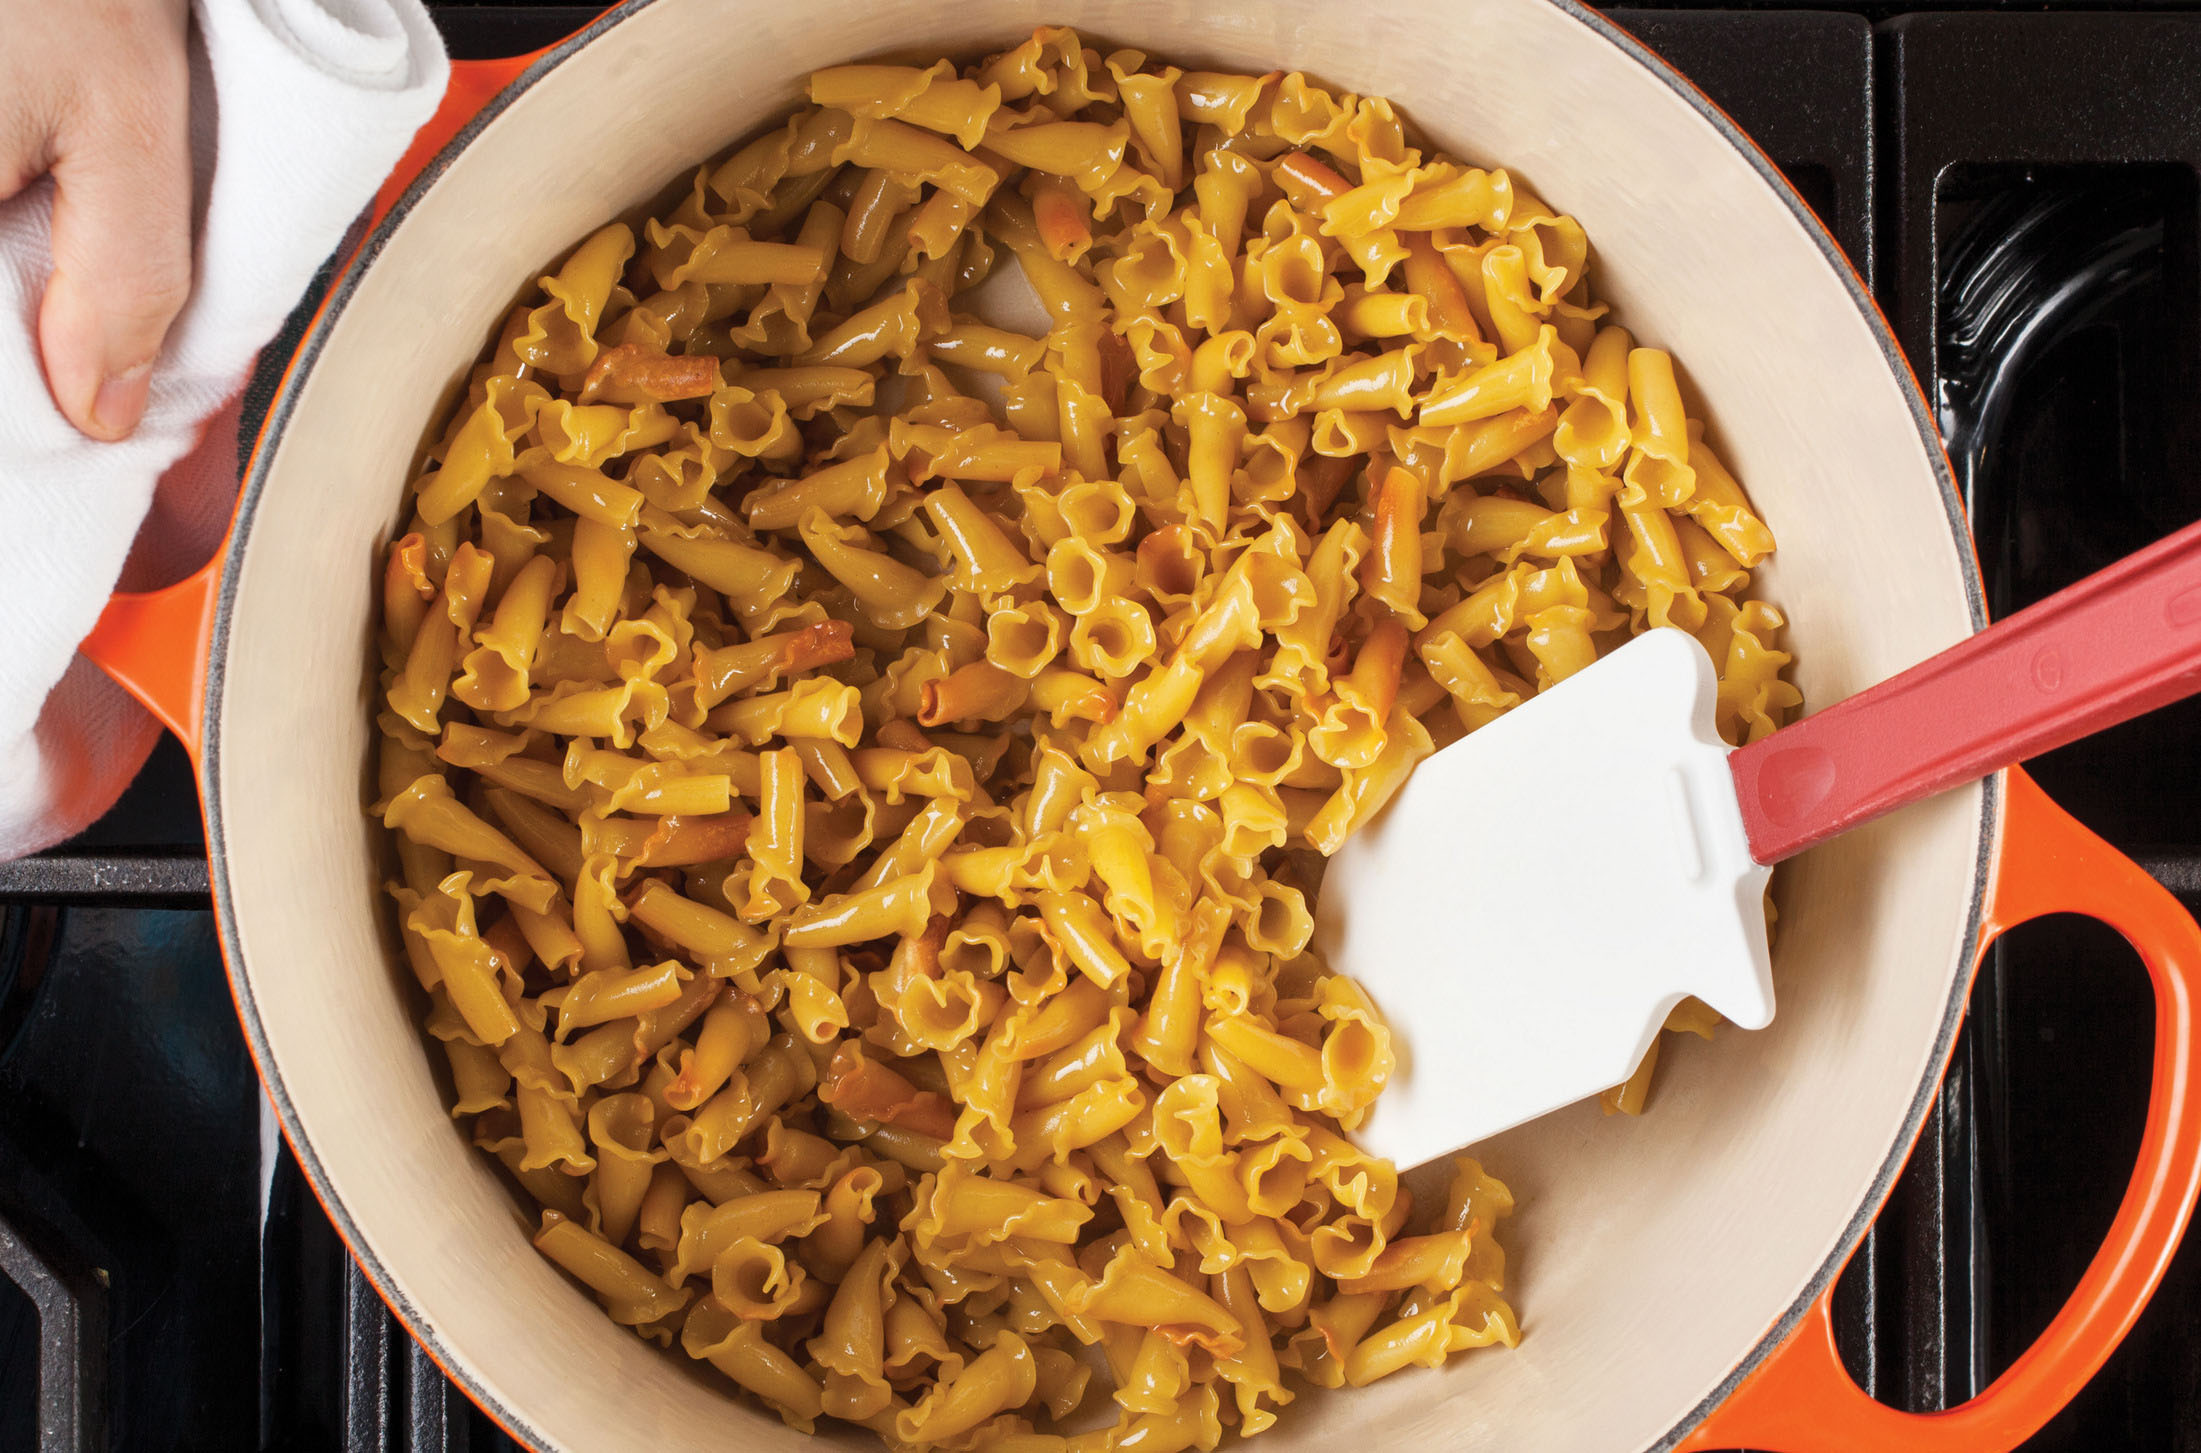
Then a thought occurred to me: If I was going to add the pasta to the broth eventually, why not get the full benefit of the broth’s flavor and use it to cook the pasta from the start? The concept was nothing new, of course: It’s a classic risotto technique, in which the rice and broth work together to produce a glossy, full-bodied “sauce” that thoroughly flavors and coats each grain. When I tried the approach with pasta, the results weren’t quite perfect, but they were promising: The noodles, which I had boiled in a modest 5 cups of liquid (4 cups of broth, 1 cup of water) until they were al dente and the Dutch oven was almost dry, emerged more flavorful and lightly coated with the silky, starchy pot liquor. In fact, the sauce was thick enough that I didn’t even need to add any cream or butter to give it body.
Now that I was on a roll, I wondered if I couldn’t stretch the risotto technique even farther. Traditionally, the raw rice grains “toast” for a few minutes in some hot fat before the liquid is added, taking on a nutty richness. Adapting this technique for my pasta recipe seemed like a natural move, except for the problem of the long spaghetti strands, which I’d need to break up first. It seemed easier to just change the shape of the noodle. After testing half a dozen shorter shapes, I opted for bell-shaped campanelle: They held on to the sauce nicely, without clinging to one another or compressing into a mass. (Bow tie–shaped farfalle and penne quills made fine substitutes.)
Now that I had the right pasta shape, I went back to the cooking technique. After sautéing the vegetables, I wiped out the pot, added a splash of extra-virgin olive oil, and toasted the pasta until it started to color. Continuing with the classic risotto method, I poured in some dry white wine (its crisp acidity would brighten the sauce), stirring the mixture until most of the liquid had cooked off, and added the hot broth and cranked up the heat to a boil. When I stuck in my fork about 10 minutes later, the results were remarkably improved: tender pasta pieces coated with a light but lustrous and creamy sauce that more than hinted at the sweet, grassy flavors of the vegetables.
Once the sautéed vegetables were incorporated, all the dish needed was a little flavor tweaking here and there. Along with the minced garlic, I added a dash of hot pepper flakes and, just before serving, a handful of grated Parmesan. Finally, I brightened the whole lot with a splash of lemon juice plus a handful of combined fresh chopped mint, chives, and lemon zest.
Nothing against the folks at Le Cirque, mind you, but unlike their original primavera, my recipe—a match-up of grassy, bright-tasting vegetables and nutty pasta in a complex, richly flavored sauce—truly tasted like spring, and came together in a fraction of the time.
Spring Vegetable Pasta
SERVES 4 TO 6
Campanelle is our pasta of choice in this dish, but farfalle and penne are acceptable substitutes.
1½ pounds leeks, white and light green parts halved lengthwise, sliced ½ inch thick, and washed thoroughly, plus 3 cups coarsely chopped dark green parts, washed thoroughly
1 pound asparagus, tough ends trimmed, chopped coarse, and reserved; spears cut on bias into ½-inch lengths
2 cups frozen peas, thawed
4 cups vegetable broth
1 cup water
4 garlic cloves, minced
2 tablespoons minced fresh mint
2 tablespoons minced fresh chives
½ teaspoon grated lemon zest plus 2 tablespoons juice
6 tablespoons extra-virgin olive oil
Salt and pepper
¼ teaspoon red pepper flakes
1 pound campanelle
1 cup dry white wine
1 ounce Parmesan cheese, grated (½ cup), plus extra for serving
1. Bring leek greens, asparagus trimmings, 1 cup peas, broth, water, and half of garlic to boil in large saucepan. Reduce heat to medium-low and simmer gently for 10 minutes. While broth simmers, combine mint, chives, and lemon zest in bowl; set aside.
2. Strain broth through fine-mesh strainer into 8-cup liquid measuring cup, pressing on solids to extract as much liquid as possible (you should have 5 cups broth; add water as needed to equal 5 cups). Discard solids and return broth to saucepan. Cover and keep warm.
3. Heat 2 tablespoons oil in Dutch oven over medium heat until shimmering. Add leeks and pinch salt and cook, covered, stirring occasionally, until leeks begin to brown, about 5 minutes. Add asparagus spears and cook until asparagus is crisp-tender, 4 to 6 minutes. Add pepper flakes and remaining garlic and cook until fragrant, about 30 seconds. Add remaining 1 cup peas and continue to cook for 1 minute longer. Transfer vegetables to bowl and set aside. Wipe out pot with paper towels.
4. Heat remaining ¼ cup oil in now-empty pot over medium heat until shimmering. Add pasta and cook, stirring often, until just beginning to brown, about 5 minutes. Add wine and cook, stirring constantly, until absorbed, about 2 minutes.
5. When wine is fully absorbed, add warm broth and bring to boil. Cook, stirring frequently, until most of liquid is absorbed and pasta is al dente, 8 to 10 minutes. Off heat, stir in Parmesan, lemon juice, vegetables, and half of herb mixture. Season with salt and pepper to taste, and serve immediately, passing extra Parmesan and remaining herb mixture separately.
FOR BETTER FLAVOR, COOK PASTA LIKE RISOTTO
To deepen the overall flavor of our Spring Vegetable Pasta and add body to the sauce, we cook the pasta like rice.
1. TOAST PASTA Sautéing the raw pasta in oil gives it a nutty, rich flavor.

2. ADD WINE AND BROTH A cup of white wine gets absorbed by the pasta, contributing brightness; boiling the pasta in enhanced vegetable broth boosts flavor.

3. COOK UNTIL CREAMY As the pasta cooks, it gets coated in the creamy, starch-thickened broth—no cream needed.
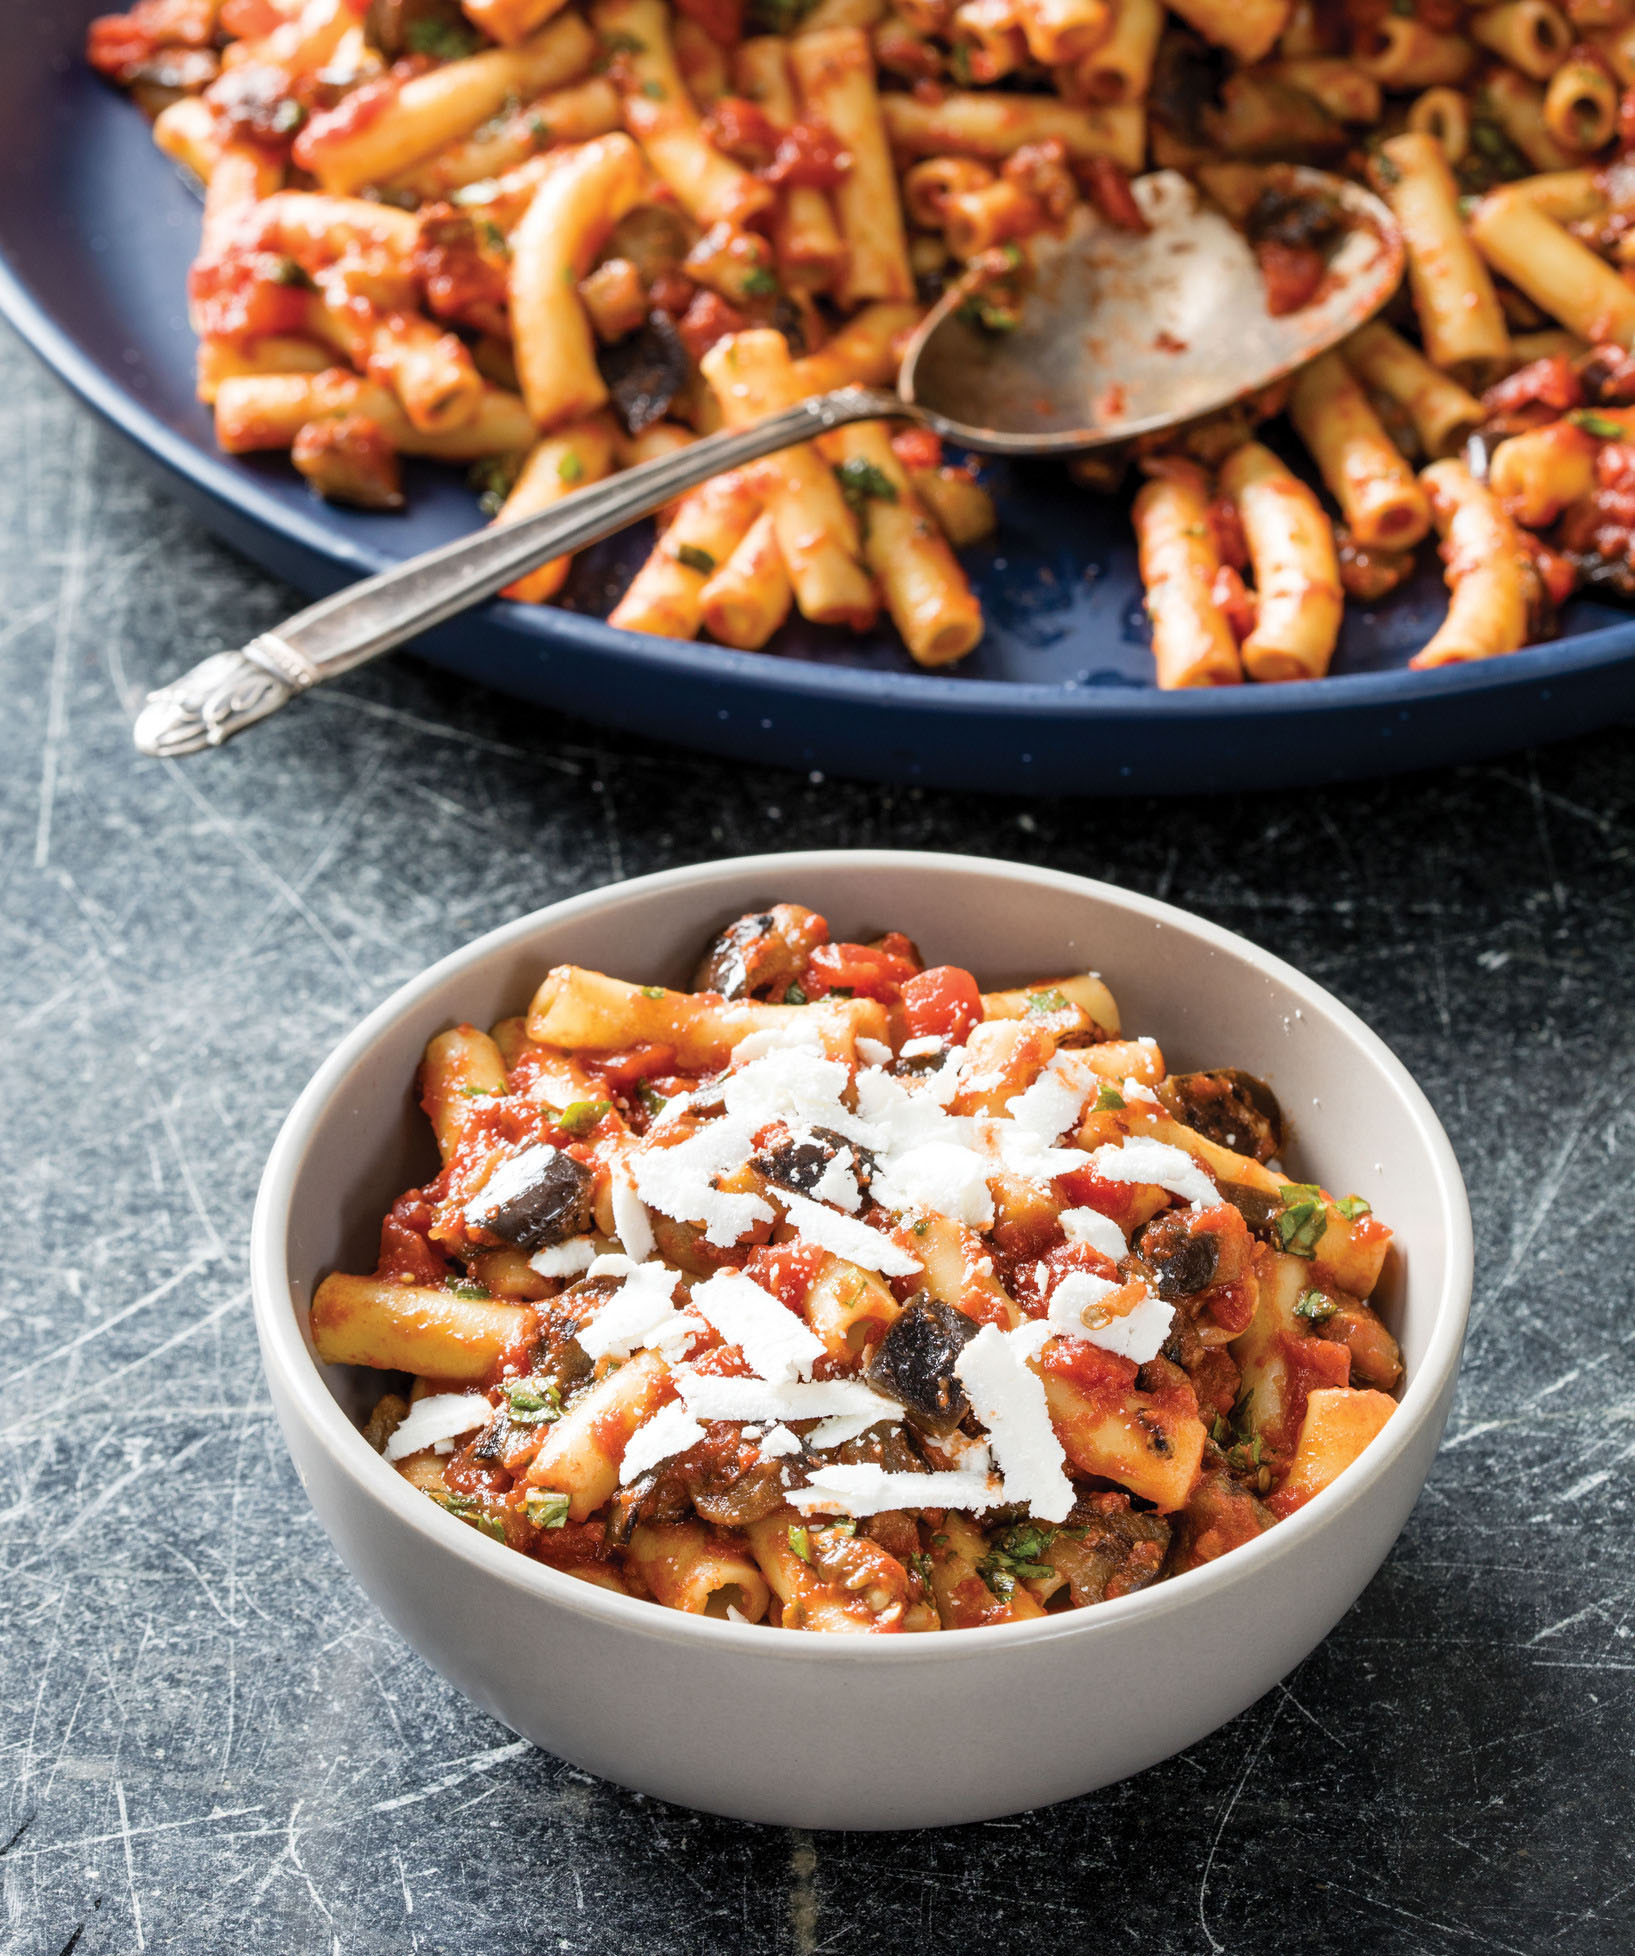
Sicilian pasta alla Norma is a lively combination of tender eggplant and robust tomato sauce, seasoned with herbs, mixed with al dente pasta, and finished with shreds of salty, milky ricotta salata (salted and pressed ricotta cheese made from sheep’s milk). The textures and flavors have much more nuance than the typical pasta with tomato sauce, and the eggplant lends pasta alla Norma a heartiness—a virtual meatiness—that makes it superbly satisfying.
Although not widely known outside Italy, this pasta is a classic in Sicily, where it was named for a 19th-century opera in which a druid priestess, Norma, perishes alongside her Roman lover. As the story goes, the opera was such a sensation, it inspired a Sicilian chef to create this dish in tribute to the opera and its composer, Vincenzo Bellini, a native son.
Microwaving the eggplant streamlines prep and allows it to caramelize, boosting flavor.
But even a classic faces pitfalls. After cooking a slew of different pasta alla Norma versions, I began to know them all too well. The eggplant is a big production to prepare, usually requiring salting before frying, and often ends up soggy and slick with oil. The tomatoes tend to coagulate into a heavy, overwhelming sauce, or they’re so few they don’t form an adequate foundation. The flavors in the dish can easily drown out the subtle essence of the eggplant.
Determined to do better, I set out to develop a bold, complex pasta. I wanted a weeknight meal with rich tomato and eggplant flavors and smooth, silky texture—without an excessive amount of work.
A STEAMY SETUP
Most pasta alla Norma recipes advise salting cubed eggplant to draw out its excess moisture, usually for about an hour. Since I was keen to streamline at every opportunity, this was the place to start. To determine if I could skip or at least shorten salting, I prepared batches with eggplant I had salted for an hour, a half hour, 15 minutes, and not at all. After tasting these different versions side by side, I had to conclude that salting for an hour was best: It drew out the most moisture, which helped the eggplant brown better and cook faster.
Next, I considered how to cook the eggplant. One of the first recipes I tried called for frying two eggplants, cut into strips, in 3 inches of oil. The eggplant soaked up about half its weight in oil, turning silky and very rich. But it made for a heavy, greasy sauce—not to mention the fact that frying splattered my stovetop with oil and required almost 40 minutes of watchful cooking in batches. Frying, I decided, was out. I briefly considered roasting the eggplant, but this method also seemed slow for a weeknight meal. The remaining option was sautéing in a lesser amount of oil. Unfortunately, when I tried this approach, the eggplant was almost always underdone and still required cooking in batches. Hoping to cook the eggplant more deeply, I peeled the skin before cubing and sautéing—but the difference was barely discernible, so the peel stayed on.
Looking for new ideas, I recalled an ingenious method for removing moisture from eggplant developed by a test kitchen colleague working on a recipe for caponata, another Sicilian eggplant dish. Instead of salting the eggplant and then leaving it to drain on paper towels on the countertop, he zapped the salted cubes in the microwave for 10 minutes. The salt draws out moisture that microwaving turns into steam, all the while causing the eggplant to collapse and compress its air pockets. The collapsed air pockets, in turn, soak up less oil in the pan. Put into practice for pasta alla Norma, this method was a resounding success. It was much faster than traditional salting and achieved even better results; the eggplant pieces came out of the microwave quite dry (a good start for browning). Furthermore, microwaving shrank the cubes to a size that could handily be cooked in just one batch in a 12-inch skillet.
Now I could try sautéing again, and this time it worked perfectly, browning the egg- plant and adding rich flavor. I cooked a few batches, browning them to various degrees. Not surprisingly, the deeply caramelized eggplant tasted the roundest and fullest, with toasty notes accenting the vegetable’s elusive sweetness. It was so flavorful that there really was nothing to be missed about frying.
Finally, I tried different types of eggplant: portly globe eggplants; smaller, more svelte Italian eggplants; and slender, lavender-colored Chinese eggplants. All worked, but in the end, I preferred globe eggplants, which have a tender yet resilient texture and far fewer seeds than other varieties, including Italian eggplants. Cut into cubes, they retained their shape even after sautéing.
A SAVORY SURPRISE
The base for pasta alla Norma is a simple tomato sauce to which the eggplant is added. I was sure that in-season tomatoes would give the dish fresh flavor, but after a couple rounds of testing, I concluded that the trouble of peeling and then salting them (to avoid a stringy, watery sauce) was more effort than I wanted for a midweek meal. It would be far better to develop a simple year-round option.
Diced canned tomatoes yielded a bright-tasting sauce with a coarse texture, but since the eggplant was already cut into cubes, the sauce was too chunky. My tasters preferred a sauce made with canned crushed tomatoes—a full 28-ounce can—for its thick consistency, which added cohesion.
To season the sauce, I started with a modest amount of garlic—two cloves, minced—but ended up using twice that amount to add some pungency. A small measure of red pepper flakes added a suggestion of heat, a generous dose of chopped basil brought fresh flavor, and a tablespoon of extra-virgin olive oil stirred in at the end with the basil gave the sauce rich, round, fruity notes.
The sauce tasted fine tossed with the pasta, especially when sprinkled with a generous dose of ricotta salata cheese, yet something was missing. It seemed to lack backbone. I was considering a break with tradition by adding pancetta or prosciutto when a test kitchen colleague offered a novel suggestion: anchovies. Of course! Cooked in oil with garlic and red pepper flakes, one minced fillet was good, but two were even better, giving the sauce a deep, savory flavor without any trace of fishiness.
A SIMMERING FINALE
So far, I had well-browned eggplant and a flavorful tomato sauce. To determine how best to bring these elements together, I made a couple more batches. For the first, I browned the eggplant, set it aside, made the sauce in the same skillet, and then added the eggplant to the sauce and simmered them together only long enough to heat through, no more than five minutes. For the second, I built the tomato sauce right on top of the browned eggplant so that they simmered together for about 10 minutes. The latter wound up a bit mushy and somewhat muddled, with some of the eggplant soggy and tattered. But the former had crisp, clear qualities—the eggplant’s caramelization could still be tasted, and its tender texture had integrity. Even with only a few minutes of simmering, the eggplant had a tendency to soak up tomato juices, causing the sauce to become rather thick, so the final adjustment was adding a little reserved pasta cooking water when tossing the sauce with the pasta. Now all the components—the pasta, the tomato sauce, and the eggplant—were perfectly in tune. No longer a tragedy, my pasta alla Norma was on the table in well under an hour, without theatrics but with bold and balanced flavors.
SERVES 4
Ricotta salata is traditional, but French feta, Pecorino Romano, and Cotija (a firm, crumbly Mexican cheese) are acceptable substitutes. We prefer kosher salt because it clings best to the eggplant. If using table salt, reduce salt amounts by half. For a spicier sauce, use the larger amount of red pepper flakes.
1½ pounds eggplant, cut into ½-inch pieces
Kosher salt
¼ cup extra-virgin olive oil
4 garlic cloves, minced
2 anchovy fillets, rinsed, patted dry, and minced
¼–½ teaspoon red pepper flakes
1 (28-ounce) can crushed tomatoes
6 tablespoons chopped fresh basil
1 pound ziti, rigatoni, or penne
3 ounces ricotta salata, shredded (1½ cups)
1. Toss eggplant with 1 teaspoon salt in large bowl. Line large plate with double layer of coffee filters and lightly spray with vegetable oil spray. Spread eggplant in even layer over coffee filters; wipe out bowl with paper towels and set aside. Microwave eggplant until dry to touch and slightly shriveled, about 10 minutes, tossing halfway through cooking. Let cool slightly.
2. Transfer eggplant to now-empty bowl, drizzle with 1 tablespoon oil, and toss gently to coat; discard coffee filters and reserve plate. Heat 1 tablespoon oil in 12-inch nonstick skillet over medium-high heat until shimmering. Add eggplant and cook, stirring every 1½ to 2 minutes (more frequent stirring may cause eggplant pieces to break apart), until well browned and fully tender, about 10 minutes. Transfer eggplant to now-empty plate and set aside. Let skillet cool slightly, about 3 minutes.
3. Heat 1 tablespoon oil, garlic, anchovies, and pepper flakes in now-empty skillet over medium heat. Cook, stirring often, until garlic turns golden but not brown, about 3 minutes. Stir in tomatoes, bring to simmer, and cook, stirring occasionally, until slightly thickened, 8 to 10 minutes. Add eggplant and continue to cook, stirring occasionally, until eggplant is heated through and flavors meld, 3 to 5 minutes longer. Stir in basil and remaining 1 tablespoon oil and season with salt to taste.
4. Meanwhile, bring 4 quarts water to boil in large pot. Add pasta and 2 tablespoons salt and cook, stirring often, until al dente. Reserve ½ cup cooking water, then drain pasta and return it to pot. Add sauce to pasta and toss to combine. Adjust consistency with reserved cooking water as needed. Serve immediately with ricotta salata.
RICOTTA SALATA’S UNDERSTUDIES
Ricotta salata, a firm, tangy Italian sheep’s-milk cheese that bears little resemblance to the moist ricotta sold in tubs, is an essential component of traditional pasta alla Norma. If you can’t find it, consider these options instead.

FRENCH FETA Milder but tangy, this is a close cousin to ricotta salata in flavor and texture.
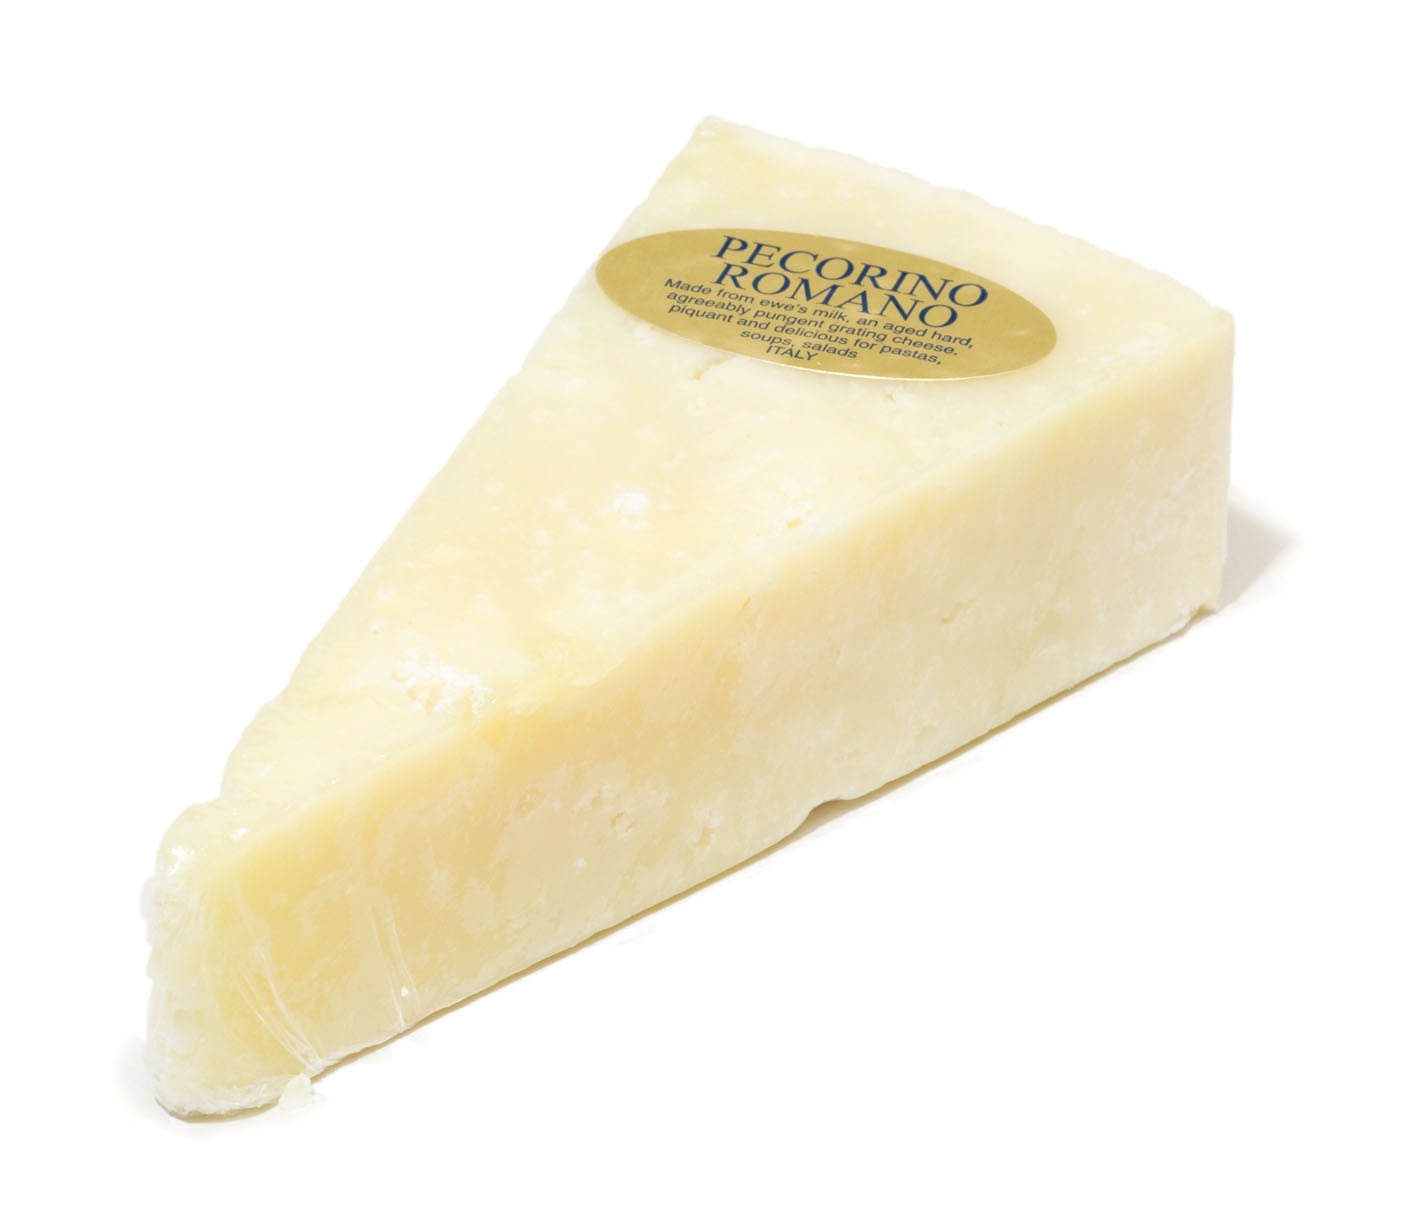
PECORINO ROMANO Hard and dry, with a slightly more assertive aroma and flavor than ricotta salata.

COTIJA Made with cow’s milk, this Mexican cheese has a firm yet crumbly texture, but is less complex than ricotta salata.
Italians have a knack for transforming humble ingredients into remarkable meals, and the rustic trio of pasta, hearty greens, and beans is no exception: When carefully prepared, the combination is sublime. But making something out of almost nothing takes time. In this case, dried cannellini beans are gently simmered until tender and greens are cleaned, cooked, and seasoned. Tossed with al dente pasta and a sprinkling of Parmesan, the result is rich and satisfying. If I could find a few shortcuts yet retain the complex flavors of the original, this dinner could become a regular in my midweek repertoire.
A BITTER BEGINNING
The hearty greens that Italians usually mix with pasta and beans include turnip, dandelion, chicory, mustard, broccoli rabe, collards, and kale. To reduce bitterness, many recipes call for blanching, shocking (dunking in ice water), squeezing dry, chopping, and sautéing them. The resulting greens are robust but not overpowering, but the whole process demands time and multiple pieces of kitchen equipment.
We streamline this classic Italian dish by using a hybrid sauté/braise technique to wilt the greens.
Two of the choices, kale and collard greens, were standouts: Tasters noted their appealing qualities but made not one mention of bitterness, giving me hope for a straightforward cooking method. Sure enough, a simple sauté tasted great, but the quantity of raw greens necessary meant that I would have to cook them in three or four batches. The solution was a sauté/braise combination. I quickly wilted half of the greens in a hot pan with olive oil, aromatic onions and garlic, and spicy red pepper flakes and then squeezed in the remainder of the raw greens. I poured in broth to serve as the braising liquid, and, 15 minutes later, tender, flavorful greens were mine.
FINISHING TOUCHES
As for the pasta, I’d run across a few references to whole-wheat spaghetti and decided to try it—despite some skepticism among a few health-food-fearing colleagues. I prepared a batch, served it up, and braced myself for the reactions. Surprise: Tasters unanimously preferred the nutty flavor of whole-wheat pasta to traditional semolina pasta for this dish. In fact, the more potent dimension of flavor provided by the whole-wheat pasta was the missing link, adding complexity that brought the beans and greens into a pleasing harmony.
To finish, I worked in some heavy-hitting ingredients to compensate for the flavor deficiency of the canned beans (the shortcut alternative to cooking them myself): tomatoes, olives, and Parmesan cheese. Still more garlic, in the form of chips, contributed welcome crunch.
One last note: I knew from experience that draining the pasta and finishing it in the sauce helps to integrate the components of a dish, and this one was no exception. Just a few minutes of simmering went a long way toward joining the gutsy flavors. Now I can have classic Italian comfort food, even when time isn’t on my side.

Whole-Wheat Pasta with Greens and Beans
SERVES 4 TO 6
3 tablespoons olive oil, plus extra for drizzling
8 garlic cloves (5 sliced thin lengthwise, 3 minced)
Salt and pepper
1 onion, chopped fine
½ teaspoon red pepper flakes
1½ pounds kale or collard greens, stemmed and cut into 1-inch pieces
1 (14.5-ounce) can diced tomatoes, drained
¾ cup chicken or vegetable broth
1 (15-ounce) can cannellini beans, rinsed
¾ cup pitted kalamata olives, chopped coarse
1 pound whole-wheat spaghetti
2 ounces Parmesan cheese, grated fine (1 cup), plus extra for serving
1. Heat oil and sliced garlic in 12-inch straight-sided sauté pan over medium heat. Cook, stirring often, until garlic turns golden but not brown, about 3 minutes. Using slotted spoon, transfer garlic to paper towel–lined plate and sprinkle garlic lightly with salt.
2. Add onion to oil left in pan and cook over medium heat until softened and lightly browned, 5 to 7 minutes. Stir in minced garlic and pepper flakes and cook until fragrant, about 30 seconds. Add half of kale and cook, tossing occasionally, until starting to wilt, about 2 minutes. Add tomatoes, broth, ¾ teaspoon salt, and remaining kale and bring to simmer. Reduce heat to medium, cover (pan will be very full), and cook, tossing occasionally, until kale is tender, about 15 minutes (mixture will be somewhat soupy). Stir in beans and olives.
3. Meanwhile, bring 4 quarts water to boil in large pot. Add pasta and 1 tablespoon salt and cook, stirring often, until just shy of al dente. Reserve ½ cup cooking water, then drain pasta and return it to pot. Add kale mixture to pasta and cook over medium heat, tossing to combine, until pasta absorbs most of liquid, about 2 minutes.
4. Off heat, stir in Parmesan. Adjust consistency with reserved cooking water as needed. Season with salt and pepper to taste, and serve immediately, drizzling individual portions with extra oil and passing garlic chips and extra Parmesan separately.
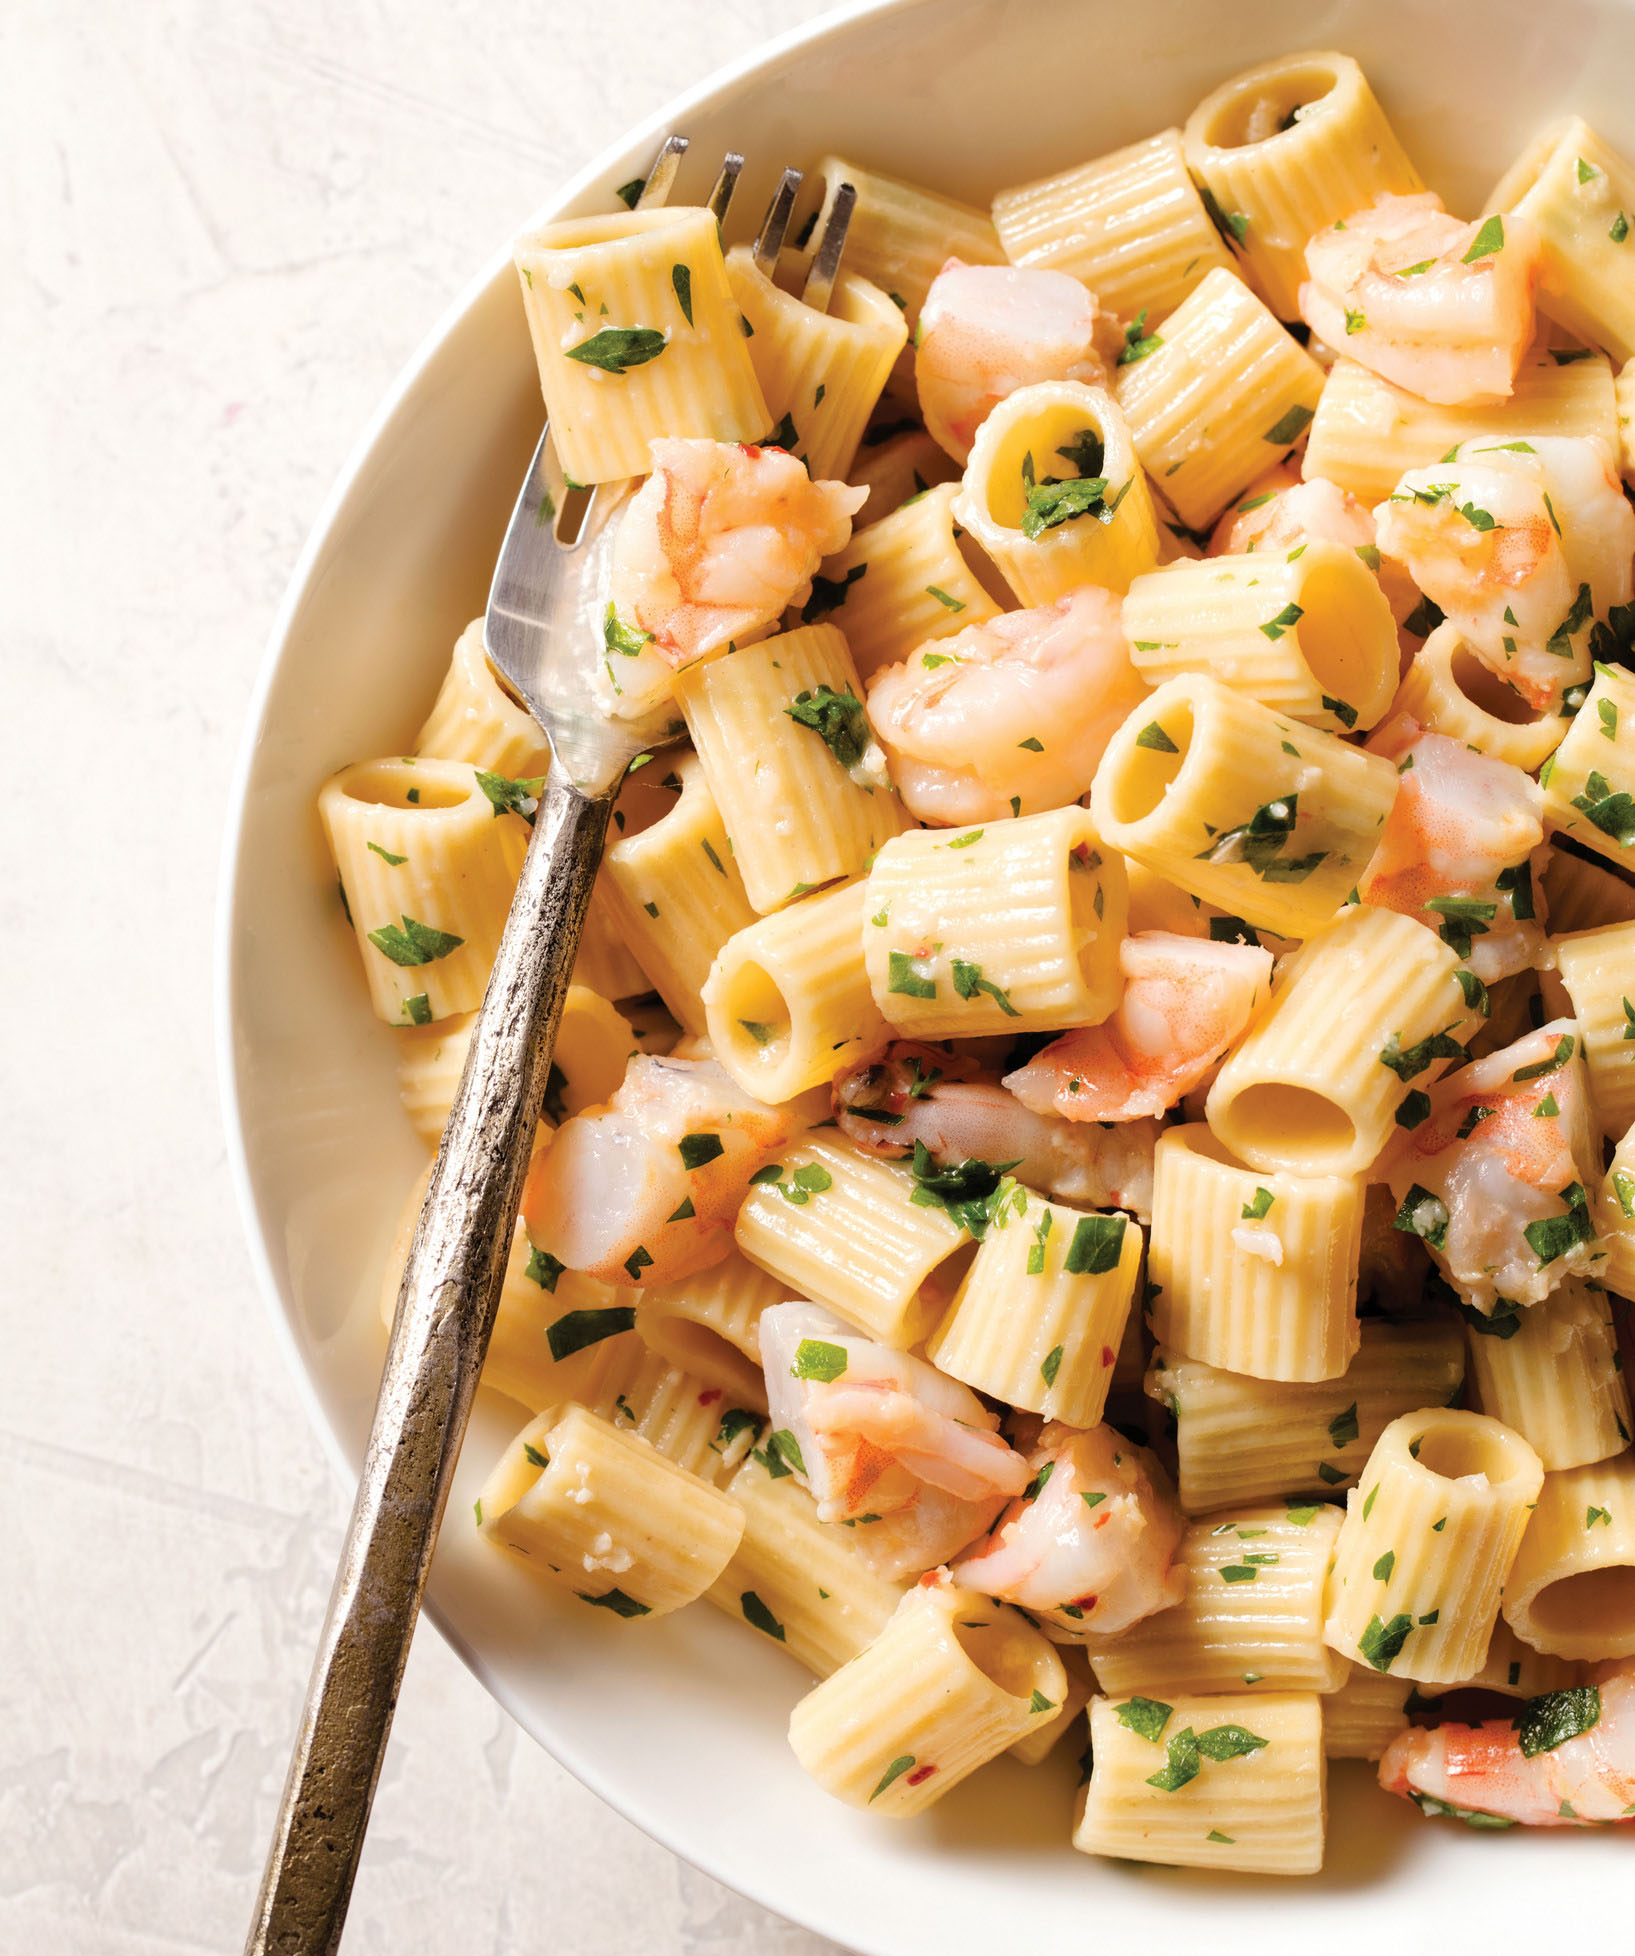
In theory, garlic shrimp pasta has all the makings of an ideal weeknight meal. Toss a few quick-cooking ingredients—shrimp, garlic, oil, wine—with boiled dried pasta, and only the salad’s left holding up dinner.
But there are challenges. Delicate shrimp overcooks in a matter of seconds. Volatile garlic can easily become overbearing or bitter (or simply disappear). Add to that the feat of getting a brothy sauce to coat the pasta, and this simple recipe turns into a precarious balancing act. But I still wanted it all: al dente pasta and moist shrimp bound by a supple sauce infused with a deep garlic flavor.
Before facing the garlic problem, I tackled the shrimp. I ruled out fast-cooking medium shrimp, as well as expensive extra-large and jumbo, landing on midpriced-but-meaty large shrimp (26 to 30 per pound). Searing them quickly over high heat yielded an overcooked texture. Poaching kept the shrimp moist but didn’t contribute much flavor. I tentatively settled on sautéing them gently in garlic and oil while building the sauce.
To build layers of garlic flavor, we use it in the marinade for the shrimp, to infuse the cooking oil, and as an element of the dish.
Starting with a basic working recipe, I sautéed the shrimp with three cloves of minced garlic in a modest amount of olive oil. Removing the shrimp, I added a pinch of red pepper flakes and a cup of white wine, reduced the sauce, then tossed it with the shrimp and linguine. The results were just OK: weak garlic, moist but lackluster shrimp, and a thinnish sauce.
Upping the garlic to six cloves gave me indisputably garlicky pasta. But now I had a new problem: All that garlic cooked unevenly. Sautéed too little, and the garlic tastes raw and harsh; too long, and random burnt granules impart a bitter taste. Turning the heat to the lowest setting and simmering the garlic longer yielded a sweet, nutty taste, but my tasters missed the brasher notes.
Borrowing tricks from our Spanish-Style Garlic Shrimp recipe, I split the difference. First, I slowly simmered the oil with smashed garlic cloves (more effective in this task than minced) over low heat, discarded the toasted cloves, and built the sauce using the infused oil. Just before adding the wine, I quickly sautéed a smaller amount of minced garlic (just long enough to bloom the flavor). Marinating the shrimp for 20 minutes with additional minced garlic gave the dish just the balanced, deeply layered garlic flavor I wanted.
Next, I tinkered with the sauce. Bottled clam broth added after the vermouth contributed complexity, bolstering the shrimp flavor. To get the sauce to cling to the pasta, I stirred a little flour into the oil as a thickener and added some cold butter to finish.
I was close, but tasters remarked that the shrimp stayed hidden in the tangle of linguine, and there simply weren’t enough bites. Swapping out the linguine for a chunky tubular pasta made it easy to find the shrimp, and cutting each shrimp into thirds before cooking ensured that nearly every bite boasted a tasty morsel.
SERVES 4 TO 6
Marinate the shrimp while you prepare the remaining ingredients. Use the smaller amount of red pepper flakes for a milder sauce.
1 pound large shrimp (26 to 30 per pound), peeled, deveined, and each shrimp cut into 3 pieces
3 tablespoons olive oil
9 garlic cloves, peeled (5 cloves minced and 4 cloves smashed)
Salt and pepper
1 pound penne, ziti, or other short, tubular pasta
¼–½ teaspoon red pepper flakes
2 teaspoons all-purpose flour
½ cup dry vermouth or white wine
¾ cup bottled clam juice
½ cup chopped fresh parsley
3 tablespoons unsalted butter
1 teaspoon lemon juice, plus lemon wedges for serving
1. Combine shrimp, 1 tablespoon oil, one-third of minced garlic, and ¼ teaspoon salt in bowl. Let shrimp marinate at room temperature for 20 minutes.
2. Heat smashed garlic and remaining 2 tablespoons oil in 12-inch skillet over medium-low heat, stirring often, until garlic turns golden but not brown, 4 to 7 minutes. Off heat, remove garlic with slotted spoon and discard. Set skillet with oil aside.
3. Bring 4 quarts water to boil in large pot. Add pasta and 1 tablespoon salt and cook, stirring often, until al dente. Reserve ½ cup cooking water, then drain pasta and return it to pot.
4. While pasta cooks, return skillet to medium heat. Add shrimp along with marinade, spread into even layer, and cook, without stirring, until oil starts to bubble gently, 1 to 2 minutes. Stir shrimp and continue to cook until almost cooked through, about 1 minute longer. Remove shrimp with slotted spoon and transfer to clean bowl. Add remaining minced garlic and pepper flakes to skillet and cook over medium heat until fragrant, about 30 seconds. Add flour and cook, stirring constantly, for 1 minute. Slowly whisk in vermouth and cook for 1 minute. Stir in clam juice and parsley and cook until mixture starts to thicken, 1 to 2 minutes. Off heat, whisk in butter until melted, then stir in lemon juice.
5. Add shrimp and sauce to pasta and toss to combine. Add reserved cooking water as needed to adjust consistency. Season with pepper to taste. Serve immediately, passing lemon wedges separately.
Though I didn’t grow up in an Italian family, I can still appreciate the appeal of a bowl of pasta dressed with tomatoey meat sauce. The sauce is rich and savory, clings well to just about any noodle shape, and can be thrown together quickly with basic ingredients such as ground beef, canned tomatoes, onion, garlic, and seasonings. That’s why I make it so often.
The thing is, sometimes I want a meatless version instead, either because I’m hosting vegetarian guests or, increasingly, because I’m trying to eat less meat. And the more I think about it, the more I realize that what I crave most about a quick meat sauce like this isn’t the flavor of the meat itself, since this type of sauce doesn’t taste particularly beefy. It’s the rich, savory flavor and hearty, unctuous body that I want. Do you really need meat to achieve the look and feel—and even the savoriness—of a good meat sauce? I decided to find out.
BUILD THE BASE
The typical Italian American meat sauce gets most of its savory depth from browning the ground beef. As the beef cooks, it releases juices that reduce and form a flavor-packed fond on the bottom of the pot. From there, you remove and reserve the beef and cook the onion, garlic, and seasonings (such as oregano and red pepper flakes) in the rendered fat, which adds to the flavor base. You then add canned tomatoes and the browned beef to the pot and simmer the sauce long enough to tenderize the meat a bit and allow the flavors to meld.
Finding a savory stand-in for the ground beef was an obvious place to start, and mushrooms were my first instinct. They’re a popular meat alternative because they’re an excellent source of both glutamic acid and nucleotides, molecules packed with savory umami flavor. Plus, their cell walls are made of a heat-stable substance called chitin, so instead of breaking down and turning to mush when cooked, they retain some satisfying meat-like chew.
That explained why so many of the vegetarian “meat” sauce recipes I tried called for mushrooms, but in most cases I found their earthy flavor too dominant; I wasn’t trying to make a mushroom sauce, after all. However, a modest amount of mushroom presence would be a good thing as long as I balanced it with other components.
Mushrooms and chickpeas, chopped quickly in a food processor, give this meatless sauce a hearty texture and savory flavor.
I ruled out more assertively flavored varieties, including porcini and shiitake, in favor of earthy but more neutral-tasting cremini, and I kept the amount to a judicious 10 ounces. To quickly chop them into ground meat–size bits, I blitzed them in a food processor. From there, I sautéed them in extra-virgin olive oil with a bit of salt; the oil would mimic the richness of rendered beef fat, and the salt would both season the mushrooms and pull water from them so that it could evaporate for faster browning. Once the mushrooms had developed some color, I added an onion (also chopped in the food processor) and a healthy scoop of tomato paste, another umami booster. When the onions were translucent and the paste had darkened to a deep rust red (a sign that its sugar had caramelized and its flavor had intensified), I added garlic, dried oregano, and red pepper flakes; stirred in the tomatoes; and simmered the sauce for about 20 minutes.
Tossed with some pasta, this early batch looked thin and tasted one-dimensional, but it was undeniably savory. What I needed was a partner for the mushrooms that would provide the sauce with some bulk and flavor balance.
FILL ’ER UP
I began to scour cookbooks and blogs for other ingredient ideas, steering clear of meat fakers such as tempeh and seitan. Instead, I compiled a list of vegetables, grains, and nuts that might mimic the hearty, lush consistency of ground beef without revealing themselves too obviously: cauliflower, eggplant, walnuts, cashews, lentils, and bulgur.
But the list quickly shortened. The nuts took the better part of an hour to become fully tender, even after I broke them up in the food processor. And the bulgur grains absorbed so much water that the sauce looked and tasted like a wheaty porridge. Lentils didn’t look or taste right in an Italian American–style sauce, eggplant had to be roasted to break down, and chopped cauliflower lost votes for its sulfurous aroma.
Chickpeas were the most promising candidate. Canned ones would be just fine for this quick sauce; they softened nicely after a few pulses in the food processor and just 15 minutes of cooking. The only drawback was that they overthickened the sauce, so I tried rinsing them after chopping to remove as much of their excess starch as possible. When that didn’t help enough, I tried adding another can of crushed tomatoes, but it contained too much pulp and not enough liquid and made the sauce too tomatoey. Ultimately, I added a couple of cups of vegetable broth along with the crushed tomatoes, which loosened the sauce without diluting the flavor. For an authentic finish, I stirred in chopped fresh basil.
The pantry staples made it quick. The food processor made it easy. And when my colleagues asked if they could take home the leftovers, I suspected that this sauce might become just as popular as the meat kind.
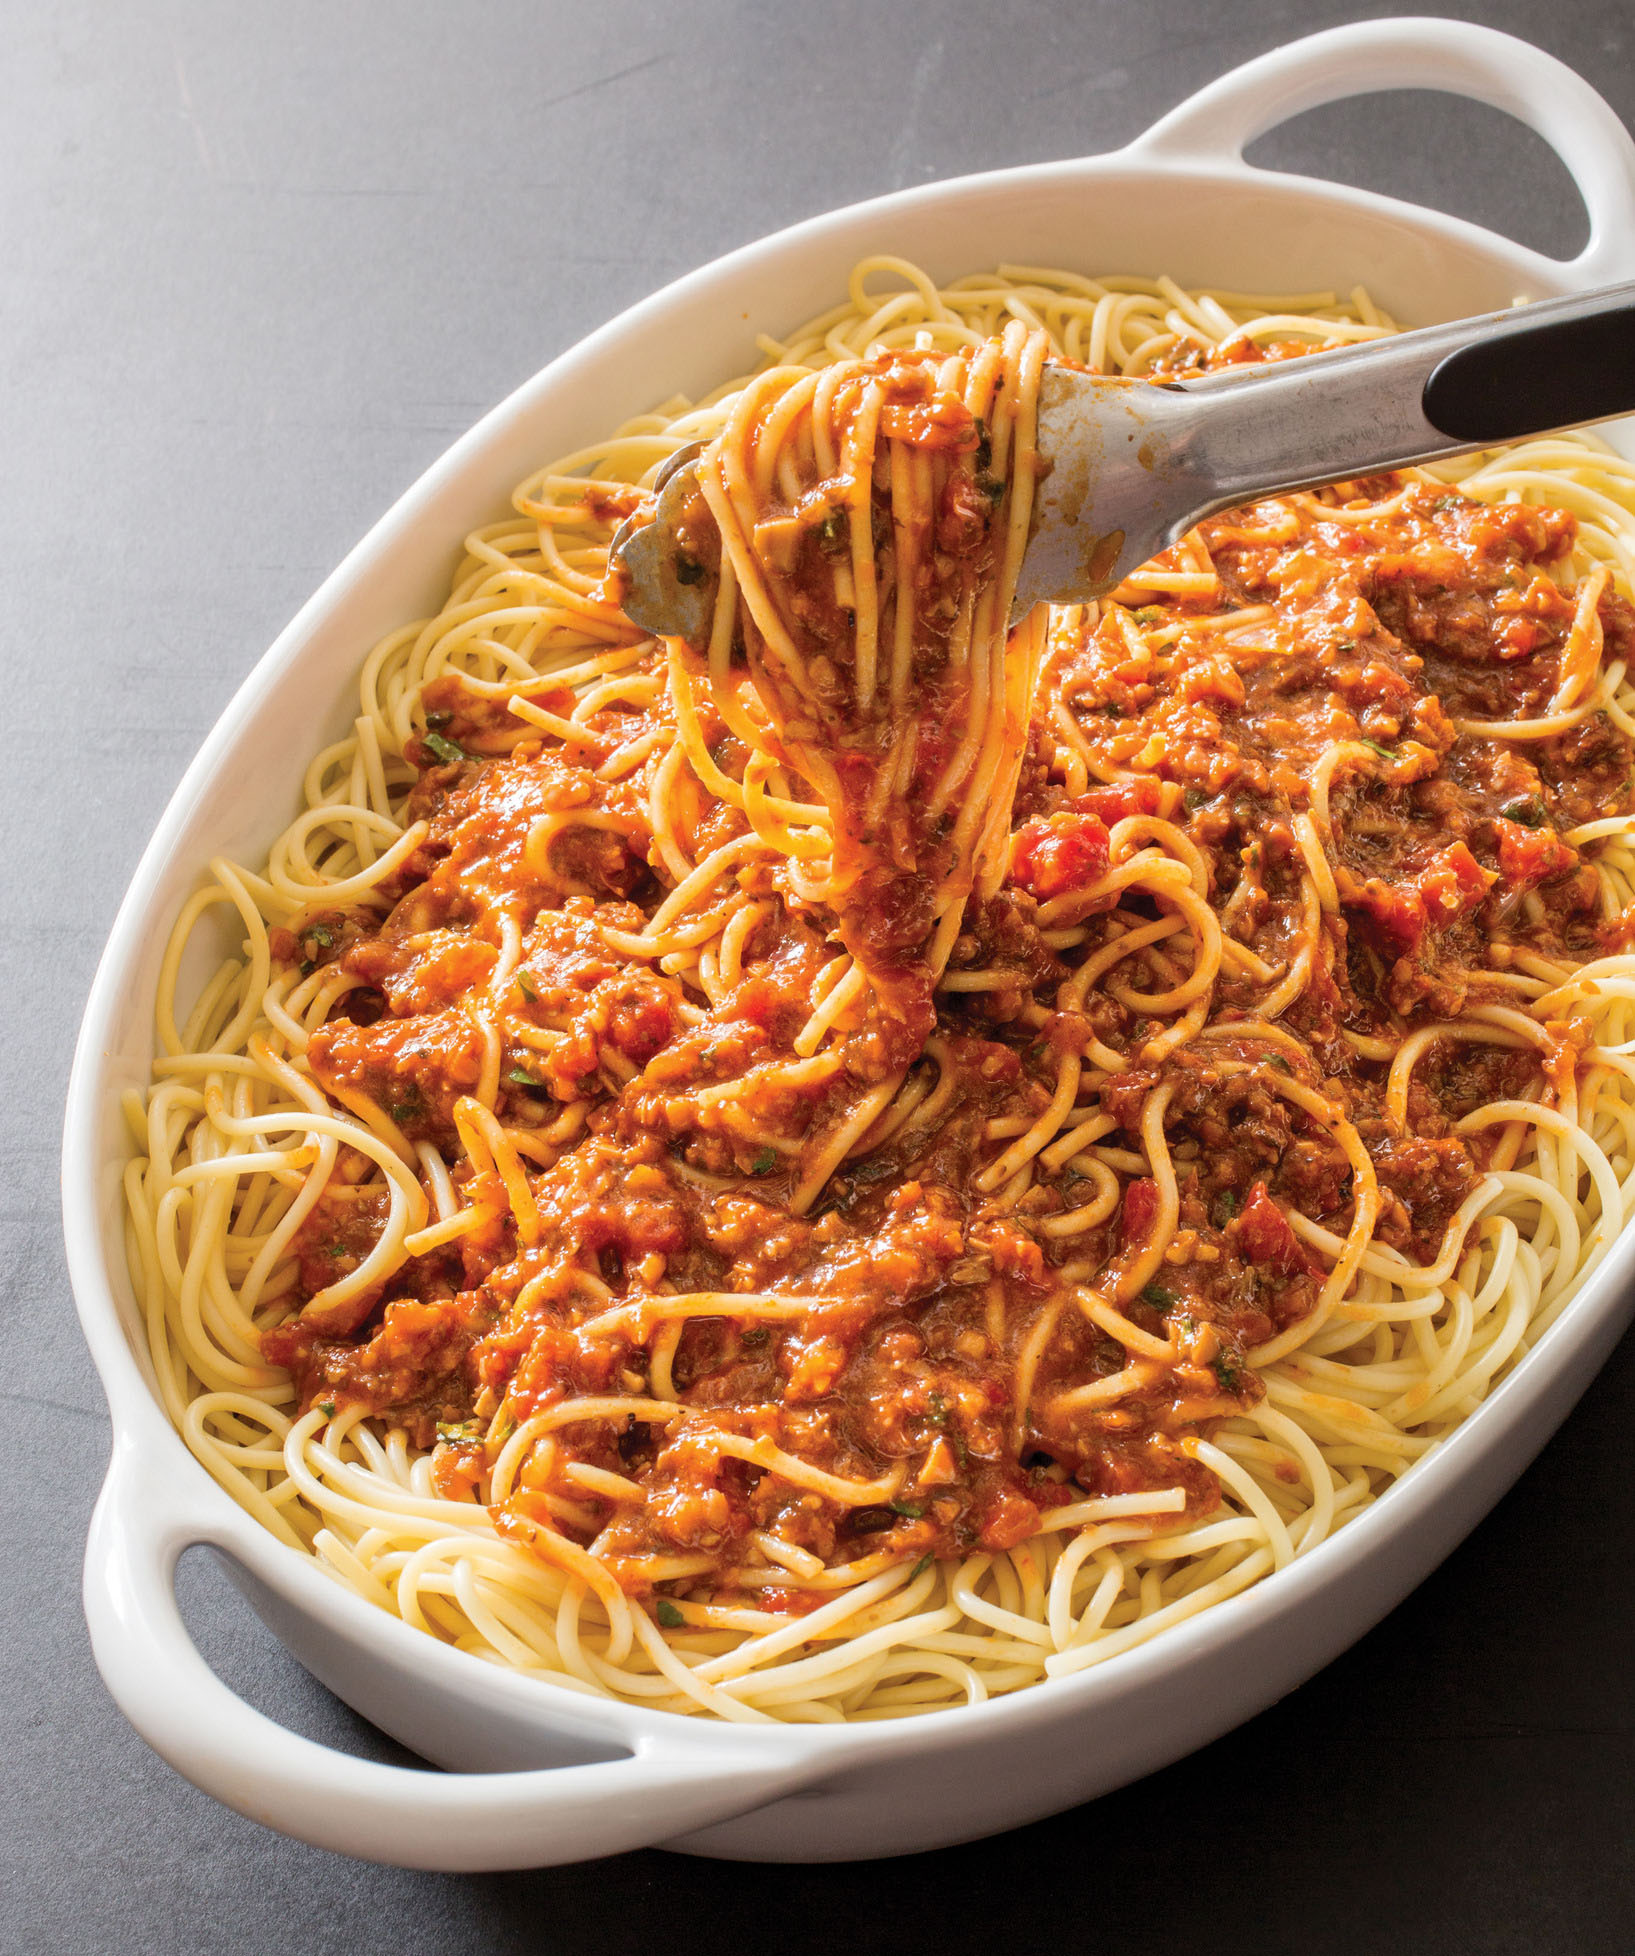
Meatless “Meat” Sauce with Chickpeas and Mushrooms
MAKES 6 CUPS; ENOUGH FOR 2 POUNDS PASTA
Make sure to rinse the chickpeas after pulsing them in the food processor or the sauce will be too thick.
10 ounces cremini mushrooms, trimmed
6 tablespoons extra-virgin olive oil
Salt and pepper
1 onion, chopped
5 garlic cloves, minced
1¼ teaspoons dried oregano
¼ teaspoon red pepper flakes
¼ cup tomato paste
1 (28-ounce) can crushed tomatoes
2 cups vegetable broth
1 (15-ounce) can chickpeas, rinsed
2 tablespoons chopped fresh basil
1. Pulse mushrooms in 2 batches in food processor until chopped into ⅛- to ¼-inch pieces, 7 to 10 pulses, scraping down sides of bowl as needed. (Do not clean workbowl.)
2. Heat 5 tablespoons oil in Dutch oven over medium-high heat until shimmering. Add mushrooms and 1 teaspoon salt and cook, stirring occasionally, until mushrooms are browned and fond has formed on bottom of pot, about 8 minutes.
3. While mushrooms cook, pulse onion in food processor until finely chopped, 7 to 10 pulses, scraping down sides of bowl as needed. (Do not clean workbowl.) Transfer onion to pot with mushrooms and cook, stirring occasionally, until onion is soft and translucent, about 5 minutes. Combine remaining 1 tablespoon oil, garlic, oregano, and pepper flakes in bowl.
4. Add tomato paste to pot and cook, stirring constantly, until mixture is rust-colored, 1 to 2 minutes. Reduce heat to medium and push vegetables to sides of pot. Add garlic mixture to center and cook, stirring constantly, until fragrant, about 30 seconds. Stir in tomatoes and broth; bring to simmer over high heat. Reduce heat to low and simmer sauce for 5 minutes, stirring occasionally.
5. While sauce simmers, pulse chickpeas in food processor until chopped into ¼-inch pieces, 7 to 10 pulses. Transfer chickpeas to fine-mesh strainer and rinse under cold running water until water runs clear; drain well. Add chickpeas to pot and simmer until sauce is slightly thickened, about 15 minutes. Stir in basil and season with salt and pepper to taste. Serve. (Sauce can be refrigerated for up to 2 days or frozen for up to 1 month.)
A SPEEDY PROCESS
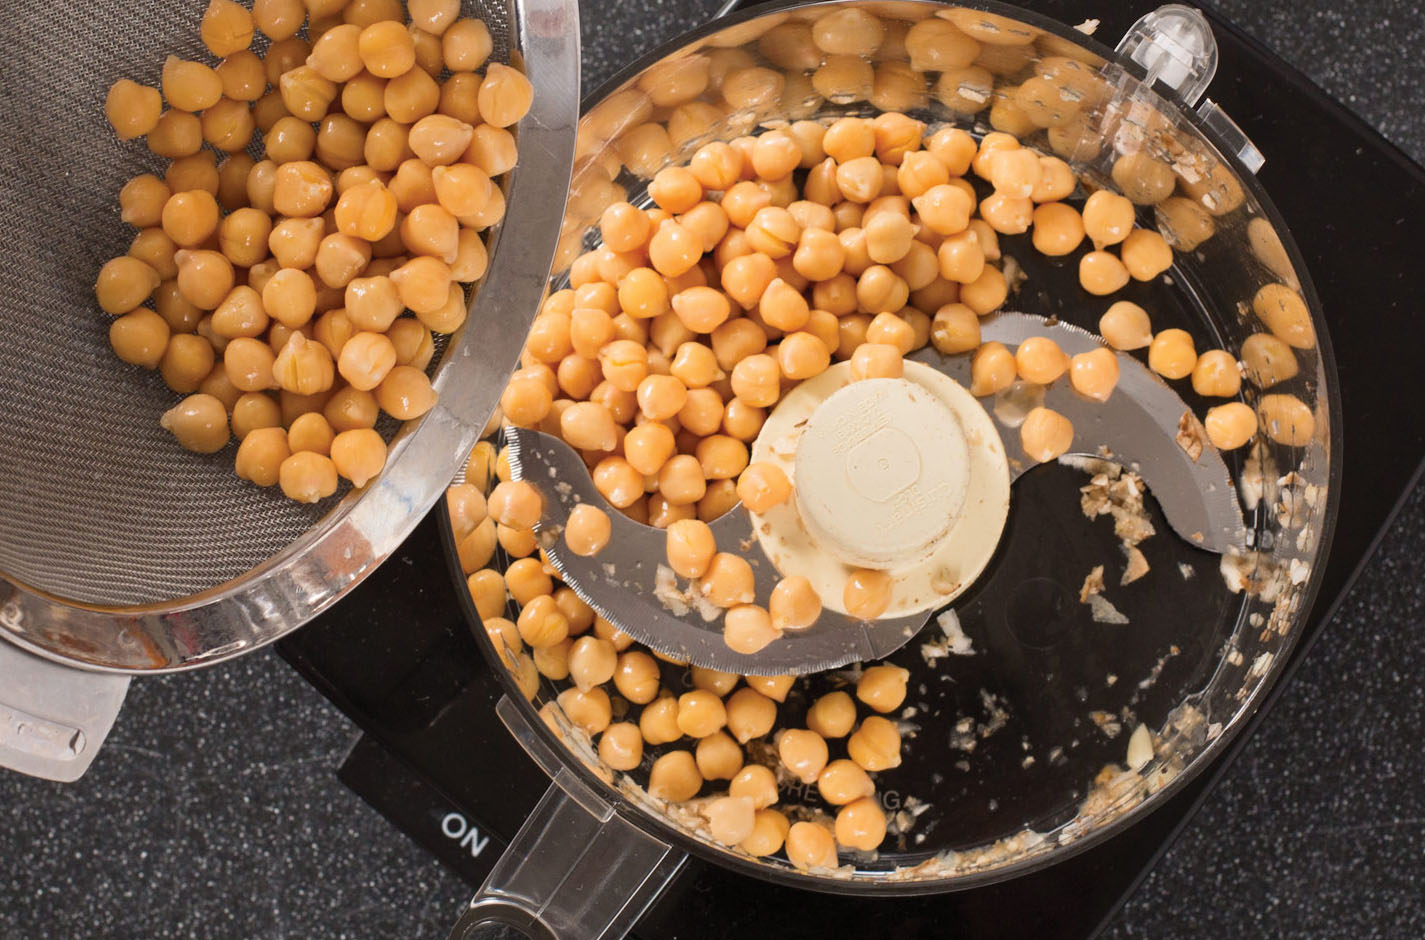
To make this recipe as quick as possible, most of the “knife work” takes place in a food processor. Even better, you don’t have to wash the processor bowl between uses.
GETTING TO “MEATY” WITHOUT MEAT
By zeroing in on the specific qualities meat brings to a meat sauce, we were able to replicate them in our meatless version.

SAVORY DEPTH from well-browned cremini mushrooms and tomato paste
HEARTY TEXTURE from drained, chopped chickpeas
RICHNESS from 6 tablespoons of extra-virgin olive oil
PASTA POINTERS
Boiling pasta in salted water is a straightforward kitchen task, but you can improve your results with these simple tricks.
1 USE PLENTY OF WATER—OR STIR OFTEN As pasta boils, it leaches starches into the cooking water, which can cause the noodles to stick together. The easiest way to cut down on sticking is to boil pasta in a generous amount of water—4 quarts per pound of dried pasta—to dilute the starches. However, if you don’t have a pot large enough for all the water, you can reduce the water by half and stir the pasta frequently during cooking.
2 SALT THE WATER Salting the cooking water ensures that seasoning gets into the pasta, not just on it. Add 1 tablespoon of salt to 4 quarts of water (or 1½ teaspoons to 2 quarts), making sure to stir well so that the salt will dissolve.
3 SKIP THE OIL Since it merely sits on top of the cooking water, adding a splash of olive oil to the pot before adding the pasta doesn’t prevent the pasta from sticking together as it cooks—though it may help keep the water from boiling over. To prevent the pasta from sticking together, simply stir it for a minute or two after adding it to the boiling water.
4 CHECK FOR DONENESS OFTEN We recommend ignoring the cooking times listed on packaging, which are almost always too long and result in mushy, overcooked pasta. Tasting the pasta is the best way to check for doneness. We prefer pasta cooked al dente, meaning that it has a bit of resistance in the center when bitten.
5 RESERVE SOME WATER Before draining the pasta, reserve about ½ cup of the cooking water, which is flavorful, somewhat salty, and starchy. It can be used to loosen a thick sauce without diluting the sauce’s body or flavor as much as plain water would.
ITALIAN-STYLE MEAT SAUCE
CHARLES KELSEY, March/April 2008
In Italy, cooking a meaty pasta sauce is an all-day affair. Whether they use ground meat for a ragù alla bolognese or chunks of meat for a rustic sauce, one thing is for sure: These sauces slowly simmer for 3 or 4 hours—or even longer. This long simmer develops concentrated flavor and, more important, breaks down the meat, giving it a soft, lush texture.
In America, “Italian meat sauce” has typically come to mean a shortcut version in which ground beef, onions, garlic, and canned tomatoes are thrown together in a pot and cooked for half an hour. While such a sauce may be quick, its lackluster flavor and rubbery meat bear no resemblance to its Italian cousins. But the trouble is, when I crave pasta with meat sauce, I don’t always have hours to spend on a Bolognese. Could I develop a meat sauce to make on a weeknight that tasted like it had been simmering for, if not all day, at least a good part of it?
MEAT OF THE MATTER
My search started with analyzing Bolognese recipes and I discovered right away that the best ones don’t brown the meat. Instead, they call for cooking the ground meat until it loses its raw color and then adding the liquid ingredients one by one, slowly reducing each and building flavor before adding the next. One of the first liquids in the pot is usually some form of dairy, a Bolognese sauce’s signature ingredient that imparts a sweet creaminess to the dish. Most American meat sauces, on the other hand, brown the beef first—a step that adds flavor but toughens the meat. They also skip the dairy in favor of tomato sauce, which doesn’t provide the milk fat or the same layers of complex flavor.
Would eliminating the browning step and adding milk work better? I headed to the test kitchen to find out. After sautéing onion and garlic, I stirred in a pound of ground beef, breaking it up with a wooden spoon. As soon as it started to lose its raw color, I immediately added ½ cup of milk along with the tomatoes, and then simmered the sauce for 30 minutes or so. The results were disappointing: Some of the meat was tender and moist, but most of it was tough and mealy. And despite the milk, the sauce lacked flavor overall. If anything, without sufficient time to reduce, the milk actually overpowered the meat flavor in the sauce. It occurred to me that in order for the milk to develop the new flavor compounds that are its key contribution to a Bolognese sauce, a lengthy simmer was necessary. Would cooking the sauce a little longer—45 minutes instead of 30—help? Not enough to notice. Furthermore, the extra 15 minutes of simmering had little impact on the meat, which was still more rubbery than not.
It was time to look beyond Bolognese for ways to improve my simple weeknight sauce. Meat tenderizer seemed like an obvious place to start. A few teaspoons did soften the beef, but it also made it spongy. Would soy sauce work? Soy sauce is a base ingredient in many of our steak marinades, where it acts much like a brine, tenderizing meat by helping it retain moisture. But I quickly discovered that while soy minimizes moisture loss in large pieces of meat, such as steak, it has virtually no impact on tiny bits of ground beef. After a little research I found out why: Bigger pieces of meat contain more water, which takes a longer time to evaporate during cooking. The water in small pieces of ground meat, on the other hand, evaporates almost immediately, and not even soy sauce can help prevent this.
A colleague suggested a trick that hadn’t occurred to me: mixing in a panade. This paste of bread and milk is often blended into meatballs and meatloaf to help them hold their shape and retain moisture during cooking. It was worth a try. Using a fork, I mashed up a piece of bread with some milk until I had a smooth paste and mixed it into the ground beef until well combined. I then proceeded as usual with the rest of the recipe: stirring the beef mixture into the sautéed onions and garlic, adding the tomatoes, and simmering. I noticed a difference in the sauce even before I ladled it over pasta for tasters. The meat looked moister and, sure enough, tasters confirmed that it was. It turns out that starches from the bread absorb liquid from the milk to form a gel that coats and lubricates the meat, much in the same way as fat. But all was not perfect: Tasters were pleased with the meat’s tenderness but complained that the sauce was too chunky and resembled chili. No problem. I pulsed the meat and panade together in a food processor to create finer pieces of supple, juicy meat.
A panade gives our quick-cooked beef a lush texture; browned mushrooms deepen the sauce’s flavor.
BEEFING UP FLAVOR
With the meat issue solved, it was time to turn my attention to flavor. Without browning or a lengthy simmer to concentrate and build new layers of flavor, complexity and depth were noticeably lacking from my sauce. Could the type of ground beef I used enhance flavor? I bought four different kinds—ground round, chuck, and sirloin, as well as meat labeled “ground beef” (a mix of various beef cuts and trimmings)—and made four sauces. The ground round was bland and spongy, but tasters liked the other three equally well. Eighty-five percent lean beef proved to have just the right degree of leanness, adding richness without making the sauce greasy. Still, tasters were pressing, “Where’s the beef [flavor]?”
Next, I tested a range of ingredients that are often used to boost meaty flavor. Beef broth ended up imparting a tinny taste to the sauce. Worcestershire and steak sauce overwhelmed it with their potent flavorings, and red wine lent a sour taste. Finally, I tried mushrooms—and at last I had a winner. The mushrooms brought a real beefiness to the sauce. After experimenting with different types, I discovered that plain white mushrooms worked just fine. The key was browning them. I minced a modest amount (about 4 ounces) and added them to the pan with the onions. Browning concentrated their flavor but left them tender and supple, allowing them to add complexity without otherwise letting their presence be known.
When it came to other components of the sauce, tasters liked a mix of diced and crushed tomatoes. The diced tomatoes brought a chunky texture, and the crushed provided a smooth foundation. I reserved a small amount of juice from the drained diced tomatoes to deglaze the pan after browning the mushrooms. This little trick gave the sauce’s tomato flavor a boost, as did a tablespoon of tomato paste. Earlier, I had ruled against milk in the sauce (except for the couple of tablespoons in the panade), but I reinstated dairy in the form of a handful of grated Parmesan, which brought a welcome tanginess. With a dash of red pepper flakes and some fresh oregano, I was done.
I now had a sauce with meltingly tender meat that was as complex and full-bodied as any sauce simmered for under an hour could be. True, no one would mistake it for a Bolognese—but no one would ever believe I hadn’t rushed home early to put it on the stove, either.

Simple Italian-Style Meat Sauce
MAKES ABOUT 6 CUPS; ENOUGH FOR 2 POUNDS PASTA
Except for ground round, this recipe will work with most types of ground beef, as long as it is 85 percent lean. (Eighty percent lean beef will turn the sauce greasy; 90 percent will make it fibrous.) If using dried oregano, add the entire amount with the reserved tomato juice in step 2. Serve over pasta with extra grated Parmesan; we like to use rigatoni or penne.
4 ounces white mushrooms, trimmed and halved if small or quartered if large
1 slice hearty white sandwich bread, torn into quarters
2 tablespoons whole milk
Salt and pepper
1 pound 85 percent lean ground beef
1 tablespoon olive oil
1 large onion, chopped fine
6 garlic cloves, minced
1 tablespoon tomato paste
¼ teaspoon red pepper flakes
1 (14.5-ounce) can diced tomatoes, drained with ¼ cup juice reserved
1 tablespoon minced fresh oregano or 1 teaspoon dried
1 (28-ounce) can crushed tomatoes
¼ cup grated Parmesan cheese
1. Pulse mushrooms in food processor until finely chopped, about 8 pulses, scraping down sides of bowl as needed; transfer to bowl. Add bread, milk, ½ teaspoon salt, and ½ teaspoon pepper to now-empty processor and pulse until paste forms, about 8 pulses. Add beef and pulse until mixture is well combined, about 6 pulses.
2. Heat oil in large saucepan over medium-high heat until just smoking. Add onion and mushrooms and cook until vegetables are softened and well browned, 6 to 12 minutes. Stir in garlic, tomato paste, and pepper flakes and cook until fragrant and tomato paste starts to brown, about 1 minute. Stir in reserved tomato juice and 2 teaspoons oregano, scraping up any browned bits. Stir in beef mixture and cook, breaking up any large pieces with wooden spoon, until no longer pink, about 3 minutes, making sure that beef does not brown.
3. Stir in diced tomatoes and crushed tomatoes and bring mixture to simmer. Reduce heat to low and cook until sauce has thickened and flavors meld, about 30 minutes. Stir in Parmesan and remaining 1 teaspoon oregano and season with salt and pepper to taste. Serve. (Sauce can be refrigerated for up to 2 days or frozen for up to 1 month.)
Ground beef can be made from a variety of cuts, and fat levels vary from 70 to 95 percent lean. Our meat sauce recipe calls for any 85 percent lean ground beef other than ground round. But when a recipe doesn’t specify, how do you know what to buy? Here’s a guide:
GROUND CHUCK Cut from the shoulder, ground chuck is distinguished by its rich, beefy flavor and tender texture.
GROUND SIRLOIN This cut from the cow’s midsection near the hip offers good beefy flavor, but it can be on the dry side. Generally fairly lean.
GROUND BEEF A mystery meat of sorts, ground beef can be any cut or combination of cuts, which means flavor and texture are rarely consistent.
GROUND ROUND Lean, tough, and often gristly, ground round comes from the rear upper leg and rump of the cow.
PANADE TO THE RESCUE
A paste of milk and bread, called a panade, is responsible for keeping the ground beef in our meat sauce moist and tender. Panades are typically used to help foods such as meatballs and meatloaf hold their shape (and moisture), so we were surprised that our panade didn’t just dissolve into a meat sauce where the beef is crumbled. Our science editor told us that starches from the bread absorb liquid from the milk to form a gel that coats and lubricates the protein molecules in the meat, keeping them moist and preventing them from linking together to form a tough matrix. Mixing the beef and panade in a food processor ensures that the starch is well dispersed.
Ragù alla bolognese, the hearty meat sauce native to the northern Italian city for which it is named, has always been a simple concept—but with a lot of complications to hamper its simplicity. Despite its undisputed Bolognese pedigree, there are countless “authentic” interpretations on record. While ground beef is the common starting point, many versions add ground pork and often veal as well. Others supplement the ground meat with finely chopped salumi, usually pancetta or prosciutto. Some recipes call for brightening the ragu with crushed tomatoes; others lean toward the drier, more concentrated depth of tomato paste. One version may call for white wine, another for red—some may call for no wine at all. Cooking times range from 90 minutes to 3 hours.
But the most controversial point of all? Dairy. Depending on which source you consult, milk and/or cream is either an essential component, lending further richness and supposedly tenderizing the long-cooked meat, or it has no place in the sauce whatsoever. In other words, what constitutes “real” ragu Bolognese is largely a matter of interpretation.
The only thing that all Italian cooks seem to agree on is this: The end product should be hearty and rich but not cloying, with a velvety texture that lightly clings to the noodles, and tomatoes should be a bit player in this show. The true star is the meat.
A little gelatin gives this sauce a silky, glossy texture, and six types of meat offer complex depth of flavor.
I’d never felt strongly about the dairy issue myself, until recently, when I sampled a Bolognese sauce made by Dante de Magistris, an Italian chef in Boston with a big following. His version was by far the meatiest, most complex version I’d ever had. I was so taken with it that I asked him for a breakdown of the recipe. Two points stood out. First, he used a whopping six meats: ground beef, pork, and veal; pancetta; mortadella (bologna-like Italian deli meat); and, to my surprise, chicken livers. Second, de Magistris stood squarely in the no-dairy camp, claiming that when he learned to make the dish in Bologna, milk and cream were definitely not included.
Those clues—plus the test kitchen’s library of Italian cookbooks—were enough to get me started on my own dairy-free Bolognese. I was determined to make my version home cook–friendly and yet satisfying to even the most discriminating Italian palate.
THE MEAT OF THE MATTER
I started with a test batch that I based on de Magistris’s version, loading up the pot with the components of the flavor base, or soffritto (chopped carrot, celery, and onion), followed by five different meats. (I wasn’t sure I really needed the chicken livers, so I left them out for the time being.) I then stirred in crushed tomatoes.
I let it all simmer, covered, for a couple of hours. The result was acceptably rich and flavorful, but I still had a good bit of tweaking to do, to both the ingredient list and the technique.
I made several more batches, adding a fistful of minced sage to the meat—considered an essential component by some sources—and trying various proportions of all five meats until I landed on 12 ounces each for the ground beef, pork, and veal and 4 ounces each of pancetta and mortadella. Some of the other classic Bolognese recipes I’d consulted specified that the ground meat should be cooked only until it loses its pink color, lest the browning lead to toughness. But I found the textural compromise to be far subtler than the flavor benefit of a good sear. I also decided to ignore tradition and add the meat to the pot before the soffritto. Without the interference of moisture from the vegetables, I could get a much better sear on the meat; plus, sautéing the veggies in the meats’ rendered fat built up even richer flavor.
What gave me pause was a more minor complaint: finely chopping the pancetta and mortadella. It was tedious work, so I called on my food processor to take over. The job was literally done with the push of a button. In fact, the appliance worked so efficiently that I also pulsed the soffritto components before sautéing them in the meats’ rendered fat.
I moved on to the next major decision: the best kind of tomato product to use. The recipes I’d read didn’t help narrow things down—I’d seen everything from the crushed tomatoes I had been using up until now to sauce to paste. One source I consulted even suggested that tomatoes were not originally part of the sauce. That idea reminded me that I liked the unobtrusive texture of tomato paste in de Magistris’s version, so I added a healthy dollop to the pot, and then let the mixture go. Once the fond had taken on a deep rust tone, I poured in a few big glugs of red wine, deglazed the pan by scraping up the browned bits with a wooden spoon, and let the sauce simmer gently for the better part of 2 hours. When the sauce was nearly done, I boiled some pasta and tossed the noodles with the ragu.
Flavorwise, the sauce was in good shape: rich and complex and, thanks to the wine and tomato paste, balanced with just enough acidity. But as my tasters noted, this ragu had a textural flaw: Its consistency was pebbly, dry, and not particularly sauce-like.
VELVET UNDERGROUND
There was one element of de Magistris’s recipe that I had overlooked in my earlier attempts: Just before the long simmering step, he ladled some homemade brodo (or broth) into the ragu, repeating the step twice more during cooking to moisten the reduced sauce. I suspected that the brodo—and the technique of adding the brodo in stages—had an important effect on the texture of Bolognese. Besides boosting the meaty flavor, the bones used to make the broth give up lots of gelatin as they simmer, which renders the liquid glossy and viscous. The more the broth reduced in the Bolognese, the more savory and satiny it became. But homemade broth was out of the question for me. Simmering bones for hours on top of making the ragu was just too much fuss; I’d have to make do with commercial broth.
No surprise here: The ragus I made with store-bought broth didn’t measure up to the Bolognese made with homemade broth—especially in regard to texture. I started brainstorming other ways to mimic the velvetiness contributed by the gelatin in real brodo—and realized that the answer was right in front of me: powdered gelatin. It’s a trick we’ve used to lend suppleness to all-beef meatloaf and viscosity to beef stew—two qualities that I was looking for in my ragu. I prepped multiple batches of the sauce, blooming varying amounts of gelatin—from 1 teaspoon all the way up to a whopping 8—in a combination of canned beef and chicken broth (1 cup each) before proceeding with the recipe. Every batch was an improvement over the gelatin-free ragus, but the powder’s effect was relatively subtle until I got up into the higher amounts, which rendered the sauce ultrasilky. That settled it: Eight teaspoons it was.
I had one more thought about the canned broth: Since the flavor and body of the canned stuff hardly equaled that of a real brodo, I wondered if the reduction step was really doing that much for the sauce. One side-by-side test gave me my answer: The batch into which I’d added all the broth at once boasted just as much meatiness and body as the one with the staggered additions. It also finished cooking in about 90 minutes.
And yet while canned broth plus gelatin nicely solved the texture problem, the sauce still lacked a certain depth and roundness of flavor. Fortunately, I still had one card left to play: chicken livers. They’d seemed superfluous to me at first, but I wondered if finely chopping them and tossing them in at the end might get at the complexity I was after. That they did—but according to my tasters, their effect was a bit too strong. Pureeing them in the food processor worked much better; this way, their rich, gamy flavor incorporated seamlessly into the sauce.
Though my sauce could hardly get any more perfect, I just couldn’t push away the thought that kept sneaking into my head: What would happen if the sauce included a little dairy? I made one last batch, adding 1 cup of milk along with the broth. But when my tasters sampled this latest version, the consensus was unanimous: Dairy muted its meaty flavor, and they liked it better without.
Without dairy, I knew that some Italian cooks out there would not consider my recipe authentic. But no matter: The sauce was undeniably complex, rich-tasting, and lusciously silky. And besides, how could any version be Bolognese without a little controversy?

Pasta with Ragù alla Bolognese
SERVES 4
This recipe makes enough sauce to coat 2 pounds of pasta. Leftover sauce may be refrigerated for up to three days or frozen for up to one month. Eight teaspoons of gelatin is equivalent to 1 ounce. If you can’t find ground veal, use an additional 12 ounces of ground beef.
1 cup chicken broth
1 cup beef broth
8 teaspoons unflavored gelatin
1 onion, chopped coarse
1 large carrot, peeled and chopped coarse
1 celery rib, chopped coarse
4 ounces pancetta, chopped
4 ounces mortadella, chopped
6 ounces chicken livers, trimmed
3 tablespoons extra-virgin olive oil
12 ounces 85 percent lean ground beef
12 ounces ground pork
12 ounces ground veal
3 tablespoons minced fresh sage
1 (6-ounce) can tomato paste
2 cups dry red wine
Salt and pepper
1 pound pappardelle or tagliatelle
Grated Parmesan cheese
1. Combine chicken broth and beef broth in bowl; sprinkle gelatin over top and set aside. Pulse onion, carrot, and celery in food processor until finely chopped, about 10 pulses, scraping down sides of bowl as needed; transfer to second bowl. Pulse pancetta and mortadella in now-empty processor until finely chopped, about 25 pulses, scraping down sides of bowl as needed; transfer to third bowl. Process chicken livers in now-empty processor until pureed, about 5 seconds; transfer to fourth bowl.
2. Heat oil in Dutch oven over medium-high heat until shimmering. Add beef, pork, and veal and cook, breaking up meat with wooden spoon, until all liquid has evaporated and meat begins to sizzle, 10 to 15 minutes. Add sage and pancetta mixture and cook, stirring frequently, until pancetta is translucent, 5 to 7 minutes, adjusting heat as needed to keep fond from burning. Add chopped vegetables and cook, stirring frequently, until softened, 5 to 7 minutes. Add tomato paste and cook, stirring constantly, until rust-colored and fragrant, about 3 minutes.
3. Stir in wine, scraping up any browned bits. Simmer until sauce has thickened, about 5 minutes. Stir in broth mixture and return to simmer. Reduce heat to low and cook at bare simmer until thickened (wooden spoon should leave trail when dragged through sauce), about 1½ hours.
4. Stir in pureed chicken livers, increase heat to medium-high, bring to boil, and immediately remove from heat. Season with salt and pepper to taste; cover and keep warm.
5. Bring 4 quarts water to boil in large pot. Add pasta and 1 tablespoon salt and cook, stirring often, until al dente. Reserve ¾ cup cooking water, then drain pasta and return it to pot. Add half of sauce and reserved cooking water to pasta and toss to combine. Serve with Parmesan.
There are those who have the best of everything, and there are those who make the best of everything. The residents of 16th-century Naples fell into the latter category. Faced with a population explosion that caused severe food shortages, they created a thrifty yet supremely satisfying gravy of beef and aromatic vegetables known, ironically, as la Genovese. (The provenance of the name is unclear: Some theorize that Genovese cooks brought it to Naples; others believe that the name references the reputed frugality of the people of Genoa.)
Later, in the 19th century, onions took center stage, and the dish became one of the region’s most beloved. The classic preparation is straightforward: A piece of beef, usually from the round, is placed in a pot and covered with approximately twice its weight in sliced onions, along with chopped aromatic vegetables, salt, and perhaps some herbs. Then several cups of water and a bit of wine go into the pot, and the mixture is simmered for anywhere from 3 to 6 hours, until the liquid has evaporated, the beef is tender, and the onions have cooked down into a soft, pulpy mass.
Traditionally, frugal cooks served the beef-flavored onion gravy (notice that I didn’t mention tomatoes; the dish predates the introduction of tomatoes to European kitchens) as a sauce for sturdy tubular pasta like rigatoni. (Incidentally, the sauce doesn’t include garlic either.) The meat itself was typically reserved for a second meal, or at least a second course, with a vegetable. But in these comparatively prosperous times, the beef is more likely to be shredded and incorporated into the sauce for a substantial single dish—exactly the kind of pasta sauce I love to make in cold-weather months.
HUMBLE BEGINNINGS
I started with a very traditional recipe, but since I was making just one meal, not two, I immediately cut down the amount of beef and onions to a more practical size—1 pound of trimmed beef round and 2½ pounds of thinly sliced onions, which I hoped would produce six to eight servings. To those key players I added a finely chopped carrot and celery stalk, plus some chopped marjoram and salt, all of which I put in a Dutch oven with 8 cups of water and 1 cup of white wine (the meat is not usually seared). I let the pot bubble away for a good 2½ hours, giving it an occasional stir to keep the contents cooking evenly. By that point, the beef was fully cooked; I removed it to let it cool before chopping it (its texture was too tight to shred) and adding it back to the sauce. In the meantime I reduced the oniony cooking liquid.
Cooking the beef and onions with a small amount of water creates an ultrasavory ragu.
Perhaps not surprisingly, this early version did not produce the succulent, deeply flavorful ragu I had envisioned. The lean round was not the best cut to be using in a moist-heat environment; it lacks fat and collagen, which keep meat tasting tender and juicy, so it cooked up dry and tight. Also, reducing the sauce itself took too long—almost 40 minutes. Lastly, the color of the sauce was an unappealing beige.
What did impress me was the deeply savory flavor of the onions. They weren’t sharp and sulfurous like fresh onions, nor did they have the sweetness of the caramelized kind. They were just plain beefy-tasting. In fact, one taster observed that the onions tasted beefier than the actual beef. I would come back to this discovery once I’d nailed down the basics of the sauce—for starters, the meat.
TESTING THE WATER
Beef round’s tight grain makes this cut a good candidate for slicing, but since I was in pursuit of more tender meat that I could shred and return to the sauce, I moved to our favorite braising cuts: short ribs, blade steaks, and chuck-eye roast. The latter won for its beefy flavor, tenderness, and (in homage to the thrifty nature of this dish) relatively low price tag. The only glitch? Cooked whole, it took upwards of 3½ hours to turn tender. Cutting it into four chunks reduced the cooking time to 2½ hours and allowed me to trim away intramuscular fat pockets. I also seasoned the roast with salt and pepper before cooking and moved the braising to a low (300-degree) oven, where the meat would cook more evenly.
And I cut way back on the water—down to 3 cups—hoping to drastically shorten the reduction time. But even with that little amount, it still took about a half-hour of stovetop reduction to turn the onions and cooking liquid saucy. I wondered: Did I have to add water at all?
In the next batch I omitted the water and simply nestled the beef in the onion mixture and sealed the pot tightly with foil (to lock in steam) and then the lid. This worked well; the meat braised to perfect tenderness in the released juices, and the sauce required less stovetop reduction time—just 10 minutes. But strangely, this version tasted less savory.
To ramp up meatiness, I turned to innovations that started to show up in later Genovese recipes: pancetta and salami (which I finely chopped in the food processor) and tomato paste. They all made the ragu more savory, particularly the umami-rich tomato paste when I browned it in the pot before adding the onions. The tomato paste also warmed up the color of the formerly drab-looking finished sauce. But while this batch tasted meatier than the previous one, it still was not as savory as the first version. I was baffled. I had not only added meaty ingredients but also taken away the world’s most neutral ingredient: water.
SAVORY SECRET
A consultation with our science editor solved the mystery. Astonishingly, it was the water that was the key to extracting the meaty flavor that was locked inside the onions. That meatiness is due to a water-soluble compound known as 3-mercapto-2-methylpentan-1-ol (MMP), the byproduct of a reaction that occurs when onions are cut and then heated in water.
By eliminating the water, I was severely limiting the development of savory flavors, so I added back 2 cups—just enough to cover the onions but not so much that the sauce’s reduction time would be lengthy. I also switched from slicing the onions to chopping them in the food processor—a timesaving technique that would also lead to the creation of more MMP. This time the sauce regained the meatiness of the original batch, and then some, with the pancetta, salami, and tomato paste. Even better, I found that I could cook it in the oven with the lid off, which encouraged evaporation and saved me some reducing time at the end. The sauce was a bit sweet, so I reserved half of the wine for adding at the end for extra brightness.
One last tweak: I found that when I vigorously mixed—instead of just lightly tossed—together the cooked pasta and sauce and a bit of cheese, the starch on the surface of the pasta pulled the components together, helping keep the liquid from separating out from the solids.
I had to hand it to those thrifty 16th-century Neapolitans. This was a true ragu—humble at its roots but as savory and satisfying as the meat-and-tomato-heavy versions that would follow. My 21st-century tweaks would make it a staple in my wintertime pasta sauce rotation.
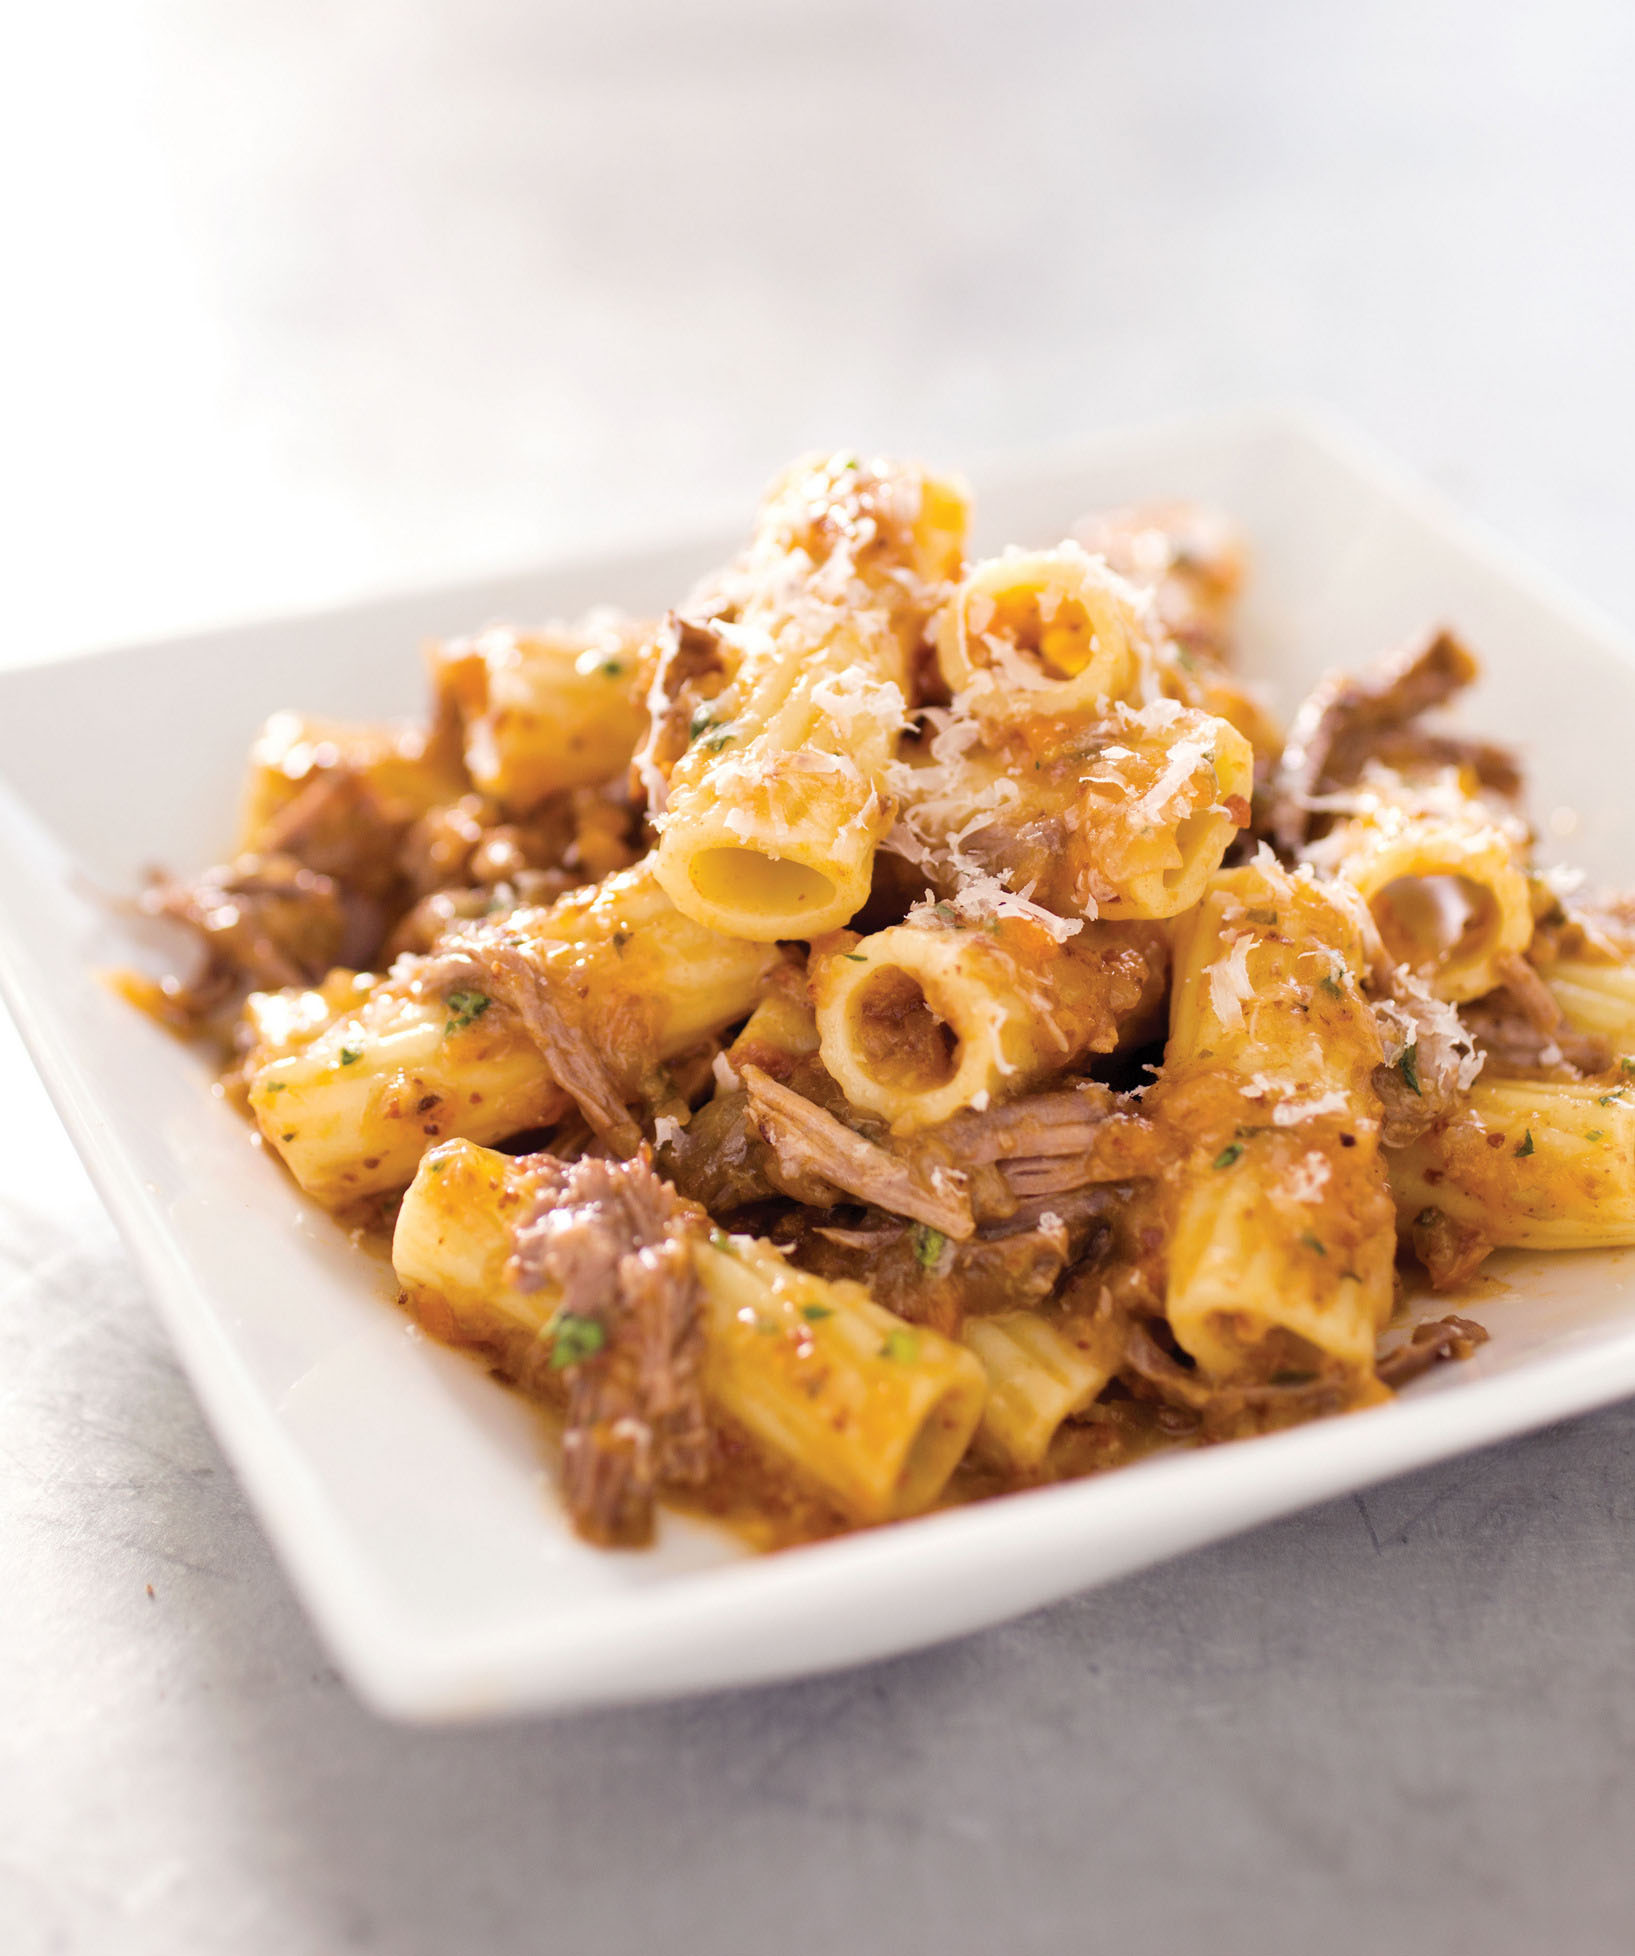
Rigatoni with Beef and Onion Ragu
SERVES 6 TO 8
If marjoram is unavailable, substitute an equal amount of oregano. Pair this dish with a lightly dressed salad of assertively flavored greens.
1 (1- to 1¼-pound) boneless beef chuck-eye roast, cut into 4 pieces and trimmed of large pieces of fat
Kosher salt and pepper
2 ounces pancetta, cut into ½-inch pieces
2 ounces salami, cut into ½-inch pieces
1 small carrot, peeled and cut into ½-inch pieces
1 small celery rib, cut into ½-inch pieces
2½ pounds onions, halved and cut into 1-inch pieces
2 tablespoons tomato paste
1 cup dry white wine
2 tablespoons minced fresh marjoram
1 pound rigatoni
1 ounce Pecorino Romano cheese, grated (½ cup), plus extra for serving
1. Sprinkle beef with 1 teaspoon salt and ½ teaspoon pepper and set aside. Adjust oven rack to lower-middle position and heat oven to 300 degrees.
2. Process pancetta and salami in food processor until ground to paste, about 30 seconds, scraping down sides of bowl as needed. Add carrot and celery and process 30 seconds longer, scraping down sides of bowl as needed. Transfer paste to Dutch oven and set aside; do not clean out processor bowl. Pulse onions in processor in 2 batches, until ⅛- to ¼-inch pieces form, 8 to 10 pulses per batch.
3. Cook pancetta mixture over medium heat, stirring frequently, until fat is rendered and fond begins to form on bottom of pot, about 5 minutes. Add tomato paste and cook, stirring constantly, until browned, about 90 seconds. Stir in 2 cups water, scraping up any browned bits. Stir in onions and bring to boil. Stir in ½ cup wine and 1 tablespoon marjoram. Add beef and push into onions to ensure that it is submerged. Transfer to oven and cook, uncovered, until beef is fully tender, 2 to 2½ hours.
4. Transfer beef to carving board. Place pot over medium heat and cook, stirring frequently, until mixture is almost completely dry. Stir in remaining ½ cup wine and cook for 2 minutes, stirring occasionally. Using 2 forks, shred beef into bite-size pieces. Stir beef and remaining 1 tablespoon marjoram into sauce and season with salt and pepper to taste. Remove from heat, cover, and keep warm.
5. Bring 4 quarts water to boil in large pot. Add rigatoni and 2 tablespoons salt and cook, stirring often, until just al dente. Drain rigatoni and add to warm sauce. Add Pecorino and stir vigorously over low heat until sauce is slightly thickened and rigatoni is fully tender, 1 to 2 minutes. Serve, passing extra Pecorino separately.
A SURPRISING FORMULA FOR MEATY FLAVOR
Much of the meaty flavor in our Genovese ragu actually comes from the onions, which contain a compound called 3-mercapto-2-methylpentan-1-ol, or MMP for short. When an onion is cut, some of its sulfur compounds combine to form a new compound: propanethial-S-oxide—the stuff that makes your eyes tear. When heated, this compound turns into MMP. MMP’s flavor is water-soluble, which means that to create it, water must be present. So to harness MMP’s full savory power, we chop the onions in a food processor (thereby releasing more compounds that can be transformed into MMP) and cook the onions and meat in 2 cups of water.

LOTS OF ONIONS

PROCESSED FINE

WATER
SPAGHETTI AND (GREAT) MEATBALLS
JACK BISHOP, January/February 1998
Like most Italian Americans, I have fond memories of my grandmother’s Sunday dinner. As a main course, she served two kinds of sausage, braciole (rolled flank steak stuffed with cheeses, herbs, and garlic), and meatballs, all simmered in tomato sauce and all designed to be eaten over spaghetti. It was delicious and decadent.
Although my grandmother is a fabulous cook, her meatballs were never the best part of the meal. (My siblings and I fought over the braciole or spicy sausage.) However, it’s the meatball part of this traditional Italian American feast that most other Americans are familiar with as part of the now-classic spaghetti and meatballs.
For this story, I wanted to make great meatballs (something the kids in my family would fight over) and try to streamline the recipe in the process. My grandmother would spend the better part of the weekend cooking Sunday dinner. I wanted to develop a spaghetti and meatball recipe that could be on the table in less than an hour—a breeze for weekend cooking and doable on weeknights when pressed for time.
RIGHT TEXTURE, RIGHT BINDER
The problem with most meatballs is that they are too dense and heavy. Serving meatballs over thin, long noodles is already a bit awkward. If the meatballs are compact, overcooked little hamburgers, the dish can be so leaden that Alka-Seltzer is the only dessert that makes sense.
Many cooks think of meatballs as hamburgers with seasonings (cheese, herbs, garlic, etc.) and a round shape. This is partly true. However, unlike hamburgers, which are best cooked rare or medium-rare, meatballs are cooked through until well-done. At this point, ground beef and seasonings will form dry, tough hockey pucks. Meatballs require additional ingredients to keep them moist and lighten their texture. My testing first focused on ingredients that would give meatballs a moister, softer consistency.
I started out with a simple recipe (ground beef plus a little cheese, parsley, salt, and pepper) and tested the various binders—eggs, dried bread crumbs, fresh bread crumbs, ground crackers, and bread soaked in milk—that were common in the recipes uncovered during my research.
A panade made with soft bread and buttermilk keeps our meatballs moist, tender, and cohesive.
I started with a whole egg and decided that it was a welcome addition. Meatballs made without egg were heavier and drier.
Next I added dried supermarket bread crumbs (the choice of my grandmother and most meatball recipe writers) to one batch and crustless bread soaked in milk (the second most popular bread binder) to another. The differences were quite clear. The crumbs soaked up any available moisture and compounded the problems caused by cooking meatballs to the well-done stage. Adding bread crumbs might be a way to extend the meat—an idea with appeal in less prosperous times—but hardly necessary in an age where the meat for this recipe cost $2. In comparison, the meatballs made with the soaked bread were moister, creamier, richer, and even more pâté-like in consistency. Clearly, milk was an important part of the equation.
There were a few problems with my first test using torn bread and milk. I soaked the crustless bread and then squeezed it dry as directed in many recipes but was still having trouble getting the bread to meld seamlessly into the meatball mixture. I saw a recipe where the crustless, torn bread cubes were cooked with milk into a paste. Although this method worked fine, I found myself waiting around for the mixture to cool before adding it to the meat.
The idea of mashing the bread and milk into a paste was good; I just wondered if I could do it without cooking. After several attempts, I devised this scheme: I starting by tearing the bread into small cubes. I placed the bread in a small bowl, drizzled the milk over it, and then mashed them together with a fork. I let the mixture sit for 10 minutes as the bread absorbed the liquid and eventually formed a smooth, thick paste. (In the meantime, I prepared the other ingredients for the meatballs.) By the time the bread was ready, so were the rest of the ingredients and I just added the entire bread-milk mixture to the bowl with the meat and seasonings.
Besides solving the problem of bread chunks being recognizable in my meatballs, this method has an added benefit. With more milk, the meatballs were even creamier and moister than versions made with bread that had been soaked and squeezed. Of course, there is a limit to how much milk can be added before the meatball mixture is too hard to handle. But ½ cup milk per pound of ground beef was clearly the winner in this first round of testing.
In the past, my colleague Pam Anderson found that yogurt adds a delicious flavor to meatloaf. Yogurt is too thick to properly soften bread by my method so I tried thinning it with some milk. Meatballs made with thinned yogurt were even richer, creamier, and more flavorful than those made with plain milk. I also tried buttermilk and the results were equally delicious, and there was no need to thin the liquid before adding it to the bread.
I went back to the issue of the egg one more time and tried the yolk only. As I suspected, the fats and emulsifiers in the yolk added moistness and richness. The white was only making the mixture sticky and harder to handle, so I eliminated it.
MEATS AND SEASONINGS
I next experimented with various meats. Until this point, I had been using all ground chuck. Leaner ground round made the meatballs dry. Ground veal was too bland. But a little ground pork, when added in a ratio of 3 parts chuck to 1 part pork, gave the meatballs another flavor dimension.
Freshly grated Parmesan cheese was needed for flavor, as was a little fresh parsley. Basil’s delicate flavor was better showcased in the tomato sauce. Raw garlic improved the flavor of the meatballs but raw onions were problematic because they tended to shrink during cooking and caused little pockets to form in the meatballs. I tried cooking the onions first, which was an improvement, but in the end the meatballs were delicious without them and I wanted to avoid precooking ingredients if possible.
I then tested three cooking techniques—roasting, broiling, and traditional pan-frying. After roasting for 25 minutes at 450 degrees the meatballs emerged nicely browned, but dry and crumbly. Broiling proved messier than pan-frying and also dried out the meatballs. Pan-frying was my method of choice.
When pan-frying, I found it important to wait until the oil was hot before adding the meatballs. I made sure to turn the meatballs several times to create a dark brown crust on all sides. This prevented them from getting soggy when placed in the tomato sauce.
I wondered if I could save cleanup time and add flavor by building the tomato sauce in the same pan used to fry the meatballs. I emptied the vegetable oil, leaving behind the browned bits on the bottom of the pan. I then added a little fresh olive oil and started my tomato sauce. Not only did this method prove convenient, but it gave depth to my quick-cooking sauce.
Meatballs need a thick, smooth sauce—the kind produced by canned crushed tomatoes. I added a little garlic and basil to the tomatoes, but otherwise kept the flavorings simple so that the focus would remain on the meatballs. Once the tomato sauce thickened, I added the browned meatballs and simmered them just until heated through. With a pot of spaghetti on the stove, dinner was ready to go.
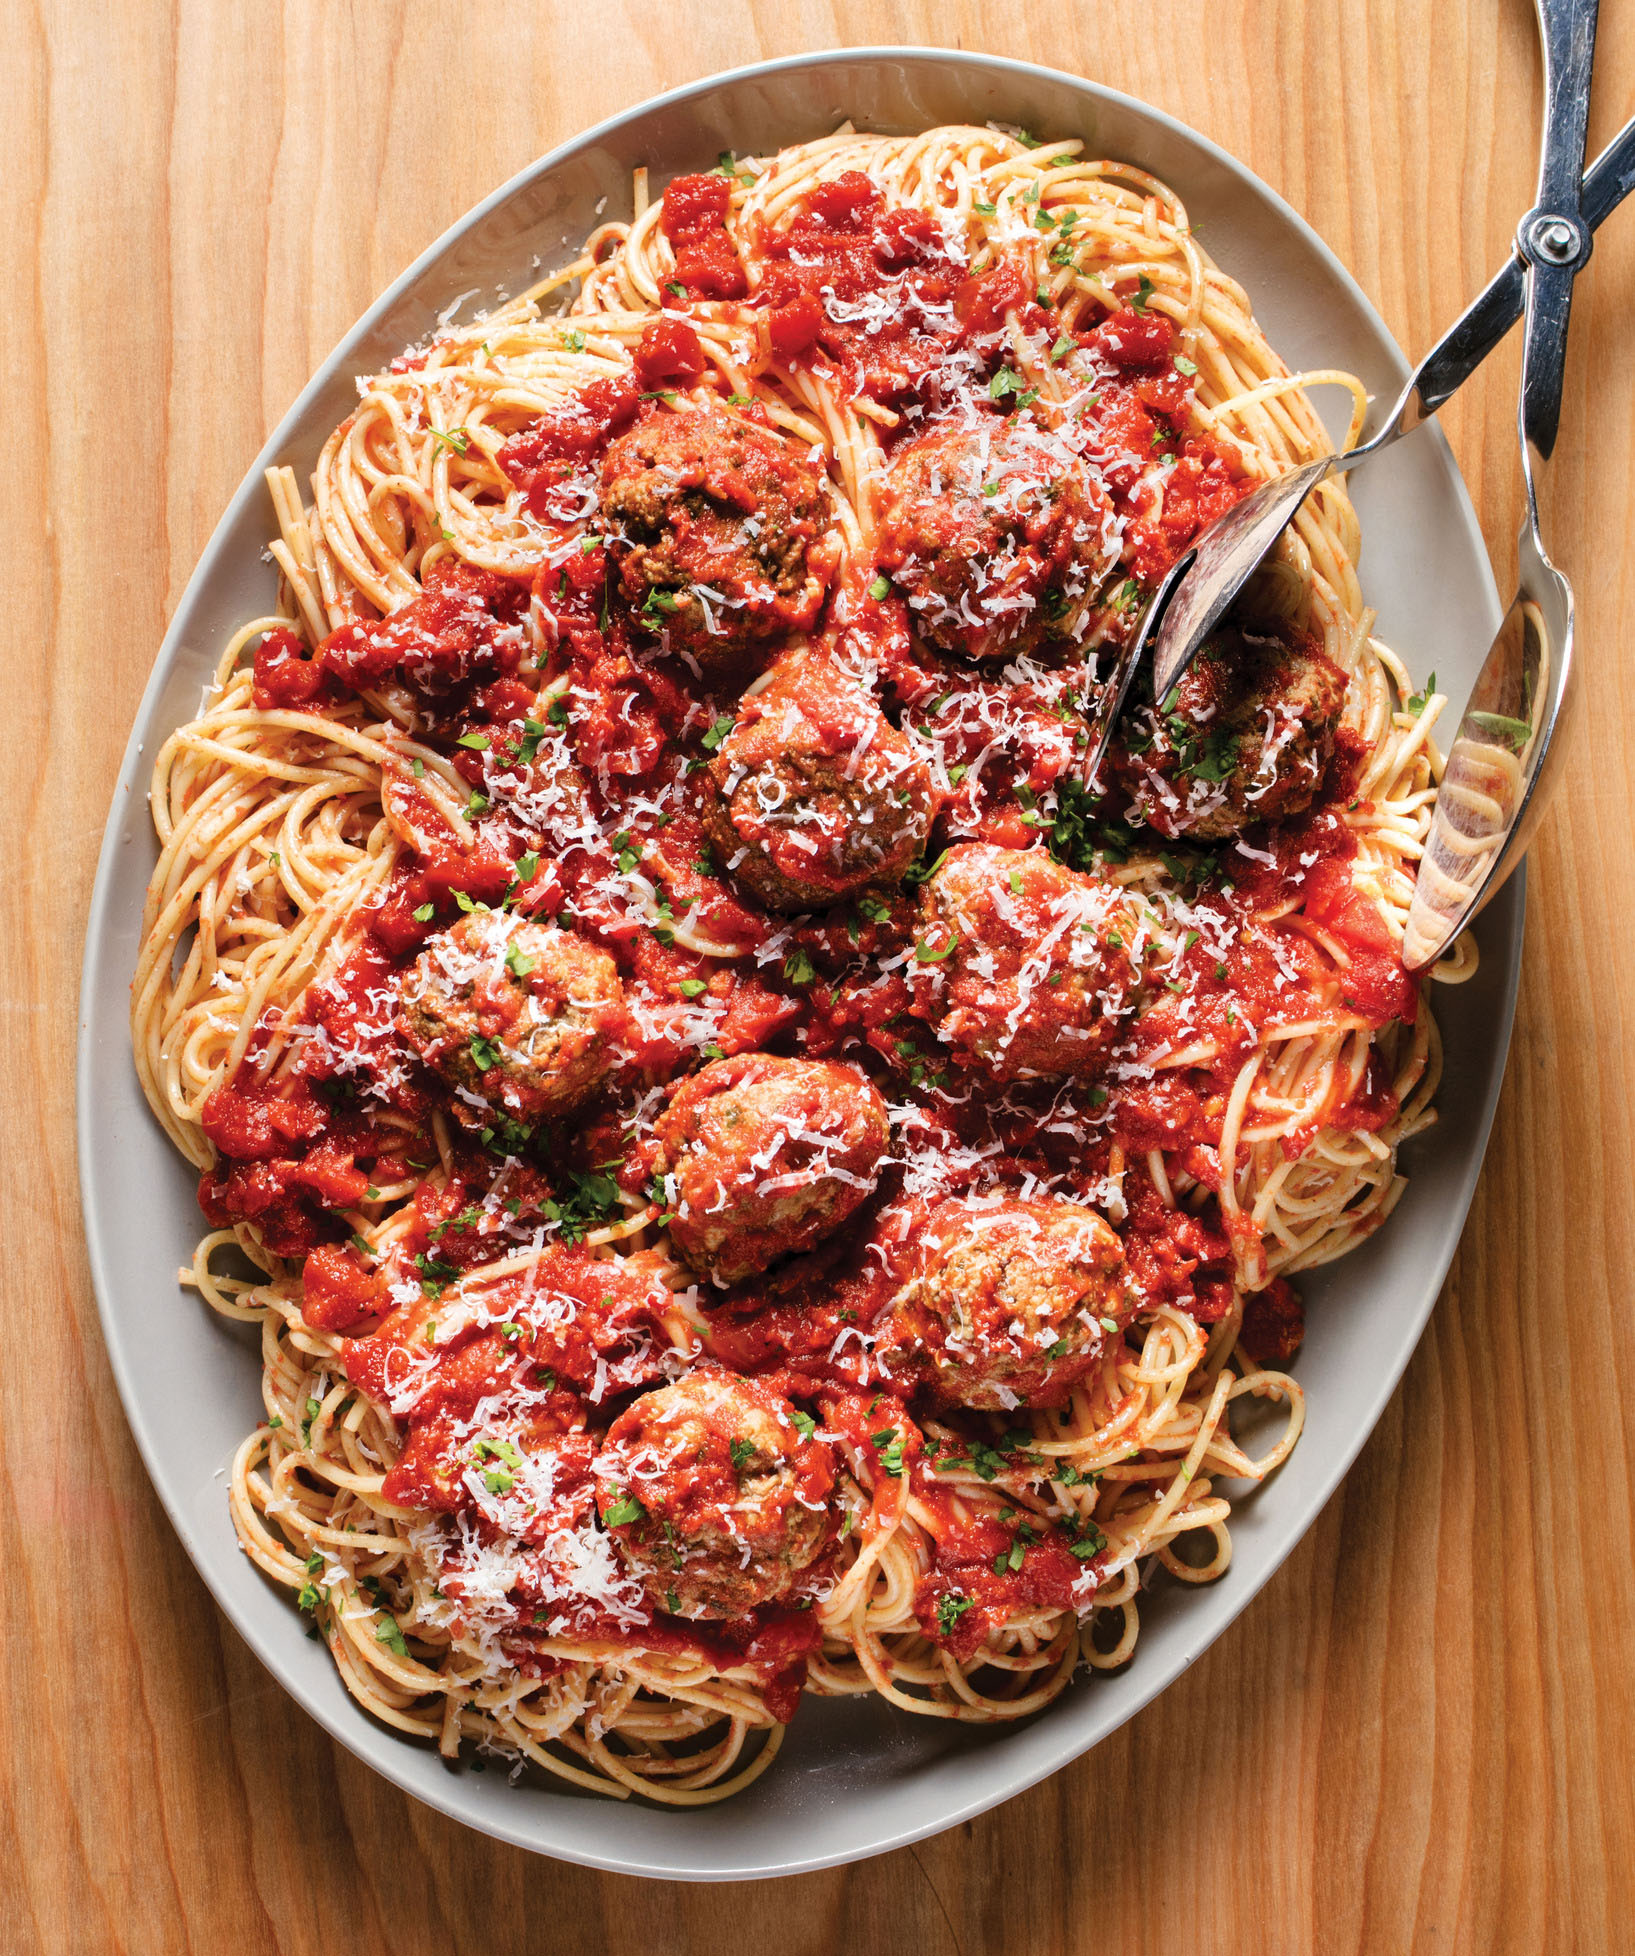
Classic Spaghetti and Meatballs
SERVES 4 TO 6
If you don’t have buttermilk, you can substitute 6 tablespoons of plain yogurt thinned with 2 tablespoons of milk. When forming the meatballs, use a light touch; if compacted, they will be dense and hard.
Meatballs
2 slices hearty white sandwich bread, crusts removed, torn into small pieces
½ cup buttermilk
12 ounces 85 percent lean ground beef
4 ounces ground pork
¼ cup grated Parmesan cheese, plus extra for serving
2 tablespoons minced fresh parsley
1 large egg yolk
1 garlic clove, minced
¾ teaspoon salt
⅛ teaspoon pepper
Vegetable oil
Tomato Sauce and Pasta
2 tablespoons extra-virgin olive oil
1 garlic clove, minced
1 (28-ounce) can crushed tomatoes
1 tablespoon minced fresh basil
Salt and pepper
1 pound spaghetti
1. For the meatballs: Using fork, mash bread and buttermilk in large bowl. Let stand for 10 minutes. Add beef, pork, Parmesan, parsley, egg yolk, garlic, salt, and pepper to bowl and mix together with your hands. Pinch off and lightly shape mixture into 1½-inch round meatballs (about 14 meatballs total).
2. Add oil to 12-inch skillet until it measures ¼ inch deep. Heat oil over medium-high heat until shimmering. Carefully add meatballs in single layer and cook until well browned on all sides, about 10 minutes. Using slotted spoon, transfer meatballs to paper towel–lined plate. Discard remaining oil.
3. For the tomato sauce and pasta: Heat oil and garlic in now-empty skillet over medium heat. Cook, stirring often and scraping up any browned bits, until garlic turns golden but not brown, about 3 minutes. Stir in tomatoes, bring to simmer, and cook until sauce thickens, about 10 minutes. Stir in basil and season with salt and pepper to taste. Gently nestle meatballs into sauce, bring back to simmer, and cook, turning meatballs occasionally, until heated through, about 5 minutes. (Sauce and meatballs can be refrigerated for up to 2 days.)
4. While sauce cooks, bring 4 quarts water to boil in large pot. Add pasta and 1 tablespoon salt and cook, stirring often, until al dente. Reserve ½ cup cooking water, then drain pasta and return it to pot. Add 1 cup sauce (without meatballs) to pasta and toss to combine. Adjust consistency with reserved cooking water as needed. Transfer pasta to serving platter, top with additional tomato sauce and meatballs, and serve, passing extra Parmesan separately.
GETTING FLAVORFUL, MOIST MEATBALLS

1. Mash bread pieces and buttermilk together with fork. Let stand until smooth paste forms, about 10 minutes.
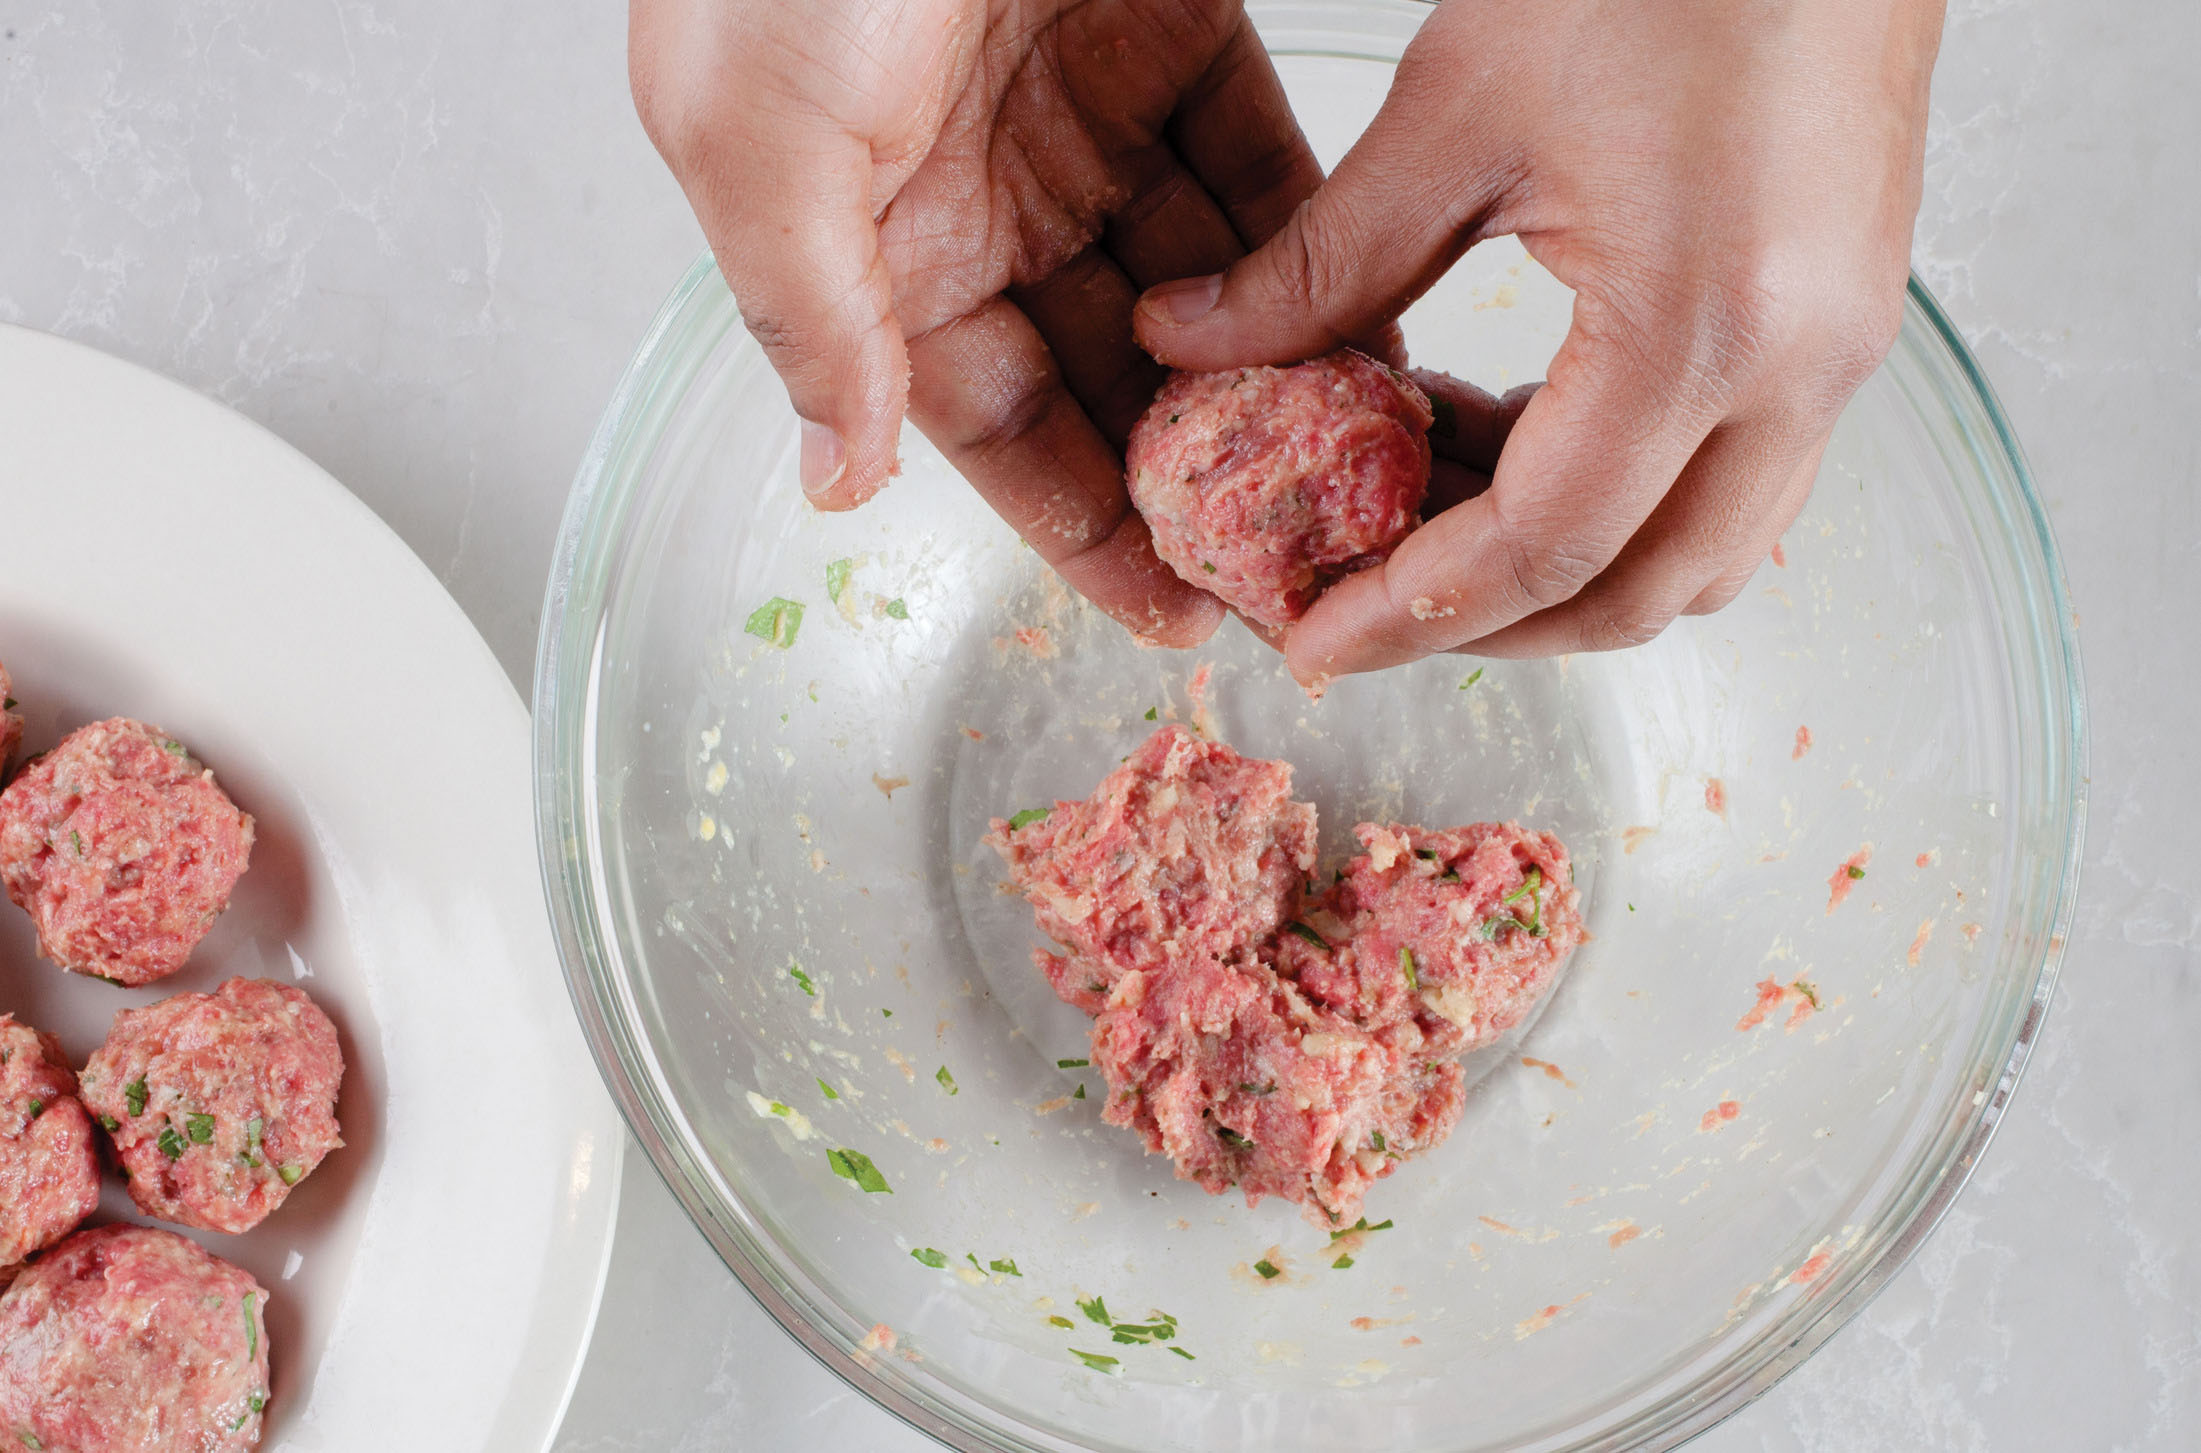
2. Add beef, pork, Parmesan, parsley, egg yolk, garlic, salt, and pepper to bowl and mix with your hands until roughly combined. Lightly shape into 1½-inch round meatballs.
There’s no reason why a vegetable lasagna made with the classic trio of eggplant, zucchini, and summer squash should be any less satisfying than a meat-based casserole, especially when the produce is in season and locally grown. But I’ve rarely cooked one that I’ve been moved to make again. Some versions look tempting enough with a topcoat of bubbly cheese and thick tomato gravy, but cutting out a square of it invariably reveals trouble at the core. Often placed between the pasta sheets raw, the zucchini and squash turn out steamy and limp, flooding the dish with their juices—or, in some instances, undercooked and crunchy. Then there’s the eggplant, which is typically not only soggy, but greasy from prefrying. Add to that the usual patches of dry, grainy ricotta and it’s a wonder this dish ever became an Italian American standard.
So what would it take to make a full-flavored lasagna with vegetables that could stand up to—not wash out—the cheese and sauce? Ridding the produce of some of its moisture and boosting its flavor before adding it to the dish would be steps in the right direction.
We precook the vegetables and create a no-cook white sauce for a simple, rich vegetable lasagna.
Shedding Water
I first focused my efforts on the most unruly element: the eggplant. Besides being full of water, eggplant is very porous and readily soaks up liquid (or oil). It therefore requires some sort of pretreatment that not only rids the fruit of water but also breaks down its absorbent air pockets. Fortunately, the test kitchen had already devised an effective—and novel—approach to both problems in another recipe: salting the eggplant and then microwaving it. Salt pulls water out of the fruit at the same time the microwave causes it to steam. Microwaving also collapses the eggplant’s air pockets, leaving the flesh shrunken, wrinkled, and less prone to absorbing oil or liquid. Following this method, I cut the eggplant into ½-inch cubes, sprinkled them with 1 teaspoon of salt, and placed the pieces on a double layer of coffee filters. (The filters absorb moisture so that liquid doesn’t pool on the plate.) I then microwaved the pieces for 10 minutes. When I sautéed this eggplant to give it more flavor and color, it hardly picked up any oil at all.
I considered salting the zucchini and yellow squash to remove their excess water, but I was fairly certain that a turn in the skillet would burn off enough liquid and deepen their flavor. I cut the squashes (1 pound of each) into ½-inch cubes and, to save myself an extra step, combined them with the microwaved eggplant. I then sautéed the mixture in two batches with minced garlic and healthy dashes of salt and pepper. About 7 minutes later, the vegetables had developed good color and picked up some garlicky flavor, but I wondered if I could do better. I minced a few more cloves of garlic, this time letting the bits soak in a tablespoon of olive oil along with some minced fresh thyme. Added to the skillet as each batch of vegetables finished cooking, this supergarlicky, herbal-infused mixture gave the eggplant and squash so much flavor that they were good enough to eat straight from the pan.
Now it was time to see how the vegetables would fare in the lasagna. I made a placeholder tomato sauce by briefly simmering crushed tomatoes with garlic, olive oil, basil, and a dash of pepper flakes. I then layered a dozen no-boil noodles (our favorite alternative to fresh pasta) with the sauce, the sautéed eggplant and vegetables, and generous helpings of ricotta, mozzarella, and nutty Parmesan cheese. I baked the casserole in a 375-degree oven until golden and bubbly.
The good news was that starting with precooked vegetables allowed me to cut the baking time from the usual hour-plus down to about 35 minutes. But improvements were still needed here and there. Instead of acting as a creamy binder, the ricotta had cooked up into grainy slicks, and some tasters wanted the dairy element to be even richer. Plus, we all agreed that the tomato sauce tasted a bit flat.
ON THE SAUCES
I had one quick idea about the ricotta, thanks to the efforts of another colleague who’d encountered similar graininess when he tried incorporating the tiny, pebbly curds into baked ziti. To solve the problem, he substituted cottage cheese, which boasts a creamier consistency (not to mention slightly tangier flavor), for the ricotta. When I made the switch with my next batch, everyone agreed that things were looking up, but that the cheese was still a bit dry and lean-tasting. In fact, this round of testing convinced me that what we all really wanted was the richness and creaminess of a béchamel sauce, the classic roux-thickened milk mixture found in countless meat and vegetable lasagna recipes. My only hesitation was that it involved extra work. I didn’t want to add more fuss to the dish by cooking a third element, so I tried a lazy man’s approach and whipped up a no-cook white sauce by whisking together 1 cup each of milk and cottage cheese with a generous 2 cups of Parmesan and a couple of minced garlic cloves.
I wasn’t expecting much from this experiment, but the results were surprisingly good. All that cheese produced a “sauce” that was considerably richer, if still a bit thin and curdled. The first problem I easily fixed by swapping the milk for an equal amount of heavy cream. The second took a bit more experimentation, but a glossy, silky-smooth sauce finally came together after I whisked 1 teaspoon of cornstarch in with the other dairy ingredients. (When the starch granules in cornstarch absorb water and swell, they get in the way of the dairy proteins and prevent them from clumping together in curds.)
As for the tomato sauce, I couldn’t help but wonder if a similar no-cook approach might liven up its dull flavor—and save a few extra minutes at the stove. I prepared another batch, this time simply stirring together the ingredients and adding the sauce to the casserole without simmering it first. The results were better than ever. Even after baking and cooling, the sauce still tasted bright, punching up the filling with just enough acidity.
FINAL FLOURISHES
And yet balancing the complexity of the dairy-rich “béchamel” sauce with the fruity tomato sauce didn’t quite perk up tasters’ interest in the filling. I needed something bolder and fresher to complement the eggplant, zucchini, and squash. Rummaging through the refrigerator for ideas, I spotted a jar of kalamata olives. A handful of these, chopped, added meaty texture and a briny, salty jolt of flavor. For freshness, I added a bag of baby spinach, which took no time to sauté in a touch of olive oil until wilted and then drain before layering into the filling. My final touch was a generous amount of chopped fresh basil leaves sprinkled on the casserole right before serving. Each of these additions was small, but they made a big difference in the flavor of the dish.
At last, this lasagna more than had it all with its rich flavors, creamy cheese, and substantial texture—along with a summery brightness that set it apart from the meat kind. I had to restrain a smile when I saw that even the most dedicated meat lovers among my tasters couldn’t help but come back for more.
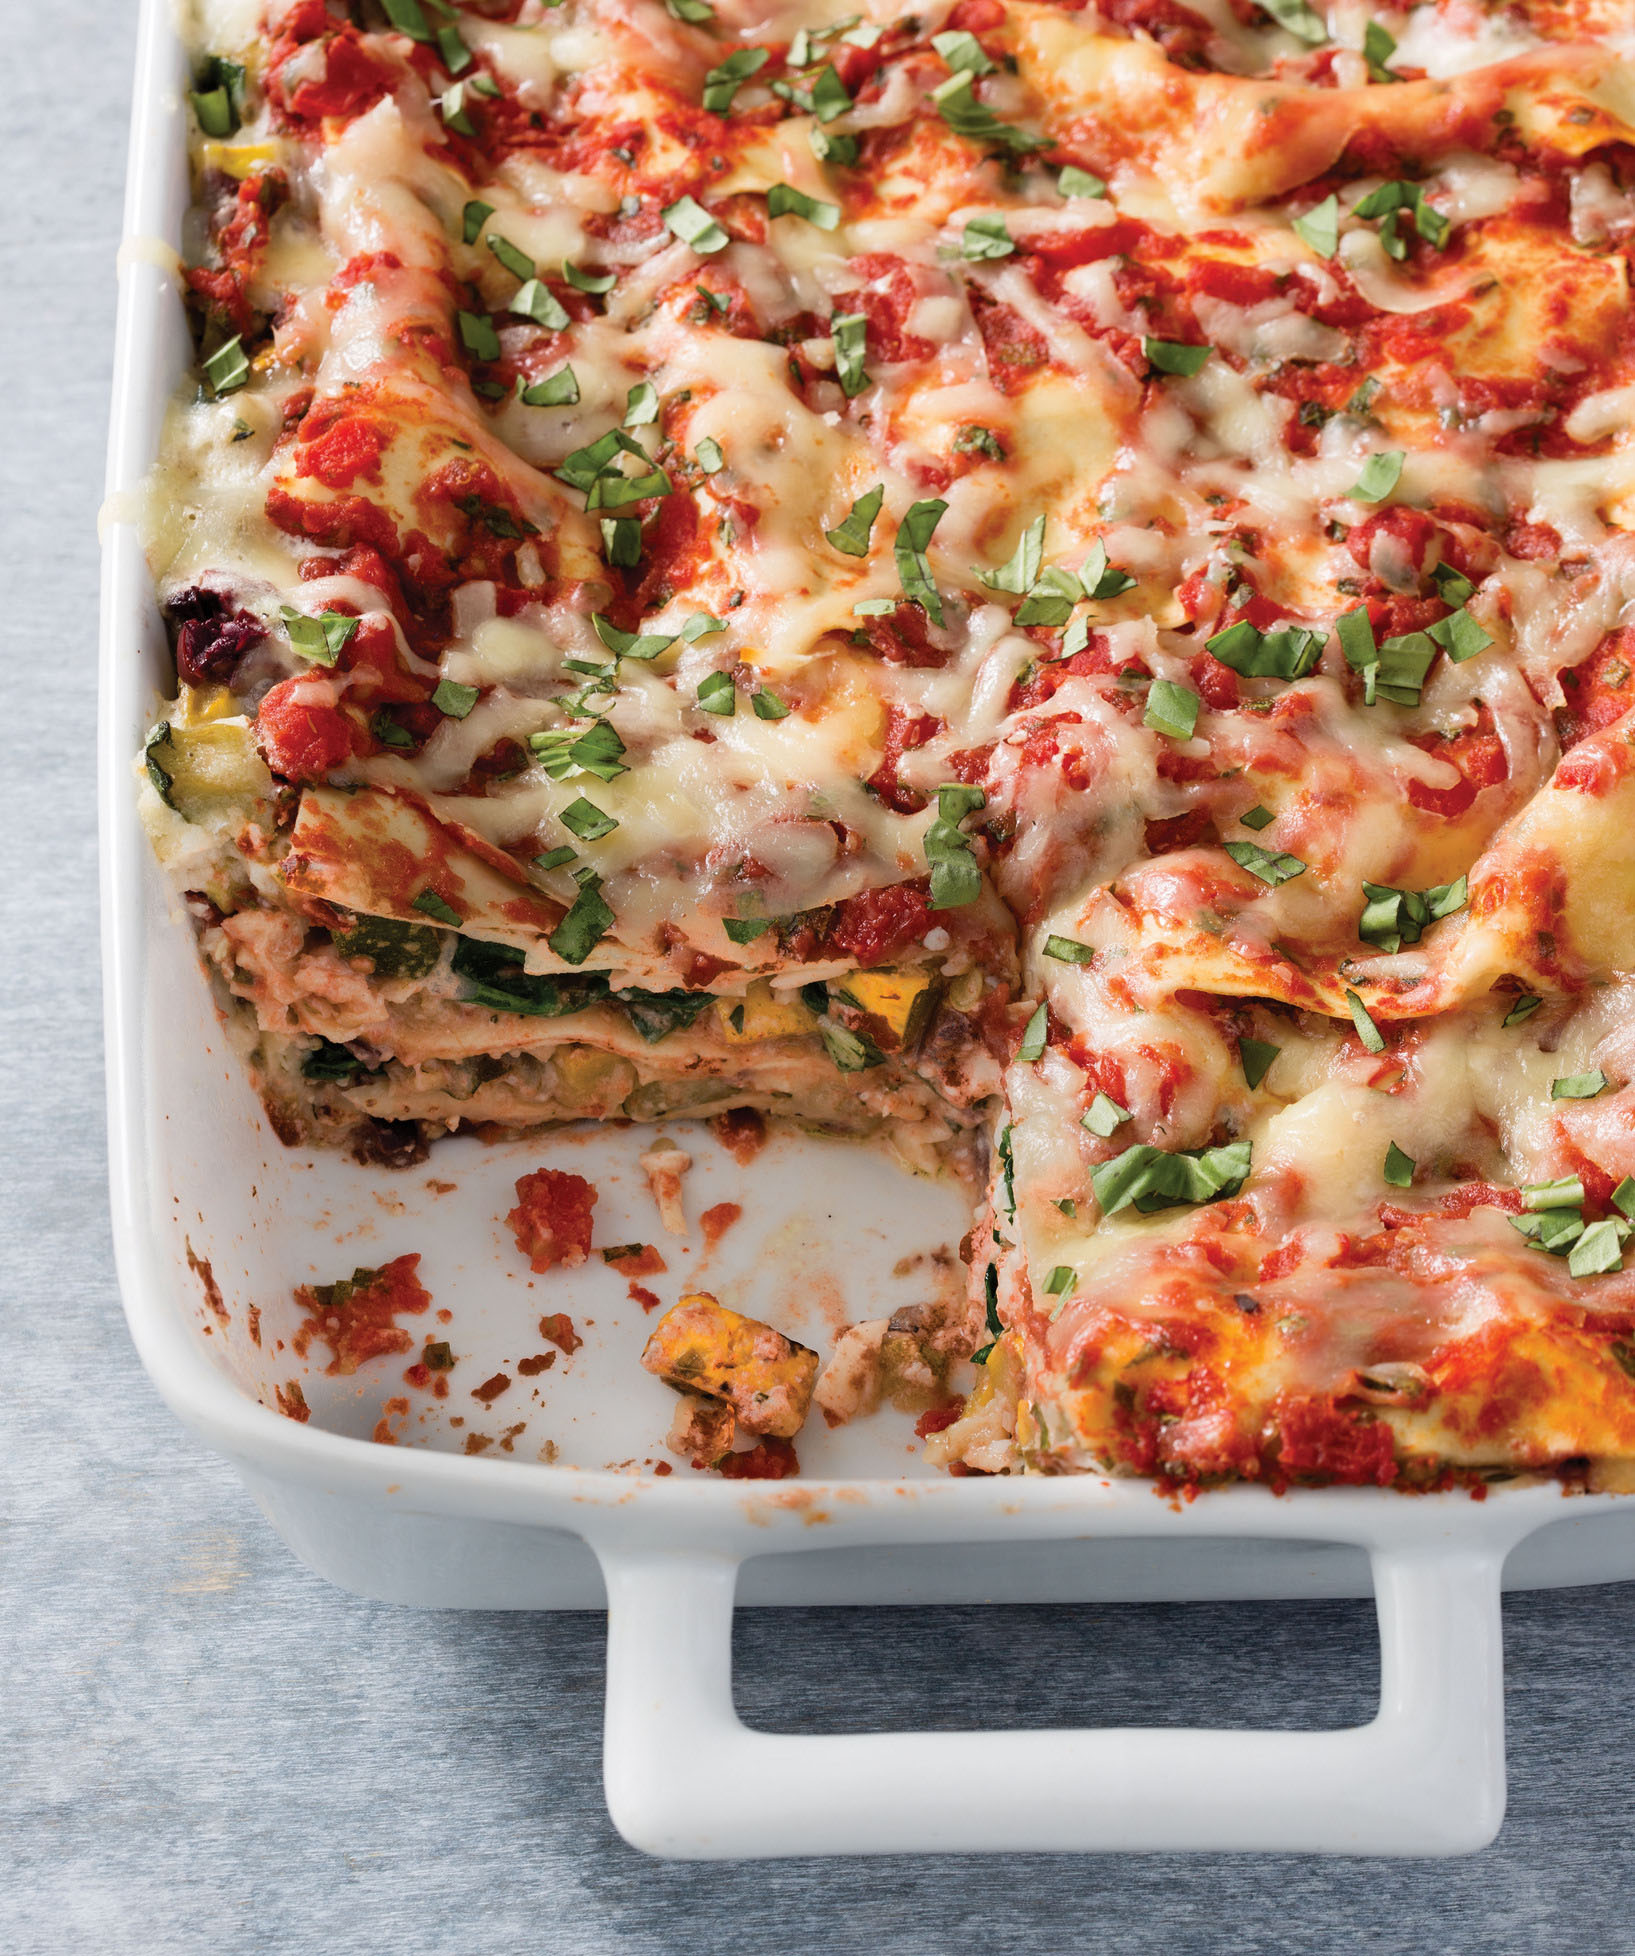
Vegetable Lasagna
SERVES 8 TO 10
Part-skim mozzarella can also be used in this recipe, but avoid preshredded cheese, as it does not melt well. We prefer kosher salt because it clings best to the eggplant. If using table salt, reduce the amounts by half.
Tomato Sauce
1 (28-ounce) can crushed tomatoes
¼ cup finely chopped fresh basil
2 tablespoons extra-virgin olive oil
2 garlic cloves, minced
1 teaspoon kosher salt
¼ teaspoon red pepper flakes
Cream Sauce
8 ounces (1 cup) whole-milk cottage cheese
4 ounces Parmesan cheese, grated (2 cups)
1 cup heavy cream
2 garlic cloves, minced
1 teaspoon cornstarch
½ teaspoon kosher salt
½ teaspoon pepper
Filling and Noodles
1½ pounds eggplant, peeled and cut into ½-inch pieces
Kosher salt and pepper
1 pound zucchini, cut into ½-inch pieces
1 pound yellow summer squash, cut into ½-inch pieces
5 tablespoons plus 1 teaspoon extra-virgin olive oil
4 garlic cloves, minced
1 tablespoon minced fresh thyme
12 ounces (12 cups) baby spinach
12 no-boil lasagna noodles
½ cup pitted kalamata olives, minced
12 ounces whole-milk mozzarella cheese, shredded (3 cups)
2 tablespoons chopped fresh basil
1. For the tomato sauce: Whisk all ingredients together in bowl; set aside.
2. For the cream sauce: Whisk all ingredients together in second bowl; set aside.
3. For the filling and noodles: Adjust oven rack to middle position and heat oven to 375 degrees. Toss eggplant with 1 teaspoon salt in large bowl. Line large plate with double layer of coffee filters and lightly spray with vegetable oil spray. Spread eggplant in even layer over coffee filters; wipe out and reserve bowl. Microwave eggplant until dry to touch and slightly shriveled, about 10 minutes, tossing halfway through microwaving. Let cool slightly. Return eggplant to bowl and toss with zucchini and summer squash.
4. Combine 1 tablespoon oil, garlic, and thyme in small bowl. Heat 2 tablespoons oil in 12-inch nonstick skillet over medium-high heat until shimmering. Add half of eggplant mixture, ¼ teaspoon salt, and ¼ teaspoon pepper and cook, stirring occasionally, until vegetables are lightly browned, about 7 minutes. Push vegetables to sides of skillet. Add half of garlic mixture to center and cook, mashing mixture into pan, until fragrant, about 30 seconds. Stir garlic mixture into vegetables and transfer to medium bowl. Repeat with 2 tablespoons oil, remaining eggplant mixture, and remaining garlic mixture; transfer to bowl.
5. Heat remaining 1 teaspoon oil in now-empty skillet over medium-high heat until shimmering. Add spinach and cook, stirring frequently, until wilted, about 3 minutes. Transfer spinach to paper towel–lined plate and let drain for 2 minutes. Stir into eggplant mixture. (Filling can be refrigerated for up to 24 hours.)
6. Grease 13 by 9-inch baking dish. Spread 1 cup tomato sauce evenly over bottom of dish. Arrange 4 noodles on top of sauce (noodles will overlap). Spread half of vegetable mixture evenly over noodles, followed by ¼ cup olives. Spoon half of cream sauce over top and sprinkle with 1 cup mozzarella. Repeat layering with 4 noodles, 1 cup tomato sauce, remaining vegetable mixture, remaining ¼ cup olives, remaining cream sauce, and 1 cup mozzarella. For final layer, arrange remaining 4 noodles on top and cover completely with remaining tomato sauce. Sprinkle remaining 1 cup mozzarella evenly over tomato sauce.
7. Cover dish tightly with aluminum foil that has been sprayed with oil spray and bake until edges are just bubbling, about 35 minutes, rotating dish halfway through baking. Let lasagna cool for 25 minutes, sprinkle with basil, and serve.