DESSERTS
Foolproof All-Butter Pie Dough
Building a Better Deep-Dish Apple Pie
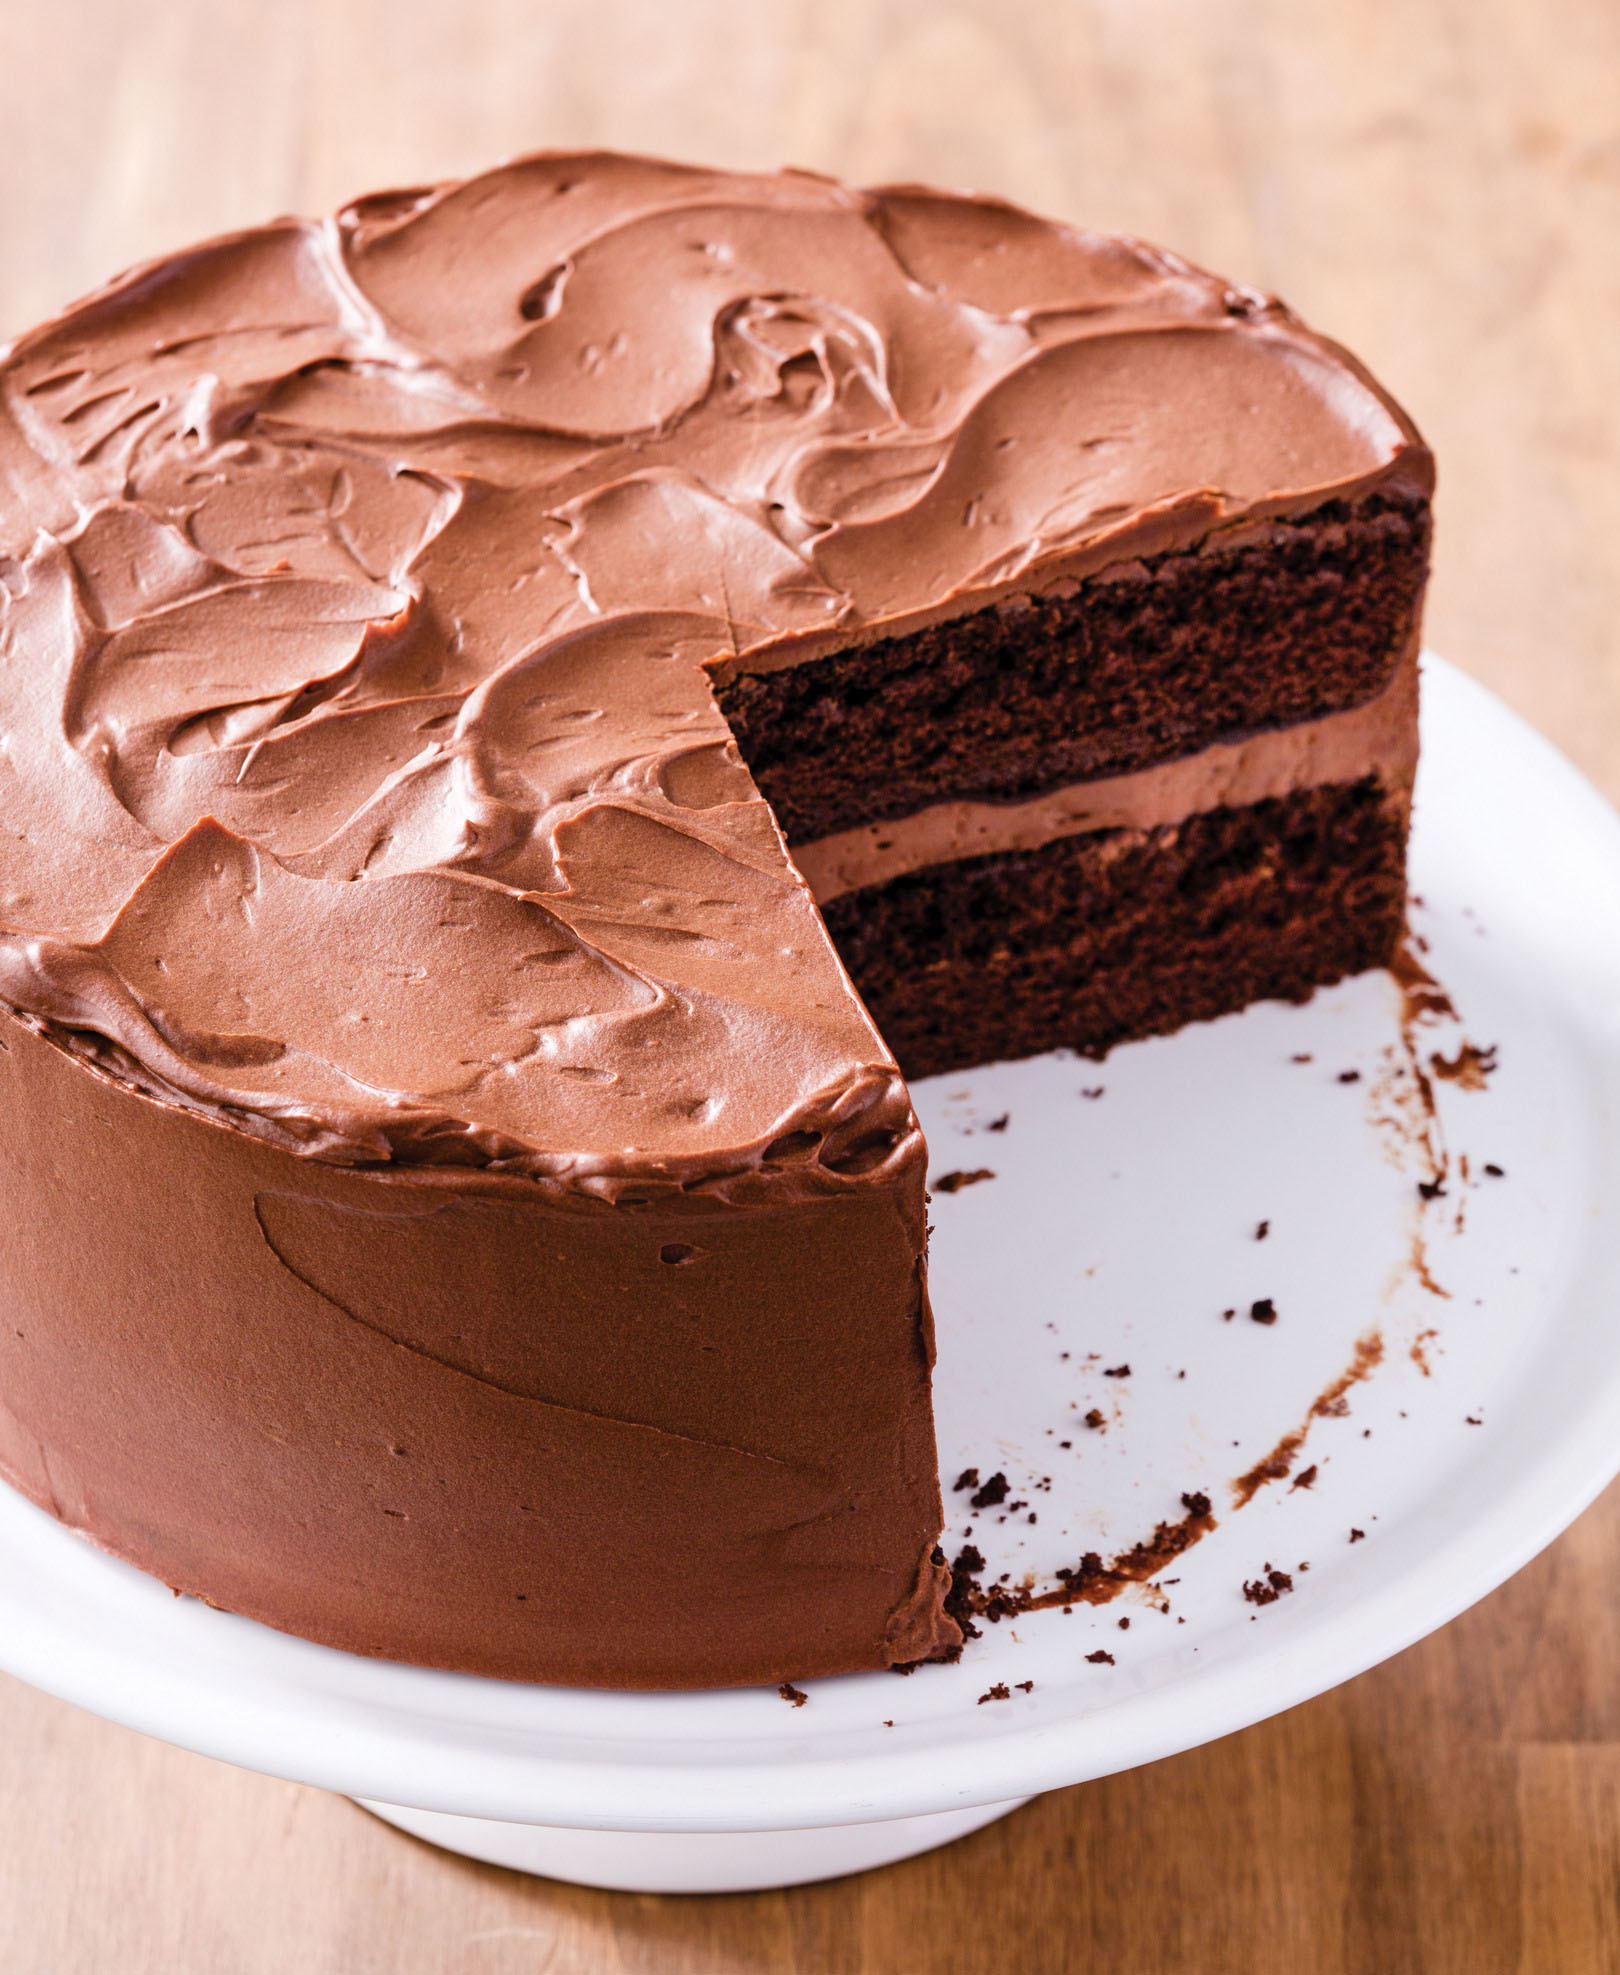
Old-Fashioned Chocolate Layer Cake
The Best Homemade Frozen Yogurt
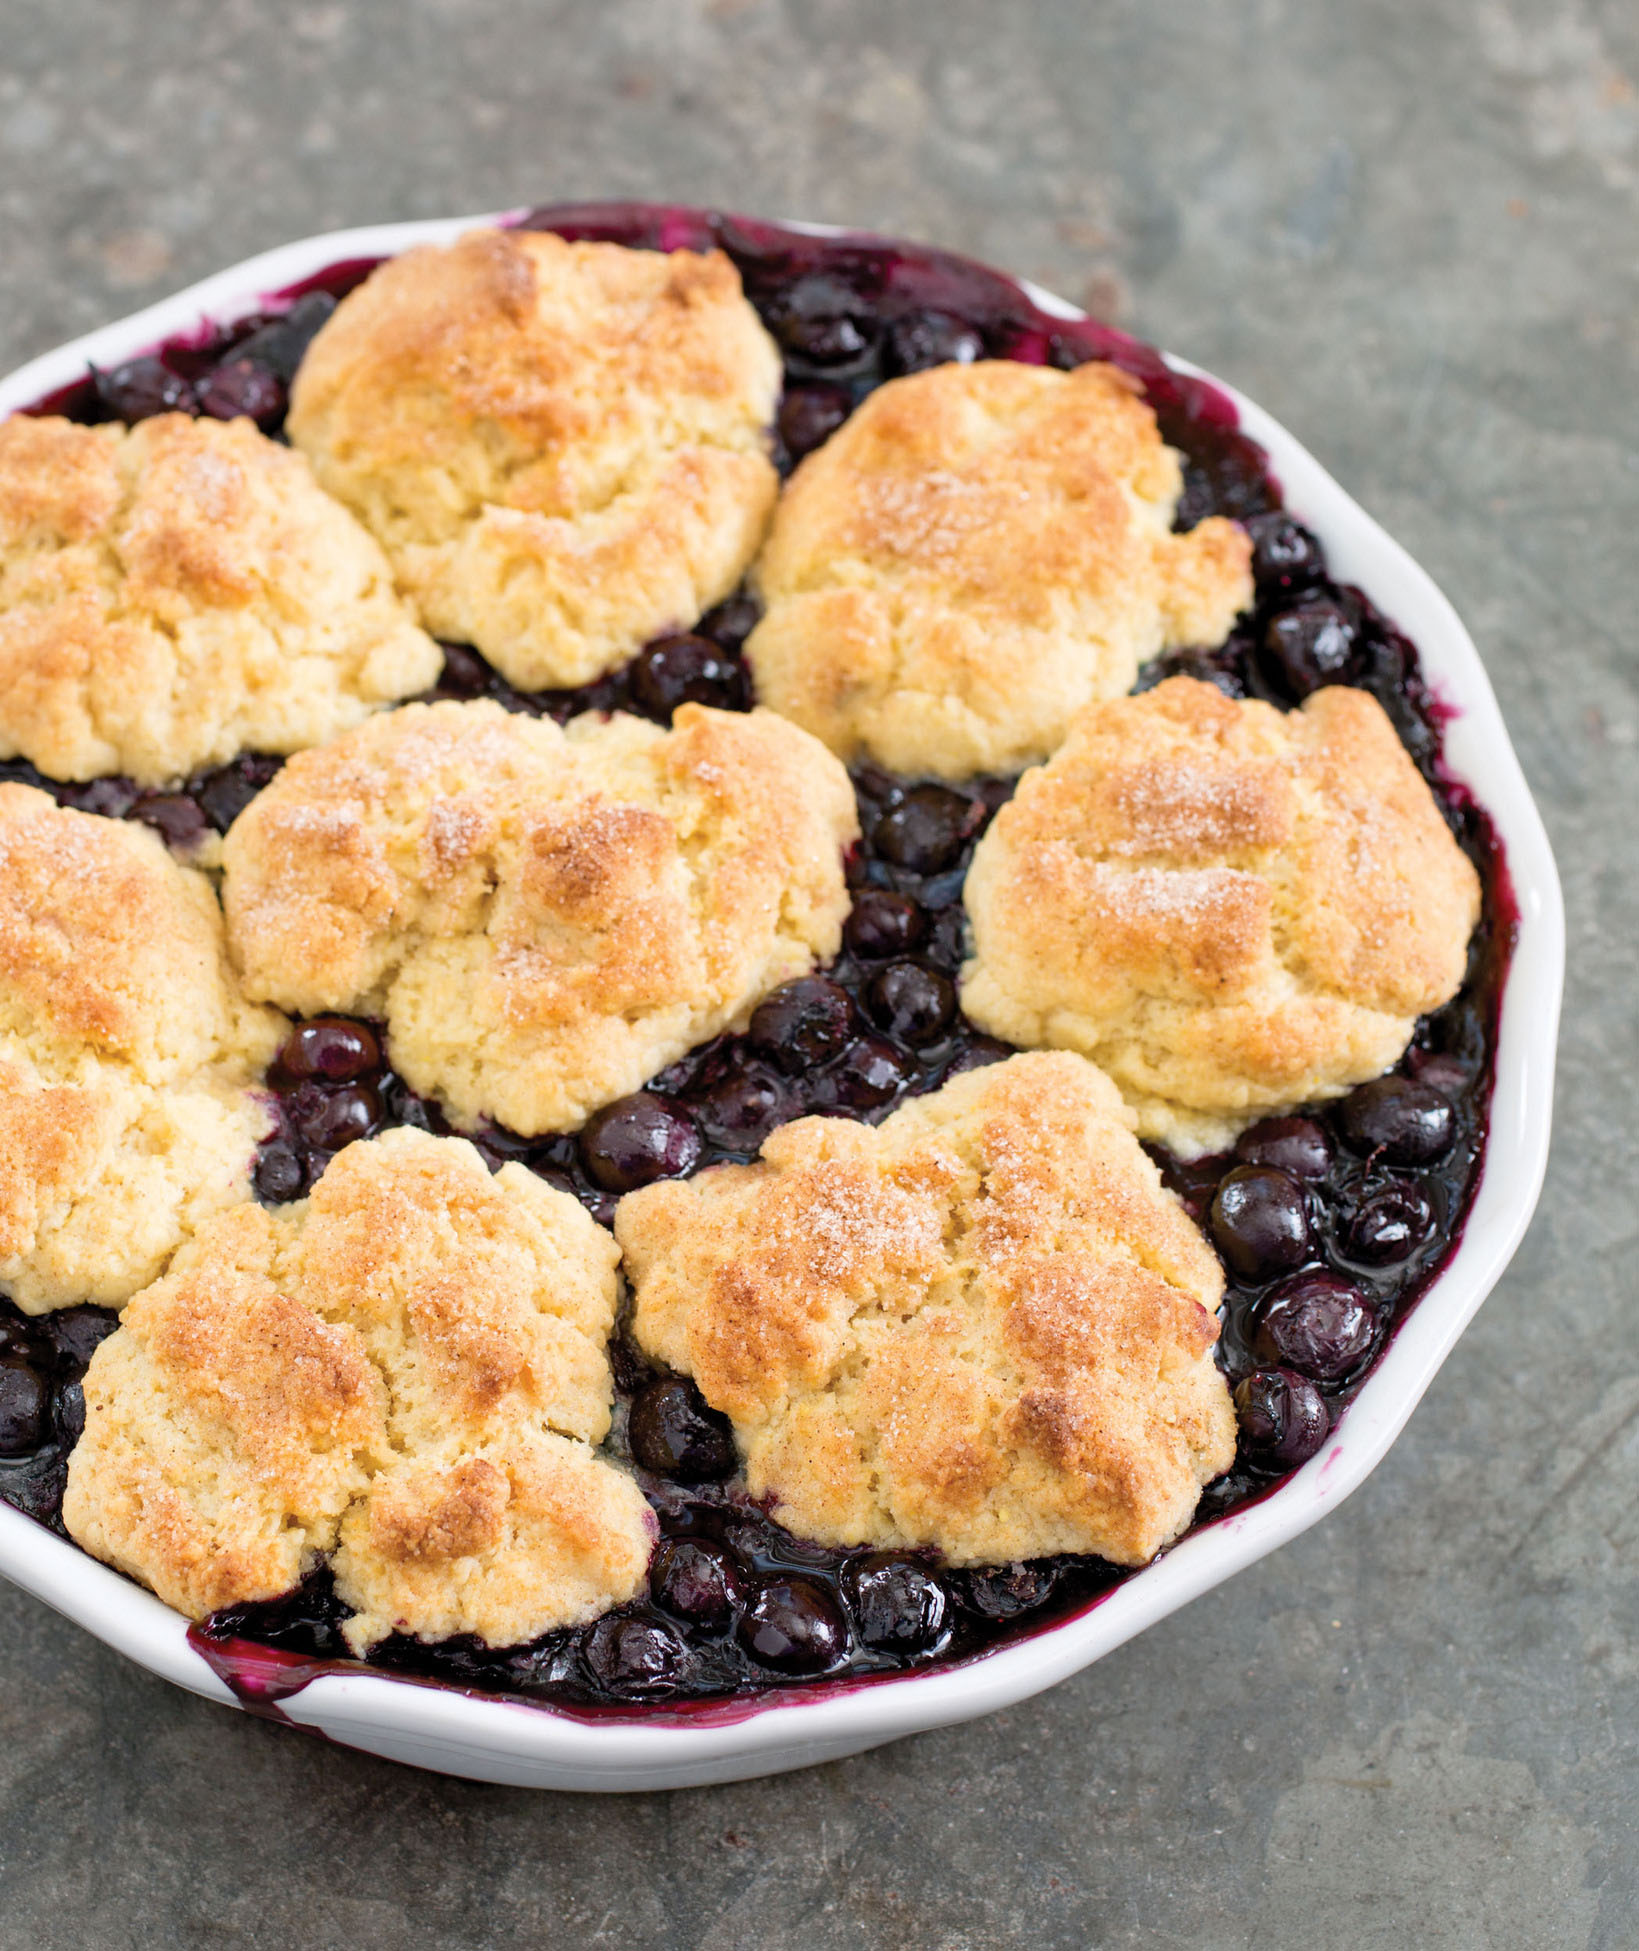
I have always been a huge fan of baked fruit desserts, especially cobblers. What could be better than a hot and bubbly fruit filling matched with tender biscuits? As simple (and appealing) as this sounds, why do so many of us end up with a filling that is sickeningly sweet and overspiced? Why is the filling so often runny, or, on the flip side, so thick and gloppy? Why are the biscuits, the most common choice of topping for cobblers, too dense, dry, and heavy? My goal was to create a filling in which the blueberries (my choice for fruit) were allowed to cook until lightly thickened. I wanted their natural sweetness to sing a cappella without being overshadowed by a symphony of sugar and spice. The biscuits would stand tall with structure, be crisp on the outside and light and buttery on the inside, and complement the filling. Most important, it had to be easy.
THE FILLING GOES FIRST
The basic ingredients found in most cobbler fillings are fruit, sugar, thickener (flour, arrowroot, cornstarch, potato starch, or tapioca), and flavorings (lemon zest, spices, etc.). The fruit and sugar are easy: Take fresh blueberries and add enough sugar such that the fruit neither remains puckery nor turns saccharine. For 6 cups of berries, I found ½ cup sugar to be ideal—and far less than the conventional amount of sugar, which in some recipes exceeds 2 cups.
A cornstarch-thickened filling topped with cornmeal and buttermilk–enhanced biscuits makes for a speedy and intensely flavored cobbler.
Some recipes swear by one thickener and warn that other choices will ruin the filling. I found this to be partly true. Tasters were all in agreement that flour—the most common choice in recipes—gave the fruit filling an unappealing starchy texture. Most tasters agreed that tapioca thickened the berry juices nicely, but the soft beads of starch left in the fruit’s juices knocked out this contender. (Also, when exposed to direct heat, as in a cobbler, the tapioca that remains near the surface of the fruit quickly turns as hard as Tic-Tacs.) Arrowroot worked beautifully, but this starch is far too expensive and can be difficult to find. Cornstarch, the winner, thickened the juices without altering the blueberry flavor or leaving any visible traces of starch behind.
Lemon juice as well as grated lemon zest brightened the fruit flavor, and, as for spices, everyone preferred cinnamon. Other flavors simply got in the way.
NOT YOUR AVERAGE TOPPING
For the topping, my guiding principle was ease of preparation. A biscuit topping was the way to go, and I had my choice of two types: dropped and rolled. Most rolled biscuit recipes call for cold butter cut into dry ingredients with a pastry blender, two knives, or sometimes a food processor, after which the dough is rolled and cut. The dropped biscuits looked more promising (translation: easier)—mix the dry ingredients, mix the wet ingredients, mix the two together, and drop (over fruit). Sounded good to me!
To be sure that my tasters agreed, I made two cobblers, one with rolled and one with dropped biscuits. The dropped biscuits, light and rustic in appearance, received the positive comments I was looking for but needed some work. To start, I had to fine-tune the ingredients, which included flour, sugar, leavener, milk, eggs, butter/shortening, and flavorings. I immediately eliminated eggs from the list because they made the biscuits a tad heavy. As for dairy, heavy cream was too rich, whereas milk and half-and-half lacked depth of flavor. I finally tested buttermilk, which delivered a much-needed flavor boost as well as a lighter, fluffier texture. As for the choice of fat, butter was in and Crisco was out—butter tasted much better. Next I wanted to test melted butter versus cold butter. Although I had been using melted butter in the dropped biscuits, I wondered if cold butter would yield better results, as some sources suggested. I melted butter for one batch and cut cold butter into the dry ingredients (with a food processor) for another. The difference was nil, so melting, the easier method, was the winner.
I soon discovered that the big problem with drop biscuits is getting them to cook through. (The batter is wetter than rolled biscuit dough and therefore has a propensity for remaining doughy.) No matter how long I left the biscuits on the berry topping in a 400-degree oven, they never baked through, turning browner and browner on top while remaining doughy on the bottom. I realized that what the biscuits needed might be a blast of heat from below—that is, from the berries. I tried baking the berries alone in a moderate 375-degree oven for 25 minutes and then dropped and baked the biscuit dough on top. Bingo! The heat from the bubbling berries helped to cook the biscuits from underneath, while the dry heat of the oven cooked the biscuits from above.
There was one final detail to perfect. I wanted the biscuits to be more crisp on the outside and to have a deeper hue. This was easily achieved by bumping the oven to 425 degrees when I added the biscuits. A sprinkling of cinnamon sugar on the dropped biscuit dough added just a bit more crunch.
SERVES 6 TO 8
While the blueberries are baking, prepare the ingredients for the topping, but do not stir the wet ingredients into the dry ingredients until just before the berries come out of the oven. A standard or deep-dish 9-inch pie plate works well for this recipe; however, an 8-inch square baking dish can also be used. Serve with vanilla ice cream or whipped cream. To reheat leftovers, put the cobbler in a 350-degree oven for 10 to 15 minutes, until heated through.
Filling
½ cup (3½ ounces) sugar
1 tablespoon cornstarch
Pinch ground cinnamon
Pinch salt
30 ounces (6 cups) blueberries
1½ teaspoons grated lemon zest plus 1 tablespoon juice
Biscuit Topping
1 cup (5 ounces) all-purpose flour
¼ cup (1¾ ounces) sugar, plus 2 teaspoons for sprinkling
2 tablespoons stone-ground cornmeal
2 teaspoons baking powder
¼ teaspoon baking soda
¼ teaspoon salt
⅓ cup buttermilk
4 tablespoons unsalted butter, melted
½ teaspoon vanilla extract
⅛ teaspoon ground cinnamon
1. For the filling: Adjust oven rack to lower-middle position and heat oven to 375 degrees. Line rimmed baking sheet with aluminum foil. Whisk sugar, cornstarch, cinnamon, and salt together in large bowl. Add blueberries and mix gently until evenly coated; add lemon zest and juice and mix until combined. Transfer mixture to 9-inch pie plate, place plate on prepared sheet, and bake until filling is bubbling around edges, about 25 minutes.
2. For the biscuit topping: Meanwhile, whisk flour, ¼ cup sugar, cornmeal, baking powder, baking soda, and salt together in large bowl. Whisk buttermilk, melted butter, and vanilla together in small bowl. Combine cinnamon and remaining 2 teaspoons sugar in small bowl and set aside. One minute before blueberries come out of oven, add buttermilk mixture to flour mixture; stir until just combined and no dry pockets remain.
3. After removing blueberries from oven, increase oven temperature to 425 degrees. Divide dough into 8 equal pieces and place them on hot filling, spacing them at least ½ inch apart (they should not touch). Sprinkle dough mounds evenly with cinnamon sugar. Bake until filling is bubbling and biscuits are golden brown on top and cooked through, 15 to 18 minutes, rotating pie plate halfway through baking. Let cool on wire rack for 20 minutes; serve warm.
variations
Blueberry Cobbler with Gingered Biscuits
Add 3 tablespoons minced crystallized ginger to flour mixture and substitute ⅛ teaspoon ground ginger for cinnamon in sugar for sprinkling on biscuits.
Thaw 30 ounces frozen blueberries in colander set over bowl to catch juice. Transfer juice (you should have about 1 cup) to small saucepan; simmer over medium heat until syrupy and thick enough to coat back of spoon, about 10 minutes. Mix syrup with blueberries and other filling ingredients; increase baking time for filling to 30 minutes and increase baking time in step 3 to 20 to 22 minutes.
GETTING EVENLY BAKED BISCUITS
Dropping the biscuits onto a hot filling heats them from the bottom, ensuring they cook through.

1. While berries bake, whisk dry ingredients in large bowl. Whisk together wet ingredients in separate small bowl. One minute before berries come out of oven, add buttermilk mixture to flour mixture and stir until just combined.

2. Take berries out of oven and increase temperature to 425 degrees. Divide dough into 8 pieces and drop onto hot filling, spacing biscuits at least ½ inch apart (they should not touch). Sprinkle with cinnamon sugar.

3. Bake until filling is bubbling and biscuits are golden brown and cooked through, 15 to 18 minutes.
If any food speaks of the summer, summer pudding does. Ripe, fragrant, lightly sweetened berries are gently cooked to coax out their juices, which then soak and soften slices of bread to make them meld with the fruit. Served chilled, summer pudding is incredibly fresh and refreshing. Last summer, I came home from a farmer’s market with half a flat of strawberries that I’d purchased for a dollar. Not enough to preserve, I thought, but a great chance to make a summer pudding. With some raspberries, blueberries, and old bread from the freezer, I easily threw one together. I was pleased with this first attempt, but the pudding was a bit too sweet for me, and the bread seemed to stand apart from the fruit, as if it were just a casing. Improving upon it, I knew, would be an easy task. I wanted sweet-tart berries and bread that melded right into them.
In a typical summer pudding, berries fill a bowl or mold of some sort that has been neatly lined with crustless bread. Well, trimming the crusts is easy, but trimming the bread to fit the mold and lining the bowl with it is fussy. After having made a couple of puddings, I quickly grew tired of this technique—it seemed to undermine the simplicity of the dessert. I came across a couple of recipes that called for layering the bread right in with the berries instead of using it to line the bowl. Not only is this bread-on-the-inside method easier, but a summer pudding made in this fashion looks spectacular—the berries on the outside are like brilliant jewels. Meanwhile, the layers of bread on the inside almost melt into the fruit.
My next adjustment to this recipe was losing the bowl as a mold. I switched instead to making individual summer puddings in ramekins. I found them to be hardly more labor-intensive in assembly than a single large pudding. Sure, you have to cut out rounds of bread to fit the ramekins, but a cookie cutter makes easy work of it, and individual servings transform this humble dessert into an elegant one. The individual puddings are also easily served—simply unmold one onto a plate, no slicing or scooping involved. I also found I could use a loaf pan to make a single large pudding; its rectangular shape requires less trimming of bread slices.
With the form set, I moved on to the ingredients. For the 4 pints of berries I was using, ¾ cup of sugar was a good amount. Lemon juice, I found, perked up the berry flavors and rounded them out. I then sought alternatives to cooking the fruit in an attempt to preserve its freshness. I mashed first some and then all of the berries with sugar. I tried cooking only a portion of the fruit with sugar. I macerated the berries with sugar. None of these methods worked. These puddings, even after being weighted and chilled overnight, had an unwelcome crunchy, raw quality. The berries need a gentle cooking to make their texture more yielding, more pudding-like, if you will. But don’t worry—5 minutes is all it takes, not even long enough to heat up the kitchen.
Next I investigated the bread. I tried six different kinds as well as pound cake (for which I was secretly rooting). Hearty, coarse-textured sandwich bread and a rustic French loaf were too tough and tasted fermented and yeasty. Very soft, pillowy sandwich bread became soggy and lifeless when soaked with juice. The pound cake, imbued with berry juice, turned into wet sand and had the textural appeal of sawdust. A good-quality white sandwich bread with a bit of heft was good, but there were two very clear winners: challah and potato bread. Their even, tight-crumbed, tender texture and light sweetness were a perfect match for the berries.
Most summer pudding recipes call for stale bread. And for good reason. Fresh bread, I found, when soaked with those berry juices, turns to mush. You might not think this would be so noticeable with the bread layered between all those berries, but every single taster remarked that the pudding made with fresh bread was soggy and gummy. On the other hand, stale bread absorbs some of the juices and melds with the berries yet still maintains some structural integrity. Rather than waiting for bread to stale, however, I simply baked the slices in the oven at a very low temperature until they were dry to the touch but still somewhat pliable.
Cooking the berries for just 5 minutes and then layering them with dried slices of potato bread makes for an elegant and bright dessert.
Probably the oddest thing about summer pudding is the fact that it is weighted as it chills. What, I wondered, does this do for the texture? And how long does the pudding need to chill? I made several batches and chilled them with and without weights for 4, 8, 24, and 30 hours. The puddings chilled for 4 hours tasted of underripe fruit. The bread was barely soaked through, and the berries barely clung together. At 8 hours the puddings were at their peak: the berries tasted fresh and held together, while the bread melted right into them. Twenty-four hours and the puddings were still good, though a hairsbreadth duller in color and flavor. After 30 hours the puddings were well past their prime and began to smell and taste fermented.
No matter how long they chilled, the summer puddings without weights were loose—they didn’t hold together after unmolding. The fruit was less cohesive and the puddings less pleasurable to eat.
No pound cake, no butter. Just bright, fresh summer berries made into the perfect summer dessert. Topped with a healthy dollop of whipped cream, what could be better?
Individual Summer Berry Puddings
SERVES 6
For this recipe, you will need six 6-ounce ramekins and a round cookie cutter of slightly smaller diameter than the ramekins. If you don’t have the right-size cutter, use a paring knife and the bottom of a ramekin (most ramekins taper toward the bottom) as a guide for trimming the rounds. Top with whipped cream, if desired.
12 slices potato bread, challah, or hearty white sandwich bread
1¼ pounds strawberries, hulled and sliced (4 cups)
10 ounces (2 cups) raspberries
5 ounces (1 cup) blackberries
5 ounces (1 cup) blueberries
¾ cup (5¼ ounces) sugar
2 tablespoons lemon juice
1. Adjust oven rack to middle position and heat oven to 200 degrees. Place bread in single layer on rimmed baking sheet and bake until dry but not brittle, about 1 hour, flipping slices once and rotating sheet halfway through baking. Set aside to cool.
2. Combine strawberries, raspberries, blackberries, blueberries, and sugar in large saucepan and cook over medium heat, stirring occasionally, until berries begin to release their juices and sugar has dissolved, about 5 minutes. Off heat, stir in lemon juice; let cool to room temperature.
3. Spray six 6-ounce ramekins with vegetable oil spray and place on rimmed baking sheet. Use cookie cutter to cut out 12 bread rounds that are slightly smaller in diameter than ramekins.
4. Using slotted spoon, place ¼ cup fruit mixture in each ramekin. Lightly soak 1 bread round in fruit juice in saucepan and place on top of fruit in ramekin; repeat with 5 more bread rounds and remaining ramekins. Divide remaining fruit among ramekins, about ½ cup per ramekin. Lightly soak 1 bread round in fruit juice and place on top of fruit in ramekin (it should sit above lip of ramekin); repeat with remaining 5 bread rounds and remaining ramekins. Pour remaining fruit juice over bread and cover ramekins loosely with plastic wrap. Place second baking sheet on top of ramekins and weight with heavy cans. Refrigerate puddings for at least 8 hours or up to 24 hours.
5. Remove cans and baking sheet and uncover puddings. Loosen puddings by running paring knife around edge of each ramekin, unmold into individual bowls, and serve immediately.
variation
SERVES 6 TO 8
Because there is no need to cut out rounds for this version, you will need only about eight slices of bread, depending on their size.
Trim crusts from toasted bread and trim slices to fit in single layer in loaf pan (you will need about 2½ slices per layer; there will be three layers). Spray 9 by 5-inch loaf pan with vegetable oil spray, line with plastic wrap, and place on rimmed baking sheet. Using slotted spoon, spread about 2 cups fruit mixture evenly over bottom of prepared pan. Lightly soak enough bread slices for 1 layer in fruit juice in saucepan and place on top of fruit. Repeat with 2 more layers of fruit and bread. Pour remaining fruit juice over bread and cover loosely with plastic wrap. Place second baking sheet on top of loaf pan and weight it with heavy cans. Refrigerate pudding as directed. When ready to serve, invert pudding onto serving platter, remove loaf pan and plastic, slice, and serve.
ASSEMBLING INDIVIDUAL SUMMER BERRY PUDDINGS

1. Cut out rounds of bread with cookie cutter.
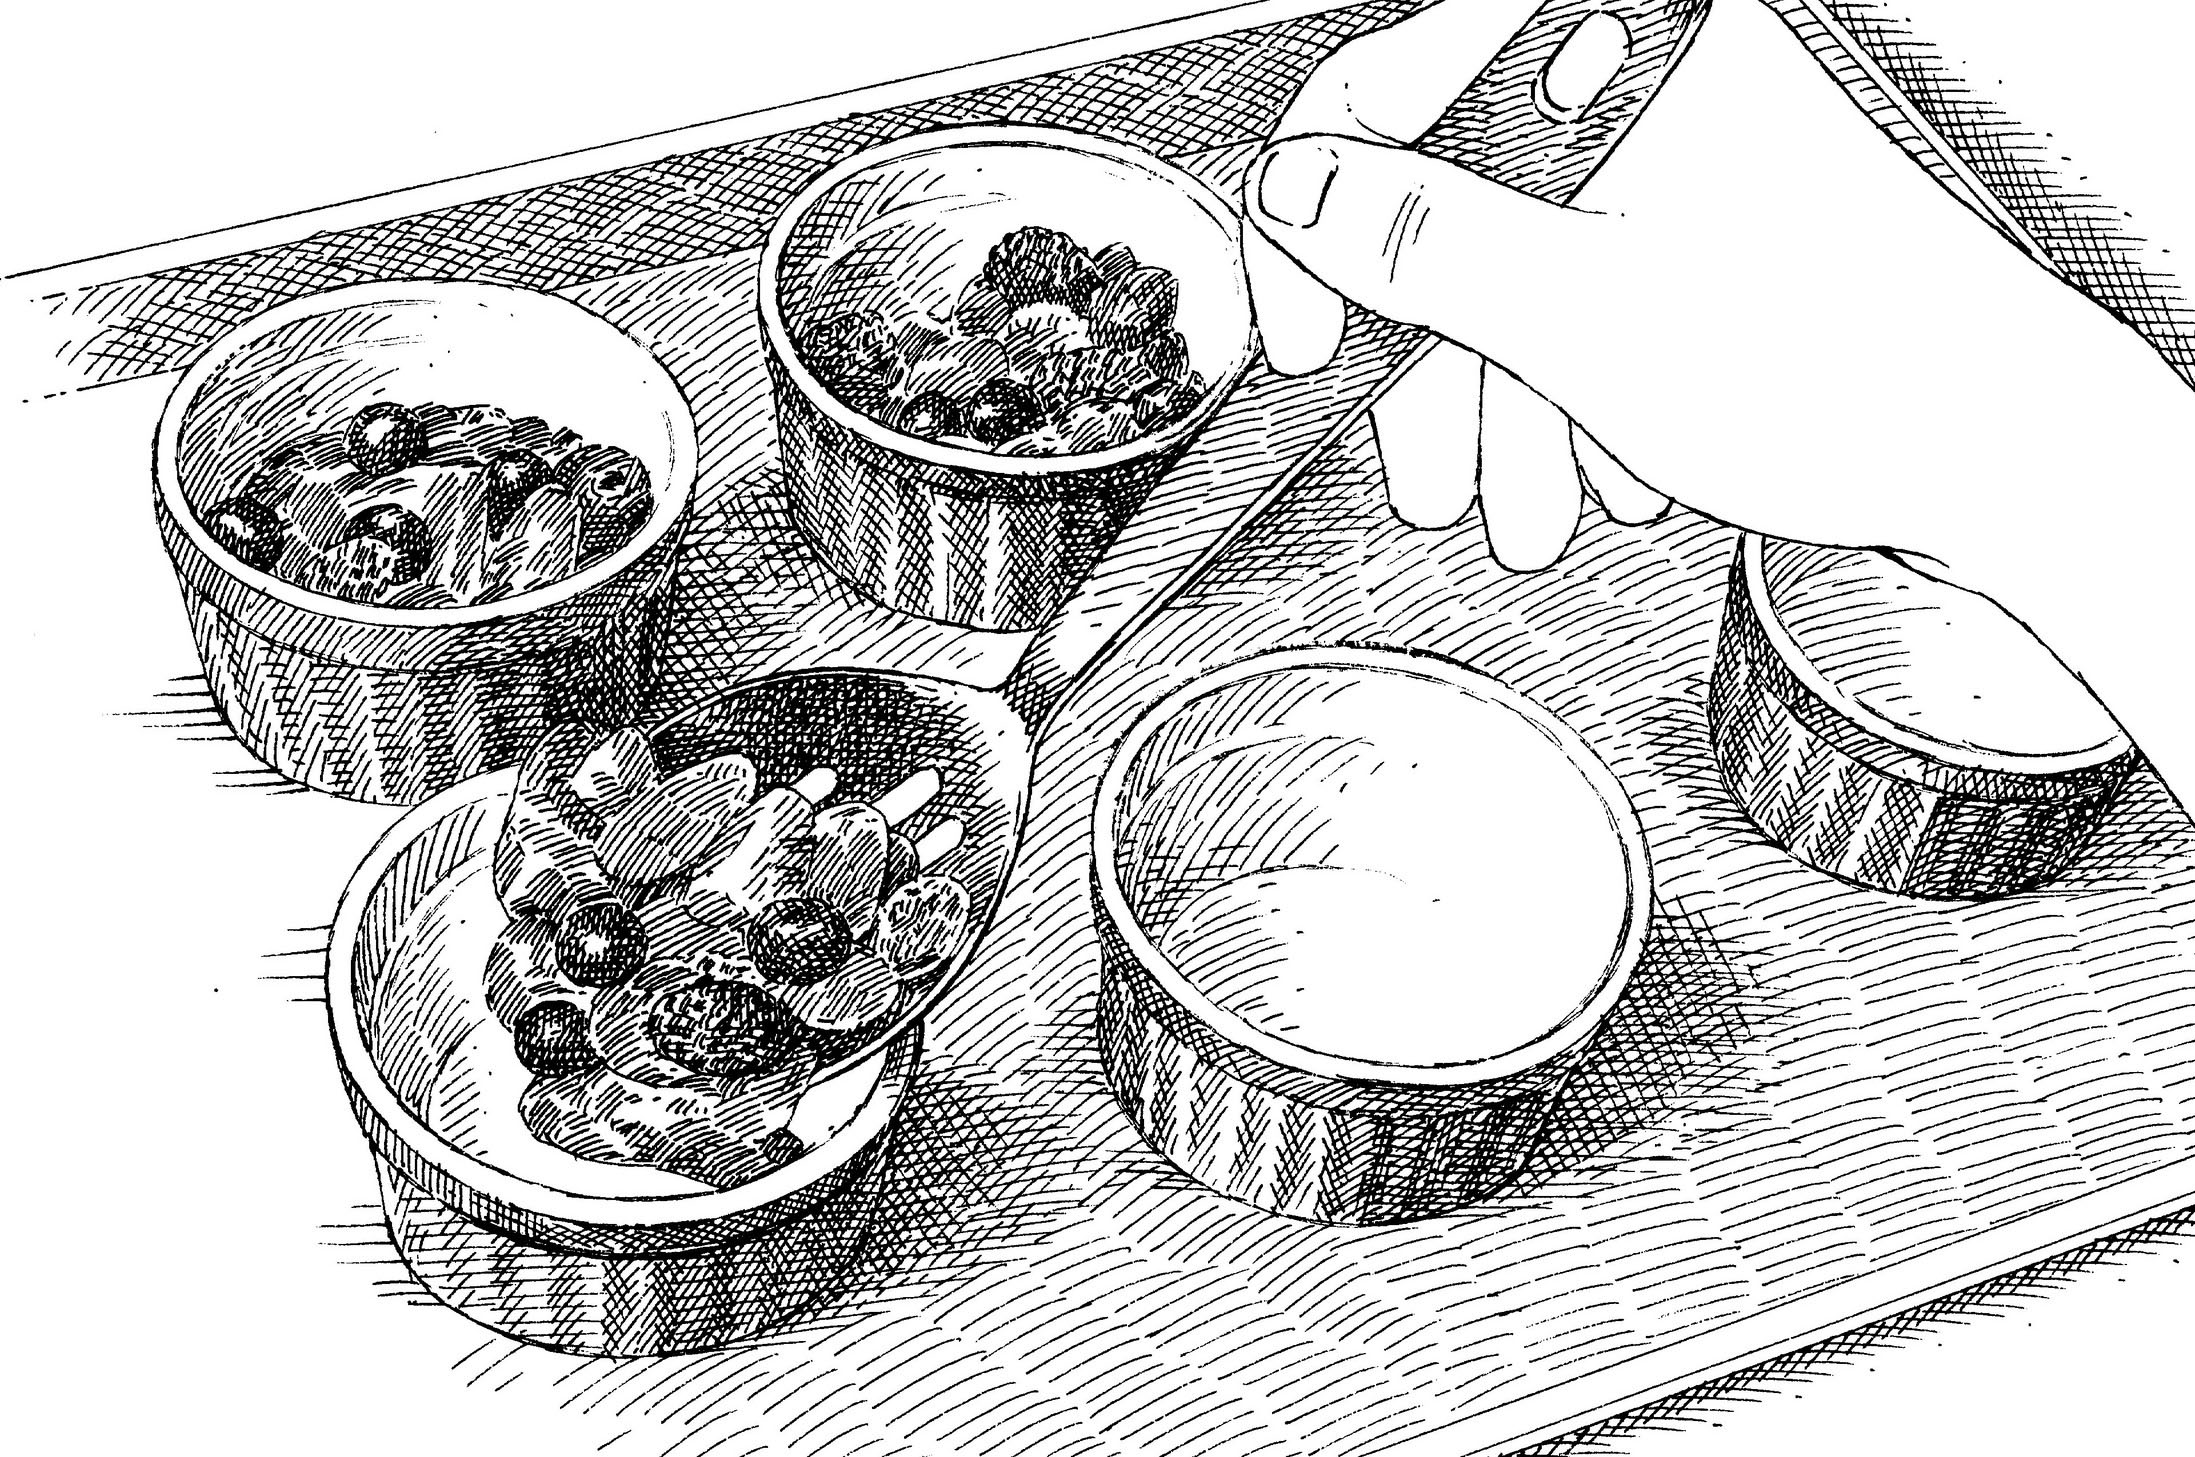
2. Use slotted spoon to place about ¼-cup portions of fruit into greased 6-ounce ramekins.
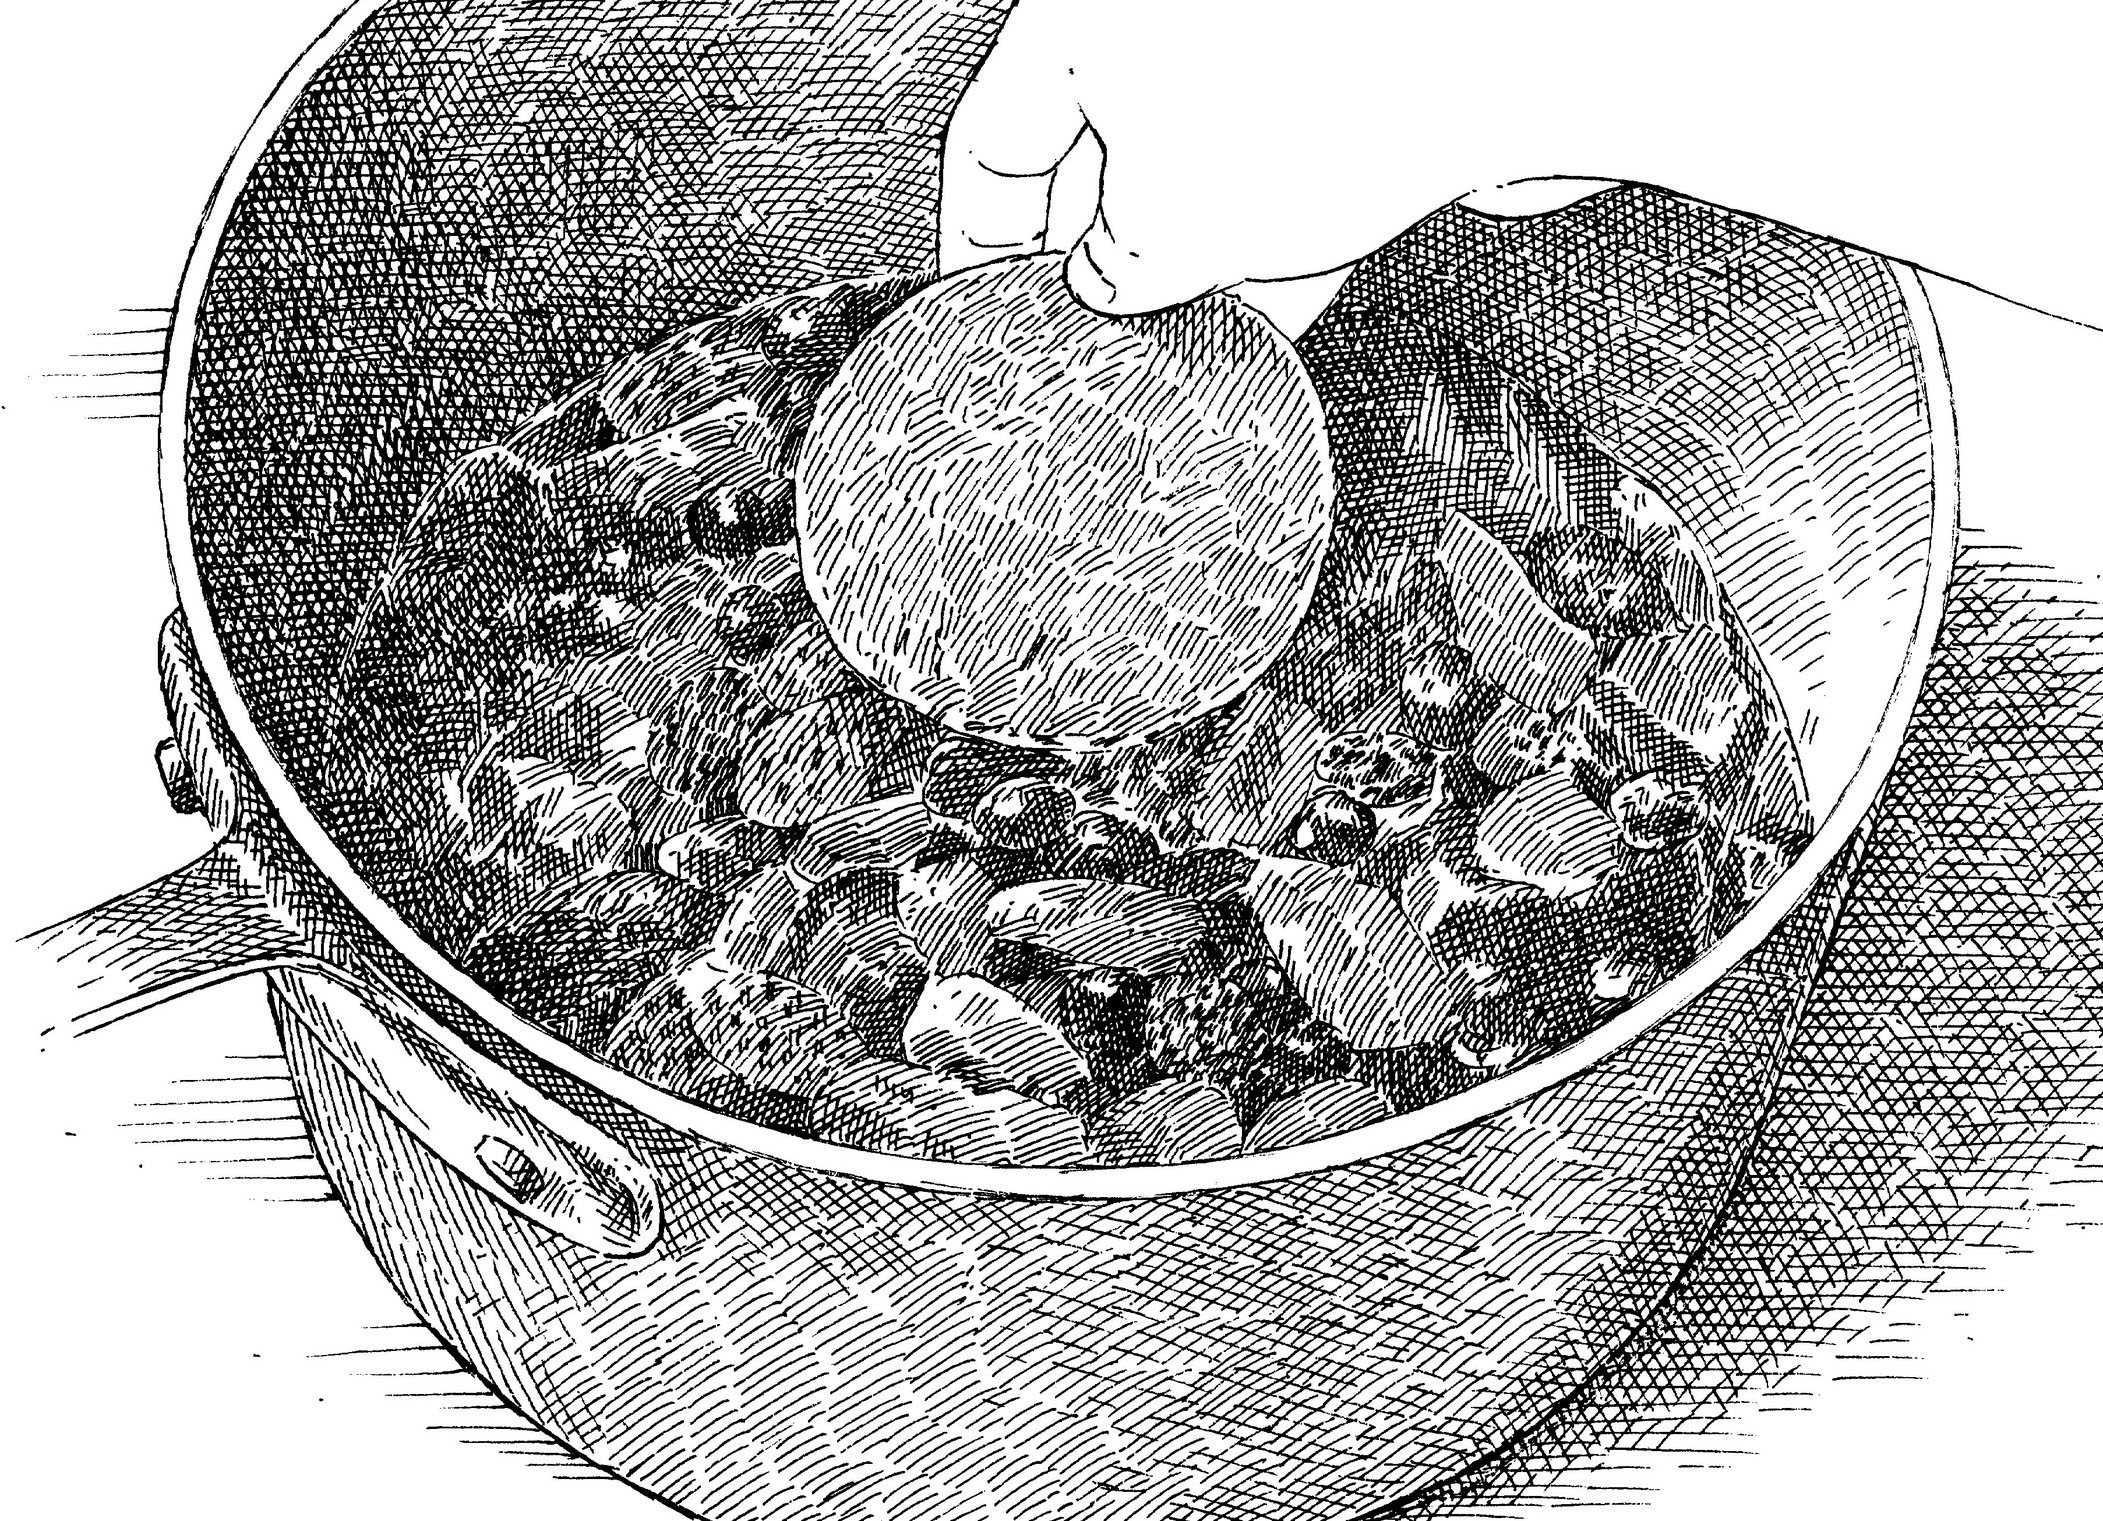
3. Lightly soak rounds of bread in berry juice and layer with fruit in each ramekin. Repeat layering with remaining fruit and bread rounds.

4. Cover filled ramekins with plastic wrap. Place cookie sheet on top, then weight with several heavy cans.
A fresh fruit tart is the showpiece of a bakery pastry case. With its clean crust edge and ornate arrangement of fruit glistening with glaze, this dessert is beautiful and conveys a sense of occasion. But anyone who has served one knows that the pretty presentation falls apart when the knife meets the tart. Instead of neat wedges, you get shards of pastry oozing messy fruit and juice-stained filling. That’s a disappointing end for a dessert that started out so impressive and required several hours to make.
I set out to reconceptualize the classic fresh fruit tart from crust to crown. I wanted the crust and filling to be sturdy and stable enough to retain their form when cut, and I wanted to streamline their preparation. That might mean departing from tradition, but as long as the tart looked pretty and featured a buttery crust complementing a satiny filling and bright, sweet, juicy fruit, I was ready for new ideas.
CRUST EASE
Plenty of published recipes touted innovative approaches to the fresh fruit tart, starting with the crust. The most promising one traded the traditional pâte sucrée—in which cold butter is worked into flour and sugar, chilled, and rolled out—for a simpler pat-in-the-pan crust. This style of crust calls for simply melting the butter and stirring it into the flour mixture to create a pliable dough that is easily pressed into the pan and baked. I tried one such recipe: While the result was crisp and cookie-like rather than flaky, it still made a nice contrast to the creamy filling.
I had one tweak in mind: Since I would be melting the butter anyway, I’d try browning it to give the pastry a richer, nuttier character. But because browning the butter cooked off its water, this produced a sandy, cracked crust. There wasn’t enough moisture for the proteins in the flour to form the gluten necessary to hold the crust together. Adding a couple of tablespoons of water to the browned butter before mixing it with the dry ingredients fixed the problem: The dough was more cohesive and, after 30 minutes in a 350-degree oven, formed a crust that held together.
On to the filling. I wasn’t keen on the traditional pastry cream: It’s fussy to make and tends to ooze from the crust when sliced. What I needed was something that was thick and creamy from the get-go. Mascarpone, the creamy, tangy-sweet fresh cheese that’s the star of tiramisù and many other Italian desserts, seemed like a good option. Sweetened with a little sugar and spread over the tart shell, it was a workable starting point, but it still wasn’t dense enough to hold its shape when sliced. Thickeners such as gelatin, pectin, and cornstarch required either cooking or hydrating in liquid to be effective, as well as several hours to set up. A colleague had a better idea: white chocolate. I could melt it in the microwave and stir it into the mascarpone. Since white chocolate is solid at room temperature, it would firm up the filling as it cooled.
I melted white baking chips (they resulted in a firmer texture than white chocolate, which contains cocoa butter) in the microwave, adding ¼ cup of heavy cream so the mixture would blend smoothly into the cheese. When the filling was homogeneous, I smoothed it into the cooled crust, gently pressed in the fruit while the filling was still slightly warm (once cooled completely it would be too firm to hold the fruit neatly), brushed on a jam glaze, and refrigerated the tart for 30 minutes so the filling would set. I then allowed the tart to sit at room temperature for 15 minutes before slicing it.
The filling was satiny and, thanks to the baking chips, nicely firm. To give it a little more oomph, I added bright, fruity lime juice, which—despite being a liquid—wouldn’t loosen the filling. Instead, the acid would act on the cream’s proteins, causing them to thicken; meanwhile, the cream’s fat would prevent any graininess.
Since heating the lime juice would drive off its bright flavor, I stirred it in with the mascarpone; it paired beautifully with the rich cheese and white chocolate. For even more lime flavor, I added a teaspoon of zest, heating it with the chocolate and cream to draw out its flavor-packed oils.
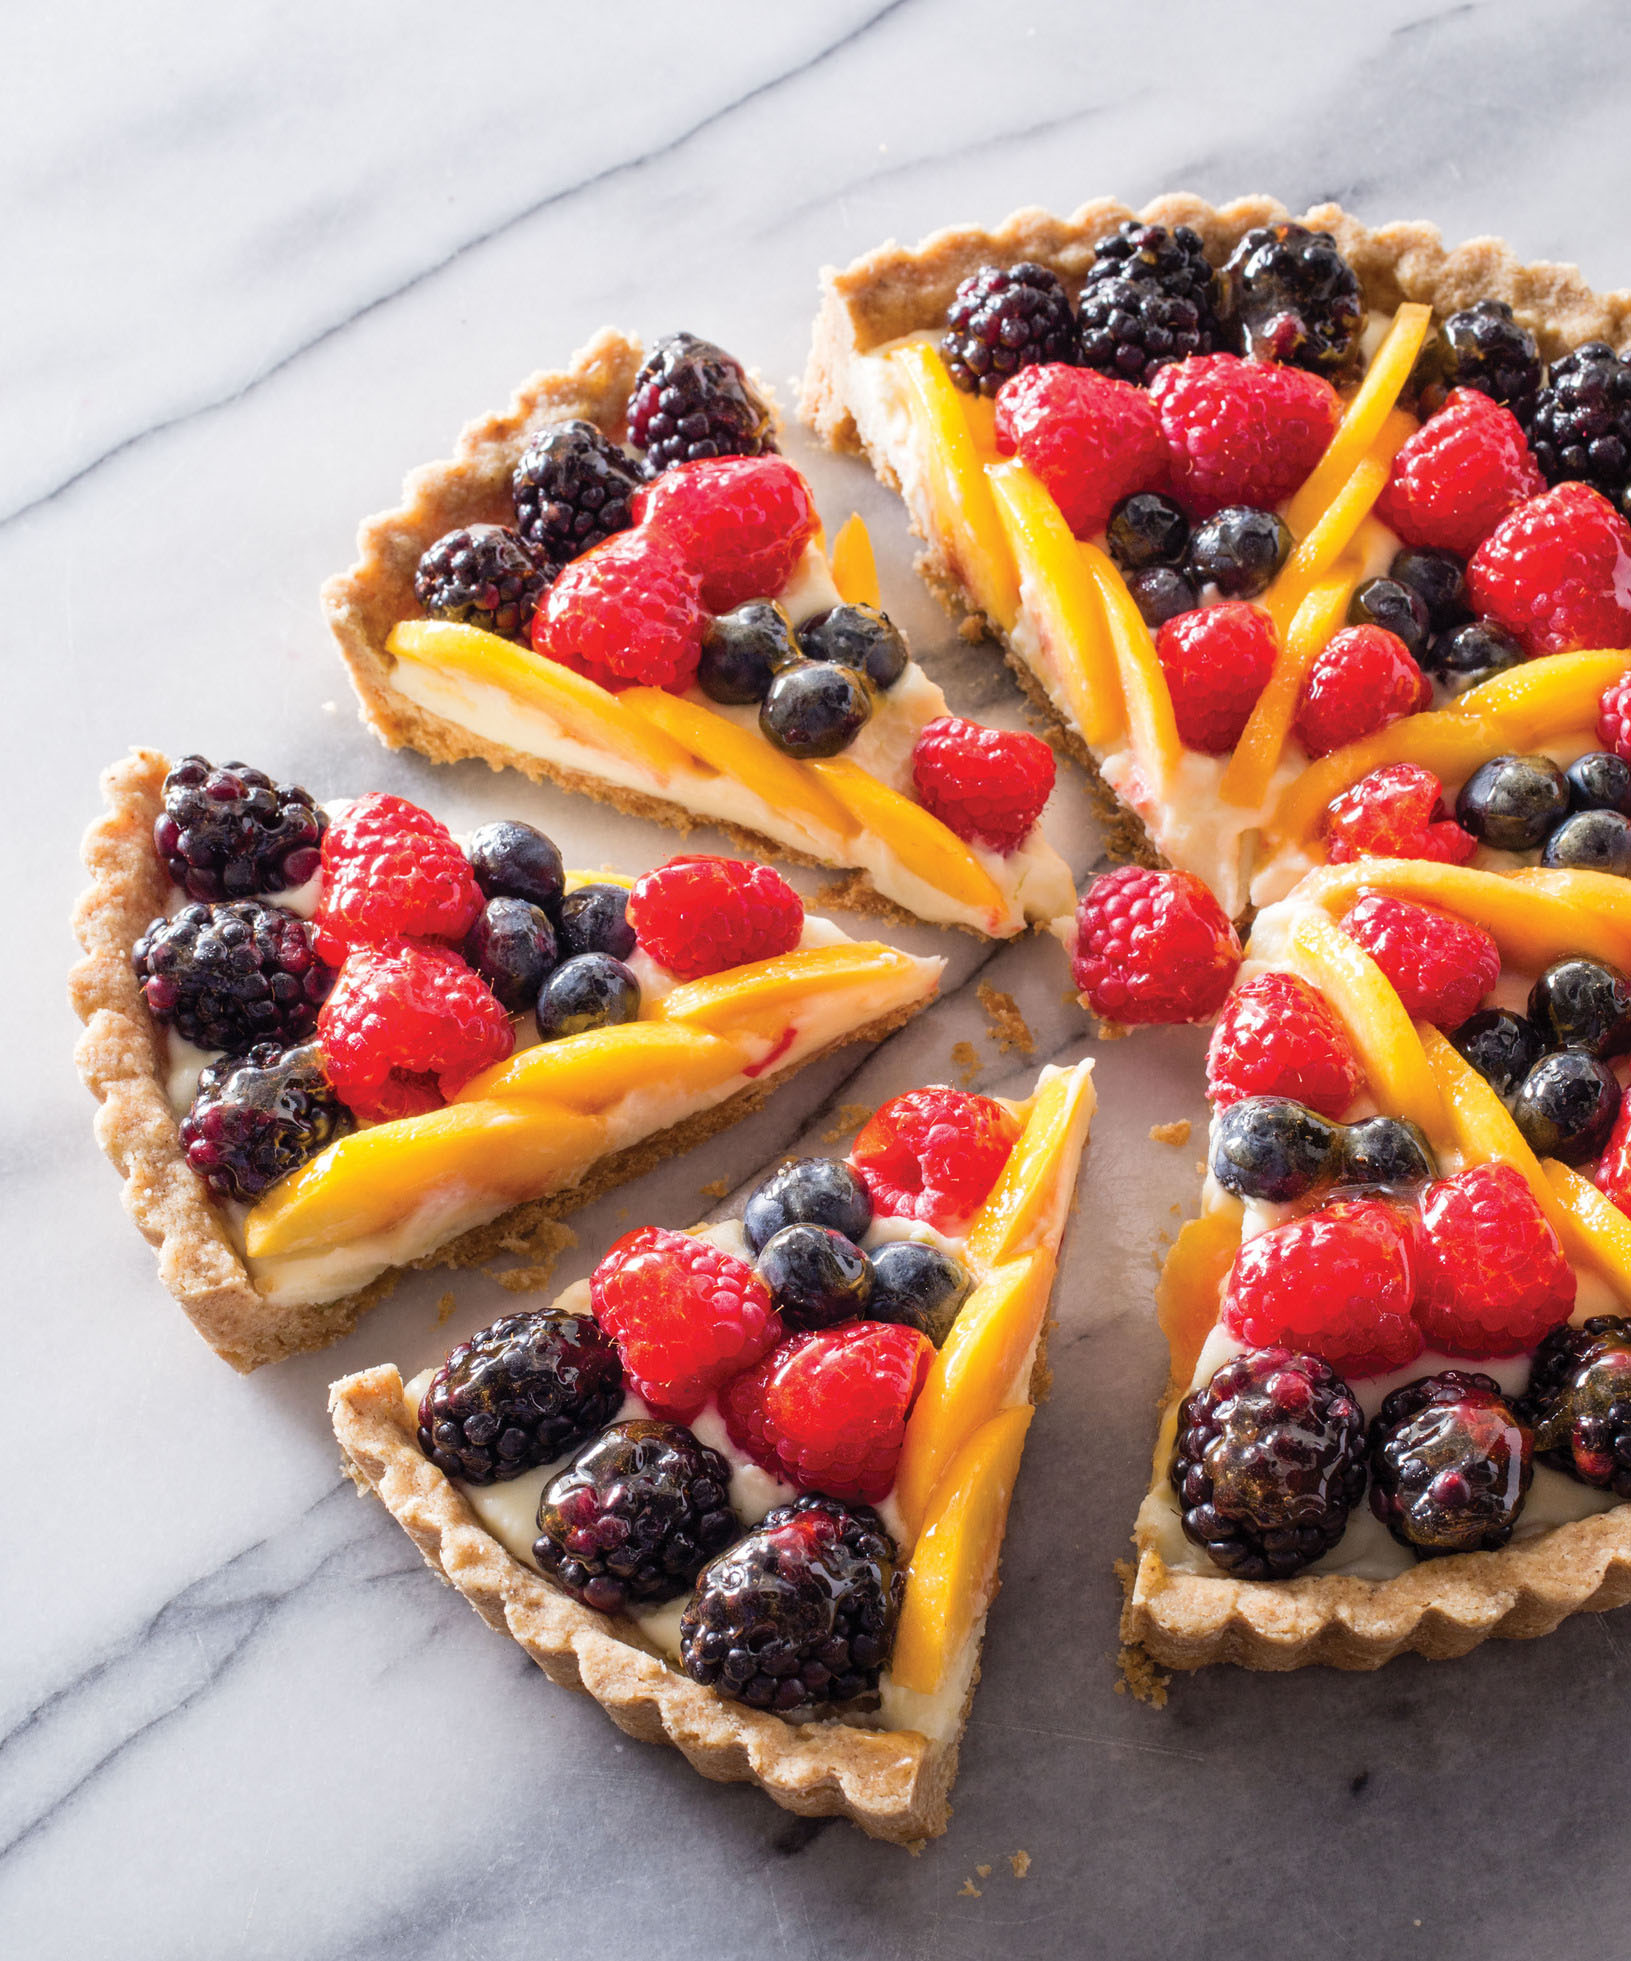
For neat slicing and serving, we use mascarpone and white baking chips in the filling and arrange the fruit in wedges.
EDIBLE ARRANGEMENTS
I decided to top the tart with an appealing, summery combo of berries and ripe peaches, peeled and cut into thin slices. But before I placed the fruit on the filling, I thought carefully about how to arrange it. Many tarts feature fruit organized in concentric circles. These look great when whole, but since you have to cut through the fruit when slicing, it winds up mangled. Why not arrange the fruit so that the knife could slip between pieces?
First, I spaced eight berries around the outer edge of the tart, which I then used as guides to help me evenly arrange eight sets of three slightly overlapping peach slices so that they radiated from the center of the tart to its outer edge. The peach slices would serve as cutting guides for eight wedges. Next, I artfully arranged a mix of berries on each wedge. The final touch: I made a quick glaze using apricot preserves that I thinned with lime juice for easy dabbing.
The crisp, sturdy, rich crust; satiny yet stable filling; and bright-tasting fruit added up to a classic showpiece with modern flavor. Best of all, it was quick to make, and each slice looked just as polished and professional as the whole tart.
Fresh Fruit Tart
SERVES 8
This recipe calls for extra berries to account for any bruising. Ripe, unpeeled nectarines can be substituted for the peaches, if desired. Use white baking chips here and not white chocolate bars, which contain cocoa butter and will result in a loose filling. Use a light hand when dabbing on the glaze; too much force will dislodge the fruit. If the glaze begins to solidify while dabbing, microwave it for 5 to 10 seconds.
Crust
1⅓ cups (6⅔ ounces) all-purpose flour
¼ cup (1¾ ounces) sugar
⅛ teaspoon salt
10 tablespoons unsalted butter
2 tablespoons water
Tart
⅓ cup (2 ounces) white baking chips
¼ cup heavy cream
1 teaspoon grated lime zest plus 7 teaspoons juice (2 limes)
Pinch salt
6 ounces (¾ cup) mascarpone cheese, room temperature
2 ripe peaches, peeled
20 ounces (4 cups) raspberries, blackberries, and blueberries
⅓ cup apricot preserves
1. For the crust: Adjust oven rack to middle position and heat oven to 350 degrees. Whisk flour, sugar, and salt together in bowl. Melt butter in small saucepan over medium-high heat, swirling saucepan occasionally, until foaming subsides. Cook, stirring and scraping bottom of saucepan with heatproof spatula, until milk solids are dark golden brown and butter has nutty aroma, 1 to 3 minutes. Remove saucepan from heat and add water. When bubbling subsides, transfer butter to bowl with flour mixture and stir until well combined. Transfer dough to 9-inch tart pan with removable bottom and let dough rest until just warm, about 10 minutes.
2. Use your hands to evenly press and smooth dough over bottom and up side of pan (using two-thirds of dough for bottom crust and remaining third for side). Place pan on wire rack set in rimmed baking sheet and bake until crust is golden brown, 25 to 30 minutes, rotating pan halfway through baking. Let crust cool completely, about 1 hour. (Cooled crust can be wrapped loosely in plastic wrap and stored at room temperature for up to 24 hours.)
3. For the tart: Microwave baking chips, cream, lime zest, and salt in medium bowl, stirring every 10 seconds, until baking chips are melted, 30 to 60 seconds. Whisk in one-third of mascarpone, then whisk in 6 teaspoons lime juice and remaining mascarpone until smooth. Transfer filling to tart shell and spread into even layer.
4. Place peach, stem side down, on cutting board. Placing knife just to side of pit, cut down to remove 1 side of peach. Turn peach 180 degrees and cut off opposite side. Cut off remaining 2 sides. Place pieces cut side down and slice ¼ inch thick. Repeat with second peach. Select best 24 slices.
5. Evenly space 8 berries around outer edge of tart. Using berries as guide, arrange 8 sets of 3 peach slices in filling, slightly overlapping slices with rounded sides up, starting at center and ending on right side of each berry. Arrange remaining berries in attractive pattern between peach slices, covering as much of filling as possible and keeping fruit in even layer.
6. Microwave preserves and remaining 1 teaspoon lime juice in small bowl until fluid, 20 to 30 seconds. Strain mixture through fine-mesh strainer. Using pastry brush, gently dab mixture over fruit, avoiding crust. Refrigerate tart for 30 minutes.
7. Remove outer metal ring of tart pan. Slide thin metal spatula between tart and pan bottom to loosen tart, then carefully slide tart onto serving platter. Let tart sit at room temperature for 15 minutes. Using peaches as guide, cut tart into wedges and serve. (Tart can be refrigerated for up to 24 hours. If refrigerated for more than 1 hour, let tart sit at room temperature for 1 hour before serving.)
MAKE AN EDIBLE SLICING GUIDE
Strategically arranging the fruit isn’t all about looks. It can make it easier to cut clean slices, too.

1. Evenly arrange 8 berries around outer edge of tart.

2. Arrange 8 sets of 3 overlapping peach slices from center to edge of tart on right side of each berry.

3. Arrange remaining berries in attractive pattern between peach slices in even layer to cover filling.
Classic and elegant, a traditional French tarte aux pommes is a visually stunning dessert that has intense fruit flavor and varied textures, yet is made with just a few basic ingredients. In its simplest form, this tart consists of crisp pastry shell that’s filled with a concentrated apple puree and then topped with a spiraling fan of paper-thin apple slices. It’s usually finished with a delicate glaze that caramelizes during baking, providing an extra layer of flavor.
But poor structure is the fatal flaw of many a handsome apple tart; overly tough apple slices and mushy crusts abound. Plus, the dessert’s overall flavor can be a bit one-dimensional. Still, I was drawn to this showstopper dessert that could be made with a short list of pantry staples. My challenge would be perfecting each component to produce a gorgeous tart with lively, intense apple flavor and a crust that stayed crisp.
For an apple tart with both integrity and beauty, we use melted rather than chilled butter in the crust and parcook the apples for the topping.
A STRONG FOUNDATION
For a dough that would hold its shape and maintain a crisp texture even after being filled with the puree, I started by preparing the three classic French pastry options and filling them with a placeholder puree: five peeled and cored Golden Delicious apples (widely available, and good quality year round) cooked with a splash of water until soft, mashed with a potato masher, and reduced until thick.
My first attempt was with frozen puff pastry, which I rolled thin and parbaked to dry it out and firm it up. But the dough shrank, and its texture softened beneath the wet puree. On to the next.
Following a classic recipe for pâte brisée (essentially the French equivalent of flaky American pie dough), I used the food processor to pulse cold butter into flour until the mixture formed a coarse meal. I drizzled in a little water, then chilled the dough, rolled it out, fit it into the tart pan, chilled it again, lined the dough with parchment, weighed it down with pie weights, parbaked it, removed the parchment and weights, and baked it until it was crisp. All that work is supposed to keep the dough from shrinking—and this shell did hold its shape nicely. But the puree still turned the pastry soggy.
Lastly, I tried a pâte sucrée. This pastry typically contains more sugar than the previous doughs, but the most significant difference is that the butter is thoroughly worked into the flour, which limits the development of gluten—the strong elastic network that forms when flour proteins are moistened with water. Less gluten translates to pastry that is less prone to shrinking and that bakes up with a finer, shorter crumb.
I worked the butter into the dry ingredients until the mixture looked like sand, then bound it with an egg (typical in pâte sucrée recipes). I chilled, rolled, chilled, and baked as before—but I skipped the pie weights, since the dough wasn’t likely to shrink.
Indeed, this crust baked up plenty sturdy, and it didn’t sog out when I filled it with the puree. But it puffed slightly during baking, and frankly, all that chilling and rolling was tiresome. There had to be an easier way.
CRUNCH TIME
Eliminating the egg would mitigate the cookie-like lift, but without the egg’s moisture, I would need another liquid component to bind the dry ingredients with the cold butter. I didn’t want to add water, since that would encourage gluten development. But what if I turned the butter (which contains very little water) into a liquid by melting it?
Stirring melted butter into the dry ingredients produced a promisingly cohesive dough that was so malleable, I didn’t need to roll it—I could simply press it into the pan. Then I chilled it and baked it.
This was by far the easiest pastry I’d ever made. The crust baked up perfectly sturdy and was no longer puffed, but crisp and delicate like shortbread—and stayed that way even when filled with the puree. Subsequent streamlining tests showed that I didn’t even have to chill this modified pâte sucrée before baking; the sides of the tart pan were shallow enough that the pastry didn’t slump. Now to improve that placeholder puree.
AMPING UP APPLESAUCE
My apple filling had to have concentrated fruit flavor and enough body to hold its shape on a fork. The latter goal I’d almost met by cooking down the puree until it had a texture and flavor somewhere between applesauce and apple butter. Moving this operation from a saucepan to a wider covered skillet helped water from the fruit evaporate faster.
For more distinctive flavor, I took a cue from Julia Child’s recipe for tarte aux pommes, in which she adds butter and apricot preserves to her puree. Tasters applauded this richer, brighter-tasting filling. The preserves also contributed pectin, which helped the filling firm up even more.
TOPPING IT OFF
Finally, I needed to find a way to simplify the shingling of the apples on top—a painstaking task, especially when trying to brush the delicately placed apples with a shiny glaze. (Luckily, the glaze itself was simple: I just brushed the top with the brightly flavored apricot preserves I was already using in the filling.) To add to my frustrations, the apple slices never became tender enough for me to cut the tart without their resisting and becoming dislodged. I tried baking the tart longer, brushing the slices with water or melted butter, and covering the tart with foil for part of the baking time so the slices might soften in the trapped steam—none of which worked.
In the end, I swapped the wafer-thin apple slices for more generous slices and sautéed them for 10 minutes to jump-start the softening before placing them on the tart. As for the spiral shingling, I decided to forgo this fussy tradition and came up with a more easygoing, but still sophisticated, rosette pattern made by placing the apple slices in concentric circles. The parcooking had made the slices conveniently pliable, so there was no awkwardness toward the center of the arrangement; I simply bent the pieces and slipped them into place.
Once the tart was baked, I applied the glaze. Encouragingly, these sturdier pieces stayed put when I brushed them with the strained jam. Then I briefly ran the tart under the broiler to get the burnished finish that characterizes this French showpiece.
The rosette design made this tart look a bit different from classic French versions, but it was every bit as elegant. And thanks to the now-tender glazed apple slices, the rich puree, and the crisp—not to mention utterly simple and foolproof—crust, every slice of the tart that I cut was picture-perfect.
French Apple Tart
SERVES 8
You may have extra apple slices after arranging the apples in step 6. If you don’t have a potato masher, you can puree the apples in a food processor. For the best flavor and texture, be sure to bake the crust thoroughly until it is deep golden brown. To ensure that the outer ring of the pan releases easily from the tart, avoid getting apple puree and apricot glaze on the crust. The tart is best served the day it is assembled, but the baked crust, apple slices, and apple puree can be made up to 24 hours in advance. Apple slices and apple puree should be refrigerated separately in airtight containers. Assemble tart with refrigerated apple slices and puree and bake as directed, adding 5 minutes to baking time.
Crust
1⅓ cups (6⅔ ounces) all-purpose flour
5 tablespoons (2¼ ounces) sugar
½ teaspoon salt
10 tablespoons unsalted butter, melted
Filling
10 Golden Delicious apples (8 ounces each), peeled and cored
3 tablespoons unsalted butter
1 tablespoon water
½ cup apricot preserves
¼ teaspoon salt
1. For the crust: Adjust 1 oven rack to lowest position and second rack 5 to 6 inches from broiler element. Heat oven to 350 degrees. Whisk flour, sugar, and salt together in bowl. Add melted butter and stir with wooden spoon until dough forms. Using your hands, press two-thirds of dough into bottom of 9-inch tart pan with removable bottom. Press remaining dough into fluted sides of pan. Press and smooth dough with your hands to even thickness. Place pan on wire rack set in rimmed baking sheet and bake on lowest rack, until crust is deep golden brown and firm to touch, 30 to 35 minutes, rotating pan halfway through baking. Set aside until ready to fill.
2. For the filling: Cut 5 apples lengthwise into quarters and cut each quarter lengthwise into 4 slices. Melt 1 tablespoon butter in 12-inch skillet over medium heat. Add apple slices and water and toss to combine. Cover and cook, stirring occasionally, until apples begin to turn translucent and are slightly pliable, 3 to 5 minutes. Transfer apples to large plate, spread into single layer, and set aside to cool. Do not clean skillet.
3. While apples cook, microwave apricot preserves until fluid, about 30 seconds. Strain preserves through fine-mesh strainer into small bowl, reserving solids. Set aside 3 tablespoons strained preserves for brushing tart.
4. Cut remaining 5 apples into ½-inch-thick wedges. Melt remaining 2 tablespoons butter in now-empty skillet over medium heat. Add remaining apricot preserves, reserved apricot solids, apple wedges, and salt. Cover and cook, stirring occasionally, until apples are very soft, about 10 minutes.
5. Mash apples to puree with potato masher. Continue to cook, stirring occasionally, until puree is reduced to 2 cups, about 5 minutes.
6. Transfer apple puree to baked tart shell and smooth surface. Select 5 thinnest slices of sautéed apple and set aside. Starting at outer edge of tart, arrange remaining slices, tightly overlapping, in concentric circles. Bend reserved slices to fit in center. Bake tart, still on wire rack in sheet, on lowest rack, for 30 minutes. Remove tart from oven and heat broiler.
7. While broiler heats, warm reserved preserves in microwave until fluid, about 20 seconds. Brush evenly over surface of apples, avoiding tart crust. Broil tart, checking every 30 seconds and turning as necessary, until apples are attractively caramelized, 1 to 3 minutes. Let tart cool for at least 1½ hours. Remove outer metal ring of tart pan, slide thin metal spatula between tart and pan bottom, and carefully slide tart onto serving platter. Cut into wedges and serve.
MAKING A ROSETTE

1. Arrange most of parcooked apple slices in tightly overlapping concentric circles.
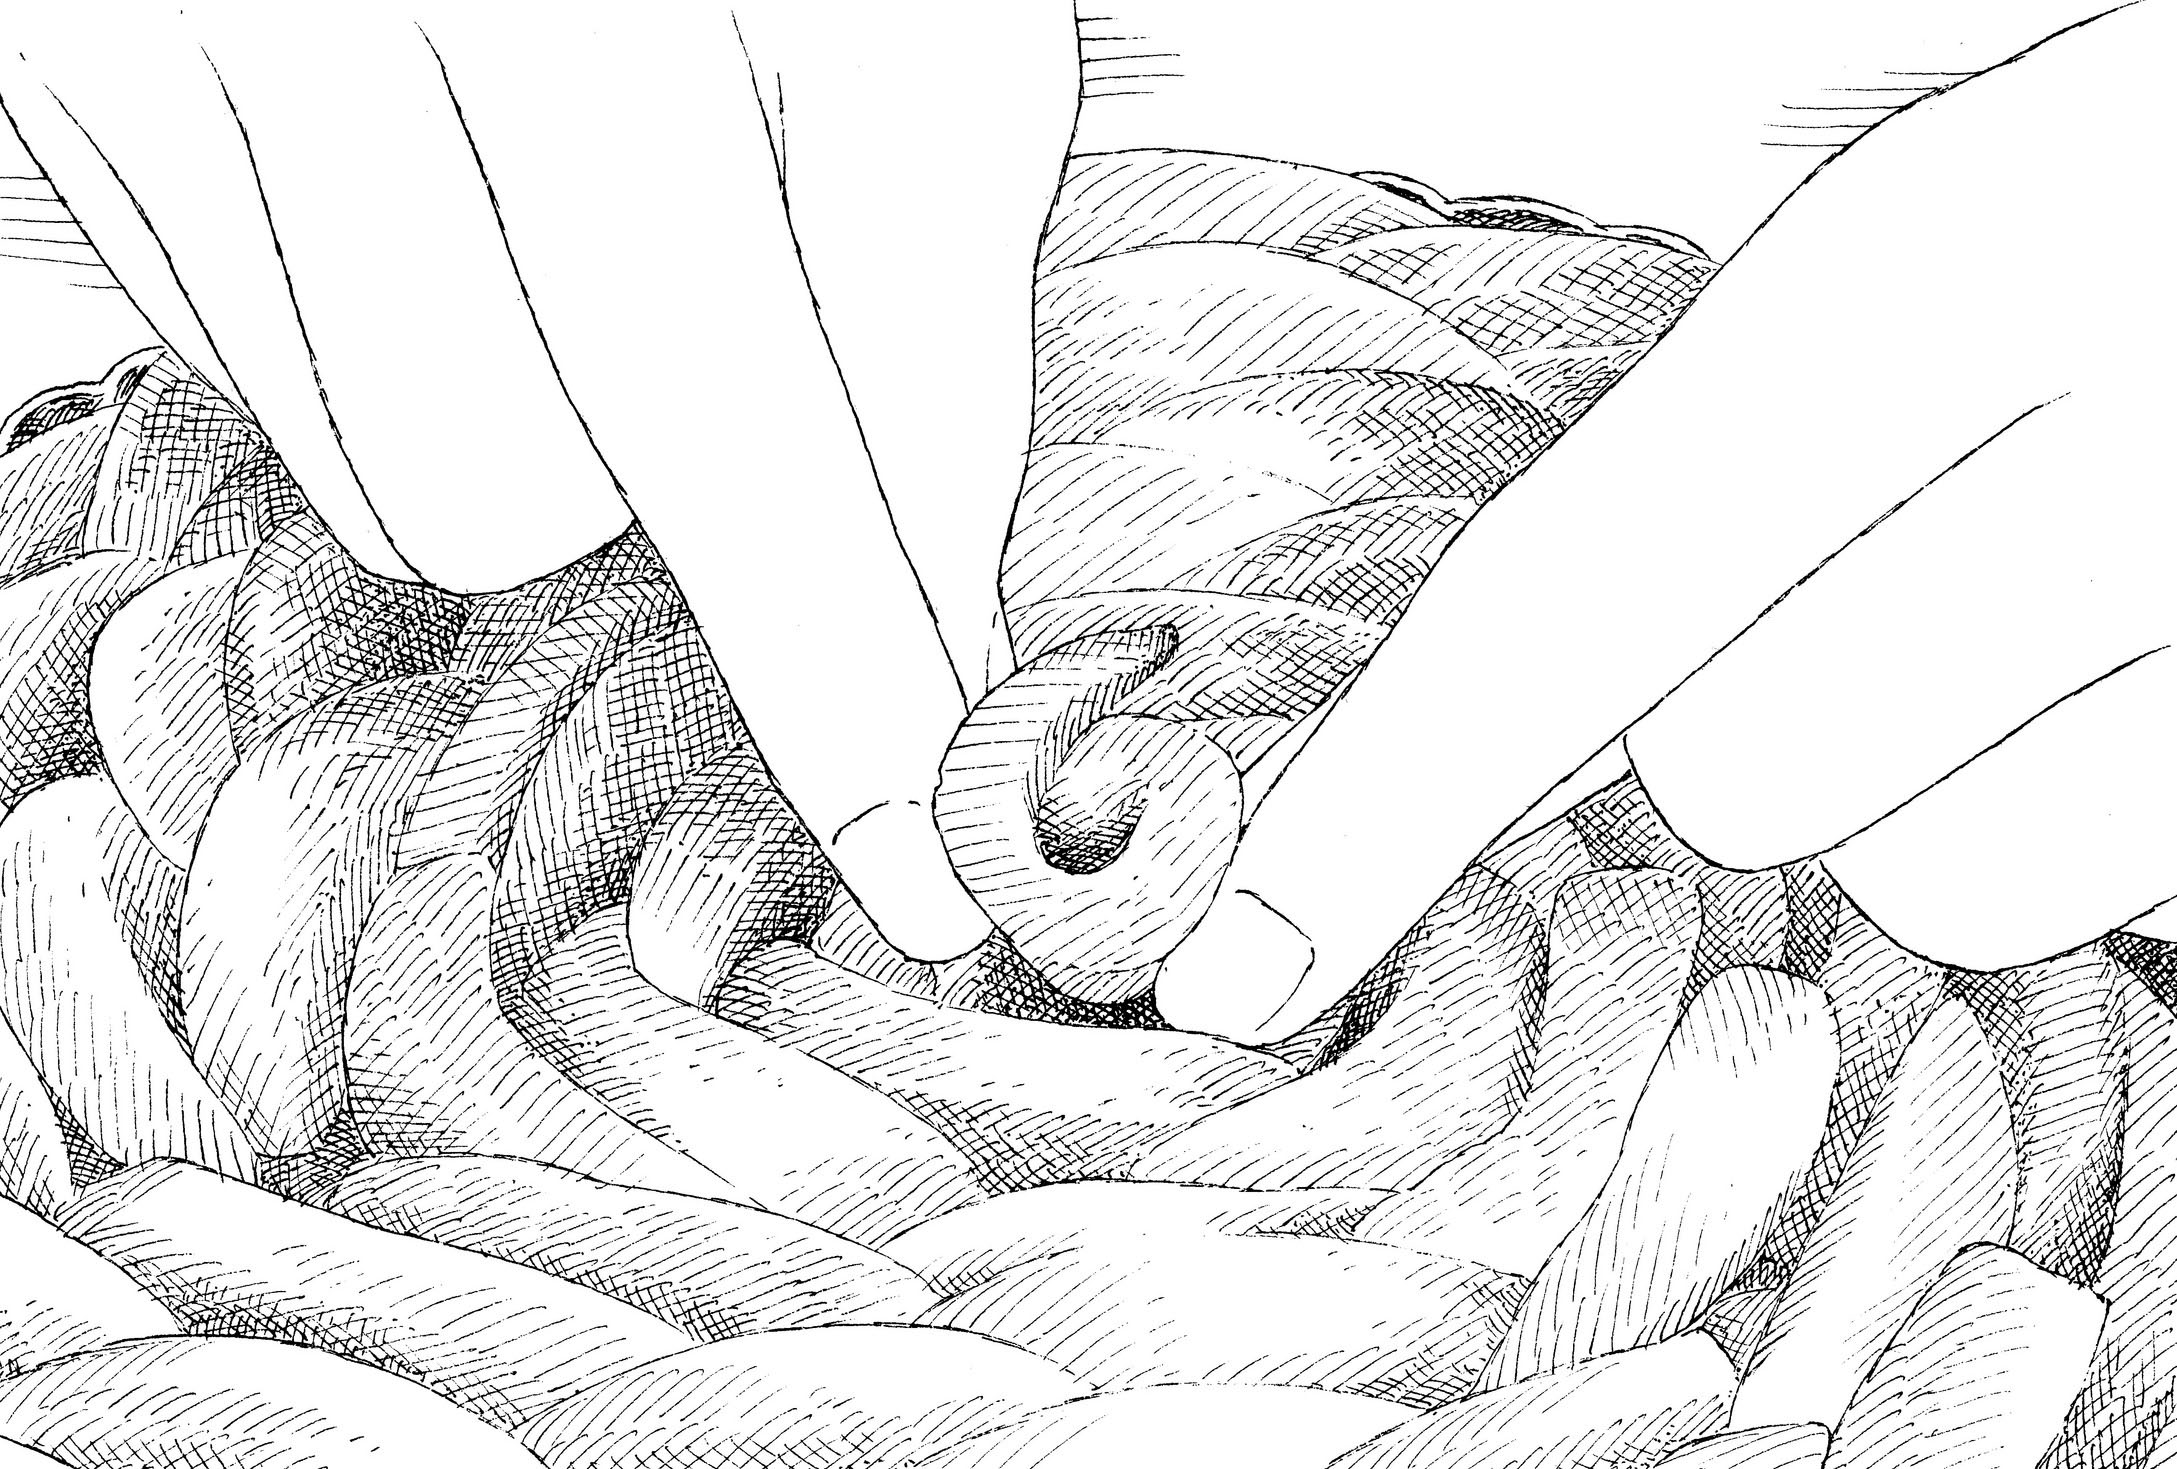
2. Bend remaining slices to fit in center.
Outside the kitchen I’m sometimes a bit of a klutz, but give me a rolling pin and a lump of traditional all-butter pie dough—the kind that’s dry and brittle and exhibits an alarming tendency to crack—and I’ll dazzle you with my proficiency and grace as I roll it into a flawless circle. It’s a skill that’s taken me decades to acquire, and practicing it makes me feel like a high priestess of pastry. Happily, that feeling of accomplishment became accessible to even the most inexperienced bakers in 2010 when we developed our Foolproof Pie Dough, which is soft and moist and a dream to roll out and bakes up flaky and tender. But as great as that recipe is, I’ve never been 100 percent converted from my traditional ways.
UPENDING PIE TRADITION
The 2010 recipe controls the ability of the flour in the dough to absorb water. That’s important because water bonds with protein in flour to form gluten, the elastic network that gives baked goods their structure. If there’s too little water, the dough will be crumbly and impossible to roll and the baked crust will fall apart; too much water and the dough will roll out easily, but it may shrink when it bakes and will certainly be tough.
To appreciate just how revolutionary the 2010 recipe is, it’s helpful to recall the way that pie dough has been made for centuries: You start by combining flour, salt, and sugar, then cut in cold butter until it’s broken into pea-size nuggets. Then you add water and mix until the dough comes together in a crumbly mass with visible bits of butter strewn throughout.
But our 2010 dough spurns tradition: Using a food processor, you mix 1½ cups of flour with some sugar and salt before adding 1½ sticks of cold butter and ½ cup of shortening (often added to pie doughs to increase flakiness); you continue processing until the fat and the dry ingredients form a smooth paste. Next you pulse in the remaining cup of flour until you have a bunch of flour-covered chunks of dough and a small amount of free flour.
Finally, you transfer the dough to a bowl and stir in ¼ cup of water and ¼ cup of vodka to bring it all together. Why vodka? Because it’s 60 percent water and 40 percent alcohol, and alcohol doesn’t activate gluten. So replacing some of the water with vodka gives you the freedom to add enough liquid to make a moist, supple dough without the risk of forming excess gluten.
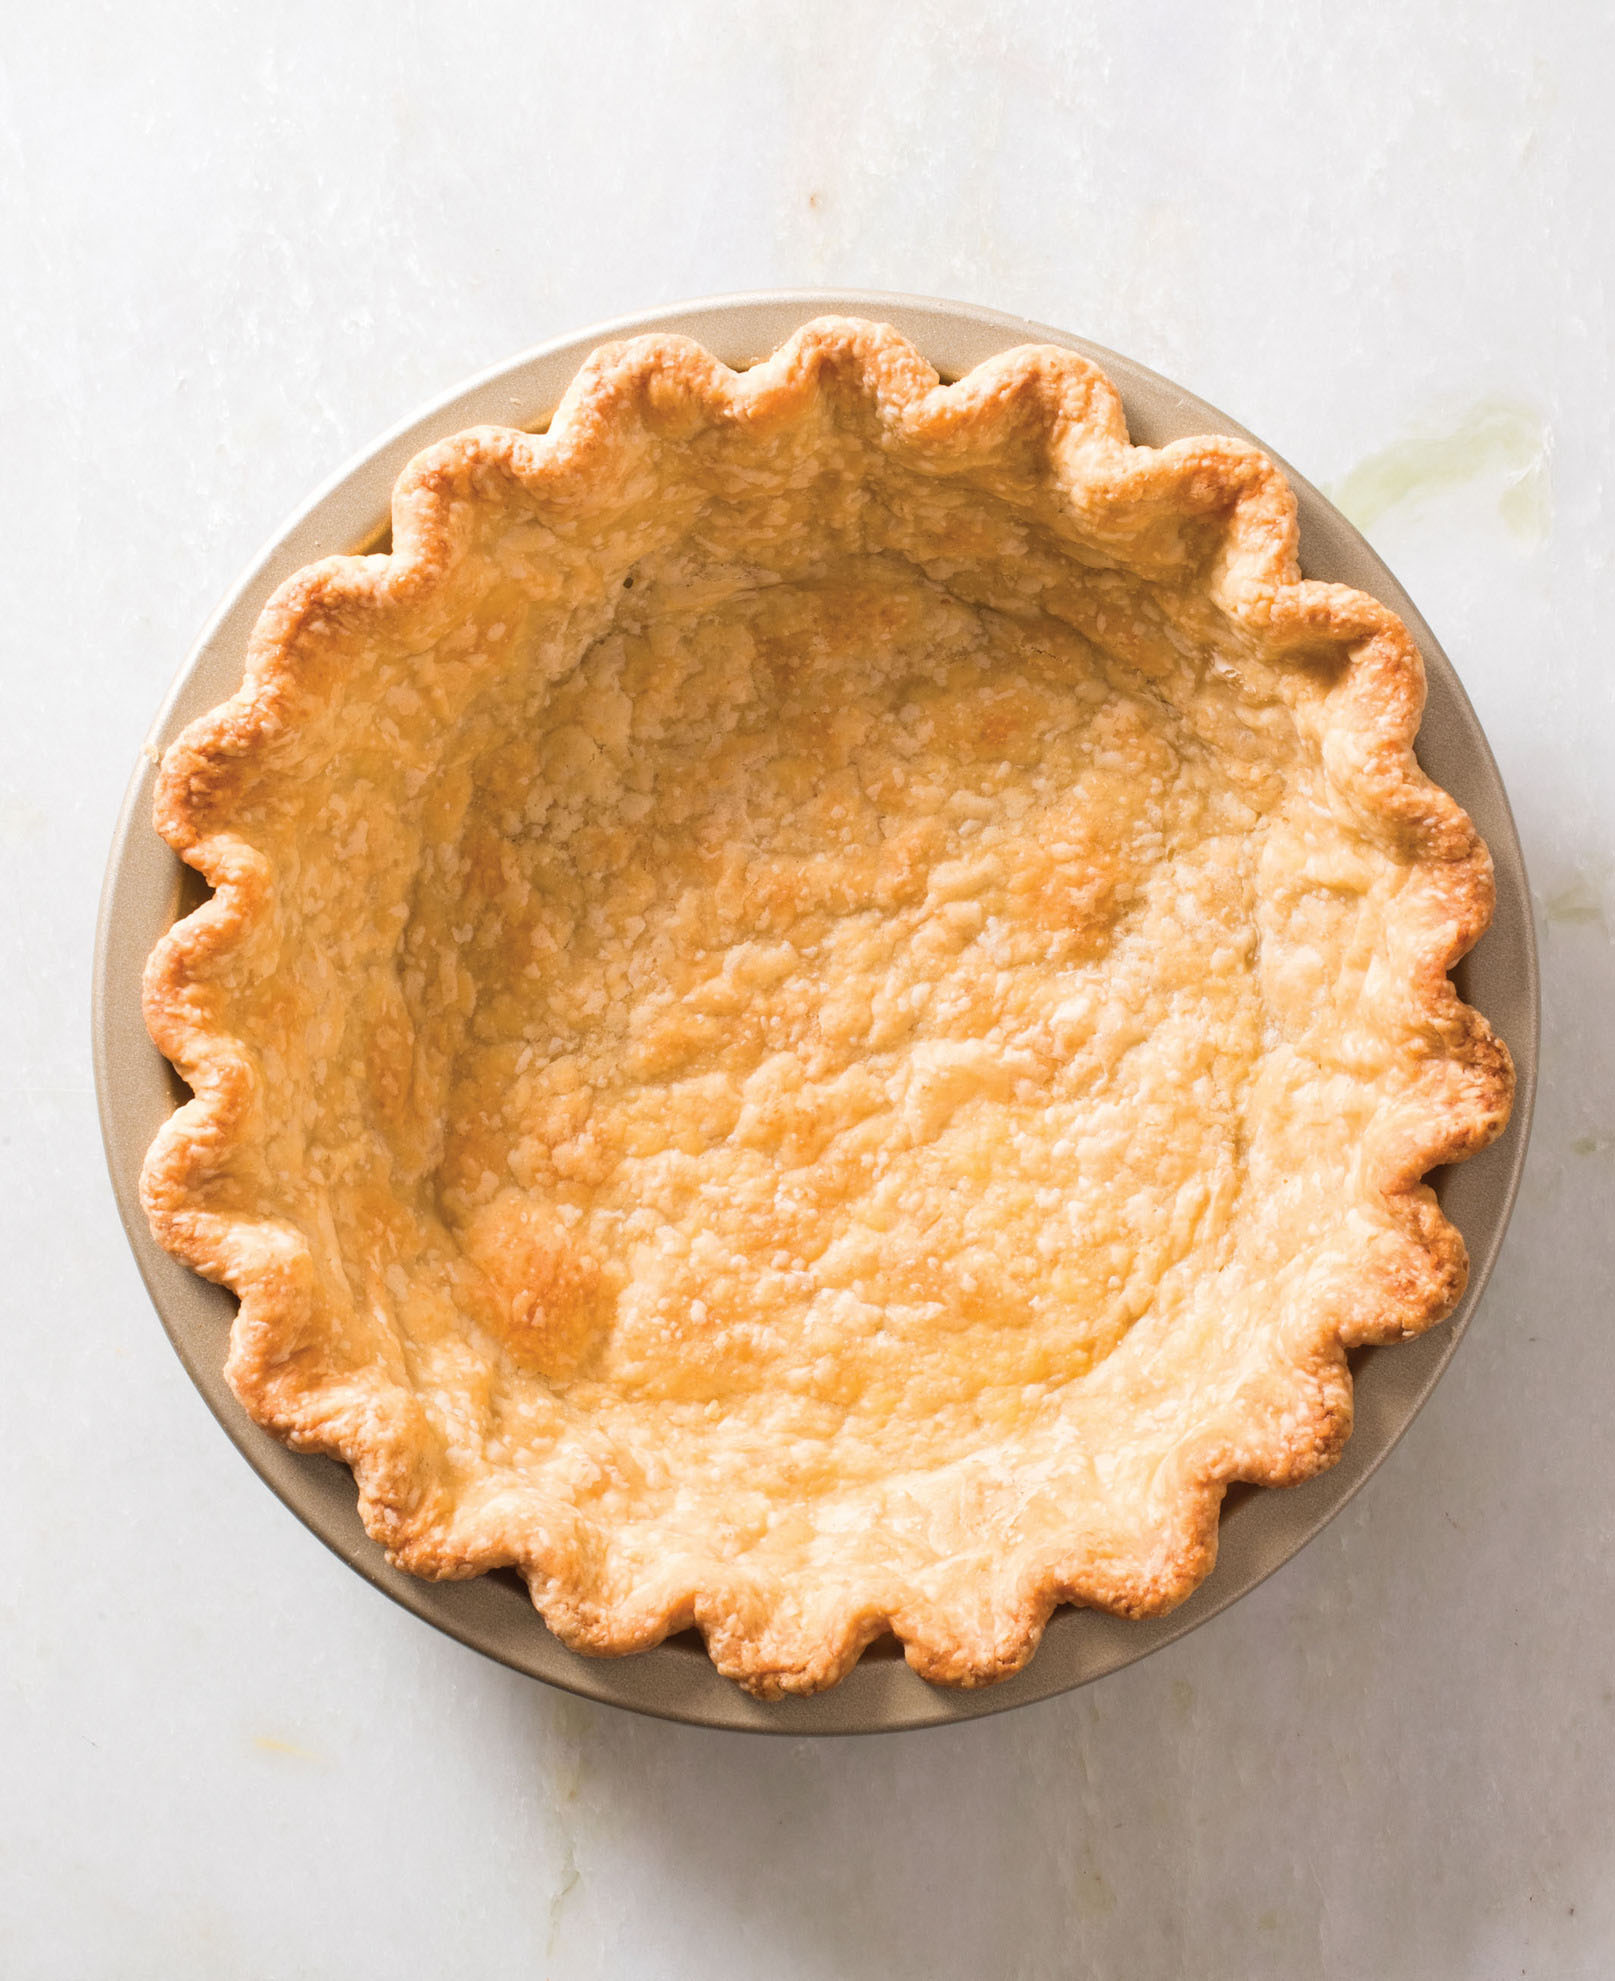
We process some of the butter with the flour and grate the rest into the dough to create a crust that bakes up tender, crisp, and shatteringly flaky.
TAKING THE ALL-BUTTER ROUTE
I’ve made plenty of pies with the 2010 dough, but honestly, I’m not crazy about using vodka and shortening. I don’t always have spirits on hand, and I prefer the richer flavor and cleaner mouthfeel of an all-butter pie crust. So I was intrigued when food writer J. Kenji Lopez-Alt, who developed the original recipe while working at Cook’s Illustrated, went on to create a shortening- and vodka-free version of the dough for the website Serious Eats. How could it work?
Quite well, actually. The new recipe called for just 6 tablespoons of water—the ¼ cup (4 tablespoons) called for in the original recipe plus 2 additional tablespoons to replicate the water content in ¼ cup of vodka. Even with less water, I found the dough only a little harder to roll out than the original, and it baked up just as tender and flaky.
Turns out that the quirky mixing method was much more important than I’d initially realized. Thoroughly processing a lot of the flour with all the fat effectively waterproofed that portion of the flour, making it difficult for its proteins to hydrate enough to form gluten. Only the remaining cup of flour that was pulsed into the paste was left unprotected and therefore available to be hydrated. The result was a limited gluten network, which produced a very tender crust even without the vodka.
And how did Lopez-Alt’s recipe work so well even without shortening? Well, shortening can be valuable in pie dough because it’s pliable even when cold, so it flattens into thin sheets under the force of the rolling pin more readily than cold, brittle butter does. But the flour-and-butter paste in this dough also rolls out more easily than butter alone would, so with the paste mixing method there’s no shortening required.
A GRATE SOLUTION
There’s no denying that the mixing method is a real game changer, but the crust it produces has a couple of faults. When I make pie dough the old-fashioned way I always get a nice sharp edge and a shatteringly flaky crust, but the edges of crusts made using the paste method usually slump a bit in the oven, even when I’m hypervigilant about chilling the formed crust. And that flakiness, which looks so impressive when you break the crust apart, doesn’t hold up when you eat it. The crust is a bit too tender, so the flakes disintegrate too readily on the palate.
Luckily, I thought I might know a way to fix both problems with one solution: I made a dough with a full ½ cup of water. My hope was that it would actually produce a little more gluten, thus giving the baked crust more structure and true crispness.
With all that water, the dough was as easy to roll as the vodka crust had been, and the slightly increased gluten gave the baked crust a more defined edge. But the crust was still a bit too tender for my taste. Maybe the best way to decrease the tenderizing effect of the butter was simply to decrease the butter.
I had been using two-and-a-half sticks of butter to equal the amount of fat in the vodka pie crust. I tried cutting back to an even two sticks, but that crust baked up hard and tough and felt stale right out of the oven. It was just too lean; I’d have to bring the butter back up to two-and-a-half sticks.
But something was bugging me: I’d made plenty of traditionally mixed all-butter pie crusts with an equally high proportion of fat. These doughs were challenging to roll out but the finished crusts always boasted just the right balance of crispness and tenderness. Why was this one so delicate?
And then I realized: In the traditional method much of the butter is left in discrete pieces that enrich the dough without compromising gluten development, but in my new crust, every bit of the butter was worked in. Perhaps the answer was to use the same amount of butter overall but to use less butter in the paste and to make sure that some of the butter remained in pieces.
Cutting the butter into very small pieces wasn’t feasible, but what if I grated it? I gave it a try, shredding 4 tablespoons of butter on a box grater. To ensure that those pieces stayed firm enough not to mix with the flour, I froze them. Meanwhile, I processed the remaining two sticks into the dry ingredients. After breaking up the paste, I pulsed in the remaining flour, transferred the mixture to a bowl, and tossed in the grated butter. Finally, I folded in ½ cup of ice water, which was absorbed by the dry flour that coated the dough chunks and the grated butter.
After a 2-hour chill, the dough rolled out beautifully. The fat-rich paste and the shredded butter–flour mixture swirled together, and, once baked, the crust held a perfect, crisp edge and was rich-tasting while being both tender and truly flaky.
Now that I have an all-butter pie dough that’s a cinch to roll out, I’m ready to adopt a new tradition.
Foolproof All-Butter Dough for Double-Crust Pie
MAKES ONE 9-INCH DOUBLE CRUST
Be sure to weigh the flour for this recipe. In the mixing stage, this dough will be more moist than most pie doughs, but as it chills it will absorb a lot of excess moisture. Roll the dough on a well-floured counter.
20 tablespoons (2½ sticks) unsalted butter, chilled
2½ cups (12½ ounces) all-purpose flour
2 tablespoons sugar
1 teaspoon salt
½ cup ice water
1. Grate 4 tablespoons butter on large holes of box grater and place in freezer. Cut remaining 16 tablespoons butter into ½-inch cubes.
2. Pulse 1½ cups flour, sugar, and salt in food processor until combined, 2 pulses. Add cubed butter and process until homogeneous paste forms, 40 to 50 seconds. Using your hands, carefully break paste into 2-inch chunks and redistribute evenly around processor blade. Add remaining 1 cup flour and pulse until mixture is broken into pieces no larger than 1 inch (most pieces will be much smaller), 4 to 5 pulses. Transfer mixture to medium bowl. Add grated butter and toss until butter pieces are separated and coated with flour.
3. Sprinkle ¼ cup ice water over mixture. Toss with rubber spatula until mixture is evenly moistened. Sprinkle remaining ¼ cup ice water over mixture and toss to combine. Press dough with spatula until dough sticks together. Use spatula to divide dough into 2 portions. Transfer each portion to sheet of plastic wrap. Working with 1 portion at a time, draw edges of plastic over dough and press firmly on sides and top to form compact, fissure-free mass. Wrap in plastic and form into 5-inch disk. Repeat with remaining portion; refrigerate dough for at least 2 hours or up to 2 days. Let chilled dough sit on counter to soften slightly, about 10 minutes, before rolling. (Wrapped dough can be frozen for up to 1 month. If frozen, let dough thaw completely on counter before rolling.)
variation
Foolproof All-Butter Dough for Single-Crust Pie
MAKES ONE 9-INCH SINGLE CRUST
Be sure to weigh the flour for this recipe. This dough will be more moist than most pie doughs, but as it chills it will absorb a lot of excess moisture. Roll the dough on a well-floured counter.
10 tablespoons unsalted butter, chilled
1¼ cups (6¼ ounces) all-purpose flour
1 tablespoon sugar
½ teaspoon salt
¼ cup ice water
1. Grate 2 tablespoons butter on large holes of box grater and place in freezer. Cut remaining 8 tablespoons butter into ½-inch cubes.
2. Pulse ¾ cup flour, sugar, and salt in food processor until combined, 2 pulses. Add cubed butter and process until homogeneous paste forms, about 30 seconds. Using your hands, carefully break paste into 2-inch chunks and redistribute evenly around processor blade. Add remaining ½ cup flour and pulse until mixture is broken into pieces no larger than 1 inch (most pieces will be much smaller), 4 to 5 pulses. Transfer mixture to medium bowl. Add grated butter and toss until butter pieces are separated and coated with flour.
3. Sprinkle 2 tablespoons ice water over mixture. Toss with rubber spatula until mixture is evenly moistened. Sprinkle remaining 2 tablespoons ice water over mixture and toss to combine. Press dough with spatula until dough sticks together. Transfer dough to sheet of plastic wrap. Draw edges of plastic over dough and press firmly on sides and top to form compact, fissure-free mass. Wrap in plastic and form into 5-inch disk. Refrigerate dough for at least 2 hours or up to 2 days. Let chilled dough sit on counter to soften slightly, about 10 minutes, before rolling. (Wrapped dough can be frozen for up to 1 month. If frozen, let dough thaw completely on counter before rolling.)
Deep-dish apple pies were traditionally baked without a bottom crust in casserole dishes, the generous filling blanketed with a layer of thick, flaky pastry. Nowadays, it is more common to find double-crust deep-dish apple pies, with the apples nestled between two layers of pastry. Unfortunately, these pies often bear little resemblance to their name, instead looking suspiciously like your standard apple pie. But I didn’t want a thin slice of plain old apple pie; I wanted a towering wedge of tender, juicy apples, fully framed by a buttery, flaky crust.
After foraging for recipes that met my specifications for deep-dish—a minimum of 4 pounds of apples as opposed to the meager 2 pounds in a standard pie—I realized that, while a standard apple pie may be juicy, most deep-dish pies are downright flooded with liquid. As a result, the bottom crust becomes a pale, soggy mess. In addition, the crowd of apples tends to cook unevenly, with mushy edges surrounding a crunchy center. Less serious—but no less annoying—is the gaping hole left between the apples (which shrink considerably) and the arching top crust, which makes it impossible to slice and serve a neat piece of pie.
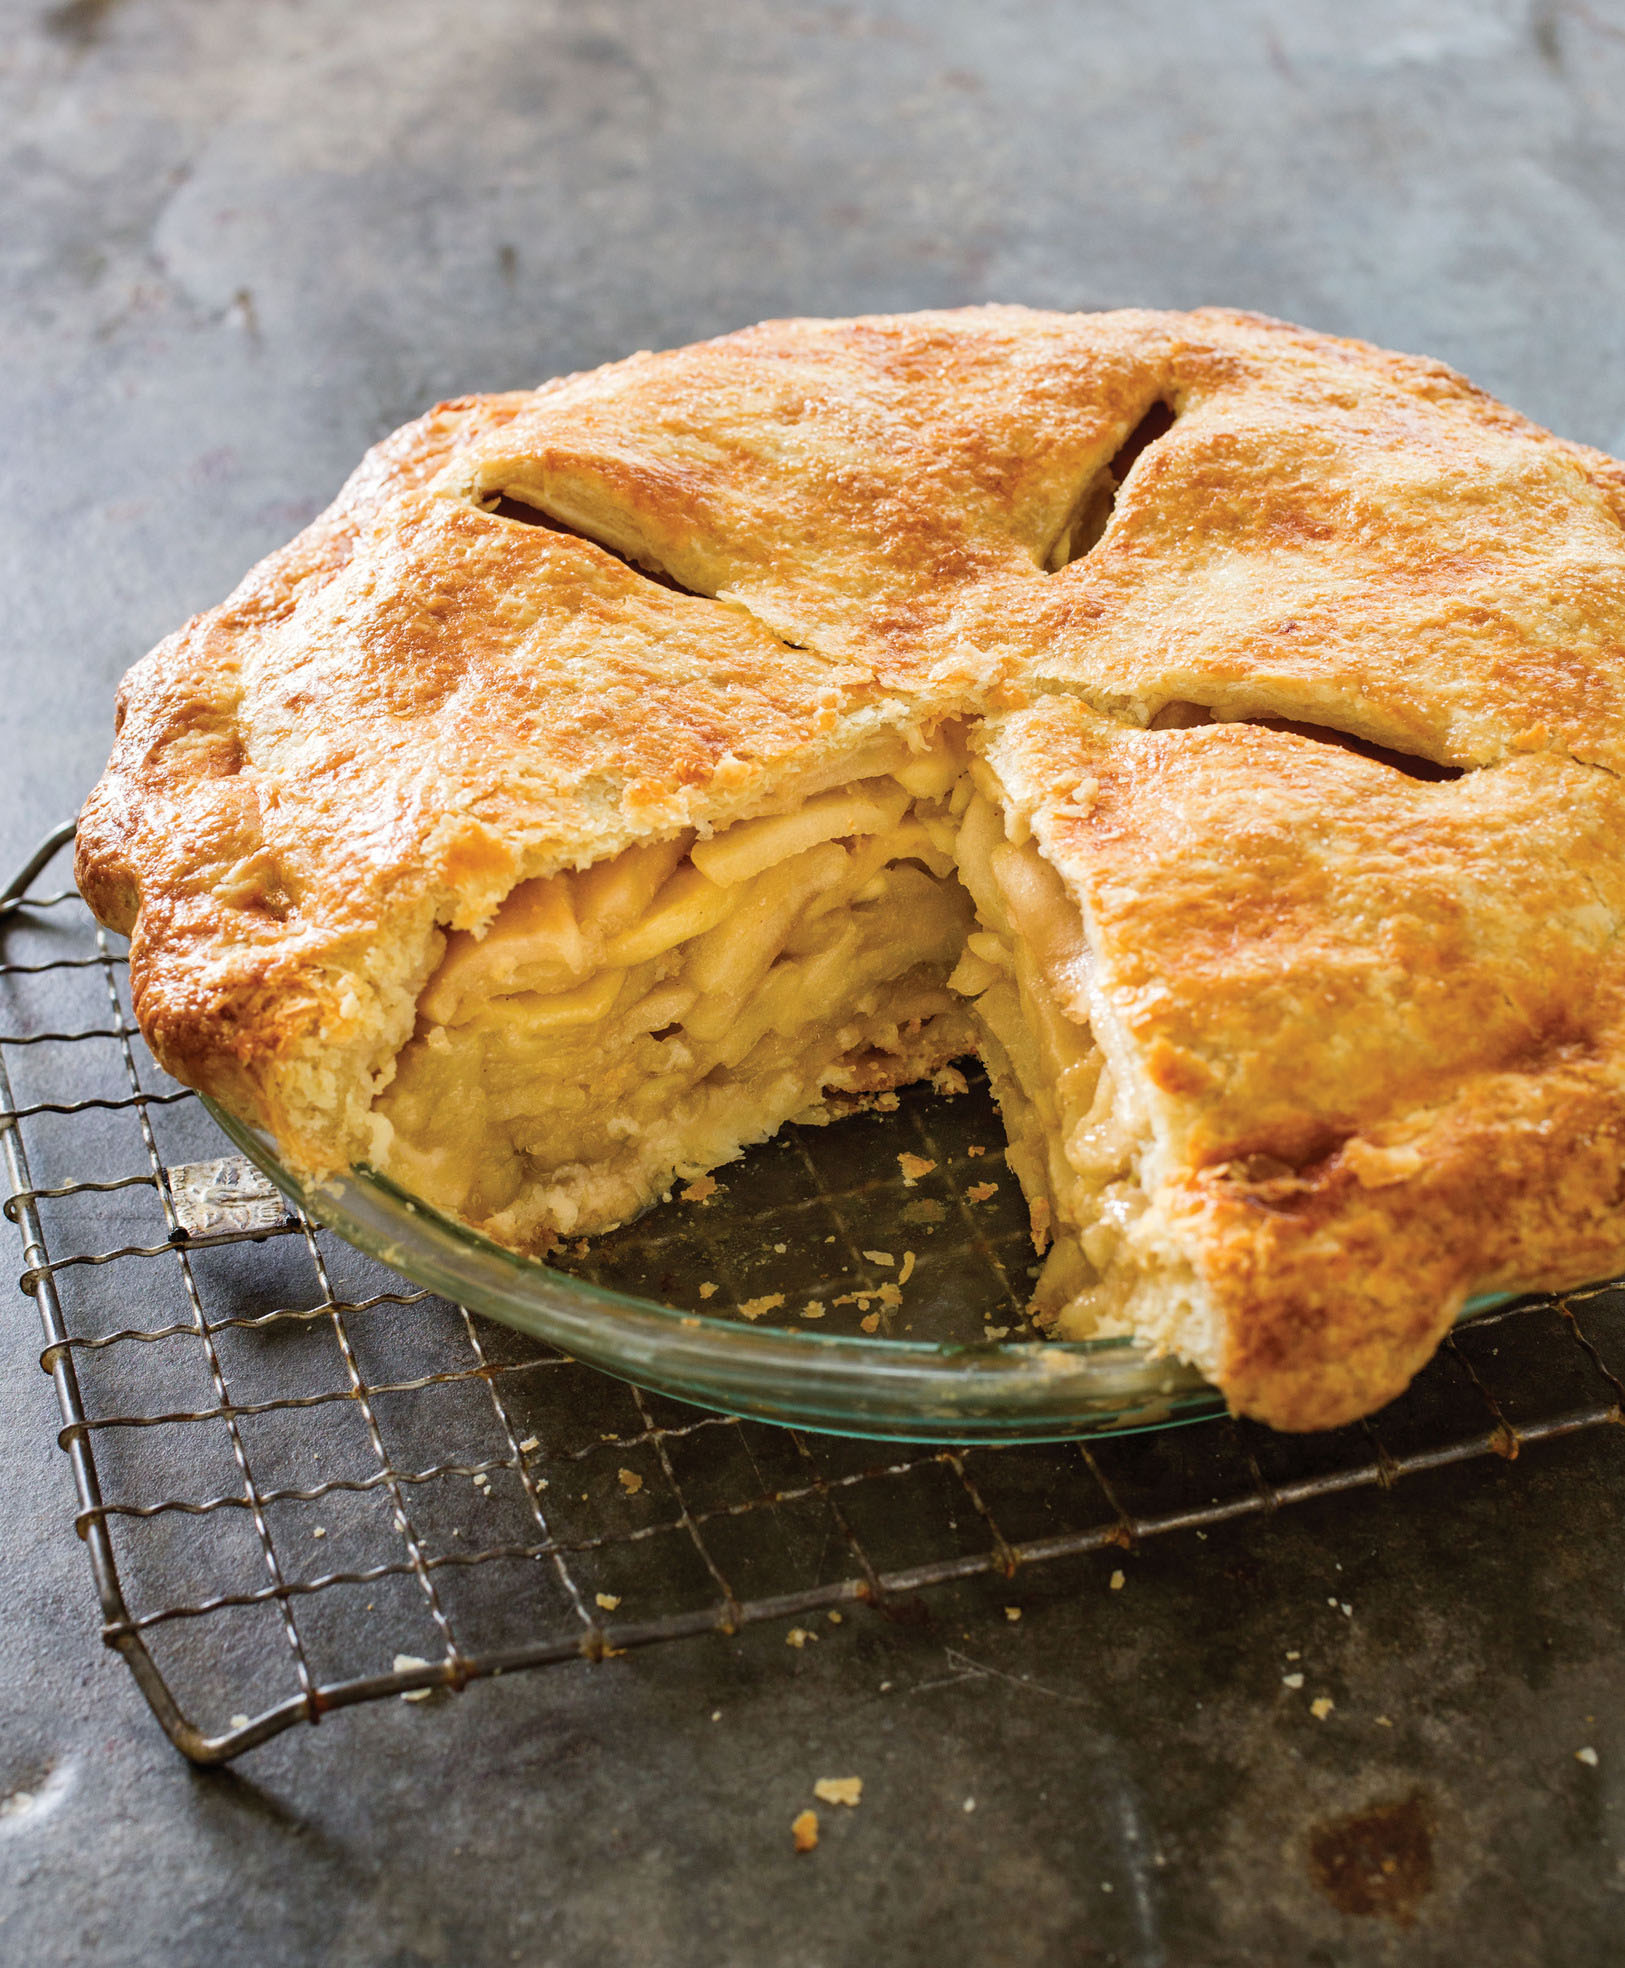
Sautéing the apples on the stovetop before loading them into the crust eliminates excess moisture and prevents gaps in the finished pie.
After a week of rescue efforts, I had made little progress. My failed attempts included slicing the apples into thick chunks and thin slices, cutting large vents in the pie dough before baking to promote steam release, and baking the pies at different temperatures. I tried moving the pie to the very bottom rack of the oven. No matter what I tried, I was confronted with a soupy filling and soggy crust. To sop up the copious amount of liquid, I added a thickening agent. But so much thickener (flour or cornstarch) was required to dam the flood that it muddied the bright flavor of the apples.
THE PECTIN PROBLEM
During my research, I had come across recipes that called for sautéing the apples before assembling them in the pie, the idea being to both extract juice and cook the apples more evenly. Although this logic seemed counterintuitive (how could cooking the apples twice cause them to become anything but insipid and mushy?), I forged ahead. After browning the apples in a hot skillet (in two batches to accommodate the large volume), I made yet another pie and then crossed my fingers. As expected, the apples were disappointingly mealy and soft, especially the exteriors, which had been seared in the hot pan. But this pie did deliver on a couple of counts: In addition to the absence of juice flooding the bottom of the pie plate, it offered a nicely browned bottom crust.
Could I keep the apples from disintegrating if I tried this method with a gentler hand? I dumped the whole mound into a large Dutch oven along with some granulated sugar (to flavor the apples and extract moisture) and then covered the pot to promote more even cooking. With frequent stirring over a medium flame for 15 to 20 minutes, the apples were tender yet still held their shape. After cooling the apples (so the butter in the crust would not melt immediately) and draining them, I baked the pie, which was again free of excess juice and sported the same browned bottom as before. This time, however, the apples weren’t mealy—they were miraculously tender.
After some digging, I discovered that apples undergo a significant structural change when held at moderately warm temperatures for 20 to 30 minutes. Between 120 and 140 degrees, the pectin is converted into a more heat-stable form. (While pectin provides structure in the raw fruit, it breaks down under the high heat of sautéing.) Once an adequate amount of pectin has been stabilized at low heat (as it apparently was on the stovetop), the apples can tolerate the heat from additional cooking (in the pie and in the oven) without becoming excessively soft.
To top it off, because the apples were shrinking before going into the pie rather than after, I had inadvertently solved the problem of the maddening gap, too. The top crust now remained united with the rest of the pie, and slicing was a breeze.
GETTING IN DEEP
Finally, with a cooking technique that produced picture-perfect results, it was time to adjust flavors. I snuck in another pound of apples (bringing the total to 5 pounds) to compensate for the bulk lost during stovetop cooking. Tart apples, such as Granny Smiths and Empires, were well liked for their brash flavor, but it was a one-dimensional profile. To achieve a fuller, more balanced flavor, I found it necessary to add a sweeter variety, such as Golden Delicious or Braeburn. Another important factor in choosing the right apple was texture. Even over the gentle heat of the stovetop, softer varieties such as McIntosh broke down and turned to mush.
With the right combination of apples, heavy flavorings were gratuitous. Some light brown sugar and granulated sugar, as well as a pinch of salt and a squeeze of lemon juice, heightened the flavor of the apples. After sampling the gamut of spices, tasters were content with just an unimposing hint of cinnamon. The perfect slice was no longer a deep-dish apple pie in the sky but a reality, sitting up nice and tall on my plate.
SERVES 8
If desired, you can substitute tart Empire or Cortland apples for the Granny Smith apples and sweet Jonagold, Fuji, or Braeburn apples for the Golden Delicious apples here.
1 recipe Foolproof All-Butter Dough for Double-Crust Pie
2½ pounds Granny Smith apples, peeled, cored, halved, and sliced ¼ inch thick
2½ pounds Golden Delicious apples, peeled, cored, halved, and sliced ¼ inch thick
½ cup (3½ ounces) plus 1 tablespoon granulated sugar
¼ cup packed (1¾ ounces) light brown sugar
½ teaspoon grated lemon zest plus 1 tablespoon juice
¼ teaspoon salt
⅛ teaspoon ground cinnamon
1 large egg white, lightly beaten
1. Roll 1 disk of dough into 12-inch circle on floured counter. Loosely roll dough around rolling pin and gently unroll it onto 9-inch pie plate, letting excess dough hang over edge. Ease dough into plate by gently lifting edge of dough with your hand while pressing into plate bottom with your other hand. Wrap dough-lined plate loosely in plastic wrap and refrigerate until dough is firm, about 30 minutes.
2. Roll other disk of dough into 12-inch circle on floured counter, then transfer to parchment paper–lined baking sheet; cover with plastic and refrigerate for 30 minutes.
3. Toss apples, ½ cup granulated sugar, brown sugar, lemon zest, salt, and cinnamon together in Dutch oven. Cover and cook over medium heat, stirring often, until apples are tender when poked with fork but still hold their shape, 15 to 20 minutes. Transfer apples and their juice to rimmed baking sheet and let cool completely, about 30 minutes.
4. Adjust oven rack to lowest position and heat oven to 425 degrees. Drain cooled apples thoroughly in colander set over bowl; reserve ¼ cup juice. Stir lemon juice into reserved juice.
5. Transfer apples to dough-lined plate, mounding them slightly in middle, and drizzle with apple juice mixture. Loosely roll remaining dough round around rolling pin and gently unroll it onto filling. Trim overhang to ½ inch beyond lip of plate. Pinch edges of top and bottom crusts firmly together. Tuck overhang under itself; folded edge should be flush with edge of plate. Crimp dough evenly around edge of plate using your fingers. Cut four 2-inch slits in top of dough. Brush surface with beaten egg white and sprinkle evenly with remaining 1 tablespoon granulated sugar.
6. Place pie on rimmed baking sheet and bake until crust is light golden brown, about 25 minutes. Reduce oven temperature to 375 degrees, rotate sheet, and continue to bake until juices are bubbling and crust is deep golden brown, 30 to 40 minutes longer. Let pie cool on wire rack until filling has set, about 2 hours; serve slightly warm or at room temperature.
THE INCREDIBLE SHRINKING APPLE
When raw apples are used in a deep-dish pie, they shrink to almost nothing, leaving a huge gap between the top crust and the filling. Precooking the apples eliminates the shrinking problem and actually helps the apples hold their shape once baked in the pie. This seems counterintuitive, but here’s what happens: When the apples are gently heated, their pectin is converted into a heat-stable form that prevents the apples from becoming mushy when cooked further in the oven. The key is to keep the temperature of the apples below 140 degrees during this precooking stage. Rather than cooking the apples in a skillet (where they are likely to become too hot), it’s best to gently heat the apples and seasonings in a large covered Dutch oven.

COOK BEFORE BAKING Precooking the apples converts their pectin into a heat-stable form that prevents them from becoming mushy—even after being cooked twice.
VARIETY MAKES A BETTER PIE
A combination of sweet and tart apples works best in pie. These six varieties, all of which retain their shape when cooked, were our favorites in kitchen tests.
SWEET

GOLDEN DELICIOUS
Sweet with buttery undertones

BRAEBURN
Takes on a pear-like flavor when baked

JONAGOLD
Intensely sweet and buttery
TART
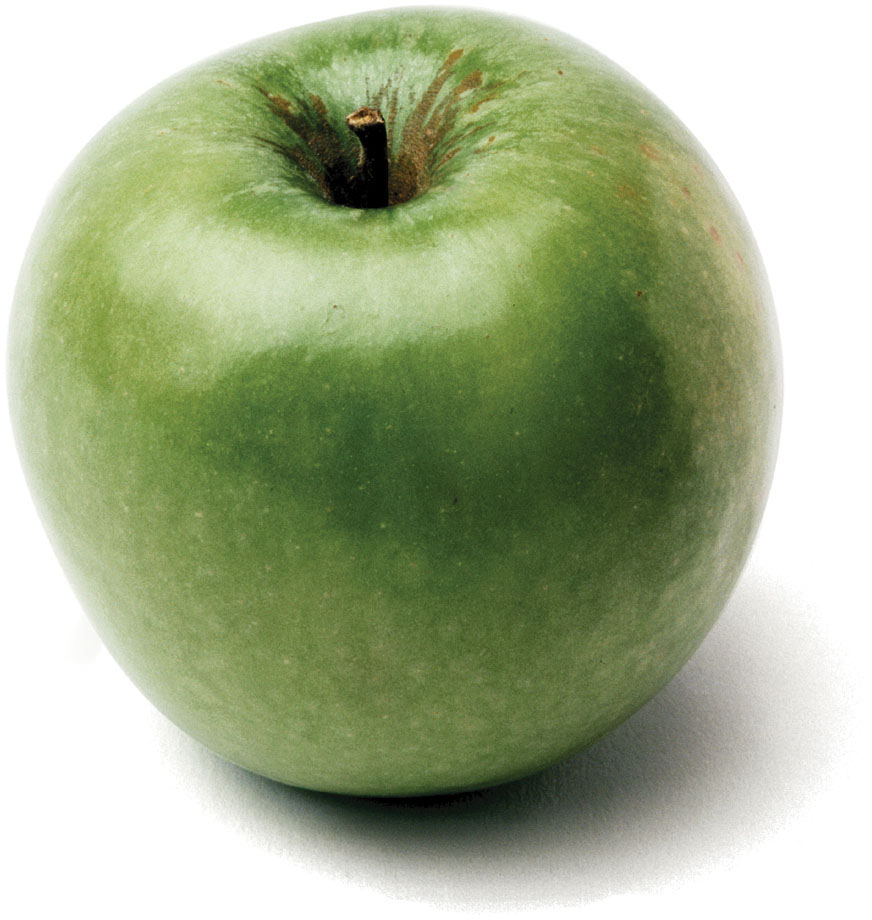
GRANNY SMITH
Vibrantly tart, holds shape best
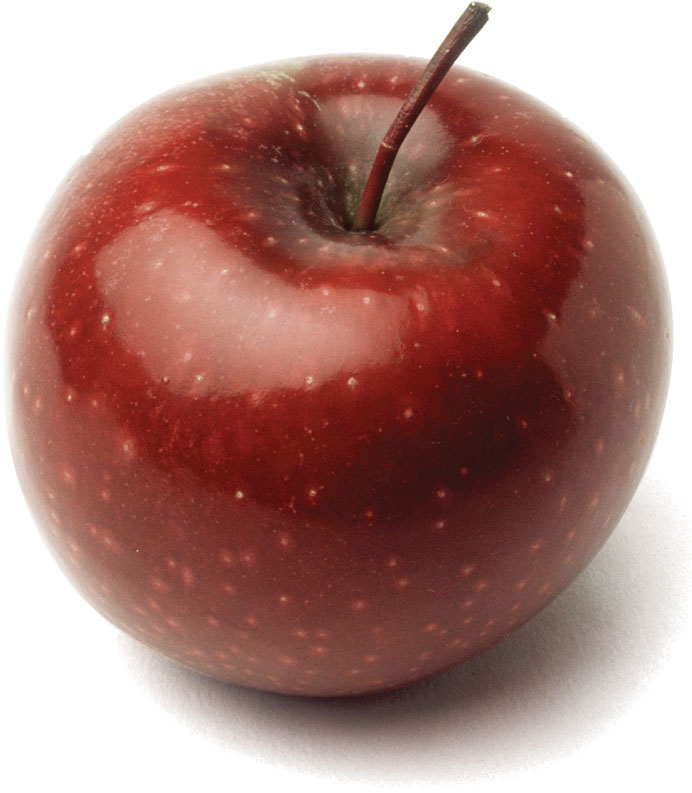
EMPIRE
Strong, complex, cider-like flavor

CORTLAND
Similar to Empire, but more tart than complex
While the almost-impossible juiciness of a ripe peach is the source of the fruit’s magnificence, it’s also the reason that fresh peaches can be tricky to use in pies. The hallmark of any fresh fruit pie is fresh fruit flavor, but ripe peaches exude so much juice that they require an excess of flavor-dampening binders to create a filling that isn’t soup. Fresh peaches can also differ dramatically in water content, so figuring out how much thickener to add can be a guessing game from one pie to the next. Finally, ripe peaches are delicate, easily disintegrating into mush when baked.
I wanted to make a peach pie with tender yet intact fruit, and I wanted it to slice cleanly without being the least bit muddled, gluey, grainy, or cloudy.
For a cohesive filling with bright, clean flavor, we add a combination of pectin and cornstarch and mash a small portion of the peaches.
CREATING A CRUST
Before I could nail down the filling, I’d need a reliable crust. Experimenting with a few recipes taught me one thing: The fillings in pies with lattice-top crusts had far better consistencies than those in pies with solid tops, since the crosshatch allows moisture to evaporate during cooking.
The pliability of a typical double-crust pie dough makes it challenging to weave into a lattice; when making a lattice, it’s helpful to have a dough with a little more structure. Luckily, we have such a dough in our archives. A little extra water and a little less fat help create a sturdy dough that can withstand some extra handling. Just as important, this dough still manages to bake up tender and taste rich and buttery.
I also wanted to simplify the mechanics of building the lattice itself, which usually requires practice to create neat, professional-looking results, but I wanted a lattice that a novice baker could do perfectly. The best approach I found came from our Linzertorte, which skips the weaving in favor of simply laying one strip over the previous one in a pattern that allows some of the strips to appear woven. Freezing the strips for 30 minutes before creating the lattice made them easier to handle.
BOUND AND UNBOUND
Now it was time to get down to the fruit. Most recipes I’d tested called for tossing thinly sliced peaches with sugar and spices before throwing them into the pie crust and then putting the pie into the oven. But I’d noted that the peaches handled this way shed a lot of moisture before they even reached the oven, thanks to the sugar’s osmotic action on the slices. Sugar is hygroscopic—meaning it easily attracts water to itself—making it superbly capable of pulling juice out of the peaches’ cells. If I was going to gain control over the consistency of the filling, that’s where I’d need to start. Since osmosis occurs on the surface, one obvious tweak would be to make the peach slices relatively large to minimize total surface area. So instead of slicing the peaches thin, I cut them into quarters and then cut each of these into thick—but still bite-size—1-inch chunks.
I also let the sugared peaches macerate for a bit and then drained off the juice before tossing the fruit into the pie, adding back only enough juice to moisten—not flood—the filling. This would allow me to control how much liquid the peaches contributed from batch to batch. I tossed 3 pounds of peaches with ½ cup of sugar, 1 tablespoon of lemon juice, and a pinch of salt. When I drained the peaches 30 minutes later, they yielded more than ½ cup of juice. I settled on using just ½ cup to moisten the filling. To this I added just enough cinnamon and nutmeg to accent the flavor of the peaches without overshadowing it.
Now it was time to experiment with thickeners that would tighten up the fruit and juice while maintaining the illusion that nothing was in the pie but fresh peaches. Flour left the filling grainy and cloudy, while tapioca pearls never completely dispersed, leaving visible beads of gel behind. (Grinding the rock-hard tapioca pearls into finer grains helped but was a pain.) Potato starch and cornstarch each worked admirably up to a point, but after that they did not eliminate further runniness so much as turn the filling murky and gluey. More important, all these starches dulled the flavor of the peaches.
Maybe adding starch was not the best approach. I thought about apple pie, which barely needs any thickener to create a filling that slices cleanly. Apples are less juicy than peaches, but they also contain lots of pectin, which helps them hold on to their moisture and remain intact during baking. For my next test I stirred some pectin into my reserved peach juice, heated the mixture briefly on the stove, and then folded it into the peach chunks. This filling turned out smooth and clear and tasted brightly of peaches. But it was still runnier than I wanted. Adding more pectin would only make the filling bouncy. Then I thought back to our recipe for Fresh Strawberry Pie, which uses a combination of pectin and cornstarch. Could I find the sweet spot using both thickeners? Yes: Two tablespoons of pectin and 1 tablespoon of cornstarch left me with a filling that was smooth, clear, and moist without being soupy.
One problem remained: a tendency for the peach chunks to fall out of the pie slices. To fix this, I mashed a small amount of the macerated peaches to a coarse pulp with a fork and used it as a form of mortar to eliminate gaps and stabilize the filling.
At last, I had a fresh peach pie that looked perfect, tasted of fresh peaches, and sliced neatly.
Fresh Peach Pie
SERVES 8
If your peaches are too soft to withstand the pressure of a peeler, cut a shallow X in the bottom of the fruit, blanch them in a pot of simmering water for 15 seconds, and then shock them in a bowl of ice water before peeling.
3 pounds peaches, peeled, quartered, and pitted, each quarter cut into thirds
½ cup (3½ ounces) plus 3 tablespoons sugar
1 teaspoon grated lemon zest plus 1 tablespoon juice
⅛ teaspoon salt
2 tablespoons low- or no-sugar-needed fruit pectin
¼ teaspoon ground cinnamon
Pinch ground nutmeg
1 recipe Pie Dough for Lattice-Top Pie (recipe follows)
1 tablespoon cornstarch
1. Toss peaches, ½ cup sugar, lemon zest and juice, and salt in medium bowl. Let stand at room temperature for at least 30 minutes or up to 1 hour. Combine pectin, cinnamon, nutmeg, and 2 tablespoons sugar in small bowl and set aside.
2. Remove dough from refrigerator. Before rolling out dough, let it sit on counter to soften slightly, about 10 minutes. Roll 1 disk of dough into 12-inch circle on lightly floured counter. Transfer to parchment paper–lined baking sheet. With pizza wheel, fluted pastry wheel, or paring knife, cut round into ten 1¼-inch-wide strips. Freeze strips on sheet until firm, about 30 minutes.
3. Adjust oven rack to lowest position, place rimmed baking sheet on rack, and heat oven to 425 degrees. Roll other disk of dough into 12-inch circle on lightly floured counter. Loosely roll dough around rolling pin and gently unroll it onto 9-inch pie plate, letting excess dough hang over edge. Ease dough into plate by gently lifting edge of dough with your hand while pressing into plate bottom with your other hand. Leave any dough that overhangs plate in place. Wrap dough-lined pie plate loosely in plastic wrap and refrigerate until dough is firm, about 30 minutes.
4. Meanwhile, transfer 1 cup peach mixture to small bowl and mash with fork until coarse paste forms. Drain remaining peach mixture in colander set in large bowl. Transfer peach juice to liquid measuring cup (you should have about ½ cup liquid; if liquid measures more than ½ cup, discard remainder). Return peach pieces to bowl and toss with cornstarch. Transfer peach juice to 12-inch skillet, add pectin mixture, and whisk until combined. Cook over medium heat, stirring occasionally, until slightly thickened and pectin is dissolved (liquid should become less cloudy), 3 to 5 minutes. Remove skillet from heat, add peach pieces and peach paste, and toss to combine.
5. Transfer peach mixture to dough-lined pie plate. Remove dough strips from freezer; if too stiff to be workable, let stand at room temperature until malleable and softened slightly but still very cold. Lay 2 longest strips across center of pie perpendicular to each other. Using 4 shortest strips, lay 2 strips across pie parallel to 1 center strip and 2 strips parallel to other center strip, near edges of pie; you should have 6 strips in place. Using remaining 4 strips, lay each one across pie parallel and equidistant from center and edge strips. If dough becomes too soft to work with, refrigerate pie and dough strips until dough firms up.
6. Trim overhang to ½ inch beyond lip of pie plate. Press edges of bottom crust and lattice strips together and fold under. Folded edge should be flush with edge of pie plate. Crimp dough evenly around edge of pie using your fingers. Using spray bottle, evenly mist lattice with water and sprinkle with remaining 1 tablespoon sugar.
7. Place pie on preheated sheet and bake until crust is set and begins to brown, about 25 minutes. Rotate pie and reduce oven temperature to 375 degrees; continue to bake until crust is deep golden brown and filling is bubbly at center, 25 to 30 minutes longer. Let cool on wire rack for 3 hours before serving.
dough
Pie Dough for Lattice-Top Pie
FOR ONE 9-INCH LATTICE-TOP PIE
3 cups (15 ounces) all-purpose flour
2 tablespoons sugar
1 teaspoon salt
7 tablespoons vegetable shortening, cut into ½-inch pieces and chilled
10 tablespoons unsalted butter, cut into ¼-inch pieces and frozen for 30 minutes
10–12 tablespoons ice water
1. Process flour, sugar, and salt in food processor until combined, about 5 seconds. Scatter shortening over top and process until mixture resembles coarse cornmeal, about 10 seconds. Scatter butter over top and pulse until mixture resembles coarse crumbs, about 10 pulses. Transfer to bowl.
2. Sprinkle 5 tablespoons ice water over flour mixture. With rubber spatula, use folding motion to evenly combine water and flour mixture. Sprinkle 5 tablespoons ice water over mixture and continue using folding motion to combine until small portion of dough holds together when squeezed in palm of your hand, adding up to 2 tablespoons remaining ice water if necessary. (Dough should feel quite moist.) Turn out dough onto clean, dry counter and gently press together into cohesive ball. Divide dough into 2 even pieces and flatten each into 4-inch disk. Wrap disks tightly in plastic wrap and refrigerate for 1 hour or up to 2 days.
PEELING PEACHES
A sharp serrated peeler can make quick work of peeling soft, ripe fruit. If you don’t have one, you can blanch the fruit in boiling water. Score the bottom of the peach with an X before dropping it into the water. After 30 to 60 seconds, watch the skin around the X for signs of splitting and tearing. Remove the peach from the boiling water with a slotted spoon and plunge it into an ice bath to stop the cooking. Once the peach has cooled, pull it from the ice water and use a paring knife to help peel back the slippery skin, starting at the X. It should come off in large strips.
I’ve often wondered why apple pie beat out cherry as our national dessert. At their best, cherry pies are juicier, more colorful, and, in my opinion, just plain tastier than apple. It all boils down to a matter of availability. You can find decent apples year-round in even the most meagerly stocked supermarket, but cherry season is cruelly short—just a brief blossoming period during the early summer. And even when cherries are available, chances are they’re a sweet variety (usually crimson-colored Bing or red-yellow-blushed Rainier), not the rare, ruby-hued sour species prized for jams and pie-making.
What makes sour cherries such prime candidates for baking (most people find them too tart for snacking purposes) is their soft, juicy flesh and bright, punchy flavor that neither oven heat nor sugar can dull. Plumper sweet cherries, on the other hand, have mellower flavors and meaty, firm flesh—traits that make them ideal for eating straight off the stem but don’t translate well to baking. My challenge was obvious: Develop a recipe for sweet cherry pie with all the intense, jammy flavor and softened but still intact fruit texture of the best sour cherry pie.
SWEET AND SOUR
Before I abandoned sour cherries altogether, I needed to get my hands on one batch to help me understand how they function in pie compared with their sweeter cousins. With help from the U.S. Postal Service, I obtained a few pounds of the tart variety from an online retailer, baked them into a pie, and tasted it side by side with one made of supermarket sweet cherries. The difference was night-and-day. Compared with the sour cherry pie’s bracing acidity, the sweet cherry pie’s taste was beyond sweet; it was downright cloying. Even more problematic, the sweet cherries’ drier, relatively dense flesh failed to break down completely (even after an hour or more of baking) and resulted in a filling that called to mind slightly softened jumbo marbles, not fruit.
So I had two issues to resolve: taming the cherries’ sweetness, and getting them to break down to the proper juicy texture. To get my bearings, I made another pie. I combined 2 pounds of pitted fresh Bing cherries and 1 cup of sugar, stirred in 3 tablespoons of ground tapioca (tasters’ preferred thickener in earlier tests), poured the filling into a shell, and wove a traditional lattice-top crust to show off the fruit’s jewel-like shine. After it had baked and cooled, I offered my colleagues a bite. As I expected, nobody could taste past the sweetness. Figuring all that sugar wasn’t helping, I tried cutting back a few tablespoons at a time, but that only created a new problem: Since sugar draws moisture out of the cherries through osmosis, less of it made for a less juicy filling. A half-cup was as low as I could go without completely ruining the texture, but the filling still verged on candy sweetness.
By pureeing some of the cherries with plums and skipping the lattice crust, we create a flavorful and juicy pie with sweet cherries.
My only other option was to add another ingredient to offset the sweetness. A couple of splashes of bourbon—a classic pairing with cherries—helped, as did the acidity of fresh lemon juice, but these were minor tweaks, and adding more of either just made the pies taste boozy or citrusy. I even tried vinegar, hoping to more closely mimic the tartness of sour cherries, but tasters objected to the sharpness of even the smallest drop. As a last-ditch effort, I tried introducing alternative fruits: super-t art fresh cranberries (too bitter), tangy red grapes (too musty), and dried sour cherries (too chewy).
None of these ideas panned out, but the concept did get me thinking about other types of fruit. Cherries fall into the stone-fruit category, along with peaches, nectarines, and plums. Sweet-fleshed peaches and nectarines wouldn’t help me, but the tartness of plums might be worth a shot. For my next pie, I sliced a couple of plums into the filling, but their flesh was just as dense and resilient as the cherries’. No problem, I thought; this was nothing my trusty food processor couldn’t fix. I made another pie, this time pureeing the plums and mixing the resulting pulp with the cherries. Perfect! The flavor, now tangy and complex, was spot on, and nobody suspected my secret.
SEALING IN THE JUICES
Now that I’d crossed one challenge off my list, I was ready to tackle the sweet cherries’ overly firm texture. The problem was twofold: Not only were the cherries refusing to break down, as a result they also weren’t releasing enough juice to amply moisten the filling. As it turned out, the culprit was cellulose, the main structural component of fruit cells: Compared with sour cherries, the sweet variety contains a full 30 percent more cellulose, making the flesh more rigid.
Without a way to rid the cherries of that extra structure, I’d have to rely on more conventional techniques to soften the flesh. I was already macerating them in sugar before baking to help draw out some of their juices, but with their relatively thick skin, this technique wasn’t effective. Halving them helped considerably, since their juice was very easily drawn out of the exposed fleshy centers. Even better, the cut cherries collapsed more readily and turned out markedly softer in the finished pie, save for a few too many solid chunks. By tossing a portion of them (1 cup) into the food processor along with the plums (and straining the chewy skins out of the resulting pulp), I got a filling that was ideally soft, if a bit dry, and studded with a few still-intact cherry pieces. As a bonus, the pies I tested using a good brand of frozen sweet cherries—an easier alternative to pitting dozens of the fresh variety—baked up equally well, making this an any-season dessert.
I’d hoped that mashing and precooking the cherries with sugar would help release some fruit juices, but this technique actually caused moisture to evaporate through the crust’s ventilated top as it baked, leading to a drier pie. Then I realized: My problem wasn’t the fruit itself, but the lattice crust. Juice-gushing sour cherry and berry pies may benefit from the extra evaporation of a woven crust, but with these cherries I needed to keep a tighter lid on the available moisture. Rolling out a traditional disk of dough, I fitted it to the bottom pastry, neatly sealed the edges, and slid the whole assembly onto a baking sheet before putting it in the oven to ensure that the bottom crust crisped up before the fruit filling could seep through. An hour or so later, out came a gorgeously golden-brown, perfectly juicy (but not runny) pie. When my tasters began to line up for second helpings, I knew I’d finally gotten cherry pie in apple-pie order.
Sweet Cherry Pie
SERVES 8
Grind the tapioca to a powder in a spice grinder or mini food processor. You can substitute 2 pounds of frozen sweet cherries for the fresh cherries. If you are using frozen fruit, measure it frozen, but let it thaw before filling the pie. If not, you run the risk of partially cooked fruit and undissolved tapioca.
1 recipe Foolproof All-Butter Dough for Double-Crust Pie
2 red plums, quartered and pitted
2½ pounds fresh sweet cherries, pitted and halved
½ cup (3½ ounces) sugar
2 tablespoons instant tapioca, ground
1 tablespoon lemon juice
2 teaspoons bourbon (optional)
⅛ teaspoon salt
⅛ teaspoon ground cinnamon (optional)
2 tablespoons unsalted butter, cut into ¼-inch pieces
1 large egg, lightly beaten with 1 teaspoon water
1. Roll 1 disk of dough into 12-inch circle on floured counter. Loosely roll dough around rolling pin and gently unroll it onto 9-inch pie plate, letting excess dough hang over edge. Ease dough into plate by gently lifting edge of dough with your hand while pressing into plate bottom with your other hand. Wrap dough-lined plate loosely in plastic wrap and refrigerate until dough is firm, about 30 minutes. Roll other disk of dough into 12-inch circle on lightly floured counter, then transfer to parchment paper–lined baking sheet; cover with plastic and refrigerate for 30 minutes.
2. Adjust oven rack to lowest position and heat oven to 400 degrees. Process plums and 1 cup cherries in food processor until smooth, about 1 minute, scraping down sides of bowl as necessary. Strain puree through fine-mesh strainer into large bowl, pressing on solids to extract as much liquid as possible; discard solids. Stir remaining cherries; sugar; tapioca; lemon juice; bourbon, if using; salt; and cinnamon, if using, into puree. Let stand for 15 minutes.
3. Spread cherry mixture with its juices into dough-lined plate and scatter butter over top. Loosely roll remaining dough round around rolling pin and gently unroll it onto filling. Trim overhang to ½ inch beyond lip of plate. Pinch edges of top and bottom crusts firmly together. Tuck overhang under itself; folded edge should be flush with edge of plate. Crimp dough evenly around edge of plate using your fingers. Cut eight 1-inch slits in top of dough. Brush surface with egg mixture. Freeze pie for 20 minutes.
4. Place pie on rimmed baking sheet and bake until crust is light golden brown, about 30 minutes. Reduce oven temperature to 350 degrees, rotate sheet, and continue to bake until juices are bubbling and crust is deep golden brown, 35 to 50 minutes longer. Let pie cool completely on wire rack to allow juices to thicken, 2 to 3 hours. Serve.
KEYS TO JUICY, SWEET-TART CHERRY PIE
While some fruits (such as blueberries) gush excess juice when baked into a pie, sweet cherries such as Bing suffer the opposite problem: Their firm, meaty flesh holds on to juice and can lead to a too-dry filling.
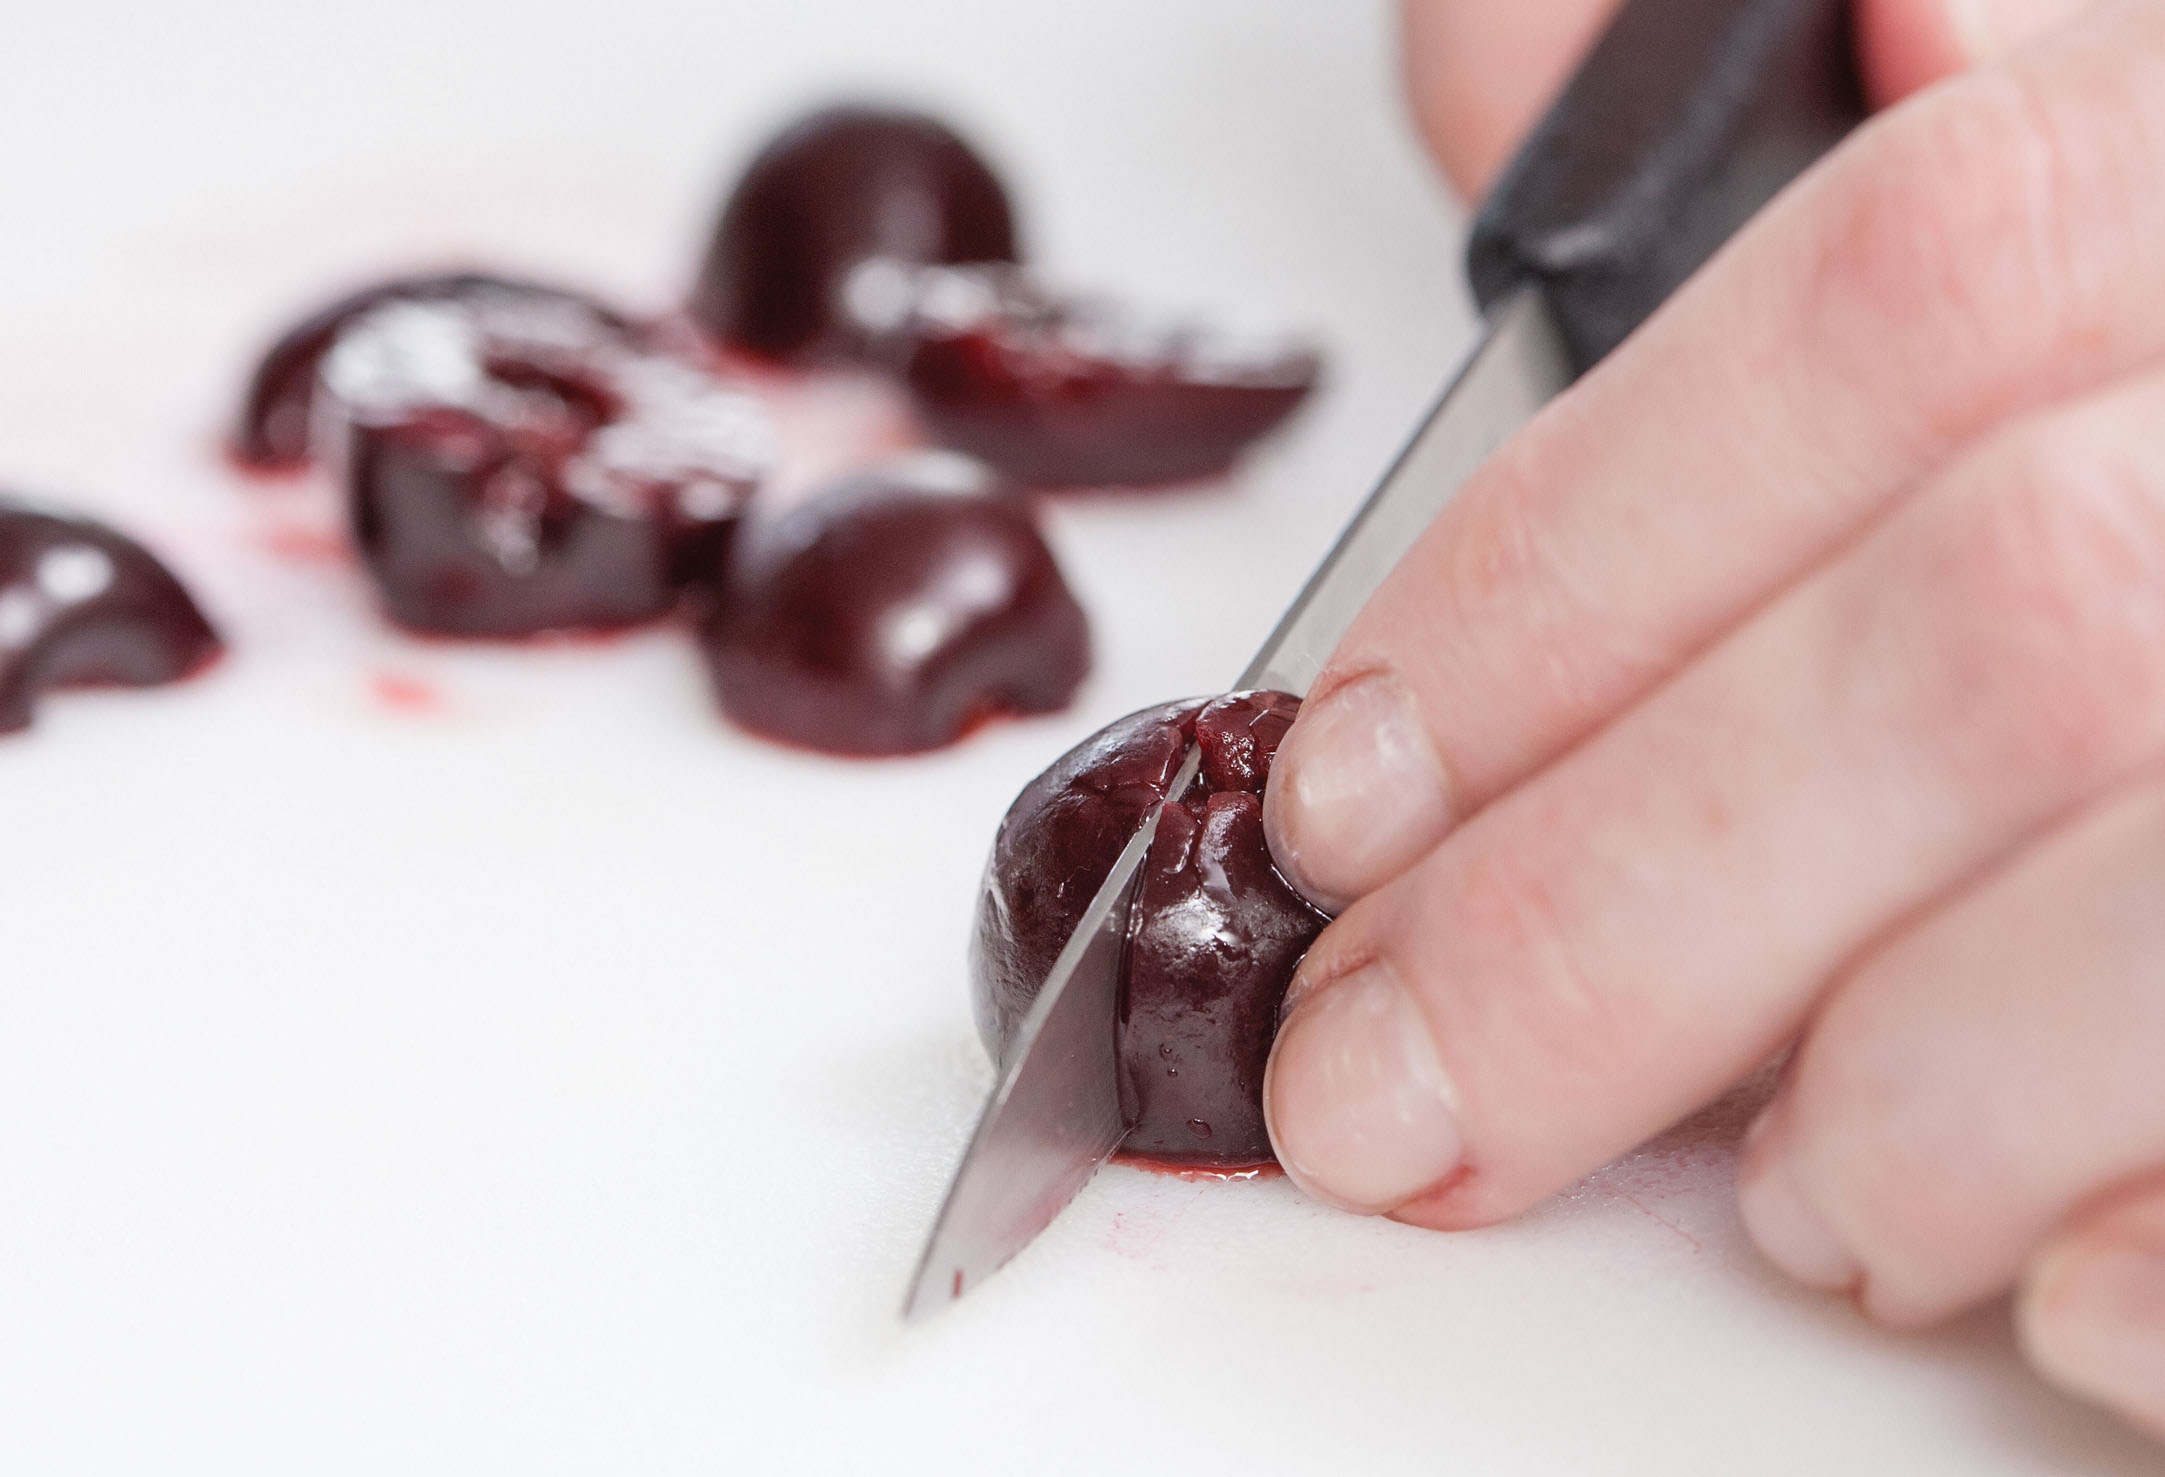
1. HALVE CHERRIES Halving the cherries exposes their dense, meaty flesh and helps them release more juice than if left whole.

2. GET PLUMMY To add tartness and juiciness, puree 1 cup cherries with two plums. Strain, adding the liquid to the halved cherries and discarding the solids.
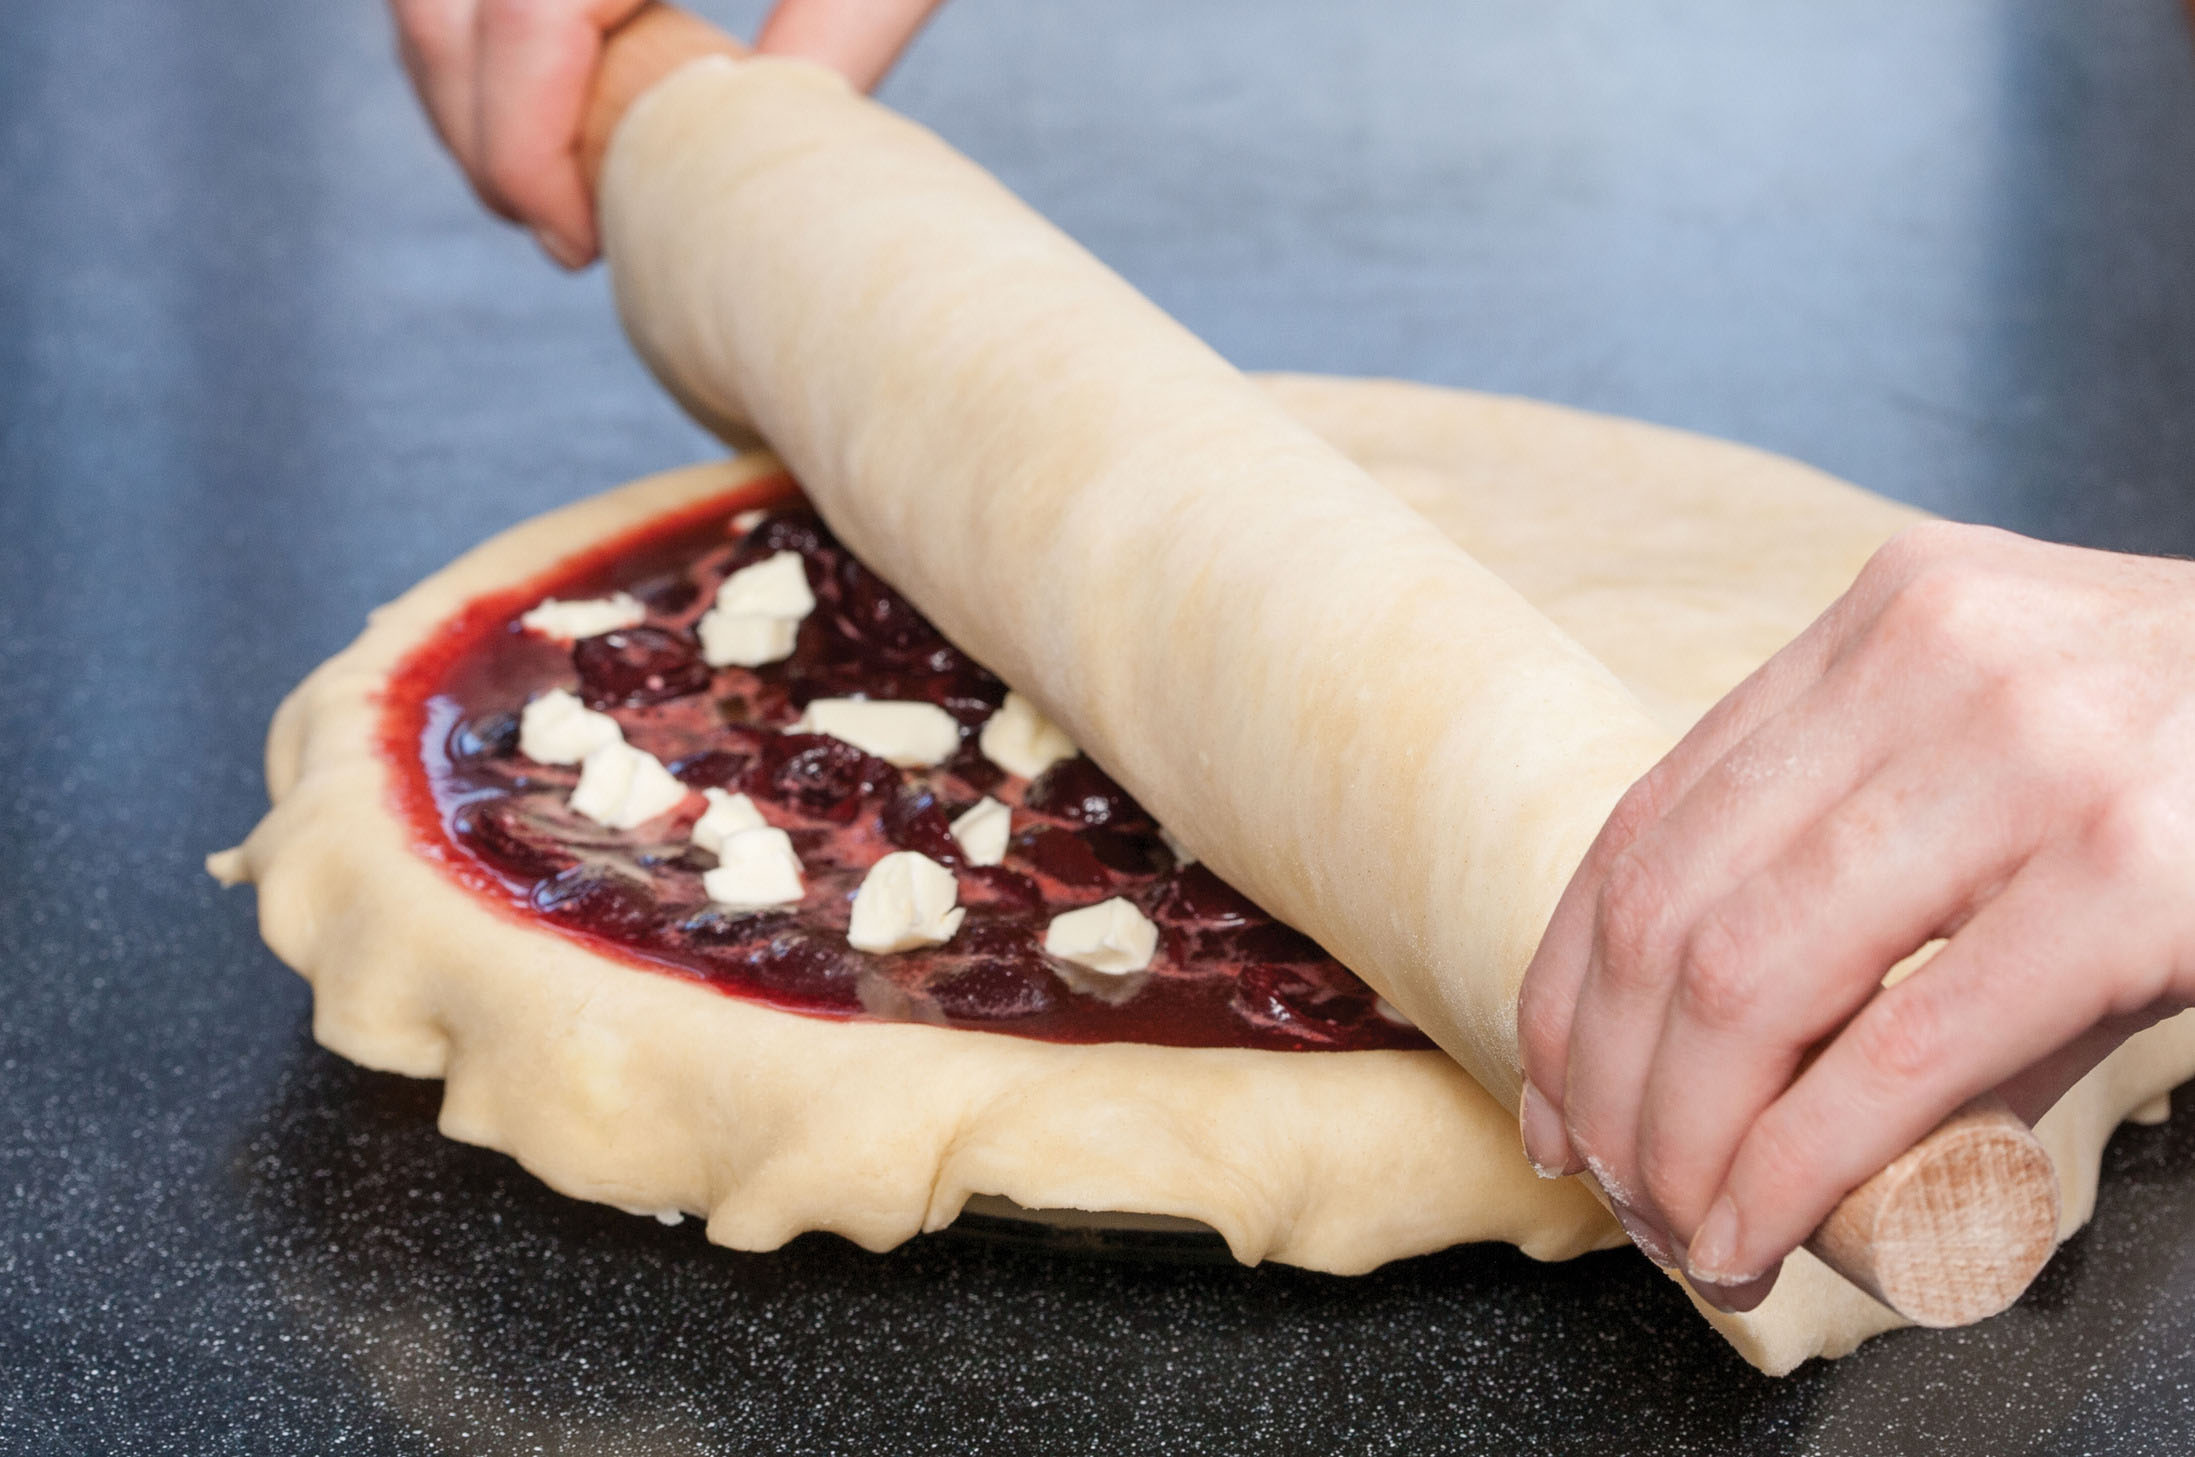
3. SKIP THE LATTICE A traditional lattice crust allows too much moisture to evaporate during baking; a closed crust helps keep juices inside.
William Faulkner once said, “You don’t love because; you love despite.” I love pecan pie more than most any other pie, despite its deep-seated problems. First off, the filling is just too sweet, both in an absolute sense and in relation to the other flavors of the pie. Can you taste the nuts? The buttery crust? Probably not; the sticky-sweet filling runs roughshod over the other components. As for that filling, it’s either curdled and separated or half-baked and soggy enough to prevent the bottom crust from baking. The pie I love, despite it all, can be wonderfully soft and smooth—almost like a cream pie—and is topped with a crunchy layer of pecans.
IN THE DETAILS
Pecan pies are prepared in a pretty uniform fashion. Corn syrup, sugar (granulated or brown), eggs, butter, and flavorings are mixed together, poured into a flaky pie shell, topped with pecans, and baked. Simple-sounding, perhaps, but each step includes various choices that will make or break the pie.
After testing a variety of different recipes, I was able to make some important decisions. The most successful recipes I tried called for partially baking the crust before adding the filling—an extra step, perhaps, but well worth it, because it ensured a well-browned, crisp crust. As for the filling, recipes were remarkably consistent, varying only in the details. That said, some did include thickeners like flour or cornstarch for stabilization, but I thought that the starchiness diminished the filling’s silky texture. For baking the assembled pie, a hot oven spelled disaster: The pies baked above 375 degrees set firm around the edges long before the center was even warmed through. Clearly, more moderate temperatures were in order. And finally, toasted pecans tasted a whole lot better than those left untoasted.
After all the problems I saw in my initial testing, I was most concerned with the texture of the filling; flavor would follow. I chose my favorite filling from those I had tested and set to work trying different oven temperatures and rack placements. While I knew that high-temperature baking was off the table, I quickly learned that too low could be just as bad. The filling took so long to firm up at 250 degrees that it rendered the formerly crisp brown crust soggy. Furthermore, the filling tended to separate, with a jelly-like layer on the bottom and a frothy cap on top. Above 300 degrees, however, the filling cooked in distinct concentric rings: The closer to the center, the softer it was.
TIME AND TEMPERATURE
Feeling a little flummoxed, I began looking at custard pie recipes to see how they solved the problems I couldn’t seem to overcome. One thing I was really surprised to learn was how early some recipes called for the pie to be pulled from the oven. I followed the instructions despite my apprehension and the pie’s jiggly tremor. As the pie cooled on the wire rack, a wonderful transformation occurred. The jiggly filling set up to the silky, smooth-as-could-be texture I sought. It appeared that the residual heat of the filling, pulled by conduction, cooked the center through. What was as loose as an egg white when pulled from the oven set up to a silky, tender filling a few hours later.
Another recipe I found tweaked the method further by heating the filling before pouring it into the crust. And the crust was hot, too—straight from the oven. These steps gave the cooking process a head start, and the results were the best yet, with the silkiest, most even texture and the crispiest crust, because the filling set up so fast in the oven.
With all this new information, I eagerly applied my findings to my pecan pie filling and produced the best pie yet. The flavor, however, still needed a little work. Hoping to mitigate the sweetness, I scaled back the amount of corn syrup typically used. I also chose dark brown sugar over granulated for its earthy, faintly bitter flavor. Butter added lushness to the filling, but too much made it greasy. After starting with one whole stick, I found that I preferred a filling with a little less—just 6 tablespoons total. Vanilla improved the filling’s flavor and brought out the pecans’ sweetness. I thought a teaspoon or so would do it, but a whopping tablespoon proved best. A generous ½ teaspoon of salt heightened the flavors and tied everything together.
Partially baking the crust and parcooking the filling before assembling the pie produces a silky filling and crisp crust.
I was thrilled with the pie but for one thing: the pecans. Left whole, they were too much of a mouthful, and I had difficulty cutting through them with a fork as I ate. Finely chopped nuts were easier to slice through and eat. This pecan pie is easy to love—without qualification. Still, there are many people who find pecan pie intrinsically too sweet. To them I recommend the soft, custard-like Maple Pecan Pie variation that follows—it might just be my favorite pie in the whole world.
SERVES 8
The crust must still be warm when the filling is added. Serve with vanilla ice cream or whipped cream, if desired.
1 recipe Foolproof All-Butter Dough for Single-Crust Pie
6 tablespoons unsalted butter, cut into 1-inch pieces
1 cup packed (7 ounces) dark brown sugar
½ teaspoon salt
3 large eggs
1 tablespoon vanilla extract
2 cups pecans, toasted and chopped fine
1. Adjust oven rack to lowest position and heat oven to 425 degrees. Roll dough into 12-inch circle on floured counter. Loosely roll dough around rolling pin and gently unroll it onto 9-inch pie plate, letting excess dough hang over edge. Ease dough into plate by gently lifting edge of dough with your hand while pressing into plate bottom with your other hand. Wrap dough-lined plate loosely in plastic wrap and refrigerate until dough is firm, about 30 minutes.
2. Trim overhang to ½ inch beyond lip of plate. Tuck overhang under itself; folded edge should be flush with edge of plate. Crimp dough evenly around edge of plate using your fingers. Wrap dough-lined plate loosely in plastic and refrigerate until dough is firm, about 15 minutes.
3. Line chilled pie shell with parchment paper or double layer of aluminum foil, covering edges to prevent burning, and fill with pie weights. Bake until pie dough looks dry and is pale in color, about 15 minutes, rotating plate halfway through baking. Remove parchment and weights and continue to bake crust until golden brown, 4 to 7 minutes longer. Transfer plate to wire rack. (Crust must still be warm when filling is added.)
4. While pie shell is baking, melt butter in heatproof bowl set in skillet of barely simmering water. Remove bowl from skillet and stir in sugar and salt until butter is absorbed. Whisk in eggs, then corn syrup and vanilla until smooth. Return bowl to skillet and stir until mixture is shiny, hot to touch, and registers 130 degrees. Off heat, stir in pecans.
5. As soon as crust comes out of oven, adjust oven rack to lower-middle position and reduce oven temperature to 275 degrees. Pour pecan mixture into warm crust. Bake pie on rimmed baking sheet until filling looks set but yields like gelatin when gently pressed with back of spoon, 50 minutes to 1 hour, rotating sheet halfway through baking. Let pie cool on wire rack until filling has set, about 2 hours; serve slightly warm or at room temperature. (Cooled pie can be wrapped tightly in plastic and stored at room temperature for up to 2 days. To serve warm, let cool as directed, then transfer to 250-degree oven for about 15 minutes before serving.)
variations
Maple syrup yields a more custard-like pie. Toasted walnuts can be substituted for the pecans. Use dark amber maple syrup here.
In step 4, decrease butter to 4 tablespoons and pecans to 1½ cups. Substitute ½ cup granulated sugar for brown sugar and 1 cup maple syrup for corn syrup and vanilla.
Buttermilk Pecan Pie with Raisins
Substitute 1½ cups granulated sugar for brown sugar and ⅔ cup buttermilk for corn syrup and vanilla. Reduce pecans to ½ cup and stir into filling with ½ cup finely chopped raisins.
CRIMPING A SINGLE CRUST PIE SHELL
Our easy crimping technique makes a decorative, sturdy edge.
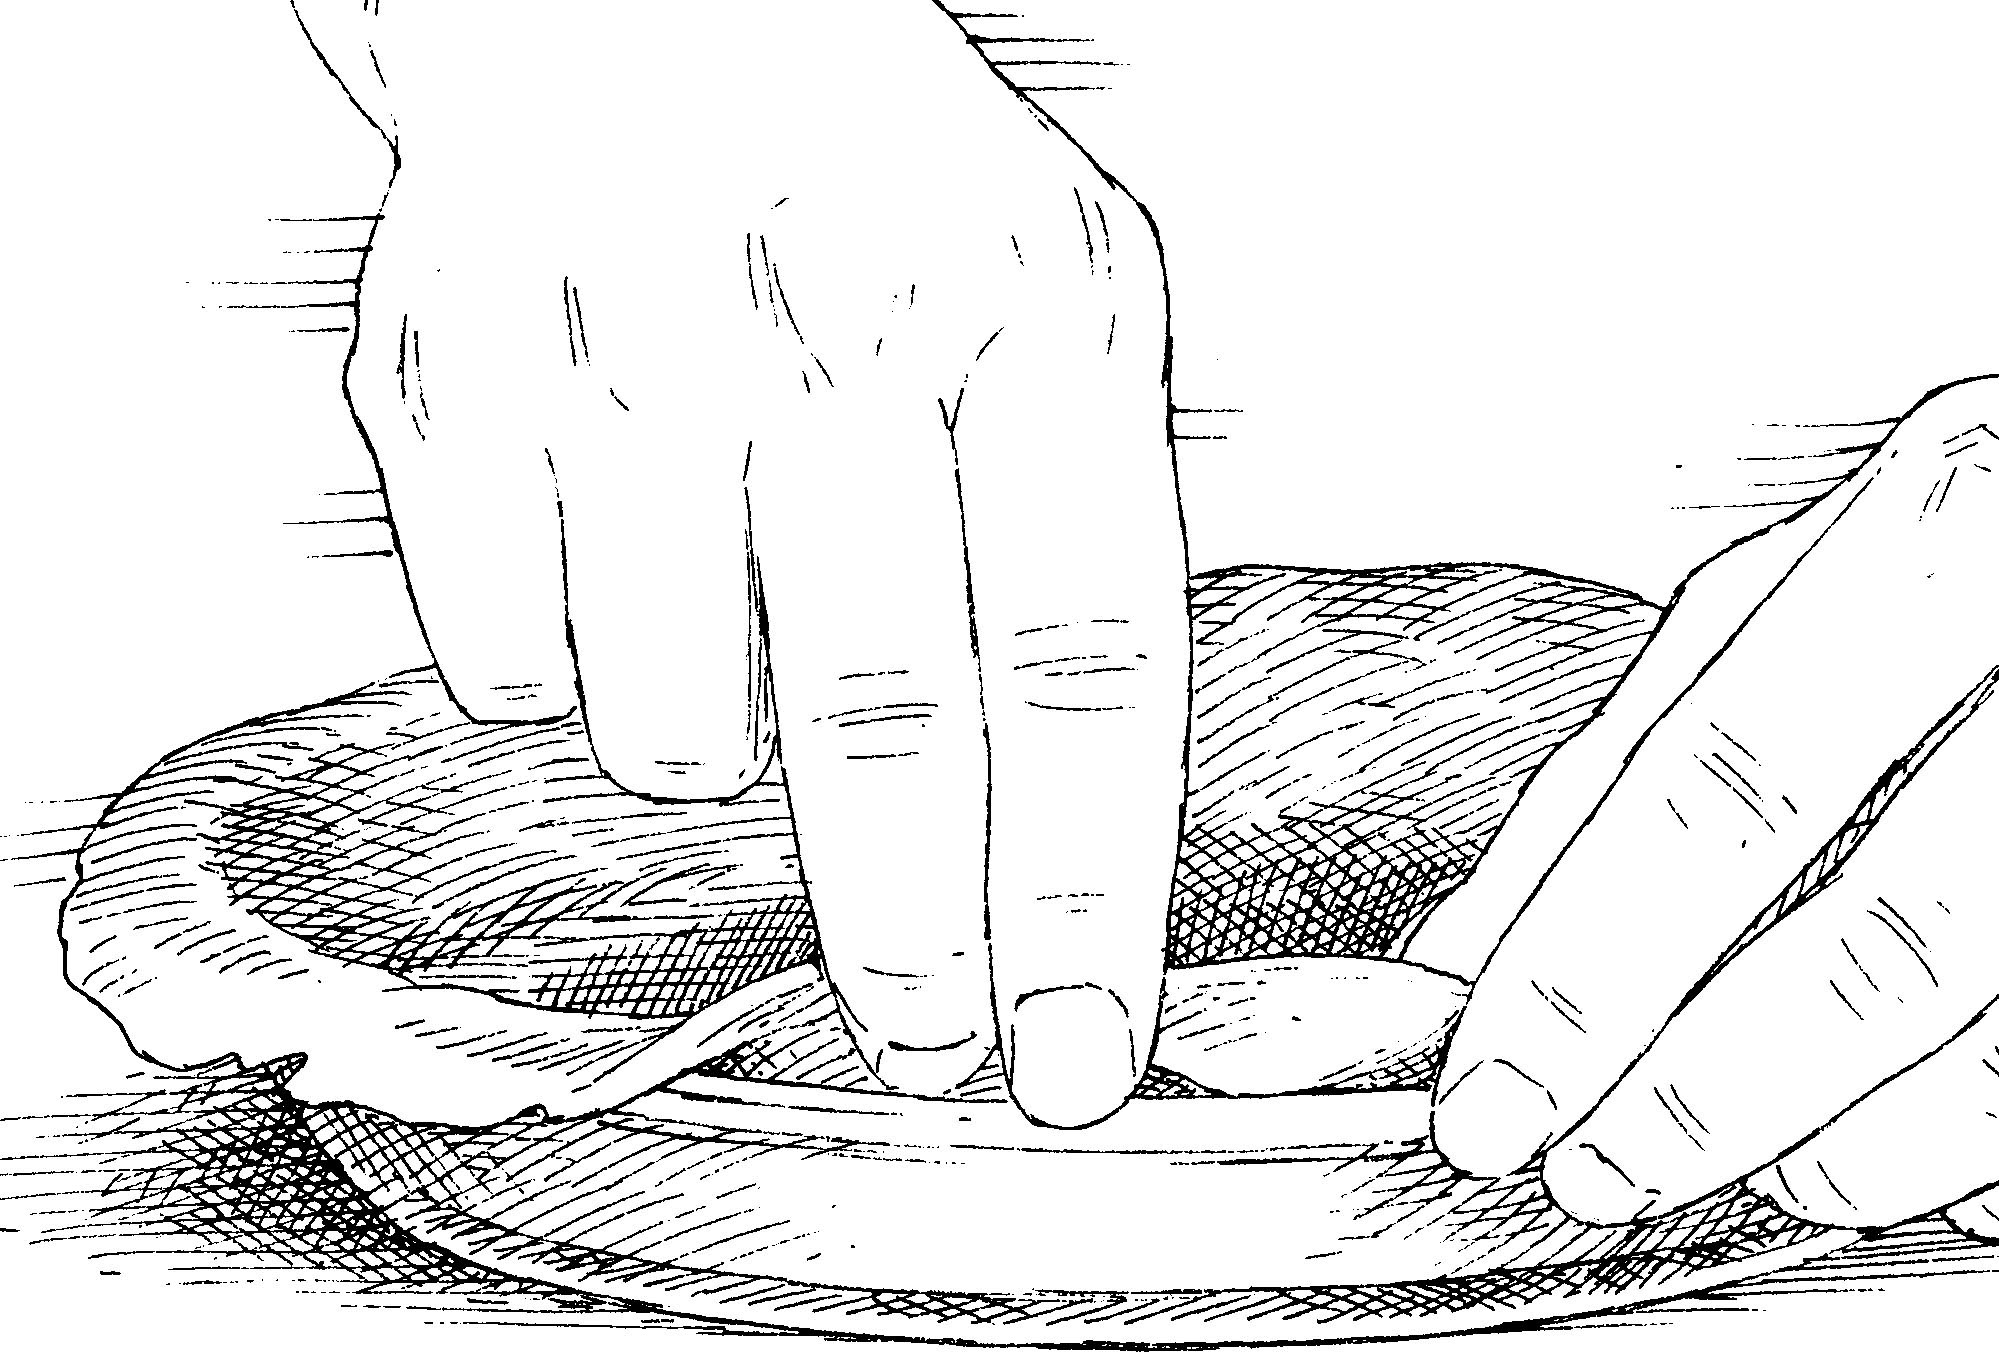
1. Use scissors to trim overhanging dough to uniform ½ inch, then tuck dough under to form thick, even edge on lip of pie plate.

2. Use both hands to pinch dough into ridges, working around perimeter.
CORN SYRUP QUANDARY
Is Karo corn syrup the same thing as the high-fructose corn syrup (HFCS) ubiquitous in soft drinks and other processed foods? In a word, no. Corn syrup (the most popular brand being Karo, introduced in 1902) is made by adding enzymes to a mixture of cornstarch and water to break the long starch strands into glucose molecules. It’s valuable in candy making because it discourages crystallization; it also helps baked goods retain moisture. And because it is less sweet than granulated sugar, corn syrup makes an excellent addition to savory glazes, contributing body and sticking power.
High-fructose corn syrup is a newer product, coming onto the market in the 1960s. It is made by putting regular corn syrup through an additional enzymatic process that converts a portion of the glucose molecules into fructose, boosting its sweetness to a level even higher than that of cane sugar. Because HFCS is considerably less expensive than cane sugar, it is widely used in processed foods, but it is not sold directly to consumers.

GOOD STUFF
Serving pumpkin pie at Thanksgiving is an exercise in futility. After a rich, filling repast, the last part of the ritual appears, problematic as ever: grainy, canned pumpkin–custard encased in a soggy crust. If pumpkin pie is so important that it wouldn’t be a holiday without it, why not make it a first-class dessert? The test kitchen’s recipe from 20 years ago was good, but lately we’ve found it overspiced and dense. I set out to turn this classic holiday dessert into more than an obligatory endnote.
PUMPING UP PUMPKIN FLAVOR
All too often, pumpkin pie does a poor job of showcasing the flavor of its star ingredient. I knew using fresh pumpkin wouldn’t help; we’ve found that very few tasters can distinguish between fresh and canned pumpkin once it’s baked in a pie—and cooking a fresh pumpkin is a lot of work. The real problem is that pumpkin, fresh or canned, contains a lot of moisture, which ultimately dilutes the pie’s flavor. This point was driven home when I wrapped the contents of a can of pumpkin puree in cheesecloth and left it in a colander to drain overnight. By the next morning, the pumpkin had released copious amounts of intensely flavored liquid.
Adding sweet potatoes to the pie filling gives it surprising depth, and precooking the filling blooms the spices and concentrates flavor.
To maximize that flavor, it made sense to concentrate the pumpkin’s liquid rather than just remove it. I took a cue from our 1993 recipe, in which we found cooking the pumpkin on the stovetop to be beneficial. I emptied a can of puree into a saucepan along with some sugar and spices and then cranked up the heat. I whisked in some dairy and eggs and poured the filling into a prebaked pie shell. Cooking the pumpkin not only improved its flavor but the hot filling also allowed the custard to firm up quickly in the oven, preventing it from soaking into the crust and turning it soggy. But I wasn’t done: Tasters still complained about an overabundance of spices.
After a few rounds of testing, I singled out just nutmeg, cinnamon, and ginger as essential. Substituting a couple of teaspoons of freshly grated ginger for the dry equivalent imparted a bright, almost fruity flavor to the pie. To intensify the flavor of the ginger and spices, I bloomed them by cooking them along with the pumpkin puree. I also experimented with different sweeteners; in the end, tasters favored a combination of white sugar and a small amount of maple syrup, which added a layer of complexity. But not enough complexity—tasters still craved a more flavorful pie.
On a whim, I borrowed a few roasted sweet potatoes that a colleague was testing for a side dish and mashed them into my pumpkin mixture without telling anyone. Tasters immediately recognized a new and deeper flavor in the pie. I had hit on a secret ingredient! But I didn’t really want to take the time to roast the sweet potatoes for this effect. Would it work just as well to microwave them? I tried this, and my tasters liked this pie just as much. Could I streamline the method even further and use canned sweet potatoes? I drained the sugar syrup from a can of candied sweet potatoes (commonly labeled yams) and cooked them with the canned pumpkin. Once again, my tasters loved the pie and never guessed the true source of the flavor.
THE SEARCH FOR A SILKY TEXTURE
With richly flavored filling at hand, it was time to tackle the texture. For a creamy, sliceable, not-too-dense pie, my goal was to eliminate the graininess that plagues most custard. To achieve this, I first played with the type of dairy and quantity of eggs. Whole milk yielded a looser pie than one made with cream, but tasters found the latter too rich. Using equal amounts of whole milk and cream provided balance. But this filling was barely sliceable, and using extra whole eggs to firm it up just made the pie taste too eggy. Since the white contains most of the water in an egg, I replaced a few of the whole eggs with yolks to firm up the custard, settling on a ratio of 3 whole eggs to 2 yolks. I then whisked the milk, cream, and eggs with some vanilla into the cooked pumpkin–sweet potato mixture and passed the filling through a fine-mesh strainer to remove any stringy bits, ensuring a smooth texture.
Most pumpkin pie recipes call for a high oven temperature to expedite cooking time. But baking any custard at high heat has its dangers. Once the temperature of custard rises above 175 degrees, it curdles, turning the filling coarse and grainy. This is exactly what happened when I baked the pie at 425 degrees, the temperature recommended by most recipes. Lowering the temperature to 350 degrees wasn’t the solution: I now had a pie that was curdled and overcooked at the outer edges but still underdone in the center. I tried the opposite extreme and baked the pie at 300 degrees, a temperature that would give me a wide margin of safety. The problem was that for the pie to cook through, I needed to leave it in the oven for nearly 2 hours. What if I combined both approaches: a high initial oven temperature for 10 minutes to give the already-warm filling a blast of heat, followed by a gentle 300 degrees for the remainder of the baking time? Not only did this reduce the total baking time to less than an hour, but the dual temperatures produced a creamy pie fully and evenly cooked from edge to center.
Hundreds of pies later, I had a pumpkin pie destined to be a new classic: velvety smooth, packed with pumpkin flavor, and redolent with just enough fragrant spices.
Pumpkin Pie
SERVES 8
Make sure to buy unsweetened canned pumpkin; avoid pumpkin pie mix. If candied sweet potatoes or yams are unavailable, regular canned sweet potatoes or yams can be substituted. When the pie is properly baked, the center 2 inches of the pie should look firm but jiggle slightly. The pie finishes cooking with residual heat; to ensure that the filling sets, let it cool at room temperature and not in the refrigerator. Do not cool this fully baked crust; the crust and filling must both be warm when the filling is added. Serve with whipped cream.
1 recipe Foolproof All-Butter Dough for Single-Crust Pie
1 cup heavy cream
1 cup whole milk
3 large eggs plus 2 large yolks
1 teaspoon vanilla extract
1 (15-ounce) can unsweetened pumpkin puree
1 cup drained candied sweet potatoes or yams
¾ cup (5¼ ounces) sugar
¼ cup maple syrup
2 teaspoons grated fresh ginger
1 teaspoon salt
½ teaspoon ground cinnamon
¼ teaspoon ground nutmeg
1. Adjust oven rack to lowest position and heat oven to 425 degrees. Roll dough into 12-inch circle on floured counter. Loosely roll dough around rolling pin and gently unroll it onto 9-inch pie plate, letting excess dough hang over edge. Ease dough into plate by gently lifting edge of dough with your hand while pressing into plate bottom with your other hand. Wrap dough-lined plate loosely in plastic wrap and refrigerate until dough is firm, about 30 minutes.
2. Trim overhang to ½ inch beyond lip of plate. Tuck overhang under itself; folded edge should be flush with edge of plate. Crimp dough evenly around edge of plate using your fingers. Wrap dough-lined plate loosely in plastic and refrigerate until dough is firm, about 15 minutes.
3. Line chilled pie shell with parchment paper or double layer of aluminum foil, covering edges to prevent burning, and fill with pie weights. Bake until pie dough looks dry and is pale in color, about 15 minutes, rotating plate halfway through baking. Remove parchment and weights and continue to bake crust until golden brown, 4 to 7 minutes longer. Transfer plate to wire rack. (Crust must still be warm when filling is added.) Reduce oven temperature to 400 degrees.
4. While pie shell is baking, whisk cream, milk, eggs and yolks, and vanilla together in bowl. Bring pumpkin puree, sweet potatoes, sugar, maple syrup, ginger, salt, cinnamon, and nutmeg to simmer in large saucepan and cook, stirring constantly and mashing sweet potatoes against sides of pot, until thick and shiny, 15 to 20 minutes.
5. Remove saucepan from heat and whisk in cream mixture until fully incorporated. Strain mixture through fine-mesh strainer into bowl, using back of ladle or spatula to press solids through strainer. Whisk mixture, then pour into warm prebaked pie crust.
6. Place pie on rimmed baking sheet and bake for 10 minutes. Reduce oven temperature to 300 degrees and continue to bake until edges of pie are set and center registers 175 degrees, 20 to 35 minutes longer. Let pie cool on wire rack to room temperature, about 3 hours. Serve.
KEY FLAVORING INGREDIENTS

SWEET POTATOES
Sweet potatoes intensify the pie’s flavor.

FRESH GINGER
Grated ginger packs more punch than dried ginger.

MAPLE SYRUP
Maple syrup boosts pumpkin’s natural sweetness.
KEEPING CUSTARD FROM CURDLING
Many recipes call for baking pumpkin pie at 425 degrees, but this can curdle the delicate custard. Baking at too low a temperature, however, simply takes too long. For a creamy pie that’s fully and evenly cooked from edge to center, we give the filling a brief blast of heat at 400 degrees and then finish the pie in a gentle, 300-degree oven.
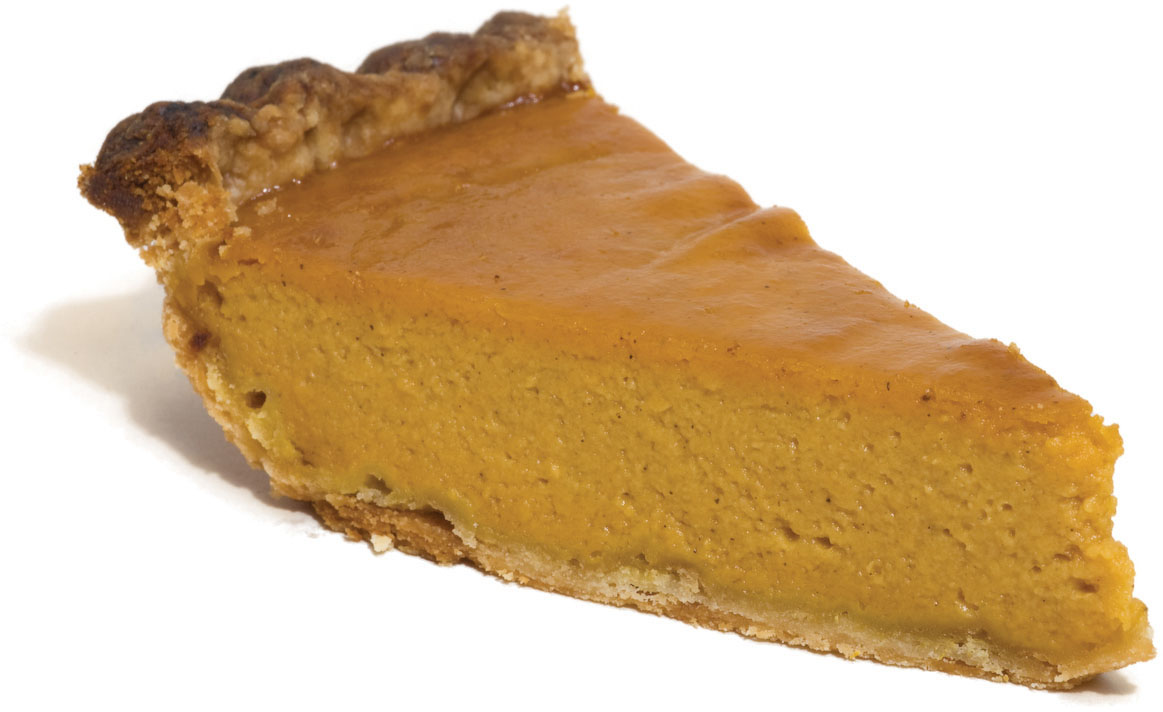
OVERCOOKED
A pie baked at 425 degrees the whole time curdles and becomes watery and grainy.
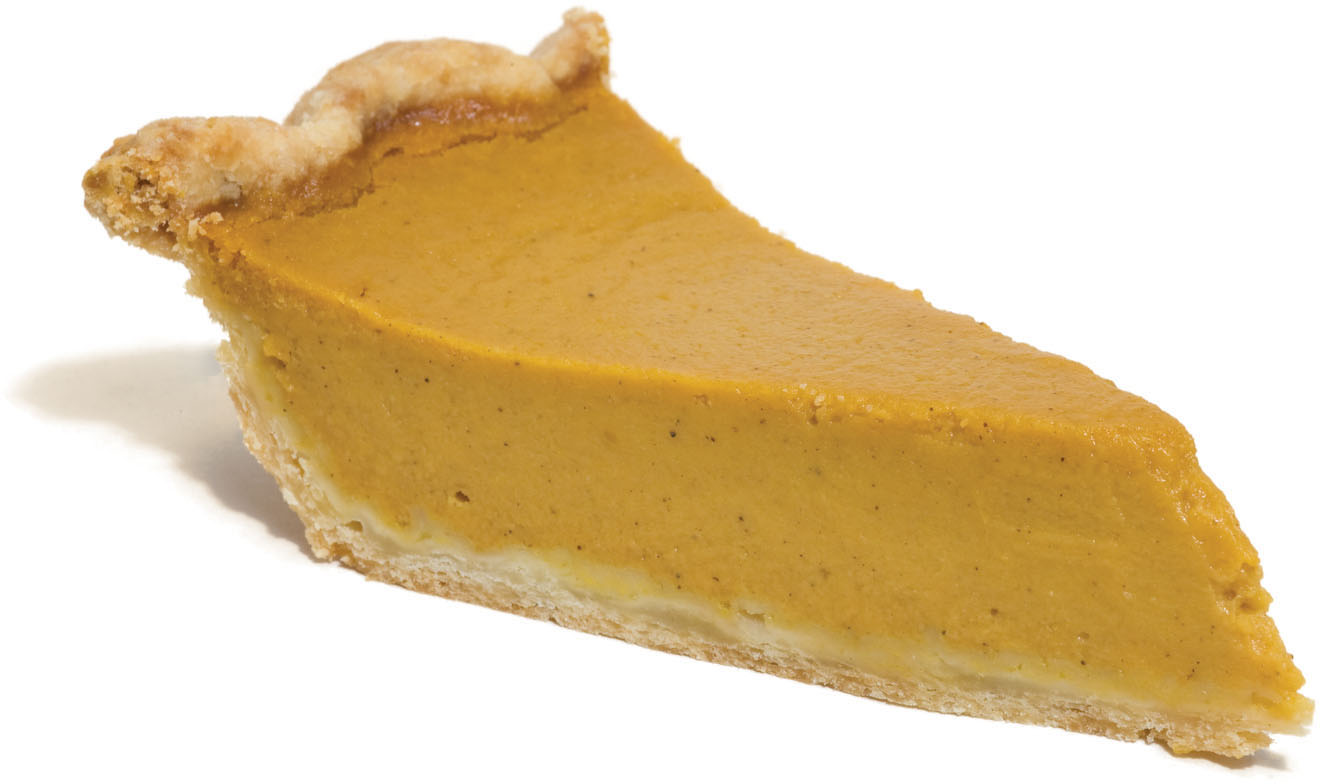
SILKY SMOOTH
Starting the pie at 400 degrees and finishing it at 300 degrees allows it to bake without curdling.
COOKING THE FILLING

Simmering the filling for pumpkin pie is an unusual step, but its benefit is threefold. First, cooking the pumpkin and sweet potatoes drives off moisture and concentrates their flavor. Second, cooking the spices along with the pumpkin allows their flavors to bloom. Third, heating the filling allows it to firm up quickly in the oven rather than soak into the pastry and cause the crust to become soggy.
I will start with a confession. Until I embarked on this article, I had never made a classic key lime pie. By “classic” I mean the kind of key lime pie with a filling that consists solely of four simple ingredients: sweetened condensed milk, egg yolks, and lime juice and zest. These ingredients, when simply mixed together and poured into a pie shell, magically thicken into a filling that sets up stiff enough to slice within a couple of hours. No baking is required (though, as I will tell, I found baking an improvement). While the “magic” of the filling is easily explained, this does not gainsay the ease, convenience, and sheer fun of the recipe.
Why, then, had I never made a condensed milk key lime pie? Because the versions that I had sampled in restaurants had tasted harsh and artificial to me. I had assumed that this unpleasant flavor had something to do with the condensed milk, but once I made a classic key lime pie myself, I understood the true source. Restaurant key lime pies are prepared with bottled, reconstituted lime juice, which tastes terrible.
If, like me, you have judged, and condemned, condensed milk key lime pies on the basis of commercial offerings, I urge you to make one yourself using fresh squeezed juice. You will find the pie an entirely different experience: pungent and refreshing, yet also cool and creamy, a very satisfying dessert indeed.
The standard recipe for condensed milk key lime pie is incredibly short and simple: Beat four egg yolks, add a 14-ounce can of sweetened condensed milk, and then stir in ½ cup of lime juice and a tablespoon of grated lime zest. Pour it all into a graham cracker crust and chill it until firm, about 2 hours. Top the pie with sweetened whipped cream and serve.
It would be lovely if this recipe worked, but I found that it doesn’t, at least not to my total satisfaction. Although the filling does set firm enough to yield clean-cut slices, it has a loose, “slurpy” consistency that I do not like. I tried to fix the consistency by beating the yolks until thick, as some recipes direct, but this did not help. Nor did it help to dribble in the lime juice, rather than adding it all at once, as other recipes suggest. I also made the filling with only two yolks and with no yolks at all (such “eggless” versions of the recipe do exist) but this yielded even thinner fillings.
Still, I am glad that I spent a day mixing key lime pie fillings in various ways. While in the heat of experimenting, I inadvertently threw the lime zest into a bowl in which I had already placed the egg yolks. When I whisked up the yolks, they turned green, and the whole filling ended up tinted a lovely shade of pale lime. What a great way to dispense with food coloring!
Having found the mix-and-chill method wanting, I decided to try baking the pie, as many recipes suggest. I used the same ingredients as I had before and simply baked the pie until the filling stiffened slightly, about 15 minutes in a moderate oven. The difference between the baked pie (which was really a custard) and the unbaked pie (which had merely been a clabber) was remarkable. The baked filling was thick, creamy, and unctuous, reminiscent of cream pie. It also tasted more pungent and complex than my raw fillings had, perhaps because the heat of the oven released the flavorful oils in the lime zest.
I had discovered that condensed milk key lime pie, when prepared according to the standard recipe and baked, was a delicious dessert. However, before I settled on the standard recipe, curiosity impelled me to try a couple of other recipes that I had come across in cookbooks. I had two recipes on hand that called for folding stiffly beaten egg whites into the filling: One called for three whites and the other for just one. The three-white pie surprised me. The filling was light and fluffy, as I had expected, but also slightly curdish and rich, reminiscent of cheesecake. However, I do not think that these whites-only versions are key lime pie as most people understand it; they are what might be called “fluffy key lime pies.” I also tried a recipe with heavy cream but found that the filling did not stiffen on mixing, which to my mind disqualified it.
One final problem: The crust was too crumbly. I often find crumb crusts a bit too hard, even difficult to cut, and over the years, I have deduced that an excess of butter, which is the glue that holds the crumbs together, is the culprit. With this in mind, I had deliberately prepared the crust with slightly less butter than I usually use. Evidently, though, I had gone too far: A certain minimum amount of butter was essential.
Using fresh lime juice and baking the pie briefly are key to a filling with a satiny, sliceable texture.
I did some cookbook sleuthing and noticed something I had never noticed before. There was a surprising consistency in recipes for crumb crusts. To one package of cracker rectangles, crushed, most cookbook recipes call for either 5 tablespoons or 5⅓ tablespoons of butter. I experimented. I couldn’t really tell the difference between crusts made with these two amounts of butter, but 4 tablespoons, the amount I had been using, was definitely too little while 6 tablespoons was definitely too much, making a tough, chewy, almost candy-like crust. There are, of course, other variables to be considered in the making of crumb crusts—underbaking, for example, causes the crusts to soak through—but I now feel that I understand the most important point in the making of this indispensable American dessert component.
SERVES 8
Despite this pie’s name, we found that most tasters couldn’t tell the difference between pies made with regular supermarket limes (called Persian limes) and those made with true Key limes. Since Persian limes are easier to find and juice, we recommend using them here. This pie’s steps diverge from those of other pies: You make the filling first and then prepare the crust. This is because the crust must still be warm when you add the filling.
Pie
4 large egg yolks
4 teaspoons grated lime zest plus ½ cup juice (5 limes)
1 (14-ounce) can sweetened condensed milk
1 recipe Graham Cracker Crust (recipe follows), baked and still warm
Topping (Optional)
1 cup heavy cream, chilled
¼ cup (1 ounce) confectioners’ sugar
1. For the pie: Whisk egg yolks and lime zest together in medium bowl until mixture has light green tint, about 2 minutes. Whisk in condensed milk until smooth, then whisk in lime juice. Cover mixture and set aside at room temperature until thickened, about 30 minutes.
2. Meanwhile, prepare and bake crust. Transfer pie plate to wire rack. Do not turn off oven. (Crust must still be warm when filling is added.)
3. Pour thickened filling into warm crust. Bake until center is firm but jiggles slightly when shaken, 15 to 20 minutes. Let pie cool slightly on wire rack, about 1 hour, then cover loosely with plastic wrap and refrigerate until filling is chilled and set, about 3 hours.
4. For the topping, if using: Once pie is fully chilled, use stand mixer fitted with whisk attachment to whip cream and sugar on medium-low speed until foamy, about 1 minute. Increase speed to high and whip until soft peaks form, 1 to 3 minutes. Spread topping attractively over top of pie and serve.
crust
Graham Cracker Crust
MAKES ENOUGH FOR ONE 9-INCH PIE
We don’t recommend using store-bought graham cracker crumbs in this recipe because they are often stale.
9 whole graham crackers, broken into 1-inch pieces
5 tablespoons unsalted butter, melted and cooled
3 tablespoons sugar
1. Adjust oven rack to middle position and heat oven to 325 degrees. Process cracker pieces in food processor to fine, even crumbs, about 30 seconds. Sprinkle melted butter and sugar over crumbs and pulse to incorporate, about 5 pulses.
2. Sprinkle mixture into 9-inch pie plate. Using bottom of dry measuring cup, press crumbs into even layer on bottom and sides of plate. Bake until crust is fragrant and beginning to brown, 13 to 18 minutes, rotating plate halfway through baking; transfer plate to wire rack.
PRESSING IN CRUMBS FOR CRUST
Making a crumb crust is a cinch compared with working with pie pastry, but unless you pack the crust properly, you risk crumbling edges during baking and slicing. Our method ensures a tight, clean edge.
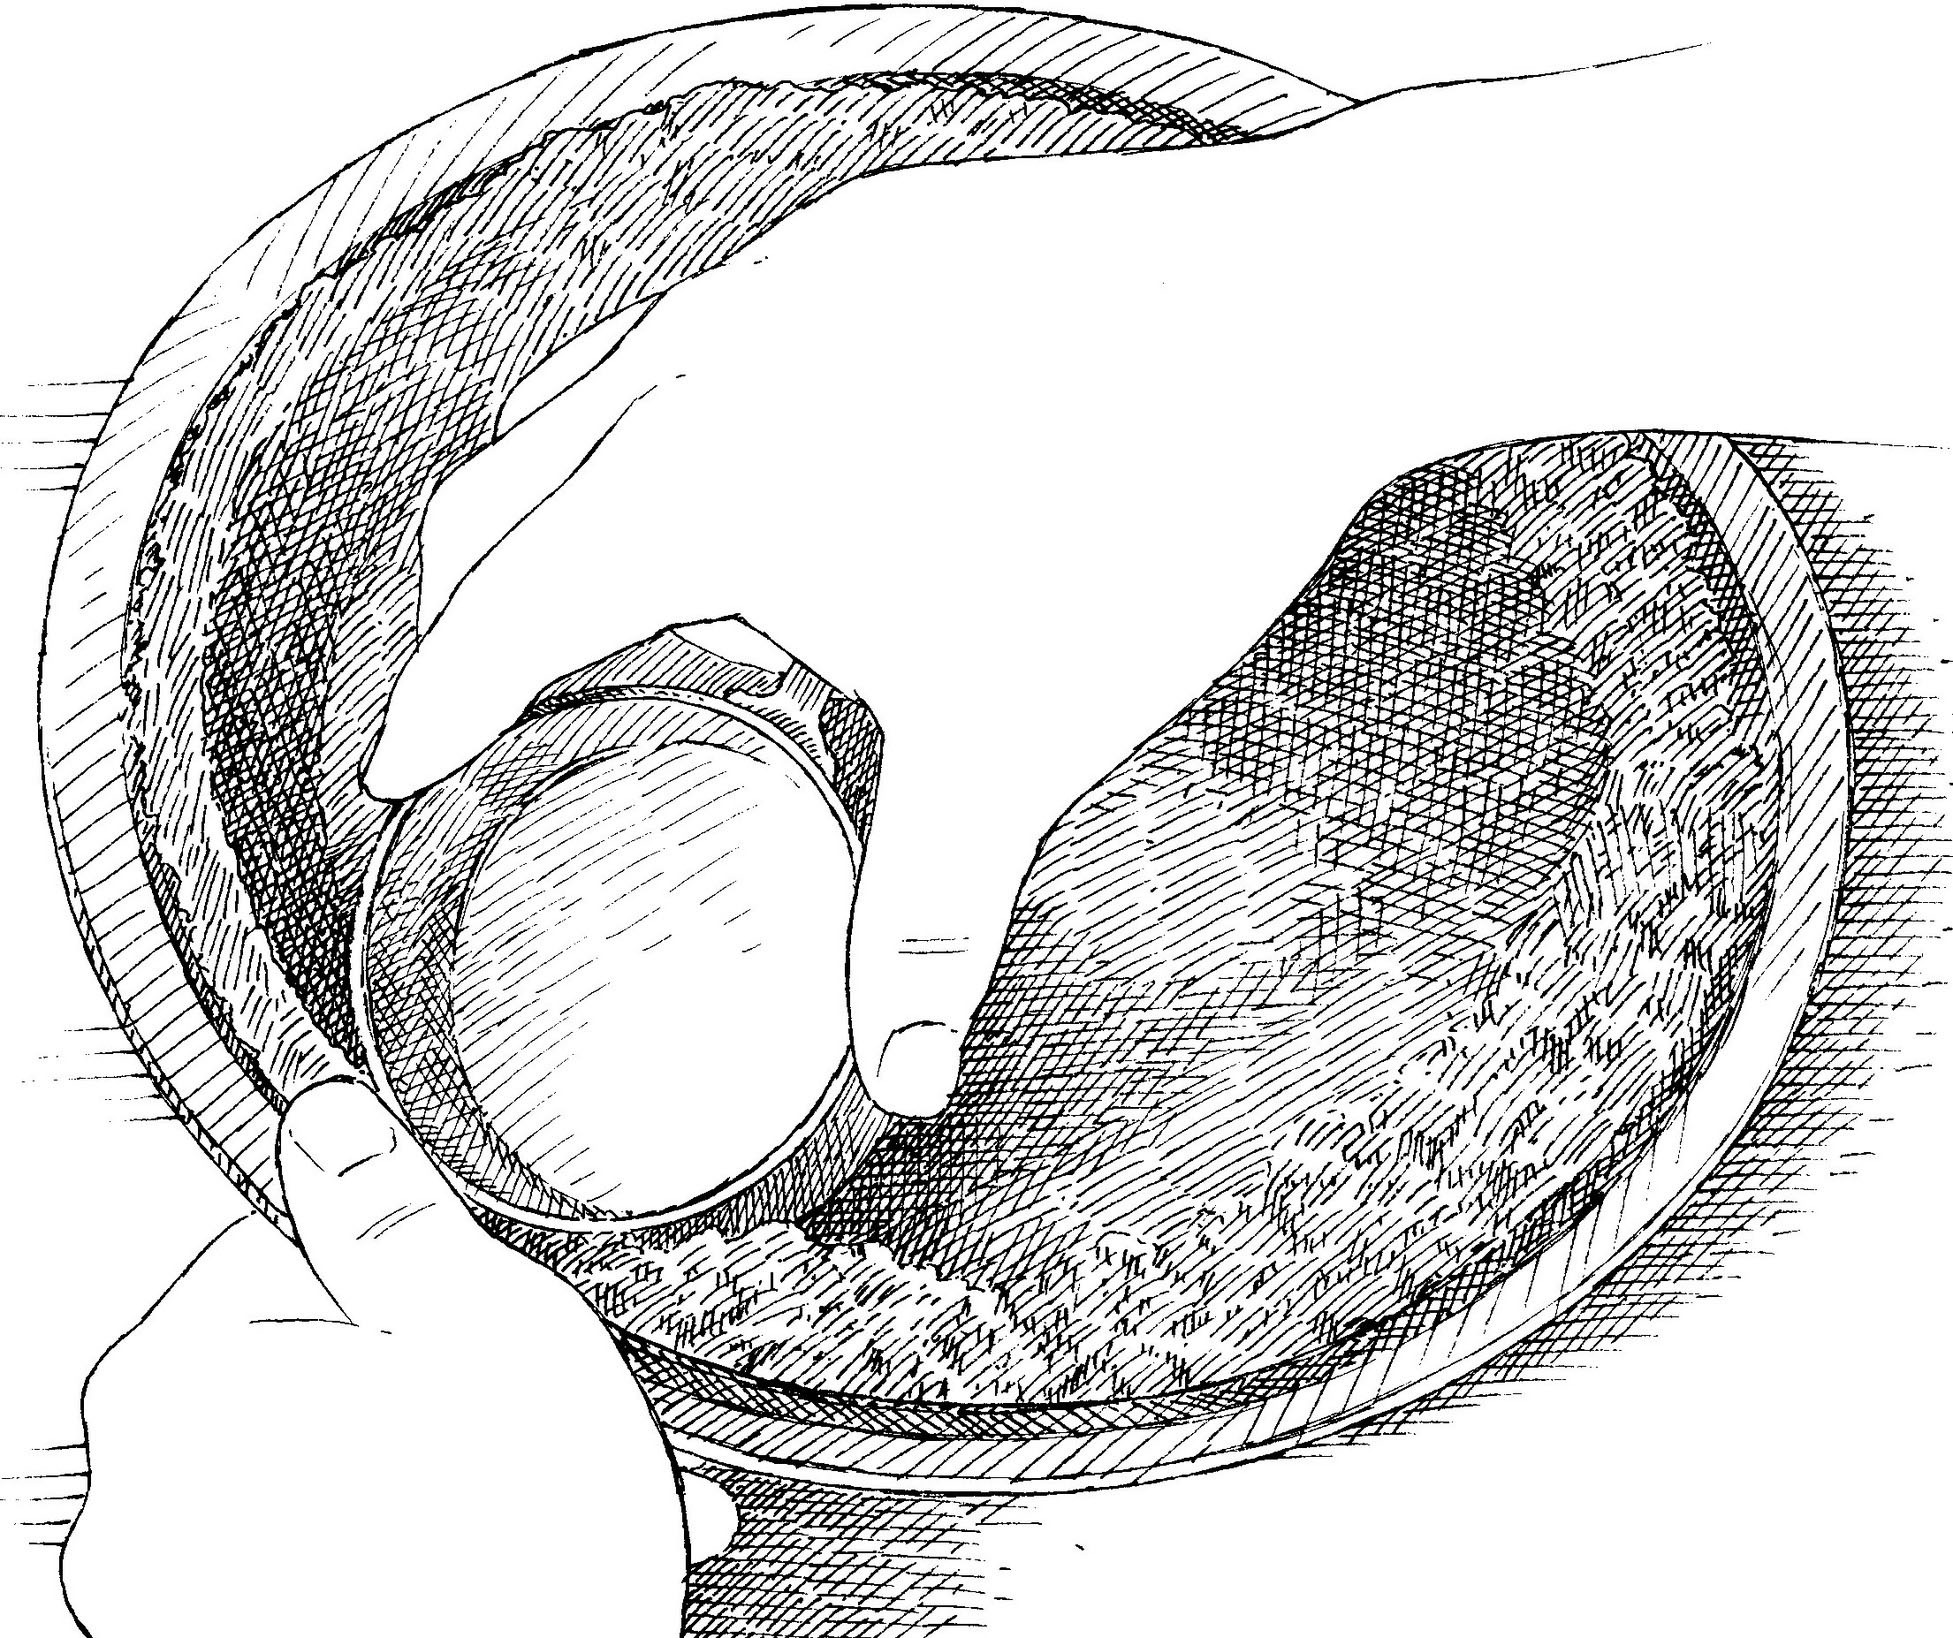
Using bottom and sides of measuring cup, press crumb mixture firmly and evenly across bottom of pie plate. Then pack crumbs against side of pie plate, using your thumb and measuring cup simultaneously.
MAKING KEY LIME PIE
Our Key Lime Pie relies on just a few ingredients and simple steps to produce a brightly flavored dessert.

1. WHISK FILLING AND LET THICKEN Whisk egg yolks and lime zest together until mixture has light green tint, about 2 minutes. Whisk in condensed milk, then whisk in lime juice. Cover mixture and let sit at room temperature until thickened, about 30 minutes.

2. POUR FILLING INTO PIE SHELL AND BAKE Pour thickened filling into warm prebaked pie crust. Bake pie until center is firm but jiggles slightly when shaken, 15 to 20 minutes.

3. CHILL BAKED PIE, THEN TOP Cover pie loosely with plastic wrap and refrigerate until filling is chilled and set, at least 3 hours or up to 24 hours. Before serving, make whipped cream and spread attractively over top of pie.
Most everybody loves lemon meringue pie—at least the bottom half of it. The controversial part, for cooks as well as consumers, is the meringue. Of all the people I’ve talked to about lemon meringue pie, I only know one person who adores the meringue. Most consider it penance to be endured for the pleasure of the filling and crust.
For cooks, meringue falls into the category of unsolved culinary mysteries. On any given day it can shrink, bead, puddle, deflate, burn, sweat, break down, or turn rubbery. Most cookbooks don’t even attempt to deal with the problems of meringue. They follow the standard recipe—granulated sugar and cream of tartar beaten slowly into the egg whites—assuming, apparently, that there is no way around the flaws. After making thirtysomething lemon meringue pies, I’m not sure I blame anyone for skirting the issue. For as easy as it was to figure out the perfect lemon filling and pie crust, the meringue remains, finally, only a manageable mystery.
My goals were clear in developing the ultimate lemon meringue pie. For me that meant a pie with a crisp, flaky crust. Of course developing the perfect crust hinged on finding a weepless meringue. Even the crispiest crust will waterlog in a puddle of sugar water. I wanted a rich filling that would balance the airy meringue, without blocking the clear, lemon flavor. And I wanted the filling to be soft, but not runny; firm enough to cut, but not stiff and gelatinous. Most importantly, I wanted a meringue that didn’t break down and puddle on the bottom or “tear” on top, not even (as cookbooks and old wives’ tales declare it must) on rainy days.
FILLING UP
The filling in lemon meringue pie has gradually evolved over the years from a category of 17th-century English desserts called cheesecakes or curd puddings, according to cookbook author and food historian Stephen Schmidt. For the last century, however, the ingredients have remained constant: sugar, water (or sometimes milk), cornstarch (sometimes part flour), egg yolks, lemon juice (and usually zest), and a little butter. Though I made one old-fashioned curd-style filling, just to confirm that it was too rich for a pie, I mainly worked toward perfecting the cornstarch-thickened lemon filling, varying the proportions to determine each ingredient’s role.
A still-hot, cornstarch-stabilized meringue is key to a topping that won’t puddle or tear.
To start, I analyzed 50 or so recipes for lemon filling, and developed a formula I thought was representative of current fillings: 1½ cups sugar, 6 tablespoons cornstarch, ¼ teaspoon salt, 2 cups water, three large egg yolks, ½ cup lemon juice, 2 teaspoons lemon zest, and 2 tablespoons unsalted butter. Starting from here, I progressively made small changes. First, I made it once with water and once with milk. As is often the case, I liked a version that, in theory, existed somewhere between the two. I liked the straightforward lemon flavor of the water-based filling, but it was one-dimensional, lacking depth. The milk-based filling was rich, mellow, and delicious, but the lemon flavor was too subdued. So I thought a water-milk combination might be the answer. But to my surprise, the fillings made with this liquid combo came out butterscotch-colored. The flavor was fine; but the color was totally unacceptable. I had two other choices for enriching the pie—eggs and butter. While trying to fix the color, I also wanted to improve the pie’s texture. The original was thick and Jell-O-like. I had little faith that butter would solve this problem, so I focused on eggs.
I would have considered egg proportions in the filling sooner, but the meringue stopped me. Knowing how most people feel about meringue, I decided not to overdo it. I settled on a conservative, but respectable three-white meringue. Since I wanted a neat, tidy formula—equal numbers of whites in the meringue and yolks in the filling—I wanted to limit the filling to three yolks. But after making pies with four, five, and six yolks, I realized that the pies tasted progressively richer with each yolk, and this was accomplished without the lemon flavor being compromised. Also, not only did the eggs enrich the pie, unlike the milk, they also reinforced its color.
I discovered that, up to a point, the quantity of sugar had more affect on the pie’s texture than on its sweetness. The fillings of pies made with 1½ cups sugar were significantly softer than the pies made with only 1 cup. So by decreasing the sugar and increasing the egg yolks, I was able to cut back on cornstarch and achieve the firm yet tender filling I was looking for.
MERINGUE IT
Long after I had settled on the perfect filling, I was still baffled by the meringue. I couldn’t find a consistently perfect meringue—one that was soft and billowy, yet firm enough to stipple nicely. And most importantly, I couldn’t find one that wouldn’t puddle on the bottom or bead on the top.
Stormy weather during the first two days of testing blew me off course. I attributed all my weeps and tears to the weather. After almost settling for a less-than-perfect meringue, I called food scientist Shirley Corriher, who slowly convinced me that my problems with meringue topping were not weather-related.
According to Corriher, the puddling underneath the meringue is from undercooking. The undercooked whites break down and return to their liquid state. The beading on top of the pie is from overcooking. This near-the-surface overcooking of the meringue causes the proteins in the egg white to coagulate, squeezing out the moisture which then surfaces as tears or beads. Although this double dilemma seemed insurmountable, Corriher offered several possible solutions, two of which worked.
To deal with undercooking, Corriher said the filling must be piping hot. To ensure this, she suggested I make the meringue first, then the filling.
Through the course of all my testing, fillings had been meringued hot. Once each filling was cooked, I covered its surface with plastic wrap to insulate it while making the meringue. Sometimes my meringues puddled; sometimes they didn’t. I followed Corriher’s suggestion to make the meringue first, but found that this delicate mixture deteriorated by the time the filling was made. So I tried another strategy. I made the filling and covered it as usual, but during the final minute or so of beating the meringue, I returned the filling to a simmer over low heat. I then poured this super-hot filling into the shell, promptly topped and sealed it with meringue, and immediately put the pie in the oven to bake. I followed this procedure with a number of differently prepared meringues and none of them puddled or wept. So, even if meringue beading or tearing is not an issue, you can at least make a lemon meringue pie with a dry bottom just by making sure the filling is really hot.
To solve the problem of overcooking, Corriher suggested that, just like the yolks in the filling, the whites in the meringue needed to be stabilized to make them more heat-tolerant. Corriher said that cornstarch, the yolk stabilizer in the filling, could also be used to strengthen the whites in the meringue. Apparently a food stylists’ trick, this is done by mixing cornstarch and water and cooking it until thick. Then this paste is gradually beaten into soft-peak meringue until firm peaks form.
I found that the cornstarch mixture did not affect the flavor or texture of the meringue. After a bit more tinkering—mostly with oven time and temperature—I finally got the cornstarch-stabilized meringue to produce a virtually tearless pie, even on a hot, humid day.
Lemon Meringue Pie
SERVES 8
Make the pie crust, let it cool, and then begin work on the filling. As soon as the filling is made, press a piece of lightly greased parchment paper against the surface and then start working on the meringue topping. You want to add warm filling to the cooled pie crust and then apply the meringue topping and quickly get the pie into the oven.
1 recipe Foolproof All-Butter Dough for Single-Crust Pie
Filling
1½ cups water
1 cup (7 ounces) sugar
¼ cup (1 ounce) cornstarch
⅛ teaspoon salt
6 large egg yolks
1 tablespoon grated lemon zest plus ½ cup juice (3 lemons)
2 tablespoons unsalted butter, cut into 2 pieces
Meringue
⅓ cup water
1 tablespoon cornstarch
4 large egg whites
½ teaspoon vanilla extract
¼ teaspoon cream of tartar
½ cup (3½ ounces) sugar
1. Adjust oven rack to lowest position and heat oven to 425 degrees. Roll dough into 12-inch circle on floured counter. Loosely roll dough around rolling pin and gently unroll it onto 9-inch pie plate, letting excess dough hang over edge. Ease dough into plate by gently lifting edge of dough with your hand while pressing into plate bottom with your other hand. Wrap dough-lined plate loosely in plastic wrap and refrigerate until dough is firm, about 30 minutes.
2. Trim overhang to ½ inch beyond lip of plate. Tuck overhang under itself; folded edge should be flush with edge of plate. Crimp dough evenly around edge of plate using your fingers. Wrap dough-lined plate loosely in plastic and refrigerate until dough is firm, about 15 minutes.
3. Line chilled pie shell with parchment paper or double layer of aluminum foil, covering edges to prevent burning, and fill with pie weights. Bake until pie dough looks dry and is light in color, 25 to 30 minutes, rotating plate halfway through baking. Remove parchment and weights and continue to bake crust until deep golden brown, 10 to 12 minutes longer. Transfer plate to wire rack. Let crust cool to room temperature.
4. For the filling: Adjust oven rack to middle position and reduce temperature to 325 degrees. Bring water, sugar, cornstarch, and salt to simmer in large saucepan over medium heat, whisking constantly. When mixture starts to turn translucent, whisk in egg yolks, two at a time. Whisk in lemon zest and juice and butter. Return mixture to brief simmer, then remove from heat. Lay sheet of lightly greased parchment paper directly on surface of filling to keep warm and prevent skin from forming.
5. For the meringue: Bring water and cornstarch to simmer in small saucepan over medium-high heat and cook, whisking occasionally, until thickened and translucent, 1 to 2 minutes. Remove from heat and let cool slightly.
6. Using stand mixer fitted with whisk attachment, whip egg whites, vanilla, and cream of tartar on medium-low speed until foamy, about 1 minute. Increase speed to medium-high and beat in sugar, 1 tablespoon at a time, until incorporated and mixture forms soft, billowy mounds. Add cornstarch mixture, 1 tablespoon at a time, and continue to beat to glossy, stiff peaks, 2 to 3 minutes.
7. Meanwhile, remove plastic from filling and return to very low heat during last minute or so of beating meringue (to ensure filling is warm).
8. Pour warm filling into cooled prebaked pie crust. Using rubber spatula, immediately distribute meringue evenly around edge and then center of pie, attaching meringue to pie crust to prevent shrinking. Using back of spoon, create attractive swirls and peaks in meringue. Bake until meringue is light golden brown, about 20 minutes. Let pie cool on wire rack until filling has set, about 2 hours. Serve.
Pudding cakes are basically egg custards, but with two clever improvements. Unlike ordinary egg custards, pudding cakes contain a little flour and some beaten egg whites. During baking, the beaten egg whites float to the top, forming a spongy, cake-like cap. Meanwhile, the remainder of the batter settles to the bottom to make a pudding-like layer.
Based on recipes that date back to colonial times, pudding cakes have existed in their present form for at least 150 years. Lemon and orange are the classic flavors, although other versions also appear fairly regularly. Historic and modern formulas are surprisingly similar. One cookbook that I consulted presented a version supposedly made in Shaker kitchens. Sure enough, the same recipe turned up in a Shaker cookbook that I own—but it also appeared, verbatim, in the 1975 edition of Joy of Cooking.
Using an extra egg white and baking in a water bath ensure that our pudding cakes have two distinct layers.
In preparing this article, I baked some 15 pudding cakes. I immediately noticed that those made with lemon or orange juice came out especially well, while those flavored in other ways tended to have flimsy, fast-dissolving tops and rubbery, dense bottoms. I eventually deduced that it was the acidity of the citrus juices that made the difference. Because the juice lightly clabbered the milk-based batter, causing it to thicken, the frothy upper layer became stiffer and more stable and thus was better able to puff. At the same time, the acidic juice undercut the thickening power of the flour, making for a more tender custard. To shore up the cake part a bit more, I tried adding an extra egg white, which worked beautifully.
As a lover of rich desserts, I could not keep myself from trying to make pudding cakes with extra butter and with cream instead of milk. I discovered, however, that the added fat caused the whipped egg whites to collapse, making for a thin top. In any case, the extra richness didn’t really impr ove the desserts—in fact, it was barely discernible.
Finally, while I find baking things in a bain-marie, or water bath, just as much of a nuisance as the next person, I’m afraid that there is no way to do without it here. Because water cannot get hotter than its boiling point, it insulates the custard and prevents it from curdling. I tried baking a pudding cake without the water bath and got scrambled eggs.
Be sure to let the pudding cakes stand in the water bath for 10 minutes after removing them from the oven. Like other custards, pudding cakes need to finish cooking outside the oven; if left in the oven long enough to make their centers completely firm, pudding cakes may become rubbery and overcooked around the edges.
My pudding cakes were perfect, with two distinct layers, and I was even happier to find that my recipe could just as easily work when divided into individual ramekins or baked in a single cake pan.
SERVES 6
This pudding cake can be made in six 6-ounce ramekins; a 9-inch round cake pan; or an 8-inch square cake pan. All require the same baking time.
2 tablespoons unsalted butter, softened, plus extra for pan(s)
½ cup plus 2 tablespoons (4⅓ ounces) sugar
⅛ teaspoon salt
3 large eggs, separated, plus 1 large white, room temperature
3 tablespoons all-purpose flour
2 teaspoons lemon zest plus ¼ cup juice (2 lemons)
1 cup whole milk
1. Adjust oven rack to middle position and heat oven to 325 degrees. Lightly butter pan or ramekins of choice. Lay folded dish towel in bottom of roasting pan and set pan or ramekins inside. Bring kettle of water to boil.
2. Meanwhile, in bowl mash sugar, salt, and butter together with back of wooden spoon until crumbly. Beat in egg yolks, then flour, mixing until smooth. Slowly beat in lemon zest and juice, then stir in milk.
3. Using stand mixer fitted with whisk attachment, whip egg whites on medium-low speed until foamy, about 1 minute. Increase speed to medium-high and whip until stiff peaks form, 3 to 4 minutes. Gently whisk whites into batter just until no large lumps remain.
4. Immediately ladle (don’t pour) batter into pan or ramekins. Set baking pan on oven rack. Pour enough boiling water into roasting pan to come halfway up sides of baking pan or ramekins. Bake until pudding cake center is set and springs back when gently touched, about 25 minutes. Remove roasting pan from oven and let pan or ramekins continue to stand in water bath for 10 minutes. Pudding cakes can be served warm, at room temperature, or chilled.
WHY USE A WATER BATH?
Our Lemon Pudding Cake is baked in a water bath. Why? Using a water bath helps to protect delicate custards from cooking too quickly and drying out. The water insulates the pudding because it cannot exceed 212 degrees before converting to steam; the air temperature of the oven, on the other hand, is much higher than this. The water also helps keep the interior of the oven humid, further preventing the custard from drying out.
New England, where I’ve lived for most of my life, is not known for its vast and fruitful olive groves. Maybe that’s why I only recently learned about olive oil cake, which is commonplace in most traditional olive-producing regions of the world.
That said, I’ve made plenty of cakes with vegetable oil. Though most people associate cake with butter, oil is a good choice for snack cakes and quick breads; it provides moisture, tenderness, and richness without calling attention to itself. It also makes the mixing process simpler. But extra-virgin olive oil, the type often called for in recipes for olive oil cake, can be noticeably grassy, peppery, and even a little bitter. That’s welcome in a salad, but in a cake?
Whipped whole eggs and ¾ cup of olive oil give this cake just enough structure and richness.
I happily discovered that the slightly savory notes of olive oil can, in fact, lend appealing complexity to a cake. But the recipes I tried varied. Some had a lot of oil and an assertive flavor and rich, dense crumb; others included a modest amount of oil and were light and spongy, with only a faint olive oil flavor. Still others had so many additional ingredients—apples, spices, citrus—that the oil’s flavor was obscured. I suspect that such recipes originated not to showcase olive oil but because people wanted cake, they needed fat to make it, and the local olive oil was the fat they had on hand. But if I was going to use extra-virgin olive oil in my cake, I wanted to be able to taste it, at least a bit. I didn’t want sponge-cake austerity or dense decadence but something in between. I wanted a cake that offered some intrigue but was at the same time simple.
CRUMB QUANDARY
One of the most attractive aspects of making a cake with oil rather than butter is the way it expedites the mixing process: There’s no waiting for butter to come to room temperature and then beating it with sugar before you even start to add the rest of the ingredients. With many oil-based cakes, you simply whisk the dry ingredients in one bowl, whisk the wet ingredients in another, and then combine the contents of the two bowls.
So that’s where I started. The dry ingredients were all-purpose flour, baking powder, and salt, and the wet ingredients were eggs, milk, and a good-quality supermarket olive oil, plus the sugar. The batter was ready to go into the oven in 5 minutes flat, and the cake came out just 40 minutes later.
This first attempt was easy to make but not easy to love. The crumb was dry and coarse, and I could detect the olive oil flavor only if I thought about it really, really hard. As for the appearance, I was okay with simplicity, but this cake looked uninvitingly plain. What I really wanted was the kind of even, fine crumb that the best butter cakes have. The problem? That texture is largely due to their being made with butter.
In a butter cake, air is whipped into the butter before it’s mixed with the other ingredients. In the heat of the oven, the baking powder creates carbon dioxide, which inflates those bubbles a bit more. Those tiny bubbles are what make a butter cake fluffy and fine-textured.
But I wasn’t without options for producing a similar effect in my oil cake. Although most oil cakes use the “mix wet, mix dry, and combine” method, chiffon cake is an oil cake that’s mixed a bit differently. Its light and fluffy texture is achieved by whipping egg whites with some sugar to form a foam, which you then fold into the batter. Might that approach work for my olive oil cake?
I applied the chiffon method to my recipe and, at the same time, implemented a couple of ingredient adjustments: I increased the eggs from two to three for better lift and the olive oil from ½ cup to ¾ cup for more richness and moisture and a more pronounced flavor. The batter was promisingly airy and mousse-like. The cake rose impressively in the oven—but it fell when it cooled. And when I cut it open, there was a line of dense, collapsed cake in the middle. The batter was too airy to support all the fat. But I was happy with the more pronounced olive oil flavor, so I was reluctant to back down. Providing more support by switching to a tube pan, the vessel of choice for chiffon cakes, could help, but frankly I didn’t want my olive oil cake to be mistaken for chiffon. Instead, I’d adjust the mixing method.
GOING ALL IN
If whipped egg whites were too airy, maybe whipping yolks, which aren’t as good at holding air, would be better. I did a quick test, but the cake came out dense and squat. Whipping whole eggs, I hoped, would be the solution. I put all three eggs, both whites and yolks, in the mixer bowl with the sugar and whipped the mixture for about 4 minutes, until it was pale and airy. I added the rest of the ingredients, including a tiny bit of lemon zest to accentuate the fruitiness of the olive oil. After pouring the batter into the cake pan, I sprinkled the top liberally with granulated sugar to lend some visual appeal and textural contrast.
The whipped whole eggs did indeed provide just the right amount of lift, creating a crumb that was fine but not dense and light but not spongy. The sugar on top had coalesced into an attractively crackly crust that complemented the cake’s plush texture, and the lemon zest supported the olive oil flavor without overwhelming it.
And there’s one more advantage to my olive oil cake: Because it’s made with liquid fat instead of solid, it will keep longer than its butter-based counterparts. It can be stored at room temperature for up to three days—in the unlikely event that it doesn’t get eaten right away.
Olive Oil Cake
SERVES 8 TO 10
For the best flavor, use a fresh, high-quality extra-virgin olive oil. If your springform pan is prone to leaking, place a rimmed baking sheet on the oven floor to catch any drips. The cake will puff during baking, but settle as it cools. Leftover cake can be wrapped in plastic wrap and stored at room temperature for up to three days.
1¾ cups (8¾ ounces) all-purpose flour
1 teaspoon baking powder
¾ teaspoon salt
3 large eggs
1¼ cups (8¾ ounces) plus 2 tablespoons sugar
¼ teaspoon grated lemon zest
¾ cup extra-virgin olive oil
¾ cup milk
1. Adjust oven rack to middle position and heat oven to 350 degrees. Grease 9-inch springform pan. Whisk flour, baking powder, and salt together in bowl.
2. Using stand mixer fitted with whisk attachment, whip eggs on medium speed until foamy, about 1 minute. Add 1¼ cups sugar and lemon zest, increase speed to high, and whip until mixture is fluffy and pale yellow, about 3 minutes. Reduce speed to medium and, with mixer running, slowly pour in oil. Mix until oil is fully incorporated, about 1 minute. Add half of flour mixture and mix on low speed until incorporated, about 1 minute, scraping down bowl as needed. Add milk and mix until combined, about 30 seconds. Add remaining flour mixture and mix until just incorporated, about 1 minute, scraping down bowl as needed.
3. Transfer batter to prepared pan; sprinkle remaining 2 tablespoons sugar over entire surface. Bake until cake is deep golden brown and toothpick inserted in center comes out with few crumbs attached, 40 to 45 minutes, rotating pan halfway through baking. Transfer pan to wire rack and let cool for 15 minutes. Remove side of pan and let cake cool completely, about 1½ hours. Cut into wedges and serve.
A REAL KEEPER
Unlike butter cakes, which start to taste dry just a day after baking, oil-based cakes and tea breads can taste moist for several days. This is an illusion, since over time the starches in both types of cakes retrograde, or stale and harden into a crystalline structure, and this structure traps water within the crystals. A cake made with butter, which is solid at room temperature, will seem drier. But oil, which is liquid at room temperature, acts to retard retrogradation, causing even a days-old cake to seem moist even though it’s actually not.
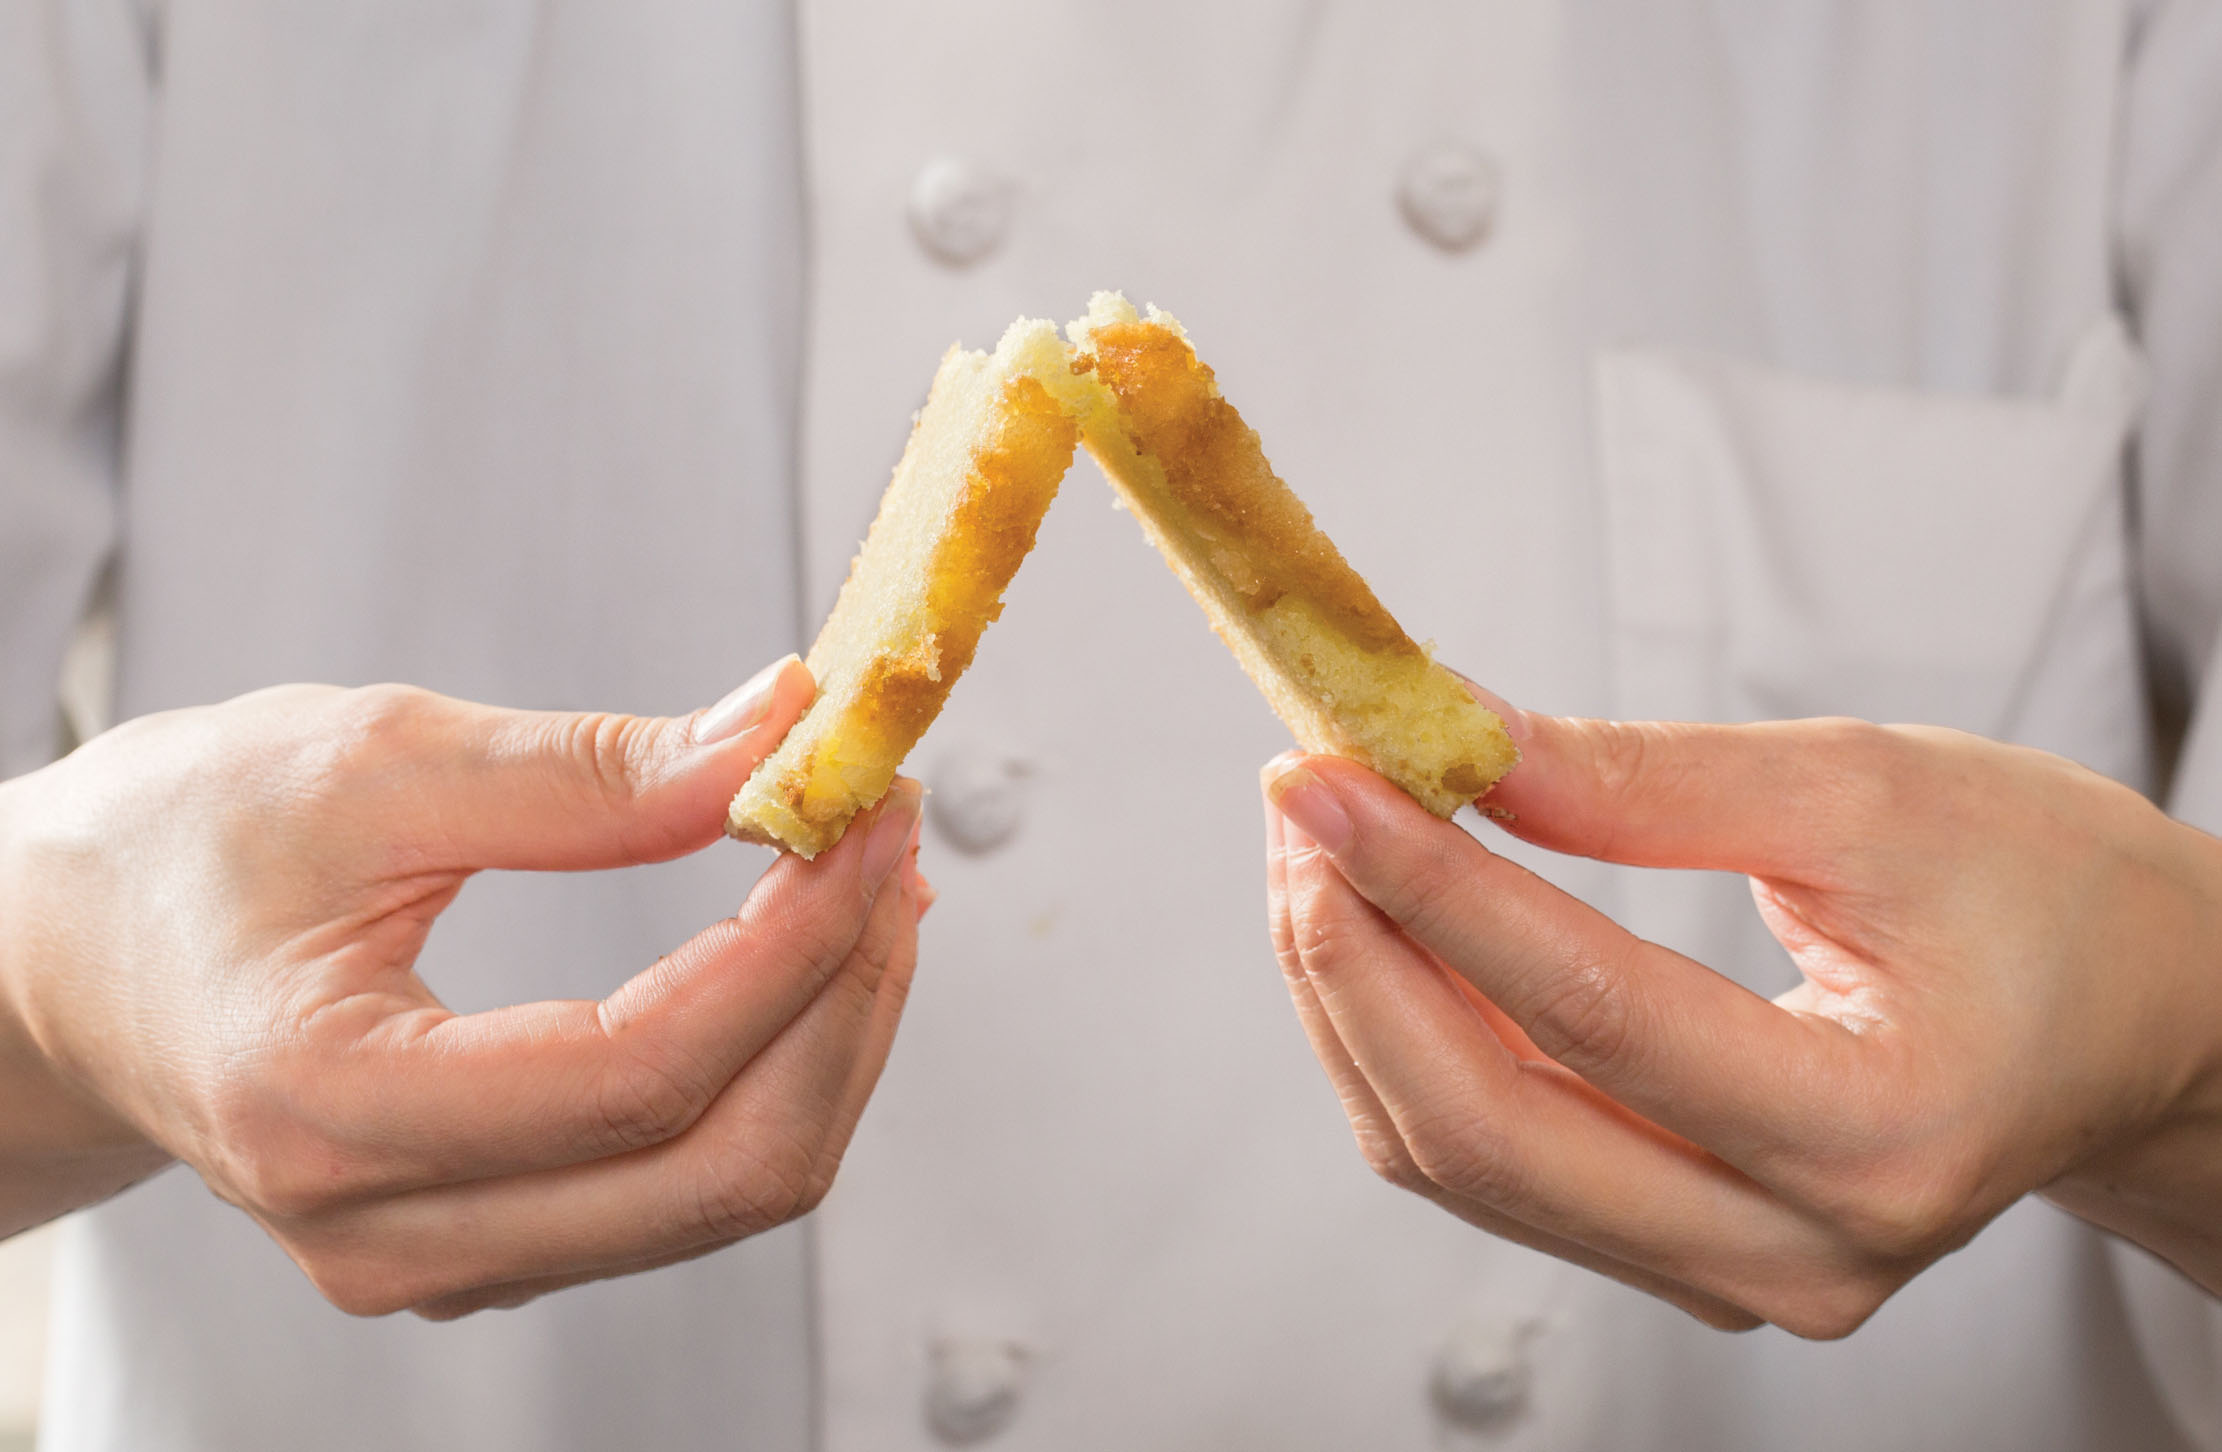
BUTTER CAKE
Dry and crumbly the day after it’s baked
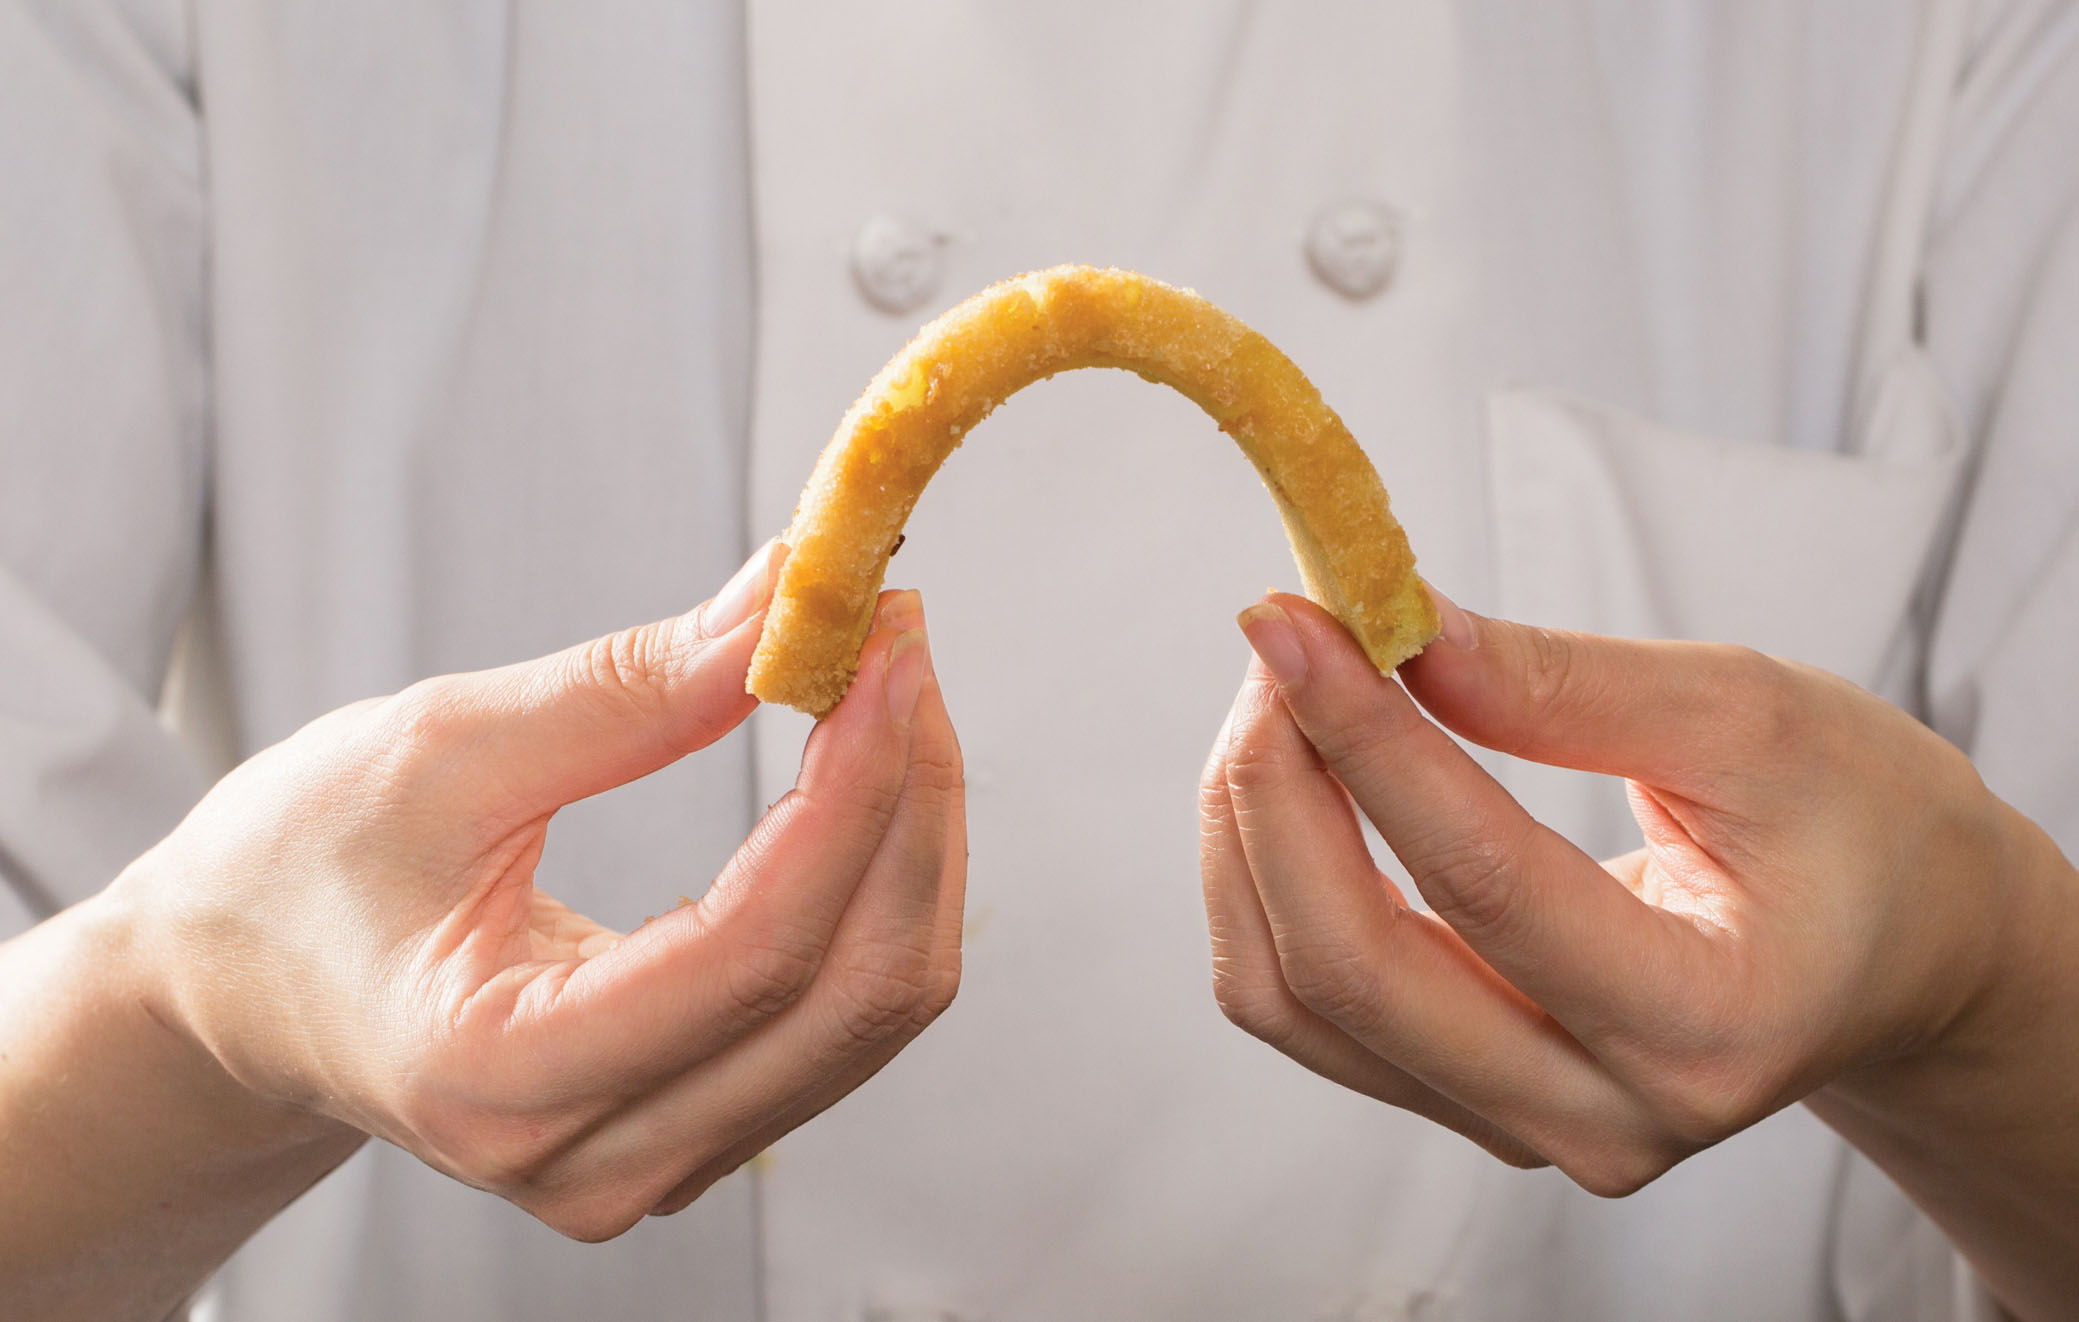
OIL CAKE
Seems moist and tender three days after baking
AERATING CAKE WITH EGGS
While butter cakes get their lift from air that’s whipped into the butter, our olive oil cake relies on eggs. Whipped whites might be the first thing to come to mind, but you can also whip just yolks or whole eggs. We tried all three in our cake. Whipped whites made it too airy, and our cake collapsed somewhat. Whipped yolks made a squat, dense cake. Whipping whole eggs was the perfect compromise. But why?
The proteins in egg whites are better at unfurling and creating a foam than the proteins in egg yolks are, so whipped whites will be more voluminous than whipped whole eggs and certainly more voluminous than whipped yolks. But the oil in this batter is a factor, too. Oil molecules are able to displace some egg white proteins in whipped whites, which weakens the bubbles. Yolks offer some protection against this; their emulsifiers help keep the oil from interfering with the structure. Thus, whipped whole eggs are the perfect compromise because they provide some lift from the whites as well as a more stable structure from the yolks.
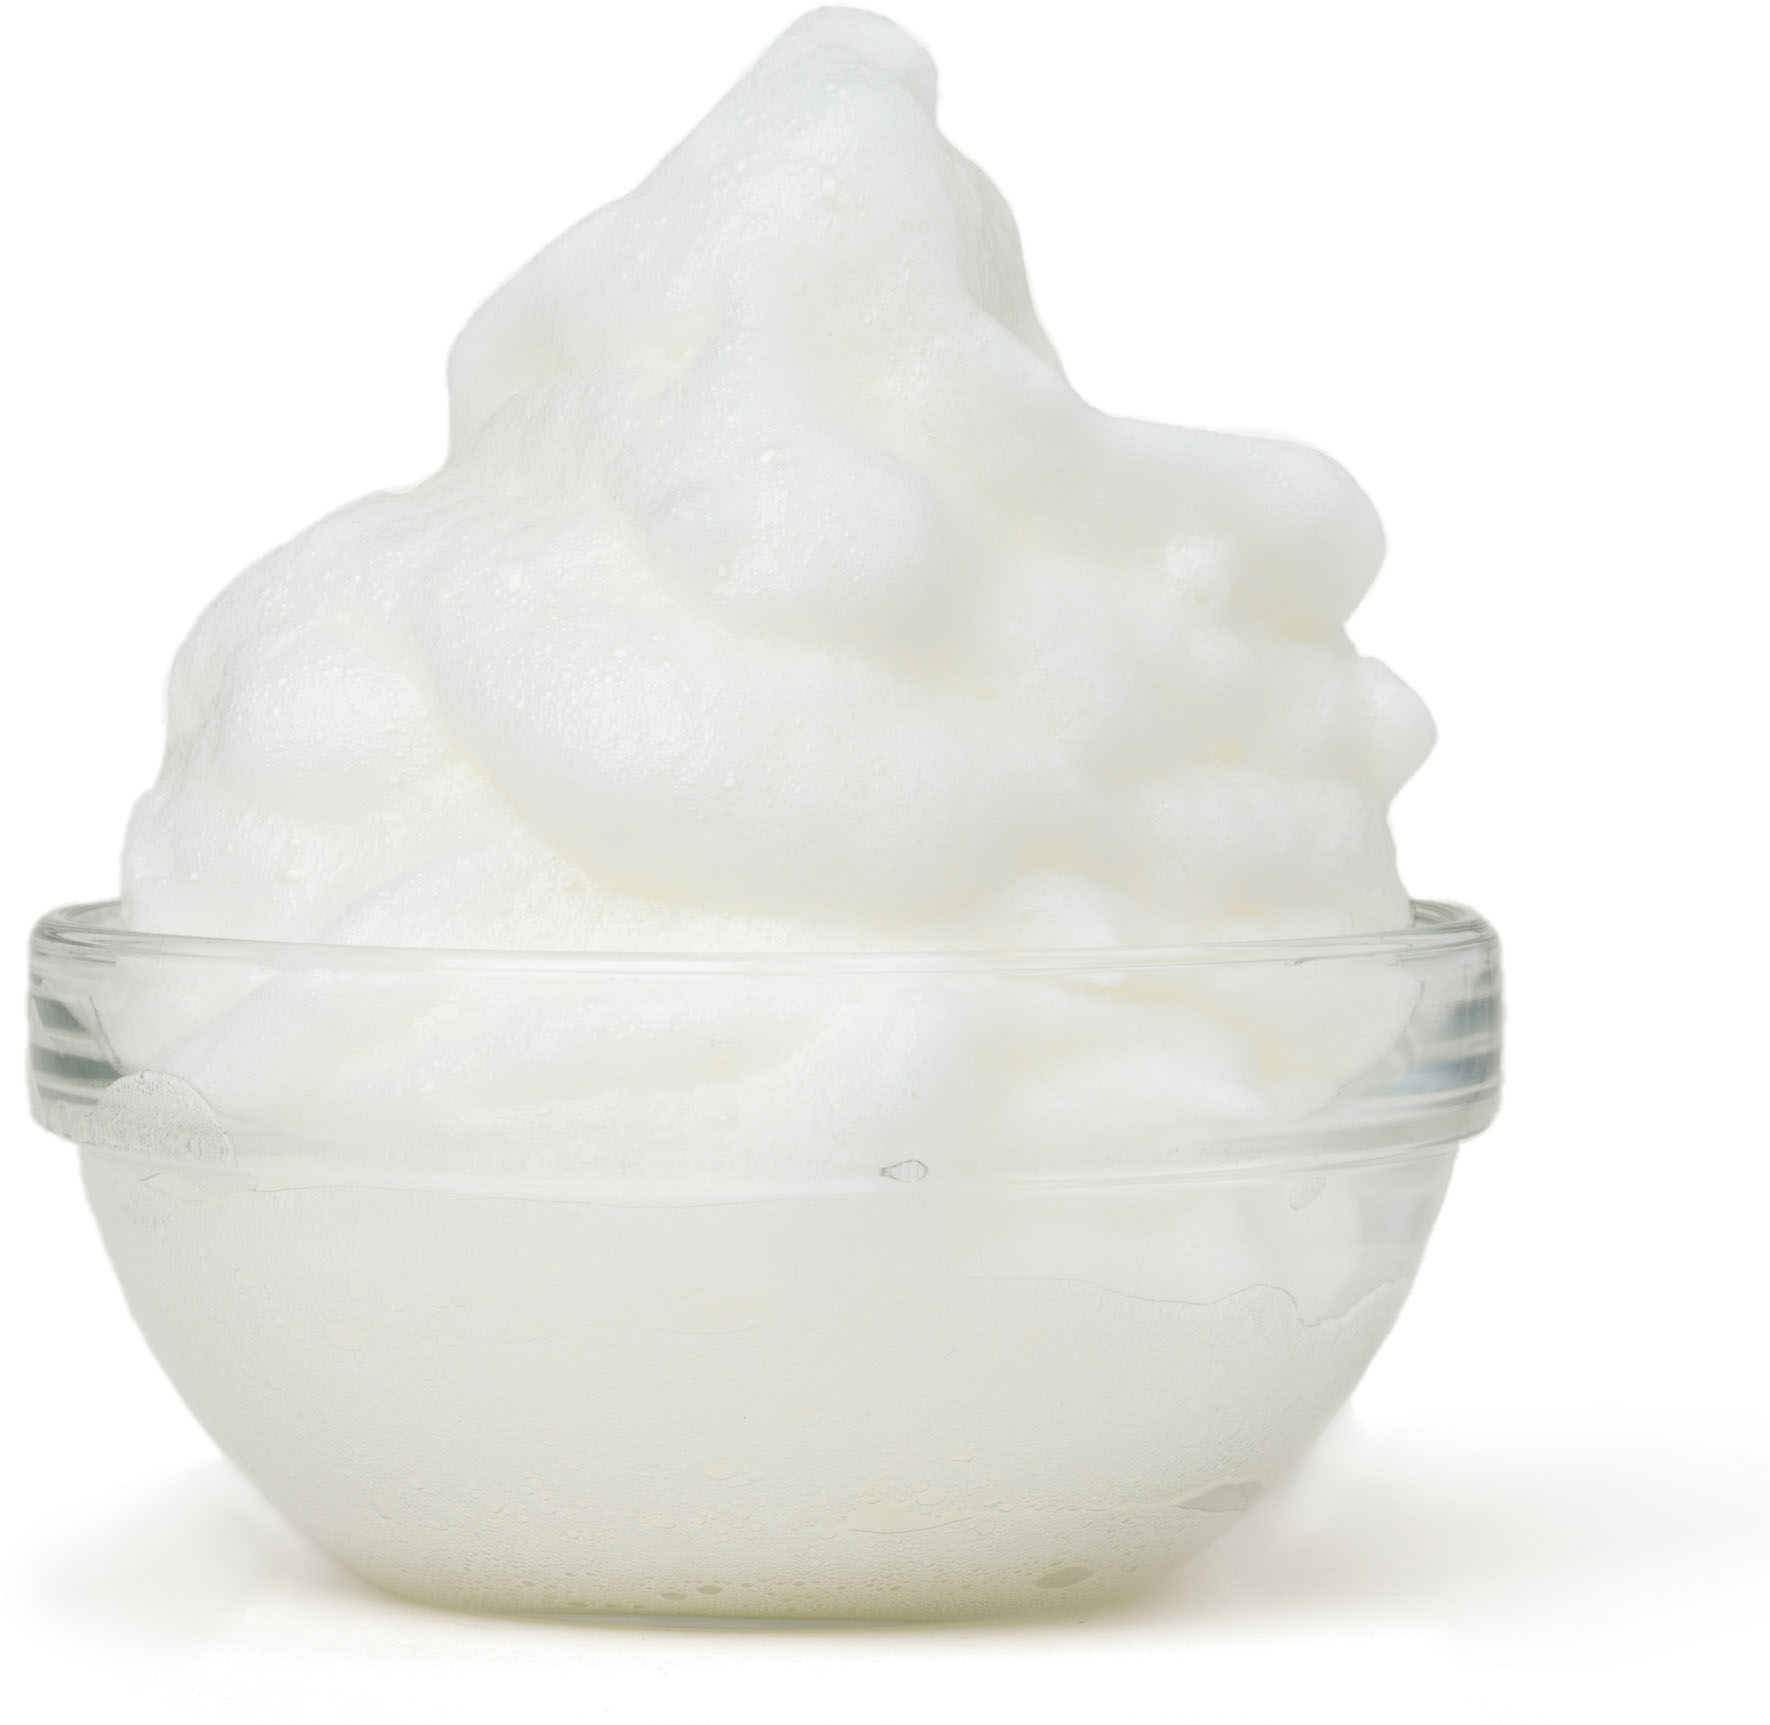
JUST WHITES
Ultrafluffy egg whites made a cake that was too airy and collapsed.
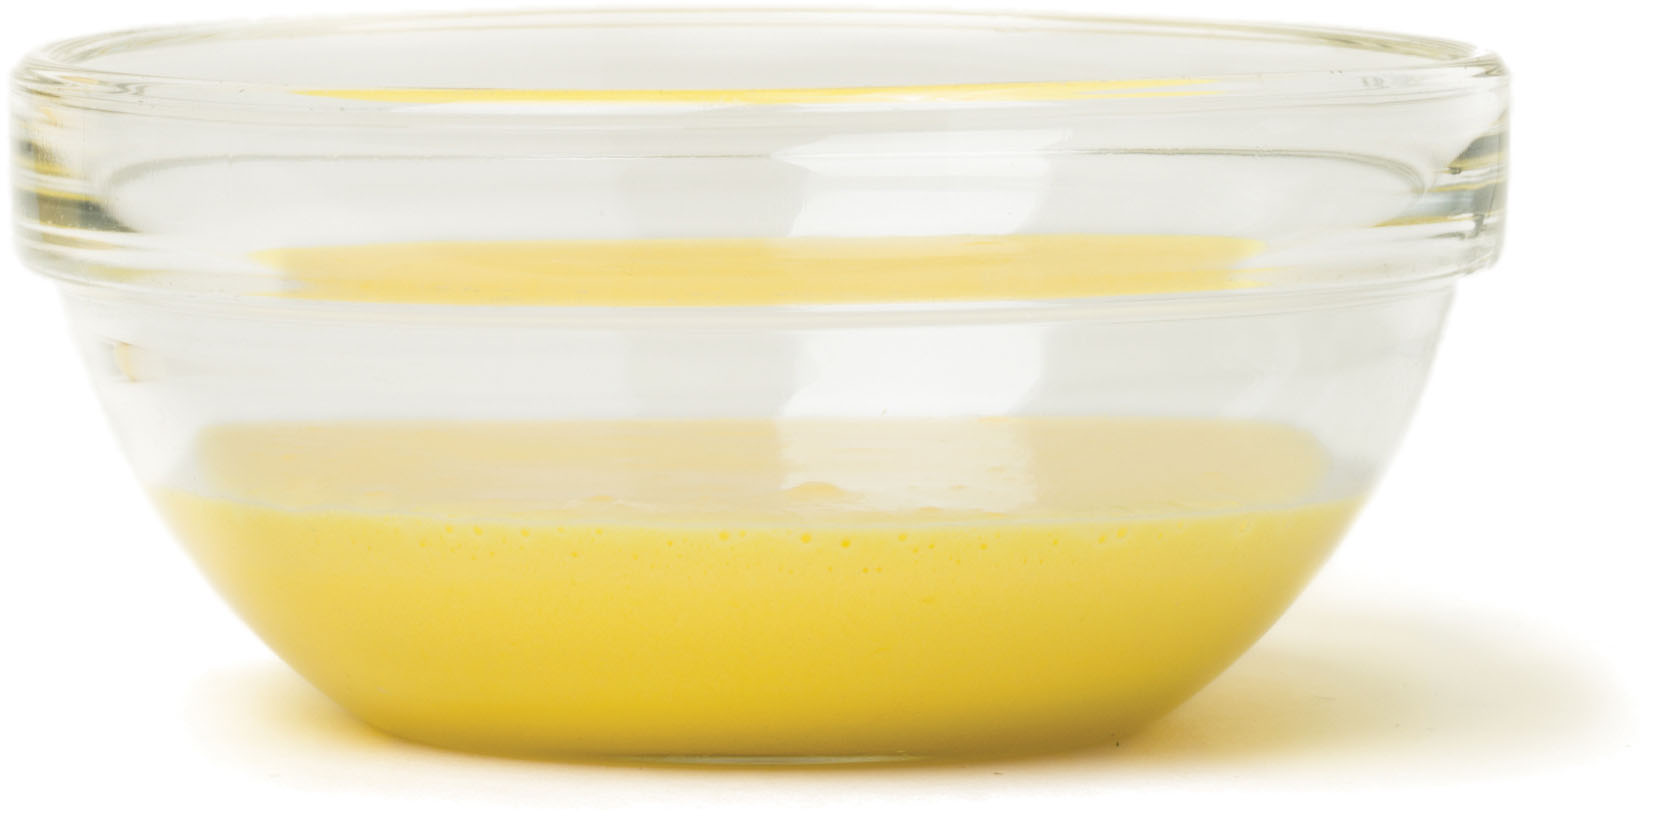
JUST YOLKS
Unable to hold much air, egg yolks made a squat, dense cake.
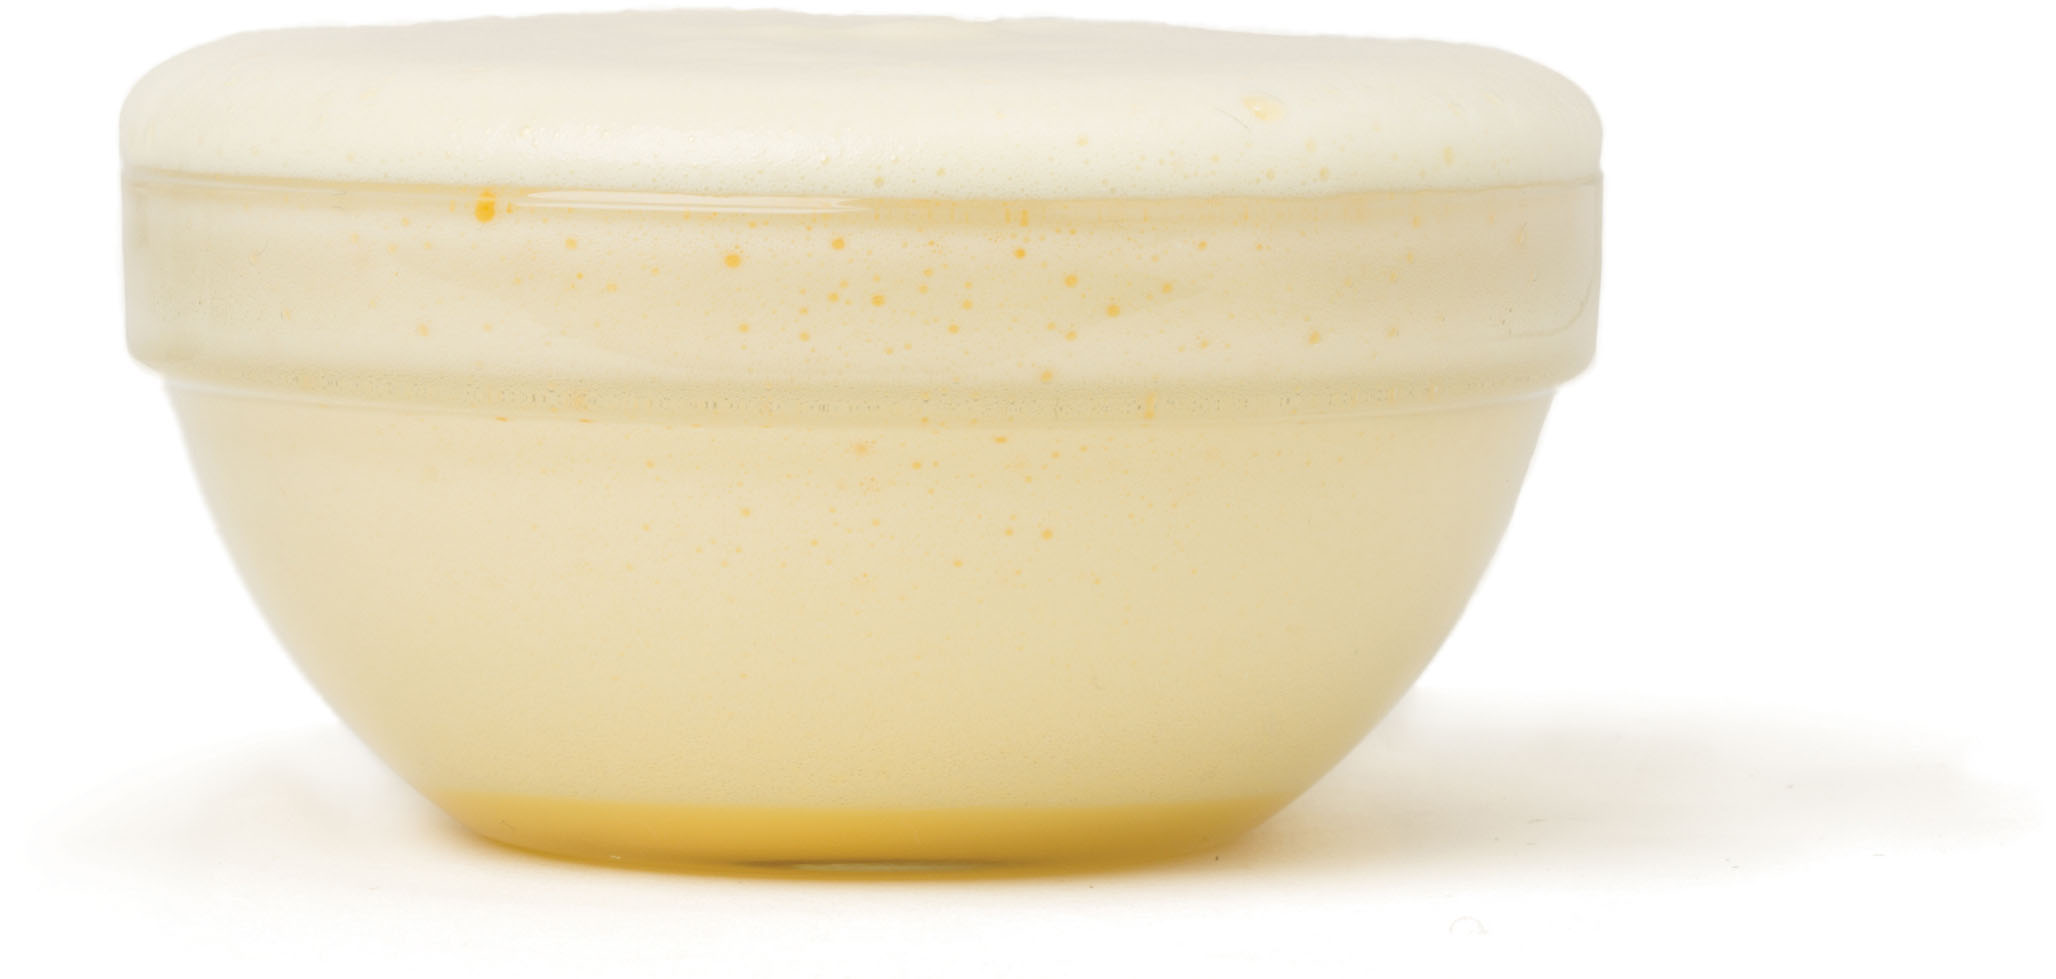
WHOLE EGGS
Whipping whole eggs provided structure and just enough lift.
Like the Hollywood stars of the 1920s who were the first to taste Harry Baker’s secret-recipe cakes, I was delighted by the uniquely light yet full richness and deep flavor of this American invention, which came to be known as the chiffon cake. To perfect this 20th-century classic, I decided to go back to Betty Crocker’s version, as first put before the public by General Mills in 1948. If the original seemed in need of fixing, I would then proceed to consult the countless variations, tinkerings, and revisions that have accumulated over the years.
With the exception of the chocolate variation, all of Betty Crocker’s original chiffon cakes call for 2¼ cups sifted cake flour (which translates to about 1⅔ cups measured by dip-and-sweep), 1½ cups sugar, 1 tablespoon baking powder, 1 teaspoon salt, ½ cup oil, five egg yolks, ¾ cup water or other liquid, 1 cup egg whites (seven to eight large), and ½ teaspoon cream of tartar.
I made a plain, an orange, and a walnut chiffon cake according to the original formula and found that I had three complaints. The cakes were a bit dry—cottony and fluffy rather than moist and foamy, the way I thought chiffon cakes should be—and they seemed to lack flavor, punch, pizzazz. In addition, the cakes rose a bit too high for the pan, a consequence of the downsizing of tube pans, from 18 to 16 cups, that took place around 1970.
Since fat increases perceived moistness and also transmits flavor, I thought that adding more oil might help, but it did not. An orange chiffon cake made with an additional ¼ cup of oil (up from ½ cup) turned out not only dry and flavorless but also greasy and heavy, an outcome that was as unexpected as it was disappointing.
Most of the cookbook authors whom I consulted wisely stuck with Betty’s ½ cup of oil. The changes they had made usually involved the eggs. Predictably, many contemporary recipes called for reducing or eliminating the egg yolks, the idea being to produce a low-cholesterol or cholesterol-free cake. I could not fathom the health advantages of cutting back the yolks from six to two or three, so I didn’t bother trying the recipes. (Assuming that the cake serves 12, the savings per person is only one-quarter to one-third yolk, around a teaspoon.)
However, the idea of using only egg whites greatly intrigued me because I thought that the result might be a sort of angel chiffon cake, easier than true angel food cake to make and, I dared hope, perhaps even more delectable. But 11 flops later, I reluctantly concluded that egg white chiffon cakes, no matter how they are made, are tough, wet, bouncy, low-rising disasters. Beware such recipes.
For a moist, tender cake that still has enough structure, decrease the flour, add extra egg yolks, and beat only some of the egg whites.
Writers more interested in taste than in health tended to increase the egg content of their chiffon cakes, particularly the whites. These recipes proved successful, but the cakes, even though they were lighter and richer than Betty Crocker’s original, still struck me as dry.
I instinctively felt that adding more liquid would be a poor idea, but at this point I felt I had no choice but to try. Unfortunately, experimentation proved my instincts right. Increasing the water from ¾ cup to 1 cup made the texture gummy and heavy—and the cake still managed to taste dry.
There was now only one ingredient left to play with, the flour, and the thought of touching this one terrified me. Since the problem was dryness, the flour obviously had to be decreased, but I knew from my experience with other sponge-type cakes that decreasing the flour could have very messy consequences. I might end up with a rubbery sponge (à la my egg white chiffon experiments) or, worse, with a demonic soufflé that heaved plops of batter onto the floor of my oven.
Whenever a sponge-type cake decides to collapse or explode, the culprit is the same: a lack of structure. Since eggs as well as flour provide structure, I reasoned that I could compensate for a decrease in flour by adding an extra egg yolk.
I made an orange chiffon cake using the Betty Crocker formula but decreasing the flour by ⅓ cup and increasing the yolks from five to six. The effect was magical. Instead of being fluffy, cottony, and crumbly, the cake was wonderfully moist and so tremblingly tender that slices flopped over at the middle if cut too thin. And the moistness transmitted all of the taste that had been lacking in my first experiments.
The cake, however, was not quite perfect. Evidently the structure was borderline, and so the cake rose very high, spilling over onto the lip of the pan. This made it difficult to cut the cake free from the pan without tearing the top crust. Furthermore, because its top was humped, the cake did not sit flat when turned upside down onto a serving plate. I figured that removing an egg white would help to shrink the cake, but I feared that it might also undercut the structure to the point where the cake wouldn’t rise at all. Nonetheless, I gave the idea a try. The resulting cake was lovely coming out of the oven, risen just to the top of the pan and perfectly flat—but its perfection was illusory. I hung the cake upside down to cool and started to clean up the kitchen when I heard a soft plop: My cake had fallen out of the pan.
Once I had taken a few nibbles of the mess, my fears were confirmed. The cake was pasty and overly moist. There was simply not enough structure to hold it together. It had to have that egg white. But perhaps, I thought, using an extra egg yolk in place of that white would save the structure but prevent the excess puffiness. Unfortunately, when I tried this formula, my test cake bulged almost as much as the one I had made with five yolks and eight whites, though it didn’t fall out of the pan, which meant that it had sufficient structure.
At this point a chiffon cake recipe that I had seen in Carole Walter’s Great Cakes (1991) came to mind. Rather than whipping all the egg whites, Walter mixed some of them, unbeaten, into the dry ingredients along with the yolks, water, and oil. Thus she incorporated less air into the batter, which should, I reasoned, make for a smaller cake. I tried Walter’s technique using seven eggs, two of them added whole to the batter and five of them separated with the whites beaten. Eureka! At last I had the perfect chiffon cake: moist, tender, flavorful, and just the right size for my pan.
In the original recipes for chiffon cake published by General Mills, the directions for beating the egg whites read, “WHIP until whites form very stiff peaks. They should be much stiffer than for angel food or meringue. DO NOT UNDERBEAT.”
These instructions, with their anxiety-inducing capitalized words and italics, are well taken. If the whites are not very stiff, the cake will not rise properly, and the bottom will be heavy, dense, wet, and custard-like. Better to overbeat than underbeat. After all, if you overbeat the egg whites and they end up dry and “blocky,” you can simply smudge and smear the recalcitrant blobs with the flat side of the spatula to break up the clumps.
SERVES 12
Serve this cake as is or dust with confectioners’ sugar.
1½ cups (10½ ounces) sugar
1⅓ cups (5⅓ ounces) cake flour
2 teaspoons baking powder
½ teaspoon salt
7 large eggs (2 whole, 5 separated), room temperature
¾ cup water
½ cup vegetable oil
1 tablespoon vanilla extract
½ teaspoon almond extract
½ teaspoon cream of tartar
1. Adjust oven rack to lower-middle position and heat oven to 325 degrees. Line 16-cup tube pan with parchment paper but do not grease. Whisk sugar, flour, baking powder, and salt together in large bowl. Whisk in whole eggs and yolks, water, oil, vanilla, and almond extract until batter is just smooth.
2. Using stand mixer fitted with whisk attachment, whip egg whites and cream of tartar on medium-low speed until foamy, about 1 minute. Increase speed to medium-high and whip until stiff peaks form, 3 to 4 minutes. Using large rubber spatula, fold whites into batter, smearing any stubborn pockets of egg white against side of bowl.
3. Transfer batter to prepared pan and smooth top with rubber spatula. Gently tap pan on counter to settle batter. Bake until skewer inserted in center comes out clean, 55 minutes to 1 hour 5 minutes, rotating pan halfway through baking.
4. If cake has prongs around rim for elevating cake, invert pan on them. If not, invert pan over neck of bottle or funnel so that air can circulate all around it. Let cake cool completely in pan, 2 to 3 hours.
5. Run thin knife around edge of pan to loosen cake, then gently tap pan upside down on counter to release cake. Peel off parchment and turn cake right side up onto platter. Serve. (Cake can be stored at room temperature for up to 2 days or refrigerated for up to 4 days.)
variations
Substitute ½ teaspoon baking soda for baking powder. Reduce water to ⅔ cup, reduce vanilla to 1 teaspoon, and omit almond extract. Add 3 tablespoons grated lemon zest plus 2 tablespoons juice (3 lemons) to batter with vanilla.
Substitute 2 tablespoons grated orange zest plus ¾ cup juice (2 oranges) for water. Reduce vanilla to 1 teaspoon and omit almond extract.
Substitute ¾ cup brewed espresso or strong coffee for water and omit almond extract. Add ½ cup finely chopped toasted walnuts and 1 ounce unsweetened grated chocolate to batter before folding in whites.
LINING A TUBE PAN WITH PARCHMENT

1. Starting with square of parchment larger than tube pan, place pan right side up on paper and trace around outside with pencil.
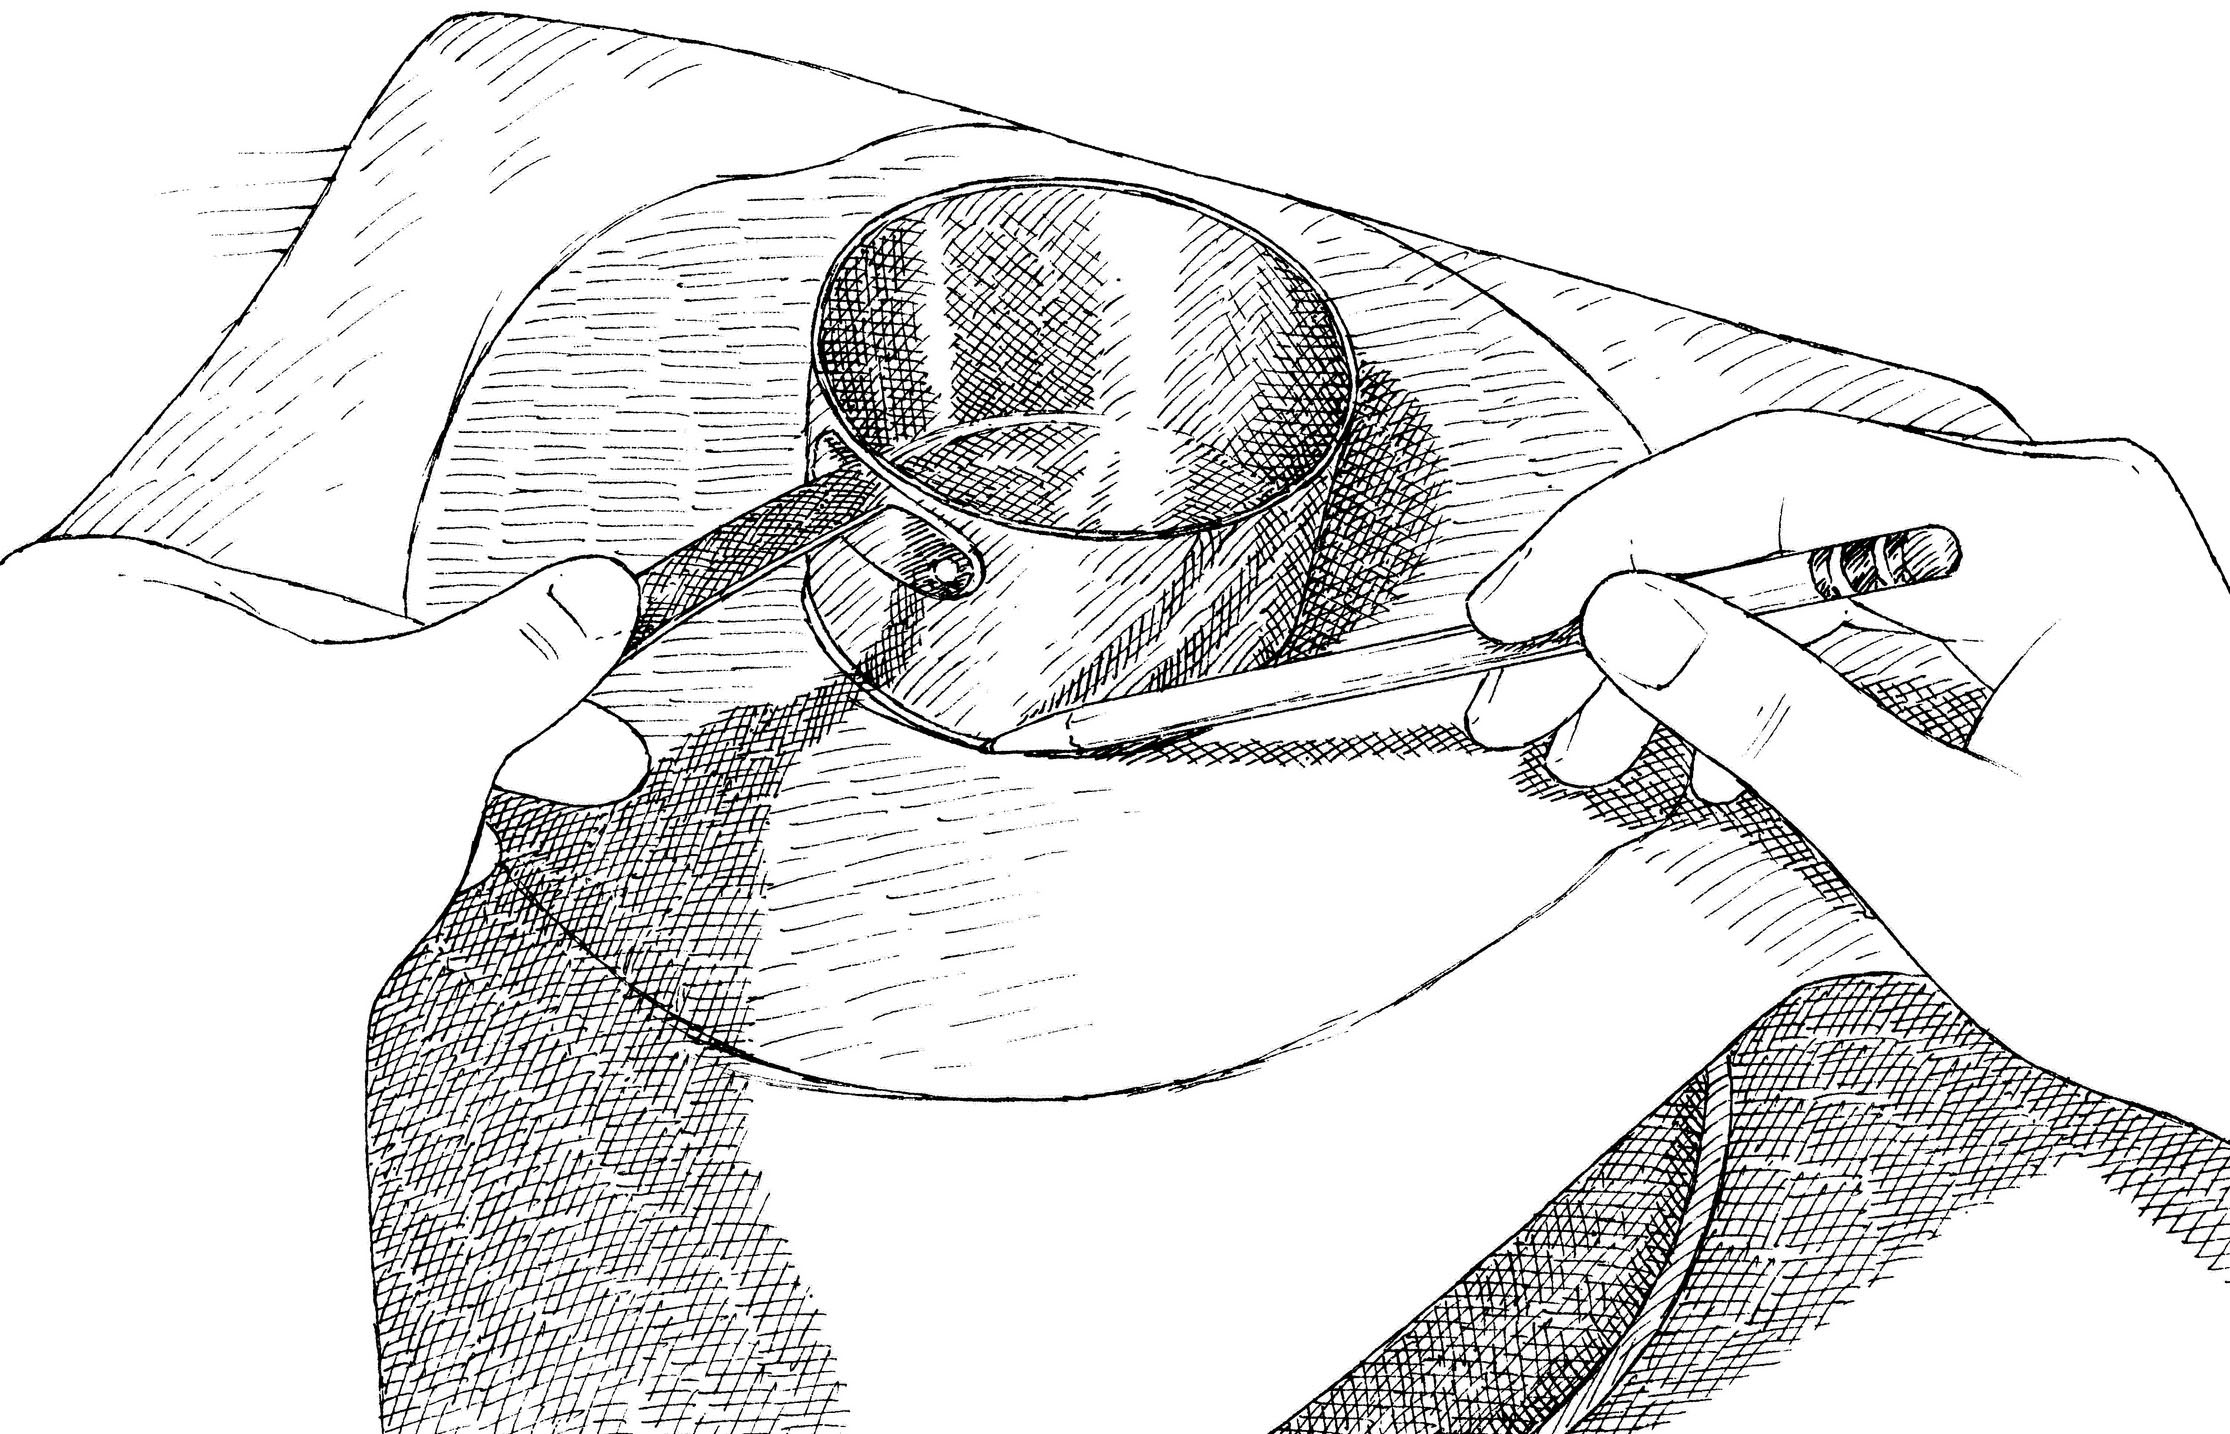
2. Turn pan upside down, place parchment on top of pan, and trace circle around measuring cup that fits opening of center hole. Cut out circles, folding parchment as needed.
Making a wedding cake is hard. Making a multilayered Dobos torte out of génoise sponge cake and buttercream is daunting. But lemon pound cake? Well, that’s easy, isn’t it? After all, it’s made only of eggs, butter, sugar, flour, and lemon mixed together and baked in a loaf pan. But if it’s so easy, why do pound cakes often turn out spongy, rubbery, heavy, and dry rather than fine-crumbed, rich, moist, and buttery? In addition, most pound cake recipes call for creaming the batter, a tricky method that demands the ingredients be at just the right temperature to achieve a silken cake batter. So my goal was twofold: Produce a superior pound cake while making the process as simple and foolproof as possible.
I started with a pound cake recipe developed in the Cook’s test kitchen in 1994 that was known for being excellent in its results but finicky in its preparation. The cake was top-notch, with a submissive crumb and a golden, buttery interior. In fact, it was everything I wanted from a pound cake except for one thing—the preparation method was anything but foolproof. Made in the traditional style of creaming the butter and sugar until fluffy and pale, the method was so exacting that even the smallest diversion sent the batter over the edge into a curdled abyss. To achieve perfection, the ingredients had to be at precisely 67 degrees, the butter and sugar beaten together for exactly 5 minutes to aerate, and the eggs drizzled into the batter over a period of 3 to 5 minutes. All of these precautions were advised to eliminate the danger of “breaking” the batter (a pound cake has so many eggs that keeping them in emulsion can be tricky when using the creaming method), which can make the crust look mottled and leave the cake’s interior dense and tough.
MACHINE AGE
I turned to other cake recipes for ideas. First I tried cutting softened butter into flour using a stand mixer. After the butter and flour resembled knobby crumbs, I added some of the eggs, beat the mixture until cohesive, then added the rest of the eggs and beat the batter further until thick, fluffy, and lush. We often favor this method for cakes because it produces a velvety texture and a superfine crumb. Although the pound cake batter assembled this way looked great, the baked cake was too open-grained and tender, more like a yellow cake than a pound cake.
Next I tried melting the butter, a method often used in making quick breads. The liquids are combined and the dry ingredients then mixed into the wet by hand. This method was quick and easy. Melting the butter eliminated all of the temperature issues associated with creaming. Best of all, the batter could be pulled together and put into the oven in 5 minutes.
Melted butter, baking powder, and the food processor make our lemon pound cake absolutely foolproof.
With a tight grain, a perfect swell and split in its center, and a nice, browned exterior, this cake showed promise. When I made it a second time, however, it sagged in the center. Additional tests yielded varying results. The problem may have been in the mixing method; perhaps inconsistent mixing produced inconsistent cakes. The solution? A food processor would do a better job of emulsification and also standardize the process. I added the eggs, sugar, and vanilla to the food processor bowl, combining them enough to integrate the sugar and eggs, and then I drizzled the melted butter in through the feed tube. I transferred the watery base to a large bowl, added lemon zest, and sifted in cake flour and salt, whisking these ingredients in by hand.
The method was a success. The cake had a split dome that afforded a peek inside at the marvelously yellow color of its interior. Just to be sure, I made the cake again and again, with the same results. Recognizing that some home cooks don’t have a food processor, I tried the method in a blender. Although the cake was a bit more dense, the differences were so minimal that I recommend either approach. With my method determined, I focused on the cake’s texture and flavor.
A MODERN POUND CAKE
My objective was to make the cake just a bit lighter, but not so light as to resemble a yellow cake. (Pound cakes are by definition heavier and more dense than layer cakes.) When I tested cake flour against all-purpose, the former was superior, making the cake more tender. But the cake still needed more lift and less sponginess.
I was at this point using two sticks of melted butter. Thinking that more butter might improve the texture, I increased the amount, but the cake turned out greasy. Next I turned to the eggs. The original Cook’s recipe called for three eggs plus three yolks, so I tried four whole eggs instead (an equivalent liquid amount), thinking that the additional white might add some lift. The cake was better but still on the dense side. Without success, I tried adding cream (this cake turned out heavy) and reducing the flour (this one was greasy). Four whole eggs had gotten me close, but the texture was still not ideal.
In the oldest of recipes (from the 1700s), eggs were the only ingredient in pound cake that gave it lift. In the 1850s, however, many cooks began adding the new wonder ingredient—baking powder—to achieve a lighter texture and a higher rise. Although traditionalists might scoff at the addition of chemical leavening, I was willing to give it a try. With just 1 teaspoon, I instilled enough breath into the cake to produce a consistent, perfect crumb. Now that I had simplified the method and achieved the right texture, it was time to concentrate on lemon flavor.
LEMON LAWS
In all of my prior tests, I had experienced difficulty keeping the lemon zest afloat. In cake after cake, the zest came together in large yellow clumps. The solution turned out to be simple. When the lemon zest was pulsed with the sugar before the eggs were added to the food processor bowl, the baked cake came out evenly dotted throughout with perfect specks of zest. I also added lemon juice to the batter to boost flavor.
While some prefer their lemon pound cake plain, or with only a simple shower of confectioners’ sugar, I like a blast of lemon flavor. A quick glaze—made by bringing sugar and lemon juice to a boil—tasted great in the pan but failed to migrate into the nooks and crannies of the cake’s crumb when simply brushed on top. I used an old trick to help the glaze on its way, poking small perforations through the cake’s top crust and sides with a toothpick. The glaze now penetrated to the interior of the cake, distributing plenty of lemon flavor. Finally, I had a quick, foolproof recipe that delivered a great crumb and plenty of lemon flavor. Pound for pound, this cake’s a winner.
Lemon Pound Cake
SERVES 8
You can use a blender instead of a food processor to mix the batter. To add the butter, remove the center cap of the lid so the butter can be drizzled into the whirling blender with minimal splattering. This batter looks almost like a thick pancake batter and is very fluid. This recipe calls for a loaf pan that measures 8½ by 4½ inches; if you use a 9 by 5-inch loaf pan, start checking for doneness 5 minutes earlier than advised in the recipe.
Cake
1½ cups (6 ounces) cake flour
1 teaspoon baking powder
½ teaspoon salt
16 tablespoons unsalted butter
1¼ cups (8¾ ounces) sugar
2 tablespoons grated lemon zest plus 2 teaspoons juice (2 lemons)
4 large eggs, room temperature
1½ teaspoons vanilla extract
Lemon Glaze
½ cup (3½ ounces) sugar
¼ cup lemon juice (2 lemons)
1. For the cake: Adjust oven rack to middle position and heat oven to 350 degrees. Grease and flour 8½ by 4½-inch loaf pan. In medium bowl, whisk together flour, baking powder, and salt; set aside.
2. Melt butter in small saucepan over medium heat. Whisk melted butter thoroughly to reincorporate any separated milk solids. Pulse sugar and lemon zest in food processor until combined, about 5 pulses. Add lemon juice, eggs, and vanilla and process until combined, about 5 seconds. With processor running, add melted butter in steady stream (this should take about 20 seconds). Transfer mixture to large bowl. Sift flour mixture over sugar mixture in 3 steps, whisking gently after each addition until just combined.
3. Pour batter into prepared pan and smooth top with rubber spatula. Bake for 15 minutes; reduce oven temperature to 325 degrees and continue baking until deep golden brown and toothpick inserted in center comes out clean, about 35 minutes, rotating pan halfway through baking. Let cake cool in pan for 10 minutes, then turn out onto wire rack. Poke cake’s top and sides with toothpick. Let cake cool completely, at least 1 hour. (Cooled cake can be wrapped tightly in plastic wrap and stored at room temperature for up to 5 days.)
4. For the lemon glaze: While cake is cooling, bring sugar and lemon juice to boil in small saucepan, stirring occasionally to dissolve sugar. Reduce heat to low and simmer until thickened slightly, about 2 minutes. Brush top and sides of cooled cake with glaze and let glaze cool completely before serving.
GLAZING POUND CAKE
To help the glaze migrate into the cake for a true blast of lemon flavor, we poke small holes in the baked cake with a toothpick.

1. After removing cake from pan, poke entire top with toothpick.
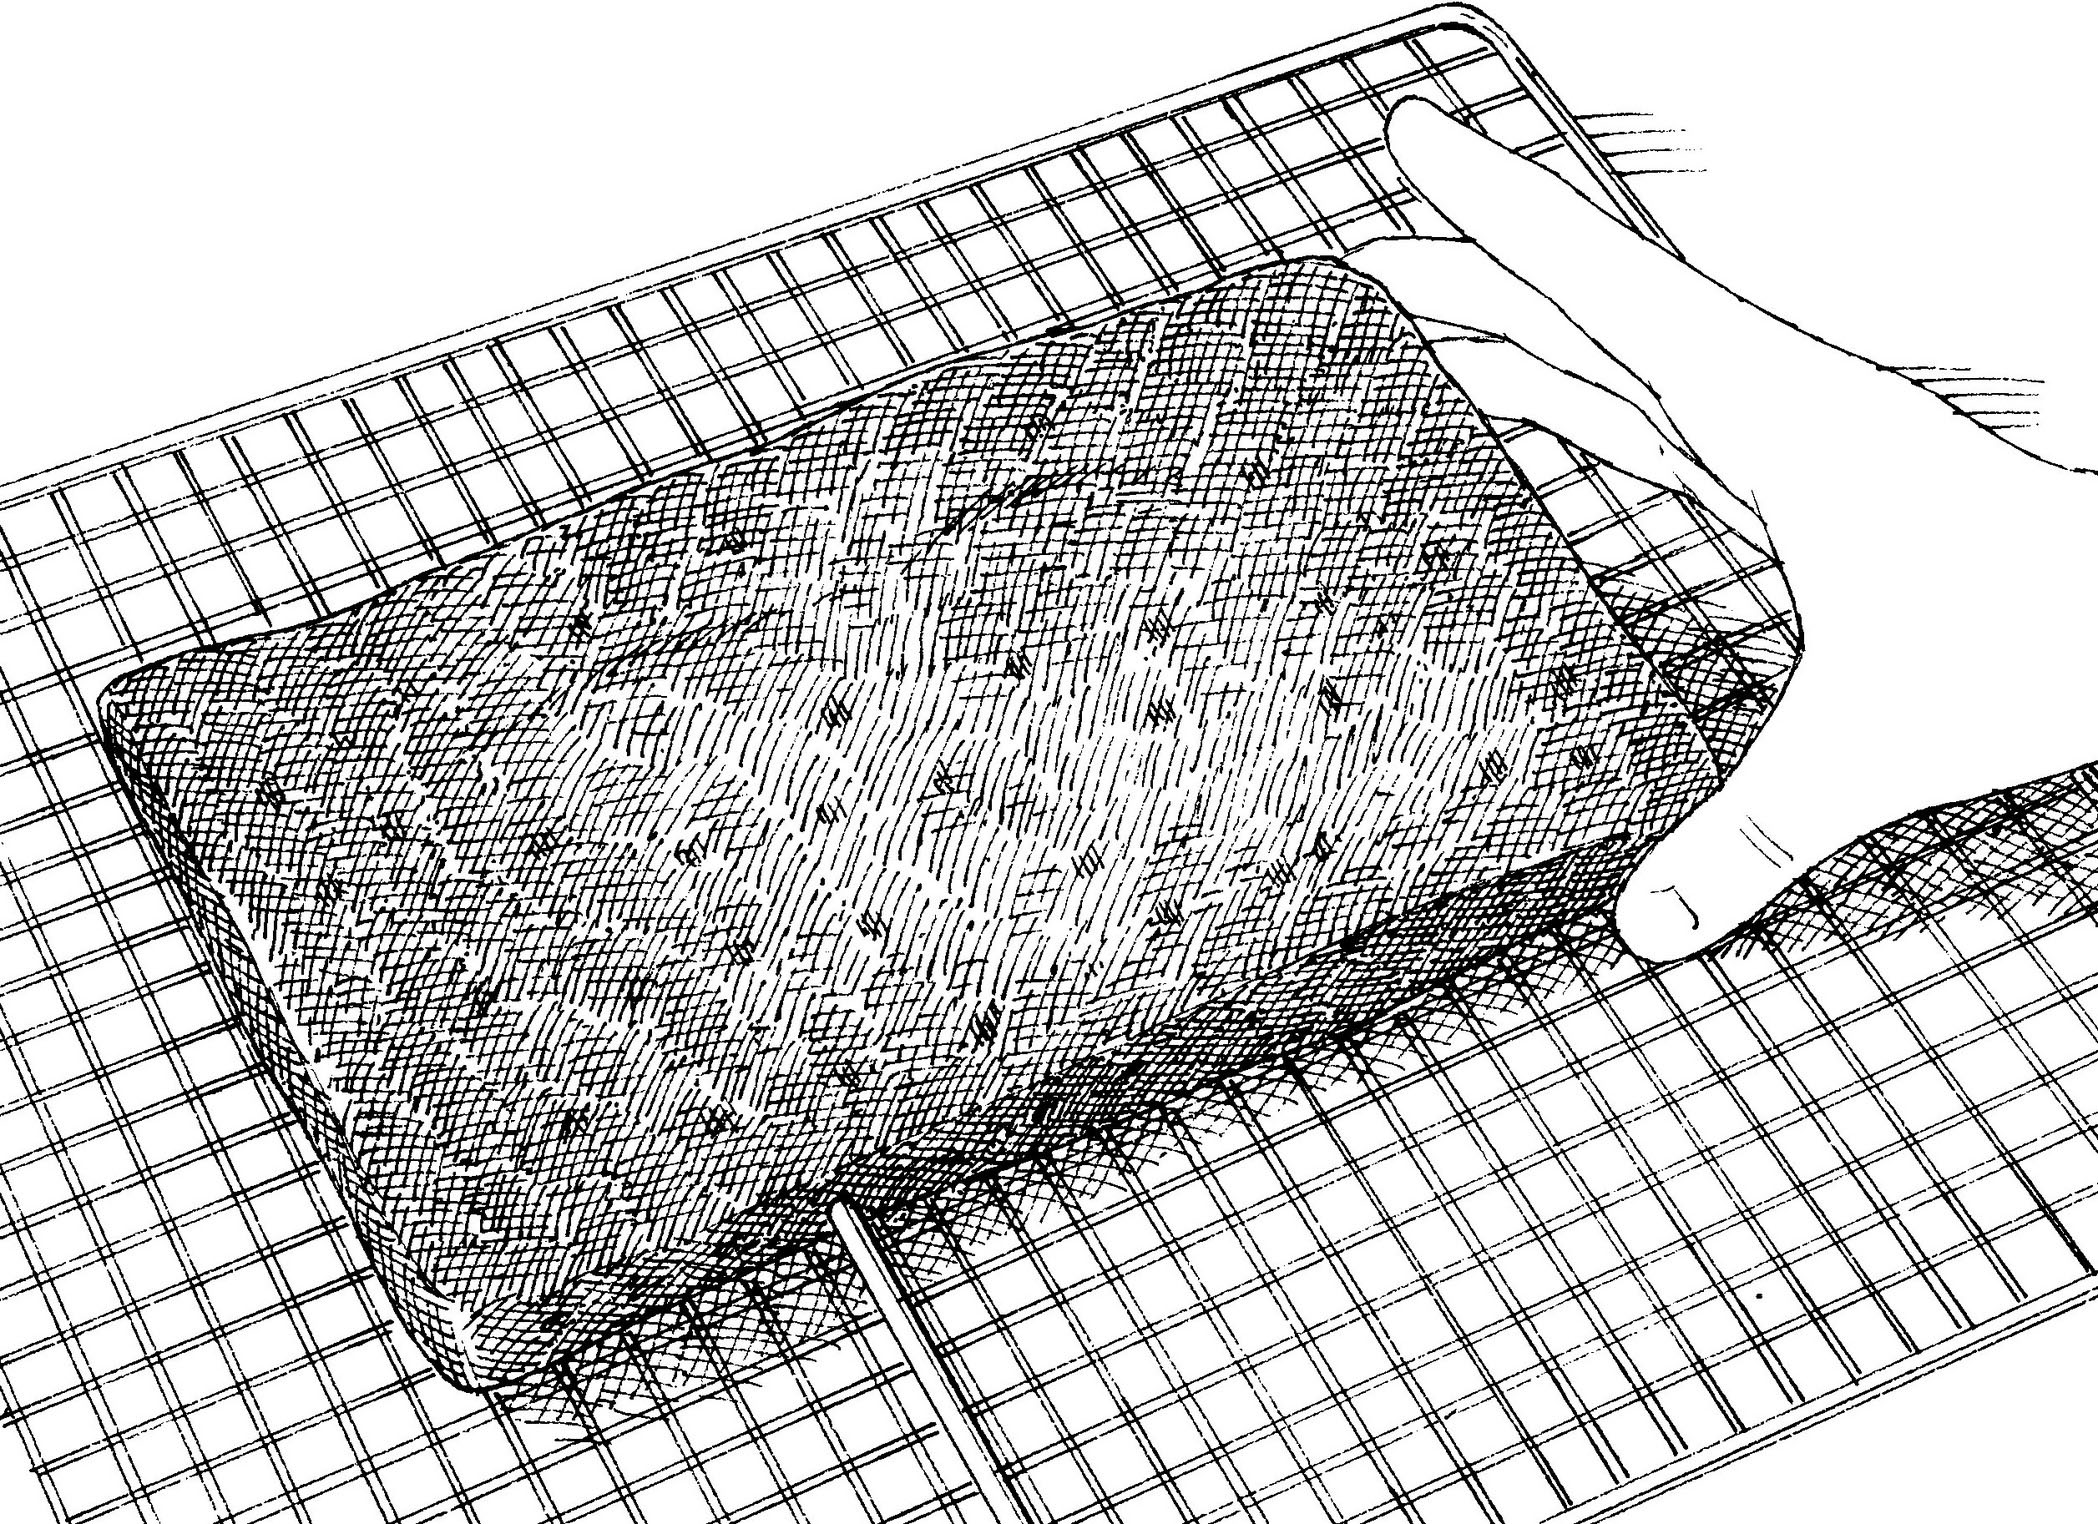
2. Poke cake on all sides with toothpick.
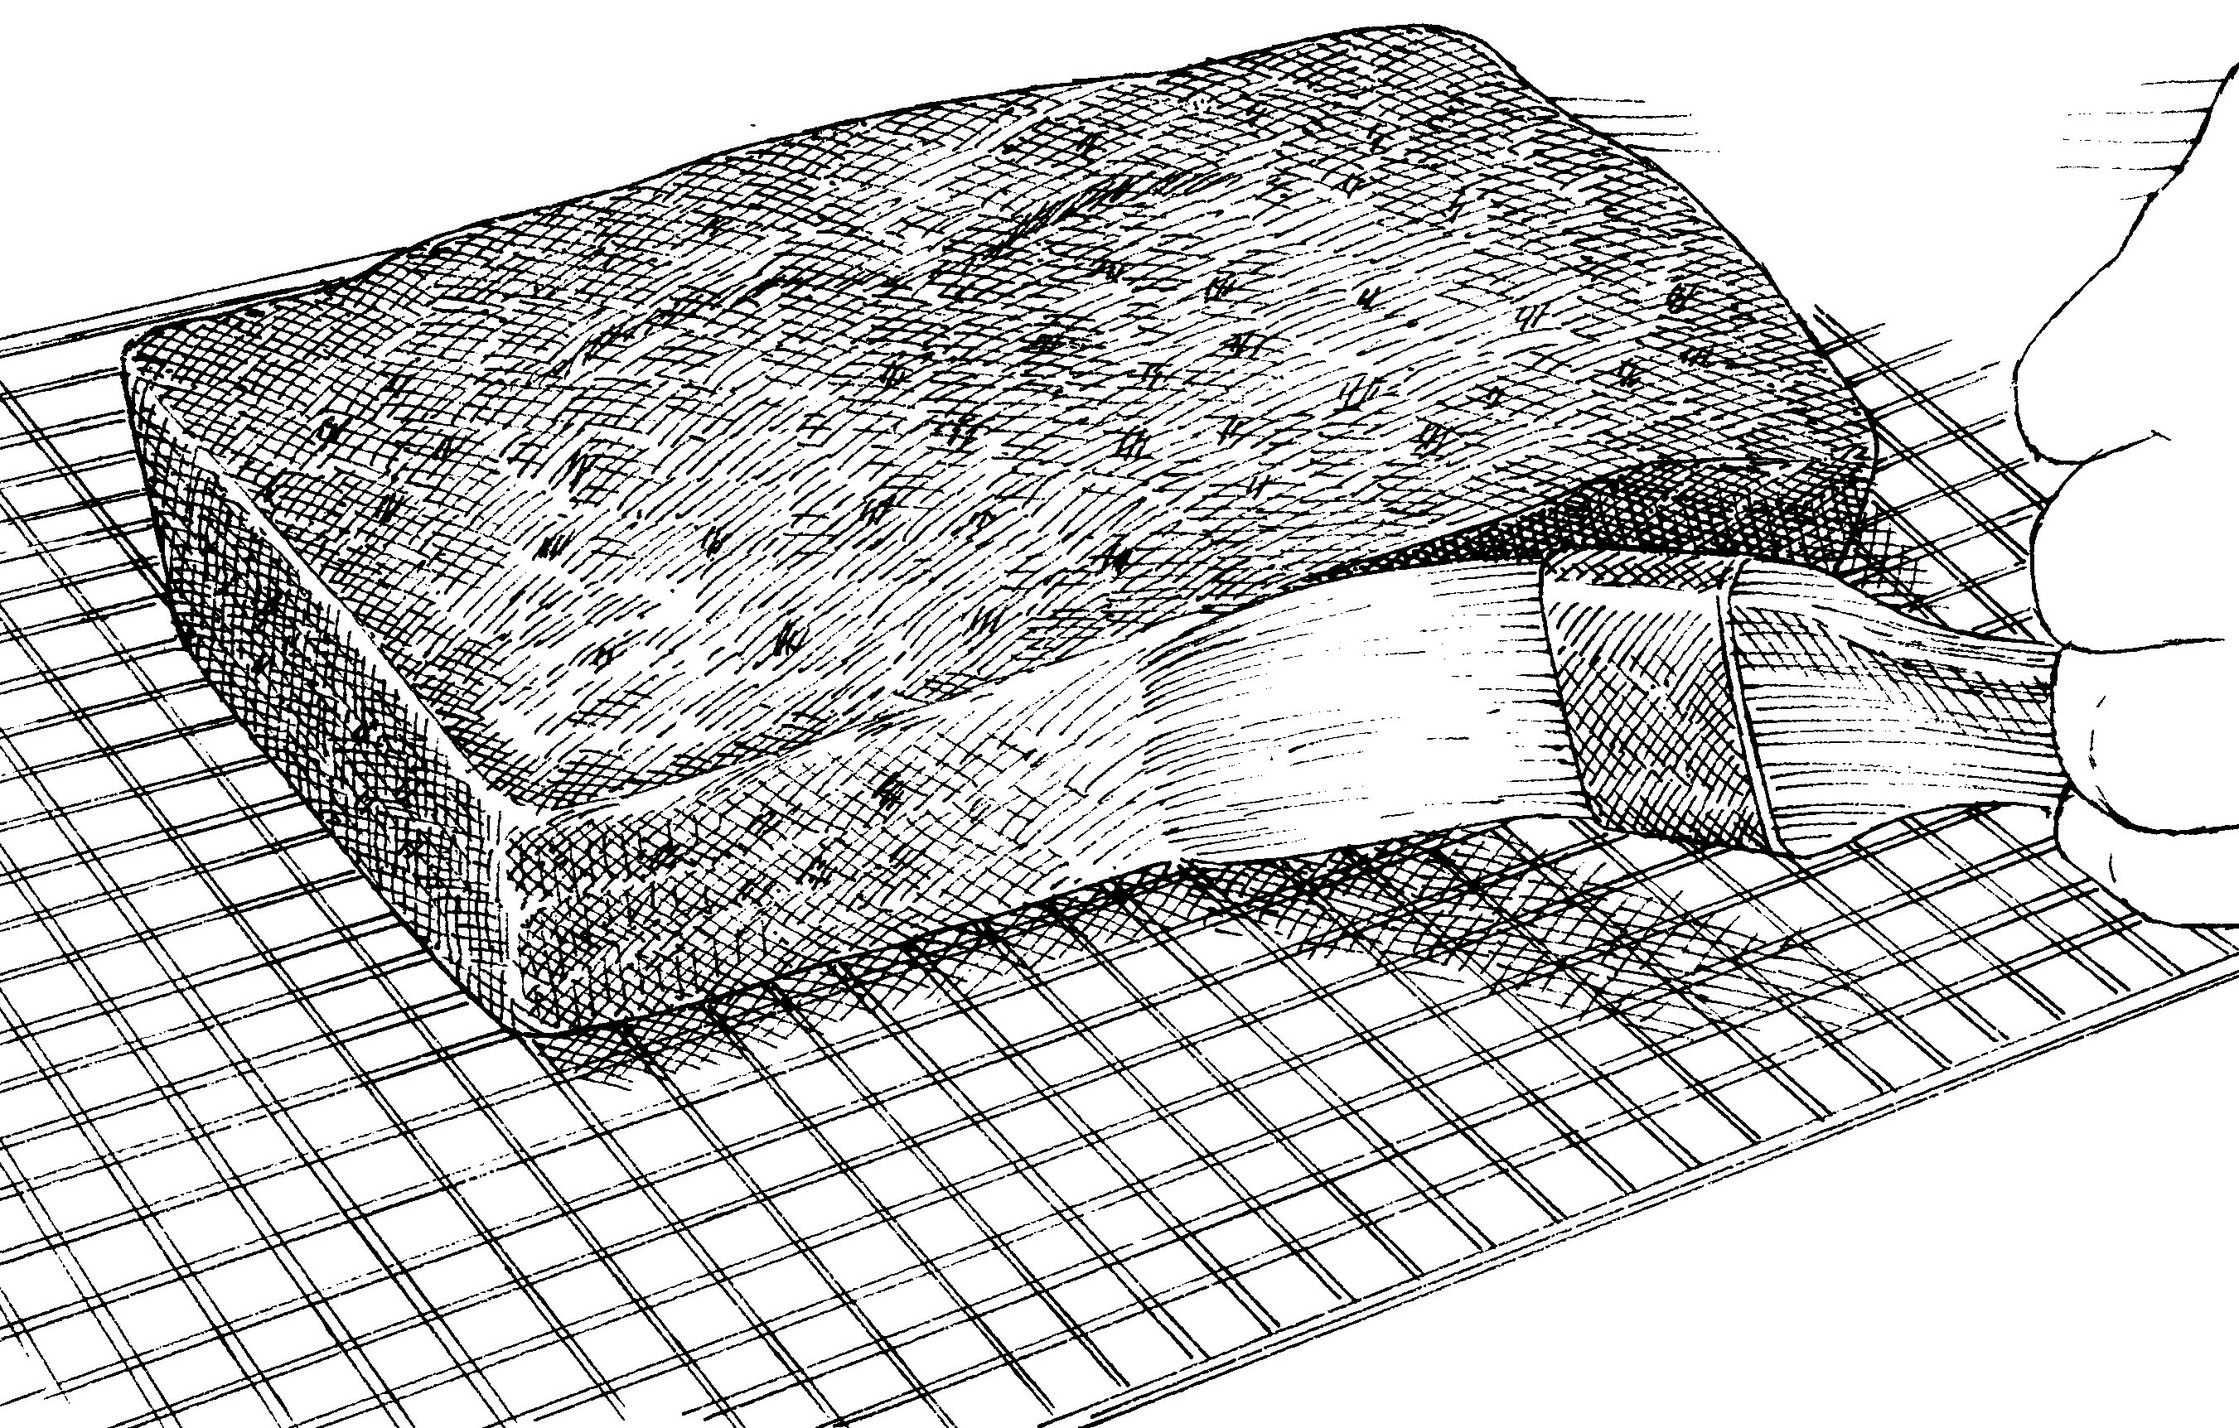
3. Brush top and sides of cooled cake with glaze. Let glaze cool to room temperature.
While many things have been supersized in recent years, chocolate cakes have become denser, richer, and squatter. Many contemporary chocolate cakes are so intense that just a few forkfuls satisfy me. These cakes are delicious—a bad chocolate cake is hard to imagine—but sometimes I just want a piece of cake, not an overly rich confection.
When I think of the perfect chocolate cake, I remember the birthday cakes my mother made. They were tall, sweet, and chocolaty—the kind of cake you had with a glass of milk, not a demitasse of espresso. Like many mothers, mine used a cake mix, but this style of old-fashioned chocolate cake is a classic. While today’s stylish cakes are dense and rich, the cake I had in mind would have a spongy but moist texture that offered a nice contrast with its thick coating of frosting.
Making a chocolate “pudding” with melted chocolate, water, cocoa powder, and sugar makes for high-impact chocolate flavor.
I knew that the mixing method would be the key to getting the right texture. Creaming—beating butter with sugar before mixing in the eggs and flour—is a very popular method for many cakes. The sugar crystals help whip air into the softened butter, which helps the cake rise in the oven. But adding melted unsweetened chocolate undid the effects of creaming, and the resulting cakes were dense and dry. I tried to lighten the load (more leavening, more eggs), but eventually I realized that this method would never produce a fluffy, tender chocolate cake.
Next up was reverse creaming. By mixing very soft butter with flour before adding any liquids, less gluten (the source of cake structure) can develop. Cake made with this technique was tender and fluffy, but too fragile to stand up to a billowy heap of frosting. I suspected that the chocolate’s moisture and fat were getting in the way.
Next, I tried ribboning, a process of whipping eggs with sugar until they double in volume and then adding the butter, dry ingredients, and milk. The term refers to the ribbon-like strands that form between the whisk and the batter when the eggs and sugar are whipped. The technique is often the first step when making a French-style sponge cake, or genoise. And many of the American cake recipes I had pulled from late-19th-century cookbooks relied on this technique, since chemical leaveners (baking soda and baking powder) were not yet widely used; the egg foam aerated the cake. While I was planning on using a leavener for extra security, maybe this technique would deliver the height and the structure I wanted.
I followed the basic ribboning procedure of whipping eggs with sugar and then adding the melted chocolate and butter, followed by the dry ingredients and milk. The cake was a bit too dry and not chocolaty enough, but it had more structure and tenderness than any of the other cakes I had made. When I added a full cup of buttermilk (which won out over regular milk), I had a fairly moist cake with good structure and spongy volume. Adding cocoa powder to the flour mixture improved the chocolate flavor.
The solution to the moisture problem presented itself as I combed through chocolate cake recipes. Although some called for mixing melted unsweetened chocolate into the batter, I came across a few references to chocolate “pudding” or “custard.” This wasn’t a classic pudding or custard (chocolate, milk, eggs, sugar, cornstarch) but a simpler concoction of chocolate, water, and sugar. Probably used to keep the chocolate from burning, this technique was popular in the early 1900s. I found recipes using it in The Settlement Cookbook (1901)—one of the most important American cookbooks of its era—and in the first edition of Joy of Cooking (1931). Although I could find few modern references to this method, I remembered the powdered “pudding” included in some supermarket cake mixes. Maybe these cake-mix makers were onto something.
I made another cake, this time melting unsweetened chocolate and cocoa powder in hot water over a double boiler and then stirring in sugar until it dissolved. What came from the oven was the moistest cake yet, with a pronounced yet subtle chocolate flavor. It was gloriously tall, and the crumb was open and spongy yet also tender and moist—the cake I had been searching for.
I wanted a silky, voluminous frosting with good chocolate flavor to pair with my cake. Frostings fall into three categories: meringue, buttercream, and ganache. Meringue and buttercream frostings offer great volume, but don’t emphasize the chocolate. Ganache is all about chocolate—it can be as simple as heated cream poured over chopped sweetened chocolate—but its texture is usually quite dense. Could I make a ganache that was soft and billowy?
I tried whipping butter into cooled ganache, but the frosting wasn’t as silky and glossy as I wanted; plus, it set into a hard shell around my cake—if it didn’t break first. After experimenting with various temperatures, times, and ingredients, I found the solution to be a simple reversal of the conventional ganache procedure: I poured cold (rather than heated) cream into warm melted (rather than room-temperature) chocolate, let the mixture come to room temperature, and then whipped it until fluffy.
My cake was all that I had imagined: moist, tender, and airy and perfectly balanced by a light and billowy yet creamy frosting.
Old-Fashioned Chocolate Layer Cake
SERVES 10 TO 12
For a smooth, spreadable frosting, use chopped semisweet chocolate, not chocolate chips, which contain less cocoa butter than bar chocolate does and will not melt as readily. Bittersweet chocolate that is 60 percent cacao can be substituted, but it will produce a stiffer frosting. Bittersweet chocolate with 70 percent cacao should be avoided, as it will produce a frosting that is crumbly and will not spread. For best results, do not make the frosting until the cakes are cooled, and use the frosting as soon as it is ready. If the frosting gets too cold and stiff to spread easily, wrap the mixer bowl with a dish towel soaked in hot water and mix on low speed until the frosting appears creamy and smooth.
Cake
4 ounces unsweetened chocolate, chopped coarse
½ cup hot water
¼ cup (¾ ounce) Dutch-processed cocoa powder
1¾ cups (12¼ ounces) sugar
1¾ cups (8¾ ounces) all-purpose flour
1½ teaspoons baking soda
1 teaspoon salt
1 cup buttermilk
2 teaspoons vanilla extract
4 large eggs plus 2 large yolks, room temperature
12 tablespoons unsalted butter, cut into 12 pieces and softened
Frosting
1 pound semisweet chocolate, chopped fine
8 tablespoons unsalted butter
⅓ cup (2⅓ ounces) sugar
2 tablespoons corn syrup
2 teaspoons vanilla extract
¼ teaspoon salt
1¼ cups heavy cream, chilled
1. For the cake: Adjust oven rack to middle position and heat oven to 350 degrees. Grease two 9-inch round cake pans, line with parchment paper, grease parchment, and flour pans. Combine chocolate, hot water, and cocoa in medium heatproof bowl set over saucepan filled with 1 inch barely simmering water, making sure that water does not touch bottom of bowl and stirring with heat-resistant rubber spatula until chocolate is melted, about 2 minutes. Add ½ cup sugar to chocolate mixture and stir until thick and glossy, 1 to 2 minutes. Remove bowl from heat; set aside to cool.
2. Whisk flour, baking soda, and salt together in medium bowl. In small bowl, combine buttermilk and vanilla. Using stand mixer fitted with whisk attachment, whip eggs and yolks on medium-low speed until combined, about 10 seconds. Add remaining 1¼ cups sugar, increase speed to high, and whip until light and fluffy, 2 to 3 minutes. Fit stand mixer with paddle. Add chocolate mixture to egg mixture and mix on medium speed until thoroughly combined, 30 to 45 seconds, scraping down bowl as needed. Add butter, 1 piece at a time, mixing for about 10 seconds after each addition. Add flour mixture in 3 additions, alternating with buttermilk mixture in 2 additions, mixing until incorporated after each addition (about 15 seconds) and scraping down bowl as needed. Reduce speed to medium-low and mix until batter is thoroughly combined, about 15 seconds. Give batter final stir by hand.
3. Divide batter evenly between prepared pans and smooth tops with rubber spatula. Bake until toothpick inserted in center comes out with few moist crumbs attached, 25 to 30 minutes, switching and rotating pans halfway through baking. Let cakes cool in pans on wire rack for 10 minutes. Remove cakes from pans, discarding parchment, and let cool completely on rack, about 2 hours, before frosting. (Cooled cakes can be wrapped tightly in plastic wrap and stored at room temperature for up to 24 hours. Wrapped tightly in plastic, then aluminum foil, cakes can be frozen for up to 1 month. Defrost cakes at room temperature before unwrapping and frosting.)
4. For the frosting: Melt chocolate in medium heatproof bowl set over saucepan filled with 1 inch barely simmering water, making sure that water does not touch bottom of bowl and stirring occasionally until smooth. Set aside, off heat. Meanwhile, melt butter in small saucepan over medium-low heat. Increase heat to medium; add sugar, corn syrup, vanilla, and salt; and stir with heat-resistant rubber spatula until sugar is dissolved, 4 to 5 minutes. Transfer melted chocolate and butter mixture to bowl of stand mixer. Add cream and stir with rubber spatula until thoroughly combined.
5. Fill large bowl halfway with ice and water, place mixer bowl over ice bath, and stir mixture constantly with rubber spatula until frosting is thick and just beginning to harden against sides of bowl, 1 to 2 minutes (frosting should be 70 degrees). Fit stand mixer with paddle and beat frosting on medium-high speed until frosting is light and fluffy, 1 to 2 minutes. Using rubber spatula, stir until completely smooth.
6. Line edges of cake platter with 4 strips of parchment to keep platter clean. Place 1 cake layer on platter. Spread 1½ cups frosting evenly over top, right to edge of cake. Top with second cake layer, press lightly to adhere, then spread 1½ cups frosting evenly over top. Spread remaining 2½ cups frosting evenly over sides of cake. To smooth frosting, run edge of offset spatula around cake sides and over top or create billows by pressing back of spoon into frosting and twirling spoon as you lift away. Carefully remove parchment strips before serving. (Cake can be refrigerated for up to 24 hours. Let come to room temperature before serving.)
The trend took shape almost overnight: A pastel-frosted cupcake landed a cameo on the HBO series Sex and the City, and before the owners of New York’s Magnolia Bakery could blink, their single-serving sweet turned into a sugar-charged sensation. The cupcake concept—a dainty, portion-controlled, out-of-hand snack universally recognized from childhood birthday parties—was just waiting to take off, and it wasn’t long before dedicated “cupcakeries” started popping up by the dozen. Now it’s more than 15 years later, and the line outside Magnolia still wraps around the block.
But if cupcake appeal is all about getting the best attributes of cake in a portable package, the irony is that most of these highly specialized bakeries either can’t deliver the goods—a moist, tender (but not crumbly) crumb capped with just enough creamy, not-too-sweet frosting—or they deviate from the classic model. Call me old-fashioned, but I prefer a simple, decadent, perfect chocolate cupcake any day, so that’s where I decided to focus my testing.
HOW THE CUPCAKE CRUMBLES
My favorite chocolate cake features a double whammy of cocoa powder (½ cup) and melted bittersweet chocolate (3 ounces) plus the roasty, chocolate-enhancing flavor of brewed coffee (½ cup). These elements, when combined with tangy buttermilk (an appropriately less-sweet but still dairy-rich alternative to regular milk), make for a moist cake with full, unabashed chocolate intensity. Figuring that a cupcake is just a pint-size version of a cake, I mixed up the batter, portioned it into a muffin tin, and popped it into the oven. Minutes later, the tasters and I dug in—and the swooning began. Here was a chocolate cupcake that tasted like chocolate. The only problem? Piles of crumbs littering the counter as we ate. As fork food, this rich, tender cake was ideal, but eaten without utensils, it was more of a cleanup project.
I quickly identified the generous dose of cocoa and the melted chocolate as likely culprits for the cupcake’s too-tender crumb. More specifically, the texture suffered from too little gluten development and too much fat. Gluten forms when proteins in flour bind together with liquid and become pliable; the more the proteins are worked into the liquid (or, in this case, the batter), the more gluten develops and the stronger the crumb. Fat (like chocolate), on the other hand, acts as a tenderizer to create a soft, delicate crumb.
Because all that cocoa powder (although very low in fat) contains no gluten-forming proteins, it works to dilute the flour, while the extra fat from the melted chocolate makes this cake too tender. Though I was loath to compromise the chocolate’s intensity, I knew that I had to cut back on both chocolate components. Fifty percent less cocoa and two-thirds less bittersweet chocolate later, I had perfectly portable (if slightly dry) cupcakes—and predictably feeble chocolate flavor.
I decided that if I had to work with less chocolate, the least I could do was take advantage of the one chocolate-enhancing ingredient I was already using: coffee. Sure enough, mixing the cocoa with hot coffee eked out more chocolate flavor. When I considered the other liquid component—buttermilk—I couldn’t help but wonder if I could exchange it for more of the caffeinated stuff. The effect might even benefit me twofold, I reasoned, since the richness of dairy products typically obscures other flavors (like adding cream to tomato soup); maybe the chocolate flavor would actually be cleaner and stronger without it. Hoping I was onto something, I swapped out the buttermilk and increased the amount of coffee to ¾ cup. Bingo. The chocolate flavor was noticeably more pronounced, and I was making good progress. (To activate the baking soda without the buttermilk’s acid, I seamlessly added 2 teaspoons of distilled white vinegar.) But I still had another dairy ingredient to consider: butter. Trying more neutral-flavored vegetable oil in place of melted butter seemed worth a shot. The result? Not a dramatic leap flavor-wise but definitely a good move. In a side-by-side tasting, even the skeptics picked the oil-only cupcakes, citing fuller, unadulterated chocolate flavor. Even better, this batch was extra moist, which everyone agreed was a plus.
Bread flour gives our cupcakes enough structure to support an ultrachocolaty crumb and a rich ganache center.
PROTEIN SHAKE(UP)
I’d done all I could think of to boost the existing chocolate flavor when a colleague suggested a more reasonable solution: Why not toughen up the structure of the cupcake that I had? That way, I could add back the extra chocolate without tenderizing it too much. My first thought was to add an extra egg or two—although they contain fat, they also help build structure—but this made the texture rubbery. Next, I intentionally overmixed the batter to stimulate gluten development (as if I were kneading bread dough), but all that bought me was a weary arm—or so I thought. Actually, thinking about bread baking gave me a good hint, as I spied a bag of bread flour on the pantry shelf. Specifically engineered for gluten development, bread flour contains more protein than all-purpose flour and turned out a cupcake that was markedly less crumble-prone but not tough.
With newfound room for more fat in the batter, I began to add back some of the chocolate. Tablespoon by tablespoon, I traded flour for cocoa powder until the latter maxed out at ⅓ cup; I then worked the bar chocolate back up to 3 ounces for the most unapologetically chocolaty (and still sturdy) cake yet.
CENTER OF ATTENTION
And yet the chocoholic in me was holding out for something even more radical. I’d pushed the batter to its limit, but remembering an earlier attempt using chocolate chips, I missed those pockets of pure, molten chocolate in the warm cake and wondered if there was another means to that end. Perhaps a mixture that would stay almost fluid even after it cooled—such as a chocolate ganache? I microwaved a standard ganache mixture of 2 ounces of bittersweet chocolate and 2 tablespoons of heavy cream (plus 1 tablespoon of confectioners’ sugar for an extra hint of sweetness), let the mixture cool until it firmed enough to scoop, and then spooned a teaspoon of it onto the cupcakes before baking. As the cupcakes baked, the ganache gently sank into the batter. In fact, the weight of the chocolate made it sink too far—a problem easily solved by thinning the ganache with 2 more tablespoons of cream. One bite into the rich cake and truffle-like center, and I knew I’d hit chocolate nirvana.
Now, about that creamy, not-too-sweet frosting. Too many of the bakery cupcakes I sampled sported swirly tufts of gritty, sicklysweet icing that cracked and disintegrated like cotton candy. I was after something a bit more refined to complement my already-rich base. Varnishing the cake with a second dose of chocolate ganache—a popular choice—actually took the chocolate intensity too far, but tasters thought that a fluffy 7-minute meringue frosting (egg whites whipped with sugar) felt insubstantial. Buttercream seemed like a reasonable compromise, but tasters vetoed the graininess of quick versions that called for simply beating butter together with confectioners’ sugar.
That left me with cooked buttercreams. I opted for the Swiss meringue variety, where egg whites and granulated sugar are heated over a double boiler and then whipped with knobs of softened butter. The result is utterly silky and decadent, without the weight and greasiness of other rich frostings. I dolloped a large mound onto each cupcake and took a bite. Velvety, with just enough sweetness, this buttercream crowned the cake perfectly. After more than two months and 800 cupcakes baked, I finally had a recipe that Carrie and Miranda would ditch Magnolia for.
Ultimate Chocolate Cupcakes with Ganache Filling
MAKES 12 CUPCAKES
Use a high-quality bittersweet or semisweet chocolate for this recipe. Though we highly recommend the ganache filling, you can omit it for a more traditional cupcake.
Filling
2 ounces bittersweet chocolate, chopped fine
¼ cup heavy cream
1 tablespoon confectioners’ sugar
Cupcakes
3 ounces bittersweet chocolate, chopped fine
⅓ cup (1 ounce) Dutch-processed cocoa powder
¾ cup brewed coffee, hot
¾ cup (4⅛ ounces) bread flour
¾ cup (5¼ ounces) granulated sugar
½ teaspoon salt
½ teaspoon baking soda
6 tablespoons vegetable oil
2 large eggs
2 teaspoons distilled white vinegar
1 teaspoon vanilla extract
1 recipe Creamy Chocolate Frosting (recipe follows)
1. For the filling: Combine chocolate, cream, and sugar in medium bowl and microwave until mixture is warm to touch, about 30 seconds. Whisk until smooth, then transfer bowl to refrigerator and let sit until just chilled, no longer than 30 minutes.
2. For the cupcakes: Adjust oven rack to middle position and heat oven to 350 degrees. Line 12-cup muffin tin with paper or foil liners. Place chocolate and cocoa in medium heatproof bowl. Pour coffee over mixture and let sit, covered, for 5 minutes. Whisk mixture gently until smooth, then transfer to refrigerator to cool completely, about 20 minutes.
3. Whisk flour, sugar, salt, and baking soda together in medium bowl. Whisk oil, eggs, vinegar, and vanilla into cooled chocolate mixture until smooth. Add flour mixture and whisk until smooth.
4. Divide batter evenly among prepared muffin cups. Place 1 slightly rounded teaspoon ganache filling on top of each portion of batter. Bake cupcakes until set and just firm to touch, 17 to 19 minutes, rotating muffin tin halfway through baking. Let cupcakes cool in muffin tin on wire rack for 10 minutes. Remove cupcakes from muffin tin and let cool completely before frosting, about 1 hour. (Unfrosted cupcakes can be stored at room temperature for up to 24 hours.)
5. Spread 2 to 3 tablespoons frosting over each cooled cupcake and serve.
MAKES ABOUT 2¼ CUPS
The chocolate should be cooled to between 85 and 100 degrees before being added to the frosting. If the frosting seems too soft after adding the chocolate, chill it briefly in the refrigerator and then rewhip it until creamy.
⅓ cup (2⅓ ounces) granulated sugar
2 large egg whites
Pinch salt
12 tablespoons unsalted butter, cut into 12 pieces and softened
6 ounces bittersweet chocolate, melted and cooled
½ teaspoon vanilla extract
1. Combine sugar, egg whites, and salt in bowl of stand mixer and set bowl over saucepan filled with 1 inch barely simmering water, making sure that water does not touch bottom of bowl. Whisking gently but constantly, heat mixture until slightly thickened and foamy and registers 150 degrees, 2 to 3 minutes.
2. Fit stand mixer with whisk attachment and whip mixture on medium speed until consistency of shaving cream and slightly cooled, 1 to 2 minutes. Add butter, 1 piece at a time, until smooth and creamy. (Frosting may look curdled after half of butter has been added; it will smooth with additional butter.) Once all butter is added, add cooled melted chocolate and vanilla; mix until —combined. Increase speed to medium-high and beat until light, fluffy, and thoroughly combined, about 30 seconds, scraping down whisk and bowl with rubber spatula as needed.
variations
Omit bittersweet chocolate and increase sugar to ½ cup. (If final frosting seems too thick, warm mixer bowl briefly over pan filled with 1 inch simmering water and beat a second time until creamy.)
Reduce sugar to ¼ cup, substitute milk chocolate for bittersweet chocolate, and add ¼ cup malted milk powder to frosting with vanilla extract in step 2.
Omit bittersweet chocolate. Increase sugar to ½ cup and increase salt to ⅛ teaspoon. Add ⅔ cup creamy peanut butter to frosting with vanilla extract in step 2. Garnish cupcakes with ½ cup chopped peanuts.
You don’t have to be a professional baker to make cupcakes that look like they came from a bakery. Here’s a simple technique for beautifully frosted cupcakes.
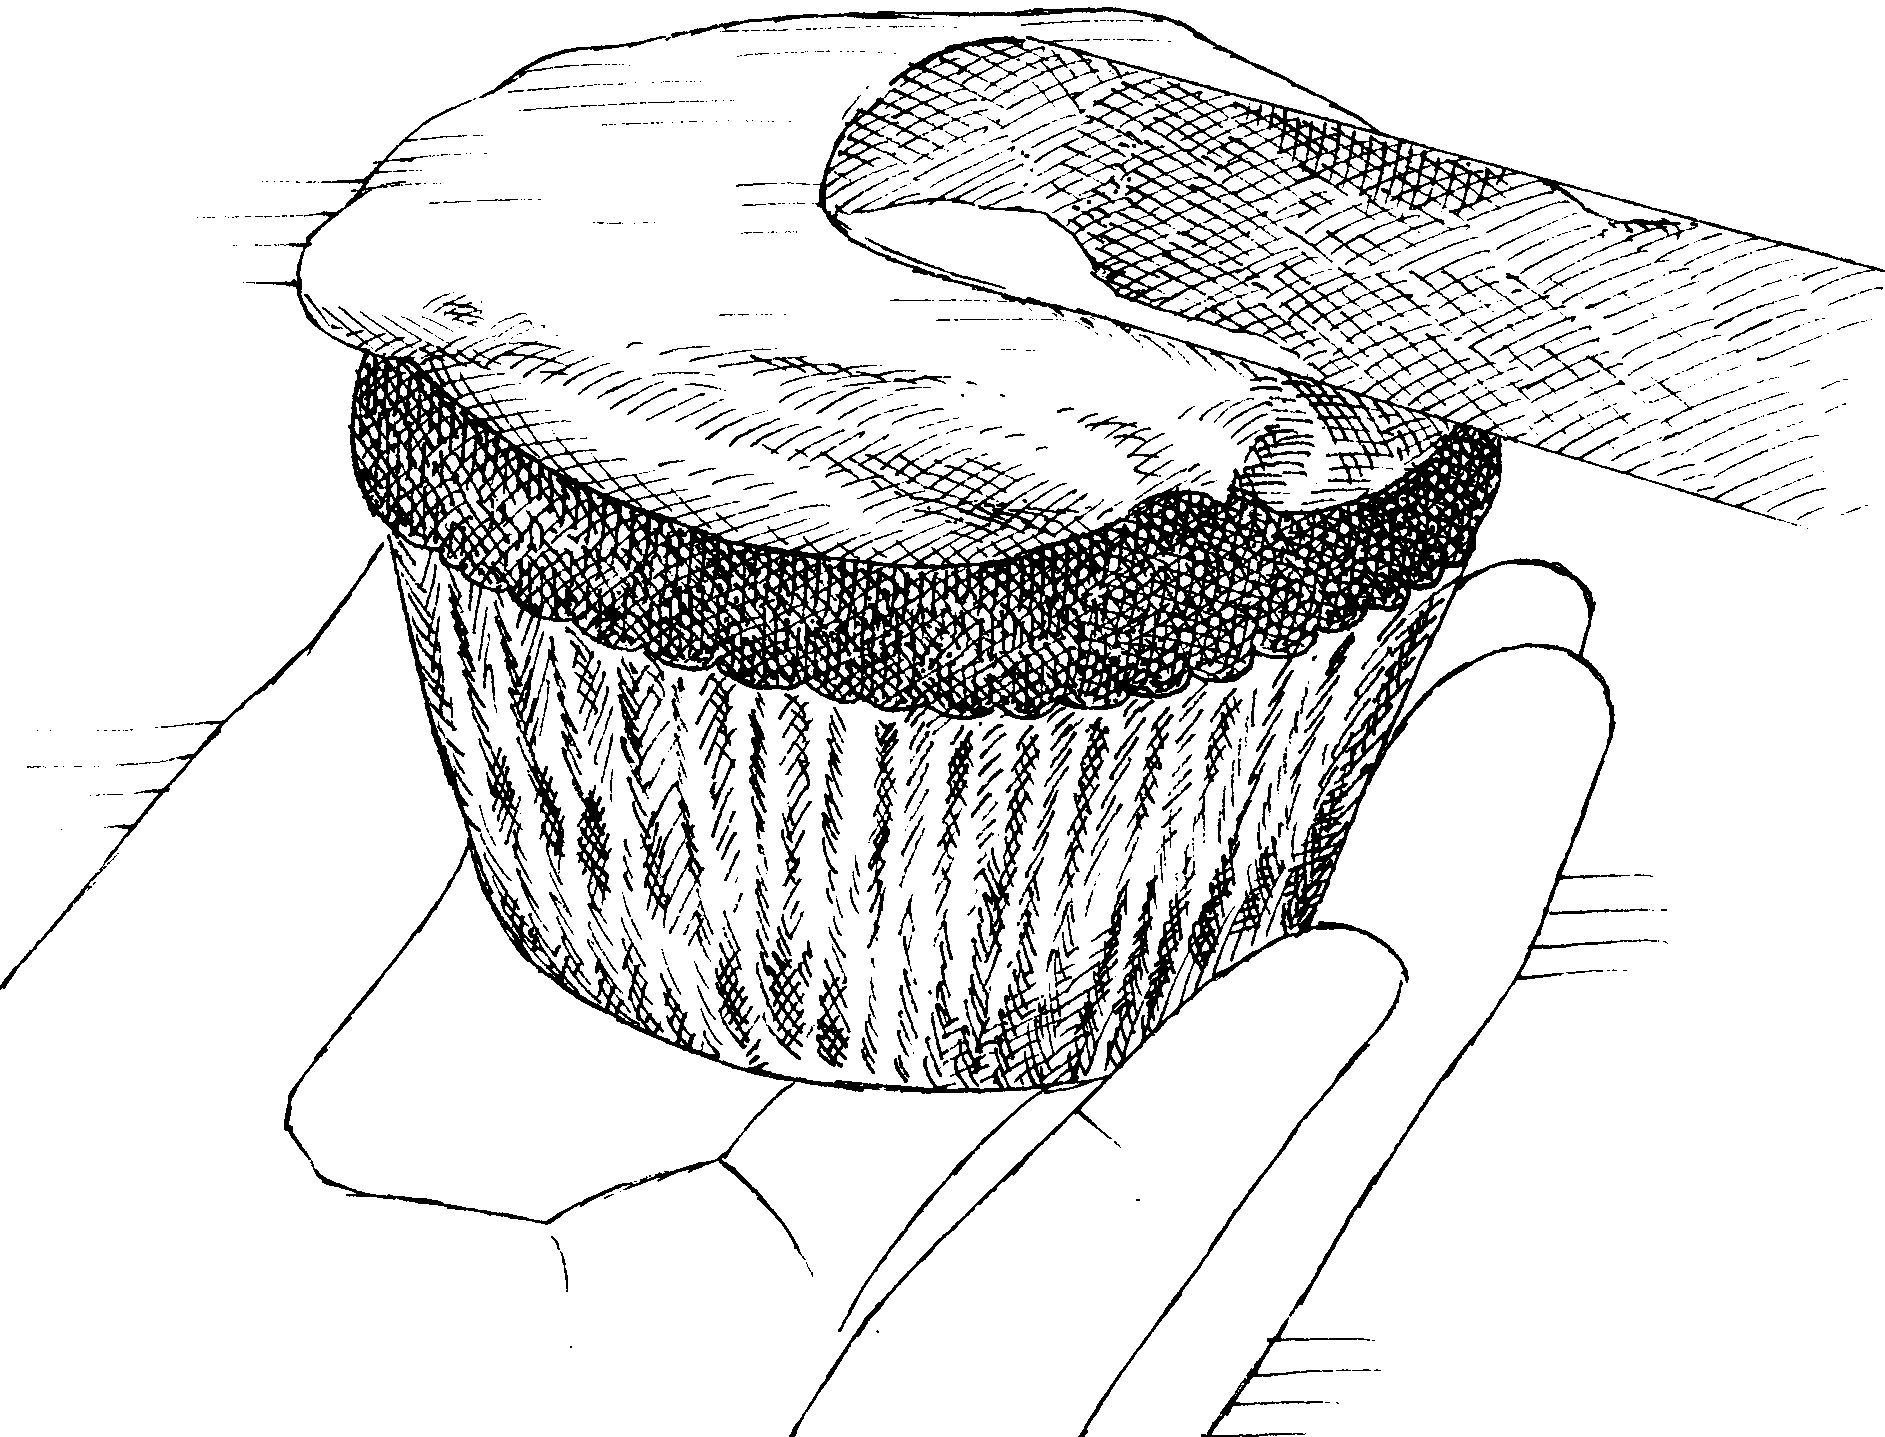
1. Place 2 to 3 tablespoons of frosting on each cupcake, forming thick layer. Using small offset spatula, spread to create flat top.
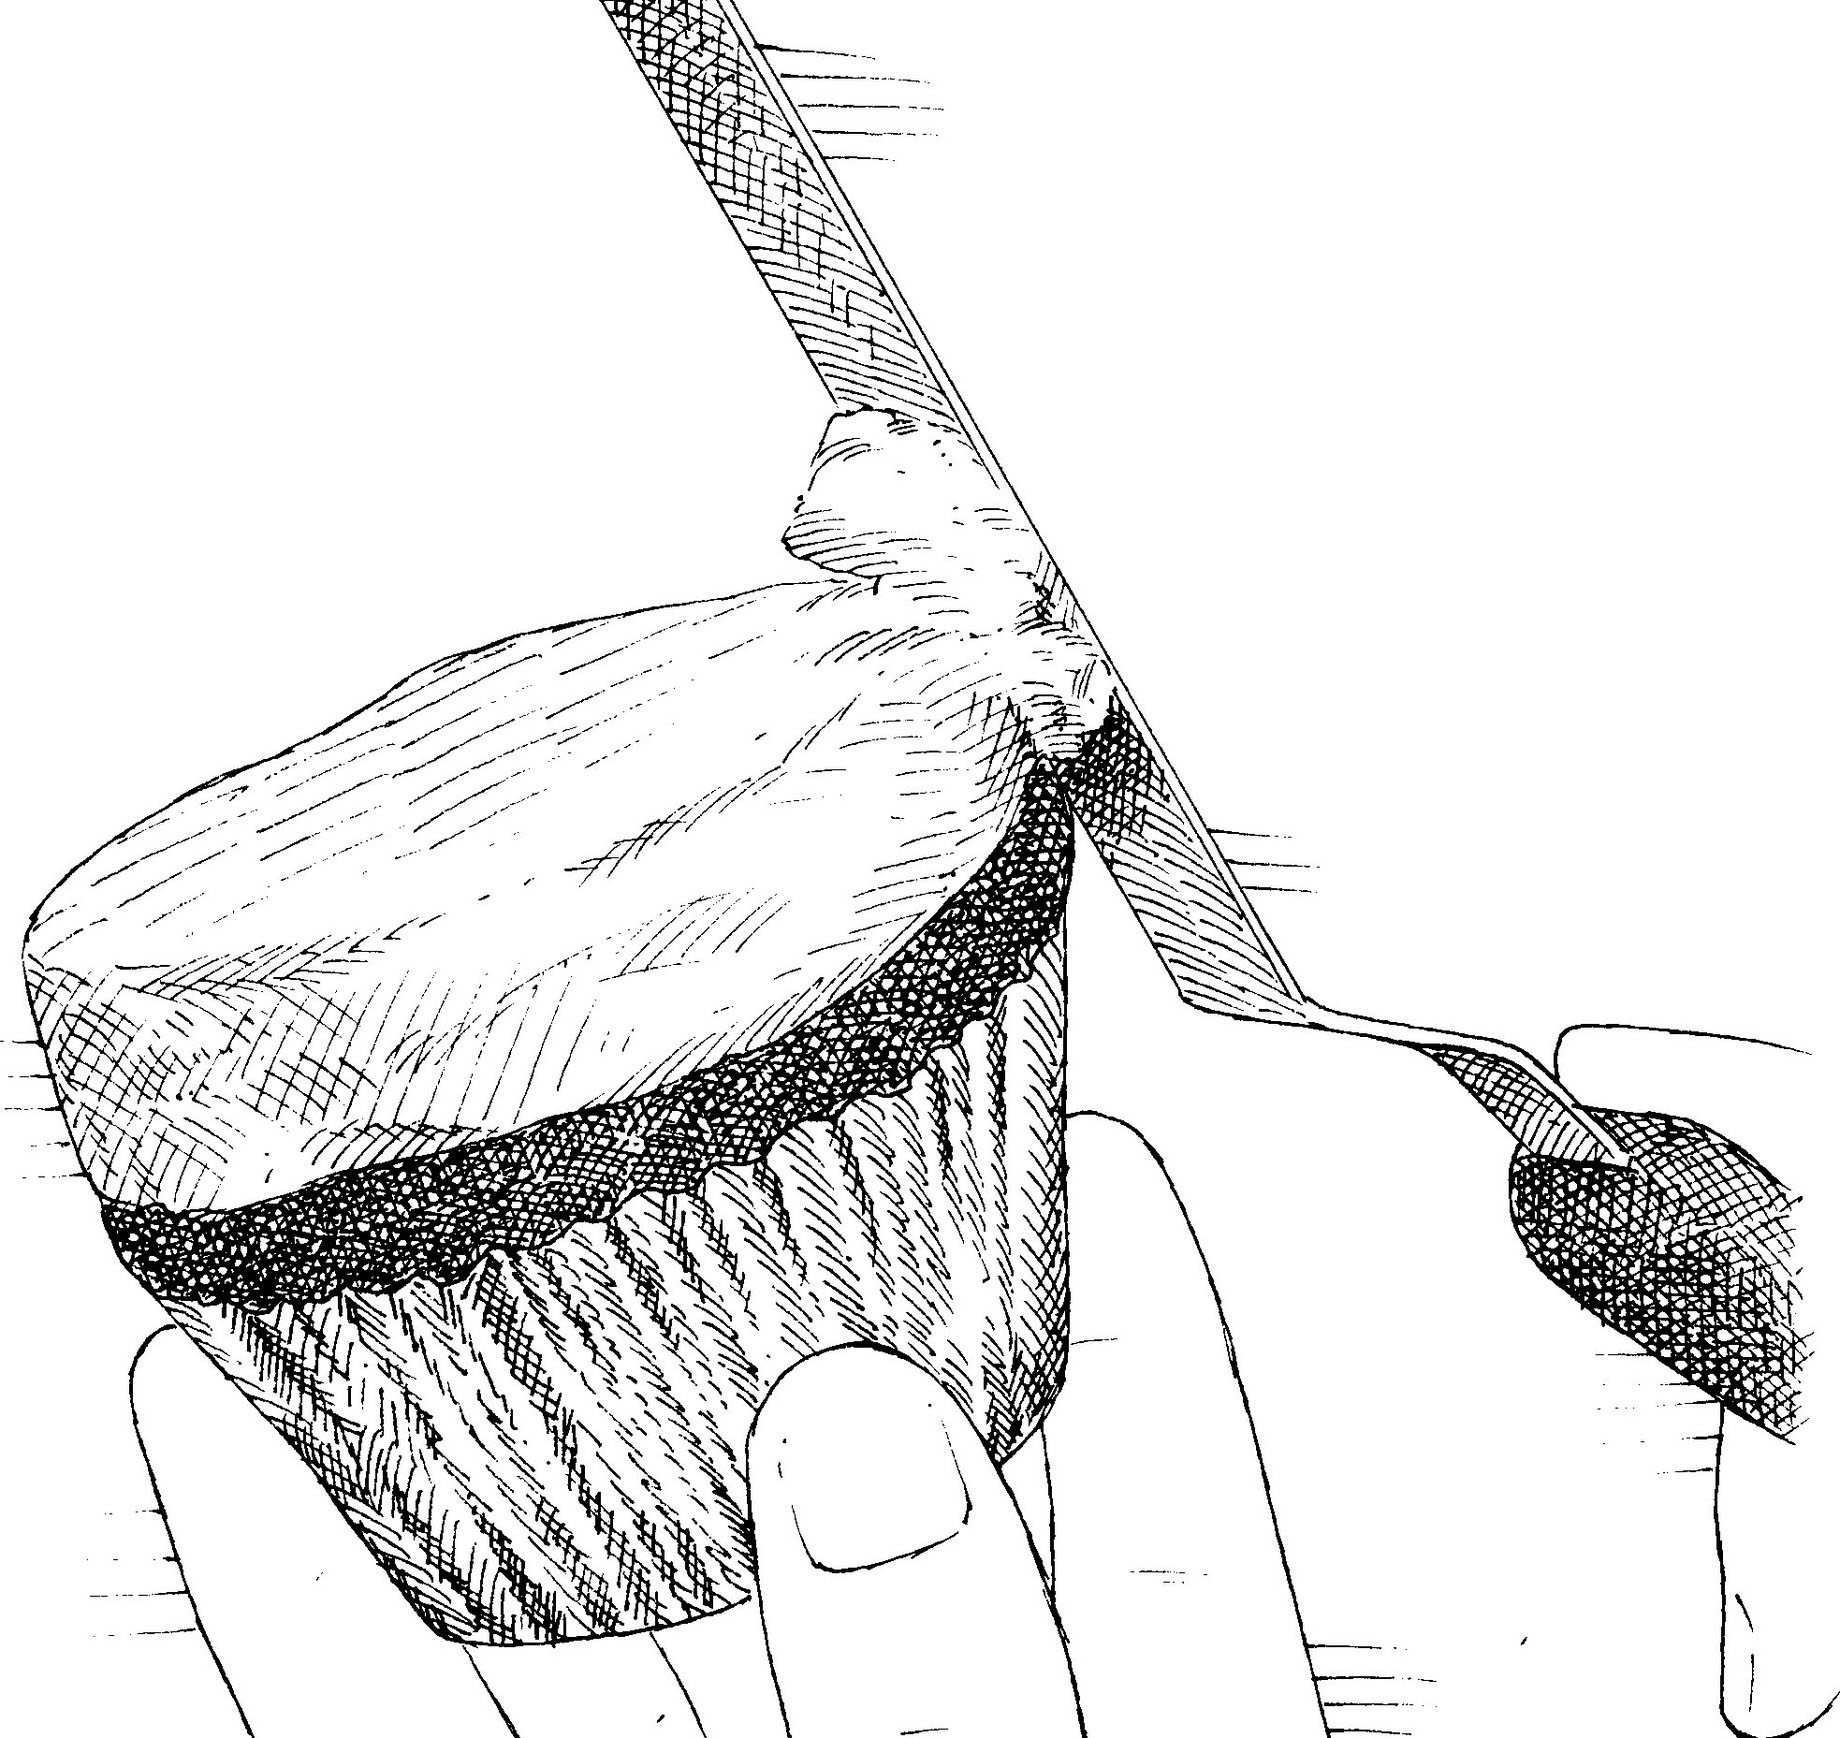
2. Using spatula, smooth edges of frosting so they are flush with sides of cupcake. Reflatten top as necessary.
NATURAL VERSUS DUTCH-PROCESSED COCOA POWDER
There are two types of unsweetened cocoa powder: natural and Dutch-processed. For our Ultimate Chocolate Cupcakes with Ganache Filling, we prefer Dutch-processed cocoa. So what’s the difference? Dutched cocoa has been neutralized with alkali to take away some of the cacao bean’s harsher, more acidic notes. But here’s another, far less well-known reason: Dutched cocoas typically have far more fat than natural cocoas, sometimes twice as much. Fat adds a perception of moisture in baked goods. In addition, cocoa powders with more fat contain less starch. Why is that important? Starch absorbs free moisture in a batter, so the crumb bakes up drier. This helps explain why we found our cupcakes to be noticeably moister when made with Dutched rather than with natural cocoa powders.
INNER SECRET: SUPER-CHOCOLATY CUPCAKES

CHOCOLATE, INSIDE AND OUT After packing lots of chocolate into the batter, we raised the bar one notch higher by filling the cupcake with a dollop of truffle-like ganache.
KEYS TO MERINGUE-STYLE BUTTERCREAM
Whereas uncooked frostings tend to be greasy and grainy, our Swiss meringue buttercream gets its satiny-smooth texture from whisking the egg whites and sugar in a double boiler, then whipping the mixture with softened butter.

1. Whisk egg white mixture until foamy and registers 150 degrees on instant-read thermometer.
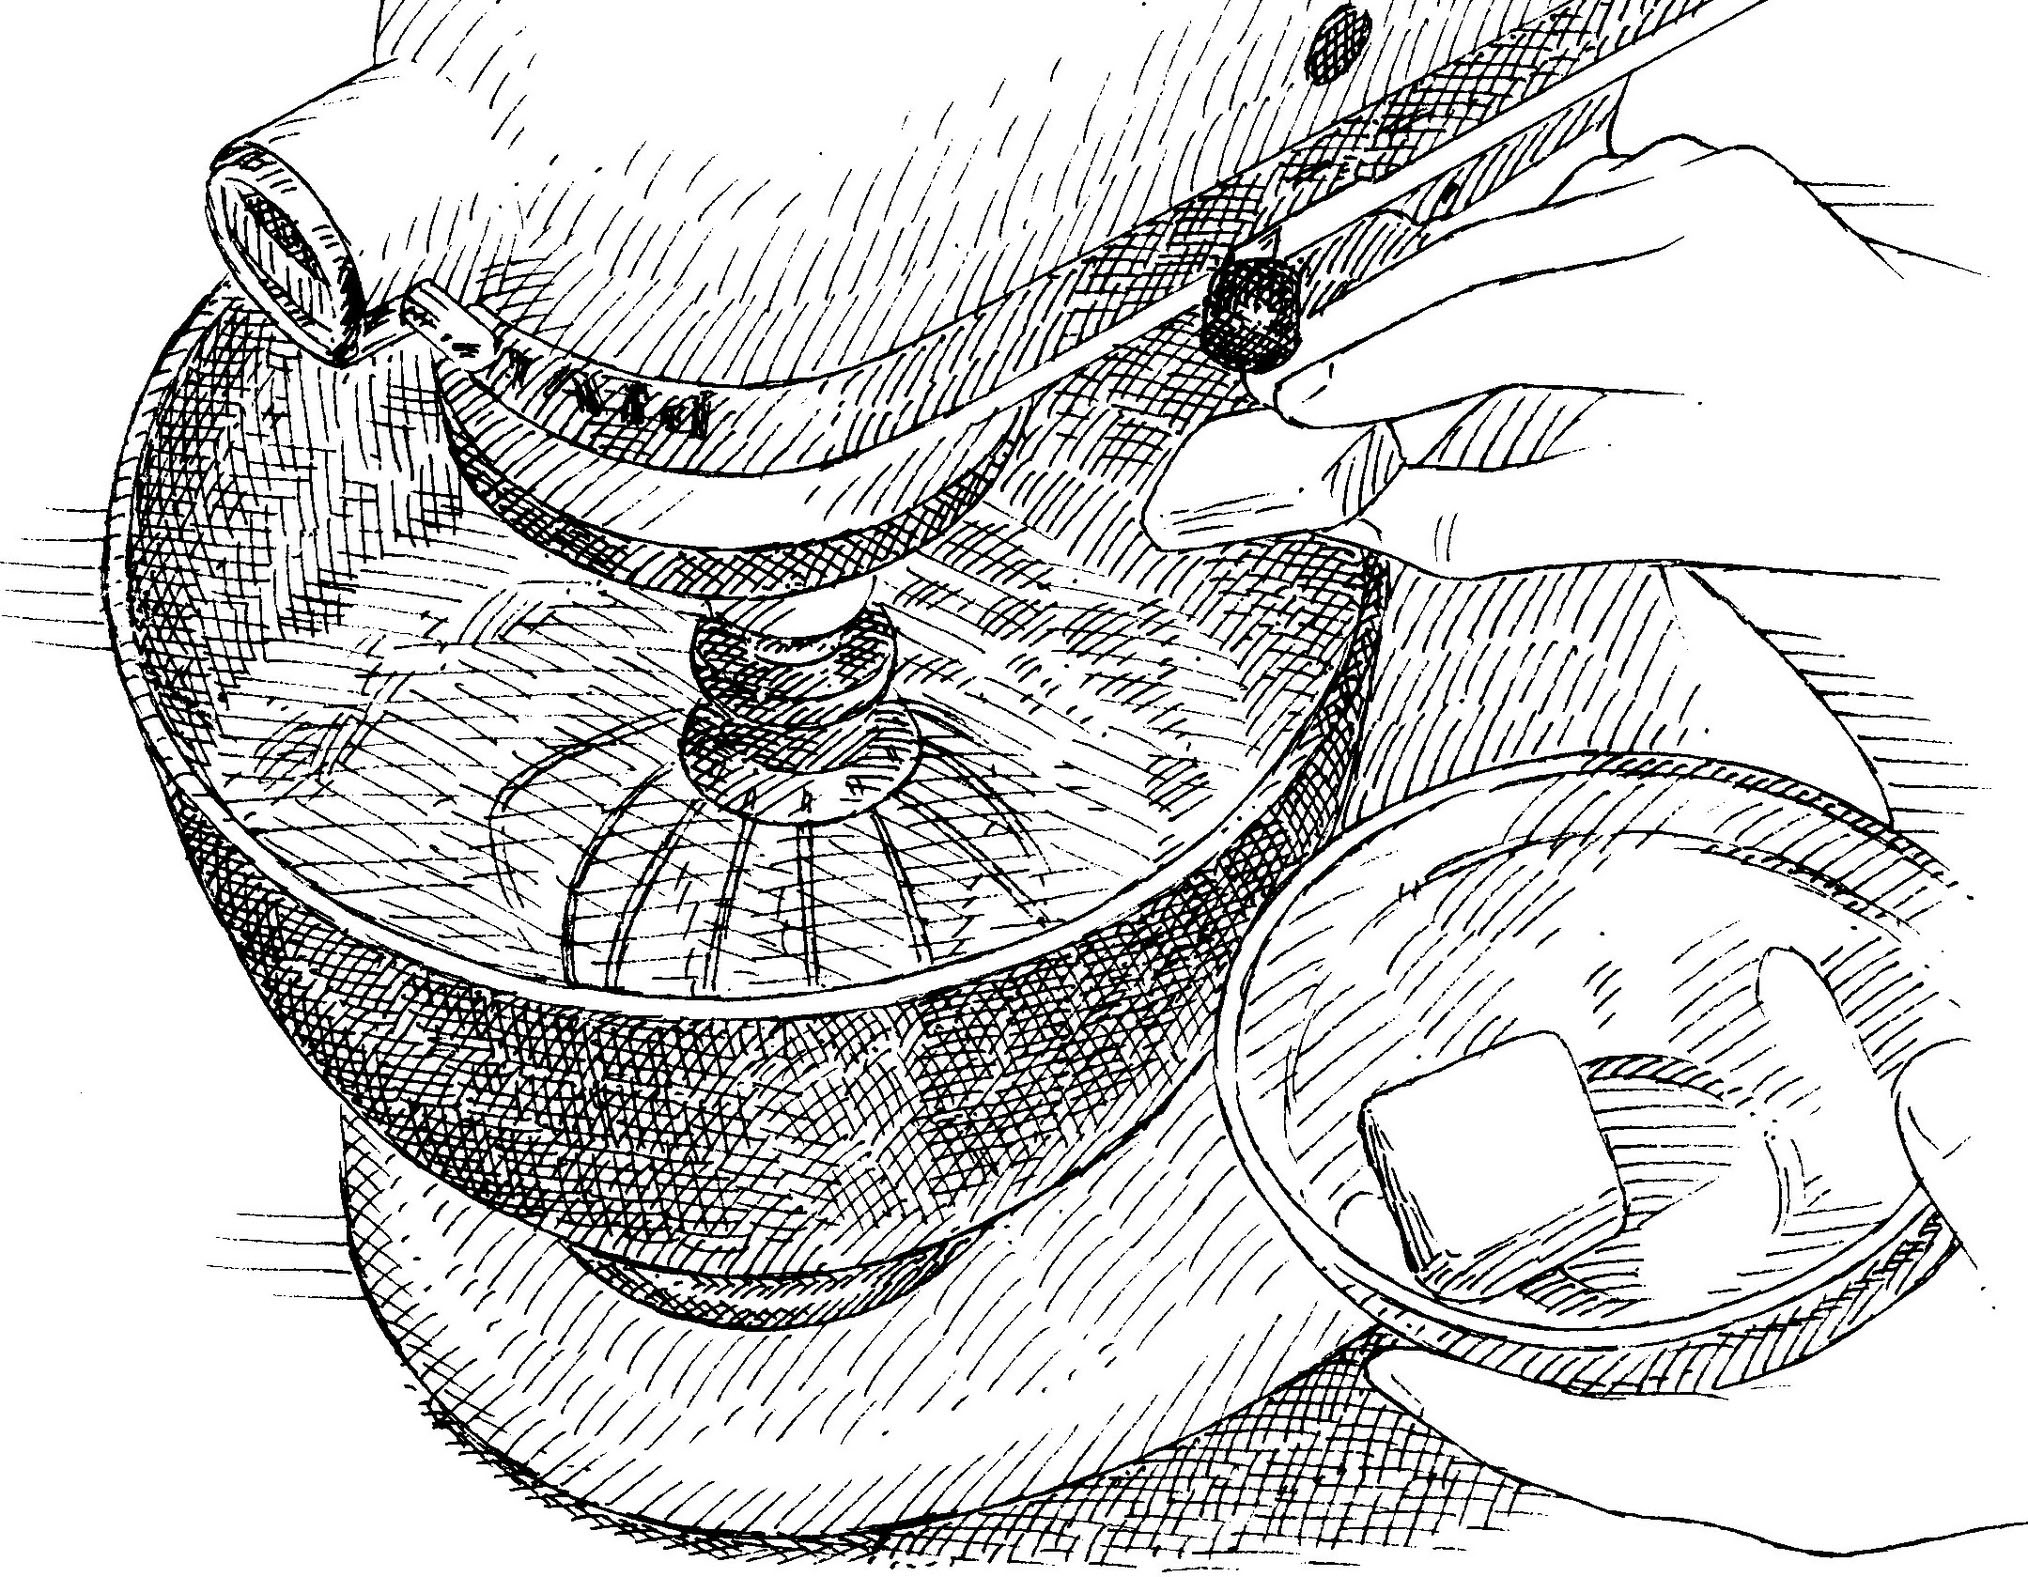
2. Beat mixture in stand mixer until slightly cooled, then slowly add softened butter.

3. Add cooled melted chocolate and vanilla, then whip until light and fluffy.
When I set out to make frozen yogurt for the first time, I thought the task would be simple. Unlike ice cream recipes, which typically call for cooking (and then cooling) a finicky custard for a base, most fro yo recipes require nothing more than throwing yogurt, sugar, and maybe a few flavorings into an ice cream maker and churning.
But these recipes were hugely disappointing: The fro yo turned out icy and rock-hard. This is partly because frozen yogurt doesn’t contain yolks or cream, both of which give ice cream proportionally more fat and less water. Fat makes ice cream taste creamier and smoother, while less water means there’s less of it to form ice crystals, leading to a more velvety, scoopable texture. I found a few frozen yogurt recipes that tried to improve texture by adding cream, but while these versions did turn out less icy, their tangy yogurt flavor had been muted.-
I wanted my frozen yogurt to put the fresh-tasting tartness of yogurt front and center. The challenge was to figure out how to do that and achieve a dense, creamy-smooth texture at the same time.
Lyle’s Golden Syrup and gelatin are the secrets to the creamy, smooth, scoopable texture of our tangy frozen yogurt.
STRAIN AND DRAIN
The obvious thing was to try to eliminate some water from the yogurt. In my initial tests, I had been using regular whole-milk yogurt (plain was a must, since I wanted to be able to control flavorings and sweetness myself). Switching to Greek yogurt, which has had much of the liquid whey strained out, produced frozen yogurt with an oddly crumbly texture.
So I considered another option: straining regular yogurt. I spooned a quart of yogurt into a fine-mesh strainer lined with cheesecloth and set over a bowl and left it overnight. By the following morning, a generous amount of whey had drained into the bowl. The fro yo I made with this yogurt was much smoother; I knew this step was a must.
INVERTING THE PROBLEM
The next ingredient to go under my microscope was sugar. Just as in ice cream, sugar doesn’t serve as a mere sweetener in frozen yogurt. It also affects the texture. Once dissolved, sugar depresses the freezing point of water, which means the more you use, the more water in the mix will stay in liquid form after churning. That translates not only to fewer ice crystals but also to a softer, more scoopable product straight from the freezer. But I didn’t want to make it so sweet that the yogurt’s flavor was overshadowed; I found that I could go up to a cup of sugar per quart.
I also knew from my ice cream testing that there were other sweeteners worth considering. One secret to the velvety texture of an ice cream recipe I’d developed a few years back (see this page) was swapping out some of the granulated sugar for corn syrup. This sweetener contains starch chains that keep water molecules from joining up and forming large ice crystals. When I tried it in my frozen yogurt, it worked pretty well at minimizing iciness, but the yogurt’s flavor seemed muted. A little research informed me why: Those starch chains trap flavor molecules. This wasn’t a problem in tame vanilla ice cream, but in tart frozen yogurt, the dulling effect was clear.
My next thought was to try incorporating an invert sugar, which is better than granulated sugar at depressing the freezing point of water. Unlike granulated sugar, which is made up of larger sucrose molecules, invert sugar is made up of two smaller molecules, glucose and fructose. Freezingpoint depression is directly related to the number of molecules dissolved in the water. So a tablespoon of invert sugar provides twice as many sugar molecules and roughly twice as much freezing-point depression as a tablespoon of granulated sugar. Supermarket options for invert sugar include honey and agave syrup, but their distinct flavors would be distracting. Luckily, I knew of another option: Lyle’s Golden Syrup. While only half invert sugar (the other half is sucrose), Lyle’s worked like magic. Just 3 tablespoons (along with ¾ cup of granulated sugar) noticeably reduced the iciness.
GETTING TRAPPED
Many manufacturers add pectin, gums, or modified starches to get smoother, less icy results. These ingredients essentially trap water, which will minimize large water droplets—and thus large ice crystal formation. Pectin made the frozen yogurt taste almost fruity, but gelatin was perfect. I needed a liquid to bloom it in, so I reserved ½ cup of whey when I drained the yogurt and microwaved the whey with the gelatin to quickly dissolve the gelatin before incorporating the mixture into my base. Just 1 teaspoon of gelatin gave me the smoothest, creamiest frozen yogurt yet.
There were just a few more details to attend to. Quickly freezing the base was key, since faster freezing promotes the formation of smaller ice crystals. I refrigerated my base until it registered 40 degrees or less before churning. And in addition to churning until it looked like thick soft-serve, I also made sure it registered 21 degrees (the temperature at which roughly 50 percent of the water has frozen) for the most consistent results.
My frozen yogurt now boasted a wonderfully creamy, smooth texture as well as the distinctively tangy, fresh flavor of its namesake ingredient.
MAKES ABOUT 1 QUART
This recipe requires draining the yogurt for 8 to 12 hours. We prefer the flavor and texture that Lyle’s Golden Syrup lends this frozen yogurt, but if you can’t find it, you can substitute light corn syrup. You can substitute low-fat yogurt for whole-milk yogurt, but the results will be less creamy and flavorful.
1 quart plain whole-milk yogurt
1 teaspoon unflavored gelatin
¾ cup sugar
3 tablespoons Lyle’s Golden Syrup
⅛ teaspoon salt
1. Line colander or fine-mesh strainer with triple layer of cheesecloth and place over large bowl or measuring cup. Place yogurt in colander, cover with plastic wrap (plastic should not touch yogurt), and refrigerate until 1¼ cups whey have drained from yogurt, at least 8 hours or up to 12 hours. (If more than 1¼ cups whey drains from yogurt, simply stir extra back into yogurt.)
2. Discard ¾ cup drained whey. Sprinkle gelatin over remaining ½ cup whey in bowl and let sit until gelatin softens, about 5 minutes. Microwave until mixture is bubbling around edges and gelatin dissolves, about 30 seconds. Let cool for 5 minutes. In large bowl, whisk sugar, syrup, salt, drained yogurt, and cooled whey-gelatin mixture until sugar is completely dissolved. Cover and refrigerate (or place bowl over ice bath) until yogurt mixture registers 40 degrees or less.
3. Churn yogurt mixture in ice cream maker until mixture resembles thick soft-serve frozen yogurt and registers about 21 degrees, 25 to 35 minutes. Transfer frozen yogurt to airtight container and freeze until firm, at least 2 hours. Serve. (Frozen yogurt can be stored for up to 5 days.)
variations
Stir 1 tablespoon grated fresh ginger and 1 teaspoon ground ginger into whey-gelatin mixture as soon as it is removed from microwave. After mixture has cooled for 5 minutes, strain through fine-mesh strainer, pressing on solids to extract all liquid. Proceed with recipe as directed.
Substitute ½ cup orange juice for ½ cup whey in step 2. Stir ½ teaspoon grated orange zest into orange juice–gelatin mixture as soon as it is removed from microwave.
Substitute ¾ cup strawberry puree for ½ cup whey in step 2.
A SOFT TOUCH
One key to the creamy texture of our frozen yogurt is Lyle’s Golden Syrup, a British pantry staple that is also readily available in American markets. Its lightly caramelized flavor distinguishes it from honey, maple syrup, and even corn syrup. The Brits use it to sweeten baked goods or drizzle it over pancakes or porridge. So what’s it doing in our fro yo? As a partial invert sugar, Lyle’s contains small fructose and glucose molecules that can interfere with ice crystal formation more readily than the larger sucrose molecules in table sugar can. With Lyle’s in the mix, more water stays in liquid form, and that translates to a less icy, more scoopable frozen yogurt.
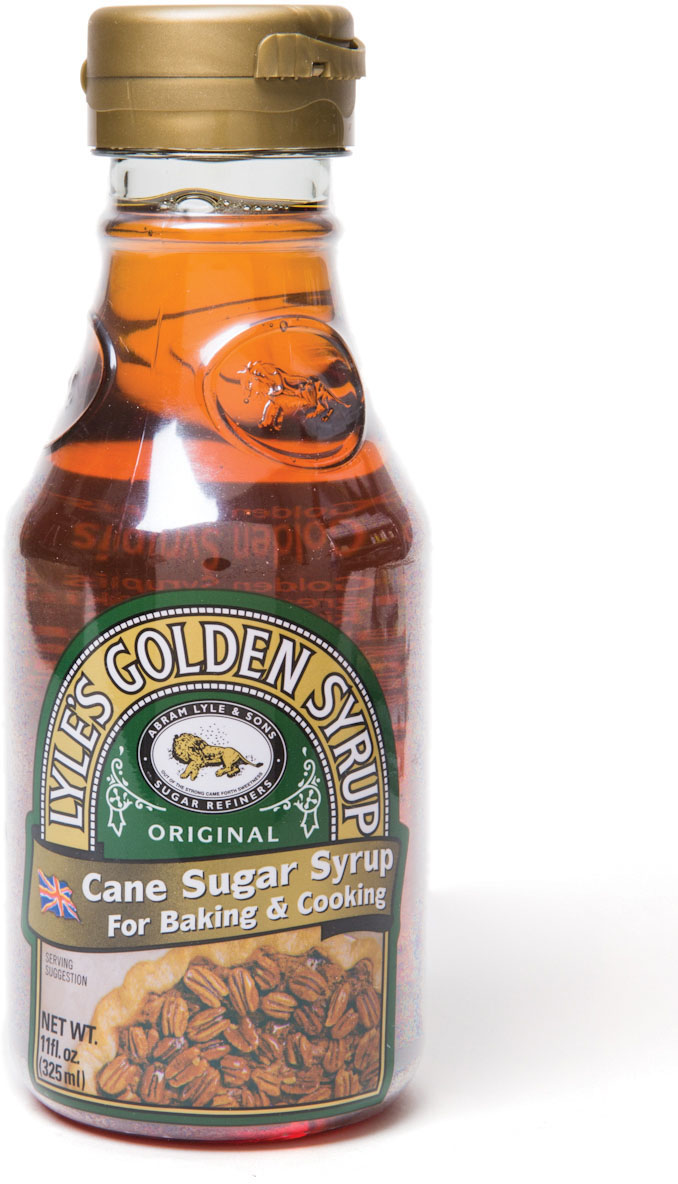
LYLE’S GOLDEN SYRUP
KEYS TO THE BEST TEXTURE FOR FROZEN YOGURT
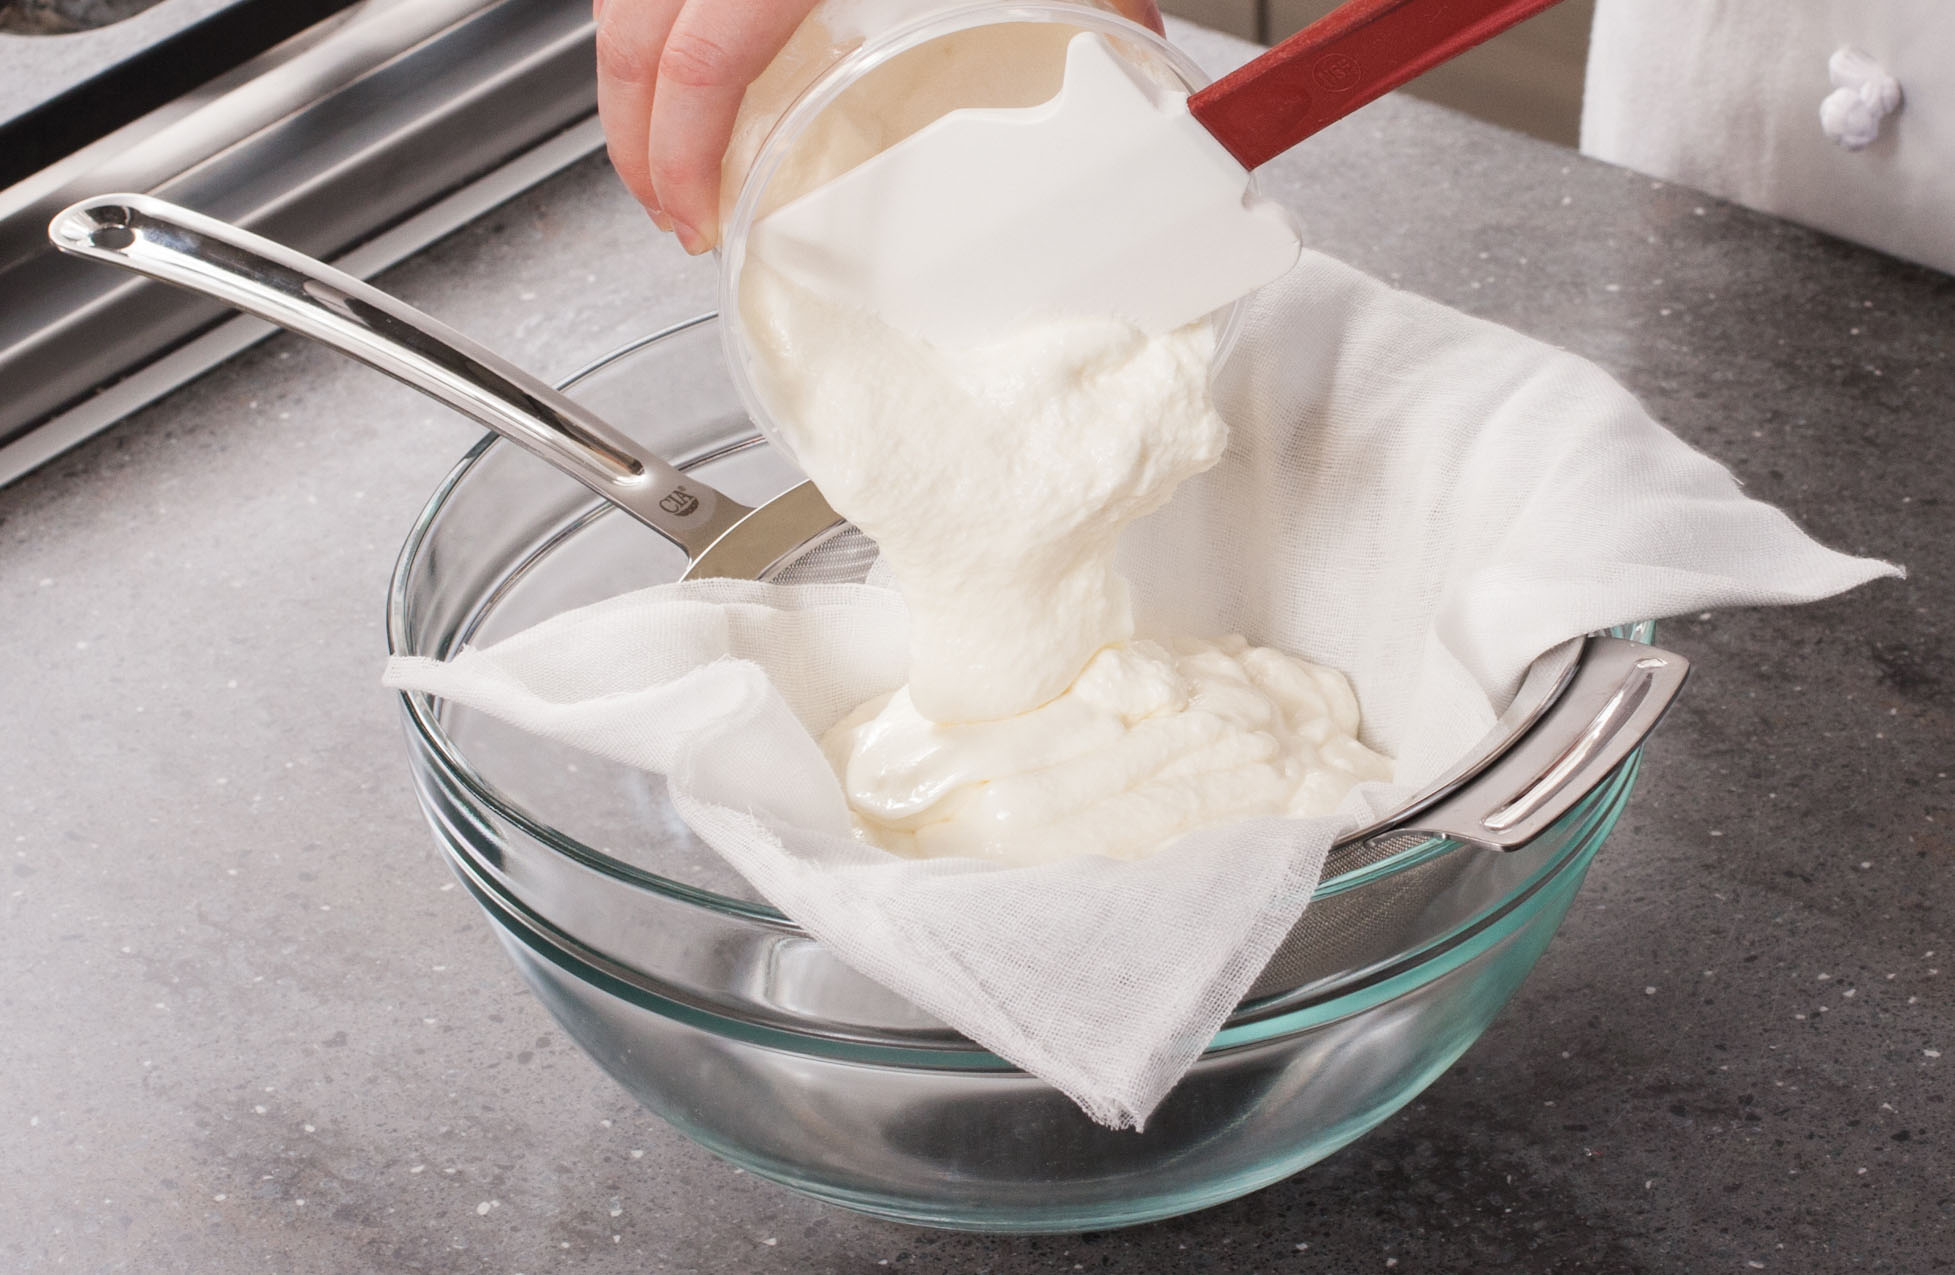
1. Let yogurt drain in cheesecloth-lined colander for 8 to 12 hours. Bloom gelatin in ½ cup whey, then combine mixture with drained yogurt, sugar, syrup, and salt.
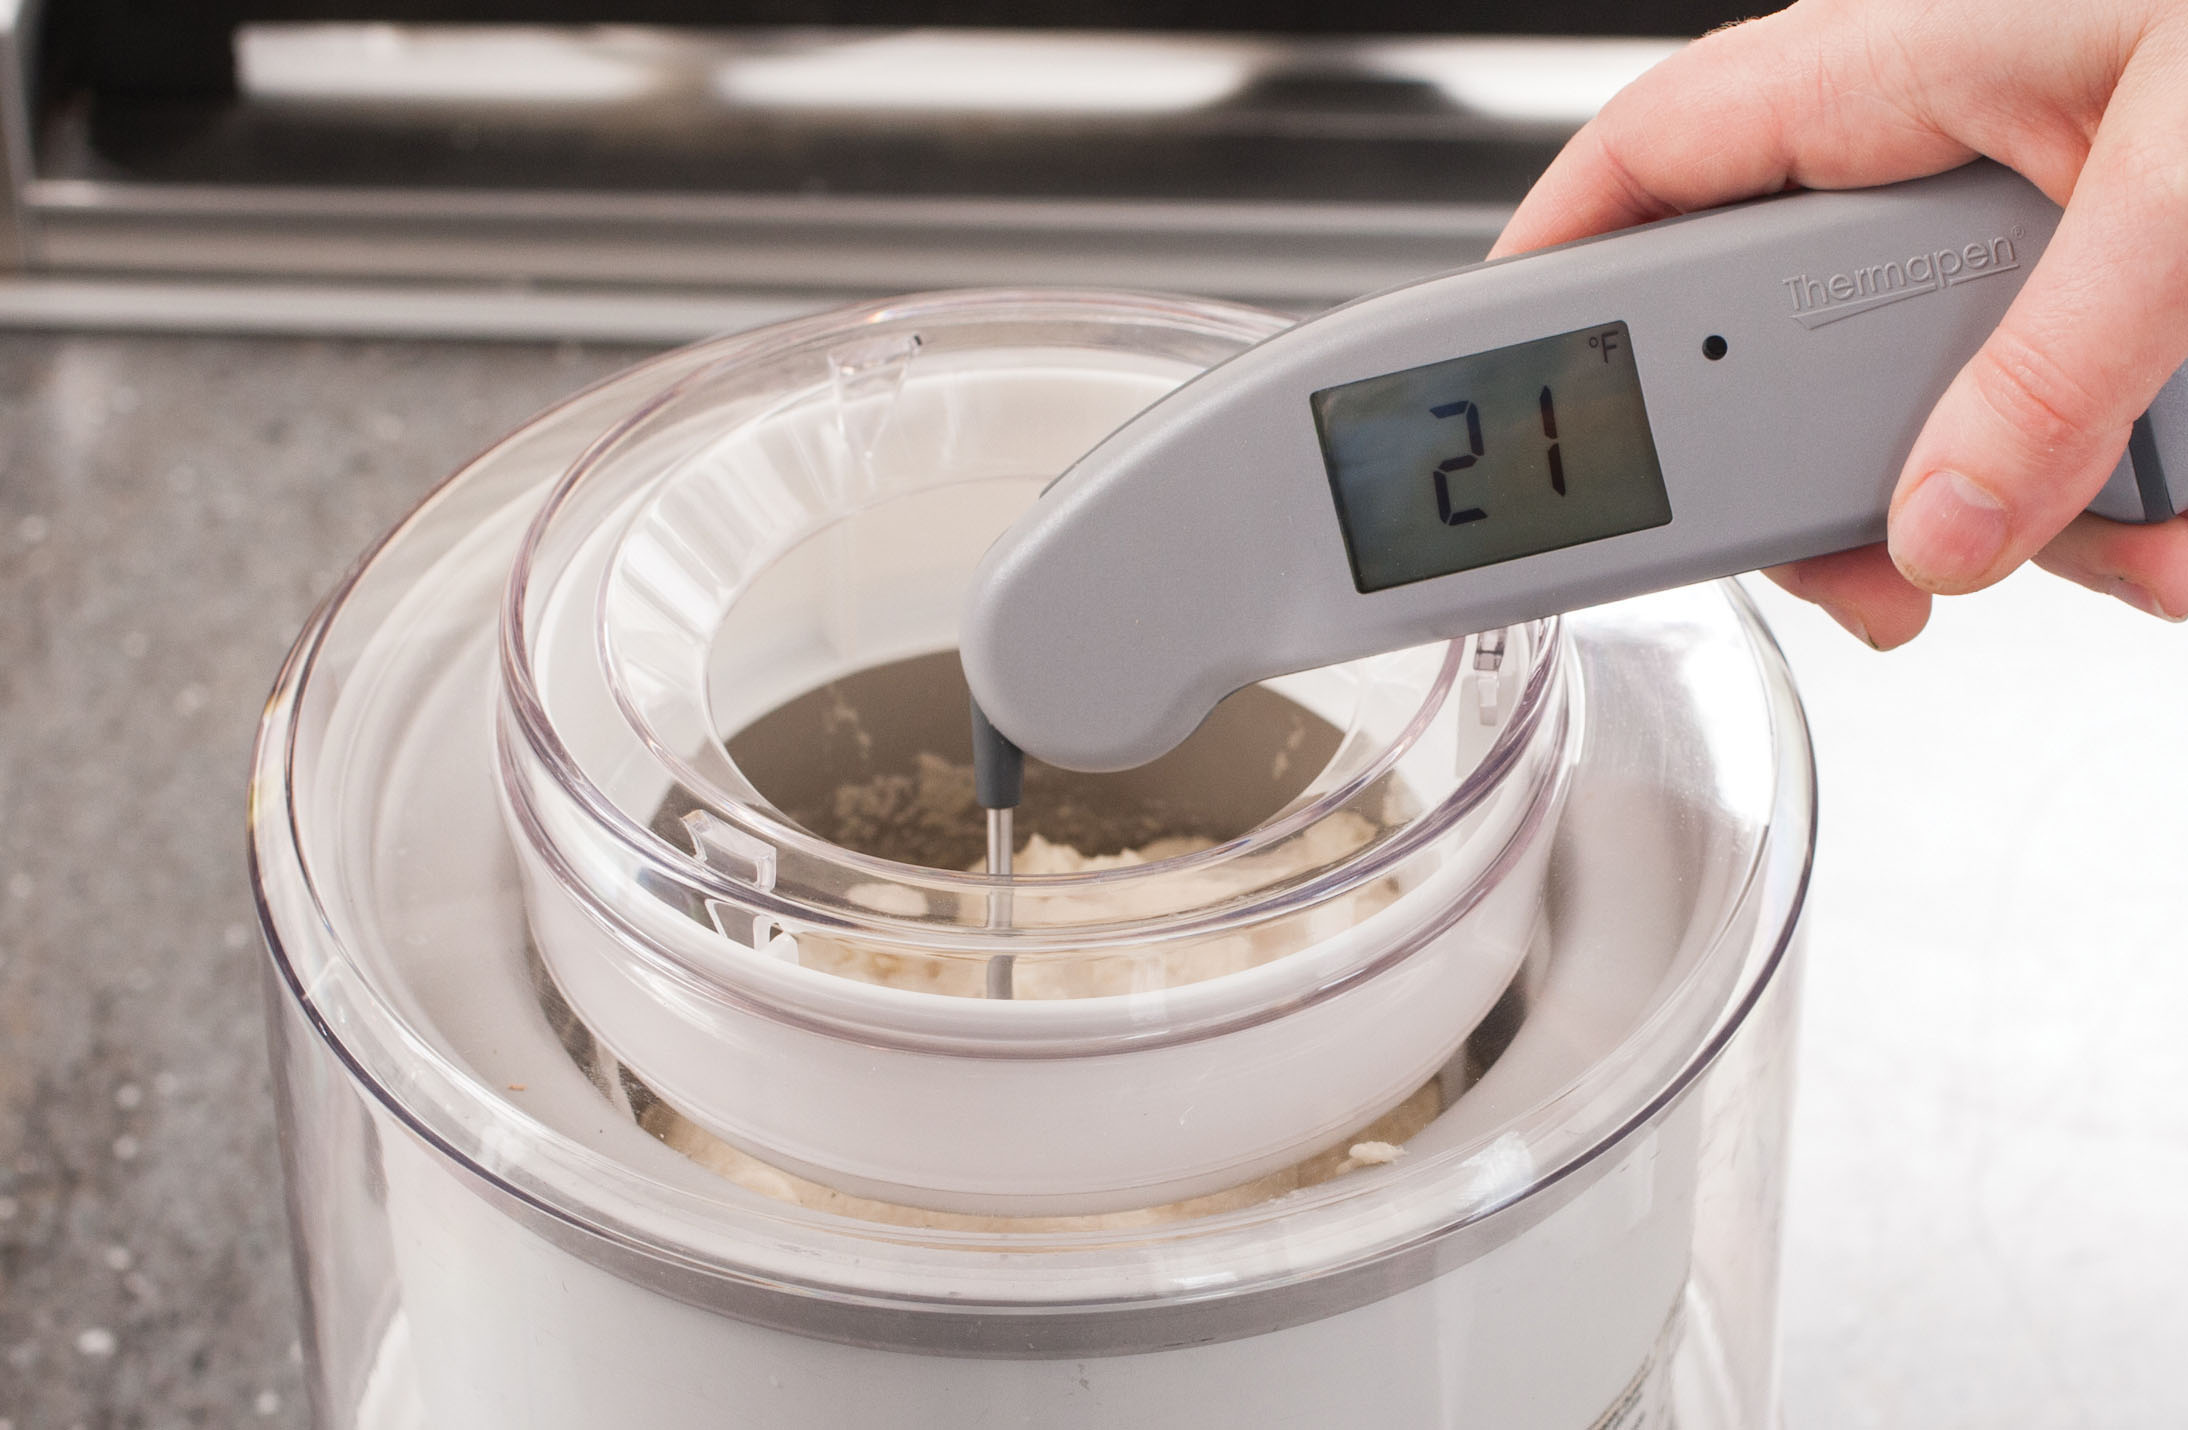
2. Place bowl over ice bath, or cover and refrigerate, until mixture registers 40 degrees or lower. Churn in ice cream machine until mixture registers 21 degrees and is consistency of thick soft serve. Transfer to airtight container and freeze until firm.
FOR CREAMIER FRO YO, FORGO GREEK YOGURT
Making creamy, smooth frozen yogurt is largely about limiting water, since less water translates to fewer large ice crystals. Thus we were surprised when frozen yogurt made with Greek-style yogurt, which has been strained of excess liquid, churned up crumbly and chalky. The reason for these results is twofold: First, Greek-style yogurt has a particularly high protein content (in lab tests, we found that it had almost twice as much protein as regular yogurt we strained ourselves). Second, it’s often strained by centrifuge, which can damage these proteins and increase the likelihood of a chalky texture. So while it may seem like a timesaver to reach for Greek when making frozen yogurt, you’ll pay for that convenience in texture. That’s why we take the time to strain regular yogurt for the creamiest, smoothest results.
I love the taste of homemade ice cream, but not its icy texture, which pales in comparison with that of ultradense “superpremium” grocery store ice creams. I wanted to exhaust any lead that might allow me to make ice cream with a texture rivaling that of the commercial stuff.
I reviewed what I knew about custard-based ice cream, which typically calls for nothing more than milk, cream, sugar, eggs, and flavorings. Once the custard has frozen, the ice cream is composed of three basic elements: ice crystals of pure water; the proteins, sugars, and fats left behind as the water in the mix is crystallized; and air. The amount of air affects denseness, whereas the makeup of the custard and how it is frozen contribute to smoothness. I decided to start with a standard custard base and focus first on finding the most effective way to freeze it.
THE IMPORTANCE OF FAST FREEZING
Smooth ice cream isn’t technically less icy than “icy” ice cream. Instead, its ice crystals are much smaller. One way to encourage the creation of small ice crystals is to freeze the ice-cream base as quickly as possible, which, along with agitation, causes the formation of thousands of tiny seed crystals, which in turn promote the formation of more tiny crystals. Speed is such an important factor in ice-cream making that commercial producers spend tens of thousands of dollars on special equipment that can freeze the custard in a matter of minutes.
My canister-style machine takes roughly 35 minutes to turn a chilled custard into soft-serve consistency—much longer than even the slowest commercial option. Plus, depending on how often the freezer door is opened, the partially frozen custard can take up to 8 hours longer to fully freeze. No wonder my results are always icy.
I wondered if I could improve my results by starting with a colder base. After letting my hot custard cool for a few minutes, I transferred a cup of it to a small bowl, which I popped into the freezer. I then put the rest of the custard in the fridge to cool overnight, per the usual method. The next day, I scraped the frozen custard into the refrigerated stuff and stirred it until the frozen custard dissolved, at which point the mixture registered around 30 degrees. Once in the canister, this base reached soft-serve consistency in just 18 minutes and, tasted straight from the machine, exhibited less iciness than previous batches had. To my great disappointment, however, after 4 hours of hardening, this ice cream was almost as icy as before.
Replacing some sugar with corn syrup and freezing a small portion of the base before churning ensures a smooth, dense texture.
I couldn’t make my freezer colder, but since the rate of cooling is a function of both temperature and surface area, there was still hope. For my next batch, instead of scraping my churned ice cream into a tall container, I spread it into a thin layer in a chilled square metal baking pan (metal conducts heat faster than glass or plastic). In about an hour, my ice cream had firmed up significantly. This was my smoothest batch yet, but it still wasn’t as smooth as store-bought. Could the ingredients themselves provide any help?
A CUSTARDY BATTLE
My tasters felt that the ice cream had optimal sweetness and richness with ¾ cup sugar, six egg yolks, and slightly more cream than milk. That left me with trying to manipulate the milk solids and water amounts. Milk solids interfere with the formation of crystals, so the more of them the better (up to a point—too much creates a sandy texture). And since crystals are created from water, the less of it the better (up to a point—too little water leads to gumminess).
Condensed or evaporated milk, which contain less water than fresh dairy does, proved effective at reducing iciness, but also contributed a “stale” and “cooked” flavor to the ice cream, even in relatively small doses. I also tried stirring in nonfat powdered milk to boost milk solids, but in order to be effective, I needed ¼ cup, at which point tasters deemed the ice cream “cheesy” and “funky.”
So I began researching the ingredients in commercial ice cream. Many commercial producers use powerful stabilizer mixes to immobilize free water in a gel, preventing it from freezing into large ice crystals. I didn’t have ready access to these magic powders, but I wondered if I couldn’t approximate their effect with something else.
In the test kitchen, we often rely on cornstarch, gelatin, and pectin to provide body to recipes. Though each works slightly differently, I knew that they all thicken by trapping water in a weak gel. But while all three mitigated iciness, each ice cream had an artificial texture and strange melting properties. The sample with gelatin refused to melt, even after 10 minutes at room temperature.
I was tempted to throw in the towel and cede victory to the pros. Instead, I decided to call on a few of them for help.
EXPERT ADVICE
I sought advice from two of the Boston area’s best-known ice-cream makers: Gus Rancatore of Toscanini’s, in nearby Cambridge, and Rick Katz, chef and owner of Pizza and Ice Cream Company, in Boston’s South End. Each provided me with a different perspective, but both circled back to one ingredient: sugar. Up to this point, I’d been relying on granulated white sugar. But ice-cream producers rely on a laundry list of different sweeteners to achieve particular textures and sweetness levels. One highly valued sweetener is invert sugar, a syrup made by cooking sugar water with an acid—a slow, finicky process that converts sucrose into glucose and fructose. With even more molecules than table sugar to interfere with ice formation, invert sugar dramatically lowers the freezing point of the ice-cream mixture so that more of the water remains liquid in the freezer. But while it’s a boon to an ice-cream shop that can hold its product at supercold temperatures, a depressed freezing point spelled disaster in my home freezer. Furthermore, while professionals can buy invert syrup, I had to make my own—an activity that proved both time-consuming and unreliable. I crossed it off my list, along with two other unobtainable sweeteners: atomized glucose and dextrose powder.
I desperately rummaged through the pantry in search of neutral-tasting alternative sweeteners that I could use. The list was depressingly short: corn syrup. Containing about 25 percent water, corn syrup seemed like the last ingredient that might work in an effort to eliminate large ice crystals. But what did I have to lose?
I mixed up batches of my working recipe, replacing some of the sugar with increasing amounts of corn syrup. I could tell that the custard bases were more viscous than my all-sugar recipe straight out of the fridge, and they all churned to a thick, soft-serve consistency in record time. The real revelation, however, came when it was time to taste. The batch with ⅓ cup of corn syrup was the closest thing to superpremium perfection I had ever achieved. Not only was it dense, but, most important, it showed no trace of iciness. Why?
After a few exchanges with our science editor, I had my answer. First, due to its viscosity, corn syrup prevents water molecules from grouping and freezing into large ice crystals. Second, corn syrup doesn’t depress the freezing point as much as sugar does. My corn-syrup ice cream froze faster in the canister and remained harder at home-freezer temperatures than did the all-sugar recipe. This stuff was virtually free of large ice crystals, and it stayed that way for nearly a week in my freezer.
After months of churning countless batches of ice cream, I had tasted sweet victory. Another thing I could count on: My ice-cream machine wouldn’t be showing up at a yard sale anytime soon.
Vanilla Ice Cream
MAKES ABOUT 1 QUART
Two teaspoons of vanilla extract can be substituted for the vanilla bean; stir the extract into the cold custard in step 3. An instant-read thermometer is critical for the best results. Using a prechilled metal baking pan and working quickly in step 4 will help prevent melting and refreezing of the ice cream and will speed the hardening process. If using a canister-style ice cream machine, be sure to freeze the empty canister for at least 24 hours or preferably 48 hours before churning. For self-refrigerating ice cream machines, prechill the canister by running the machine for 5 to 10 minutes before pouring in the custard.
1 vanilla bean
1¾ cups heavy cream
1¼ cups whole milk
½ cup plus 2 tablespoons sugar
⅓ cup light corn syrup
¼ teaspoon salt
6 large egg yolks
1. Place 8- or 9-inch square baking pan in freezer. Cut vanilla bean in half lengthwise. Using tip of paring knife, scrape out seeds. Combine vanilla bean and seeds, cream, milk, 6 tablespoons sugar, corn syrup, and salt in medium saucepan. Heat over medium-high heat, stirring occasionally, until mixture is steaming steadily and registers 175 degrees, 5 to 10 minutes. Remove saucepan from heat.
2. While cream mixture heats, whisk egg yolks and remaining ¼ cup sugar together in bowl until smooth, about 30 seconds. Slowly whisk 1 cup heated cream mixture into egg yolk mixture. Return mixture to saucepan and cook over medium-low heat, stirring constantly, until mixture thickens and registers 180 degrees, 7 to 14 minutes. Immediately pour custard into large bowl and let cool until no longer steaming, 10 to 20 minutes. Transfer 1 cup custard to small bowl. Cover both bowls with plastic wrap. Place large bowl in refrigerator and small bowl in freezer and let cool completely, at least 4 hours or up to 24 hours. (Small bowl of custard will freeze solid.)
3. Remove custards from refrigerator and freezer. Scrape frozen custard from small bowl into large bowl of custard. Stir occasionally until frozen custard has fully dissolved. Strain custard through fine-mesh strainer and transfer to ice cream machine. Churn until mixture resembles thick soft-serve ice cream and registers about 21 degrees, 15 to 25 minutes. Transfer ice cream to frozen baking pan and press plastic on surface. Return to freezer until firm around edges, about 1 hour.
4. Transfer ice cream to airtight container, pressing firmly to remove any air pockets, and freeze until firm, at least 2 hours or up to 5 days. Serve.
variations
Freeze the crystallized ginger for at least 15 minutes before adding it to the churning ice cream.
Substitute one 3-inch piece fresh ginger, peeled and sliced into thin rounds, and 2 teaspoons ground ginger for vanilla bean. Add ½ cup chopped crystallized ginger to ice cream during last minute of churning.
Look for chocolate-covered cocoa nibs (roasted pieces of the cocoa bean) in chocolate shops or well-stocked supermarkets. Freeze the cocoa nibs for at least 15 minutes before adding them to the churning ice cream.
Substitute ½ cup coarsely ground coffee for vanilla bean. Add ¾ cup chocolate-covered cocoa nibs to ice cream during last minute of churning.
