Sweet and salty walnut cookies
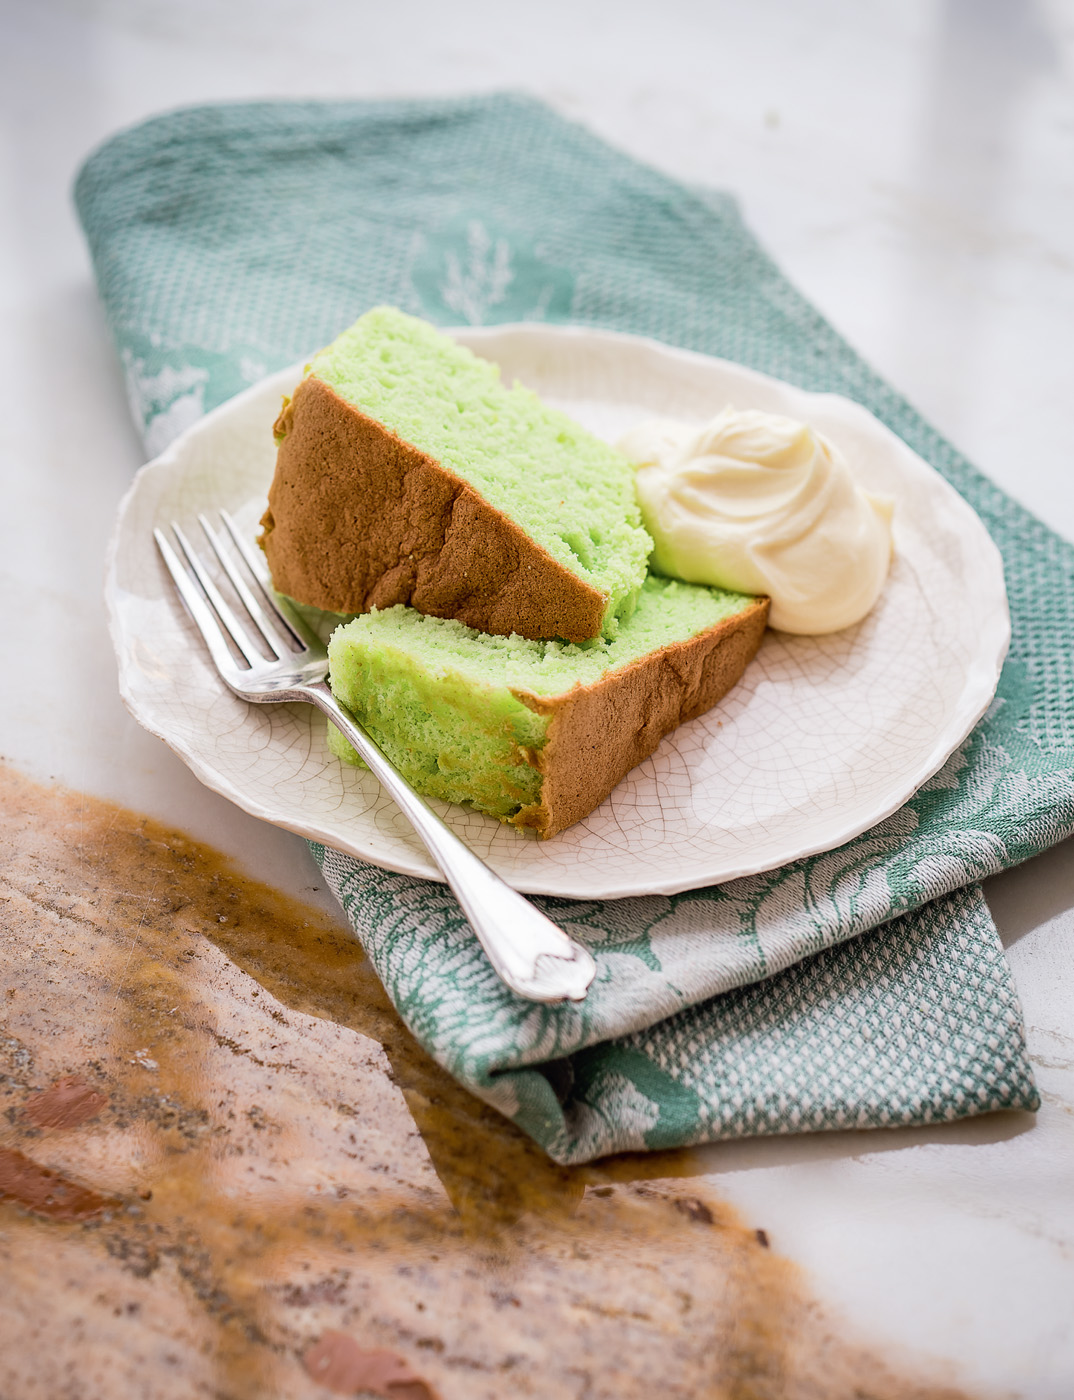
Mum and Dad’s vibrant pandan cake
Walk through any Chinatown, in any city, and you will know at once if the ovens of a Hong Kong-style bakery are blazing away long before you arrive at the inviting facade of the shop front. The giveaway? An irresistible aroma that perfumes the air; a warm, sweet scent that diffuses through the streets like a silent snake-charming song, luring us towards light and fluffy breads, pillow-soft cakes, rich pastries and gorgeously crumbly biscuits that just can’t be reconciled with the word ‘diet’.
In the West, Cantonese food is not typically associated with baking, and yet it is a much-loved part of the cuisine. In Hong Kong the fanciest bakeries dress their windows with mind-boggling cakes, often shaped into uncanny likenesses of Hello Kitty and fresh fruit. But our favourite bakery in London’s Chinatown forgoes these elaborate displays. Their self-service layout is welcoming: patrons simply pick up a plastic tray and a pair of tongs at the front door, before shuffling through the store to make their selections from clear plastic-fronted cabinets that look like they have been cobbled together by someone’s dad. It feels as if the entire store is sheathed in a soft glow, an effect of the perfectly golden and glazed tops of fresh buns and cakes.
Sounds lovely, so what could be better? Re-creating the baked heaven in your own home. It is with great pride and enthusiasm that we share our recipes for homemade Chinese baked goods. Whether you are after tasty afternoon tea treats or something with celebratory flair, simply flip through this chapter and you will discover something that may be pleasantly surprising: there’s absolutely nothing half-baked about a Chinese bakery.
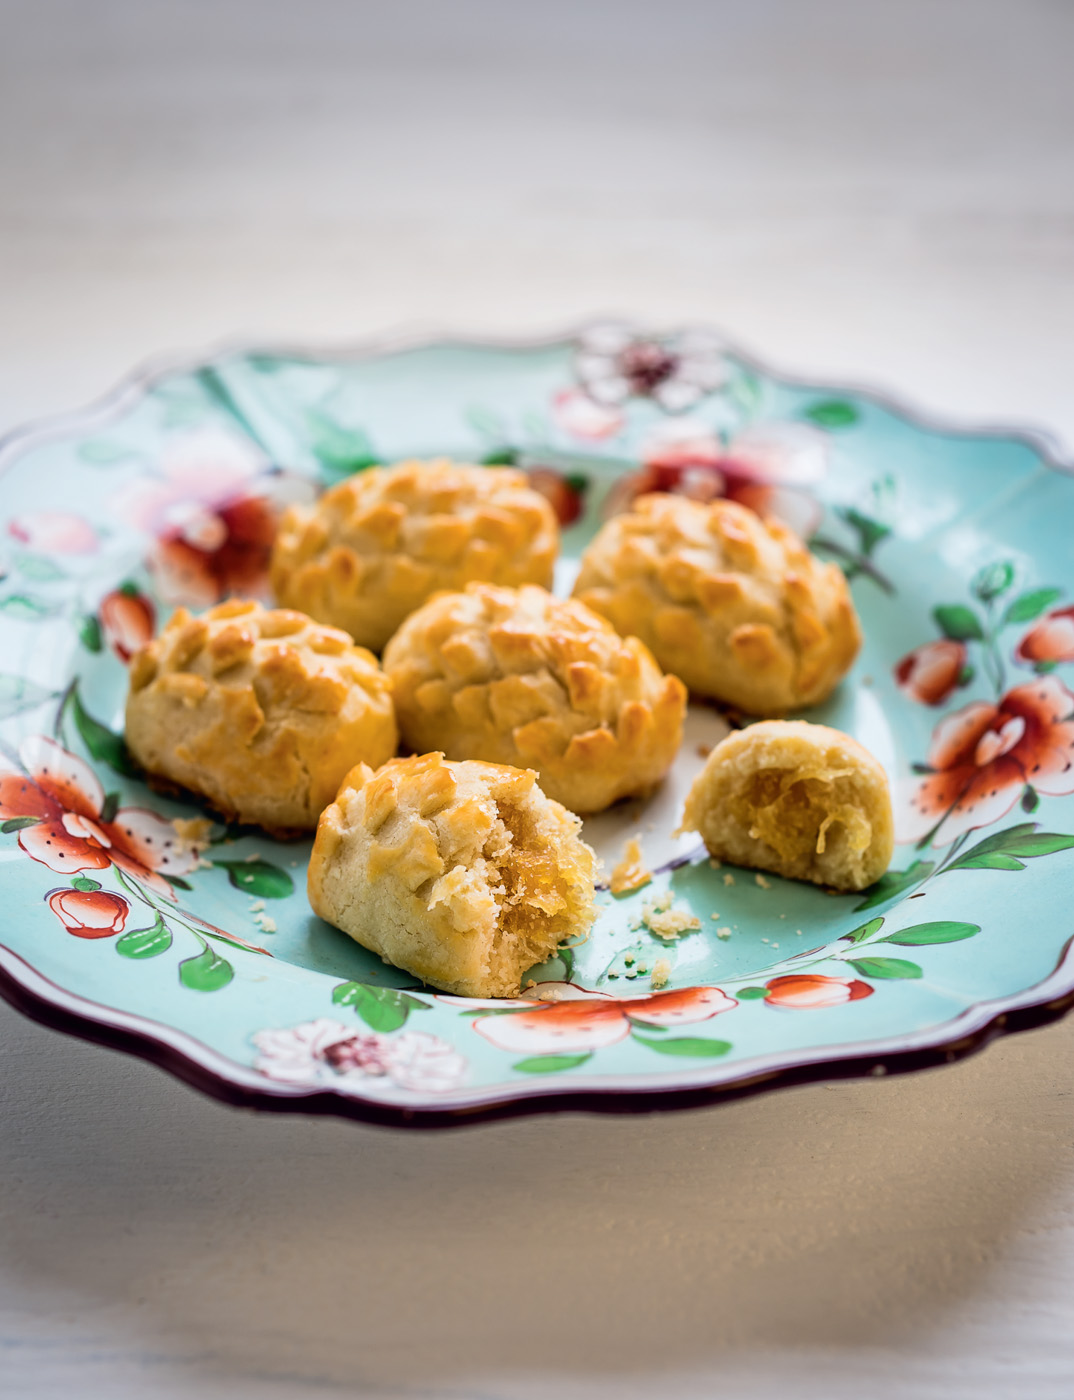
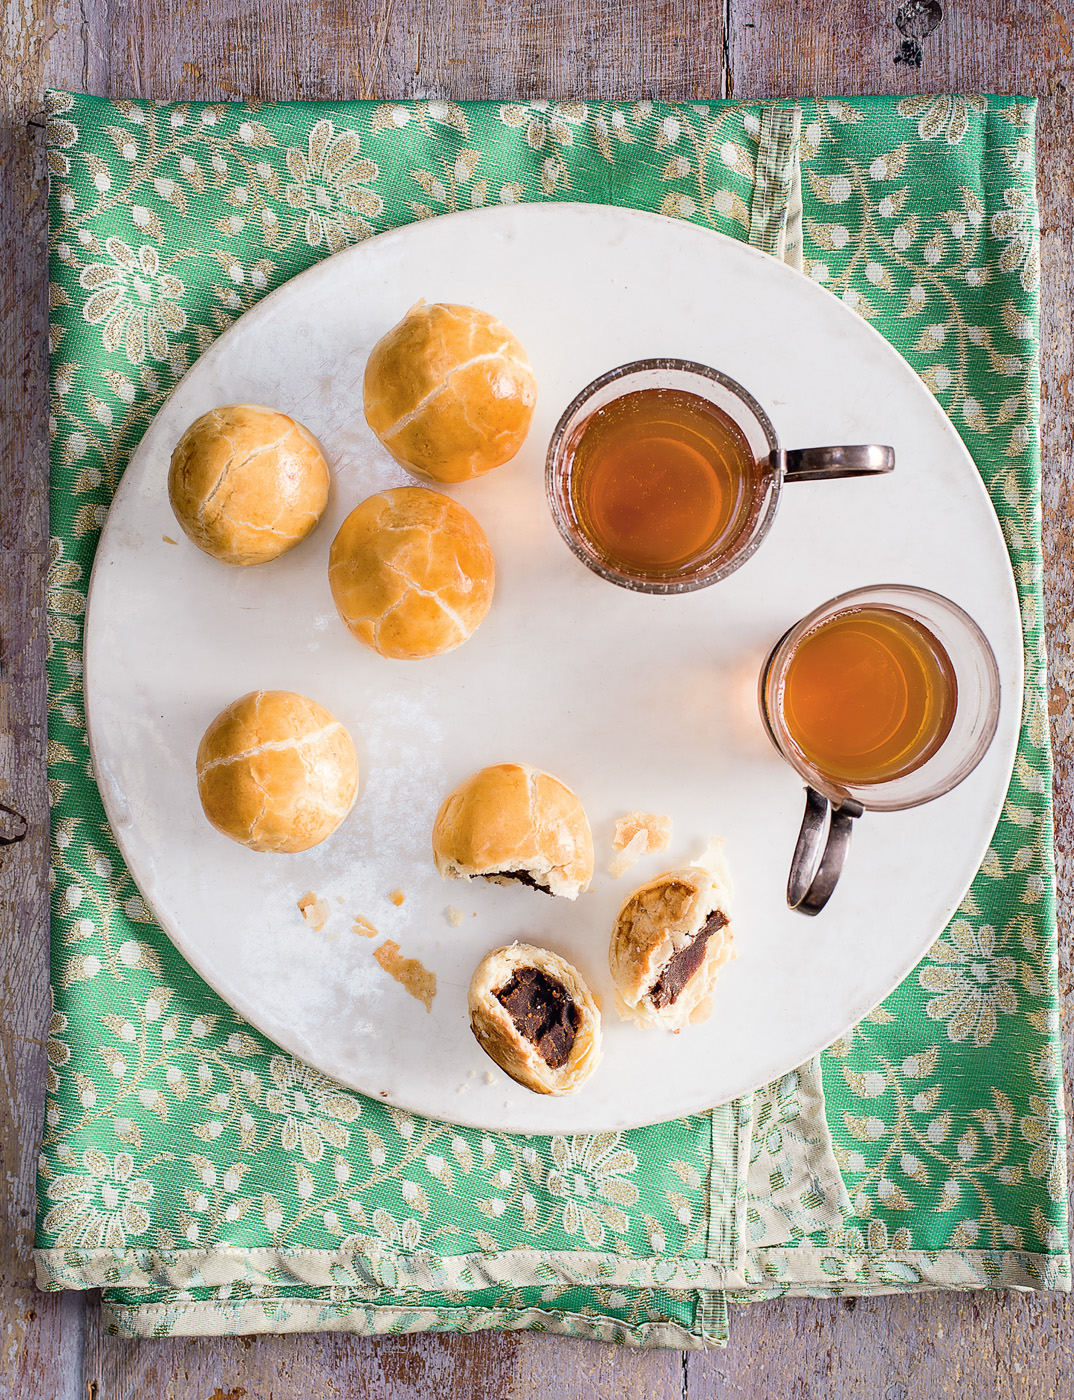
We have been eating a packaged version of these our whole lives, but it wasn’t until we were guests at a Singaporean family’s Chinese New Year celebration that we experienced the unbeatable moreishness of the homemade version. With pastry so faa that it instantly melts in your mouth, and jam that is satisfyingly chewy, we guarantee you’ll be hooked after your first bite.
Serves 4
432g canned pineapple chunks, drained
45g granulated sugar
10 cloves
pinch salt
1 egg yolk, for glazing
for the dough
175g plain flour
25g cornflour
75g icing sugar
pinch salt
100g cold unsalted butter, cubed
25g cold lard or vegetable shortening, cubed
1 egg yolk
¼ tsp vanilla extract
vegetable oil, for greasing
1 First prepare the filling. Use your hands to squeeze as much liquid from the pineapple as you can, then blitz the squeezed pineapple in a food processor until the largest pieces are roughly the size of pine nuts. Transfer to a small saucepan and add the sugar, cloves, and salt. Cook over a low heat, stirring occasionally for 40–50 minutes until most of the moisture has evaporated. The pineapple should be a deep yellow colour. Leave to cool.
2 For the dough, put the flours, icing sugar, and salt into a large bowl. Working as quickly as you can, use your fingertips to rub the butter and lard into the dry ingredients until the majority of the mixture resembles fine crumbs. Mix in the egg yolk and vanilla. Squeeze lightly to bring the mixture together and form into a rough ball. Cover tightly with cling film and chill for 30 minutes until firm.
3 Preheat the oven to 180°C/350°F/Gas mark 4 and line a baking sheet with non-stick paper.
4 To form the tarts, divide the filling into 20 almond-sized pieces and with lightly oiled hands, shape each piece into a fat cylinder. Take a heaped ½ tablespoon of dough and flatten into a 5cm disc. Create a dip in the centre and add a piece of filling then wrap the dough around the filling. It should look like a fat sausage. Applying the lightest pressure, roll the sausage back and forth in your palm until the outside is smooth.
5 In a bowl, whisk the egg yolk with 1 teaspoon water and brush this mixture onto each tart. Use small scissors to make rows of V-shaped snips on the surface and chill for 20 minutes. Bake for 15–18 minutes until golden yellow. Leave to cool completely on a wire rack. Store in an airtight container for up to one week.
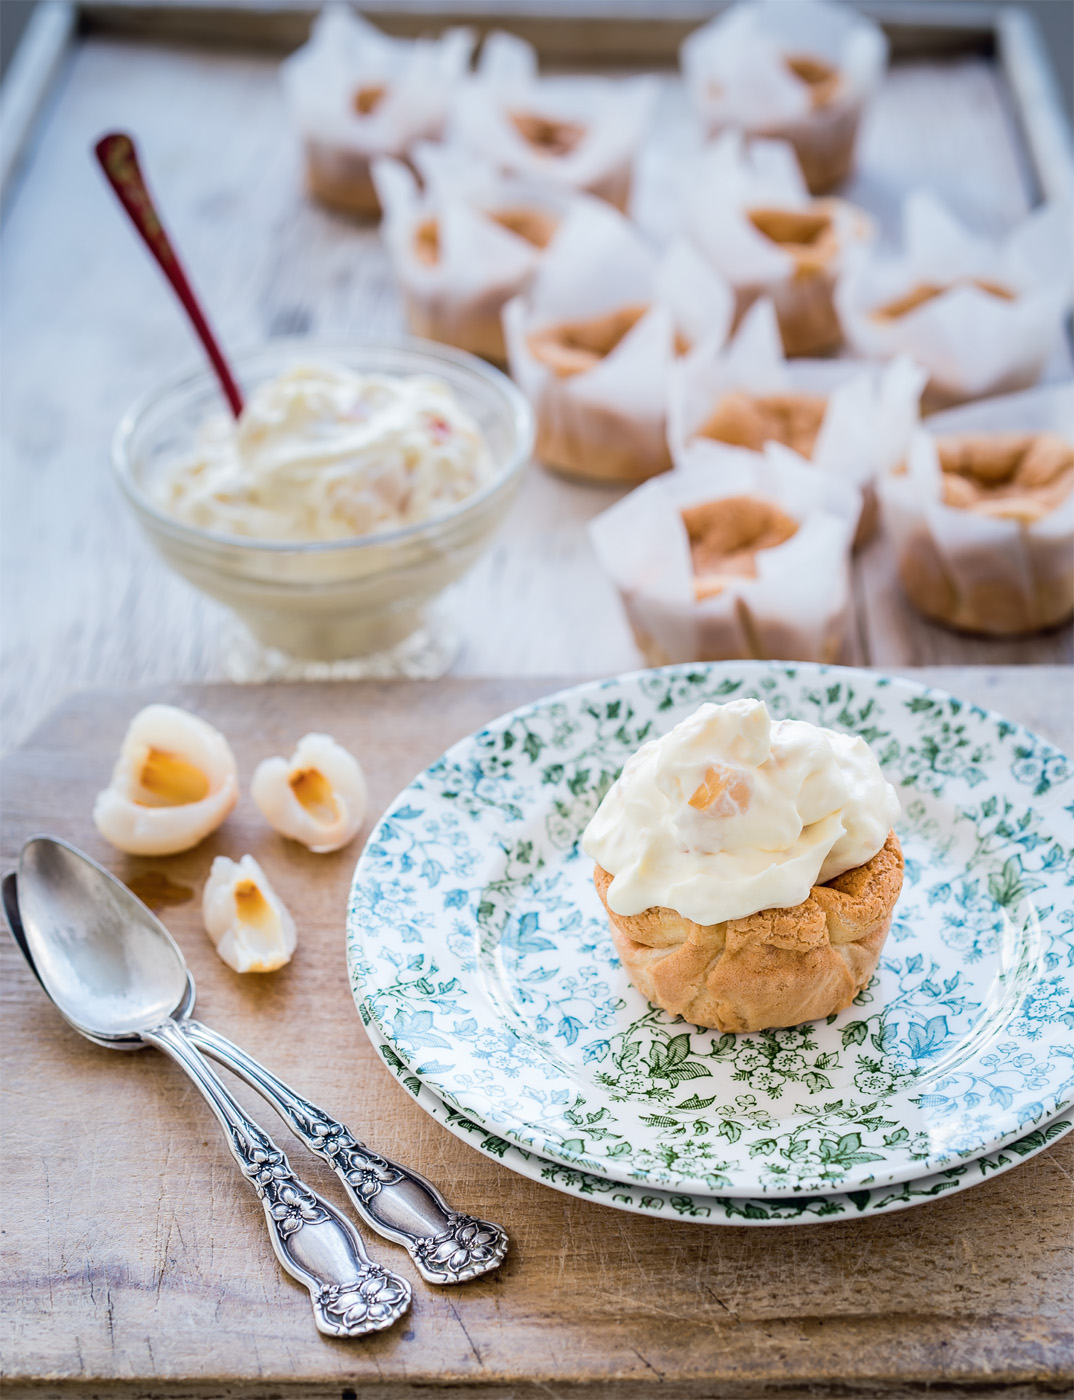
The simple and literal name of these cakes belies a wonderfully light and eggy cake with a beautiful golden crust. Although it looks like a sponge from the outside, the texture inside is quite unique: the crumb is very fine with a slightly daan (springy) bite quality. We like to bake ours in a muffin tin for a pretty mini version, before loading them up with a lychee cream for extra sweetness and texture.
Makes 12 muffin-sized cakes
for the yolk mixture
3 egg yolks
1 whole egg
½ tsp vanilla extract
55ml vegetable oil
70g self-raising flour
for the meringue
3 egg whites
65g icing sugar, sifted
for the lychee cream
200ml double cream
3 tbsp icing sugar, sifted
100g canned lychees, roughly chopped
1 tsp lychee juice from the can or 1 tsp lychee liqueur
1 Preheat the oven to 170°C/340°F/Gas mark 3. Prepare your muffin tin by lining the holes with squares of non-stick paper.
2 Put all the ingredients for the yolk mixture, except the flour, into a large bowl, and use a hand whisk to whisk until the yolks are slightly pale in colour. Sift in the flour and whisk again until smooth. The batter will be very thick at this stage.
3 For the meringue, beat the egg whites in a large, clean, grease-free bowl until they become frothy, then gradually add the sifted icing sugar and continue beating until the whites are opaque and glossy, and stiff peaks form.
4 Add a third of the egg whites to the yolk batter and use a whisk to gently combine the two. Repeat with the remaining egg whites, folding them in gently until they have just combined with the mixture. Pour or spoon the cake mixture into the prepared cups until they are two-thirds full and bake for 20–25 minutes, or until the cakes are golden brown. Turn the oven off and open the door, leaving the cakes inside for a further 5 minutes. Then pop the tray on top of a wire rack and leave the cakes to cool completely before twisting them out of the cups.
5 In a bowl, whip the cream to soft peaks and stir in the sifted icing sugar followed by the chopped lychees and lychee juice (or liqueur). Spoon the cream generously on top of the cakes to serve.
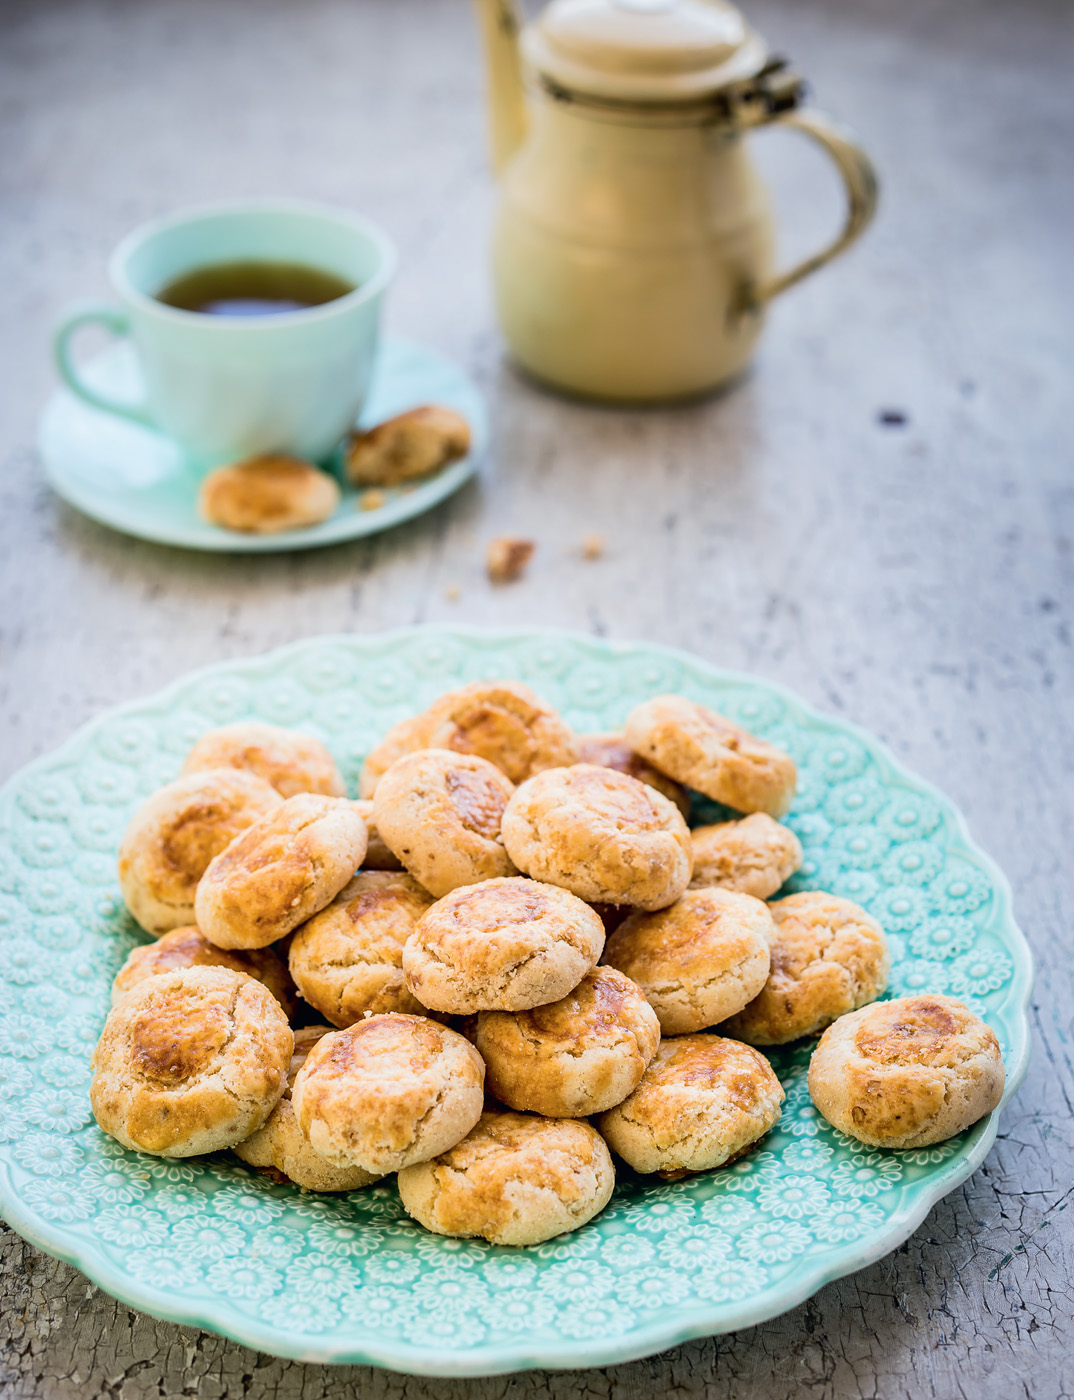
If you have ever been inside a Chinese supermarket around Chinese New Year, you may have noticed the red-lidded containers stacked to the brim with little golden-brown cookies. Hup toh soh, or walnut cookies, are frequently gifted around this time. Walnuts are thought to symbolise the happiness of the entire family and their physical resemblance to a brain is supposed to boost mental prowess. Using lard makes for a supremely crumbly texture, but they are still delicious if you wish to use vegetable shortening instead.
Makes 40–50
190g plain flour
65g cornflour
¼ tsp salt
½ tsp bicarbonate of soda
75g unsalted butter, softened
75g lard or vegetable shortening (see tip), softened
110g granulated sugar
½ tsp vanilla extract
1 egg, beaten
10 walnut halves, finely chopped
1 Preheat the oven to 170°C/340°F/Gas mark 3½ and line a baking sheet with non-stick paper. Mix the flours, salt and bicarbonate of soda together in a large bowl. Sift twice between two different bowls in order to fully incorporate the flours. In another bowl, use a wooden spoon to beat the butter and lard together until they are thoroughly combined. Beat in the sugar, vanilla and 2 teaspoons of the beaten egg. Sift the flour mixture into the wet ingredients along with the walnuts, then fold and mix until it is a smooth ball of dough.
2 Roll ½ tablespoons of the cookie dough into compact balls and arrange them on the prepared baking sheet, making sure that there is at least 3cm of space between each cookie. Use a small bottle cap to slightly flatten each ball. You should be able to see an impression of a circle on the surface. Brush the remaining beaten egg over the tops and sides of the cookies and bake for 15–20 minutes until the cookies are golden brown.
3 Leave the cookies to cool completely on a wire rack before serving with a cup of tea or crumbling over vanilla ice cream. Store in an airtight container where it will keep for up to one week.
DUMPLING SISTERS TIP
If using vegetable shortening instead of lard, switch off the oven after baking but leave the cookies inside for a further 2–3 minutes so they have a chance to dry out – this will give you an airier texture.
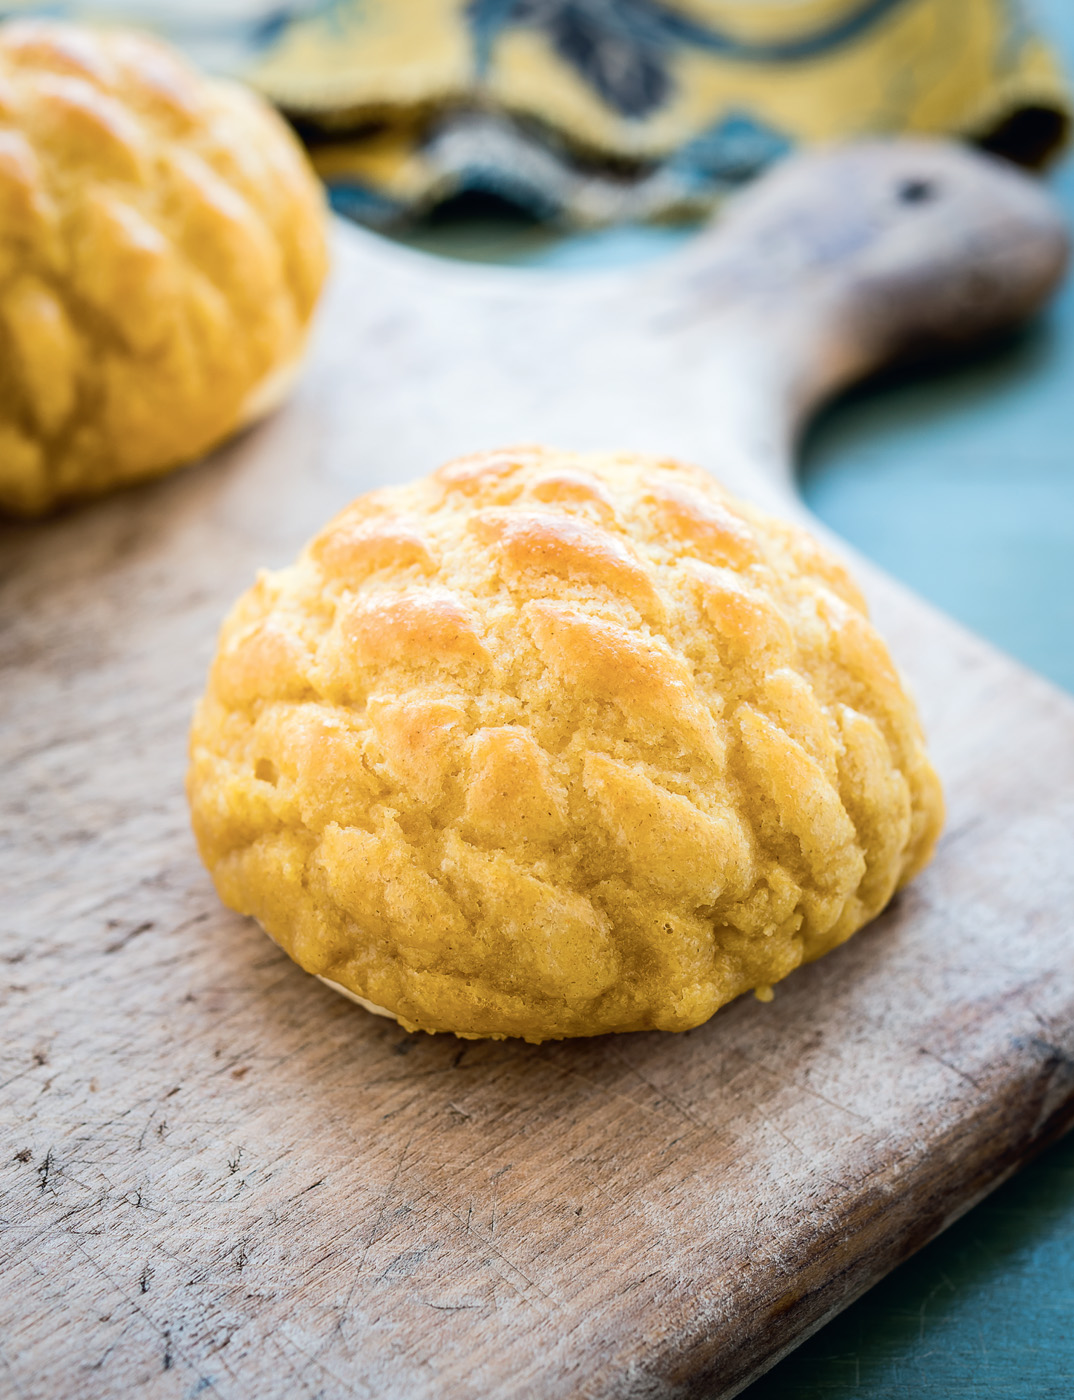
From Tiger Cake to Pineapple Tarts, you could say that the Chinese enjoy making edible art that imitates life. Bo lo bao are no exception, and even though there’s no pineapple, the name describes a streusel-like top that looks like a tasty approximation of the tropical fruit itself. Sink your teeth into one and you will love the duo of mouthfeels: the soung (crumbly) layer of the pineapple topping and the meen (bouncy, cottony soft) body of the bun.
Makes 10
1 batch of sweet bread dough, up to first rise (end of step 3, here)
1 egg, beaten
for the topping
110g plain flour
80g granulated sugar
¼ tsp bicarbonate of soda
¼ tsp baking powder
2 tbsp custard powder
2 egg yolks
60g unsalted butter, softened
1 Line a baking sheet with non-stick paper. Divide the sweet bread dough into 10 portions of about 70g each and shape into domes. Place onto the prepared baking sheet, cover with cling film then a tea towel and leave to rest in a warm place for 1–1½ hours until doubled in size.
2 Meanwhile, combine the dry ingredients for the topping in a bowl. Beat in the egg yolks, butter and 1 teaspoon water until evenly combined into a buttery dough. Shape into a fat sausage, wrap in cling film and chill for at least 20 minutes until firm.
3 Preheat the oven to 180°C/350°F/Gas mark 4. Divide the dough for the topping into 10 equal-sized pieces, then roll each out to a 2mm-thick disc – this is easiest done between two sheets of cling film. Lay a disc on top of each bun – gently moulding it into a dome shape – and brush with egg wash. Use the tip of a bamboo skewer to score a cross-hatch pattern into the topping dough.
4 Bake for 10–12 minutes until sunshine yellow. These are best eaten warm, or store in an airtight container for up to three days.
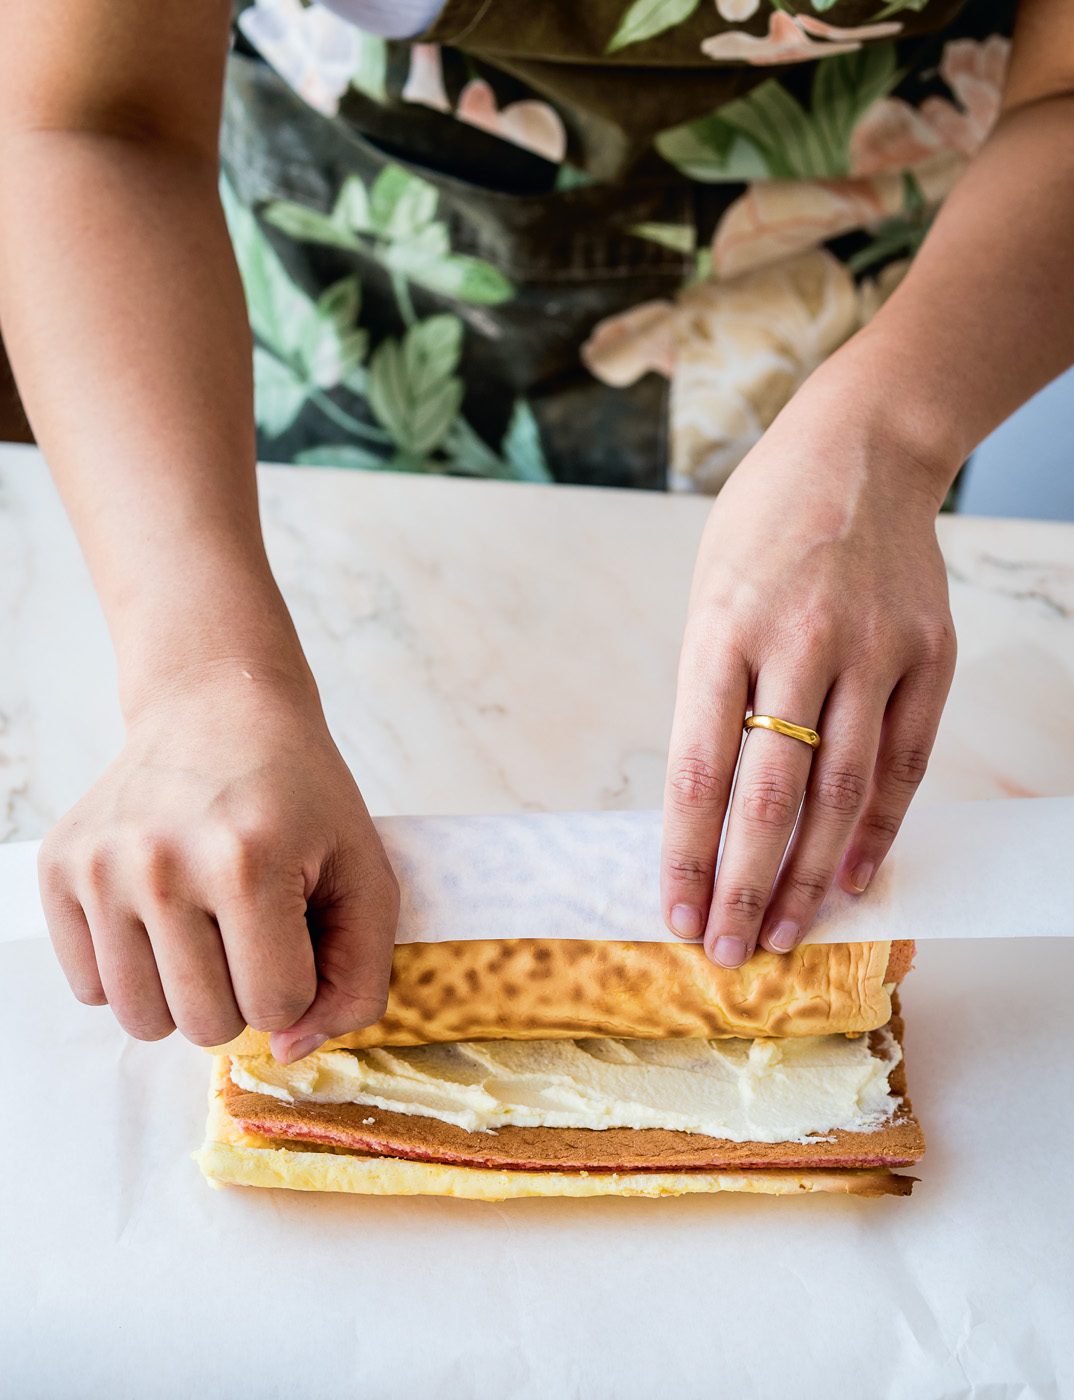
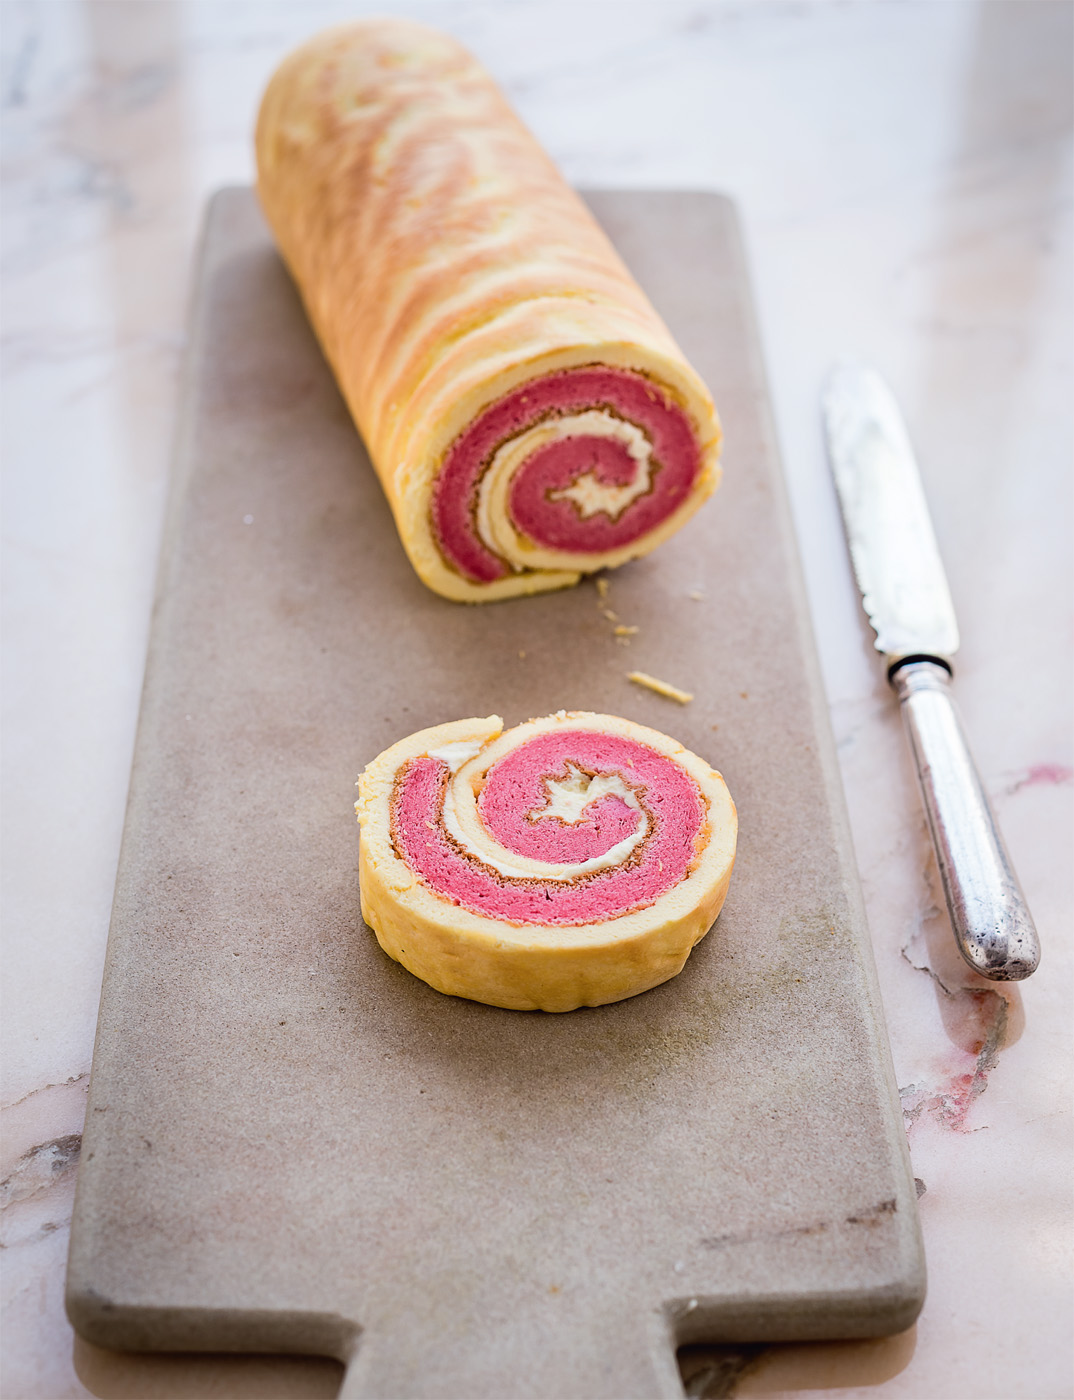
It was during a family trip to Guangzhou back in 2003 that we first set eyes on this fabulous creation, rather sweetly named tiger cake because of its evocative stripy ‘skin’, which is made by baking a cornflour mixture at a high temperature. To this day the best tiger cake we have ever eaten was from the hole-in-the-wall bakery near our grandmother’s house, but we think that this one comes close.
Makes 1
for the inner cake
4 eggs, separated
80g granulated sugar
3 tbsp vegetable oil
4 drops vanilla extract
2 drops red food colouring
50ml full-fat milk
60g plain flour
20g cornflour
½ tsp baking powder
for the tiger skin
6 egg yolks
60g caster sugar
¼ tsp vanilla extract
20g cornflour
for the filling
150ml double cream, whipped
1½ tbsp icing sugar
1 Preheat the oven to 180°C/350°F/Gas mark 4 and line a Swiss roll tin with non-stick paper. For the inner cake, beat the egg whites in a large, clean, grease-free bowl and gradually add 60g of the sugar until soft peaks form. Set aside.
2 Beat the egg yolks and the remaining 20g sugar in another bowl for 2 minutes, until they have thickened slightly and become a pale yellow colour. Beat for another minute, gradually adding the oil. Add the vanilla, food colouring and milk, then beat for 1 minute.
3 Mix the flours and baking powder together in a bowl. Sift the flour mixture twice between two different bowls. Sift the flour mixture again into the beaten egg yolk mixture, and whisk until smooth. Use a spatula to gently fold in half of the beaten egg whites into the yolk mixture. Repeat with the remaining egg whites, folding only until just combined.
4 Pour the mixture into the prepared tin and smooth over the top. Make sure that the mixture is spread out to the edges of the tin. Bake for 15 minutes until golden brown.
5 Meanwhile, prepare the tiger skin. Beat the egg yolks, sugar and vanilla in a large bowl until thick and pale. Add the cornflour and beat until smooth. Set aside.
6 Lift the cooked inner cake out of the tin by the paper and place onto a wire rack. Increase the oven temperature to 240°C/475°F/Gas mark 9. Leave the inner cake to cool for 3 minutes, then cut a 1cm-wide strip off one of the short sides. Gently score a line 1cm in from the cut edge of the cake, slicing down about halfway into the depth of the cake, then roll the whole thing – the cake and paper – into a firm spiral before putting it onto a wire rack.
7 Line the tin with a new sheet of non-stick paper, pour in the tiger skin mixture, and smooth over the top. Make sure that the mixture is spread out to the edges of the tin. Bake in the oven for 2–3 minutes. As soon as you can make out a stripy pattern, remove from the oven immediately. Lift the tiger skin out of the tin by the paper and put it on the wire rack. Leave to cool for 5 minutes, then carefully peel the skin away from the paper.
8 To roll your tiger cake, take a piece of non-stick paper that is a little larger than the cake. Put the tiger skin on the paper, pattern side down, then unroll the inner cake on top of the tiger skin and line it up at the edge that is closest to you. The tiger skin should be slightly longer than the inner cake on the far side. Spread the whipped cream on top of the inner cake, then use the paper to help you firmly roll the tiger cake. Twist the sides of the paper so the cake looks like a wrapped lolly and leave until ready to serve with tea (a Chinese green tea called bi luo chun, or ‘spring snail’ is an excellent choice).
The cute domes of these pastries belie the sophisticated layers nesting within. Like Custard Egg Tarts (here) the pastry layers are achieved by alternating layers of water dough and butter dough.
Makes 15
1 egg yolk, beaten, for brushing
for the butter dough
125g plain flour
45g cornflour
85g unsalted butter, at room temperature and cubed
for the water dough
50g strong bread flour
90g plain flour
30g cornflour
40g icing sugar
50g unsalted butter, at room temperature and cubed
for the filling
175g sweet red bean paste
1 Make the butter dough. In a large bowl, mix the flours together. Use your fingertips to rub in the butter then use the heel of one hand to fold and press the dough until the butter is evenly incorporated. Shape into a ball, wrap in cling film and chill for 30 minutes.
2 Make the water dough. In a large bowl, stir together the flours, sugar and 75ml cold water. Turn out onto a work surface, dot the butter all over the dough and using the heel of your hand, coax the butter into the dough until just evenly combined. Wrap in cling film and chill for 20 minutes.
3 For both doughs, divide into 15 portions and then form each portion into a ball. Use a damp cloth to cover the dough pieces that you are not working on to prevent them from drying out.
4 Take a portion of water dough and flatten into a disc. Place a ball of butter dough in the centre. Ease the water dough up and around the butter dough and pinch firmly at the top to create an even seal. Put the ball back under the damp cloth. Repeat with the remaining dough and leave to rest for 10 minutes.
5 Retrieve the first ball of dough that you worked with and put a rolling pin directly on top. Roll upward in one motion, then return the pin to where you started and roll down in another motion. You should end up with a stretched out oval shape, about 6cm wide and 12cm long. Lift the bottom edge and roll the pastry up into a scroll shape. Put back under the damp cloth. Repeat with the remaining dough, and leave to rest for 10 minutes.
6 Put a scroll in front of you with the seal running vertically. Using the same upward then downward rolling motion as before, roll the dough into a stretched-out oval, about 4cm wide and 12cm long. Roll into a scroll as before, repeat with the remaining dough, and leave to rest under the damp cloth for 10 minutes.
7 Preheat the oven to 180°C/350°F/Gas mark 4 and line a baking sheet with non-stick paper. Using oiled hands, roll the red bean paste into heaped ½ tablespoon-sized balls. If the red bean paste is too soft to handle, place it in the freezer for 30 minutes to firm up.
8 Put a scroll in your hand with the seal facing upward. Use your thumb to pinch down in the middle so that the scroll folds in half. Put the dough smooth side facing down on the work surface, flatten with your palm and then roll it out into an 8cm disc. Put a ball of red bean paste into the centre of the disc and wrap the dough up and around the filling and pinch to seal tightly at the top. Turn the filled dough over and place sealed-side down onto the prepared baking sheet and repeat with the remaining dough, leaving at least 3cm between each ball of dough.
9 Brush the egg yolk over the pastries and bake for 25 minutes until golden brown. Cool on a wire rack. These will keep in an airtight container for up to a week.

This colourful twist on fluffy chiffon cake originated in South-east Asia and has long been a Chinese bakery favourite. Traditionally, the cake mixture is dyed bright green by adding juice squeezed from the leaves of the pandan (pandanus amaryllifolius) plant. Luckily for those of us in short supply of pandan leaves, the extract is available in Chinese supermarkets and online (see here).
Serves 6-8
20g cornflour
55g plain flour
4 large eggs, separated
1½ tbsp caster sugar, plus 80g for the egg whites
2 tbsp full-fat milk
¼ tsp pandan essence
4½ tbsp vegetable oil, plus extra for greasing
¾ tsp baking powder
¼ tsp salt
¼ tbsp lemon juice
whipped cream, to serve
1 Preheat the oven to 170°C/340°F/Gas mark 3 and grease a 24cm ring cake tin with oil. Mix together the flours, then sift the mixture twice between two different bowls to combine the flours evenly. Put the egg yolks into a large bowl and use an electric whisk to beat the yolks for 2 minutes until they are thick and pale. Add the 1½ tablespoons sugar, the milk, pandan essence, and 1½ tablespoons oil and beat for a further 3 minutes, gradually adding the remaining 3 tablespoons oil until thick and glossy. Add the baking powder and salt and beat for another 30 seconds to combine. Sift the flour mixture into the egg yolk mixture and beat until the mixture is smooth. Set aside.
2 Put the egg whites and lemon juice into a large, clean, grease-free bowl and use an electric beater to beat the egg whites for 1 minute until light and fluffy. Gradually add the 80g sugar as you beat the egg whites for a further 5 minutes, until glossy and stiff peaks form.
3 Use a whisk to gently fold a third of the egg whites into the egg yolk mixture, then fold in the second third of the egg whites. Repeat with the last third of egg whites, until just combined, then pour the cake mixture into the prepared cake tin and smooth over the top. Bake for 20–25 minutes, or until a skewer inserted into the cake comes out clean. Remove the cake from the oven and put the cake, still in the tin, upside down on a wire rack to cool for 1 hour. Run a knife around the inside edge of the tin, transfer the cake to a wire rack and allow to cool completely. Serve generous slices with whipped cream or a cup of green tea (or both).
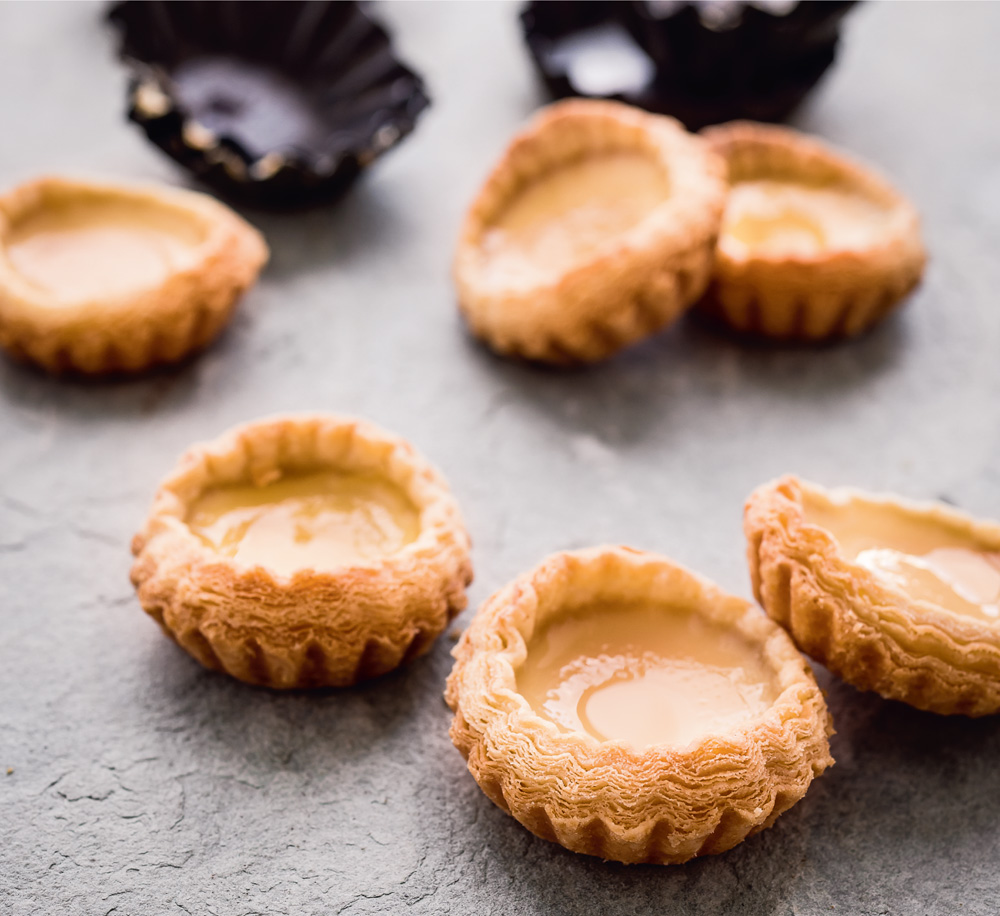
When we were younger, dan tat were Julie’s absolute favourite dim sum with their irresistibly waat (silky smooth) custard and gazillion layers of soung (loose and crumbly) pastry. During a family trip to Guangzhou we had yum cha at the same restaurant every day, but on one occasion the dan tat had been taken off the menu. Not one to be deterred by ‘staff only’ entrances, our beloved and larger than life gou yeh poh (ninth great aunt) took little Julie by the hand and marched into the kitchen to demand answers … needless to say, 15 minutes later the dim sum carts were all sunny yellow with the unmistakable smell of freshly baked tarts wafting through the air.
Makes 14
for the butter dough
80g cold unsalted butter
100g plain flour
120g cold lard or vegetable shortening
for the water dough
125g plain flour, plus extra for dusting
¼ egg (about 15g), beaten
1 tbsp granulated sugar
¼ tsp salt
7g cold lard or vegetable shortening
for the filling
120ml full-fat milk
40g granulated sugar
¼ tsp vanilla extract
1 egg
1 For the butter dough, use a fork or pastry cutter to cut the butter into the flour until evenly distributed, then repeat with the lard until you have a paste. Put the paste into the centre of a piece of cling film and fold into an 18 x 18cm square. Squeeze the dough into the corners of the square until it takes on the shape, and flatten evenly with your palms. The slab should be about 0.5cm thick. Chill for 30 minutes.
2 For the water dough, put the flour, beaten egg, sugar, salt and lard into a medium bowl. Add 40ml cold water and stir until it forms a dough. Turn out onto a lightly floured work surface and use the heels of your palms to bring the mixture together, kneading lightly until the ingredients are evenly distributed. Wrap the dough in cling film and chill for 30 minutes.
3 Meanwhile, prepare the filling. Gently heat the milk, sugar and vanilla in a small saucepan for 5–8 minutes until the sugar has melted, then leave to cool. Stir the beaten eggs into the cooled milk mixture and strain through a sieve twice. Set aside.
4 Roll the water dough out onto a lightly floured surface into a 20 x 40cm rectangle. Place the flattened square of butter dough into the centre of the rectangle. Fold in the overhanging flaps of water dough to wrap around the butter dough. Roll into a 20 x 40cm rectangle. Fold in half to form a square, then in half again to form a rough 10 x 20cm rectangle. Chill in the fridge for 20 minutes.
5 Roll the chilled dough into a 20 x 40cm rectangle, fold into thirds, chill for 20 minutes, then repeat the folding and chilling once more.
6 Preheat the oven to 160°C/325°F/Gas mark 3. Roll the chilled dough into a 20 x 30cm rectangle, then use a 9cm cookie cutter to cut out 14 pastry rounds and ease each into a 7cm tart case, or a muffin tray. Prick the bottom of each with a fork and arrange the tart cases on a baking sheet. Chill for 10 minutes.
7 Remove the tart cases from the fridge and pour in the custard filling to just below half full. Bake for 13–15 minutes until the pastry is light golden and the custard puffs up slightly. Leave to cool in the cases for 10 minutes, then turn out onto a wire rack. Best served warm on the day they are made.