This chapter is about sound work in postproduction. Be sure to read Chapter 13, for issues of dialogue editing. Recording and processing sound is discussed in Chapters 10 and 11.
The Idea of Sound Editing and Mixing
Sound editing refers to the process of creating and refining the sound for a movie in postproduction. Mixing is the process of enhancing and balancing the sound. On a large production, sound editing is generally done by specialized sound editors who are not involved in the picture editing. The team may include different editors working specifically on music, ADR (see p. 532), sound effects, or Foleys (see below). A sound designer may create unique textures or effects. On a small production, the same people may do both picture and sound editing.
Sound is often treated as an afterthought, something to be “tidied up” before a project can be finished. But sound is tremendously important to the experience of watching a movie. An image can be invested with a vastly different sense of mood, location, and context, depending on the sound that accompanies it. Some of these impressions come from direct cues (the sound of birds, a nearby crowd, or a clock), while others work indirectly through the volume, rhythm, and density of the sound track. The emotional content of a scene—and the emotions purportedly felt by characters on screen—is often conveyed as much or more by music and sound design as by any dialogue or picture. Even on a straightforward documentary or corporate video, the way the sound is handled in terms of minimizing noise and maximizing the intelligibility of voices plays a big part in the success of the project.
It is said that humans place priority on visual over aural information. Perhaps so, but it’s often the case that film or video footage that is poorly shot but has a clear and easily understood sound track seems okay, while a movie with nicely lit, nicely framed images, but a muddy, harsh, and hard-to-understand track is really irritating to audiences. Unfortunately for the sound recordists, editors, and mixers who do the work, audiences often don’t realize when the sound track is great, but they’re very aware when there are sound problems.
The editing of dialogue, sound effects, and music often evolves organically during the picture editing phase. While the dialogue and picture are being edited, you might try out music or effects in some scenes. You might experiment with audio filters or equalization and often need to do temporary mixes for test screenings. Nonlinear editing is nondestructive, which means you can do many things to the sound and undo them later if you don’t like the effect.1 For some projects, the picture editor does very detailed mixing in the NLE, which may be used as the basis for the final mix.

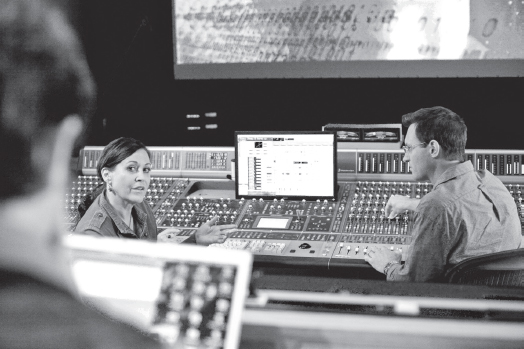
Fig. 15-1. Mix studio. (Avid Technology, Inc.)
Even so, sound work doesn’t usually begin in earnest until the picture is locked (or nearly so) and the movie’s structural decisions are all made. The job of sound editing begins with the sound editor screening the movie with the director and the picture editor. If you’re doing all these jobs yourself, then watch the movie with a notepad (and try not to feel too lonely). In this process, called spotting, every scene is examined for problems, and to determine where effects are needed and where a certain feeling or quality of sound is desired. A spotting session is also done for music, with the music editor, the composer (who will create music), and the music supervisor (who finds existing music that can be used, and may play a larger role in hiring or working with the composer). If the music spotting session is done prior to effects spotting, you’ll have a better sense of which scenes need detailed effects. Spotting information can also be noted with markers directly in the sequence in the editing system (the markers can later be exported as a text list if desired).
The sound editor or editors then begin the process of sorting out the sound. The audio is divided into several different strands or tracks. One set of tracks is used for dialogue, another for effects, another for music, and so on. Portioning out different types of sounds to separate tracks makes it easier for the mixer to adjust and balance them. This process is called splitting tracks. Effects are obtained and other sounds are added, building up the layers of sound; this is track building.
When all the tracks have been built, a sound mix is done to blend them all back together. Enhancing the way the tracks sound in the mix is sometimes called sweetening. The mix may be done in a studio by a professional mixer, or it may be performed by the filmmaker using a nonlinear editing system (NLE) or a digital audio workstation (DAW). A professional mix studio (also called a dub stage or mix stage) is designed with optimal acoustics for evaluating the audio as it will be heard by audiences. Though more costly, studio mixes are preferable to mixes done in the editing room or other multiuse spaces that may have machine noise, poor speakers, or bad acoustics. For theatrical and broadcast projects, it’s essential to mix in a good listening environment. Also, professional mixers bring a wealth of experience about creating a good sound track that most filmmakers lack. Nevertheless, with diminishing budgets and the increasing audio processing power of NLEs and DAWs, many types of projects are successfully mixed by filmmakers themselves on their own systems.
After the mix, the sound track is recombined with the picture for distribution. Different types of distribution may call for different types of mixes.
THE SOUND EDITING PROCESS
How sound is handled in postproduction depends on the project, how it was shot, your budget, the equipment being used, and how you plan to distribute the finished movie.
As for the tools of sound work, the distinctions between the capabilities of an NLE, a DAW, and a mix studio have broken down somewhat. For example, some NLEs have powerful sound editing capabilities. A DAW, which is a specialized system for sound editing and mixing, might be just another application running on the same computer as the NLE. And a mix studio might be using the same DAW, but with better controls, better speakers, in a better listening environment.
For most video projects, the production audio (the sound recorded in the field) is recorded in the video camcorder along with the picture. For some digital shoots and all film shoots, the audio is recorded double system with a separate audio recorder. For workflows involving double-system sound, see Working with Double-System Sound, p. 589, and, for projects shot in film, Chapter 16.
The simplest, cheapest way to do sound work is just to do it on the NLE being used for the picture edit. For many projects this is where all the sound editing and mixing is done. Audio is exported as a finished sound track, either with the video or separately (to be remarried to the picture if a separate online edit is done). This method is best for simple and/or low-budget projects but is often not a good idea for complex mixes.
Even when following this workflow, you might also make use of a specialized audio application, like a version of Avid’s Pro Tools, that works easily with your NLE.

Fig. 15-2. Digital audio workstation (DAW). Most DAWs, including the Pro Tools system shown here, can be used for movie track work and mixing, as well as creating music. (Avid Technology, Inc.)
For the most control, audio is exported from the NLE and imported to a full-featured DAW for track work and mixing. Depending on the project, this may mean handing over the project from the picture editor to the sound department. Or, on a smaller project, you might do the sound work yourself, then hand over the tracks to a professional mixer just for the final mix. A professional mix studio will have good speakers and an optimal environment for judging the mix. Professional sound editors and mixers use DAWs with apps such as Pro Tools, Nuendo, and Apple Logic. Among the advantages of DAWs are more sophisticated audio processing, better control over audio levels and channels, and better tools for noise reduction, sample rate conversions, and the like.
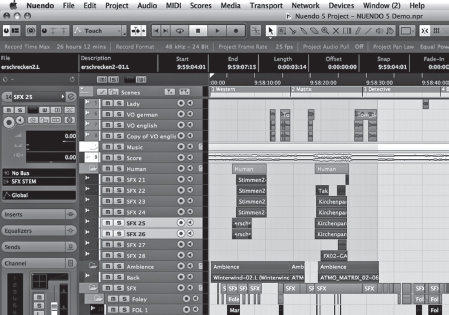
Fig. 15-3. DAWs, like the Nuendo system shown here, display audio clips on a timeline, much like NLEs do. (Steinberg Media Technologies GmbH)
In the past, sound for projects shot on film would be transferred to 16mm or 35mm magnetic film for editing, and the mix would be done from these mag film elements (see Fig. 15-11). Today, even if the film is edited on a flatbed with mag tracks, the sound is usually transferred to digital for mixing.
Planning Ahead
Many of the decisions made during picture and sound editing are affected by how the movie will be finished. Some questions that you’ll face later on, which are worth considering early in the process, include:
Some topics in this chapter, such as the sections on sound processing and setting levels, are discussed in terms of the final mix but apply equally to working with sound throughout the picture and sound editing process. It will help to read through the whole chapter before beginning sound work.
SOUND EDITING TOOLS
The Working Environment
Sound work is first and foremost about listening, so it’s essential you have a good environment in which to hear your tracks. If you’re working with computers, drives, or decks that have noisy fans, make every effort to isolate them in another room or at least minimize the noise where you’re sitting. Sometimes you can get extension cables to move the keyboard and monitors farther from the CPU, or use sound-dampening enclosures.
The editing room itself will affect the sound because of its acoustics (how sound reflects within it), noise, and other factors. Make sure there’s enough furniture, carpeting, and/or sound-dampening panels to keep the room from being too reverberant and boomy.
Speakers are very important. A good set of “near field” speakers, designed for close listening, are often best. They should be aimed properly for your sitting position—usually in a rough equilateral-triangle arrangement (with the same distance between the two speakers as between you and each speaker, and each turned in slightly toward you). Avoid cheap computer speakers. Some people use “multimedia” speakers that have tiny little tweeters on the desktop with a subwoofer on the floor for bass. The problem with these is that they reproduce the high frequencies and the lows, but may be deficient in the midrange, where most dialogue lies.
One philosophy is that you should listen on the best speakers possible, turned up loud, to hear every nuance of the sound. Another suggests that you use lower-quality speakers at a lower volume level, more like the ones many people watching the movie will have. Ideally, you should have a chance to hear the sound on both. The great speakers will have detail in the highs and lows that some people, especially theater audiences, will hear. The smaller speakers will create some problems and mask others that you need to know about. Some people use headphones for sound work, which are great for hearing details and blocking out editing room noise, but can seriously misrepresent how people will hear the movie through speakers in the real world. To learn what your movie sounds like, get it out of the editing room and screen it in different environments—such as in a theater with big speakers turned up loud and in a living room on a TV that has typical small speakers.
It’s helpful to have a small mixer (see next section) to control the level and balance of editing room speakers.
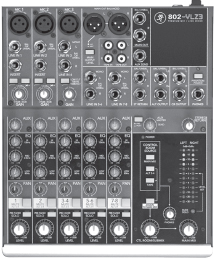
Fig. 15-4. Mackie 802-VLZ3 mixer. Mackie makes a series of popular, versatile mixers. (Mackie Designs, Inc.)
The Mixing Console
The mixing console (also called recording console, mixer, or board) is used to control and balance a number of sound sources and blend them into a combined sound track. The most sophisticated consoles are massive, computer-controlled systems used on a dub stage (see Fig. 15-1). At the other end of the range are simple, manually operated boards often used with an editing system for monitoring sound and inputting different gear into the NLE (see Figs. 14-7 and 15-4).
Today virtually all mixing is done with computer control. Software apps and DAWs often have on-screen displays that look a lot like a mix board. Sometimes apps are used with an attached physical console that has sliders you can move by hand (a “control surface”; see Fig. 15-12), which is a lot easier than trying to adjust levels with a mouse.
Because many NLE setups use a virtual or physical mixer to control various audio inputs, a short discussion may be helpful. The mix board accepts a number of input channels, or just channels. Each channel is controlled with its own channel strip on the surface of the board that has a fader (level control) and other adjustments. You might use one channel to input a microphone, and another pair of channels to bring in sound from a video deck. The channels can be assigned to various buses; a bus is a network for combining the output of two or more channels and sending it somewhere (a bit like a city bus collecting passengers from different neighborhoods and taking them downtown). The mix bus is the main output of the board, the monitor bus is the signal sent to the monitor speakers, and so on. You can send any channel you want to the main mix, where a master fader controls the level of all the channels together. You might choose to assign some channel strips to a separate output channel. This is sometimes done to create alternate versions of a mix, or when two people are using the board for different equipment at the same time.

Fig. 15-5. Channel strip from Mackie 1202-VLZ3 mixer. See text. (Robert Brun)
To set up a channel on a mixer, plug the sound source (say, a video deck or microphone) into the channel input. Turn the gain control all the way down, and set the channel’s level, the master fader, and the EQ controls to U or 0 dB. Now play the sound source (with nothing else playing) and adjust the gain (trim) control until the level looks good on the mixer’s level meter. See Chapter 11 for more on setting levels. Now you can set the EQ where you like it, and use the channel strip and master fader to control the level as you choose. Generally you want to avoid a situation where a channel’s gain is set low and the master fader is set very high to compensate. If you’re just using one channel, often it’s a good idea to leave the channel’s gain at U and use the master fader to ride the level (see Gain Structure, p. 455).
SOUND EDITING TECHNIQUE
Editing dialogue and narration is discussed in Chapter 13. Basic sound editing methods are discussed in Chapter 14.
Evaluating the Sound Track
All the audio in the movie should be evaluated carefully at the start of sound editing. Is the dialogue clear and easy to understand? Is there objectionable wind or other noise that interferes with dialogue? Go through the tracks and cut out any noise, pops, or clicks that you can, and usually any breaths before or after words (that aren’t part of an actor’s performance). You can fill the holes later with room tone (see below for more on this). Pops that occur at cuts can often be fixed with a two-frame crossfade (sound dissolve).
If you have doubts about the quality of any section of audio, try equalizing or using noise reduction or other processing to improve it. Be critical—if you think you’re unhappy with some bad sound now, just wait till you see the movie with an audience. For nondialogue scenes, the remedy may be to throw out the production sound and rebuild the audio with effects (see below). For dialogue scenes in a drama, you may need to use other takes, or consider automatic dialogue replacement (ADR; see p. 532). Consult a mixer or other professional for possible remedies. If it’s unfixable, you may need to lose the whole scene.
Sound and Continuity
Sound plays an important role in establishing a sense of time or place. In both fiction and documentary, very often shots that were filmed at different times must be cut together to create the illusion that they actually occurred in continuous time. In one shot the waiter says, “Can I take your order?” and in the next the woman says, “I’ll start with the soup.” These two shots may have been taken hours or even days apart, but they must maintain the illusion of being connected. The way the sound is handled can either make or break the scene.
When you’re editing, be attentive to changes in the quality, content, and level of sound and use them to your advantage. If your goal is to blend a series of shots into a continuous flow, avoid making hard sound cuts that butt up two sections of audio that differ greatly in quality or tone, especially right at a picture cut. A crossfade can smooth out a hard cut. Certain differences in quality and level can be smoothed over by adjusting levels and doing some EQ. Sometimes just moving the audio cut a few frames before or after the picture cut helps (see Fig. 14-25).
Audiences will accept most changes in sound if they’re gradual. One technique is to add in a background track that remains constant and masks other discontinuities in a scene. Say you have a shot with the sound of an airplane overhead, preceded and followed by shots without the plane. You could add airplane sound to another track (which you can get from a sound effects library); fade it in before the noisy shot, then gradually fade it out after it (see Fig. 15-6). This progression gives the sense that the plane passes overhead during the three shots. As long as the sound doesn’t cut in or out sharply, many discontinuities can be covered in a similar way.

Fig. 15-6. Smoothing out a noisy shot. On audio track 1 are two clean dialogue clips (1 and 3) that have no background noise. On track 2, the dialogue clip (2) has noise from an air conditioner that was running when that part of the scene was shot. Room tone with air conditioner noise was found earlier in the shot and a copy (4) was pasted on track 3. It is crossfaded with clip 2, so the noise level comes in gradually, not abruptly. Normally, a second copy of clip 4 could be placed at the end of clip 2 and faded out, to smooth the transition out of the noisy section. However, the noise at the end of clip 2 is different and doesn’t match. So room tone (T), which was found in a short pause at the end of clip 2, is copied, then pasted repeatedly as a loop on track 3. Crossfades from one section of the loop to the next can help blend them together. Then the looped clips as a group can be faded out (on some systems this requires making a nest or a compound clip).
If you’re cutting a scene in which there was audible music on location, there will be jumps in the music every time you make a cut in the audio track. Try to position cuts in background sound under dialogue or other sounds that can distract the audience from the discontinuous background.
While gradual crossfades ease viewers from sequence to sequence, it’s often desirable to have hard, clear changes in sound to produce a shock effect. Opening a scene with sound that is radically different from the previous sequence is a way to make a clean break, start a new chapter. When cutting from a loud scene to a quiet scene, it often works best to allow the loud sound to continue slightly beyond the picture cut, decaying (fading out) naturally. When a loud scene follows a quiet scene, a straight cut often works best.
When building tracks, don’t forget the power of silence. A sense of hush can help build tension. A moment of quiet after a loud or intense scene can have tremendous impact. Sounds can be used as punctuation to control the phrasing of a scene. Often, the rhythm of sounds should be used to determine the timing of picture cuts as much as or more than anything going on in the picture.
Sound Effects
For feature films, it’s common during shooting to record only the sound of the actors’ voices, with the assumption that all other sounds (such as footsteps, rain, cars pulling up, or pencils on paper) will be added later. Shooting often takes place on an acoustically isolated soundstage. Without added sound effects to bring a sense of realism, the footage will seem very flat. Documentaries often need effects as well, to augment or replace sounds recorded on location.
Sound effects (SFX) are available from a number of sources. You can download effects from the Web or buy them on discs. Most mix facilities keep an effects library. A good library has an astounding range of effects: you might find, for example, five hundred different crowd sounds, from low murmurs to wild applause. Libraries such as Sound Ideas or the Hollywood Edge offer effects for specific models of cars, species of birds, types of shoes, guns, or screams.
The most compelling effects may not be the obvious library choice. A car zooming by in a dramatic scene could have engine and tire sounds, plus rocket sounds or even musical tones. To create unusual effects, the sound designer will collect, sample, and process all sorts of sounds and textures.
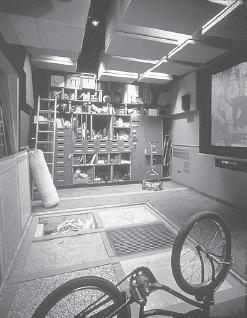
Fig. 15-7. Foley room. The various floor surfaces are used to make different types of footsteps. Items in the background are for generating other sound effects. (Sync Sound, Inc.)
A Foley stage is a special studio for creating effects while watching the picture (named for Jack Foley, who invented the technique in the early days of sound films). The floor may have different sections with gravel, wood, or other surfaces to simulate different kinds of footfalls. A good Foley artist can pour water, make drinking sounds, and do other effects that work perfectly with picture. When doing foreign language versions of a film, Foleys are often needed because the original effects that were recorded with the dialogue have to be cut out.
Effects can also be used to help define a place or a character and can be used as a narrative element. Some effects are clichéd (the creaking floors and squeaking doors of a spooky old house), but imaginative use of sounds can add a vivid flavor to an otherwise bland location.
Effects are sometimes used to create moods or impressionistic backgrounds that don’t relate literally to anything in the image. Creative sound editing may involve burying abstract or unrelated sounds under the more obvious sounds created by people or objects on screen. Sometimes these effects are very subtle. A quiet, very low-frequency sound may be barely audible but can create a subliminal sense of tension. As editor Victoria Garvin Davis points out, often the mark of a good effect is that you never even notice it.
Room Tone and Ambience
The sound track should never be allowed to go completely dead. With the exception of an anechoic chamber, no place on earth is totally silent. Every space has a characteristic room tone (see p. 445). For technical reasons as well as aesthetic ones the track should always have some sound, even if very quiet. Whenever dialogue has been edited and there are gaps between one bit of dialogue and the next, room tone is particularly important to maintain a sense of continuity. Filling in room tone is sometimes called toning out the track.
If the recordist has provided room tone at each location, you can lay it under the scene to fill small dropouts or larger holes or to provide a sense of “air,” which is quite different from no sound. If no room tone has been specifically recorded, you may be able to steal short sections from pauses on the set (such as the time just before the director says “action”) or long spaces between words. You may need to go back to the original field recordings to find these moments.
Short lengths of tone can sometimes be looped to generate more tone. On an NLE, this can be easily done by copying and pasting the same piece more than once. Listen closely to make sure there’s nothing distinct that will be heard repeating (one trick is to insert a clip of tone, then copy and paste a “reverse motion” version of the same clip right after it so the cut is seamless).
Often, you want to create a sonic atmosphere or ambience that goes beyond simple room tone. For example, vehicle and pedestrian sounds for a street scene. Background (BG) or natural (“nat”) sound is often constructed during sound editing or the mix from several different ambience tracks together. A background of natural sound or music under dialogue is sometimes called a bed.
You could try recording your own backgrounds, but many atmospheres, such as the sound of wind in the trees, are simpler to get from an effects library than to try to record. Another background is walla, which is a track of people speaking in which no words can be made out, which is useful for scenes in restaurants, or with groups or crowds.
The Score
Music may be scored (composed) specifically for a movie or preexisting music may be licensed for use. An underscore (or just score) is music that audiences understand as being added by the filmmakers to augment a scene; source music seems to come from some source in a scene (for example, a car radio or a pianist next door).2 Songs may be used over action, either as a form of score or as source music. To preserve continuity, music is almost always added to a movie during editing and is rarely recorded simultaneously with the dialogue. (Of course, in a documentary, recording ambient music may at times be unavoidable.)
Music is a powerful tool for the filmmaker. Used right, it can enhance a scene tremendously. Most fiction films would be emotionally flat without music. But if the wrong music is used, or at the wrong time, it can ruin a scene. Though there are many movies with catchy themes, or where well-known songs are used to great effect, it’s interesting how many movie scores are actually quite subtle and nondescript. Listen to the score for a movie you’ve liked. Often the most powerful scenes are supported by very atmospheric music that doesn’t in itself make a big statement. A case can also be made for times when music should be avoided. In some documentaries and in some moments in dramas, music can have a kind of manipulative effect that may be inappropriate. No matter what music you choose, it unavoidably makes a kind of editorial comment in terms of mood and which parts of the action are highlighted. Sometimes audiences should be allowed to form their own reactions, without help from the filmmaker (or composer).
To get a sense of music’s power, take a scene from your project and try placing completely different types of music over it (hard-charging rock, lilting classical) or even try faster or slower tempo examples from the same genre. Then slide the same piece earlier or later over the picture. It can be quite amazing how the same scene takes on completely different meanings, how different parts of the scene stand out as important, and how different cuts seem beautifully in sync with the rhythm and others wildly off.
Typically, during the rough-cut stage, movies are edited with no music or with temp (temporary) music. The editor and/or director bring in music they like and “throw it in” to the movie during editing to try it out. This can be a great way to experiment and find what styles work with the picture. The problem is that after weeks or months of watching the movie with the temp music, filmmakers often fall in love with it and find it very disturbing to take it out. The temp music must come out for many reasons, ranging from its having been used in another movie to the likelihood that you can’t afford it to the fact that you’ve hired a composer to write a score. Often composers have ideas that are very different from the temp music you’ve picked, and they may not be able or willing to write something like the temp track if you ask them to.
Every composer has his or her own method of working, and the director and composer must feel their way along in finding the right music for the project. Spotting sheets (sometimes called spot lists, cue sheets, or timing sheets) should be prepared, showing every needed music cue and its length. Cues are numbered sequentially on each reel with the letter “M” (2M5 is the fifth cue on reel 2). Music may be used within a scene or as a segue (pronounced “seg-way”), which is a transition or bridge from one scene to next. A stinger is a very short bit used to highlight a moment or help end or begin a scene.
The director should discuss with the composer what each scene is about, and what aspects of the scene the music should reinforce. Even if you know musical terminology, describing music with words can be tremendously difficult. The conversation often turns to far-flung metaphors about colors, emotions, weather—whatever is useful to describe the effect the music should have on the listener. What makes great composers great is their ability to understand the ideas and emotions in a scene and express that in music.
When auditioning different cues, try out different moods and feels. You may discover humor where you never saw it before or, with a more emotional cue, poignancy in a commonplace activity. Pay particular attention to tempo. Music that’s too slow can drag a scene down; music that’s a little fast may infuse energy, but too fast can make a scene feel rushed. The musical key is also important; sometimes the same cue transposed to a different key will suddenly work where it didn’t before.
Scoring is often left until the last moment in postproduction, but there is a lot to be gained by starting the process as early as possible.
Licensing Music
If you can’t afford or don’t want an original score, you can license existing music. Popular songs by well-known musical groups are usually very expensive. Often a music supervisor will have contacts with indie bands, composers, or others who are eager to have their music used in a movie, and that music may be much more affordable. Music libraries sell prerecorded music that can be used for a reasonable fee with minimal hassle. Many of them offer tracks that sound very much like famous bands (but just different enough to avoid a lawsuit). See Chapter 17 for discussion of copyright, licensing, and the business aspects of using music.
Music Editing
When delivering a cut of the project to the composer, it’s usually a good idea to pan any temp music to the left audio channel only, so the composer can choose to hear the clean track without the music if desired.
The composer will supply each cue to you either with timecode in the track or with starting timecode listed separately so you can place the music where intended. Nevertheless, sometimes music needs to be cut or repositioned to work with the edited scenes. Not infrequently, a cue written for one scene works better with another.
When placing music (and when having it composed) keep in mind that in dialogue scenes, the dialogue needs to be audible. If the music is so loud that it fights with the dialogue, the music will have to be brought down in the mix. A smart composer (or music editor) will place the most active, loudest passages of music before or after lines of dialogue, and have the music lay back a bit when people are talking. If the music and the characters aren’t directly competing, they can both be loud and both be heard.
Cutting music is easier if you’re familiar with the mechanics of music. Some picture cuts are best made on the upbeat, others on the downbeat. Locating musical beats on an NLE may be easier if you view the audio waveform (see Fig. 14-24). Short (or sometimes long) crossfades help bridge cuts within the music. A musical note or another sound (like some sirens) that holds and then decays slowly can sometimes be shortened by removing frames from the middle of the sound rather than from the beginning or end; use a crossfade to smooth the cut.
In the mix, source music that is meant to appear to be coming from, say, a car radio is usually filtered to match the source. In this case, you might roll off both high and low frequencies to simulate a tinny, “lo-fi” speaker.
On some productions, the composer will premix the music herself and deliver it to you as a stereo track. On others, the composer may deliver the music with many separate tracks of individual instruments that the rerecording mixer will premix prior to the main mix (or the composer may supply a set of partially mixed stems with rhythm, melody, and vocal tracks).
Music Creation Software
A number of available apps allow musicians and nonmusicians to construct music tracks by assembling prerecorded loops of instruments that contain snippets of melodies and rhythms. The loops can be combined with other tracks performed with a keyboard or recorded with a mic. You can create an actual score this way, or it’s handy for quickly trying out ideas for a scratch track.
There are apps just for music, such as GarageBand, and there are DAWs that can be used for both building music tracks and general mixing; these include Logic, Nuendo, and Pro Tools. The loops may be sampled from real instruments and you can adjust them for tempo and pitch. You can buy additional loops in different musical styles on the Web. These apps may also include a library of stock cues you can use. Sonicfire Pro is a hybrid app that helps you find appropriate stock music from the SmartSound library, then customize it for individual scenes in your project.

Fig. 15-8. Sonicfire Pro can connect to a royalty-free music library where you can locate appropriate music cues, then adjust them to scenes in your movie. (SmartSound)
POPS AND CLICKS. Often on NLEs, you get a pop or click where two audio clips meet on the same track (even if neither pops by itself). To avoid this, put a two-frame crossfade between them or try trimming one side back by a frame (or less). Some DAWs can routinely add a crossfade of several milliseconds to avoid clicks at cuts.
AUDIO SCRUBBING. Many sound edits can only be made by listening to the track slowly. The term audio scrubbing comes from the use of reel-to-reel tape recorders, where you would manually pull the sound back and forth across the playback head in a scrubbing motion to find individual sounds. Some digital systems offer the choice of analog-style scrub (slow and low-pitched) and a digital version that plays a small number of frames at full speed. See which works best for you.
STEREO PAIRS. As noted on p. 585, paired stereo tracks include one track that’s panned to the left channel and one that’s panned to the right. This is appropriate for music, or other stereo recordings, but sometimes two mono tracks from a camcorder show up on the timeline as a stereo pair—for example, the sound from a boom mic and a lavalier may be inadvertently paired. In this case you should unpair them, then pan them to the center so that both go equally to both speakers. Then, you should probably pick one and lower the level of the other completely (or just disable or delete the other clip if it’s clearly inferior).
Summing (combining) two identical tracks on the same channel will cause the level to rise by about 6 dB. You can use summing to your advantage when you can’t get enough volume from a very quiet clip by just raising the gain. Try copying the clip and pasting the copy directly below the original on the timeline to double the level. While this can work on an NLE, most DAWs have better ways of increasing level. For more on stereo, see Chapter 11 and later in this chapter.
TRIMS AND OUTTAKES. One advantage of doing at least basic track work on the NLE used for picture editing is to get instant access to outtakes. There are many situations in which you need to replace room tone or a line of dialogue. It’s very handy to be able to quickly scan through alternate takes, or to use the match frame command to instantly find the extension to a shot. These things take longer on another machine if you don’t have all the media easily accessible on hard drive.
Whoever is doing the sound editing may want access to all the production audio recorded for the movie. Crucial pieces of room tone or replacement dialogue may be hiding in unexpected places in the tracks. Be prepared to deliver to the sound editor all the audio, including wild sound, and the logs, if requested.
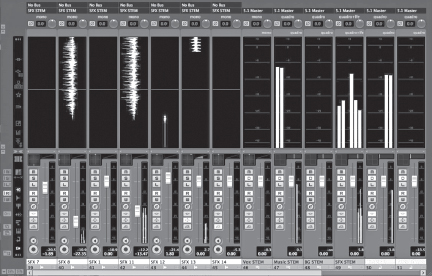
Fig. 15-9. DAW mixing panel. This Nuendo screen shows sound effects tracks in a 5.1-channel mix. (Steinberg Media Technologies GmbH)
Everything done in sound editing is geared toward the mix. The better your preparation, the better the movie will sound and the faster the mix will go. Regardless of whether the mix will be done by a professional mixer or by you on your own system, go through the entire sound track and be sure you’ve provided all the sounds needed. During the mix, changes or new effects may be called for, but try to anticipate as much as you can.
Mixes are done with different types of equipment, but all mixes share the same fundamental process:
The sound mixer, also called the rerecording mixer, presides at the console. Like an orchestra conductor, the mixer determines how the various tracks will blend into the whole. Some mixes require two or three mixers operating the console(s).
Splitting Tracks
During picture editing, the sound may be bunched on a few or several tracks in the editing system. After the picture has been locked, and it’s time to prepare for the mix, the tracks are split in a very specific way to facilitate the mix. Sounds are segregated onto different tracks according to the type of sound; for example, dialogue, music, narration, and effects are usually all put on separate tracks. Actually, each type of sound is usually split into a group of tracks (for example, you may need many tracks to accommodate all your dialogue or effects). This layout is used partly so the mixer knows what to expect from various tracks, but also so that he can minimize the number of adjustments made during the mix. Say you have narration in your movie. If all the narration is on one track—and there is nothing else on that track—then the mixer can fine-tune the level and EQ for the narrator’s voice and then quite possibly never touch that channel again during the mix. If, on the other hand, the narrator’s voice keeps turning up on different tracks, or there are other sounds sharing her track, the mixer will constantly have to make adjustments to compensate.
A simple documentary might be mixed with anywhere from eight to more than twenty tracks; a simple dramatic mix might involve twenty to forty tracks. A complex, effects-filled drama for 5.1-channel surround sound might have well over one hundred tracks. When there are many tracks, often a premix is done to consolidate numerous effects tracks into a few that can be more easily balanced with the dialogue and music.
Talk to your mixer for his preferences before splitting tracks. Some mixers prefer tracks to be laid out in a particular order. For example, the first tracks contain dialogue and sync sound, the next narration, then music, and the last effects. If there is no narration or music, the effects tracks would follow immediately after the dialogue. If your movie has very little of one type of sound (say, only a couple of bits of music), you can usually let it share another track (in this case you might put music on the effects track).
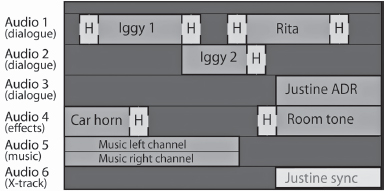
Fig. 15-10. Track work. Prior to the mix, audio is split into separate dialogue, effects, and music tracks. Shown here, a wide shot of Iggy (Iggy 1) and close-up (Iggy 2) are placed on separate tracks because they were miked differently and call for different equalization. Rita’s dialogue sounds similar to Iggy 1, so they are on the same track. Justine’s dialogue was rerecorded after the scene was shot because of background noise; the replacement lines require room tone. The original sync version of Justine’s dialogue is on audio track 6 if needed, but for the time being the clip is inaudible (clips can be made silent by disabling or muting them). The sections marked “H” are handles available for crossfades, which are often needed to smooth out dialogue cuts (handles are normally invisible on the timeline). The two channels of stereo music shown here share the same track; on some NLEs, stereo sound is displayed as two linked clips on separate tracks.
A common method of labeling tracks uses letters for each track in a group: you might have Dia. A, Dia. B, Dia. C, and SFX A, SFX B, etc. If the movie is divided into reels (see below), each reel is given a number, so a given track might be labeled, say, “Reel 3, Mus. A.” Ask the mixer for track labeling preferences.
CHECKERBOARDING. To make mixing go faster, tracks within any group may be split into a checkerboard pattern (see Fig. 15-10). For example, two characters who are miked differently might be split onto separate dialogue tracks. This can make it easier to adjust the EQ and level differently for the two mics.
In general, if one clip follows another on the same track and you can play them both without changing the EQ, hearing a click, or making a large level change, then leave them on the same track. Tracks should be split when two sections of sound are different from each other in level or quality and you want them to be similar, or if they are similar and you want them to be different. Thus, if two parts of a sequence are miked very differently and need to be evened out, put them on separate tracks. If you have a shot of actor A followed by a separate shot of actor B and the level or quality of the sound changes at the cut, they should be on separate tracks.
If the difference between two clips is caused by a change of background tone, it usually helps to ease the transition by doing a crossfade between the two shots (assuming there’s enough media to do so).
How many tracks do you need for each type of sound? Say you’re splitting your dialogue. You put the first clip on one track, then put the next on the second track. If the next split comes in less than eight to ten seconds, you probably should put that piece on a third track rather than going back to the first. But not necessarily. There are different schools of thought about how much to checkerboard tracks. The idea of splitting tracks originated when mixes were done with mag film dubbers (see Fig. 15-11). With a dubber, it’s only possible to do a crossfade between two shots if they’re on separate tracks; you have to checkerboard them to do the effect. With a digital system, however, it’s easy to set up a crossfade between one clip and the next on the same track. Mixers differ in how much they want tracks checkerboarded; ask yours for his preferences. On some systems, EQ and other effects may be applied to individual clips, so checkerboarding may not be helpful, particularly if you’re doing your own mix. However, on some systems effects are applied to an entire track, or the mixer may be trying to set levels by hand (the old-fashioned way); splitting tracks can make those tasks easier.
After talking with the mixer, work through the movie shot by shot to determine how many tracks you need. Sometimes you’ll want extra tracks for optional effects or alternate dialogue takes to give the mixer more options. You don’t want to use more tracks than are necessary; on the other hand, having more tracks could save you time and money in the mix.
Reel Breaks and Reference Movies
To be absolutely sure that there aren’t any sync errors, it’s best to do the mix with the final picture (either from the online video edit or, for a project finished on film, a digital transfer of a print or other film element). That way, any sync discrepancies can be fixed in the mix.
However, it’s often the case that you have to mix with the locked picture from the offline edit. Create a reference file or tape of the offline edit that includes your rough sound mix as a guide for the mixer.3 Talk with the mix studio people about what file format, frame rate, frame size, and codec they want. Often, they’ll want burned-in sequence timecode.
FOR PROJECTS SHOT ON VIDEO. The mixer will usually want a file or tape of the offline edit with sequence timecode burned in (window burn). Mixers often prefer that you deliver the movie as a file, in QuickTime or another format. Follow the instructions for leaders on p. 621, so that the file begins at 00:58:00:00, has the correct countdown leader, and the first frame of action (FFOA, also called first frame of picture or FFOP) starts at 01:00:00:00. The same layout should be used when making a tape. Be sure it has the proper countdown leader, continuous timecode, and no dropped frames.
Put a sync pop4 (the audible beep in the countdown leader that syncs to the picture exactly two seconds prior to the start of the program) on all the audio tracks as a sync check. Also add 30 seconds of black after the last frame of action, followed by a tail leader with visible sync frame and sync pop on all the tracks. This is done on the NLE prior to output.
In some cases, the project will need to be broken into shorter lengths (reels) if the entire movie can’t be edited, mixed, or finished in one chunk (which may happen, for example, if files get too big). If so, each reel is made into a separate sequence, beginning with a different hour timecode. Accordingly, reel 1 would begin at 01:00:00:00, with reel 2 starting at 02:00:00:00, and so on. The reels can be joined together later.
FOR PROJECTS THAT WILL BE FINISHED AND PRINTED ON FILM. See Reel Length, p. 705, for guidelines on dividing up reels, and the note above for setting the starting timecode on each reel.
When preparing film projects, each reel should begin with a standard SMPTE leader (also called an Academy leader). This has the familiar eight-second countdown. Your NLE should have a leader included as a file or you can download one. The leader counts down from 8 to 2 with two seconds of black following. The frame exactly at 2 should have a sync pop or beep edited into all sound tracks. The sync pops aid in keeping the tracks in sync during the mix and are essential for putting the film optical track in sync with the picture; see Optical Tracks, p. 713. A tail leader with a beep should also be added.
With projects that are going to be finished digitally, the SMPTE leader is often edited in before the hour mark, so that the beep at two takes place—for the first reel—at 00:59:58:00 and the first frame of action appears at one hour straight up (01:00:00:00). However, for projects that involve cutting and printing film, the lab may want the SMPTE leader to begin at the hour mark, so the beep at two would appear at 01:00:06:00 and the FFOA starts at 01:00:08:00.5 Talk to the mix facility, lab, and/or post house technicians for the way they want the reels broken down.
On some projects, the 35mm film footage count is also included as a burned-in window, with 000+00 beginning at the SMPTE leader start frame.
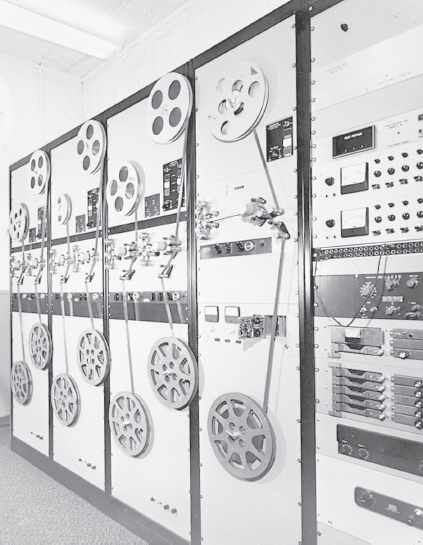
Fig. 15-11. For decades, film mixes were done with multiple reels of analog magnetic film playing on dubbers. Six playback transports are at left; one master record dubber is at right. Now, most of the dubbers that survive are only used to transfer mag film to digital for mixing. (Rangertone Research)
Preparing and Delivering Tracks
If you’re working with a mixer or a sound studio, ask how they like the tracks prepared and delivered. Following their preferences, split the tracks as discussed above. Clean up the sequence by deleting any disabled or inaudible clips that you don’t need for the mix. When the tracks are ready, you need to export them from the NLE and import them into whichever online edit system or DAW the mixer uses. There are a few options. For an overview of this process, see File Formats and Data Exchange, p. 242, and Managing Media, p. 609.
EXPORT THE SEQUENCE AND MEDIA. Usually the best way to move the audio tracks to another system is to export the entire sequence with its media. This is often done by exporting the timeline from the NLE using an OMF or AAF file (see p. 244). OMF/AAF files include a wealth of metadata about where each clip belongs on the timeline, audio levels, media file names, and so on. In addition, when you create the file, you have the choice of whether or not to include (embed) the actual audio media in the file.
When you import an OMF/AAF file into the DAW, all the audio clips should appear in the new sequence in their proper timeline position on their own tracks. Ideally, you chose to embed the audio media in the OMF/AAF file, so you can give the sound studio a self-contained file on a DVD or hard drive that has the sequence and all the sound in one neat package—what could be easier?
In some situations this process isn’t quite so simple. For example, not all systems can export or import OMF/AAF files. Some systems can exchange sequences using XML files or apps like Boris Transfer. In the past, Automatic Duck programs have also been used for this purpose.
Sometimes you want to send the OMF/AAF sequence (also called the composition) separately from the audio media files; for example, when there are ongoing changes to a project during sound editing or if the OMF/AAF file is too large.6 In this case, the media (either all the audio media for the project, or a consolidated set of files with just the audio used in the sequence) is delivered first, and an OMF/AAF of the most recent sequence is delivered separately. The OMF/AAF composition will then link to the media.
Depending on the systems involved, not all the information in your offline sequence may be translated to the DAW. For example, some or all clip level adjustments may not carry over from one system to the other. You may also want to remove any filter effects or EQ (see below).
Be sure to include ample handles on your clips. Handles are extensions of clips that remain hidden (inaudible) but are available in case the mixer wants to use them for crossfades or to lengthen a clip (see Fig. 15-10). Mixers may request handle lengths anywhere from 30 frames to ten seconds or more, which you can select with the OMF/AAF export tool. Whenever possible, confirm that the exported OMF/AAF file actually plays and links to the media before sending it on to the mix studio.
Be sure all audio clips are at the same sample rate (typically, mix sessions are done at 48 kHz/16 bits).
EXPORT AUDIO FILES. If your system doesn’t support OMF/AAF, you can export each track as a separate audio file (in a format such as AIFF or WAV). You must have head leaders with a sync pop because, depending on the format, there may be no timecode. This method is cumbersome and doesn’t allow for handles. (That is, you can include extensions of shots if you want, but they aren’t “hidden” and the mixer will have to manually fade or cut any extra audio that’s not needed—not very useful.) Also, unlike OMF, the files will appear in the DAW as a single, uninterrupted clip, which makes it harder to see where different sounds are, see how they relate, and slide clips around when needed.
EXPORT AN EDL. An EDL contains the basic data about where each clip begins and ends and where it belongs on the timeline (see Fig. 14-41). An EDL contains no media. It’s a bit like using OMF/AAF but with no media and less metadata. An EDL is sometimes used when the sound studio prefers to recapture the original production audio instead of using the media from the NLE. An EDL can also be used with systems that don’t support OMF.
PREP AND DELIVERY. No matter what method you’re using, as a rule you should remove any filters or EQ you’ve done in the offline edit so the mixer can create his or her own.7 This is especially the case when exporting AIFF or WAV audio files, because once the effect is applied to those files, the mixer can’t remove them later. (When exporting AIFF or WAV or laying off to tape, you may also want to remove any level adjustments you made to clips.)
Some editors put a lot of work into their rough mix and want to preserve any level adjustments they made as a basis for the final mix. If you’re using OMF/AAF and a system that can translate audio clip levels from the NLE to the mixer’s DAW, this may indeed save a lot of time in the final mix. However, some mixers prefer to start with a blank slate, and don’t want the editor’s levels at all, since things change a lot once you start sweetening (and he can always listen to the tracks on the reference file or tape if he wants to hear what the editor had in mind).
Mix Prep and Final Cut Pro X
As discussed in Chapter 14, starting with version X, Apple completely redesigned Final Cut Pro. Unlike virtually every professional NLE, FCP X doesn’t use fixed, sequential audio tracks, so you can’t checkerboard sound as described above. However, it does offer other techniques to separate different sound clips using metadata. For example, you can give every clip a role name that identifies what type of sound it is. The default FCP X role categories are dialogue, music, and effects, although you can create as many more as you like. You can further divide these into subroles. Under the dialogue category, for instance, you could add “Jim in Office,” “Jim in car” or “Jim, Scene 6.” You could create separate subroles for “truck effect” and “boat effect.” Whatever makes sense for your production. It’s very easy to find and listen to all the clips that share the same role or subrole. You can also select various clips and group them together in a compound clip, then apply a volume adjustment, EQ, or other effect to the entire group. By leveraging audio processing tools from Logic Studio as well as Final Cut, FCP X offers much improved audio mixing within the app. If you want to output mix stems (see p. 673), you can export each type of sound according to its role to an AIFF or WAVE audio file.
However, if you’re planning to export audio to a DAW for mixing, things are not as flexible. First, if you have three different effects clips playing together that have the same “effects” role, they’ll be folded together on export. The solution is to assign separate roles or subroles to any clips you will want separate control of during the mix. Also, as just described in Export Audio Files, creating an AIFF means no handles, which could be a problem if you decide to add a fade or dissolve during the mix that requires extra frames. Lastly, each track is just one long clip, so you don’t have the flexibility you would have with an OMF/AAF to find and reposition clips. As of this writing FCP X is relatively new, and better solutions are emerging for mixing in other systems, such as the X2PRO Audio Convert app by Marquis Broadcast that can convert an FCP X timeline into an AAF file that can be opened in Avid Pro Tools.
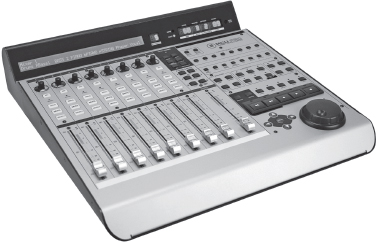
Fig. 15-12. A control surface has mechanical faders that can interact with software apps, allowing you to make level adjustments using the sliders, which is faster and more comfortable than using a mouse. The Mackie MCU Pro can be used with many different apps, including Logic, Pro Tools, Nuendo, and Ableton. (Mackie Designs, Inc.)
Cue Sheets
In a traditional mix, the sound editor draws up mix cue sheets (also known as log sheets). These act like road maps to show the mixer where sounds are located on each of the tracks. The mixer wants to know where each track begins, how it should start (cut in, quick fade, or slow fade), what the sound is, where it should cut or fade out, and how far the track actually extends beyond this point (if at all). These days, few people bother with cue sheets, since the timeline on the DAW shows the mixer where all the clips are.
THE SOUND MIX
This section is in part about doing the mix in a sound studio with a professional mixer. However, most of the content applies if you’re doing either a rough or a final mix yourself on your own system.
Arranging for the Mix
Professional sound mixes are expensive (from about $100 to $350 or more per hour); some studios offer discounts to students and for special projects. Get references from other filmmakers before picking a mixer.
Depending on the complexity of the tracks, the equipment, and the mixer’s skill, a mix can take two to ten times the length of the movie or more. Some feature films are mixed for months, with significant reediting done during the process. For a documentary or simple drama without a lot of problems, a half hour of material a day is fairly typical if the work is being done carefully. Some studios allow you to book a few hours of “bump” time in case your mix goes over schedule; you pay for this time only if you use it.
The more time you spend in the mix talking, or reviewing sections that have already been mixed, the more it will cost. Sometimes filmmakers will take a file or tape of the day’s work home to review before the next day’s session (though even this output may be a real-time process, adding time to the mix).
Some mixers work most efficiently by making the first pass by themselves without the filmmaker present. Then you come to the studio, listen, and make adjustments as necessary.
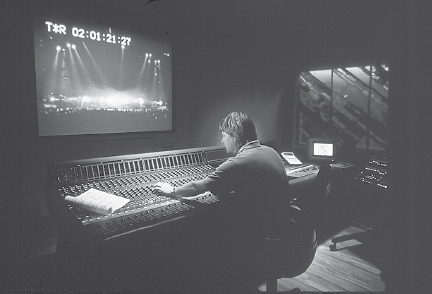
Fig. 15-13. Rerecording mixer at work. (Sync Sound, Inc.)
Working with the Mixer
The sound mix is a constant series of (often unspoken) questions. Is the dialogue clear? Is this actor’s voice too loud compared to the others? Is the music too “thin”? Have we lost that rain effect under the sound of the car? Is the sync sound competing with the narration? Left alone, a good mixer can make basic decisions about the relative volume of sounds, equalization, and the pacing of fades. Nevertheless, for many questions there is no “correct” answer. The mixer, director, and sound editor(s) must work together to realize the director’s goals for the movie. Trust the mixer’s experience in translating what you’re hearing in the studio to what the audience will hear, but don’t be afraid to speak up if something doesn’t sound right to you.
Mixers and filmmakers sometimes have conflicts. Mixers tell tales of overcaffeinated filmmakers who haven’t slept in days giving them badly prepared tracks and expecting miracles. Filmmakers tell of surly mixers who blame them for audio problems and refuse to take suggestions on how things should be mixed. If you can combine a well-prepared sound editor with a mixer who has good ears, quick reflexes, and a pleasant personality, you’ve hit pay dirt.
Mixing for Your Audience
Before an architect can design a building, he or she needs specific information about where it will be sited, how the structure will be used, and what construction materials can be employed. Before a mixer can start work, he or she will have a similar set of questions: Where will the movie be shown? What technologies will be used to show it? How many different versions do you need? Some projects are designed solely for one distribution route. For example, a video for a museum kiosk might be shown under very controlled conditions in one place only. But for many productions, there are several distribution paths. A feature film might be seen in theaters, in living rooms on TV, and in noisy coffee shops on mobile phones and iPads. A corporate video might be shown on a big screen at a company meeting, then streamed on the company’s intranet. Each of these may call for different choices in the mix. On some projects, the mix may be adjusted for different types of output.
LEVEL AND DYNAMIC RANGE
How or where a movie is shown affects the basic approach to sound balancing, in particular the relationship of loud sounds to quiet sounds. See Sound, p. 402, for the basics of dynamic range, and especially Setting the Recording Level, p. 446, before reading this section.
In a movie theater, the space itself is quiet and the speakers are big and loud enough so that quiet sounds and deep bass come across clearly. Loud sounds like explosions and gunshots can be very exciting in theaters because they really sound big. This is partly because they are indeed loud (as measured by sound pressure), but it is also due to the great dynamic range between the quieter sounds and the explosions. Our ears get used to dialogue at a quieter level, then the big sounds come and knock us out of our seats. This idea applies to all types of sounds, including the music score, which can include very subtle, quiet passages as well as stunning, full crescendos.
When people watch movies at home, it’s a very different story. First, the movie is competing with all sorts of other sounds, including people talking, noises from the street, appliances, air conditioners—whatever. Though some people have “home theaters” equipped with decent speakers, many TVs have small speakers that are pretty weak when it comes to reproducing either the high frequencies or the lows. And the overall volume level for TV viewing is usually lower than in a theater. Subtlety is lost. If you make any sounds too quiet in the mix, they’ll be drowned out by the background noise. Everything needs to punch through to be heard. A common problem happens when mixing music. In the quiet of the mix studio, listening on big speakers, you may think a soft passage of music sounds great. But when you hear the same mix on TV at home, you can’t even hear the music.
When people watch movies streamed over the Internet, it’s usually even worse. A computer may have small speakers, a mobile phone has tiny speakers, and the audio may be processed for Web delivery. So it’s not just the screening environment that limits dynamic range—it’s also the delivery method.
What does this mean for the mix? For a theatrical mix, you have a lot of dynamic range to play with; for a TV or Internet mix you have much less. Here’s one way to visualize it: all recording systems have an upper limit on how loud sounds can be. Regardless of the format, you can’t go above this level. For a theatrical mix, you can let quiet sounds go much lower than this level. But for a TV mix—or for any format where there’s more noise involved—“quiet” sounds should stay much closer to the top.

Fig. 15-14. Compression and limiting. (A) This audio has great dynamic range—note the difference in level between the quietest sounds and the peaks. (B) If we raise the level so that the quieter sounds are loud enough to be heard clearly, the peaks are now too high and will be clipped and distorted. (C) Using a compressor, we can reduce the height of the peaks while keeping the average level up. In this case, a limiter is also being used to ensure that no peaks go over −10 dBFS. Note that we’ve now significantly reduced the sound’s dynamic range. Because the average level has been raised, C will sound a lot louder than A, even though the highest peaks are the same in both. (Steven Ascher)
Compression is a useful type of processing for many mixes. An audio compressor reduces the level of the loudest sounds to keep them from overrecording.8 In some mixes, a compressor and/or peak limiter (see p. 454) might be used just to prevent overrecording of the loudest peaks. But for a TV mix or especially for an Internet mix, compressors are often used like a vise to squeeze the dynamic range of the sound. The overall level of the sound is raised, making the formerly “quiet” sounds pretty loud, and the compressor and limiter keep the loudest sounds from going over the top (see Fig. 15-14). The result is that everything is closer to the same level—the dynamic range is compressed—so the track will better penetrate the noisy home environment. However, too much compression can make the track sound flat and textureless, and that makes for an unpleasant experience if you do show the movie in a quiet room with good speakers. In the past, TV commercials were highly compressed, which is why they seemed to blast out of your TV set, even though their maximum peak level was no higher than the seemingly quieter program before and after. Typical pop music is also highly compressed, with dynamic range sometimes as little as 2 or 3 dB between average level and peaks, so everything sounds loud and punches through in a noisy car.
USING A COMPRESSOR. Compressors and other devices share certain types of adjustments that can seem really intimidating when you first encounter them, but will make more sense when you start using them (see Fig. 15-15). Take the example of using a compressor to reduce dynamic range so you can raise the overall level and make the track sound louder.
The threshold control determines how loud a sound must be for the compressor to operate; signals that exceed the threshold will be compressed. If you set the threshold to 0 dB, the compressor will do nothing.
The attack control determines how rapidly the compressor responds to peaks that cross the threshold (lower value equals faster attack). The release control sets the time it takes for the compressor to stop working after the peak passes. You can start with the defaults for attack and release (depending on the sound, if you set these too fast, you may hear the volume pumping; if you set them too slow, you may hear that too).
The ratio control determines how much the level is reduced. A 2:1 ratio is a good starting point, and it will compress signals above the threshold by one-half. The higher the ratio, the more aggressive the compression, and the flatter the dynamics. Limiters, which are like compressors on steroids, may use ratios of 20:1 up to 100:1 or more (along with a very fast attack), to create a brick wall that prevents levels from exceeding the threshold at all. Many people use a compressor with a relatively gentle ratio for the basic effect, and add a limiter just for protection at the very top end. You might set a limiter to prevent peaks from going above around −2 dB (or somewhat lower) to guarantee they won’t be clipped.
Compressors and limiters often have a gain reduction meter that shows how much they are actively reducing the peaks. The meter stays at 0 when the sound level is below the threshold. As you lower the threshold, you’ll see the compressor reducing the peaks more, and the track will probably sound quieter. If you now increase the gain control (which affects the overall level), you can increase the loudness. By tweaking the threshold, the ratio, and the gain, you’ll find a balance you like that reduces the dynamic range a little or a lot (depending on the effect you’re going for) and places the audio at the level that’s right for the mix you’re doing. Generally you don’t want a combination that results in the compressor constantly reducing the level by several dBs (which you’ll see on the gain reduction meter) or things may sound squashed and unnatural.
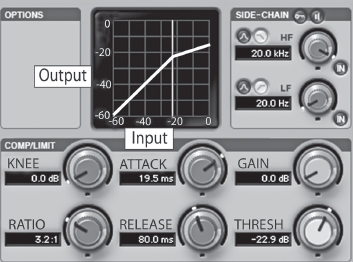
Fig. 15-15. Compressor/limiter. This DigiRack plug-in has a graph that shows the relationship of the sound level going into the compressor (the horizontal axis) and the sound level coming out of the compressor (the vertical axis). With no compression, output equals input. In this figure, audio levels above the −22 dB threshold will be compressed (reduced in volume). It’s interesting to compare this to Fig. 5.1, which shows a graph with a similar slope used to compress video levels. (Avid Technology, Inc.)
Some apps offer compressor effects that are highly simplified with little user adjustment, such as Final Cut Pro X’s loudness effect (discussed below). These may work fine for general purposes and they’re obviously easy to use.
After you create any effect, hit the bypass button to compare before and after, to see if you really like it.
Loudness Meters and New Standards
There has been a major change in how audio levels for television programs are measured and controlled. As discussed on p. 448, neither peak-reading meters nor VU meters give an accurate representation of how loud something sounds. However, newer loudness meters use a sophisticated algorithm to give a reading that much more closely represents how loud the program feels to a listener (perceived loudness). Starting around 2010, a new generation of loudness meters arrived that comply with the ITU-R BS.1770 standard (see Fig. 15-16). Loudness is measured in LUs (loudness units); 1 LU is equivalent to 1 dB.
In Europe, loudness meters are marked in LUFS (loudness units, referenced to full scale). In North America, a very similar system uses the LKFS scale (loudness, K weighted, relative to full scale). A reading in LUFS is essentially the same as one in LKFS.9
Most loudness meters can display the loudness averaged over a few-second period as well as across the entire program (called program loudness). They also provide a superaccurate reading of peaks (true peak level, which accounts for the highest spikes that can result after digital-to-analog conversion).10 The key thing to remember about loudness meters is that the reading in LUFS or LKFS is a very good indication of how loud the program will sound.
As loudness metering technology has developed, the rules broadcasters must follow to control the audio level of programming have changed as well. In the United States, Congress passed the CALM Act, which requires that TV commercials be at a similar loudness level as other programming. No longer can ads get away with using extreme compression to sound so much louder than TV shows. In Europe, the EBU is putting in place similar guidelines. Networks are using loudness metering to ensure consistent loudness across all their programming and across different playback devices.11
In mixing an individual movie or show, the legal loudness level may be used to set the loudness of an “anchor element” (typically dialogue), with other elements in the mix (music, effects) balanced around it. The various elements do not have to be at the same level. The new standards should permit more dynamic mixing in individual scenes since the measured loudness is an average over the whole program.
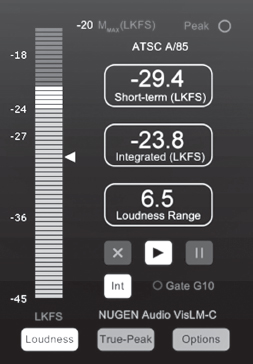
Fig. 15-16. Loudness meter. This plug-in by NuGen displays a variety of information, including the loudness of the audio at any moment, as well as the loudness averaged over the length of the program (“integrated”), which helps you stay legal for broadcast. This meter can display loudness in LKFS units used in North America or LUFS used in Europe. (NuGen Audio)
Setting the Mix Level
If you’re working with a mixer, he’ll know what level to record the track at. If your movie will be delivered to a TV network, the broadcaster will give you technical specs for program loudness and true peak levels; be sure to show them to the mixer.
In North America, new digital television standards call for the average loudness of dialogue to be −24 LKFS, plus or minus 2 LUs. Short peaks can go very high (up to −2 dBFS) as long as dialogue is correct (which allows for punchy effects or moments of loud music). Loudness does not need to read a constant −24, it simply must come out to this average value over the length of a show or a commercial and not vary too much during the program. In Europe, the target for average loudness is −23 LUFS, plus or minus 1 LU.
If you’re doing your own mix, ideally you’ll work with a loudness meter, which may be available as a plug-in for your NLE or DAW or as a stand-alone application or device.
If you don’t have a loudness meter, you’re probably using the audio meter on your NLE or DAW, which is typically a peak-reading meter with 0 dBFS at the top of the scale (see Fig. 11-10). NLE peak meters don’t give a good reading of perceived loudness, but you can approximate the correct target loudness by keeping the dialogue peaks around −10 dBFS on the NLE’s peak meter.12
As noted above, occasional peaks can legally go up to −2 dBFS, but don’t let the level stay up there. Some mixers use a “brick wall” limiter or compressor to keep peaks safely below.
A reference tone should be recorded in the color bars that precede the program. As discussed on p. 452, a reference tone of −20 dBFS is common in the U.S., while −18 dBFS is used in the UK.
In some cases when mixing for nonbroadcast video or Internet use, people like to mix with a higher average level for dialogue (but as before, highest peaks should not exceed −2 dBFS). If you’re mixing for the Web, listen to how your encoded video compares in level to other material on the Web and adjust as necessary. Whether your outlet is the Internet, DVD/Blu-ray, TV, or theaters, the goal is to have an average level that’s consistent with the other movies out there, so that your audio sounds fine without people having to set the playback level up or down.
Once you have the recording level set so it looks correct according to the meter, set the monitor speakers to a comfortable level. Then, don’t change the speaker level while you mix, so you’ll have a consistent way to judge volume level by ear. Many mixers work with a quite loud monitor so they can hear everything clearly, but be aware that a monitor set to a high volume level will make bass and treble seem more vivid compared to a quieter monitor. So music, for example, will seem more present when the monitor is loud. When you listen later on a monitor set to a quieter, more normal level, the music will seem less distinct, even though the mix hasn’t changed.
In most mix studios, you can switch between full-sized, high-quality speakers and small, not-great speakers, which can be useful in helping you judge how the movie may ultimately sound in different viewing/listening environments.
HITTING THE TARGET. Good sound mixers are able to balance sections of the movie that should be relatively quiet with those that should be loud, all the while keeping the sound track as a whole at the proper level to be consistent with industry standards. As noted above, if the movie will be broadcast, there are slightly different standards for North America, the UK, and Europe. Theatrical mixes often have yet different target levels. A professional mixer can guide you through the process and put you in a good position to pass the (often nitpicky) technical requirements of broadcasters and distributors.
Filmmakers doing their own mixes sometimes use filters or plug-ins to automatically set the level of the entire movie or of individual clips. For example, normalizing filters, such as the normalization gain filter in Final Cut Pro 7, work by scanning through the audio to find the highest peaks, then they adjust the overall level so those peaks hit a specified level (default is 0 dBFS, but you shouldn’t let peaks go this high). Eyeheight makes the KARMAudioAU plug-in, which measures loudness, not just peaks, and can ensure that tracks stay within the different international loudness standards mentioned above.
These kinds of automated features can be useful to ensure that no levels are too hot. However, the risk of using them to push up the level of quieter passages is that you may lose dynamic range, and things that should be quiet will now be louder. If you choose to normalize, be sure to listen and decide if you like the result. Final Cut Pro X offers a “loudness” effect as an “audio enhancement,” which is essentially a compressor/limiter as described above. This can automatically increase average level and decrease dynamic range, but it does offer manual override.
FREQUENCY RANGE AND EQ
Another consideration when mixing is the balance of low-, mid-, and high-frequency sounds (from bass to treble).
During the shoot, we make every effort to record sound with good mics and other equipment that has a flat response over a wide range of frequencies (see p. 423 for more on this concept). We want to capture the low frequencies for a full-bodied sound and the high frequencies for brightness and clarity. However, in mixing, we often make adjustments that might include: reducing (rolling off) the bass to minimize rumble from wind or vehicles; increasing the midrange to improve intelligibility; and cutting or rolling off high frequencies to diminish noise or hiss.
Changing the relative balance of frequencies is called equalization or EQ. EQ is done in part just to make the track sound better. Some people like to massage the sound quite a bit with EQ; others prefer a flatter, more “natural” approach. It’s up to you and your ears.
However, as with setting the level, it’s not just how things sound in the mix studio that you need to be concerned with. What will the audience’s listening environment be? A theater with big speakers or a noisy living room with a small TV? The big bass speakers in a theater can make a low sound feel full and rich. A pulsing bass guitar in the music could sound very cool. The same bass played on a low-end TV might just rattle the speaker and muddy the other sounds you want to hear. Some recording formats (like film optical tracks) can also limit frequency response.
When frequency range is limited, one common problem is that dialogue that sounds clear in the mix room may lose intelligibility later on. Sometimes it’s necessary to make voices a little “thinner” (using less bass and accentuated midrange) so they’ll sound clearer to the audience.
This is where an experienced mixer can be very helpful in knowing how to adjust EQ for the ultimate viewer.
Setting EQ
You may want to use some EQ during the picture edit to improve your tracks for screenings, or you may be doing your own final mix. Equalizers allow you to selectively emphasize (boost) or deemphasize (cut or roll off) various frequencies throughout the audio spectrum. The simplest “equalizer” is the bass/treble control on a car radio. Graphic equalizers have a separate slider or control for several different bands of frequencies (see Fig. 11-12). Parametric equalizers allow you to select different frequency bands, choose how wide each band is, and boost or cut them to varying degrees (see Fig. 15-17).

Fig. 15-17. An equalizer can boost different frequency bands (above the 0 dB line) or diminish them (below the line). The controls at the bottom of this Apple Logic equalizer allow you to select the center of each frequency band, how wide the band is, and how much to raise or lower the sound level. The EQ shown here is a basic one for improving the clarity of speech tracks by boosting the midrange and rolling off the bass (compare it with Fig. 10-21B). Equalization should always be done by ear and not by formula. (Apple, Inc.)
To increase the intelligibility of speech, you might boost midrange frequencies that are between around 2 and 4 kHz (2,000 to 4,000 Hz). To increase the “warmth” or fullness of voice or music, experiment with boosting the 200 to 300 Hz region.
Rolling off low frequencies reduces the rumble caused by wind and microphone noise (for more, see Bass Filters, p. 459). Some people reduce frequencies below about 100 Hz, rolling off at a slope of around 24dB per octave. Others use a low-frequency cutoff (high pass filter) set slightly lower (around 75 to 80 Hz or so). Since bass rumble can force you to record at too low a level, this is one type of EQ that should generally be done.
High-frequency hiss from mic or system noise may be reduced with a noise-reduction plug-in (preferable—see below) or by rolling off frequencies starting above about 5 kHz or so. The upper-end frequencies can be cut off with a low pass or high shelf filter. The sound of a voice on the telephone can be simulated by boosting frequencies between about 400 and 2,000 Hz and rolling off all others. Many NLEs have EQ presets you can experiment with that may do what you want with one click.
Good equalization is an art, and should always be done by ear, not by numbers.
OTHER SOUND PROCESSING
Many tools are available to manipulate sound, including the compressors and equalizers just discussed, plus pitch shifters, delays, and noise reduction. In the past, separate hardware devices were used for different effects. Today, virtually all types of sound processing can be done with software plug-ins. The following are a few common tools.
Noise Reduction
Ambient noise is perhaps the biggest problem in location sound recording. Other types of noise, including hum or hiss, can be produced by lights, equipment, or analog tape.
Various noise-reduction apps can be very effective in isolating different types of noise and eliminating or reducing them with minimal effect on other sounds. These may be part of an NLE or DAW and/or available as plug-ins, such as those made by iZotope and Bias. With many of these noise-reduction systems, you “train” the software by letting it analyze a section of audio that has just the offending noise. It can then reduce that noise in passages that contain dialogue, music, or other sounds. If your audio clip has a short section in which the noise is in the clear with nothing else, that’s probably enough for the software to analyze. If not, you might include handles or an additional clip with the same noise for the mixer to use.
Fig. 15-18. Digital noise reducers, like the iZotope RX 2, can target many types of noise and reduce or remove them, often with little effect on dialogue and music. The RX 2 is available as a plug-in and a stand-alone application. Most NLEs offer some form of noise reduction. (iZotope, Inc.)
RX is a suite of audio repair tools by iZotope (www.izotope.com) that includes plug-ins to restore peaks that were clipped due to overrecording and to visually identify noise (such as a siren) so it can be removed from dialogue (see Fig. 15-18).
Another noise reduction method is called a noise gate. Noise gates minimize noise by acting like an automatic gain control in reverse: whenever there is no clear sound signal (such as speech) they reduce the recording level—because it is during the pauses that noise is the most conspicuous. Noise gates can make a noisy track clearer, but a heavily “gated” track will cause the background level to abruptly rise and fall, making it sound noticeably processed. Noise gates can also be used to make an overly reverberant track drier and to change the character of music.
Notch and Hum Filters
Also called dipping filters, these are a bit like very precise equalizers. They allow you to pinpoint one or two frequency bands and notch (cut) them or peak (boost) them. Notch filters are useful for isolating and removing specific noises, like the 60 Hz hum caused by fluorescent lights (50 Hz in Europe and Asia), with minimal disturbance to the rest of the track. To get rid of a noise, start by peaking it to make it as loud as possible. Once you’ve located it, then dip at the same frequency.
Many NLEs have hum filters, which do a similar thing. There may be frequency setting for the center of the hum and a Q setting that controls how far above and below that frequency is affected (the bandwidth). Use the gain control to reduce the hum as much as possible without impairing other sounds. Many kinds of interference are audible at both fundamental frequencies and harmonics; notching at two or three frequencies may be necessary for complete removal.
The more sophisticated noise-reducing plug-ins mentioned above may do a better job than either of these filters.
Reverb
The way sound waves reflect off the walls of an enclosed space gives your ear cues about how large the space is. This sound reverberation gives a sense of “liveness” to sound (see Acoustics of the Recording Space, p. 445). A reverb unit can be used to add reverberation to sound after it has been recorded. With more reverb, sounds take longer to decay, making them seem like they were recorded in a larger or more reverberant space. Reverb units can make voices postdubbed in the studio seem more like they were recorded on location. Sound that lacks reverb is sometimes called “dry” or “tight.” Many DAWs have sophisticated modules that can simulate any size space from a closet to a concert hall, such as Logic’s Space Designer. An echo filter repeats the sound as though echoing in a tunnel or canyon.
De-Essers
Compressors used to reduce the sibilance, or whistling, caused by s sounds in some people’s speech are called de-essers. You can hear sibilance distortion sometimes by turning the volume very high on a radio with small speakers. The de-esser compresses high frequencies (where sibilance distortion occurs) without affecting much else.
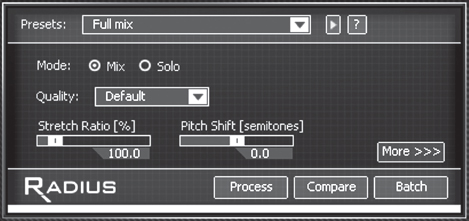
Fig. 15-19. iZotope Radius can be used to change the pitch of an instrument or voice while preserving the timing of the original recording. Or you can change the tempo (speed) of the audio without changing the pitch. Pitch shifters, which may be included in your NLE, can help when you want to change the speed of the movie or an individual clip without the pitch changes that would otherwise occur. (iZotope, Inc.)
Sound Formats and Audio Channels
Several different audio formats are used when movies are shown in theaters, on TV, from DVD/Blu-ray, or over the Web. Formats vary in how many channels of audio they can play. In some cases, the producer can choose how many channels to mix for; in others, it’s dictated by the distribution method planned for the project. Let’s begin with the options in terms of audio channels.
Mono sound means a single channel of audio. For example, 16mm film prints with optical sound tracks reproduce mono sound. The film may be shown on a projector with a single built-in speaker or it may be shown in a theater that has many speakers. Regardless, there is only one channel of sound. Student films are often recorded, edited, and mixed in mono.
Virtually every other means of showing a movie today has the possibility of at least two channels of sound. Some have six or more.
In typical music or TV sound in the home, stereo sound means two channels (left and right). Stereo (also called 2.0 channels) adds presence to music and allows you to place sounds on one side or the other, giving a sense of dimensionality. A movie can be released in stereo even if all the production sound was recorded in mono. In fact, this is often the case. The sound recorded in the field may be taken with a single mono microphone and recorded on one track in the camcorder or audio recorder. During editing, additional tracks are introduced, such as music and effects. Finally, in the mix, the mixer portions the sounds out to either or both of the two stereo channels. Music tracks may have true stereo separation while dialogue is often positioned identically on the left and right (with the pan control in the center), making it essentially “two-channel mono.” Many television programs, corporate videos, and other movies are done this way.
In the film industry, “stereo” is understood to include a surround channel. In a movie theater, surround speakers are placed along the sides and rear of the theater. Sounds that are assigned to the surround channel include ambience (atmospheres) and some special effects, which surround the audience, adding a sense of realism.
Proper theater stereo also has a center channel so that the sound of actors speaking on screen will appear natural, coming directly from the screen instead of seeming off balance for people who are not sitting in the middle of the theater. This format is often referred to as LCRS (left, center, right, surround).
Films mixed for analog Dolby Stereo can have these four channels, with left, center, and right speakers hidden behind the screen, and surround speakers at the rear and sides of the theater. The four channels are specially encoded so they can be recorded on just two tracks, so a “stereo” (two-channel) recording can carry all the information for the four playback streams. This encoding of four channels in two is also called LT/RT (left total, right total).
Moving up the food chain, the 5.1-channel standard includes the same left, center, and right channels across the front of the room but the surround channel is split into left and right sides. For really deep bass, an additional channel is added to drive a subwoofer—this channel is called LFE (low-frequency effects). Since this bass channel uses much less bandwidth than the other five channels, this layout is referred to as having “5.1 channels.”
The most common 5.1-channel format is Dolby Digital (AC-3), which is used in a wide variety of applications, including digital broadcasting, DVDs, Blu-rays, and theatrical films. Dolby Digital is digitally compressed and can pack all 5.1 channels into less space than a single channel of uncompressed PCM audio.

Fig. 15-20. Speaker layouts for different sound formats (as seen from above). The single surround channel in the LCRS format is often sent to more than one speaker. The 5.1-channel format includes a subwoofer for low-frequency effects (deep bass).
A Dolby Pro Logic II encoder can record the 5.1 channels to a two-track recording format (much like Dolby Stereo discussed above). This may be used, for example, in a consumer camcorder equipped for 5.1-channel surround sound recording.
If a movie mixed in Dolby Digital is broadcast on TV or distributed for home video, the system cleverly adjusts for individual playback systems. People who have only one speaker (say, in an older TV set) will receive a mono signal with all the sound. People who have two speakers (in a typical “stereo” TV) receive a two-channel signal (called a stereo downmix). And people who have a “home theater” setup with left, right, center, and surround speakers and a Pro Logic decoder in their system can “unfold” the matrix into 5.1 channels for the full effect.
Other formats add more channels. Dolby E can store up to eight channels of audio on two compressed channels (it is decoded to Dolby Digital before reaching home viewers). Dolby Surround EX adds a center surround speaker for 6.1 channels, Dolby Digital Plus has 7.1 channels (the surround speaker array has four parts—left side, left back, right side, right back). SDDS offers 7.1 channels by dividing the front speaker array into five parts. The goal of adding more channels is to provide a more dynamic, enveloping sound experience for the audience. Toward that aim, Dolby is developing the Atmos format, which includes speakers over the audience for a 3D, immersive effect. For more on how these formats are applied to film, see Sound for Film Prints, p. 713.
WORKING WITH AN AUDIO FORMAT. Broadcasters or distributors often require programming in a certain format (increasingly, 5.1 channels is standard for television, DVD, and Blu-ray). In other cases you may have an option.
Mixing for many channels adds time and complexity to the sound edit and mix; it also requires a studio equipped with the necessary speaker layout. While dialogue is almost always placed in the center, you have flexibility about where to place other types of sounds.
Hardware converters, apps, and plug-ins like Soundfield’s UPM-1 can take a stereo (two-channel) sound track and “fake” a 5.1-channel mix by putting dialogue in the front speaker channels while placing effects and ambience (as much as possible) in the surround speaker channels. This synthesized upmix can allow stereo programs to be released in 5.1-channel formats for broadcast or other distribution.
As noted above, programming released in 5.1 channels will be viewed by some in mono and by some in two-channel stereo. It’s essential that you test your 5.1-channel mix to be sure it “folds down” correctly to stereo and mono without any phasing or other issues. Even a program originally mixed in stereo should be monitored in mono, preferably through headphones.
When a theatrical film is to be mixed in Dolby Digital, arrangements must be made to license the format from Dolby, which is not cheap. (Licensing is also needed for nontheatrical products that bear the Dolby logo.)
Broadcasters now routinely require 5.1-channel sound tracks, but some types of productions may not gain much from a multichannel sound track and aren’t required to have one. For example, a corporate video or Web video might be mixed in basic stereo (just two channels) or even mono on the assumption that most viewers will not have a home theater setup and will hear the sound through relatively small speakers on a TV or computer. Particularly for nonaction, non-special-effects movies, many audiences never notice the difference.
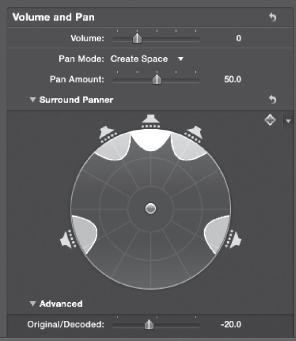
15-21. When doing a 5.1-channel mix, you can use a surround panner to set the direction from which the audience hears different sounds. Shown here, the panner from Final Cut Pro X with left, center, and right front speaker channels, as well as left and right surround channels. (Apple, Inc.)
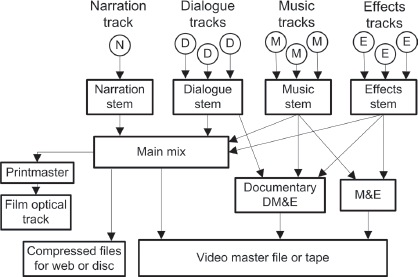
Fig. 15-22. This shows how individual dialogue, music, and effects (and sometimes narration) tracks are combined into stems, and the stems are then output in various combinations for different deliverables. An M&E mix (or a DM&E for a documentary) may be recorded on separate audio channels along with the main mix on the final video master file or tape. (Steven Ascher)
At the end of the mix, you often need to create several versions of the sound track for different uses.
Foreign Release
For foreign distribution, when translation to another language is called for, you will need to supply an M&E (music and effects) track. The M&E mix contains all the nondialogue sound that will be used as a bed on which dubbed, foreign language voices will be added. For a drama, there may be sync scenes in which dialogue and effects (such as footsteps) can’t be separated. In this case, Foley work may be needed to create clean effects tracks that have no dialogue—a process that may take several days (see p. 644). A “fully filled M&E” means you are supplying complete and continuous background and effects tracks, along with any music, so that dialogue in another language can later be added without additional track work.
On a documentary, the M&E may just be a mix without narration (sometimes called a DM&E), since the dialogue is often inextricable from the “effects” (they’re all recorded together on location). When a foreign language version of a documentary is made, interviews and other scenes are often subtitled, but sometimes they are dubbed instead (because broadcasters don’t want to make viewers read subtitles). If there is narration, it’s usually dubbed even if the dialogue is subtitled. Broadcasters may ask for an “undipped” version of the sound track with no narration (undipped means a track that has not been lowered, or ducked, as it normally would be whenever the narrator speaks). You can prepare for this by first mixing the entire film with undipped music and sync sound, then returning to the beginning and making a dipped version with narration exclusively for domestic use.14 See Chapter 17 for more on preparing a movie for foreign release.
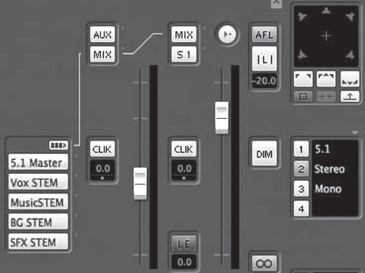
Fig. 15-23. This Nuendo monitor panel has selections for listening to individual stems—vox (voice), music, BG (background), and SFX (effects)—or the combined 5.1-channel master mix. The master can be monitored with all 5.1 channels using a full speaker array in the room, as a stereo (two-channel) downmix on two speakers, or as a mono mix with just one channel of sound. (Steinberg Media Technologies GmbH)
1. A few effects do in fact alter the captured audio files—avoid those until the final mix and/or be sure to save a copy of the original clip (prior to applying the effect) on the timeline.
2. Source music or other sound from within the story’s space is sometimes referred to as diegetic sound, as opposed to the nondiegetic sound of the movie’s score.
3. “Reference” here means something to refer to in the mix; if you’re making a QuickTime file, the term “reference file” has another meaning (it’s a file that doesn’t contain media; see p. 618). Any QuickTime files you make to give to the mixer should be self-contained.
4. In the UK, it’s called a sync pip. Also note that in Europe and the UK, programs often start at 10:00:00:00 timecode.
5. In 16mm, with the “Picture Start” frame of the SMPTE leader used as zero (01:00:00:00 in video), the first frame of action occurs at exactly 4 feet, 32 frames.
6. As of this writing, OMF files are limited to 2GB. Sometimes it’s necessary to break the movie into shorter sections or only export a few tracks at a time to keep each OMF file under the limit.
7. Some DAWs, such as Pro Tools, allow the mixer to disregard any plug-in effects on import.
8. Don’t confuse audio compression with the digital compression used to make files smaller.
9. EBU meters that read in LUFS use “gating” to ignore moments of silence in determining the average level. For typical television programming the difference between a reading in LUFS and one in LKFS may be less than 1 dB.
10. True peak level, which loudness meters can display, can be 2 dB higher than what typical peak meters indicate.
11. With programs encoded in Dolby AC3, a chunk of metadata called dialnorm should indicate the loudness at which the program was recorded. Broadcasters and cable operators are required to set it to the average program and commercial loudness. If set appropriately, loudness will be consistent for consumers from channel to channel and from program to program.
12. You can download audio clips at www.atsc.org that are recorded at −24LKFS so you can see how they read on your meters and get a sense for where the peaks should be. Look for documents referring to A/85 calibration.
13. Background (BG) sound is sometimes a separate stem from effects, and sometimes they are combined in one stem.
14. DAWs can output undipped tracks simply by removing the added level settings.