
11
Connecting databases
This chapter demonstrates how to establish a simple user forum with PHP and a MySQL database.
Making a connection
Connection to a MySQL database can be attempted from a standard PHP script. The script defines a variable named “dbc” (database connection) that gets assigned the value returned by calling a built-in mysqli_connect() function. This call requires four arguments to specify the host server, the MySQL username and password, and the database to connect. When the call succeeds, the mysqli_connect() function returns an “object” that represents the connection to the MySQL Server. The script looks like this:
<?php
$dbc =
mysqli_connect( ‘host’ , ‘user’ , ‘password’ , ‘database’ )
OR die ( mysqli_connect_error() ) ;
mysqli_set_charset( $dbc , ‘utf-8’ ) ;
connect_db.php

The MySQL Community Edition is available free at mysql.com/downloads/mysql
The object returned by a successful call to mysqli_connect() is very important as it is used as an argument in other PHP function calls that communicate with the MySQL Server. For example, in the above script it must be used as the first argument in the call to the mysqli_set_charset() function to identify the connection.

This chapter assumes the MySQL database server is installed and configured for a user on the localhost server, with full privileges to use a database named “website_db”. Further instruction and examples can be found in our companion book in this series PHP & MySQL in easy steps .
When the call to the mysqli_connect() function fails, the script branches to an alternative that calls the die() function. This is equivalent to calling exit() to immediately terminate the script. Optionally the die() function can accept a string argument that will be printed out as the scripts halts. In this case the string message is returned by the mysqli_connect_error() function that describes why the connection attempt failed.
As the connection script contains sensitive user details, it must not be placed alongside other PHP scripts in your web server’s / htdocs directory. The connect_db.php script should instead be located in the parent directory of /htdocs , where it is not directly accessible but can be incorporated into other PHP scripts by a require statement, like this:
<?php
require ( ‘../connect_db.php’ ) ;
if ( mysqli_ping( $dbc ) )
{
echo ‘MySQL Server ‘ . mysqli_get_server_info( $dbc ) . ‘ on ‘ . mysqli_get_host_info( $dbc ) ;
}
require.php
The files in your web server’s directory structure should therefore be arranged in the hierarchy depicted below, so when you request the require.php script via HTTP, the connect_db.php script gets incorporated from its location in the parent directory, and the connection gets made to the MySQL Server.


Files that contain only pure PHP code, like both those listed here, should omit the PHP ?> closing tag at the end of the file. This prevents accidental whitespace or new lines after the PHP closing tag, which may cause unwanted effects.

The connection script connect_db.php must be working successfully to connect to a MySQL database for the examples in this chapter.
Creating a forum
User messages can be stored in a MySQL database table by a PHP script, so they may be subsequently retrieved for display in a forum page containing messages from various registered users. Typically a database table containing posted user messages might store the post ID, the user’s first name and last name, the subject title, the message itself, and the date when posted:
|
Column Name: |
Content Type: |
Example: |
|
post_id |
Number |
123 |
|
first_name |
Text |
Mike |
|
last_name |
Text |
McGrath |
|
subject |
Text |
Ice Cream |
|
message |
Text |
Delicious on a hot day. |
|
post_date |
Date/Time |
2016-07-24 12:30:00 |
MySQL database tables can only be created by the root MySQL user or another MySQL user that has been granted full access privileges.
A database table of this design can be created using the Structured Query Language (SQL). The design of this database table simply requires that SQL VARCHAR or TEXT data types should be specified for those columns storing text. Post IDs should be positive SQL integer INT values that the table automatically allocates with SQL AUTO_INCREMENT , and the message posted timestamp should be stored as an SQL DATETIME value. All these items will be required to post a message to the database table so each column must have an SQL NOT NULL rule.
You can discover how to fully use the Structured Query Language with databases from our companion book in this series entitled SQL in easy steps .
The SQL query command required to produce this design as a MySQL database table named “forum” can be issued at the prompt in the MySQL Command Line Client, or issued by running a PHP script in the web browser.
create_forum.php
 Begin a PHP script with a statement to connect to a database using the standard connection scripts described on the previous page
<?php
require( ‘..\ connect_db.php ’ ) ;
 Next, assign the SQL specifications of the table design to a variable
$sql
=
‘CREATE TABLE IF NOT EXISTS
forum
( ‘
.
‘post_id INT UNSIGNED NOT NULL AUTO_INCREMENT ,’
.
‘first_name VARCHAR(20) NOT NULL ,’
.
‘last_name VARCHAR(40) NOT NULL ,’
.
‘subject VARCHAR(60) NOT NULL ,’
.
‘message TEXT NOT NULL ,’
.
‘post_date DATETIME NOT NULL ,’
.
‘PRIMARY KEY ( post_id ) ) ‘
;
 Now, add a test to report whether the table was created successfully, or describe the error on failure
if( mysqli_query( $dbc , $sql ) === TRUE )
{
echo ‘Table “forum” created successfully’ ;
}
else
{
echo ‘Error creating table : ‘ .mysqli_error( $dbc ) ;
}
 Remember to close the database connection when done
mysqli_close( $dbc ) ;
 Save the document in your web server’s
/htdocs
directory as
create_forum.php
then open the page via HTTP to create the forum table
Save the document in your web server’s
/htdocs
directory as
create_forum.php
then open the page via HTTP to create the forum table
The SQL VARCHAR data type specifies a character length, whereas the TEXT data type accommodates up to 65,535 characters.
The mysqli_query() function executes the SQL query, whereas the mysqli_error() function will provide a report if an error occurs.
Providing the page
A forum page can be created to display previously posted messages retrieved from the MySQL ‘forum’ database table, created on the previous page. Forum messages can be displayed between the page header and footer, together with a hyperlink to another page where the user can post a new forum message. If the forum database contains no previously posted content, the script can simply advise that there are currently no messages.
The PHP mysqli_query() function can make an SQL query to retrieve the database table content, and the mysqli_num_rows() function can discover how many table rows are in the result. When table rows are found in the result, the mysqli_fetch_array() function can be used to fetch an associative array of rows and data in each column by specifying the result and MYSQLI_ASSOC constant as arguments:
forum.php
Begin a PHP script with a statement to set the page title
<?php
$page_title = ‘PHP Forum’ ;
Next, add a statement to include a page header
include ( ‘includes/header.html’ ) ;
Add a statement to open the database connection
require ( ‘..\connect_db.php’ ) ;
Retrieve all messages from the database table and assign them to a variable
$sql = ‘SELECT * FROM forum’ ;
$result = mysqli_query( $dbc , $sql ) ;
Test whether the database table is empty and display an appropriate advisory comment
if ( mysqli_num_rows( $result ) > 0 )
{
// Statements to be inserted here (step 6).
}
else
{
echo ‘<p>There are currently no messages.</p>’ ;
}
Columns are returned as an associative array in which the row name is the key for each value in that column.
 Next, insert statements to write a table displaying all messages retrieved from the database table if any are found
echo ‘<table><tr><th>Posted By</th>
<th>Subject</th><th id=”msg”>Message</th></tr>’ ;
while ( $row = mysqli_fetch_array( $result , MYSQLI_ASSOC ) )
{
echo ‘<tr><td>’ .
$row[ ‘first_name’ ] . ’ ‘ .
$row[ ‘last_name’ ] . ‘<br>’ .
$row[ ‘post_date’ ] . ’</td><td>’ .
$row[ ‘subject’ ] . ‘</td><td>’ .
$row[ ‘message’ ] . ‘</td></tr>’ ;
}
echo ‘</table>’ ;
 After the test block, add a statement to create a hyperlink to a “Post Message” page
echo ‘<p><a href=” post.php ”>Post Message</a></p>’ ;
 Now, add a statement to close the database connection
mysqli_close( $dbc ) ;
 Add a final statement to include a page footer
include ( ‘includes/footer.html’ ) ;
?>
 Save the document in your web server’s
/htdocs
directory as
forum.php
then open the page via HTTP to see the forum page
Save the document in your web server’s
/htdocs
directory as
forum.php
then open the page via HTTP to see the forum page

Database table rows are returned into the array having the row name as the array index. The cells on the HTML table row will be populated by the data contained in the columns on a row of the database forum table.
The HTML header and footer inclusions are demonstrated in the example here .
Supplying a form
Having completed the PHP script to display posted forum messages, described on the previous page, we can now create a PHP script to allow the user to post new messages. This can simply provide an HTML form with fields for usernames, the subject title, and the message body itself:
post.php
Begin a PHP script with a statement to set the page title
<?php
$page_title = ‘PHP Post Message’ ;
Now, add a statement to include a page header
include ( ‘includes/header.html’ ) ;
Add a statement to display the form
echo ‘<form action=” process.php ”
method=” POST ” accept-charset=”utf-8”>
First Name : <input name=” first_name ” type=”text”>
Last Name : <input name=” last_name ” type=”text”>
<p>Subject :<br>
<input name=” subject ” type=”text” size=”64”></p>
<p>Message :<br>
<textarea name=” message ” rows=”5” cols=”50”>
</textarea></p>
<p><input type=”submit” value=”Submit”></p>
</form>’ ;
Next, add a statement to create a hyperlink to the Forum page
echo ‘<p>
<a href=”forum.php”>Forum</a></p>’ ;
Add a final statement to include a page footer
include ( ‘includes/footer.html’ ) ;
?>
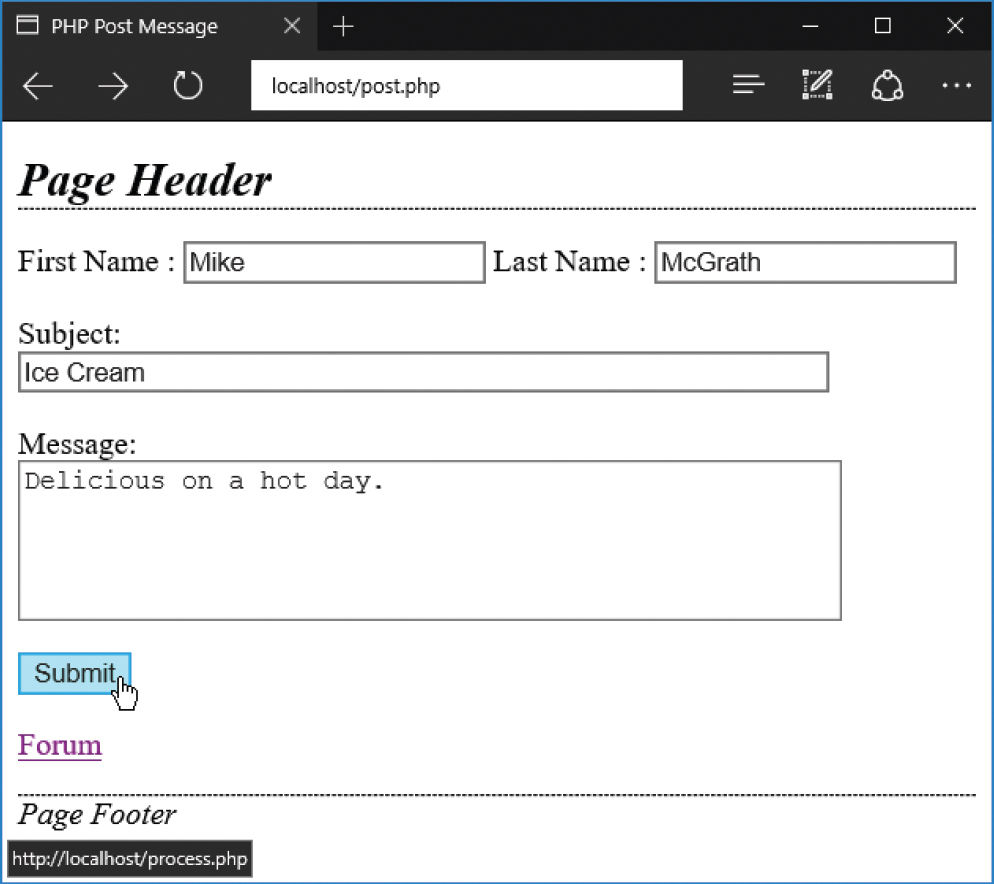
Save this script in your web server’s
/htdocs
directory as
post.php
then follow the hyperlink on the Forum page to see this message form page
Notice that the form action attribute nominates a submission handler named process.php – this is listed here .


In practice, users of a forum may have first registered their names. In that case, those names could also be stored in a database table for recall later – but usernames will be submitted by the HTML form in this example, for simplicity.
The Post Message page provides a hyperlink back to the Forum page, should the user wish to return there.
Processing messages
Having completed the PHP script to supply a form to post new forum messages, described on the previous pages, you can now create a PHP script to process the submitted messages.
The script to process the HTML form can ensure that all form fields are not empty for simple validation. The trim() function can be used to strip whitespace and the empty() function can be used to test for empty string submissions.
Once the form input is found to be valid, the script can then store the submitted message in the MySQL “forum” database table. If the attempt to post the message succeeds the forum page can be loaded to display the messages, or upon failure an error message can be displayed:
process.php
Begin a PHP script with a statement to set the page title
<?php
$page_title = ‘PHP Process Error’ ;
Next, add a statement to include a page header
include ( ‘includes/header.html’ ) ;
Now, add an exit function to display a notification and a link to return to the post page if validation fails
function fail( $str )
{
echo “<p>Please enter a $str .</p>” ;
echo ‘<p><a href=”post.php”>Post Message</a>’ ;
include ( ‘includes/footer.html’ ) ;
exit() ;
}
Add a test to ensure the form has been submitted
if( isset( $_POST[ ‘message’ ] ) )
{
// Statements to be inserted here (step 5).
// Statements to be inserted here (step 6).
// Statements to be inserted here (step 7).
}
This script is nominated by the form in post.php to process its submitted user data messages. The form is not “sticky” though – so any entered field data is not retained if the user must return to the form to complete an empty input field.
Insert tests to ensure the user has filled in all form fields
if ( !empty( trim( $_POST[ ‘first_name’ ] ) ) )
{ $first_name = addslashes( $_POST[ ‘first_name’ ] ) ; }
e lse { fail( ‘First Name’ ) ; }
i f ( !empty( trim( $_POST[ ‘last_name’ ] ) ) )
{ $last_name = addslashes( $_POST[ ‘last_name’ ] ) ; }
e lse { fail( ‘Last Name’ ) ; }
i f ( !empty( trim( $_POST[ ‘subject’ ] ) ) )
{ $subject = addslashes( $_POST[ ‘subject’ ] ) ; }
e lse { fail( ‘Subject’ ) ; }
i f ( !empty( trim( $_POST[ ‘message’ ] ) ) )
{ $message = addslashes( $_POST[ ‘message’ ] ) ; }
e lse { fail( ‘Message’ ) ; }
When validation succeeds, open the database connection
require ( ‘../connect_db.php’ ) ;
Now, insert statements to add the submitted HTML form field values into the MySQL “forum” database table
$sql = “INSERT INTO forum
( first_name, last_name, subject, message, post_date )
VALUES
(‘ $first_name ’, ‘ $last_name ’,’ $subject ’, ‘ $message ’, NOW() )” ;
$result = mysqli_query ( $dbc , $sql ) ;
Finally, insert a statement to report a failure error or relocate the browser to the forum page on success
if ( mysqli_affected_rows( $dbc ) != 1 )
{
echo ‘<p>Error</p>’ .mysqli_error( $dbc ) ;
mysqli_close( $dbc ) ;
}
else
{
mysqli_close( $dbc ) ;
header( ‘Location: forum.php ’ ) ;
}
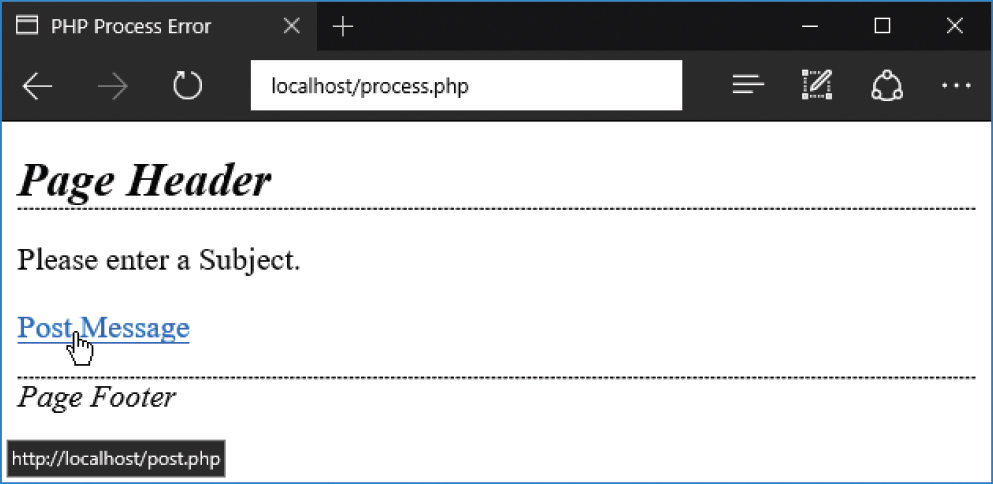
Save this script in your web server’s
/htdocs
directory as
process.php
, then submit the form without entries in all fields to see the script display error messages
Notice that the PHP addslashes() function is used here to escape apostrophes and quotes.
NOW() is a MySQL function, which returns a datetime value that is the current timestamp.
This script supplies its own error messages if it finds empty form fields, or a MySQL error message if the data cannot be added to the database table.
Confirming success
It’s now time to test the message board process to ensure that validation performs correctly, and posted messages appear on the Forum page:
Open the Post Message page, then complete all fields and submit the form to see the message appear on the forum

The “Posted By” details are retrieved from the first_name, last_name, and post_date columns of the MySQL “forum” database table.
Next, return to the Post Message page then attempt to post a message with no Subject entry to see an error
Return to the Post Message page and post more messages as different users to see them get added to the forum

You can stop the MySQL Server service and post a message to see the MySQL error report.
New forum messages are added to the bottom of the table here but the order could be reversed by adding a SORT clause to the SQL query.
Summary
• A PHP script can connect to a MySQL database using the mysqli_connect() function to specify the host server, username, user password, and database name as its arguments
• The mysqli_connect() function returns a database connection object, which can be supplied as the argument to other functions, such as the mysqli_set_charset() function
• The die() function is equivalent to calling the exit() function to terminate the script
• The mysqli_connect_error() function returns an error message if a connection attempt fails, and can be specified as the argument to the die() function, to be called as the script halts
• It is recommended to place a connection script outside the regular /htdocs directory for security and incorporate it into other scripts, when needed, using a require statement
• The mysqli_ping() function can verify connection to a specified database, then information can be retrieved using mysqli_get_server_info() and mysqli_get_host_info()
• The mysqli_query() function attempts to execute a SQL query on a specified database object and the mysqli_error() function can be used to describe the cause of a failed attempt
• Database connections should always be closed when they are no longer required by calling the mysqli_close() function
• When a database query succeeds, the mysqli_num_rows() function can reveal the total number of rows retrieved
• The mysqli_fetch_array() function can create an associative array of rows and data from a successful query result
• The PHP empty() function can be used to test a posted HTML form field to discover if it is empty
• A row of data can be added to a MySQL database table, using the mysqli_query() function, then a confirmation test can be made using the mysqli_affected_rows() function
• The browser can be relocated to a new page using the header() function to specify a ‘Location:URL’ argument