
Kitchen Confidence
How Would a Test Cook Do That?

Test Your Cooking IQ
Bench Test
Memorize This!
How to Know When Food Is Done
Cheat Sheet
Cooking School At-a-Glance
For most of us, once we learn to do something a particular way, that’s the way we’ll do it for the rest of our lives. This rule applies both in the world at large and in the kitchen in particular; if your aunt who makes the best cherry pie taught you to pit cherries using a knitting needle and a glass soda bottle, then that’s probably the way you’ll always do it. But here in the test kitchen, our test cooks try many different approaches before deciding on the best way to execute a particular task. The average recipe in our kitchen is tested more than 30 times before being published, and in the process of all that testing, we’ve also come up with some best practices for all kinds of kitchen work. Those tips and tricks are outlined here to help you learn new skills, level up your existing abilities, unlearn some bad habits, and tackle all your kitchen challenges with the confidence of a test cook.
A bench test is a hands-on exam designed to make sure that a cook has the basic culinary talents required to do a job, from measuring to knife skills to following a recipe from start to finish. This multiple-choice quiz gets at just some of the foundational knowledge you need to be a successful cook.
 If a recipe calls for searing a piece of meat, which of the following should you do?
A. Use moderate heat.
B. Move the meat around in the pan a lot.
C. None of the above.
 Which of these techniques can make raw kale softer and easier to chew?
A. Massaging the leaves with your hands.
B. Soaking the leaves in hot water.
C. Either A or B.
 If your silicone spatula gets really stained, you can clean it using
A. A bucket of salt.
B. Toothpaste.
C. Hydrogen peroxide.
 If you accidentally oversoften butter, you can fix it by
A. Letting it sit until it congeals again and then resoftening.
B. Cooling it quickly with ice cubes.
C. Mixing in some additional cold butter.
 When a recipe calls for “one-second pulses” in a food processor, which of the following actions you should you take?
A. Press and hold the button for a full second.
B. Press the button, release it, and repeat after 1 second.
C. It depends on how your food processor works.
 It’s easiest to separate eggs when they are
A. Cold from the refrigerator.
B. At room temperature.
C. Cold or room temperature; it doesn’t matter.
 Professional chefs season food from way above the counter
A. Because it changes the taste of the seasoning.
B. Because it helps distribute the seasoning more evenly.
C. For no good reason—it just looks cool.
 If a recipe calls for tenting meat with foil after cooking, you should
A. Ignore it and leave the foil off.
B. Wrap the meat tightly in foil.
C. Loosely cover the meat with foil.
 If you’re beating cream by hand, the most efficient way to use the whisk is to
A. Beat in loops that take the whisk up and out of the bowl.
B. Stir in circles like a spoon.
C. Use side-to-side strokes back and forth in the bowl.
 The best way to keep meat from getting stuck to the pan while searing is to
A. Let it cook without touching it.
B. Press down on the meat while it cooks.
C. Move the meat around a lot while it’s cooking.
Answers
Why do TV chefs sprinkle salt from way up in the air? Is this just kitchen theatrics, or is there a reason behind this practice?

This showy technique actually seasons food more effectively.
We’ve seen chefs season food by sprinkling salt from a good 10 or 12 inches above the counter. To see whether there’s any advantage to this trick, we sprinkled chicken breasts with ground black pepper from different heights—4 inches, 8 inches, and 12 inches—and found that the higher the starting point, the more evenly the seasoning was distributed. And the more evenly the seasoning is distributed, the better food tastes. So go ahead and add a little cheffy flourish the next time you season.

Is it better to season food early in the cooking process or just at the end?

Salt takes time to do its work, so season early in the process. If you’re salting at the end, use a very light touch.
Most recipes (and culinary schools) advise seasoning food with salt early in the cooking process, not just at the end. We know that salt penetrates food slowly when the food is cold. (We have found that it takes a full 24 hours for salt to diffuse into the center of a refrigerated raw turkey.) While the process is faster during cooking (the rate of diffusion of salt into meat will double with every 10-degree increase up to the boiling point), it’s still not instantaneous. And salt penetrates vegetables even more slowly than it does meat, because the salt must cross two rigid walls surrounding every plant cell, while the cells in meat contain only one thin wall. Adding salt at the beginning of cooking gives it time to migrate into the pieces of food, seasoning them throughout; if you add salt only at the end, it provides a more concentrated, superficial coating that immediately hits your tongue.
For the most even seasoning and well-rounded flavor, we strongly encourage seasoning food early in the cooking process as we direct in our recipes. However, if you forget, do not try to make up for it by simply stirring in all the salt at the end. Instead, start with a very small amount of salt and then taste and season further as desired. On the flip side, if you are watching your salt intake, you could wait until the end of cooking to season your food, knowing that you’ll be able to get away with a lesser amount.
What’s the best way to remove the seeds from a pomegranate?

Our favorite method involves using a bowl of water to your advantage.
While many sources recommend removing the seeds from a pomegranate by placing half of the fruit cut side down on a work surface and hitting the end with a rolling pin or wooden spoon, we’ve found an even better way that removes every seed without any mess.
1. Cut off the bump on the blossom end and score the outside of the fruit from pole to pole into six sections.
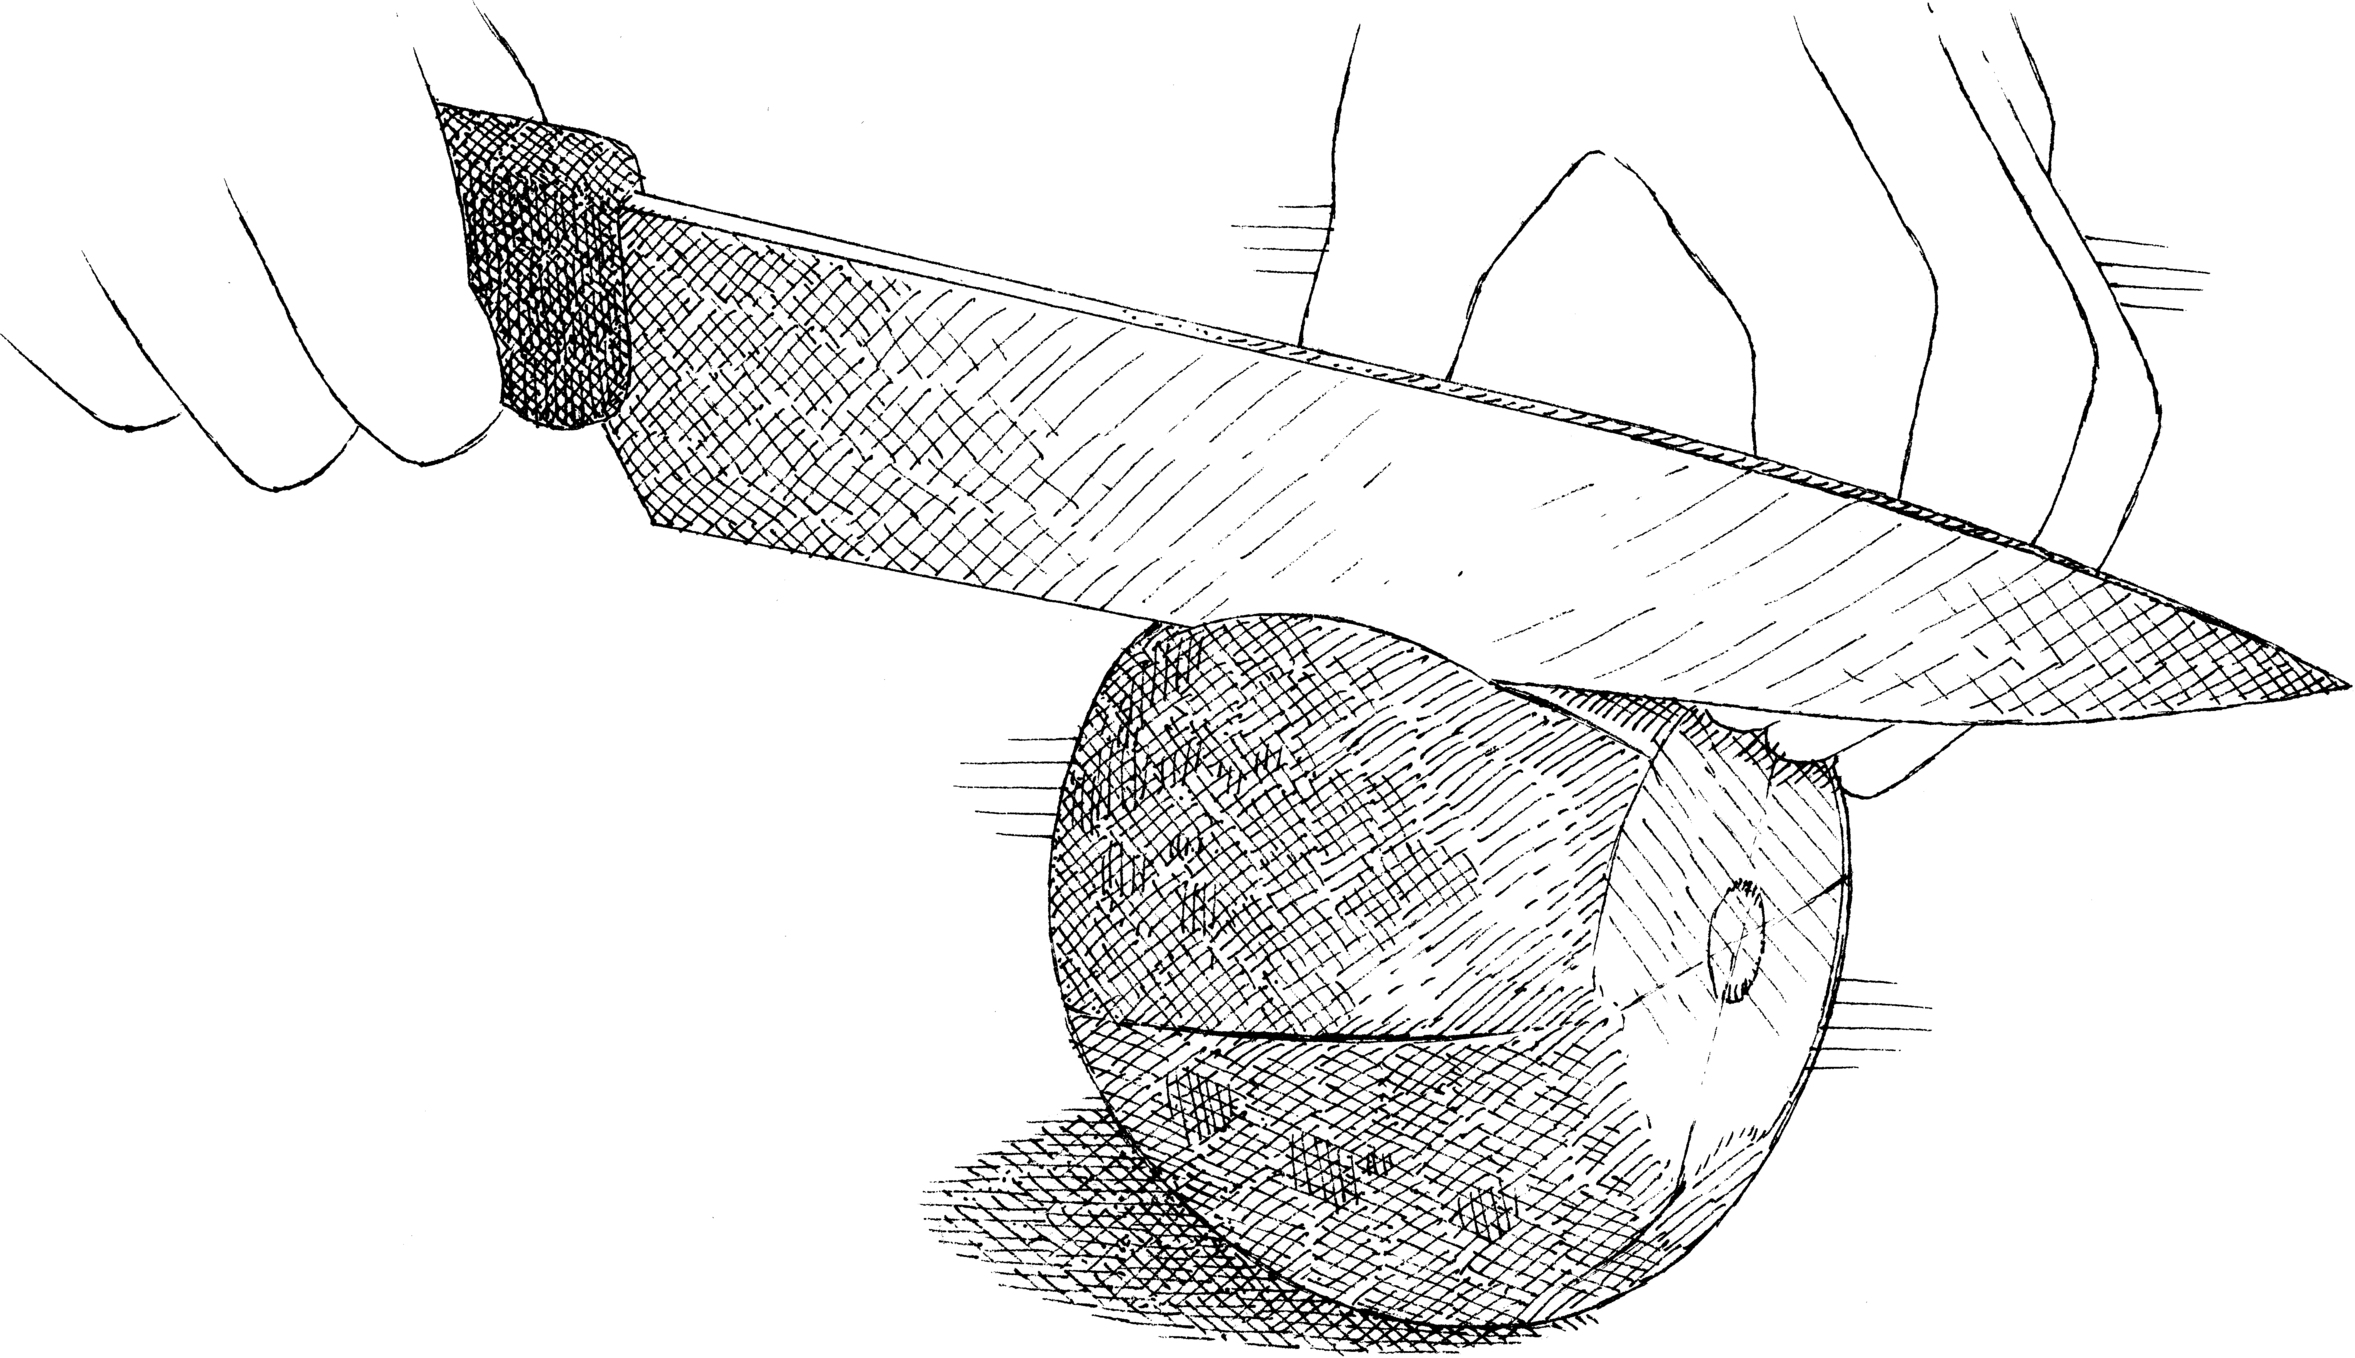
2. Insert your thumbs into the blossom end and pull the fruit apart in sections.

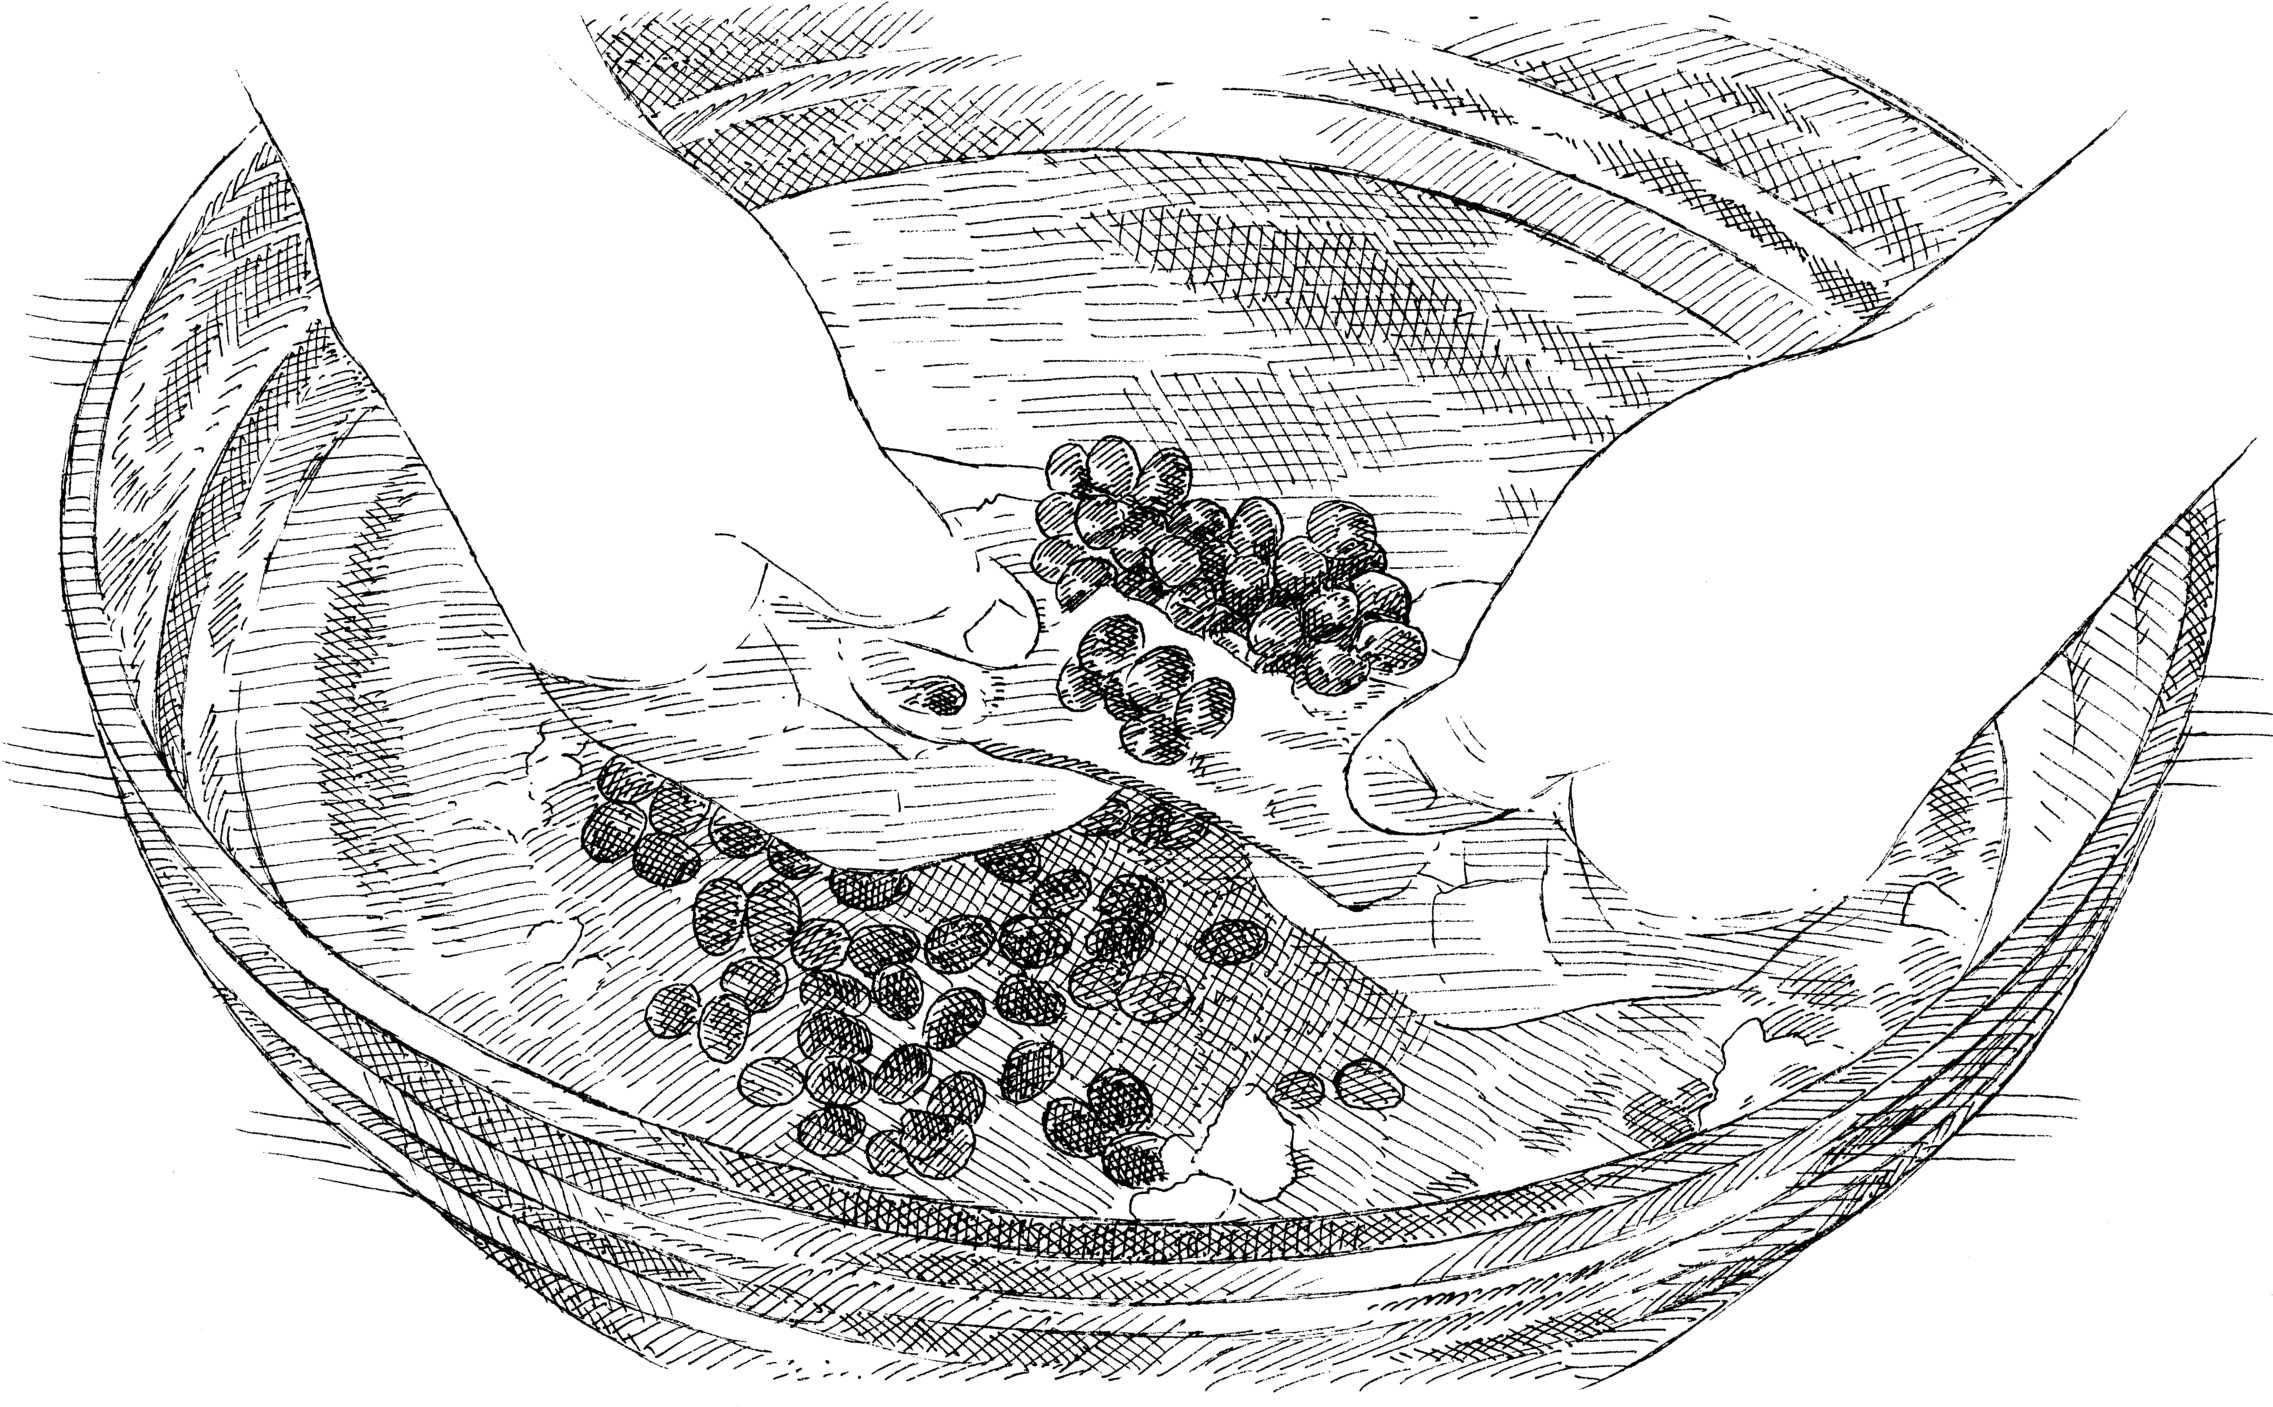
3. Submerge the sections in a bowl of cold water and then bend the rind backward to release the seeds. Pull out any stragglers and let the seeds sink to the bottom of the bowl. Discard the rind and any bits of membrane that float to the surface, and then drain the seeds in a colander. The seeds can be refrigerated in an airtight container for up to 5 days.
What kind of citrus peel garnish should I use for my fancy cocktails?

It depends on what you’re going for. Bartenders aren’t just showing off when they make those fancy twists—there’s a good reason for them.
There are three common citrus peel garnishes for cocktails: The first is a twist, a simple strip of citrus peel that is twisted over the drink to release essential oils and then rubbed around the rim of the glass and discarded. The second is a flamed twist, in which a flame is held between the drink and the peel so that when the peel is twisted, its oils ignite briefly. The third type is a swath, a band of zest with a little pith attached that is twirled and placed in the drink. We made all three types of garnishes with orange peel and tasted each in a simple Negroni cocktail. We found that the twist contributed bright orange notes that enlivened the drink. The flamed twist offered sulfurous undertones and had a somewhat subdued orange fragrance. The swath added citrus notes along with mild bitterness from the pith. In sum, fancy citrus peel garnishes are more than just ornamental: Your choice should hinge on the flavor profile you’re trying to create.
What’s the best way to get all the juice out of a lime or lemon?

We think it’s worth investing in a special gadget for this task.
We’ve squeezed our way through literally thousands of lemons and limes, so we’ve had a chance to test all kinds of different methods for getting as much juice as possible from these fruits. We tested squeezing against a citrus juicer, in which a fruit half is twisted over a ridged, conical head set over a bowl; a simple wooden reamer, which is manually turned inside the fruit half; and a citrus squeezer, a device that presses the fruit half inside out to extract the juice.
Each method yielded the same amount of juice, about twice as much as by hand squeezing alone. But when we factored in ease of use and speed, the squeezer pressed ahead of the competition. An added bonus: All the bits of pulp were contained in the well of the press rather than dropping down into the juice.
Are there any tricks for yielding more juice? We tried rolling the fruits on the counter, heating them in the microwave, and poking them with a fork; while these tips may help when squeezing by hand or using a reamer, none made a bit of difference in yield (or ease) when using a hand-held squeezer. In fact, we found that cold lemons and limes straight out of the refrigerator yielded the most juice—the firm flesh split open more readily than when warm and more pliable.
What is the best way to revive wilted produce?

Cold water is the answer to all your wilted produce woes.
Soft leafy greens like lettuce, spinach, and arugula can be revived by simply soaking them in a bowl of ice water for 30 minutes. We wondered if a similar technique might be used to revive other types of produce.
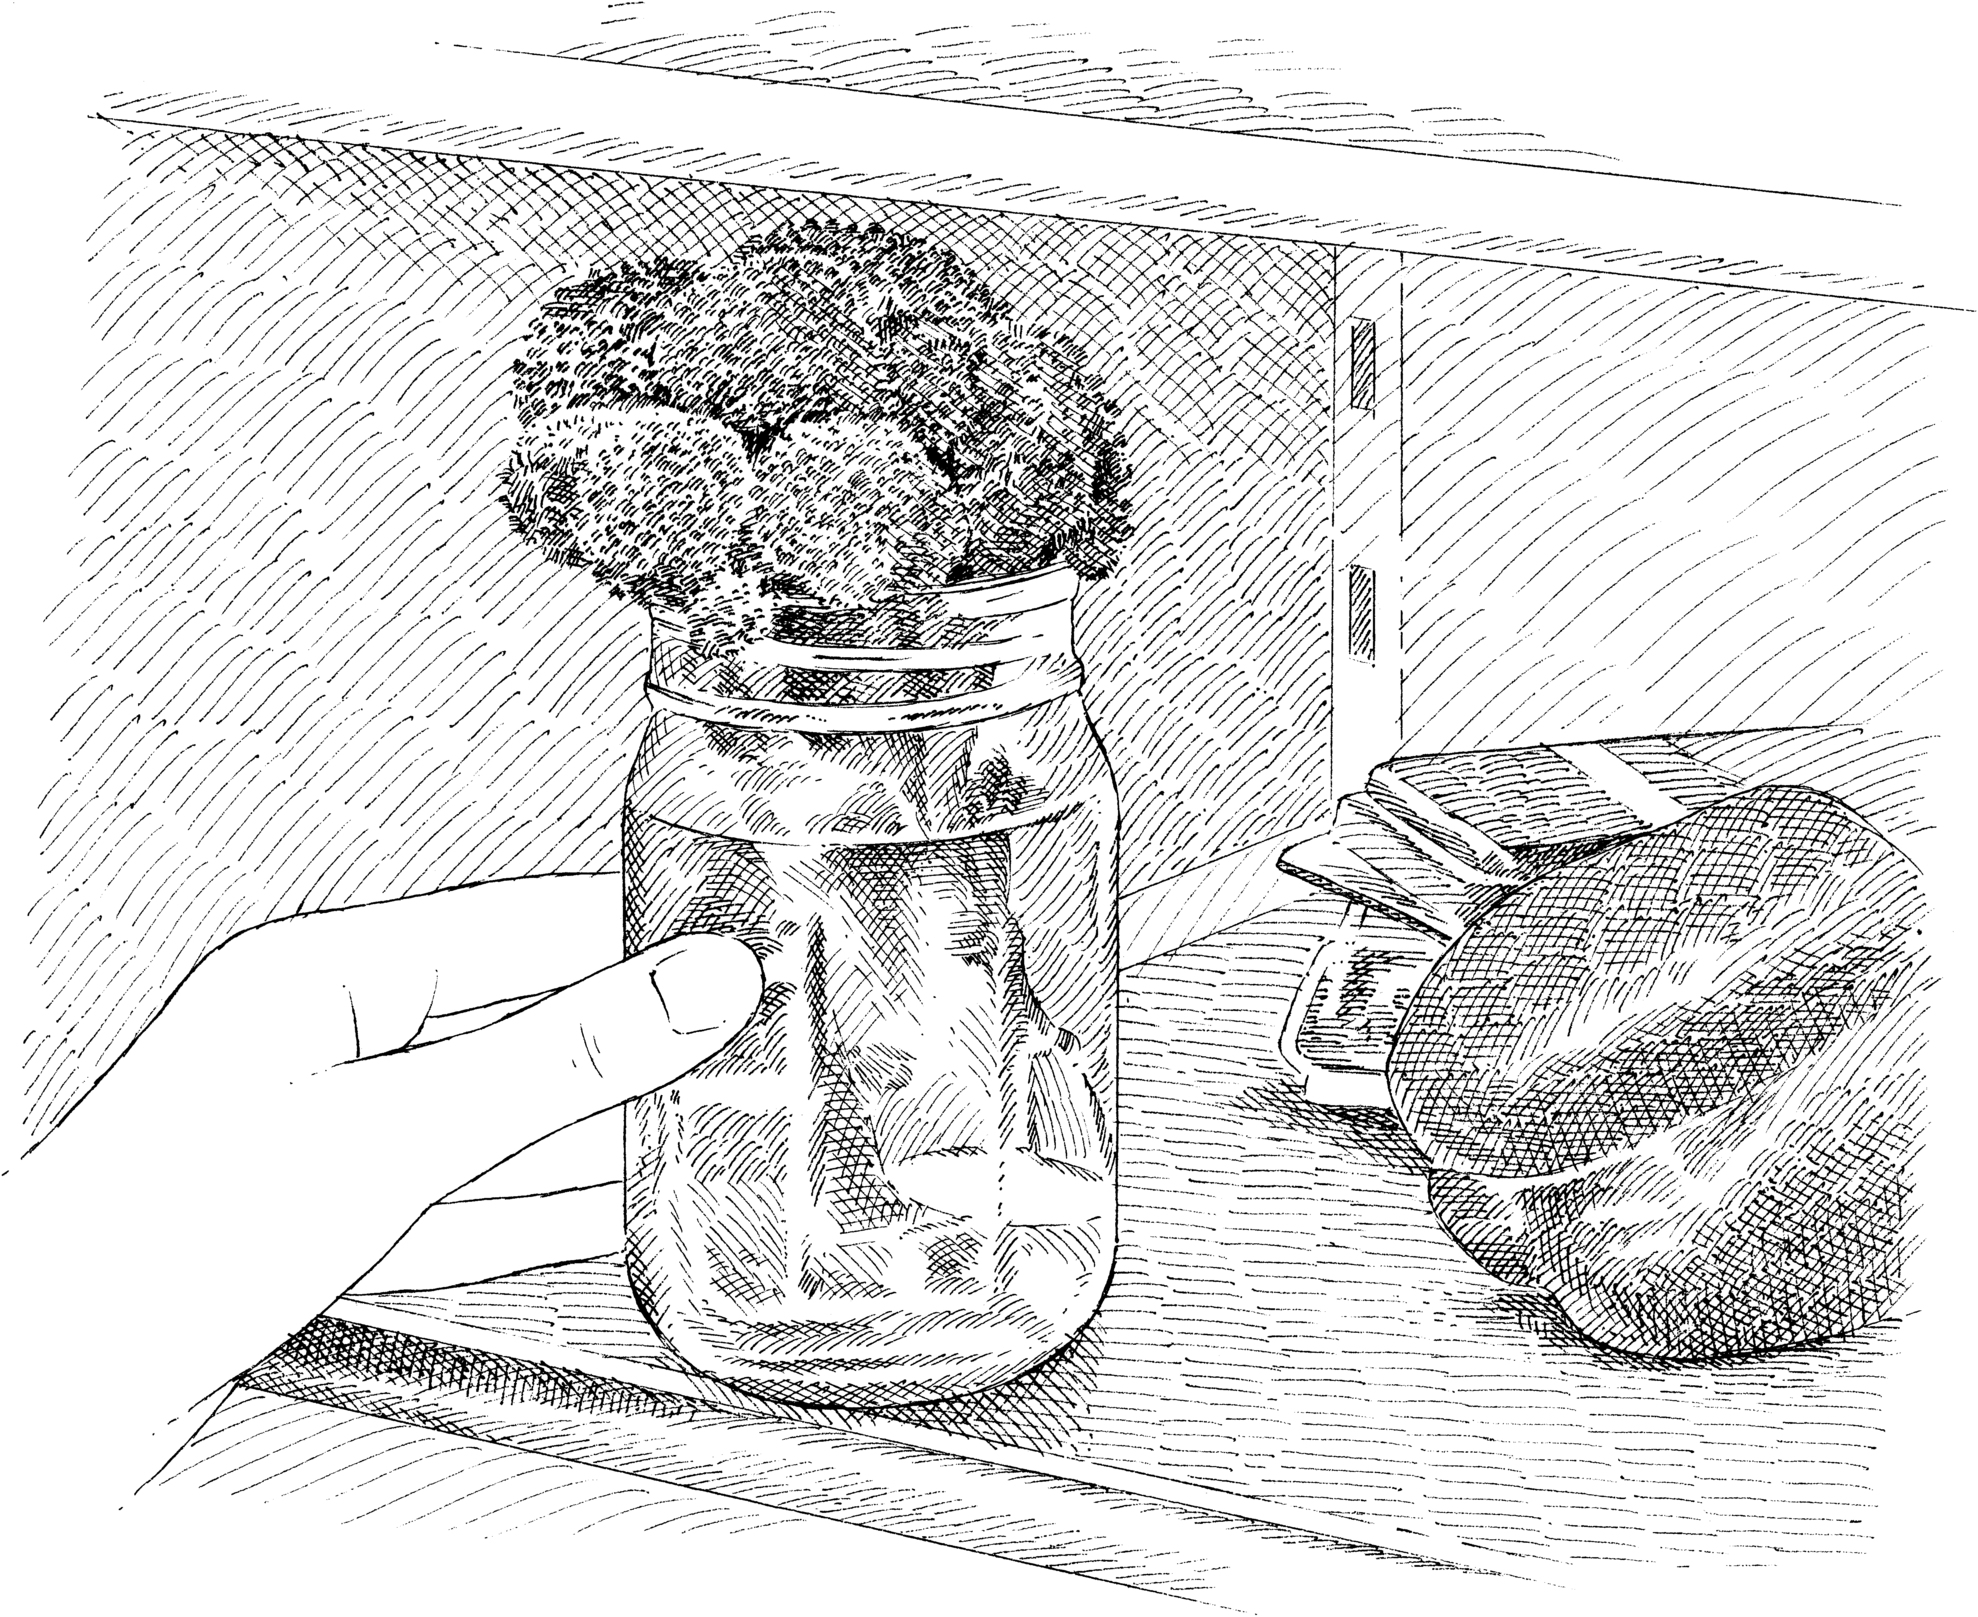
Vegetables like broccoli, asparagus, celery, scallions, and parsley absorb water best through their cut bases (not along their waxy stalks and stems). We found that the best way to revive these vegetables was to trim their stalks or stems on the bias and stand them up in a container of cold water in the refrigerator for about an hour. This exposes as many of their moisture-wicking capillaries as possible to water.
I know that I’m supposed to soften kale if I’m going to eat it raw, but I’m not sure how—do I really have to massage it?

Don’t be weirded out by the idea of massaging kale—it’s easy and effective.
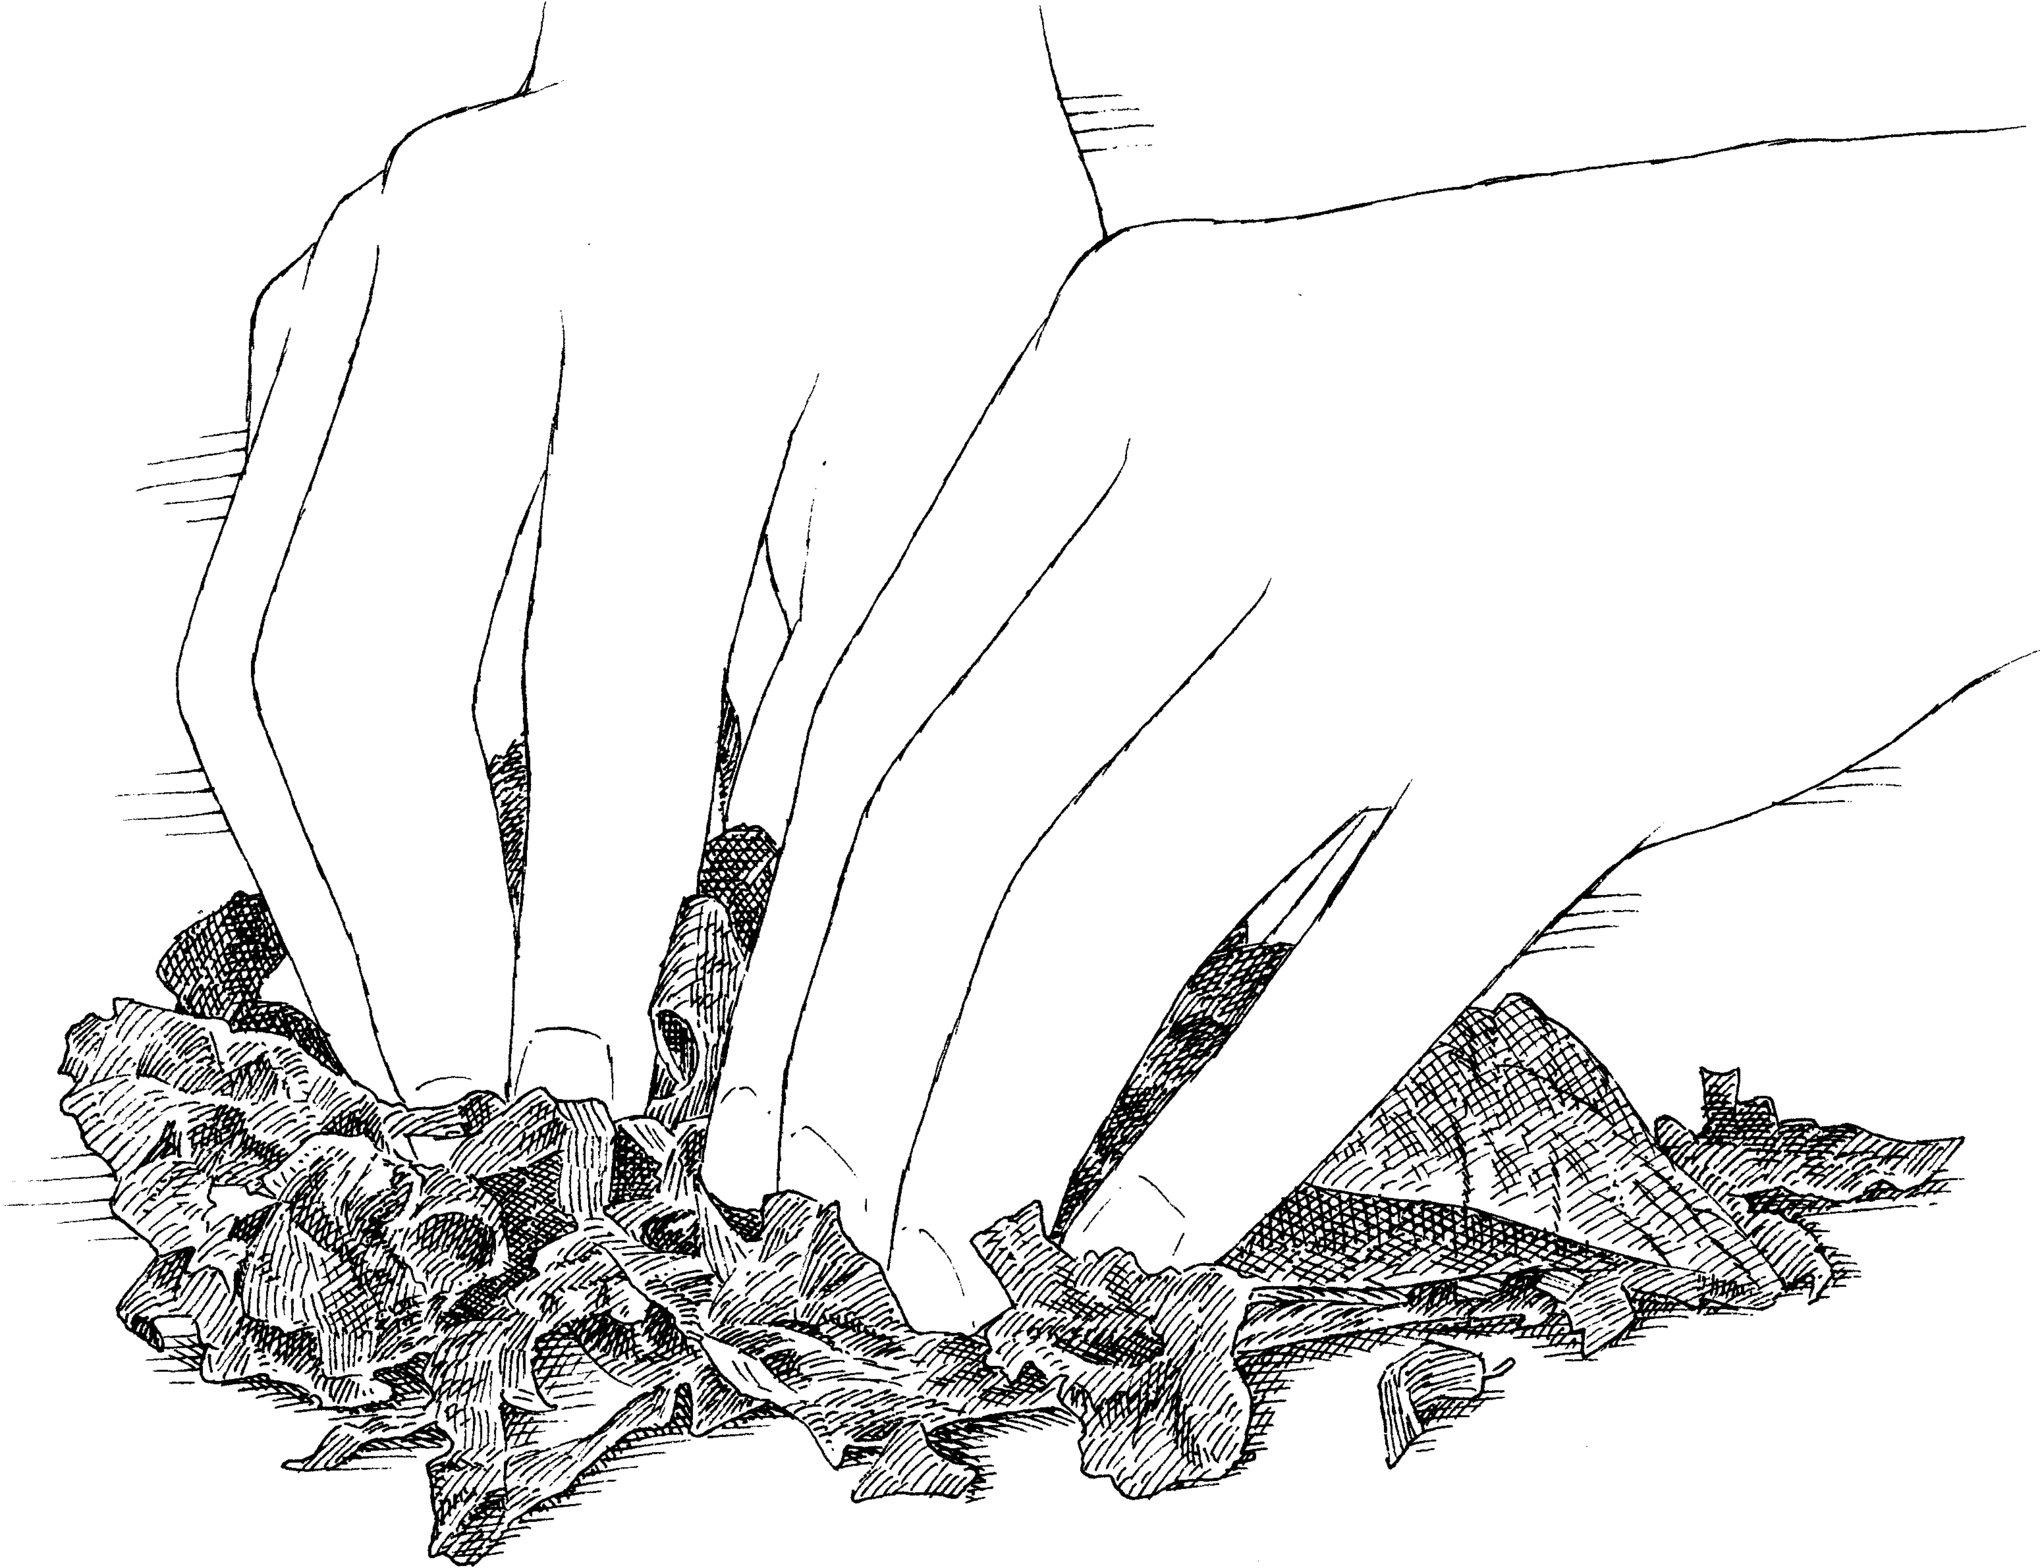
Once just a garnish, raw kale has recently become a star addition to salads. While we love the bright, nutty flavor of the uncooked vegetable, unless we’re using baby kale, its texture can be a little tough. You can soak the kale in hot water for about 10 minutes to tenderize it, but there’s a way to soften these greens without subjecting them to heat: After removing the ribs, cut the leaves into ¼-inch ribbons and “massage” them. Kneading and squeezing breaks down the kale’s cell walls much the way that heat does, darkening the leaves and turning them silky. We found that it takes a rubdown of at least 5 minutes to soften a bunch of coarse green curly kale, but the more delicate leaves of Tuscan kale (also known as dinosaur or Lacinato kale) or red kale need just a minute of massaging.
Do you have any suggestions for getting rid of the irritating burn that can happen when you accidentally touch a fresh hot chile?

Relief is on the way—just make sure you have hydrogen peroxide on hand.
Capsaicin is the chemical in chiles responsible for their heat. It binds to receptors on the tongue or skin, triggering a pain response. To find out if anything could be done to lessen this burn, we rounded up some brave testers to seed chiles without gloves, smear chile paste onto patches of their skin, and eat scrambled eggs doused in hot sauce. We then tested some home remedies. For the skin, we washed with soap and water and rubbed the affected area with oil, vinegar, tomato juice, a baking soda slurry, and hydrogen peroxide. For the mouth, we swished with (but did not swallow) water, milk, beer, and a mixture of hydrogen peroxide and water.
Soap and water helped lessen the burn on skin a bit, but oil, vinegar, tomato juice, and baking soda didn’t help at all. As for a mouthwash, water and beer failed, and milk had only a slight impact. What worked well both on the skin and in the mouth? Hydrogen peroxide.
It turns out that peroxide reacts with capsaicin molecules, changing their structure and rendering them incapable of bonding with our receptors. Peroxide works even better in the presence of a base like baking soda: We found that a solution of ⅛ teaspoon of baking soda, 1 tablespoon of water, and 1 tablespoon of hydrogen peroxide could be used to wash the affected area or to rinse the mouth (swish vigorously for 30 seconds and then spit out) to tone down a chile’s stinging burn to a mild warmth. (Toothpaste containing peroxide and baking soda is a somewhat less effective remedy.) Always keep peroxide, baking soda, and toothpaste away from your eyes. To avoid these issues in the first place, it’s a good idea to wear gloves when working with very hot chiles. If you don’t have gloves, avoid touching your eyes, nose, or mouth with your fingertips and make sure to wash well as soon as chile prep is completed.
When I make chicken, it always comes out dry and bland. How can I make it juicy and tender like the stuff I get at good restaurants?

Here in the test kitchen, one of our favorite tricks for lean meats is to brine them to improve both flavor and texture.

We find that soaking chicken (as well as turkey and even pork) in a saltwater solution before cooking is the best way to protect the delicate meat. Whether we are roasting a turkey or grilling chicken parts, we have consistently found that brining keeps the meat juicier. Brining gives delicate poultry a meatier, firmer consistency and seasons the meat down to the bone. We also find that brining adds moisture to pork and shrimp and improves their texture and flavor when grilled.
Brining promotes a change in the structure of the proteins in the muscle. This rearrangement of the protein molecules compromises the structural integrity of the meat, reducing its overall toughness. It also creates gaps that fill up with water. The added salt makes the water less likely to evaporate during cooking, and the result is meat that is both juicy and tender.
In many cases, we also add sugar to the brine. Sugar has little if any effect on the texture of the meat, but it does add flavor and promote better browning of the skin, which results in even more flavor. Just be sure to pat the meat dry after removing it from the brine.
I’ve read that tenting meat with aluminum foil can ruin its crust. Is this true?

For most meats (but not poultry), just make sure you tent the foil loosely and there shouldn’t be any problems.
Here in the test kitchen, we often call for tenting meat with foil to keep it warm while it rests. And because meat’s temperature continues to rise for a few minutes after it’s pulled from the oven (known as carryover cooking), we often build the tenting step into our recipe times.
We tested different cuts of meat not tented, tented, and with the foil tightly crimped around the plate the meat was resting on. Our results depended on the meat in question. We do not recommend tenting chicken or turkey when you’re looking for crispy skin, because tenting traps steam and leaves the skin soggy. We do, however, suggest tenting steaks, beef roasts, and pork roasts, so long as they don’t have a glaze. These meats are often cooked to lower temperatures, so the foil plays a bigger role in keeping the temperature of the meat from dropping. In our tests, the crusts on these meats did not soften significantly when tented. When the meats were glazed, however, the foil often hit and damaged the glaze, and the trapped steam compromised the glazy texture.
Unless a recipe calls for something more specific, we found that tenting works best when the foil is loosely placed on top of the meat in an upside-down V. Don’t crimp the edges of the foil around the meat or the plate that the meat is resting on, because air needs to be able to circulate under the foil.

Should I take the rubber bands off a lobster’s claws before I boil it?

Don’t risk your fingers.
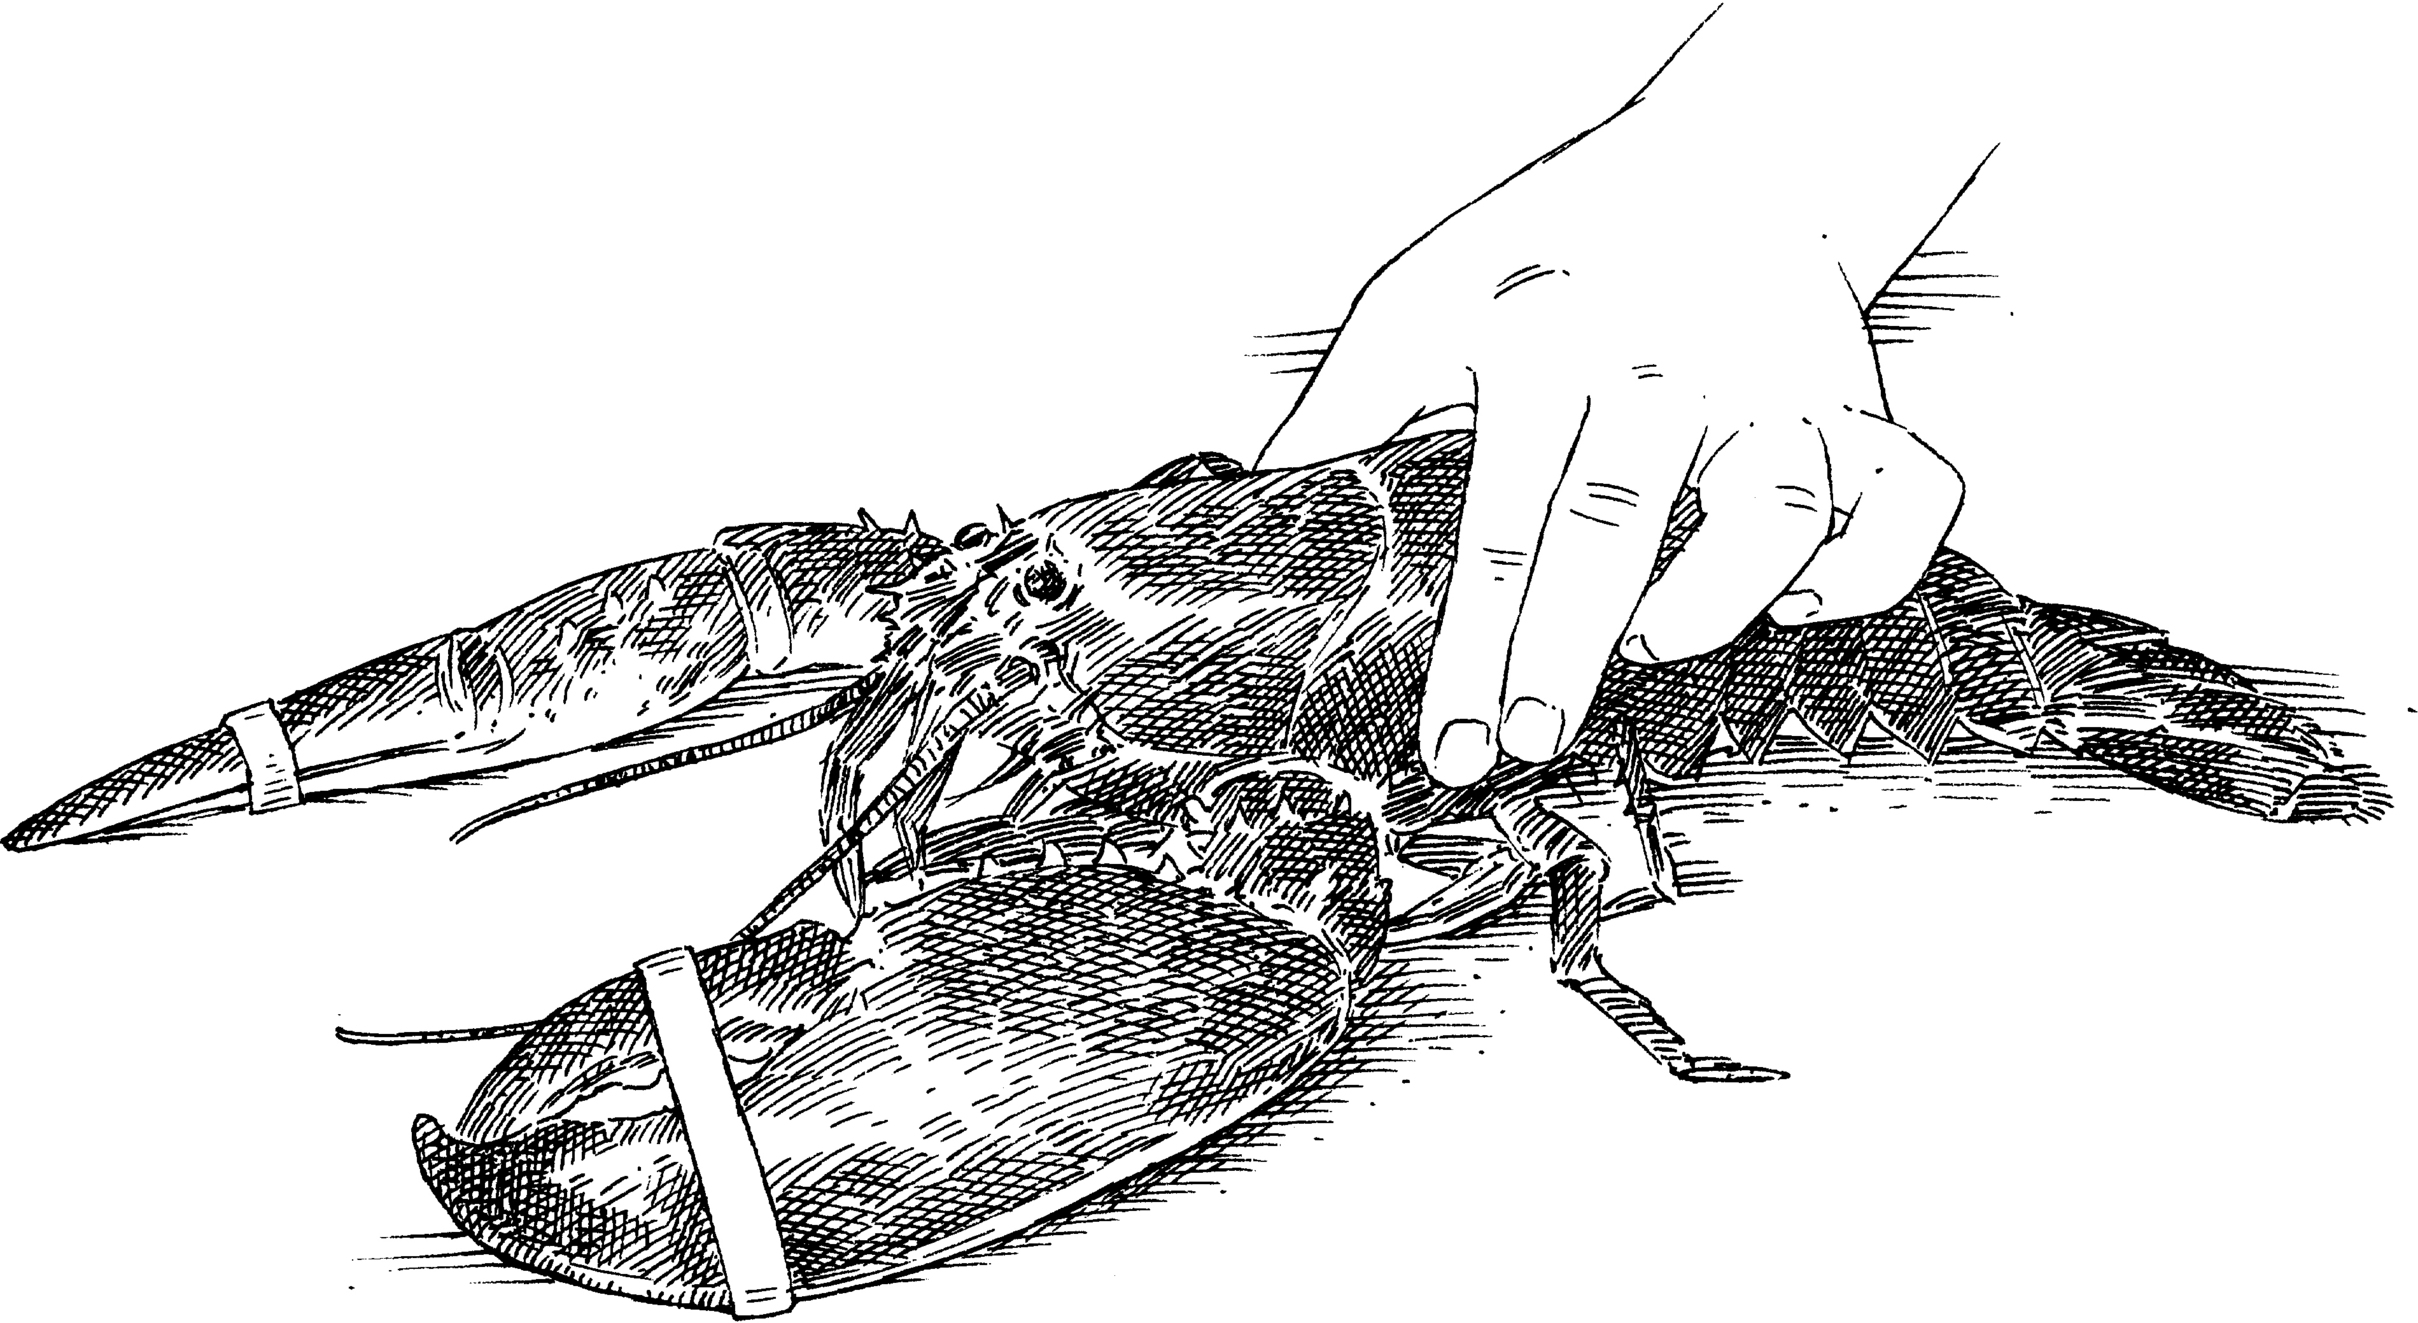
For safety reasons, we’ve always left the rubber bands on lobster claws when adding lobsters to a pot of boiling water. But after a test kitchen photo of rubber-banded lobsters going into a pot appeared on our website, we received a number of emails and letters from readers stating that the rubber bands would affect the flavor of the cooked lobster. To find out if this is true, we decided to run a test.
We cooked lobsters with and without rubber bands in separate pots of boiling water and then tasted both the lobster meat and the cooking water. While a few tasters claimed they noticed a subtle difference in the cooking water taken from the pot in which we cooked the banded lobsters, no one could detect any flavor differences between the lobster meat samples. Our takeaway? We’ll keep our fingers safe and continue to leave the rubber bands in place until after the lobsters are cooked.
Is there a way to use one measuring cup for all different types of ingredients? Do I really need liquid cups and dry cups?

Using the same measuring cup for all kinds of ingredients is a recipe for disaster.
To prove how important it is to use the right measuring tools for a particular ingredient, we asked 18 people, both cooks and non-cooks, to measure 1 cup of all-purpose flour in both dry and liquid measuring cups. We then weighed the flour to assess accuracy (a properly measured cup of all-purpose flour weighs 5 ounces). With the dry measuring cup, the measurements were off by as much as 13 percent. This variance can be attributed to how each person dipped the cup into the flour; a more forceful dip packs more flour into the same volume. Measuring flour in a liquid measuring cup, where it’s impossible to level off any excess, drove that variance all the way up to 26 percent.
The same people then measured 1 cup of water (which should weigh 8.345 ounces) in both dry and liquid measuring cups. The dry cup varied by 23 percent, while the liquid cup varied by only 10 percent. There was a greater variance when measuring water in a dry cup because it was so easy to overfill, as the surface tension of water allows it to sit slightly higher in this type of vessel.
When measuring a dry ingredient, it is best to scoop it up with a dry measuring cup and then sweep off the excess with a flat utensil, a method we call “dip and sweep.” To fill a liquid measuring cup, we recommend placing it on the counter, bending down so that the cup’s markings are at eye level, and then pouring in the liquid until the meniscus (the bottom of the concave curve of liquid) reaches the desired marking. And whenever you want to be closer to 100 percent accurate, use a scale.
How should I measure sticky ingredients that aren’t quite wet but definitely aren’t dry?

If you don’t have a special measuring cup for ingredients that fall between wet and dry, your best bet is to use a dry measuring cup.
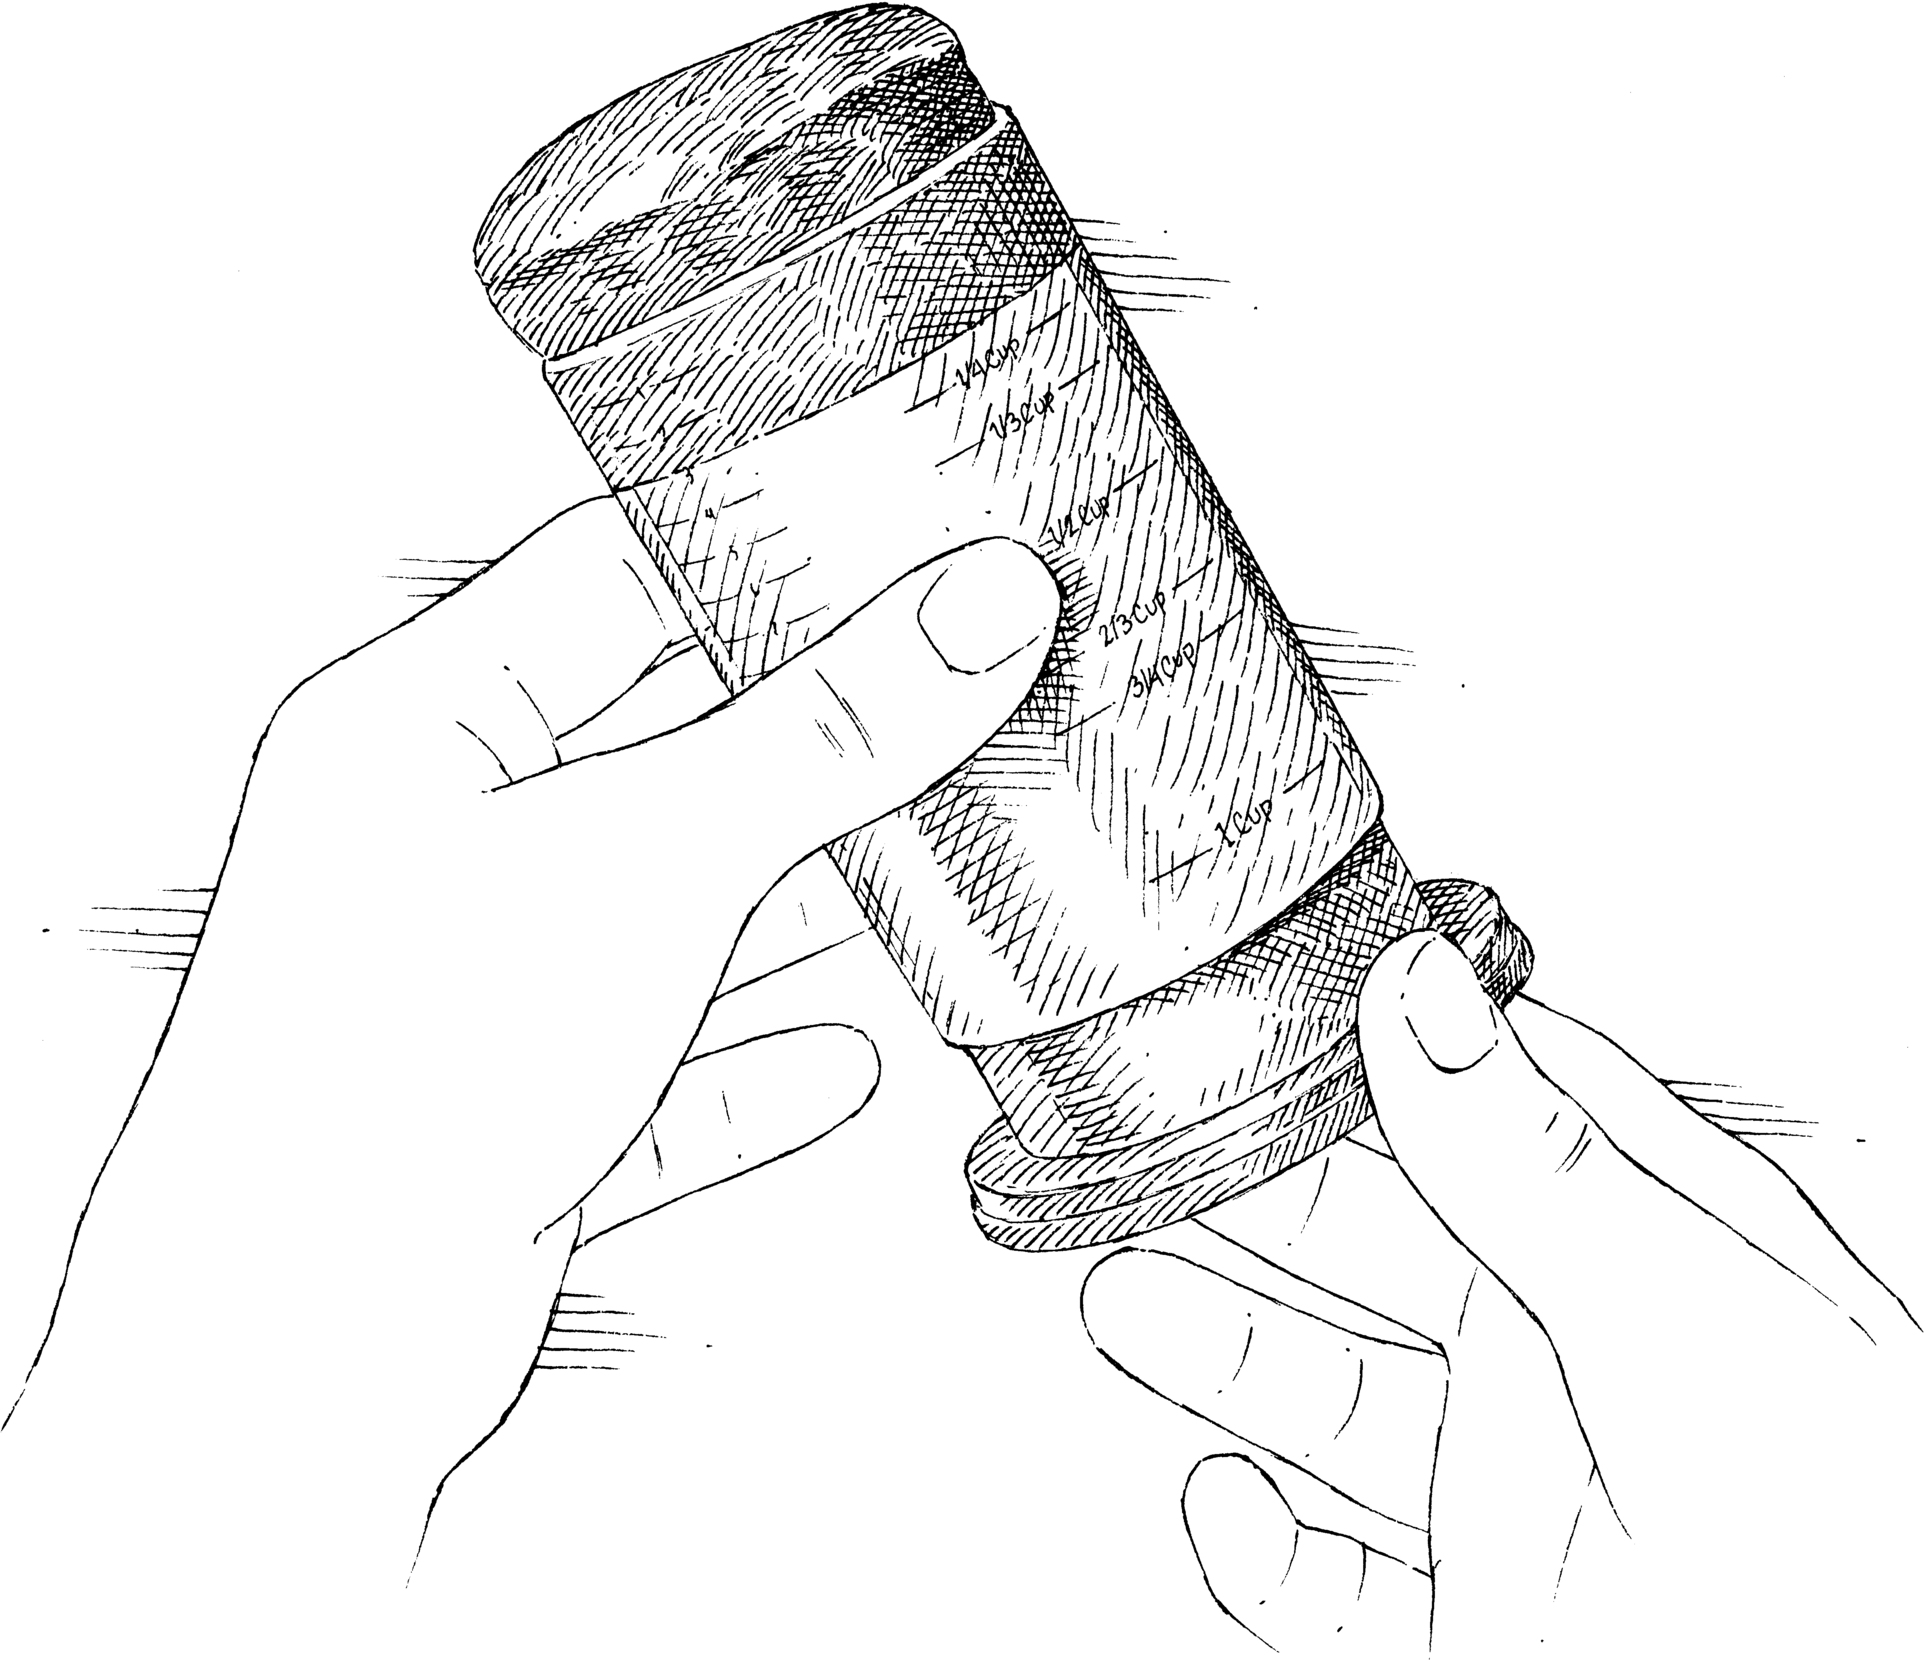
Measuring semisoft “in-between” ingredients such as honey, peanut butter, mayonnaise, and ketchup can be a challenge: Do you use a dry measuring cup? A liquid measure? And how do you get every last bit out of the cup? In the test kitchen, we use an adjustable measuring cup because it provides us with the most accurate and consistent results. Our favorite features a plastic barrel with clear measurement markings and an easy-to-use plunger insert.
The next-best option is to use a dry measuring cup. If the item you’re measuring is thick, you can slide the back of a butter knife across the top of the cup to get a more accurate measurement. We recommend spraying the measuring cup lightly with vegetable oil spray before filling it. When emptied, the ingredient should slide right out of the cup, but make sure you also carefully scrape out the cup. Leaving traces of sticky ingredients behind in the cup can negatively affect a recipe. All that being said, if a weight is listed in the ingredient list and you have a scale, rely on that for the most accurate measurement.
How do I measure “packed brown sugar”? What exactly does that mean?

When we say “packed brown sugar,” we really do mean packed.
When a recipe calls for “packed brown sugar,” that means firmly packed. Packing is necessary because the moist brown sugar naturally clumps together. But as we learned after asking five test kitchen staffers to pack brown sugar into a 1-cup dry measure, “firmly packed” can mean different things to different people. The five packed cups of brown sugar ranged in weight from 6¾ ounces to 8 ounces, although on average they weighed 7 ounces, the same as 1 cup of granulated sugar.
For those readers who do not own a kitchen scale, we thought it would be helpful to describe the act of packing brown sugar: Fill the cup with sugar until mounded and then use your fingers, a spoon, the back of another measuring cup, or the flat part of an icing spatula to compress the sugar until no air pockets remain and the sugar can be compressed no more (but be reasonable—don’t strain a muscle). If the cup isn’t completely filled, add more sugar and compress again; if it is then mounded, scrape off the excess so that the sugar is level with the sides of the cup.
What’s the best way to measure grated cheese? Should I be packing it into the measuring cup or not?

Be gentle when measuring fluffy ingredients like grated cheese.
Whether it’s shredded mozzarella or finely grated Parmesan, you want a measure of cheese that’s more fluffy than not. Simply grate the cheese over a piece of waxed paper and then pile it into the cup, tamping down on the cheese very gently to make sure there are no air pockets that will give you a false reading. Packing the cheese—as you would brown sugar—would undo all the work of grating it.
What’s the best way to measure lettuce?

Be gentle with the greens and keep in mind that different types might need slightly different treatments.
We always give both an ounce measure and a cup measure for greens. But when we tried to convert our usual formula of 2 ounces (or 2 cups) of lightly packed greens per serving to arugula, we ended up with more greens than we could eat. That’s because our calculation was based on head lettuce, which is heavier than arugula. For lighter greens such as baby spinach, mesclun, and arugula, less is more: One ounce of lightly packed baby greens yields roughly 1½ cups, just enough for one serving.
But what exactly does “lightly” packed mean? The reason we don’t just call for a more accurate measure of “tightly” packed greens pressed firmly into the cup is that this method would bruise delicate leafy greens. To lightly pack greens, simply drop them by the handful into a measuring cup and then gently pat down, using your fingertips rather than the palm of your hand. This method also applies to fresh herbs.
Does it matter whether I drink beer from the bottle or from a glass?

If you care what your beer tastes like, always go for the glass.
We sampled three styles of beer—lager, IPA, and stout—straight from the bottle and in a glass and evaluated the differences, if any, in bitterness, maltiness, and aroma. We expected that a glass might make a difference for the aromatic, hoppy IPA, but we were surprised that tasters noticed that all three beers were more aromatic when sipped from a glass, even the lager. In addition, the IPA was perceived as less bitter and more balanced when sipped from a glass, while the stout tasted fuller and maltier. Why? The glass allows more of a beer’s aromas to be directed to your nose than does the narrow opening of a bottle. Our recommendation: No matter the beer, using a glass will improve the drinking experience.
My cast-iron skillet is my favorite tool for cooking fish, but the fish leaves a smelly mess behind. How can I totally clean and deodorize the skillet without damaging the pan’s seasoning?

There’s a simple way to remove all traces of fish from your cast-iron skillet: Just use your oven.
A cast-iron skillet is a great tool for searing salmon and tuna, but you can end up with a lingering fishy taste and odor that make it unpleasant to cook other ingredients in the same pan. After frying up more than 3 pounds of salmon and trying several ways to eliminate the smelly evidence—using kosher salt, baking soda, lemon juice, and various combinations thereof—we were stumped.
Scrubbing with baking soda and rubbing with lemon juice and kosher salt helped diminish the smell, but not enough to keep an egg subsequently fried in the pan from smelling like fish oil. Dish soap helped, but since some cooks don’t like to use soap in cast-iron pans since they’re afraid it will strip the valuable seasoning, we wanted to find an alternative. (For the record, a well-seasoned pan shouldn’t be damaged by a small amount of dish soap as long as you rinse and dry it well afterward—see here.)
One last thought we had was to heat the pan up again. The two sources of fishy funk are compounds called trialkyamines, which evaporate at around 200 to 250 degrees, and oxidized fatty acids, which vaporize at temperatures above 350 degrees. We heated the empty pans over a medium flame on the stovetop for 15 minutes and in a 400-degree oven for 10 minutes. Sure enough, both methods worked equally well at eliminating odors. We particularly liked the oven method: It’s fast and doesn’t stink up the kitchen.
How can I clean off really baked-on, built-up messes in my pans without damaging the pans themselves?

Sometimes there’s nothing like soap and water for cleaning a really dirty pan.

In the test kitchen, our stainless pots and pans get a daily workout in many high-heat applications. Over time, a layer of baked-on oil and grease often develops that is difficult to remove without the aid of harsh, toxic cleansers. This scorched residue is the result of heating oil or other fats to high temperatures. When oil or other fats are heated to or above their smoke point, their triglycerides break down into free fatty acids, which then polymerize to a resin that is insoluble in water.
Is there a way to remove this residue without resorting to caustic chemical cleansers? To find out, we let four seriously damaged pans sit overnight with the following treatments: one coated with a thick paste of baking soda and water, one filled with straight vinegar, one soaked in a 20 percent vinegar solution, and one soaked in hot, soapy water. (Baking soda, vinegar, and soap all contain compounds that help dissolve fatty-acid resins and help them release from metal.) None of these treatments was 100 percent effective; we still needed scouring powder and a metal scrubbing pad to remove the most tenaciously burnt-on bits of oil. But somewhat surprisingly, the hot, soapy water was the best treatment of the bunch, loosening the residue enough so that it required the least amount of elbow grease and a minimum of scratching of the pan’s finish to fully release.
There are stains on the inside of my enameled pans that I just can’t get rid of—do you know any tricks?

No matter how dirty they are, you can still get your enameled pans looking as good as new.
We are very fond (culinary pun intended) of Le Creuset enameled cast-iron Dutch ovens; the 12 or so we have in the test kitchen get a lot of use. The downside to these workhorses is that their light-colored enamel interiors become discolored and stained with use. While the staining doesn’t affect your ability to use the pot, it can be aesthetically undesirable.
We took a couple of stained pots from the kitchen and filled them with Le Creuset’s recommended stain-removal solution of 1 teaspoon of bleach per 1 pint of water. The pots were slightly improved but still far from their original hue. We then tried a much stronger solution (which was OK’d by the manufacturer) of 1 part bleach to 3 parts water. After standing overnight, a lightly stained pot was just as good as new, but a heavily stained one required an additional night of soaking before it, too, was looking natty.
What’s the best way to keep my butcher-block countertop clean?

Your butcher-block counter needs to be treated differently from the other work surfaces in your kitchen.
Butcher-block tables, which function not only as a work space but as a cutting surface, must be cared for and treated in a manner similar to cutting boards. To reduce the growth of bacteria on your butcher block, be sure to scrub it with hot, soapy water after each use. The U.S. Department of Agriculture also recommends the periodic application of a solution of 1 teaspoon of bleach per quart of water to sanitize the surface, which should then be rinsed off with cold water.
To maintain the appearance of the wood surface, some manufacturers suggest applying a food-safe oil every few weeks using a clean cloth. The oil soaks into the fibers of the wood, acting as a barrier to excess moisture. The experts we consulted recommend using mineral oil (make sure the container is labeled “food-grade”) rather than more volatile oils like vegetable oil and olive oil, which can turn rancid over time. For day-to-day use, we suggest reserving your butcher block for applications that don’t involve fish, meat, or poultry. Instead, use a separate cutting board for these tasks, which will make cleaning much easier while reducing the risk of cross-contamination.
How should I wash my blender jar?

To extend the life of your blender, we recommend hand-washing whenever possible.
Even blenders that are deemed dishwasher-safe may not be immune to shrinking or warping after enough trips through the dishwasher; especially vulnerable are the rubber gaskets, which when damaged can cause leaking.
To make hand-washing easier, particularly when cleaning sticky or pasty ingredients such as peanut butter and hummus, we recommend an initial 20-second whir with hot tap water (enough to fill the bottom third of the jar) and a drop or two of dish soap to loosen any material trapped underneath the blades, and then repeating once or twice with hot water only. To finish the job, unscrew the bottom of the jar and hand-wash each piece using a soapy sponge. For one-piece jar models, use a long, plastic-handled wand-style sponge to reach food stuck on the bottom or sides.
What’s the best way to avoid getting beet stains on my cutting board?

We have a simple trick: Use vegetable oil spray.
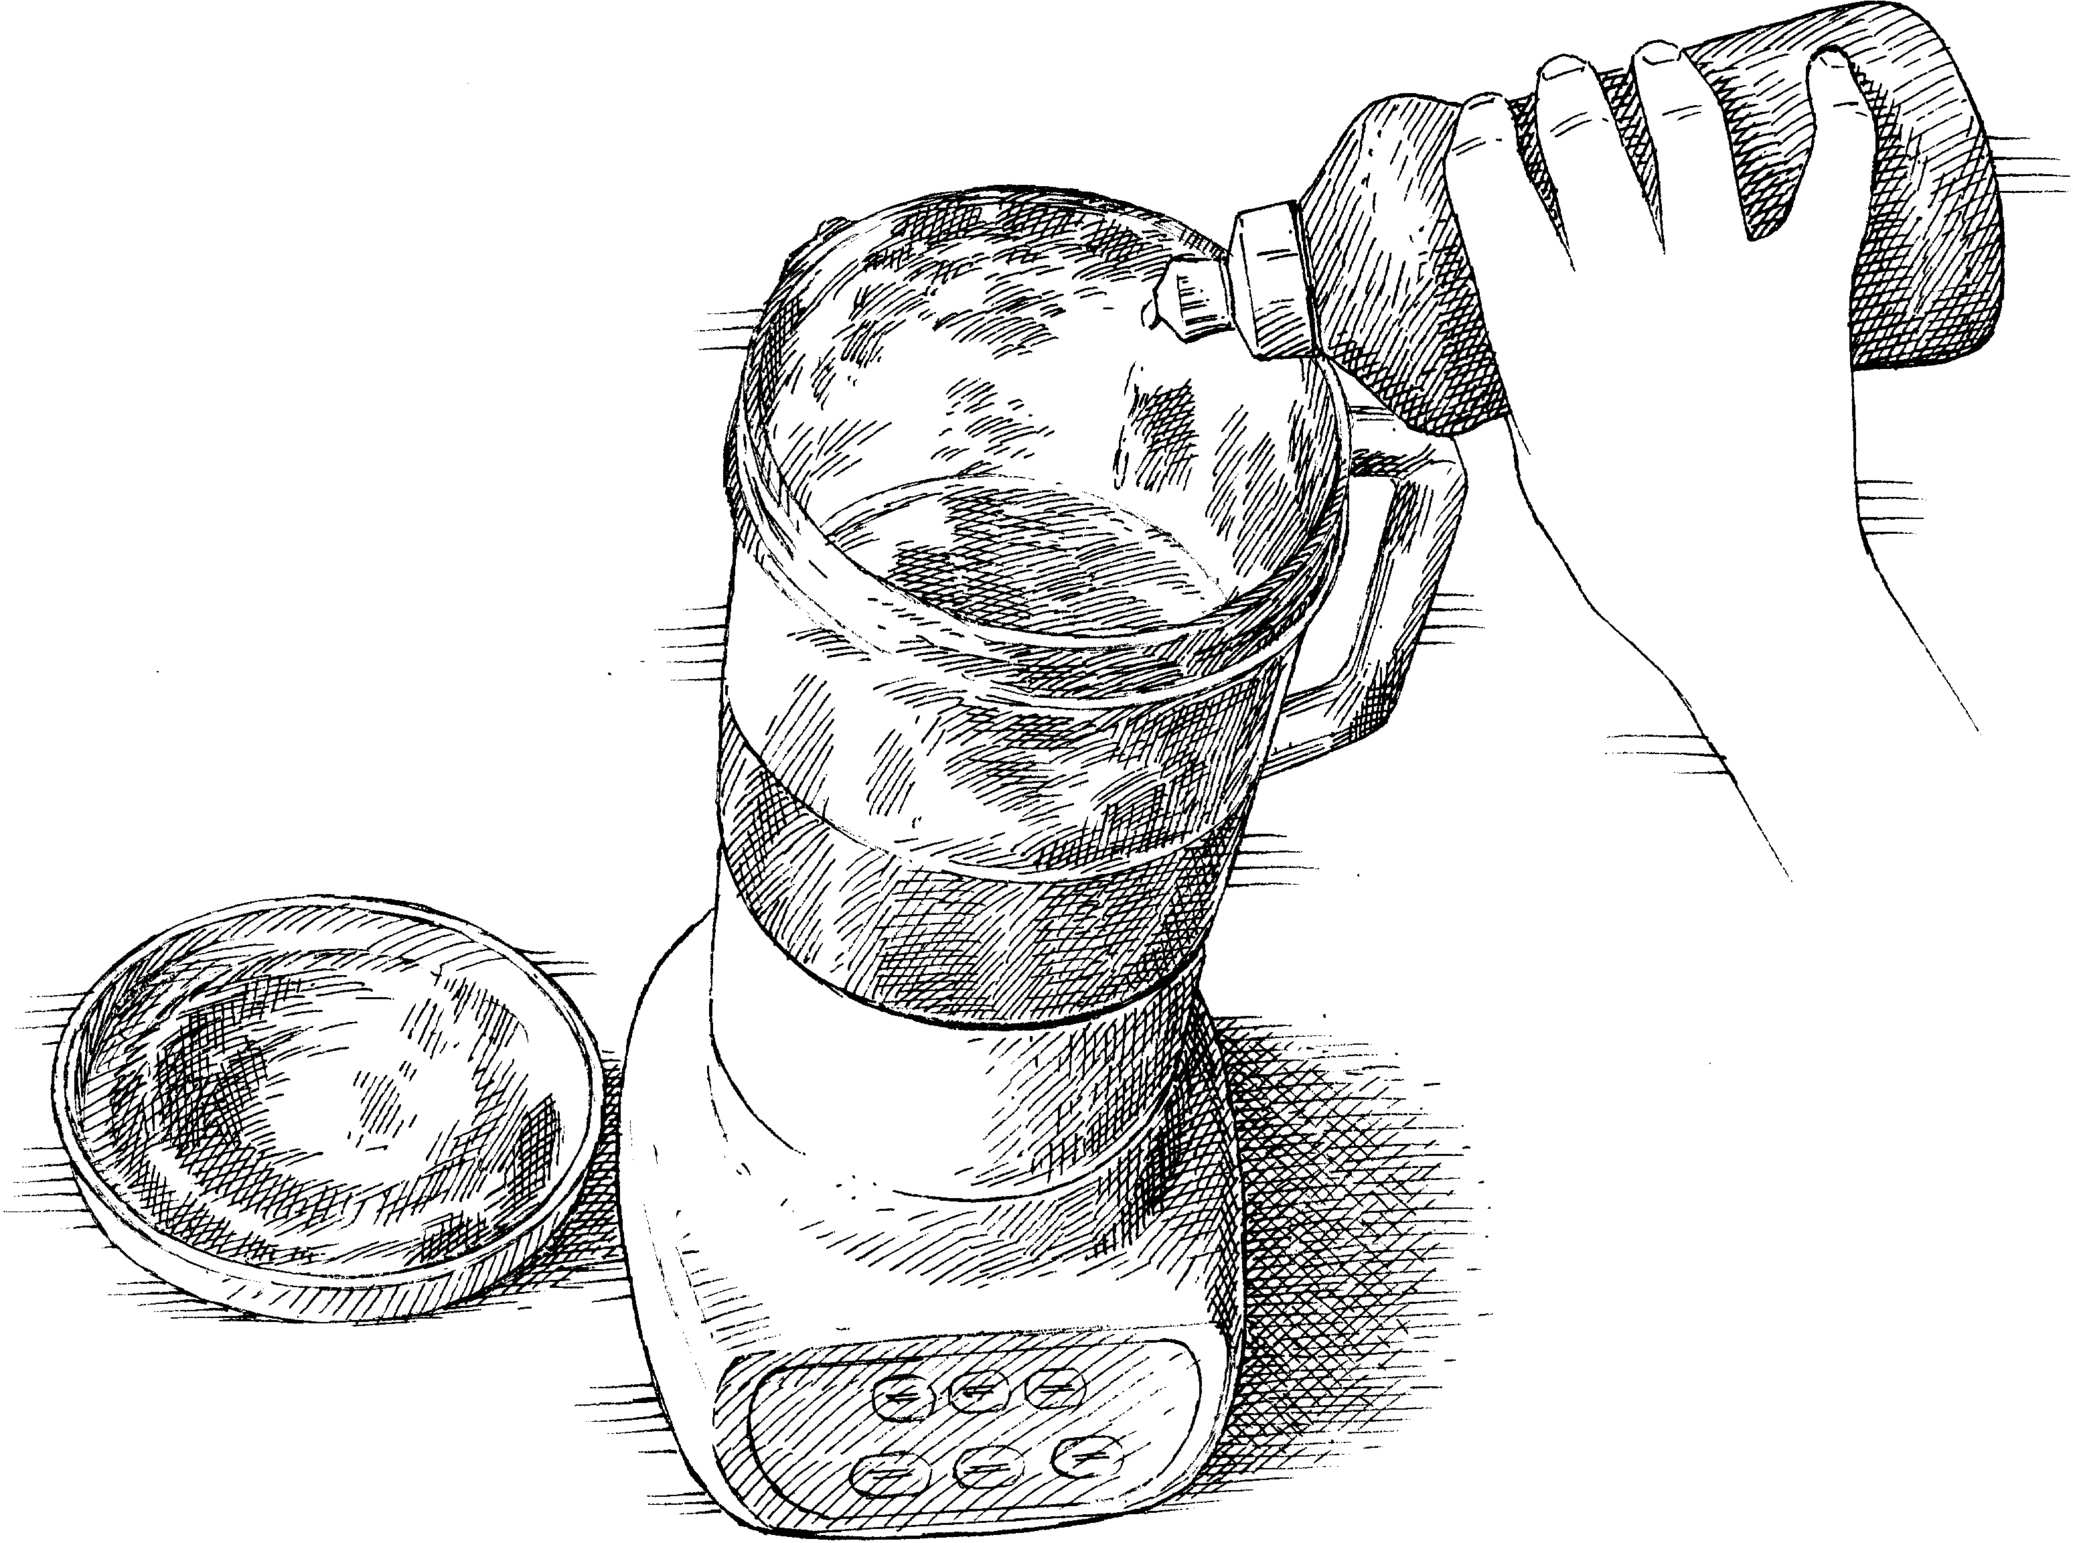
Prepping beets usually leaves your cutting board with dark stains that discolor other foods you put on it. If you need to keep using a beet-stained board for the rest of a recipe, try this trick: Give its surface a light coat of nonstick cooking spray before chopping the beets. This thin coating adds no discernible slickness under your knife and allows you to quickly wipe the board clean with a paper towel before moving on to your next task.
What’s the best way to clean stained silicone spatulas?

You can spruce up stained silicone with a little chemical intervention.
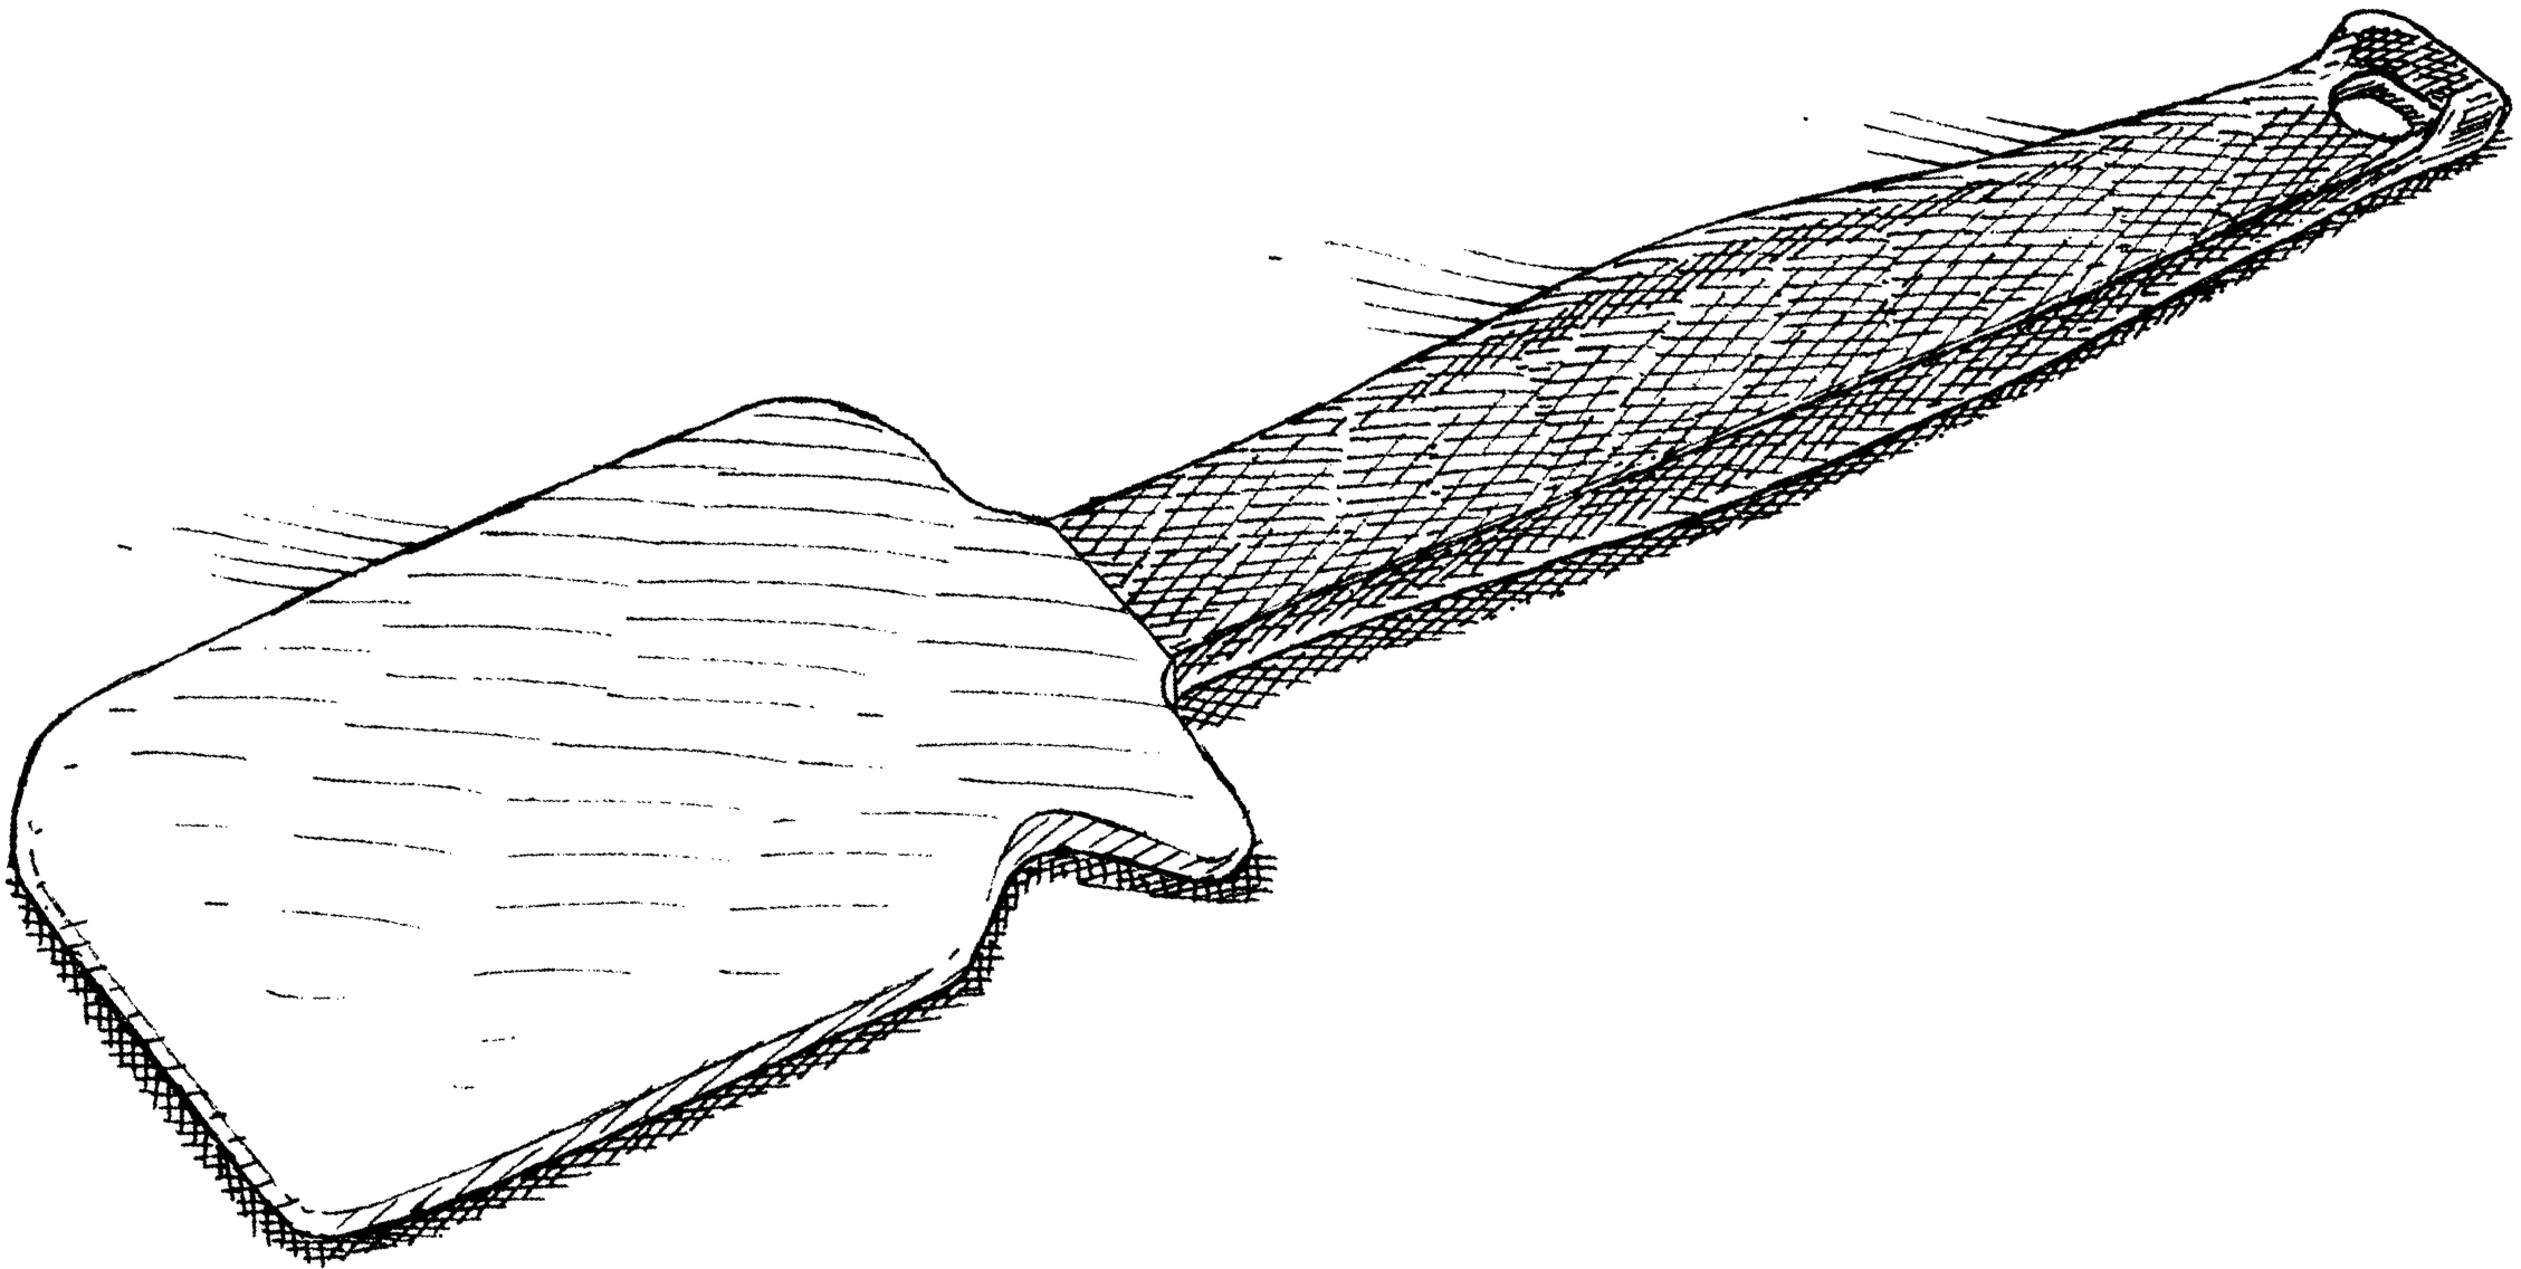
After staining one set of white silicone spatulas bright yellow with a turmeric-and-water paste and another set red with tomato sauce, we soaked each one in potential stain fighters: white vinegar, a slurry of dish soap and baking soda, 3 percent hydrogen peroxide, a bleach solution (made by diluting 2½ tablespoons of bleach in 2 cups of water), and a control mixture of soapy water. After 24 hours of soaking, only the spatulas soaked in hydrogen peroxide or the bleach solution were back to their original white.
It turns out that while soap can help break up and wash away oil, to remove intensely colored stains, the compounds that provide the color need to be broken down into colorless molecules. Hydrogen peroxide and bleach are both oxidants, a type of compound that excels at this task. Just remember to wash your stain-free spatulas in warm soapy water before use.
Is there a way to fully clean a wooden spoon? Mine always seem to hold on to odors and flavors.

Baking soda is the key to keeping your wooden utensils odor-free.
We love wooden spoons, but because of their tendency to retain odors and transfer flavors, a hint of yesterday’s French onion soup can end up in today’s cake batter. Since it isn’t advisable to put wooden utensils in the dishwasher, what’s the best way to remove odors?
To find out, we stood six brand-new wooden spoons in a container of freshly chopped raw onions for 30 minutes, rinsed them with water, then cleaned them with the following substances: dish soap and water, vinegar and water, bleach and water, a lemon dipped in salt, a tablespoon of baking soda mixed with a teaspoon of water, and more plain water as a control.
The only spoon that our panel of sniffers deemed odor-free was the one scrubbed with baking soda. Here’s why: Odors left behind in the porous surface of a wooden spoon are often caused by weak organic acids. Baking soda neutralizes such acids, eliminating their odor. Furthermore, since baking soda is water soluble, it is drawn into the wood along with the moisture in the paste, thus working its magic as far as the water is able to penetrate.
Is there a way to really deep-clean a wooden salad bowl?

The answer is sandpaper.
Years of exposure to oily salad dressings can leave wooden salad bowls with a gummy, rancid residue that all the soap and hot water in the world can’t wash off. To find a better solution, we hunted around in our cupboards for the most gunked-up wooden bowl we could find and subjected it to several treatments—rubbing it with baking soda, scrubbing it with lemon juice and salt, and wiping it down with alcohol—but the sticky buildup wouldn’t budge.
In the end, we decided to get tough and found that the best way to restore our bowl to good-as-new condition was to completely remove the accumulated layers of oil with sandpaper and start fresh. Using medium-grit sandpaper (80 to 120 grit), gently rub the bowl’s surface until it turns matte and pale; thoroughly wash and dry the bowl; and give it a new coat of food-grade mineral oil (don’t use vegetable oil or olive oil, which quickly turn rancid and sticky). With a paper towel, liberally apply the oil to all surfaces of the bowl, let it soak in for 15 minutes, and then wipe it with a fresh paper towel. Reapply oil whenever the bowl becomes dry or dull.
It’s fine to use mild dish soap and warm water to clean well-seasoned wooden bowls; doing this will help maintain the seasoning and prevent oil buildup. Dry the bowl thoroughly after cleaning and never put it in the dishwasher or let it soak in water; otherwise, it can warp and crack.
I’ve heard that sponges are breeding grounds for bacteria, but I have no idea how to clean something that’s always cleaning other things—can you help?

Your sponge is one of the dirtiest things in your kitchen, but you can fix that with simple boiling water.
Whenever possible, use a paper towel or a clean dishcloth instead of a sponge to wipe up. If you do use a sponge, disinfect it. We tried microwaving, freezing, bleaching, and boiling sponges that had seen a hard month of use in the test kitchen, as well as running them through the dishwasher and simply washing them in soap and water. Lab results showed that microwaving and boiling were most effective, but since sponges can burn in a high-powered microwave, we recommend boiling them for 3 minutes.
Is there any way to quickly cool a whole pot of soup so I can package it up and put it in the fridge faster?

We like a quick ice bath to help speed up the cooling process.
Putting hot food directly into the fridge after cooking isn’t a good idea—it can give off enough heat to raise the temperature in your refrigerator, potentially making it hospitable to the spread of bacteria. The U.S. Food and Drug Administration (USDA) recommends cooling foods to 70 degrees within the first 2 hours after cooking, and to 40 degrees within another 4 hours. We usually cool food on the counter for about an hour and then put it in the fridge. If you’re in a rush to cool off a sauce, soup, or stew so that you can put it in the fridge for storage, the best thing to do is get it out of the pot that it was cooked in and into a wide, shallow receptacle, such as a baking dish or large bowl. This increases the surface area, thereby speeding cooling.
If you care to further fast-forward cooling, fill a large cooler or the sink with cold water and ice packs. Place the saucepan or stockpot in the cooler or sink and stir the contents occasionally to speed the chilling process. Refill the cooler or sink with cold water if necessary. Once cooled, the food can be transferred to a storage container and put into the fridge.
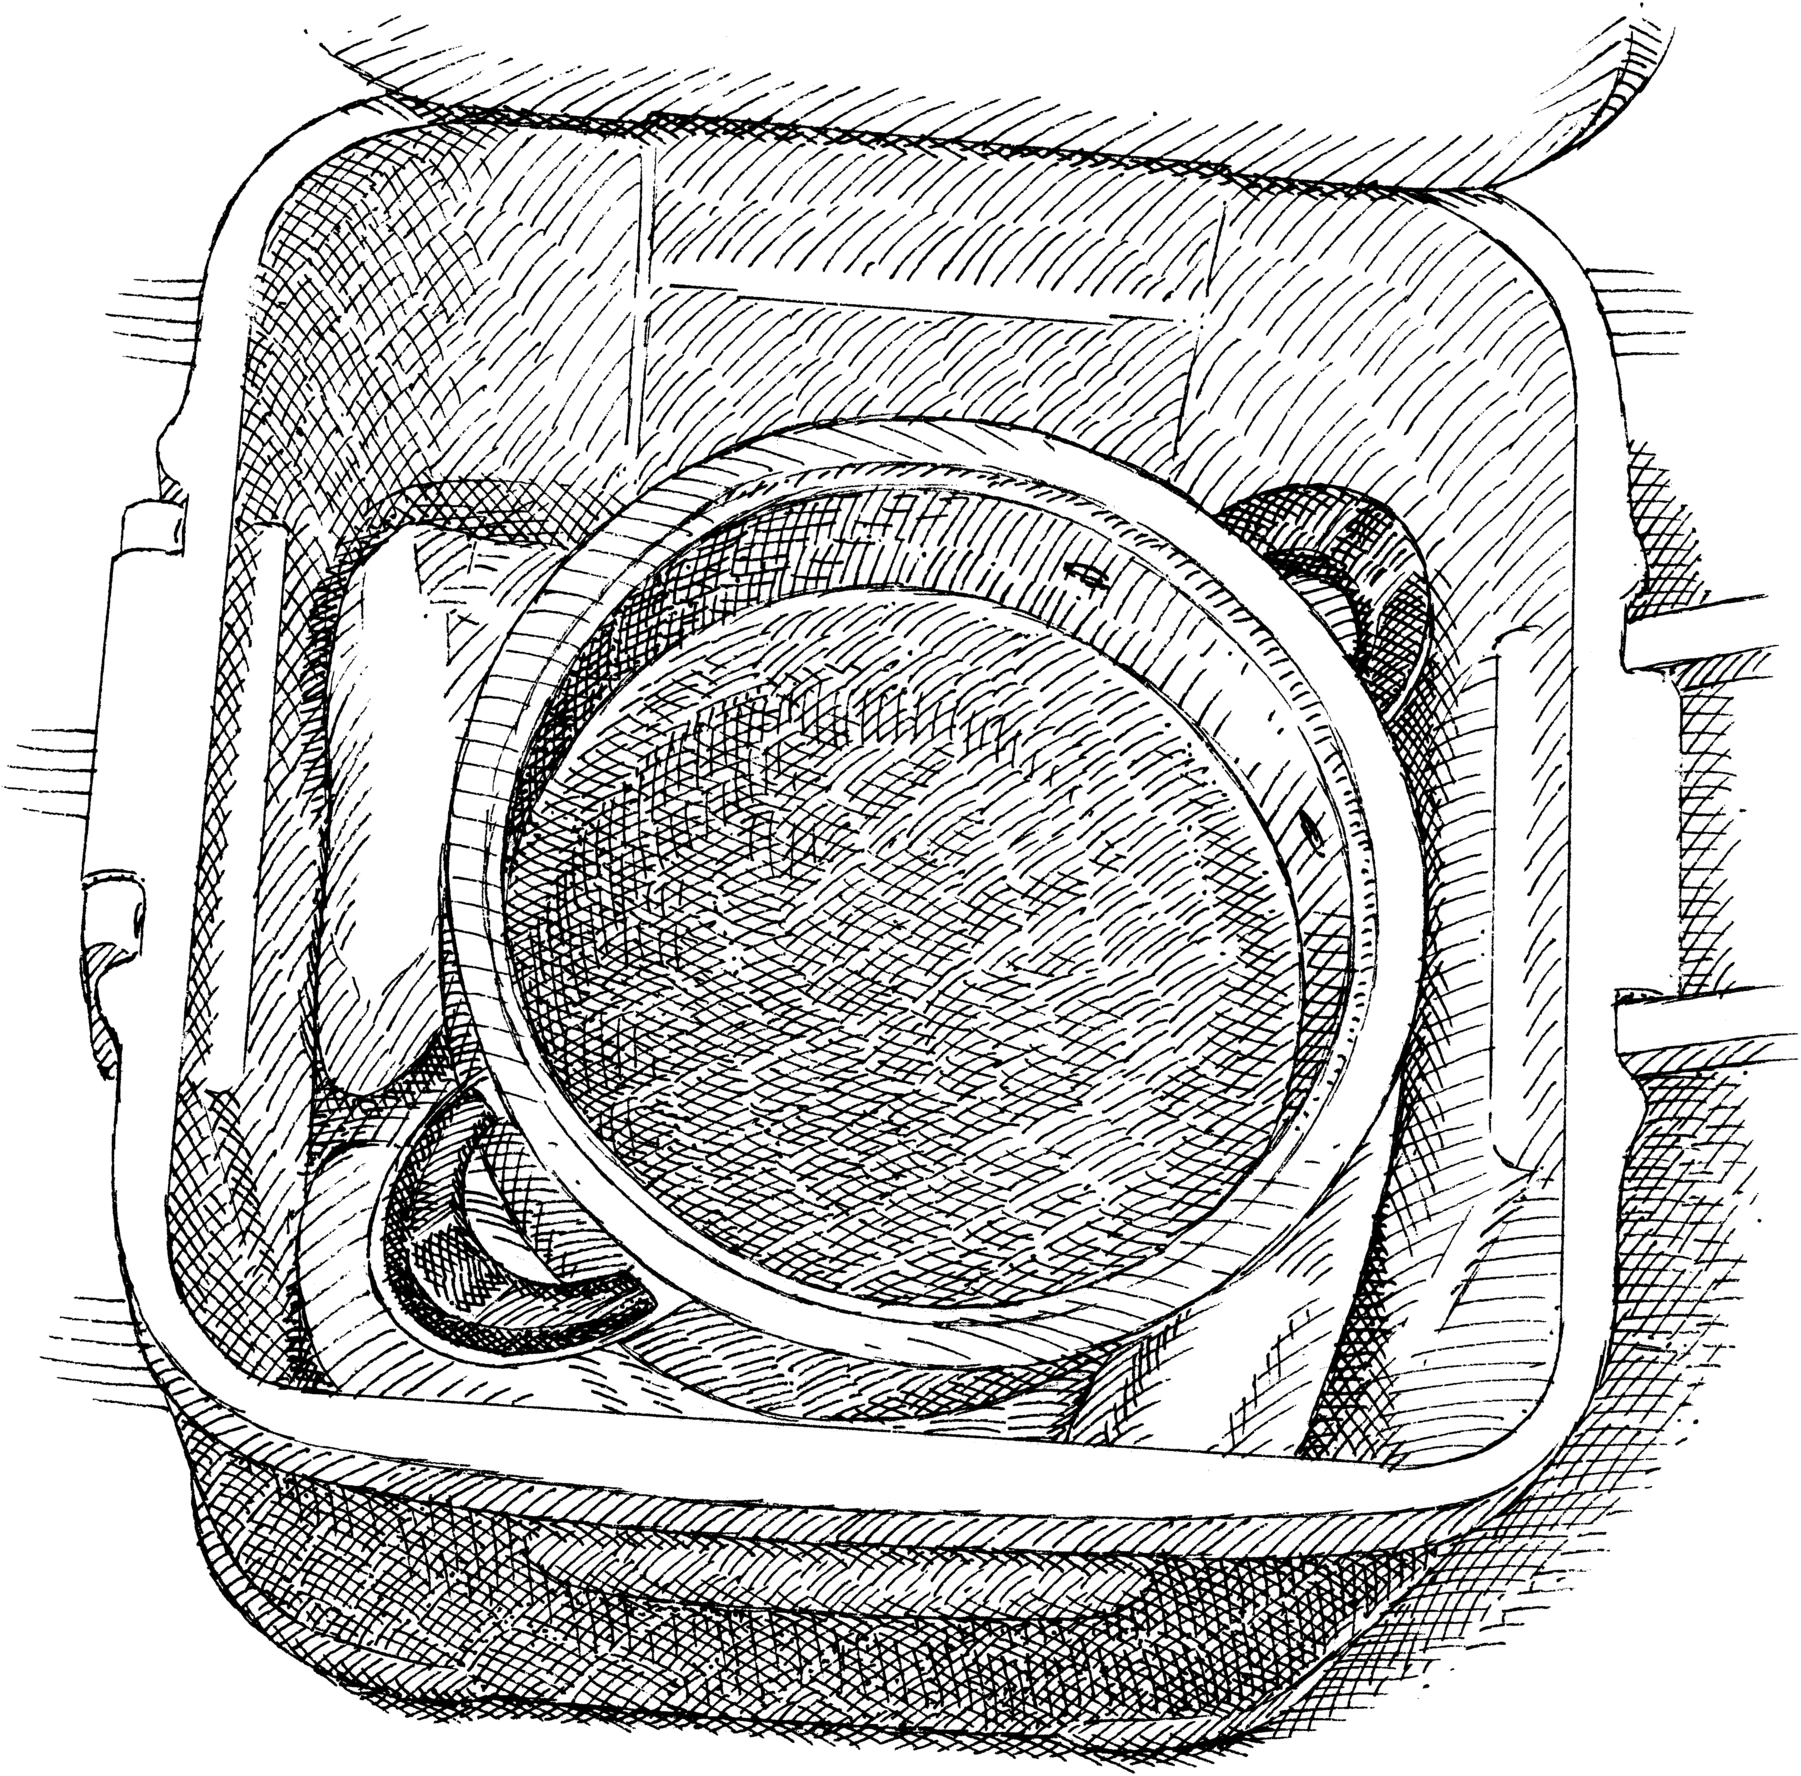
Sometimes I forget to take meat out of the freezer to defrost; is there a way to thaw it quickly without compromising quality or safety?

Small cuts can be quick-thawed using hot water, but with large cuts you might be out of luck.
To prevent the growth of harmful bacteria when thawing frozen meat, we use one of two methods: We defrost thicker (1 inch or greater) cuts in the refrigerator and place thinner cuts on a heavy cast-iron or steel pan at room temperature, where the metal’s rapid heat transfer safely thaws the meat in about an hour.
But an article by food scientist Harold McGee in the New York Times alerted us to an even faster way to thaw small cuts—a method that’s been studied by and won approval from the USDA: Soak cuts such as chops, steaks, cutlets, and fish fillets in hot water.
Following this approach, we sealed chicken breasts, steaks, and chops in zipper-lock bags and submerged the packages in very hot (140-degree) water. The chicken thawed in less than 8 minutes, and the other cuts in roughly 12 minutes—both fast enough that the rate of bacterial growth fell into the “safe” category, and the meat didn’t start to cook. The chicken breasts turned slightly opaque after thawing. Once cooked, however, the hot-thawed breasts and other cuts were indistinguishable from cold-thawed meat.
Large roasts or whole birds are not suitable for hot-water thawing because they would need to be in the bath so long that bacteria would proliferate.
What’s the correct way to measure the doneness of poultry? I’m never quite sure where to put the thermometer, so I just poke random parts of the bird until I get a reading of 160 degrees.

The short answer is “by sticking the thermometer in the thickest part of the chicken,” but there’s a little more to it than that.
The doneness of poultry is determined by taking its temperature in the thickest part of the breast and/or thigh. If you’re taking the temperature of the breast on a whole chicken, aim for the meat just above the bone by inserting the thermometer low into the thickness of the breast. Insert the thermometer horizontally from the top (neck) end down the length of the breast. Because the cavity slows the cooking, the coolest spot sits just above the bone. If you’re taking the temperature of a single breast (bone-in or boneless), aim for the dead center of the meat by inserting the thermometer at the midpoint of the thickness.
On a single thigh or leg quarter, the meat is relatively thin and of even thickness, which simplifies the task of taking the temperature. When the leg is part of a whole chicken, the best way to take the temperature of the thigh is to insert the probe down into the space between the tip of the breast and the thigh. Angle the probe outward ever so slightly so that it pierces the meat in the lower part of the thigh. To be certain that it isn’t inserted too far, push the probe until it pokes through the bottom side of the chicken, then slowly withdraw it, looking for the lowest registered temperature.
Even if you follow the above guidelines to the letter, the process of testing for doneness remains by and large one of trial and error. Make sure you poke the bird a couple of times to find the lowest temperature.
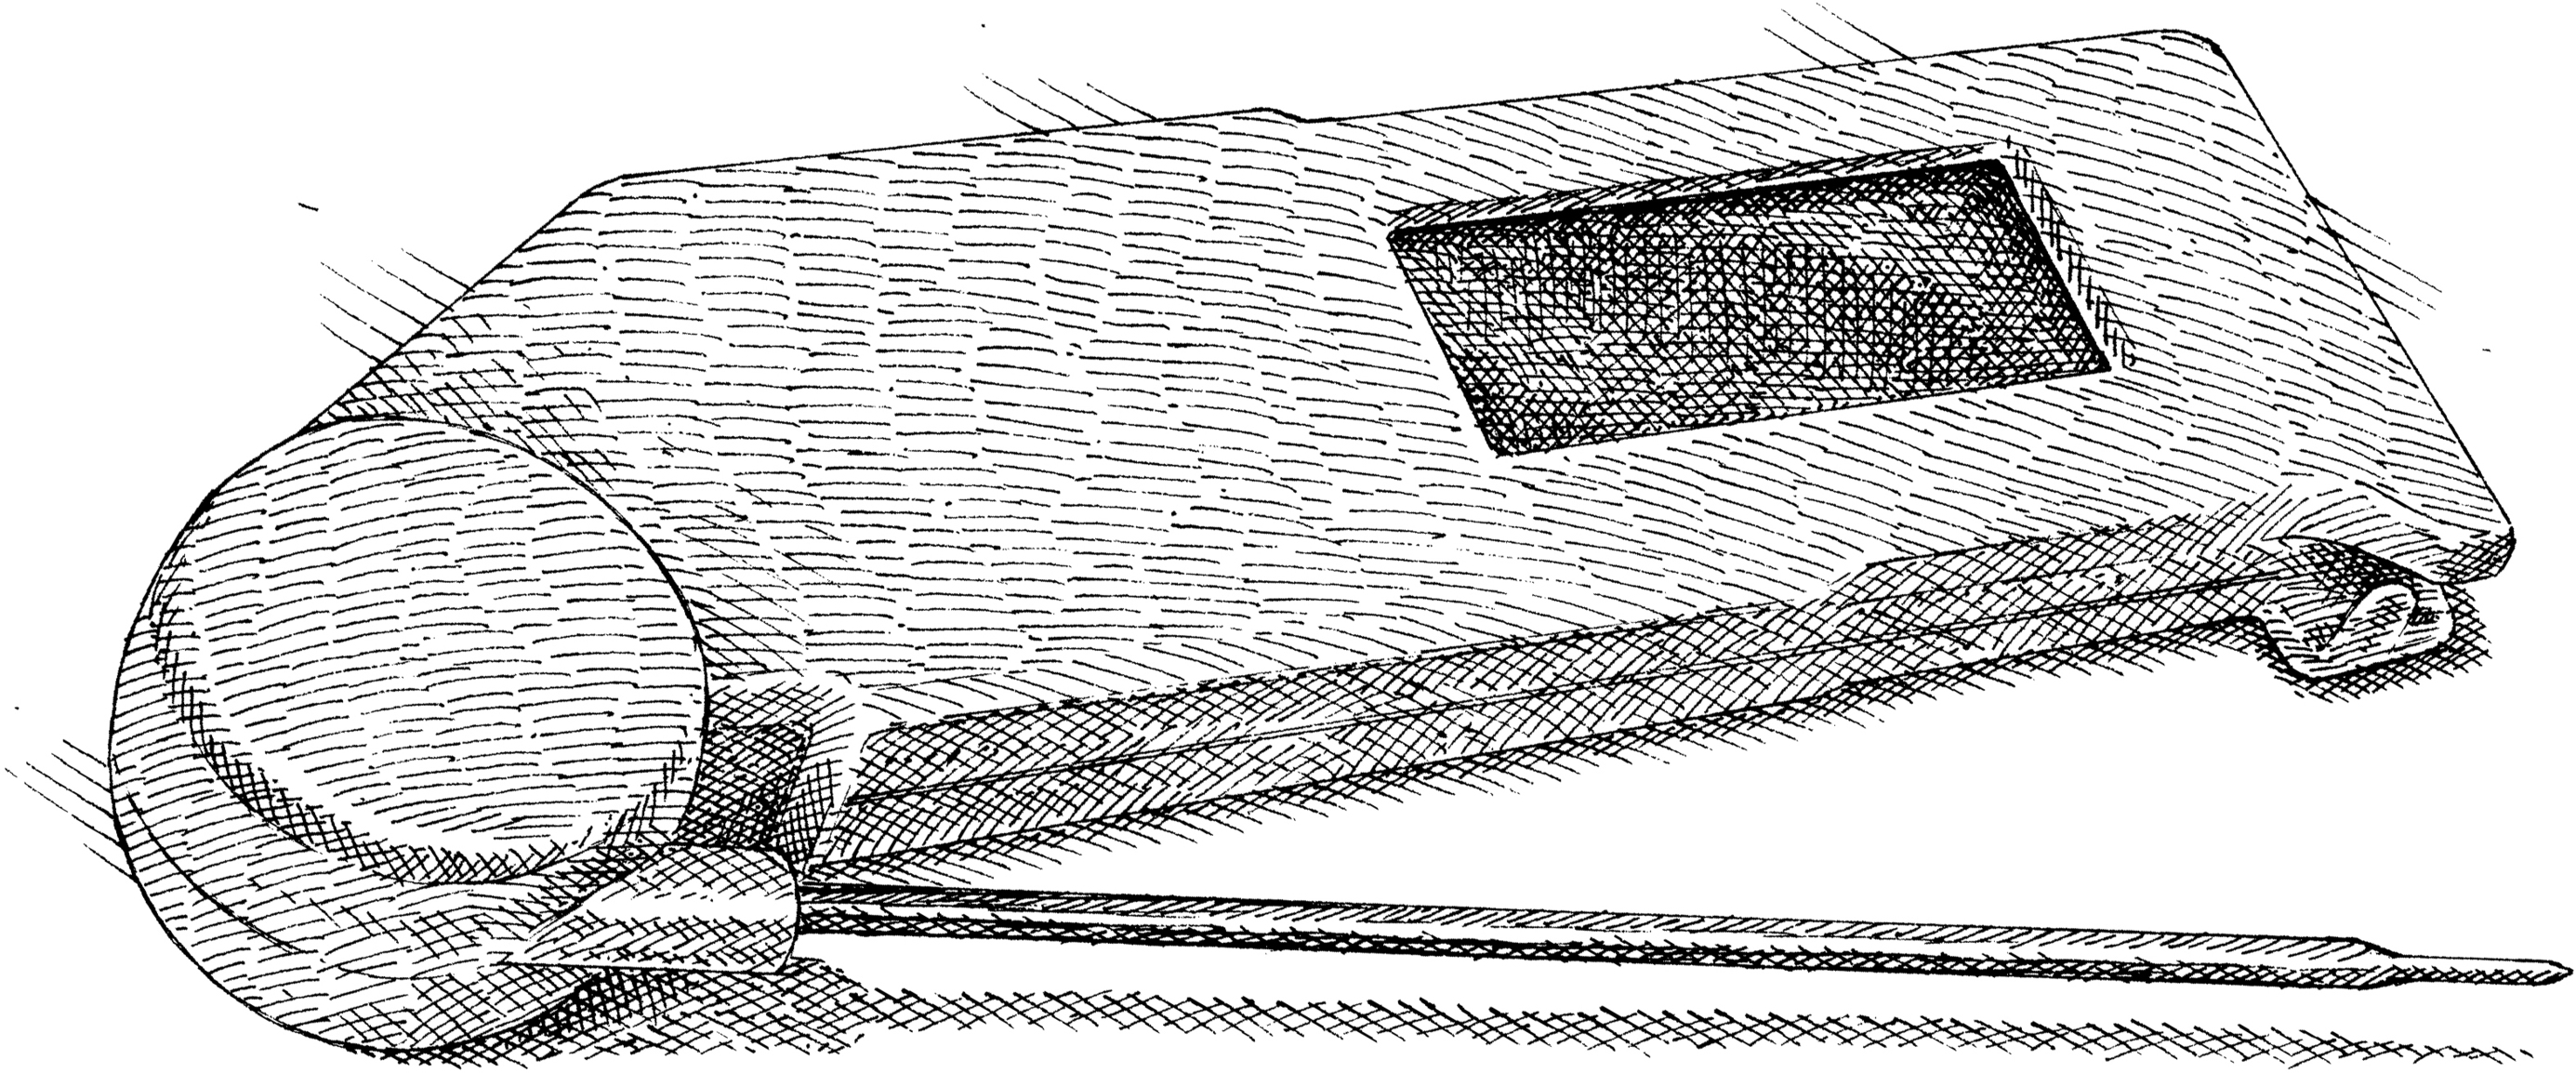
Is it possible to bring home leftover French fries from a restaurant and reheat them successfully?

Reheating restaurant French fries in a preheated, lightly oiled skillet yields the crispest results.
Common wisdom says that French fries must be eaten right away; old, cold fries are fit only for the trash bin. But is this really true? We hoped not. We brought in French fries from a few local restaurants, let them cool, and tried several methods of reviving them with a goal of crisp, hot fries that, if they didn’t taste exactly the same as those straight out of the fry basket, came close.
Microwaving them, unsurprisingly, resulted in soggy fries. And even at a variety of temperatures, the oven left fries dry, leathery, and decidedly uncrisp. We turned our attention to the stovetop. We tried heating the cold fries through in a dry skillet, in ½ inch of oil, and in a lightly oiled skillet. In a side-by-side tasting, this last method worked especially well.
To use our method, heat 1 tablespoon of vegetable oil in a 12-inch nonstick skillet until nice and hot (it should just start smoking). Add the fries in a single layer just covering the bottom of the skillet and stir frequently until they darken slightly in color and are fragrant, 2 to 3 minutes. Drain them on a paper towel–lined plate to absorb any excess oil. If you’d like, sprinkle them with a little salt for extra seasoning.
When using a 12-inch skillet, we were able to effectively reheat 6 ounces of fries, or about the amount in a large order of McDonald’s fries. This method worked equally well for standard, shoestring, and steak fries.
What’s the best way to reheat leftover steak?

Our favorite reheating method for steak mirrors our favorite cooking method.
The best method we have found for cooking steaks is to slowly warm them in the oven and then sear them in a hot skillet. This produces medium-rare meat from edge to edge, with a well-browned crust. When we rewarmed leftover cooked steaks in a low oven and then briefly seared them, the results were also remarkably good. The reheated steaks were only slightly less juicy than freshly cooked ones, and their crusts were actually more crisp.
Here’s the method: Place leftover steaks on a wire rack set in a rimmed baking sheet and warm them on the middle rack of a 250-degree oven until the steaks register 110 degrees (roughly 30 minutes for 1½-inch-thick steaks, but timing will vary according to thickness and size). Pat the steaks dry with a paper towel and heat 1 tablespoon of vegetable oil in a 12-inch skillet over high heat until smoking. Sear the steaks on both sides until crisp, 60 to 90 seconds per side. Let the steaks rest for 5 minutes before serving. After resting, the centers should be at medium-rare temperature (125 to 130 degrees).
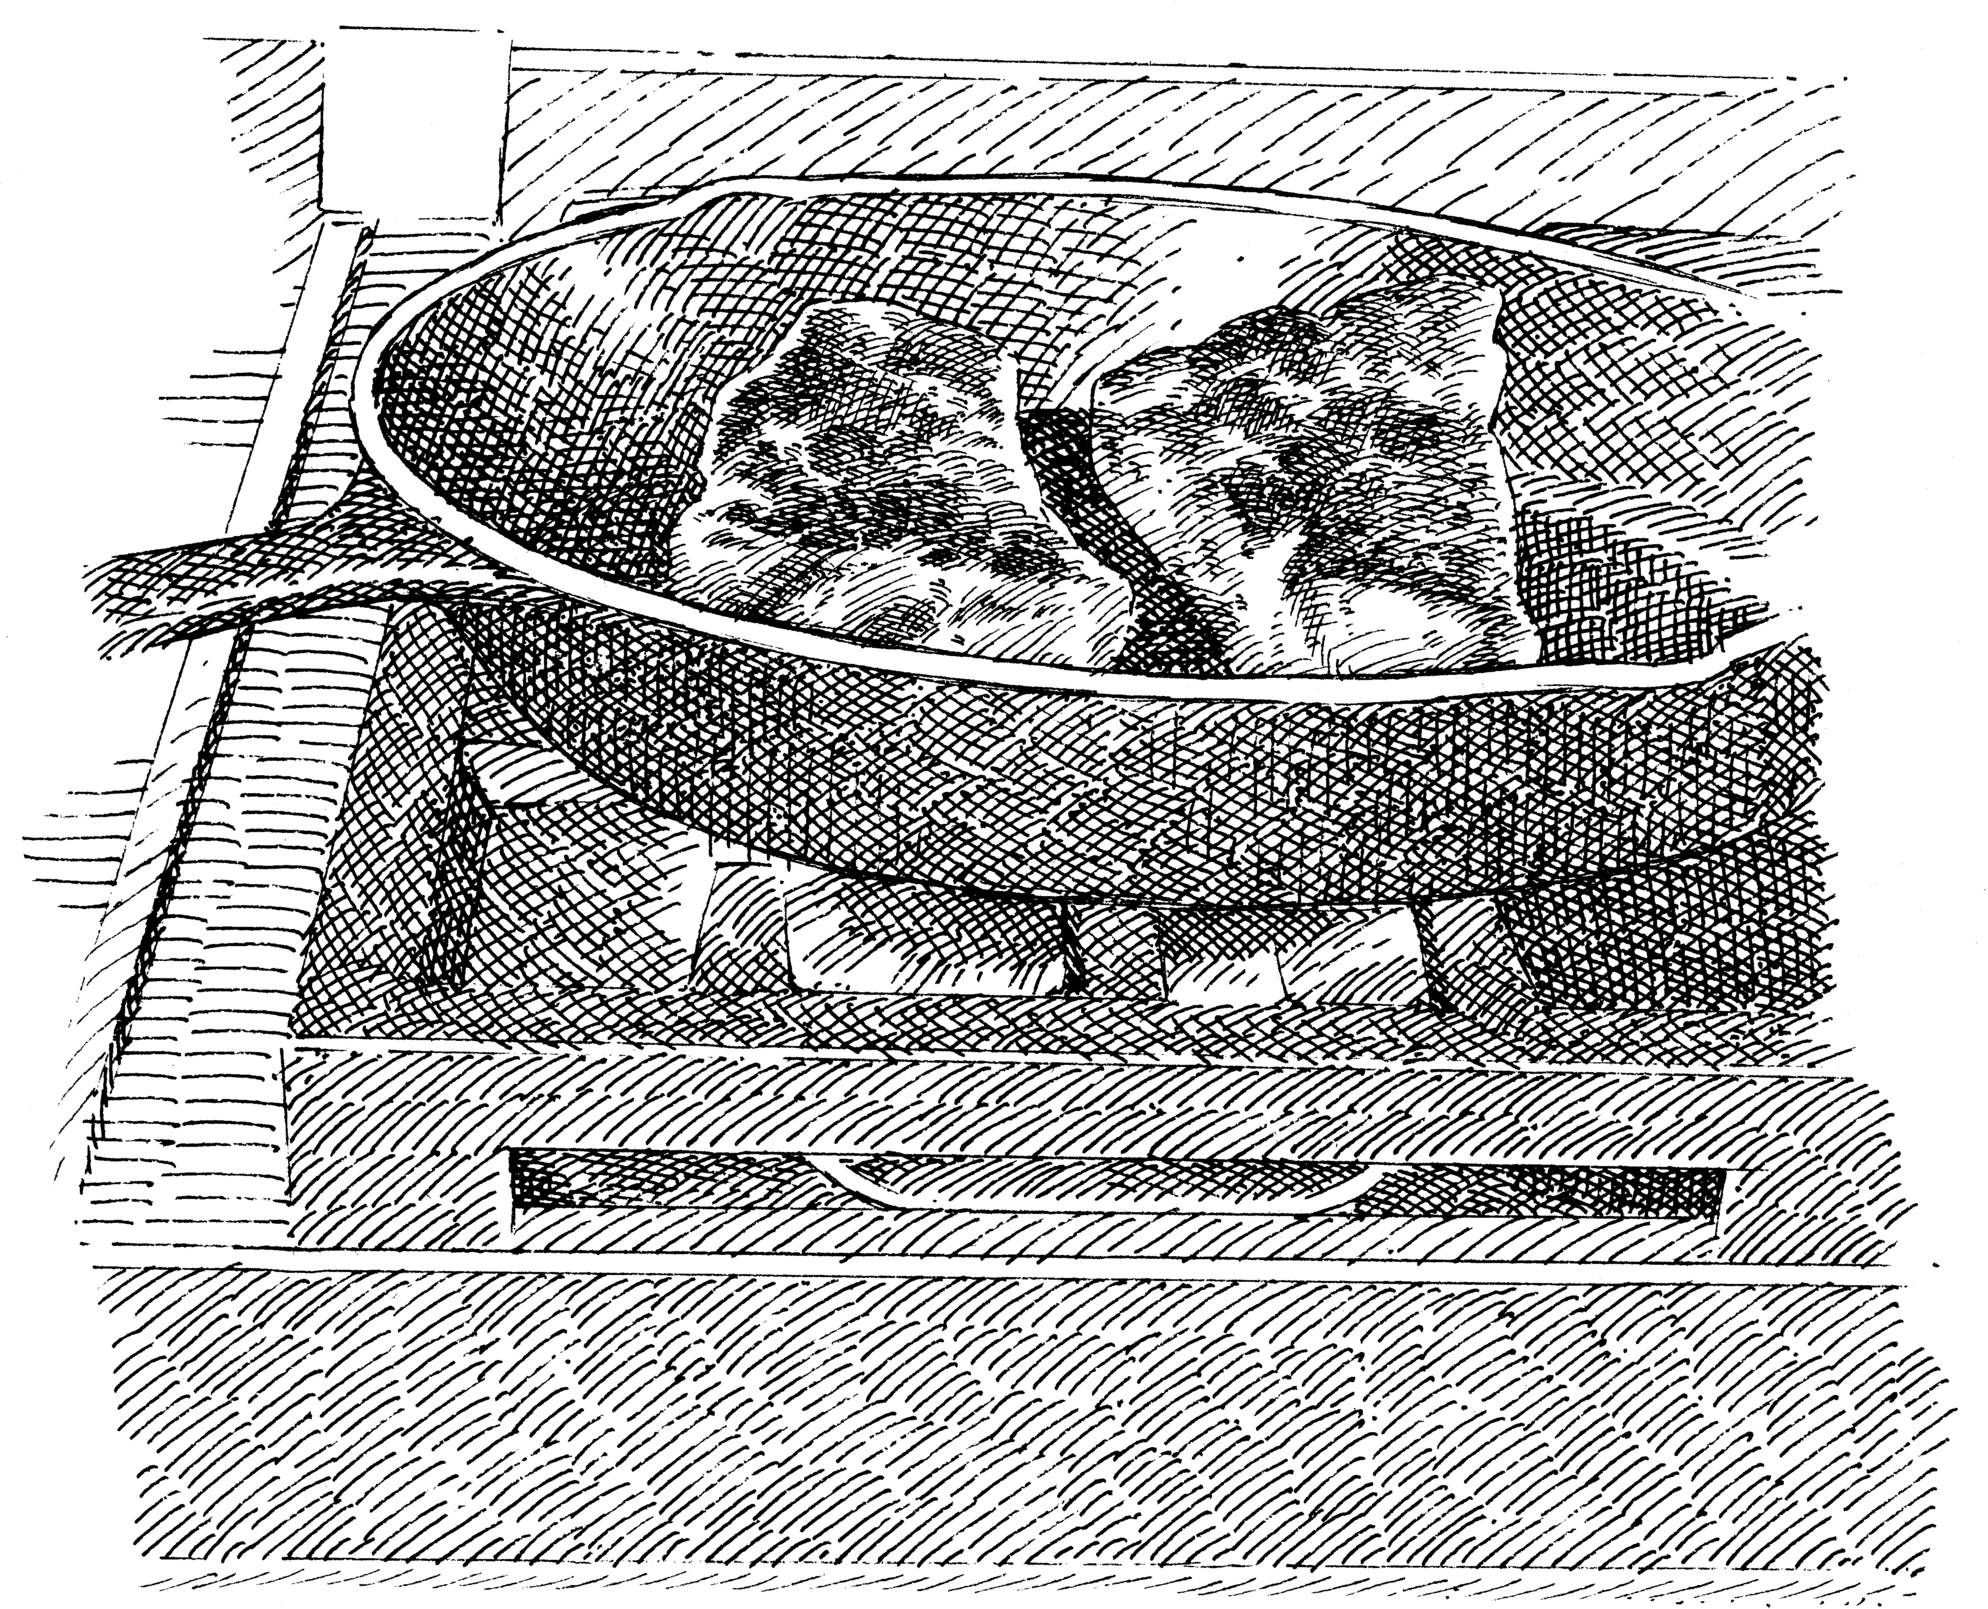
Is there a way to reheat leftover fish so it isn’t terrible?

You can use a low, gentle oven to reheat thick cuts of leftover fish, but you’re probably out of luck with thinner cuts.
Fish is notoriously susceptible to overcooking, so reheating previously cooked fillets is something that makes nearly all cooks balk. But since almost everyone has leftover fish from time to time, we decided to figure out the best approach to warming it up.
We had far more success reheating thick fillets and steaks than thin ones. Both swordfish and halibut steaks reheated nicely, retaining their moisture well and suffering no detectable change in flavor. Likewise, salmon reheated well, but thanks to the oxidation of its abundant fatty acids into strong-smelling aldehydes, doing so brought out a bit more of the fish’s pungent aroma. There was little we could do to prevent trout from drying out and overcooking when heated a second time.
To reheat thicker fish fillets, use this gentle approach: Place the fillets on a wire rack set in a rimmed baking sheet, cover them with foil (to prevent the exterior of the fish from drying out), and heat them in a 275-degree oven until they register 125 to 130 degrees, about 15 minutes for 1-inch-thick fillets (timing varies according to fillet size). If you have leftover cooked thin fish, we recommend serving it in cold applications like salads.
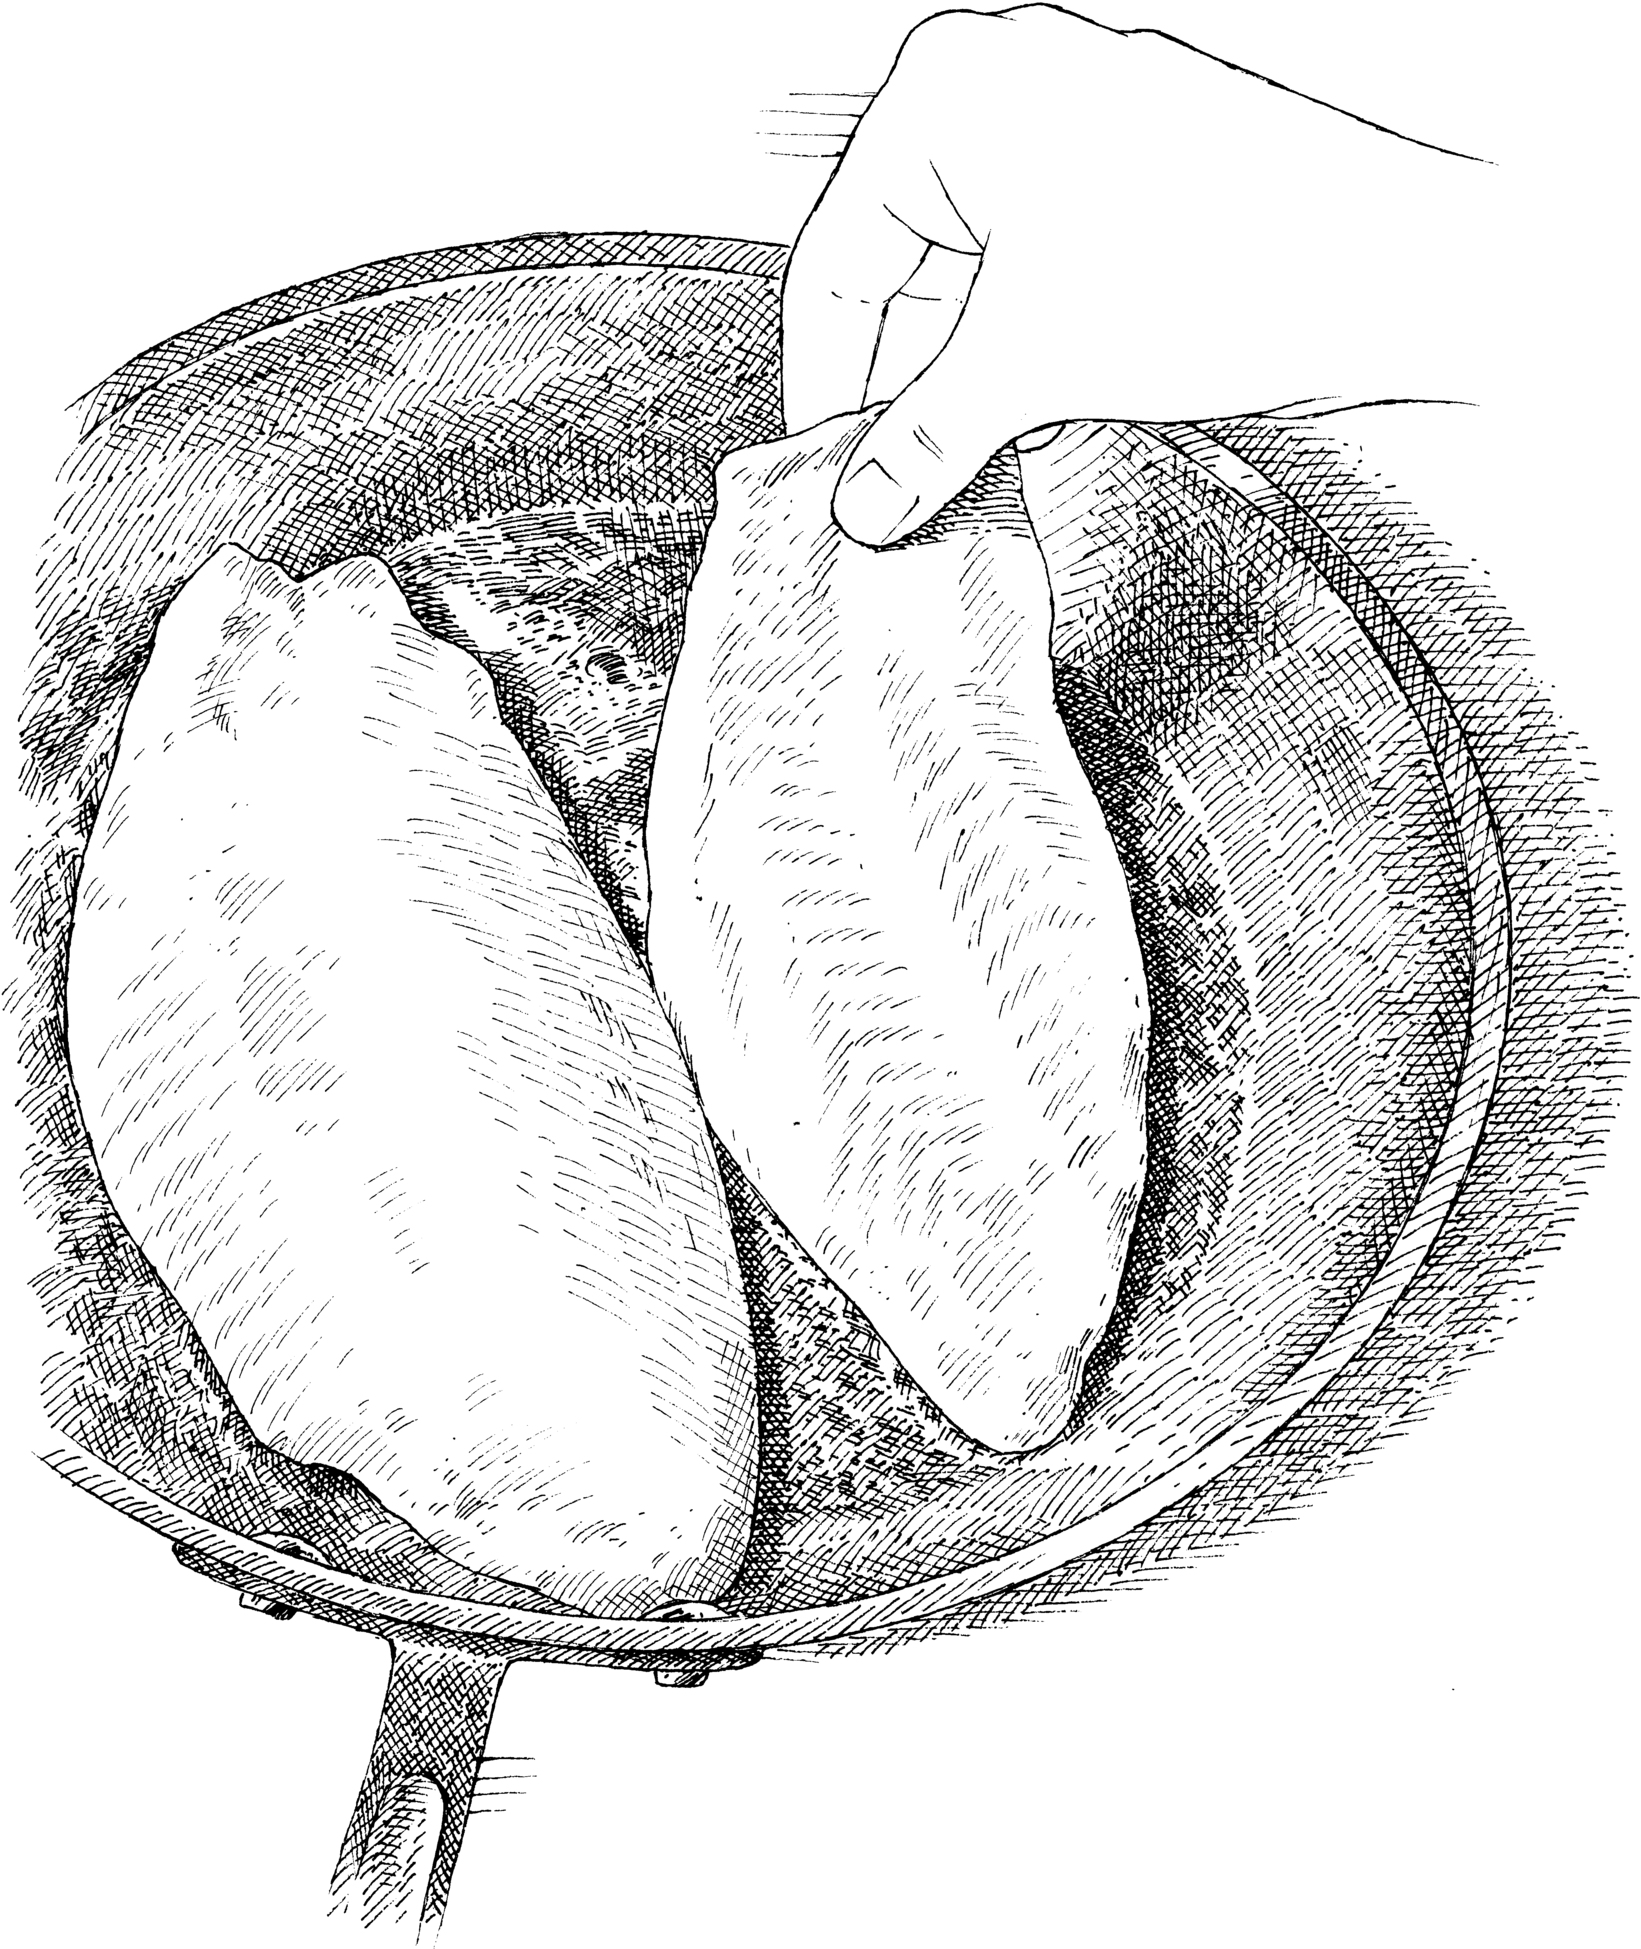
Leftover turkey is always so disappointing—is there any way to save it?

Our gentle method helps ensure that as much moisture as possible stays in the meat and crisps the skin.

Leftover turkey is a fact of life during the holidays, but when you reheat the meat (especially lean breast meat), it rarely comes out well. Here’s the best method we’ve come up with to avoid next-day turkey disappointment.
Wrap the leftover portions in aluminum foil, stacking any sliced pieces, and place them on a wire rack set in a rimmed baking sheet. Transfer them to a 275-degree oven and heat them until the meat registers 130 degrees, a temperature warm enough for serving but not so hot that it drives off more moisture. (Sliced turkey should be warm throughout; if the slices are relatively thick, you can insert the probe into the meat just as you would with bone-in pieces.) This gentle oven temperature also means that the meat comes up to temperature slowly and evenly. Timing will vary greatly based on the shape and size of the leftover turkey pieces. For a crosswise-cut half breast, we found 35 to 45 minutes to be sufficient. Finally, place any large skin-on pieces skin side down in a lightly oiled skillet over medium-high heat, heating until the skin recrisps.

Since the temperature of cooked meat will continue to rise as it rests, it should be removed from the oven, grill, or pan when it is 5 to 10 degrees below the desired serving temperature. The temperatures in the following charts should be used to determine when to stop the cooking process. A thin steak or chop should then rest for 5 to 10 minutes, a thicker roast for 15 to 20 minutes. And when cooking a large roast like a turkey, the meat should rest for about 40 minutes before it is carved. To keep meat warm while it rests, tent it loosely with foil (except skin-on chicken and turkey or glazed roasts—see here for more details).
Our doneness recommendations represent our assessment of palatability weighed against safety. The basics from the USDA differ somewhat: Cook whole cuts of meat to an internal temperature of at least 145 degrees and let rest for at least 3 minutes. Cook ground meat to an internal temperature of at least 160 degrees. Cook all poultry, including ground poultry, to an internal temperature of at least 165 degrees. For more information on food safety from the USDA, visit www.fsis.usda.gov.
| For This Ingredient | Cook to This Temperature |
| BEEF/LAMB/VEAL | |
| Rare | 115 to 120 degrees |
| Medium-Rare | 120 to 125 degrees |
| Medium | 130 to 135 degrees |
| Medium-Well | 140 to 145 degrees |
| Well-Done | 150 to 155 degrees |
| PORK | |
| Chops and Tenderloin | 145 degrees |
| Loin Roasts | 140 degrees |
| CHICKEN AND TURKEY | |
| White Meat | 160 degrees |
| Dark Meat | 175 degrees |
| FISH | |
| Rare | 110 degrees (for tuna only) |
| Medium-Rare | 125 degrees |
| Medium | 140 degrees (for white-fleshed fish) |
We rely on temperature to properly prepare all kinds of foods, not just meat, poultry, and seafood. Here’s a partial list of other times when temperature is particularly useful.
How can I tell if my grill fire is “medium-hot”? Does that correspond to a particular temperature? What if I don’t have a thermometer?

Even if your grill doesn’t have a thermometer, there is an easy way to determine the intensity of a fire’s heat, and it works for both charcoal and gas grills: Just use your hand.

With charcoal, once you have started the coals and they are covered with a layer of gray ash, distribute the coals on the grill bottom, put the cooking grate in place, and allow the grate to heat up for about 5 minutes. On a gas grill, preheat with the lid down and all burners on high for about 15 minutes.
Take the temperature of either type of fire by holding your hand 5 inches above the cooking grate and counting the number of seconds you can leave it there comfortably. Yes, really: your hand. With a hot fire (about 500 degrees), you’ll be able to hold your hand above the grate for only 2 seconds. With a medium-hot fire (about 400 degrees), you’ll be able to keep your hand there for 3 to 4 seconds; a medium fire (about 300 degrees), 5 to 6 seconds; and a medium-low fire (about 250 degrees), 7 seconds.
When using a gas grill, you may just as well ignore the built-in thermometer with its general readings of medium, medium-high, or high in favor of the hand-testing method, which is much more accurate.
What’s the best way to figure out if my oven is running hot or cold? Do I have to buy a special oven thermometer?

A properly calibrated oven is essential for ensuring consistent cooking results, but you don’t need an oven thermometer to check yours.
Because many people don’t have an oven thermometer, we developed an easy method to test for accuracy using an instant-read thermometer. We tested this method in multiple ovens, both gas and electric, and it worked well in all of them. Here’s how to do it.
Set an oven rack in the middle position and heat your oven to 350 degrees for at least 30 minutes. Fill an ovensafe glass 2-cup measure with 1 cup of water. Using an instant-read thermometer, check that the water is exactly 70 degrees, adjusting the temperature with hot or cold water as necessary. Place the cup in the center of the rack and close the oven door. After 15 minutes, remove the cup and insert the instant-read thermometer, making sure to swirl the thermometer around in the water to even out any hot spots. If your oven is properly calibrated, the water should be at 150 degrees (plus or minus 2 degrees). If the water is not at 150 degrees, your oven is running too hot or too cold and needs to be adjusted accordingly. (Note: To avoid shattering the glass cup, allow the water to cool before pouring it out.)

What’s the proper technique for whisking? I’ve heard it’s all in the wrist, but I’m not sure I’m doing it right; sometimes I feel like I’m just stirring with the whisk.

Most of the time, side-to-side movement is most effective, but whipping egg whites is a different story.
We’ve noticed that different cooks seem to favor different motions when using a whisk. Some prefer side-to-side strokes, others use circular stirring, and others like the looping action of beating that takes the whisk up and out of the bowl. That got us wondering: Is any one of these motions more effective than the others? We compared stirring, beating, and side-to-side motions in three applications: emulsifying vinaigrette and whipping small amounts of cream and egg whites. We timed how long the dressing stayed emulsified and how long it took to whip cream and egg whites to stiff peaks.
In all cases, side-to-side whisking was highly effective. It kept the vinaigrette fully emulsified for 15 minutes, and it speedily whipped cream to stiff peaks in 4 minutes and egg whites to stiff peaks in 5 minutes. Circular stirring was ineffectual across the board. Beating was effective only at whipping egg whites, creating stiff peaks in a record 4 minutes, surpassing the timing of side-to-side strokes.
Side-to-side whisking is an easier motion to execute quickly and aggressively, allowing you to carry out more and harder motions per minute than with the other strokes. This action also causes more of what scientists call “shear force” to be applied to the liquid. As the whisk moves in one direction across the bowl, the liquid starts to move with it. But then the whisk is dragged in the opposite direction, exerting force against the rest of the liquid still moving toward it. In vinaigrette, the greater shear force of side-to-side whisking helps break oil into tinier droplets that stay suspended in vinegar, keeping the dressing emulsified longer. To create stiff peaks in cream and egg whites, shear force and efficiency are both key. As the tines are dragged through each liquid, they create channels that trap air. Since the faster the channels are created, the faster the cream or whites gain volume, rapid, aggressive side-to-side strokes are very effective. However, because egg whites are very viscous, more of them cling to the tines of the whisk. This allows the whisk to create wider channels to trap air. Since beating takes the whisk out of the liquid during some of its action, these larger channels can stay open longer, thus trapping even more air.
What’s the best way to make fried foods at home without creating a giant mess or burning down the house?

Frying stirs fear in many home cooks, but if you follow a few simple guidelines, it’s really not that scary.
When done right, frying isn’t difficult. It all comes down to the temperature of the oil. If the oil is too hot, the exterior of the food will burn before it cooks through. If it’s not hot enough, the food won’t release moisture and will fry up limp and soggy.
Use the Right Thermometer A thermometer that can register high temperatures is essential. One that clips to the side of the pot, like a candy thermometer, saves you from dipping it in and out of a pot of hot oil.
Use a Large, Heavy Pot A heavy pot or Dutch oven that is at least 6 quarts in capacity allows plenty of room for the food to fry, ensures even heating, and helps keep the oil hot.
Use Peanut Oil An oil with a high smoke point is a must for frying; we prefer the neutral flavor of peanut oil, but vegetable oil will also work. Fill the pot no more than halfway with oil to minimize any dangerous splattering.
Keep the Oil Hot The temperature of the oil will drop a little when you first add the food to the pot, so we usually increase the heat right after adding the food to minimize the temperature change. If the oil splatters, wipe up as you go.
Fry in Batches Add food to the hot oil in small portions. Adding too much food at once will make the temperature drop too much and will result in soggy–rather than crispy–fried food.
Let the Fried Food Drain Let the finished food drain on paper towels to minimize greasiness.
Is there an easy way to make fried food less greasy (but not less delicious)?

For fried food that’s light, crisp, and not greasy, the proper oil temperature is critical, and maintaining that takes effort.
Most deep frying starts with oil between 325 and 375 degrees, but the temperature drops as soon as food is added. Once the oil recovers some heat, it should remain somewhere between 250 and 325 degrees (depending on your recipe) for the duration of cooking. To maintain the proper oil temperature, use a clip-on deep-fry thermometer and keep close watch.
If the oil starts lightly smoking, that’s a sign that it’s overheated and starting to break down; remove the pot from the heat until the oil cools to the correct temperature. If the oil has given off a significant amount of smoke, it will impart an off-flavor to foods and should be discarded. (Make sure to thoroughly pat food dry before frying, because water can cause oil to decompose, lowering its smoke point by as much as 30 degrees.)
On the other hand, food fried in oil that’s too cool will retain too much moisture and emerge soggy. If the temperature drops too low, bring the oil back up to your target range before frying the next batch.
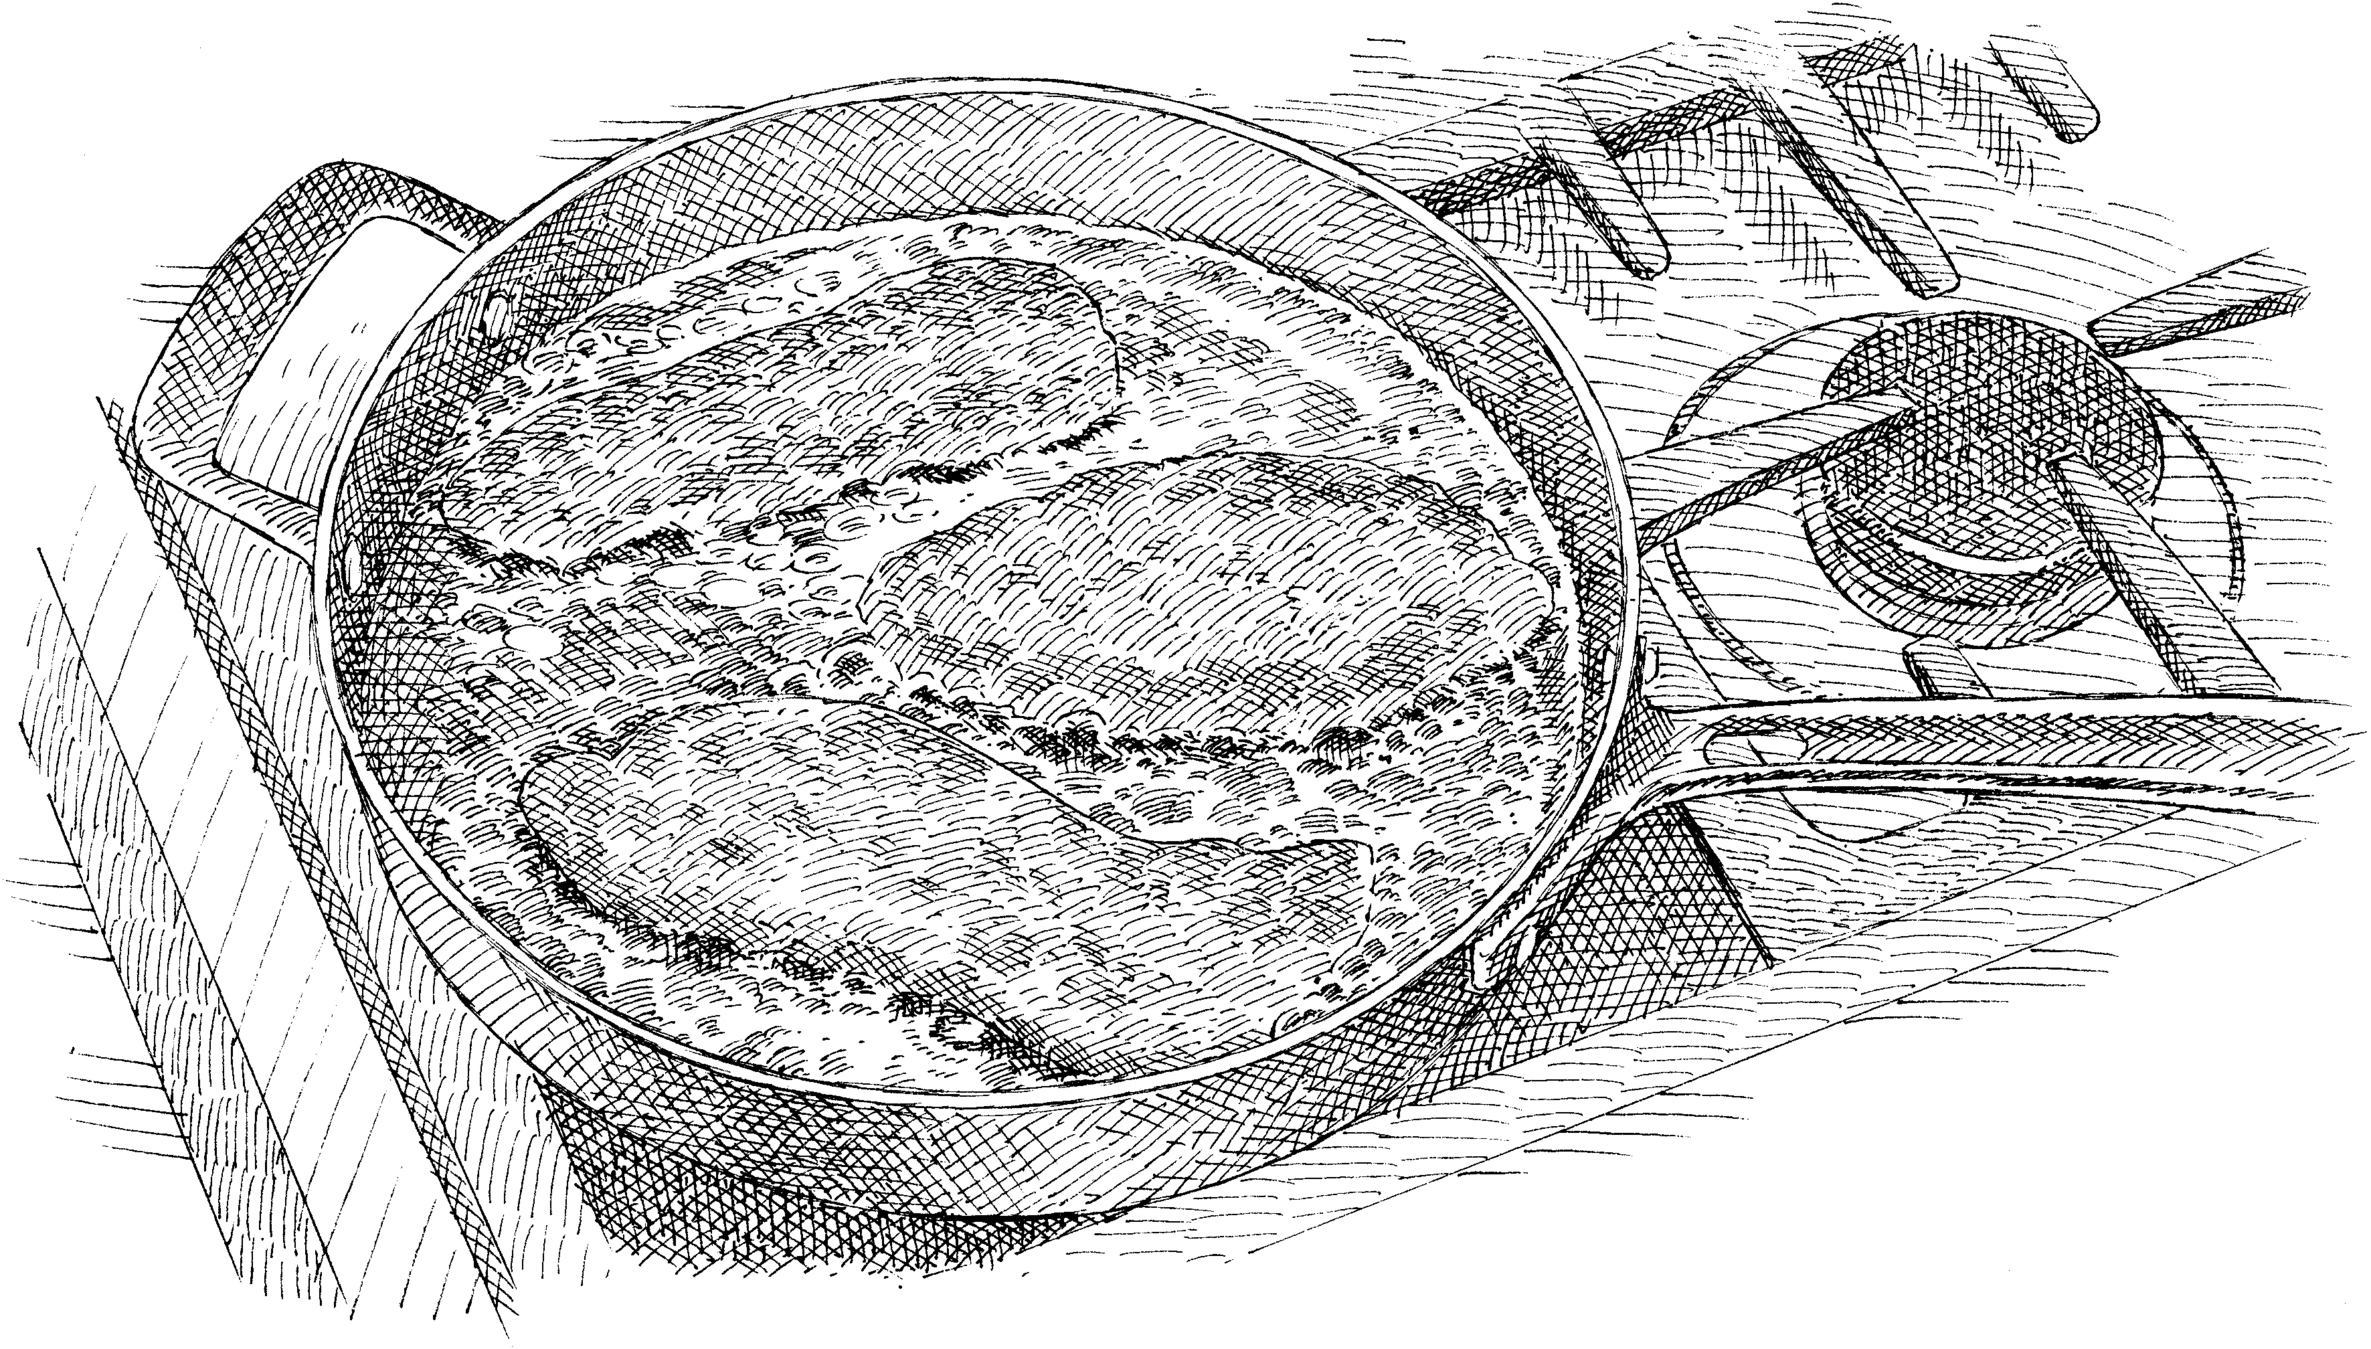
For many years I have been trying to decipher the instructions typically given for boiling times. Should I boil an item from the time it goes into the water or from the time the water returns to a boil? Does the same formula hold for both blanching vegetables and cooking lobster?

It depends on the kind of cooking, but in most cases you should start counting when the food goes into the water to avoid overcooking.
Hmmm. We realized this was a good question when we turned to a number of our recipes for blanching and found that we don’t specify whether the water must return to a boil before you start counting the seconds or minutes. We can’t speak for other recipe writers, but in our recipes for blanching, you should start counting from the moment you plunge the fruit or vegetable into the boiling water. The goal in blanching is not to cook foods through but usually to aid in skinning (peaches and tomatoes) or to soften till the food becomes crisp-tender (vegetables for crudités). If you don’t start counting till the water returns to a boil, the food will be overcooked.
For foods meant to be cooked all the way through, from lobster to pasta to potatoes, you should generally start counting once the water returns to a boil—at least that’s the way it works in our recipes. And if the recipe gives a range (say, 20 to 30 minutes for good-size potatoes), it’s always best to start checking for doneness early—once those potatoes are overcooked, there’s no going back.
Why do recipes always say to bring liquids to a full boil and then reduce them to a simmer? Why not just slowly work up to a simmer and stay there?

There are two good reasons for this practice: time efficiency and food safety.
Simmering—cooking foods over moderate heat—is an important technique in making soups, stews, braises, sauces, and stocks. But why boil first? First, if you bring a stew or braise up to a simmer over low heat, the total cooking time will be considerably longer. In one recent test here in the kitchen, an osso buco recipe required an extra hour when we failed to bring the liquid to a boil before turning down the heat. Starting from a boil also ensures that all the ingredients (proteins and starches, as well as the liquid) in the pot get up to a safe temperature quickly and evenly. If you let foods come to a simmer very slowly, they are likely to spend more time in the so-called danger zone, between 40 and 140 degrees, which in certain foods promotes the growth of bacteria.
Is it possible to flambé at home without setting my kitchen on fire?

Flambéing is more than just table-side theatrics, and anyone can master it with a few tips.
Yes, it looks incredibly cool, but igniting alcohol also helps develop a deeper, more complex flavor in sauces, thanks to flavor-boosting chemical reactions that occur only at the high temperatures reached in flambéing. But accomplishing this feat at home can be daunting. Here are some tips for successful—and safe—flambéing at home.
Be Prepared Turn off the exhaust fan, tie back long hair, and have a lid ready to smother dangerous flare-ups.
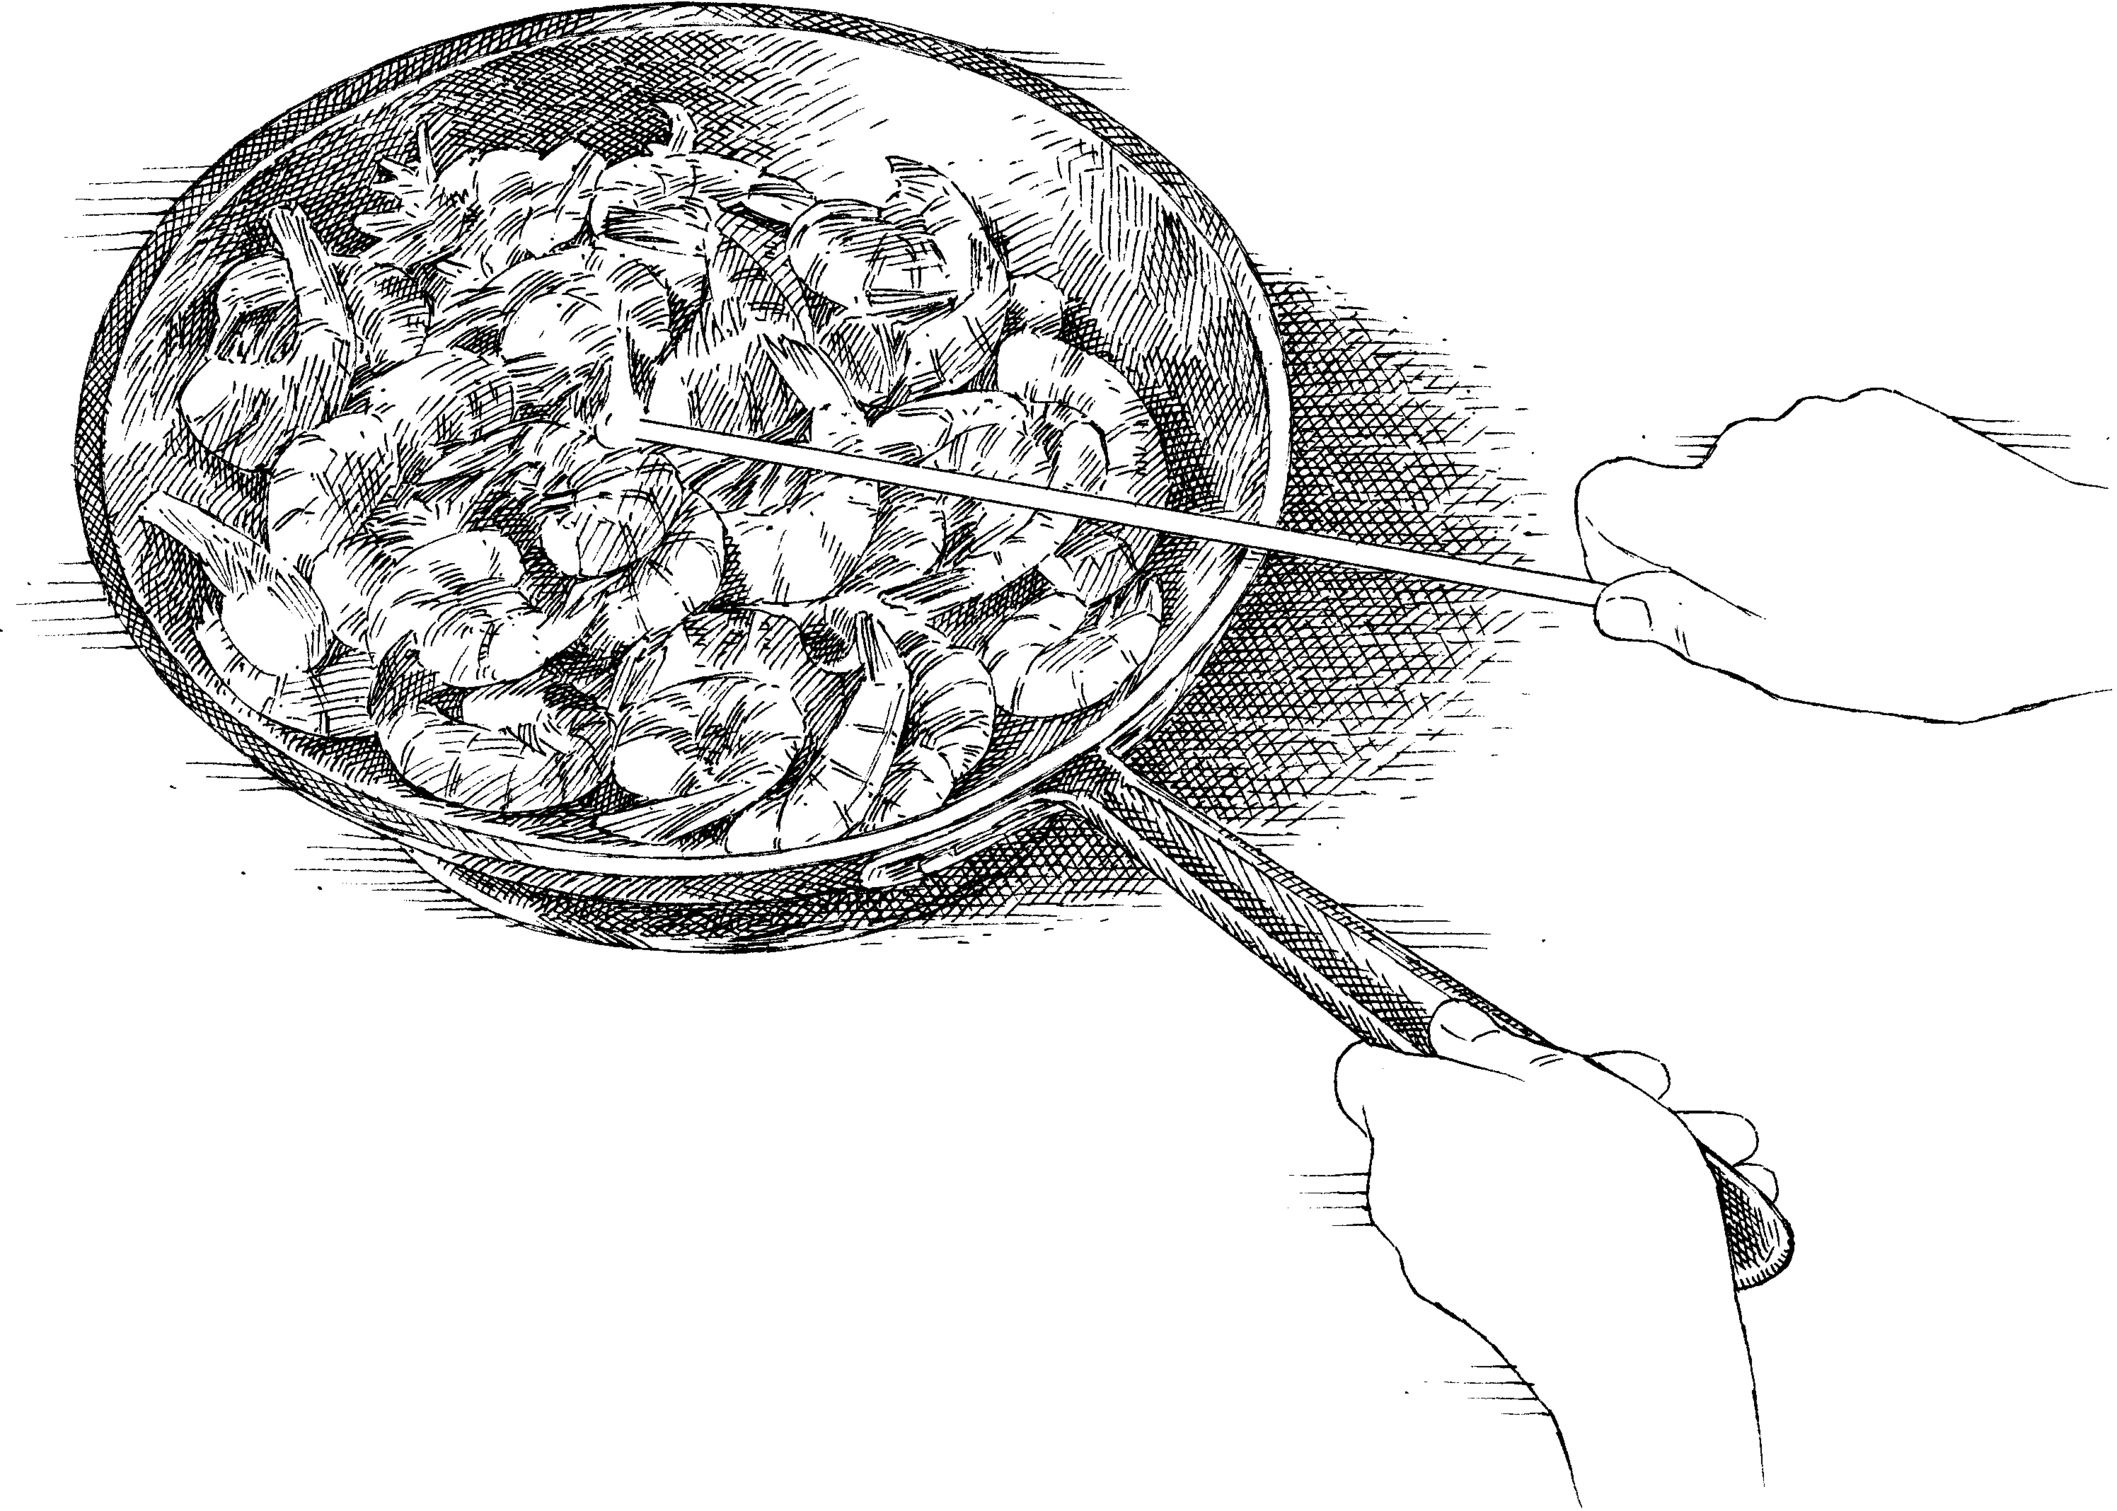
Use the Proper Equipment A pan with flared sides (such as a skillet) rather than straight sides will allow more oxygen to mingle with the alcohol vapors, increasing the chance that you’ll spark the desired flame. If possible, use long, wooden chimney matches, and light the alcohol with your arm extended to full length.
Ignite Warm Alcohol If the alcohol becomes too hot, the vapors can rise to dangerous heights, causing large flare-ups once lit. Inversely, if the alcohol is too cold, there won’t be enough vapors to light at all. We’ve found that heating alcohol to 100 degrees produces the most moderate yet long-burning flame. It usually takes about 5 seconds over medium heat to get alcohol to the right temperature. You can tell it’s ready when vapors start to rise up from the pan.
Light the Alcohol off the Heat If using a gas burner, be sure to turn off the flame to eliminate the chance of accidental ignitions near the side of the pan. Removing the pan from the heat also gives you more control over the alcohol’s temperature.
If a Dangerous Flare-Up Should Occur Simply slide the lid over the top of the skillet (coming in from the side of, rather than over, the flames) to put out the fire quickly. Let the alcohol cool down and start again.
If the Alcohol Won’t Light If the pan is full of other ingredients, the potency of the alcohol can be diminished as it becomes incorporated. For a more foolproof flame, ignite the alcohol in a separate small skillet or saucepan; once the flame has burned off, add the reduced alcohol to the remaining ingredients.
Can you explain the differences between sautéing and searing? How do I know which technique to use?

Sautéing and searing both involve cooking food in a shallow pan on the stovetop, but their similarities end there.
Sautéing and searing are both techniques that are used to develop browning, but they work best with very different types of ingredients.
Sautéing, which relies on cooking food in a small amount of fat over moderately high heat, is best for thin, lean cuts of meat like cutlets or medallions, and for smaller pieces of delicate foods like chopped vegetables. The use of moderate heat extends the time window for browning, allowing these quick-cooking ingredients to brown before they overcook. Sautéing is also characterized by shaking the pan or stirring to make sure all the ingredients are equally exposed to the heat (the verb sauté in French means “to jump,” which describes the way the food should move in the pan). Using a slope-sided skillet facilitates flipping and stirring.
Searing is a surface treatment used to produce a flavorful brown crust on thick cuts of protein and vegetables, such as chops, cauliflower steaks, or tofu. In most cases, searing is the first step in the cooking process, followed by a gentler cooking method to finish the interior of the food. It uses high heat in a conventional, rather than nonstick, skillet. This helps develop the fond (brown bits that stick to the pan) and build flavor. Unlike in a sauté, food that is being seared should be left alone and not moved or flipped until it has had a chance to build a crust. Note that searing does not “seal in” juices in meat, as is commonly believed (see here).
When I sear meat on the stovetop, it always gets stuck to the pan and makes a huge mess! Is there a better way to do it?

The key ingredient for making sure meat doesn’t stick to the pan when you sear it is patience.
Meat sticks during cooking thanks to the adhesion of dissolved proteins to the cooking surface in a process known as adsorption. While the mechanisms by which proteins adsorb onto a skillet are complicated and not fully understood, we do know that once the pan becomes hot enough, the link between the proteins and the pan will loosen, and the bond will eventually break.
To prevent steak from sticking, follow these steps: Heat oil in a heavy-bottomed skillet over high heat until it is just smoking (on most stovetops, this takes 2 to 3 minutes). Sear the meat without moving it, using tongs to flip it only when a substantial browned crust forms around the edges. If the meat doesn’t lift easily, continue searing until it does.

I can’t figure out how to use my broiler—sometimes it burns my food but other times it seems to be barely working. What’s going on in there?

Almost all broilers heat unevenly, but you can make a map of yours in order to make it easier to use it effectively.
Uneven broiler heat is a fact of kitchen life; even with identical oven models, we’ve found individual quirks. But in general, most broilers tend to heat up the center and back of the oven, leaving the sides and front cool. To test your oven’s heating pattern, make a “map” by lining a baking sheet with slices of white bread and toasting it under the broiler. The different degrees of browning will provide an accurate representation of the oven’s hot spots and cooler regions, so you can position food accordingly (and, if necessary, move it partway through cooking).
How to Make a Broiler “Map”
1. Position the oven rack 4 inches from the broiler element and heat the broiler. Line the entire surface of a large baking sheet with a single layer of white bread slices.
2. Place the baking sheet in the oven under the heated broiler. Cook until all the bread slices have started to brown (some pieces may turn black—if the bread starts to smoke, remove the baking sheet immediately). Remove the baking sheet from the oven, being careful to maintain its orientation.
3. Take a photo of your broiler map and keep it near your oven.
What size pieces should I aim for when a recipe calls for “chopped” vegetables? And what’s the difference between “chopped” and “diced”?

There are some basic rules of thumb for common descriptive terms you’ll encounter in recipe prep.
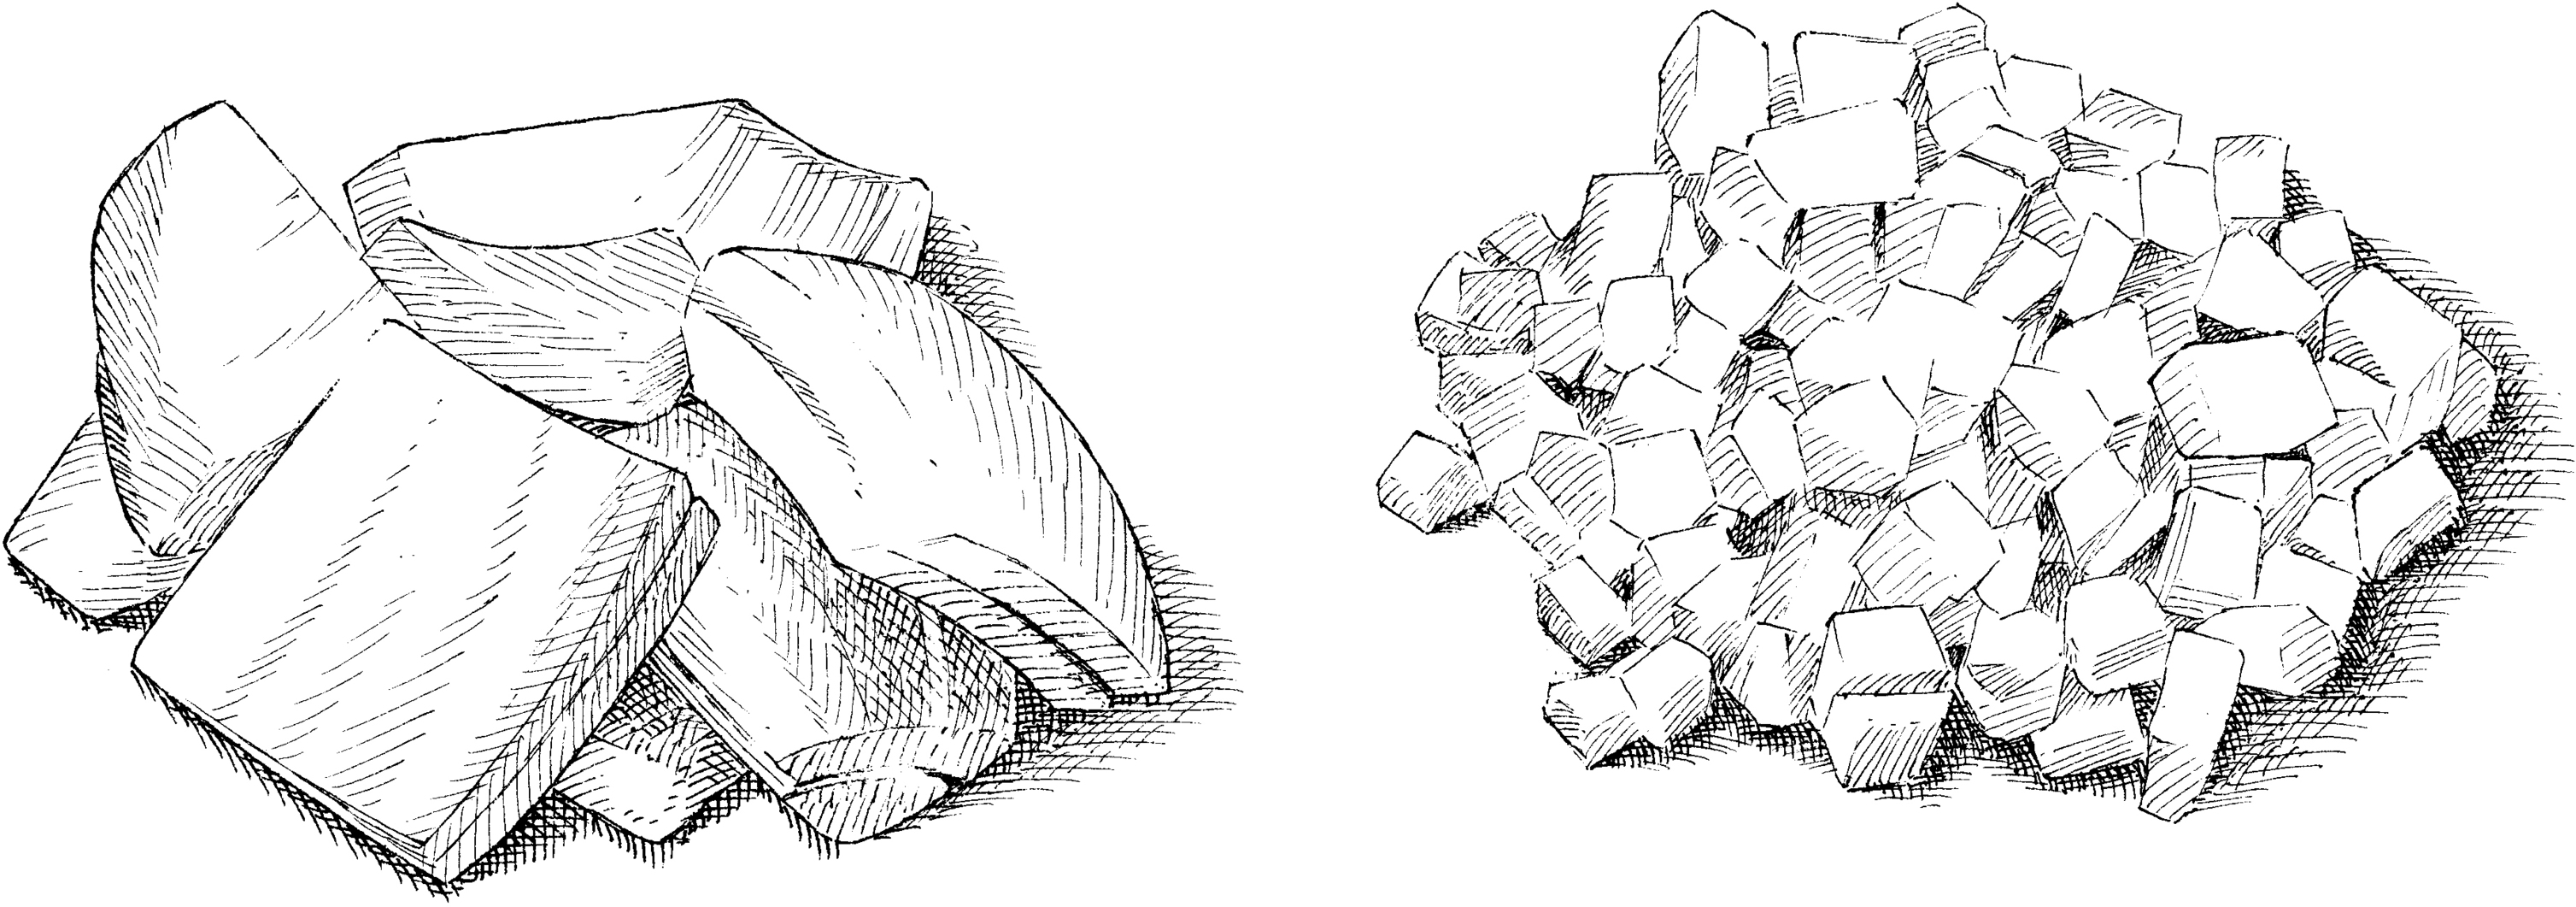
Cutting ingredients to the correct size is important to the success of a recipe. Uniformity of size is the top concern, since ingredients cut to different sizes will have different cooking times: Some smaller pieces of vegetables might burn, for instance, while the bigger chunks continue to cook. In the test kitchen, a ruler is a necessary tool for all our test cooks to ensure that ingredients are cut to the proper size and will cook for the same amount of time, every time. See here for guidelines on how to prep food to different specifications. (And if you don’t have a ruler on hand, keep in mind that for most people, the length between the thumb’s knuckle and its tip is almost exactly 1 inch.)
While “chopping” is a general word for cutting food into small pieces, dicing is a much more specific designation. Diced food is cut into uniform cubes, the size of which will be specified in the recipe. Of course, most ingredients do not have right angles, so not every piece will be a perfect cube; just do your best.
Does it matter which way I slice an onion? Once it’s cut up, it’s all the same, right?

Slicing with the grain of the onion will make it taste less pungent, while cutting against the grain makes for more pungent onions.
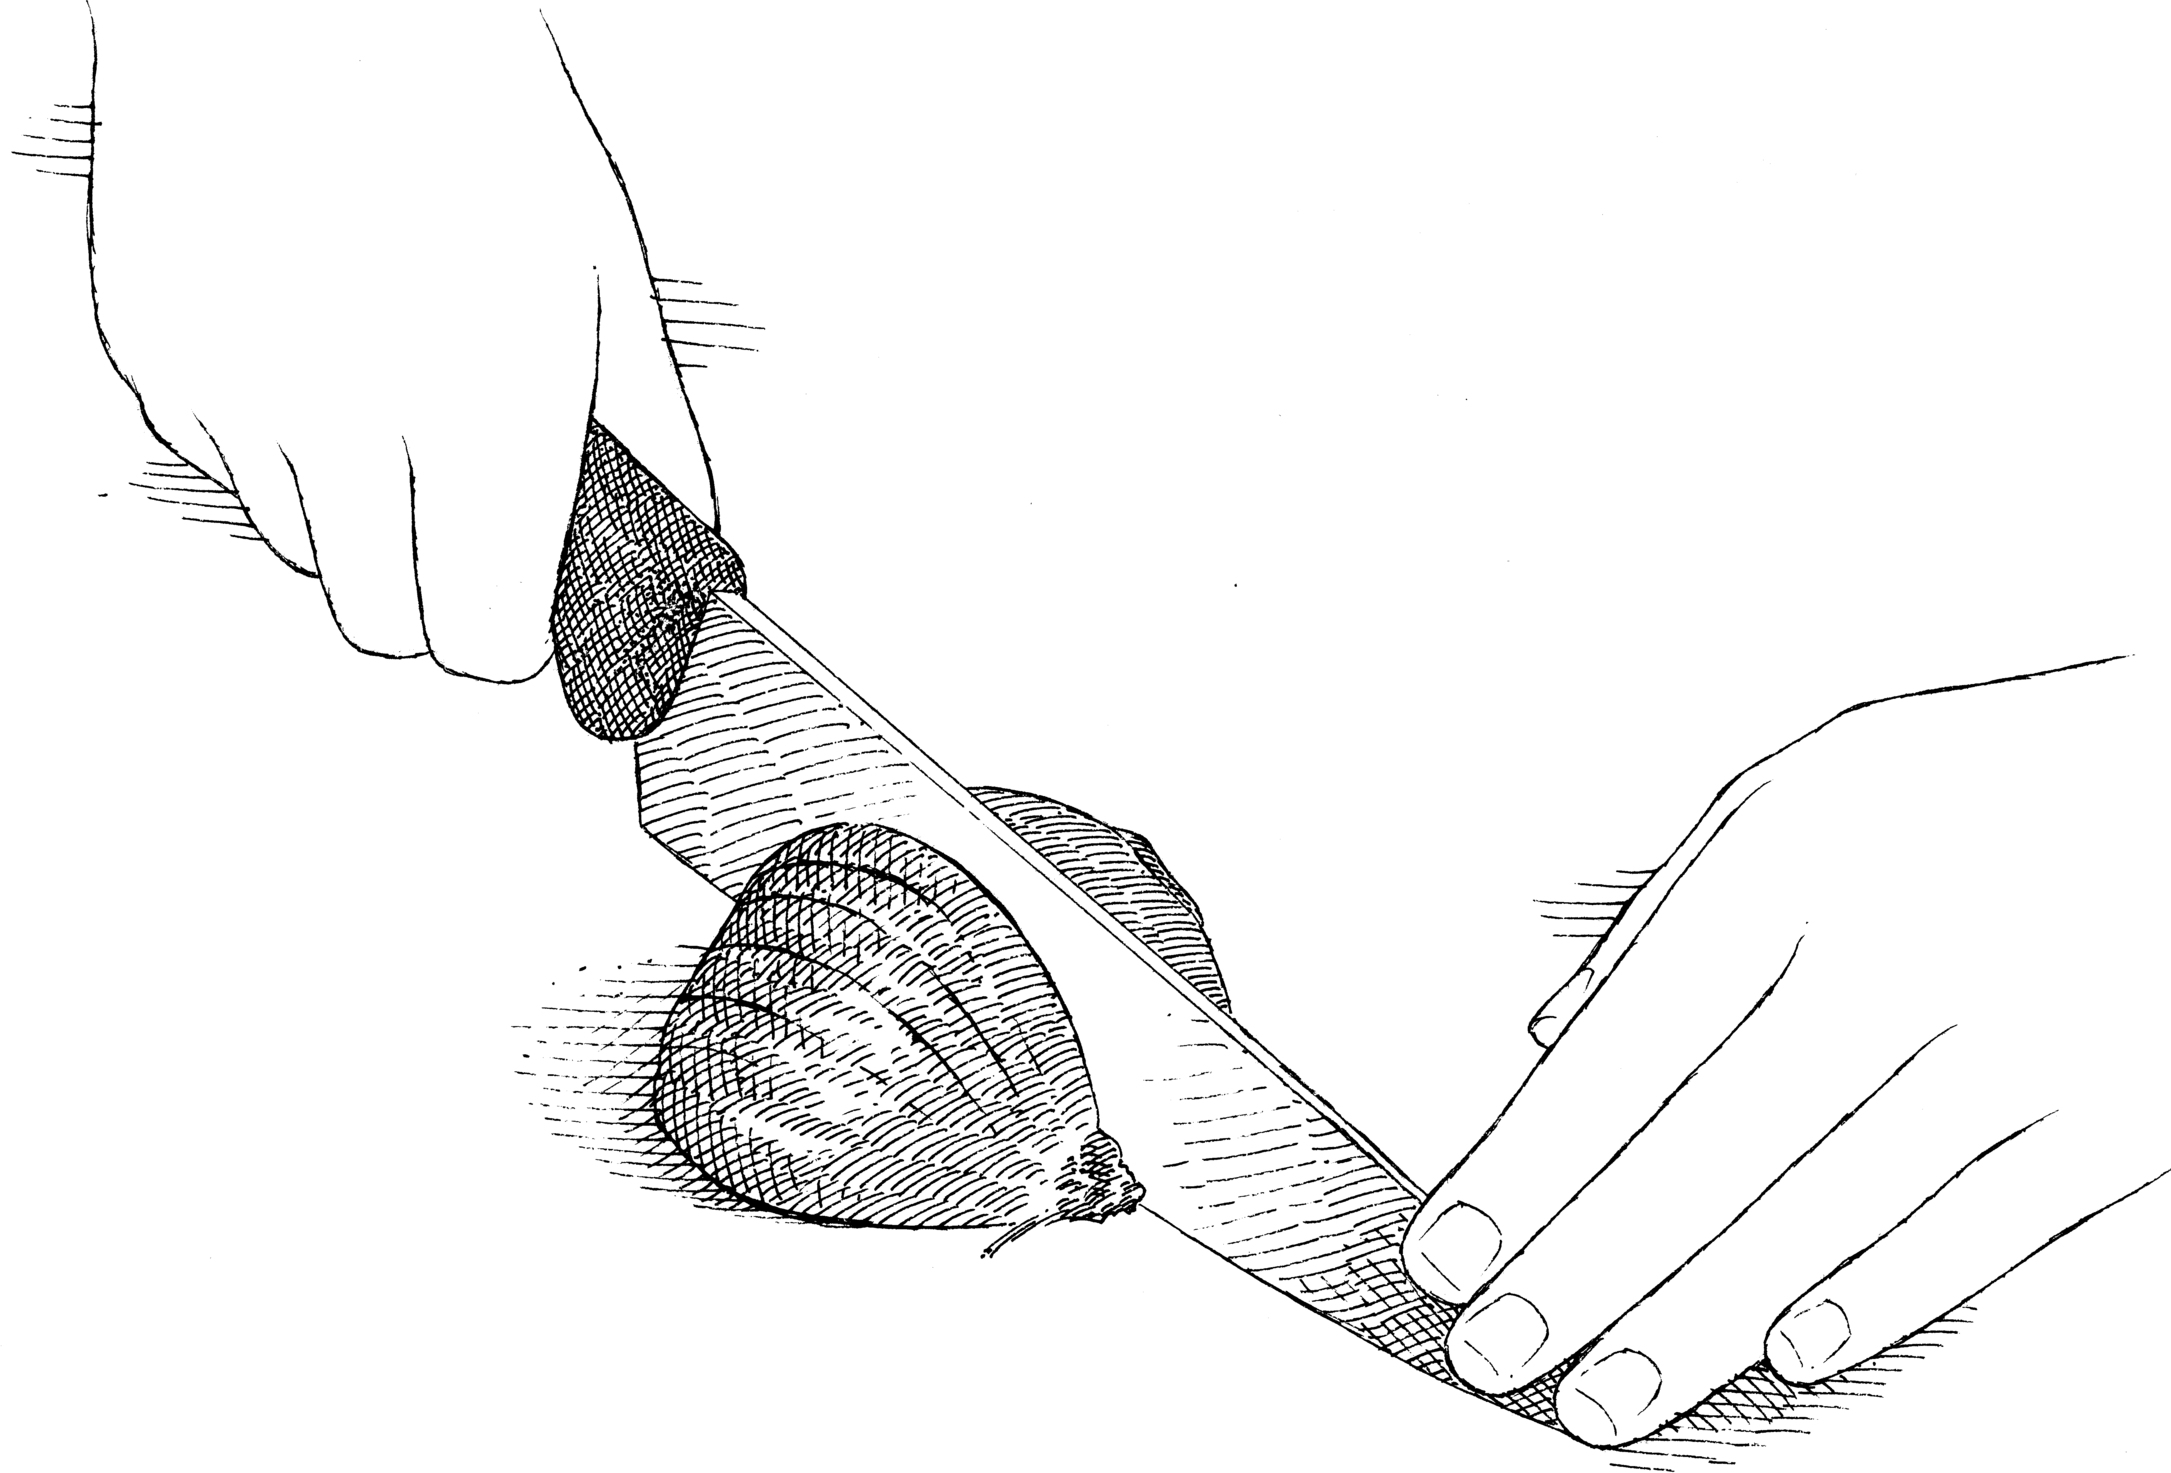
We took eight onions and sliced each two different ways: pole to pole (with the grain) and parallel to the equator (against the grain). We then smelled and tasted pieces from each onion cut each way. The onions sliced pole to pole were clearly less pungent in taste and odor than those cut along the equator. Here’s why: The intense flavor and acrid odor of onions are caused by substances called thiosulfinates, created when enzymes known as alliinases contained in the onion’s cells interact with proteins that are also present in the vegetable. These reactions take place only when the onion’s cells are ruptured and release the strong-smelling enzymes. Cutting with the grain ruptures fewer cells than cutting against the grain, leading to the release of fewer alliinases and the creation of fewer thiosulfinates. We have also found that slicing onions pole to pole helps them retain their shape and texture and makes them more pleasing to the eye in the finished dish.
Is there an easy way to deal with fresh thyme? I find it so fussy to work with.

Stop going leaf by leaf and use the stems to your advantage.
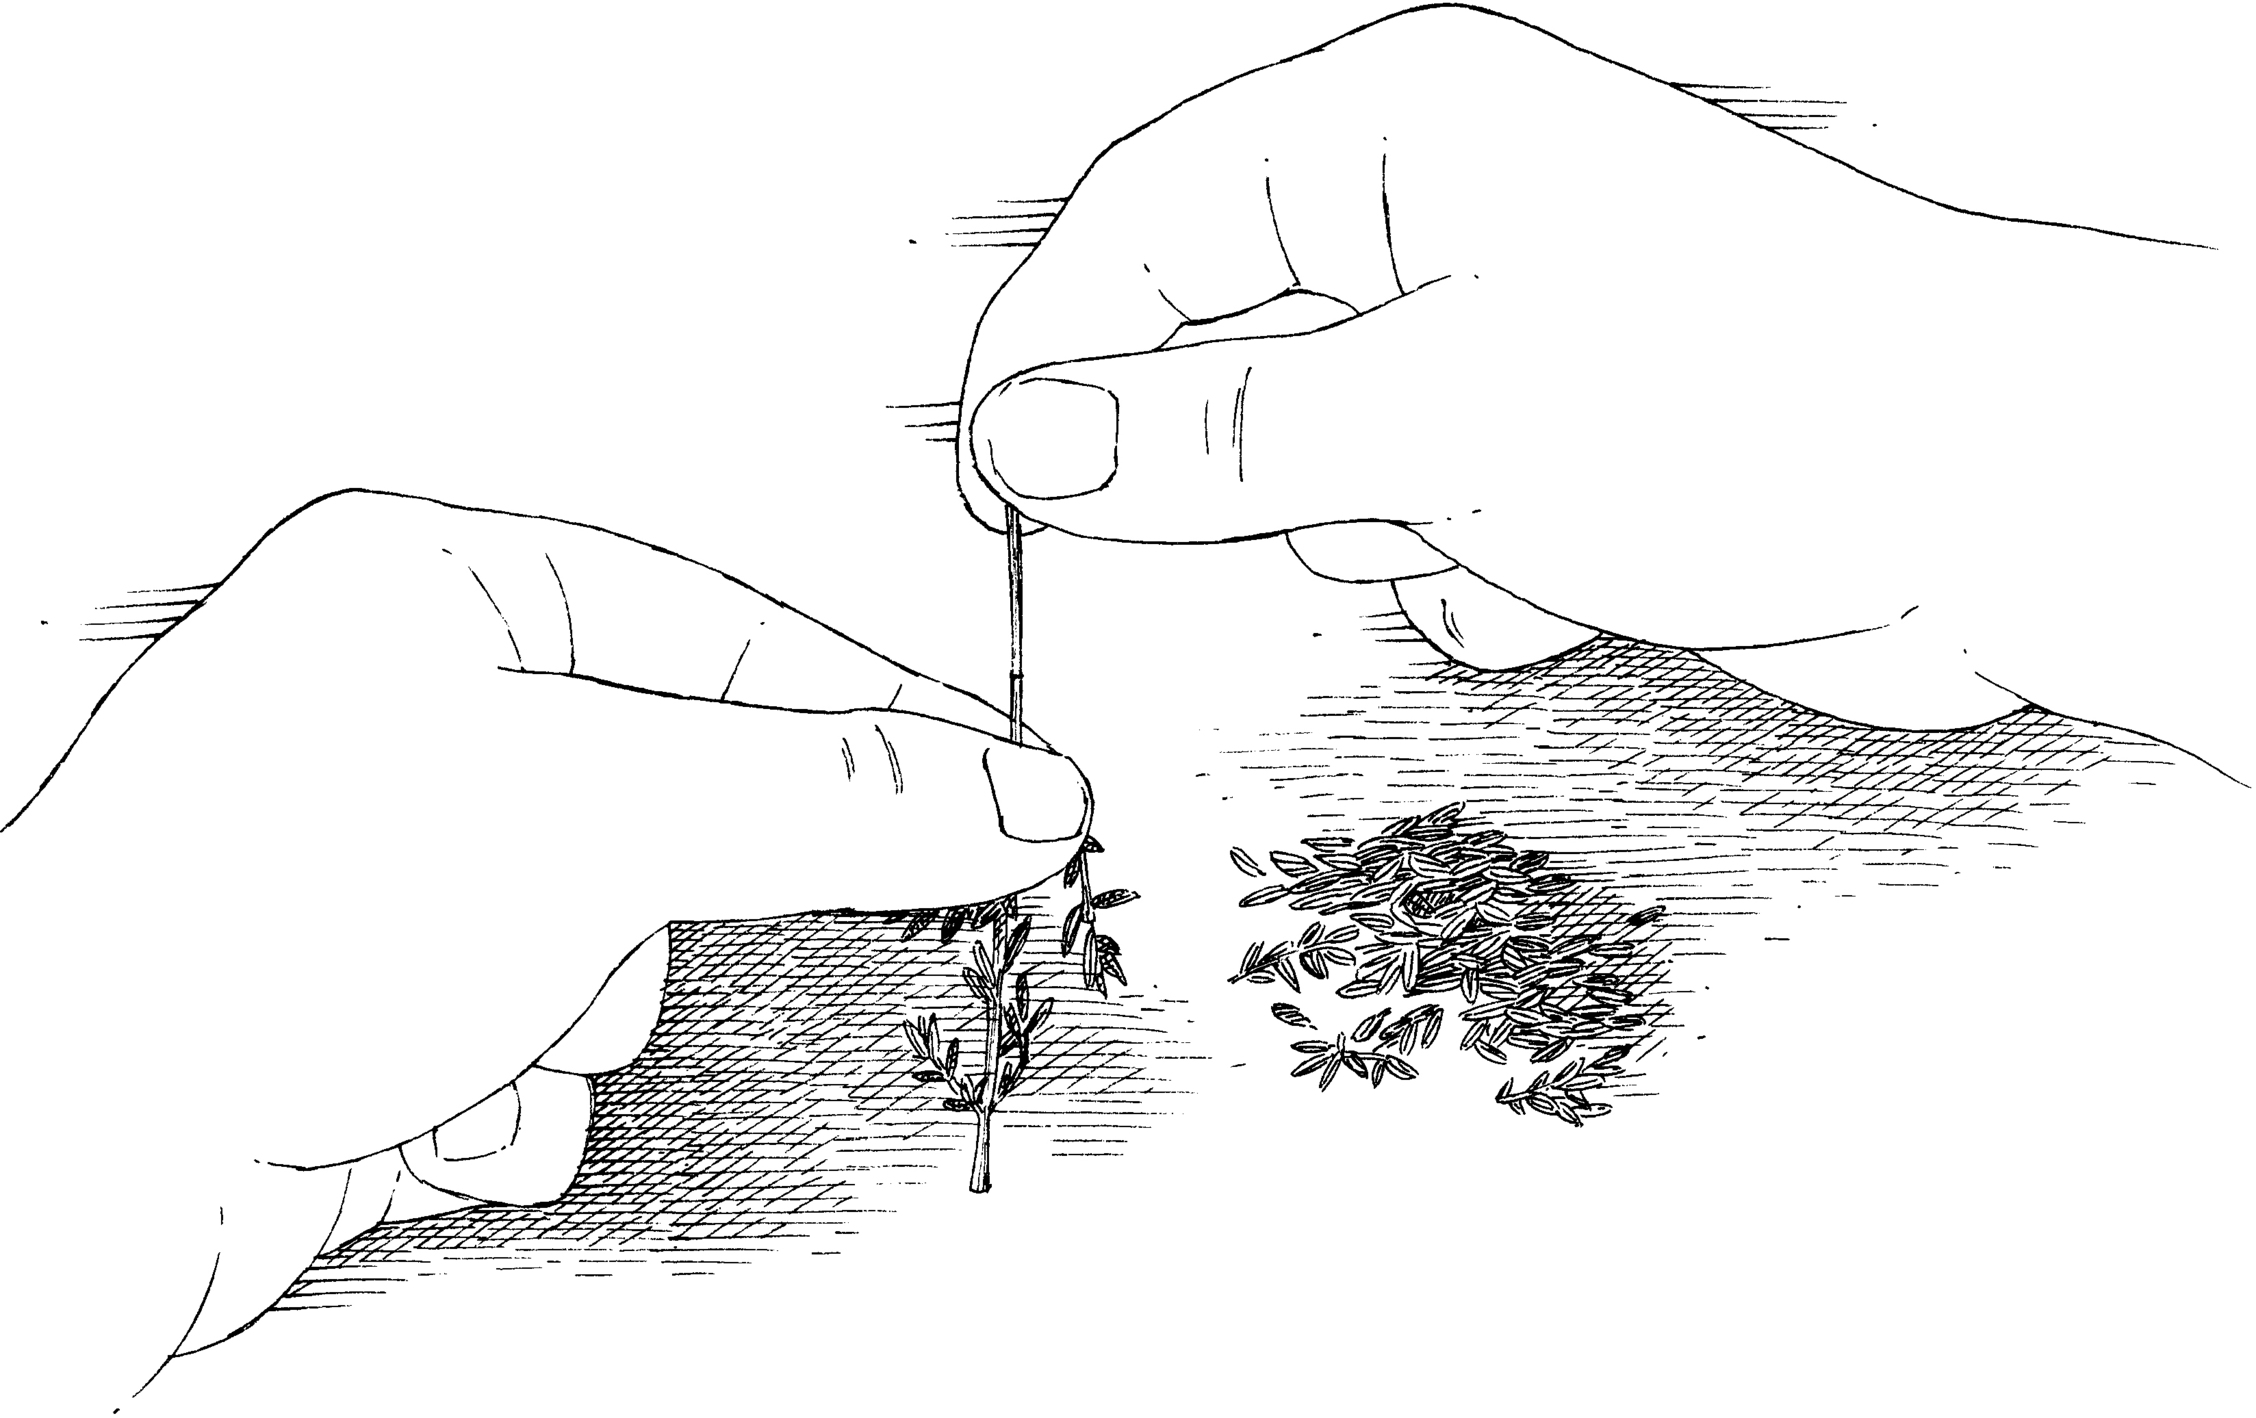
Picking minuscule leaves of fresh thyme off the stem can really pluck at your nerves, especially if a recipe calls for a good deal of it. In the test kitchen, we rely on some tricks to make this job go faster. If the thyme has very thin, pliable stems, just chop the stems and leaves together, discarding the tough bottom portions as you go. If the stems are thicker and woodier, hold the sprig of thyme upright, by the top of the stem; then run your thumb and forefinger down the stem to release the leaves and smaller offshoots. The tender tips can be left intact and chopped along with the leaves once the woodier stems have been sheared clean and discarded.
How do I know when my knives need to be sharpened?

Give them the paper test.
Owning a knife sharpener makes tuning up your knives easy, but how do you know when it’s time? The best way to tell if a knife is sharp is to put it to the paper test. Holding a sheet of paper (basic printer paper is best) firmly at the top with one hand, draw the blade down through the paper, heel to tip, with the other hand. The knife should glide through the paper and require only minimal pushing. If it snags, try realigning the blade’s edge using a honing, or sharpening, steel and then repeat the test.
To safely use a steel, hold it vertically with the tip firmly planted on the counter. Place the heel of the knife blade against the top of the steel and point the knife tip slightly upward. Position the blade at a 15-degree angle away from the steel. Maintaining light pressure and a 15-degree angle between the blade and the steel, slide the blade down the length of the steel in a sweeping motion, pulling the knife toward your body so that the middle of the blade is in contact with the middle of the steel. Finish the motion by passing the tip of the blade over the bottom of the steel. Repeat this motion on the other side of the blade. Four or five strokes on each side of the blade (a total of eight to ten alternating passes) should realign the edge. If the knife still doesn’t cut the paper cleanly, use an electric or manual sharpener. You can minimize the amount of metal removed by focusing on just this section of the blade to fine-tune the sharpening.
How do I dispose of an old knife?

Never just throw an old knife in the trash.
Many home cooks have old or unused knives lurking in the back of kitchen drawers, taking up space and posing a safety risk. Just tossing knives in the trash creates a hazard for sanitation workers, so we contacted a few professional knife manufacturers and waste disposal companies for advice on getting rid of them safely. Many suggested donating the knife if there’s still life in it. You could take it to a thrift store or soup kitchen in your area.
If donating isn’t possible, carefully wrapping the knife for disposal is important for the safety of waste management workers. Use two 9-inch strips of 2-inch-wide electrical tape to cover the tip end and butt end of the blade in a double layer. Then fold an 8 by 10-inch piece of cardboard lengthwise around the blade to cover it entirely. Secure this in place with more heavy-duty tape and write “SHARP KNIFE” on both sides of the package. From there you can hand-deliver it to a waste management or recycling center for safe disposal and/or recycling.
What’s the difference between “processing” ingredients in the food processor and “pulsing” them? Why would a recipe call for one technique or the other?

The food processor is a great tool for chopping ingredients—as long as you use it correctly.
Pulsing food offers more control than simply processing it; the food is chopped more evenly because the ingredients are redistributed—akin to stirring—with every pulse. To test this theory, we made two batches of tomato salsa. We made one batch pulsing the ingredients three times and another batch in which we let the processor run for 3 seconds. We repeated this test with shelled pecans.
The tomato salsa that had been processed was significantly more pureed and had the consistency of a tomato sauce, while the pulsed salsa was pleasantly chunky, as a salsa should be. The processed pecans featured an uneven mix of very small and large pieces; the pecans that were pulsed for the same amount of time were chopped much more evenly.
This proved to us that pulsing produces more evenly chopped food than processing does. For that reason, we call for pulsing when we want foods to be evenly chopped.
When a recipe calls for “one-second pulses” in the food processor, should you hold down the button for a full second and then release it? Or just press it for a microsecond, release it, and wait a full second before pressing down again? The answer depends on your machine. Some instantly spin and continue to rotate for a second after you lift your finger off the button. Others come to a halt as soon as you lift up, requiring you to keep the button depressed to complete a “pulse.” You want the blade to be in motion for about 1 second for each pulse. To ensure that you get the right results when a recipe calls for a certain number of pulses, observe your processor to determine what exactly happens to the blade.
What’s the best way to prepare cake pans so my cakes won’t stick?

It depends on what kind of pan you’re using, but you definitely do need to prepare the pans.
Different cooks in our test kitchen have championed various methods for preparing pans over the years. To find out which strategies are best, we baked a few dozen butter cakes, pound cakes, sponge cakes, and Bundt cakes, using all manner of pan preparations.
With their bumps and ridges, Bundt cakes proved the trickiest. Greasing with softened butter and then dusting the pans with flour left us with a streaky, frosted look on our finished cakes (think bad dye job). A paste made of melted butter and flour (or cocoa for chocolate Bundt cakes), or just plain baking spray (which is vegetable oil spray with flour added), produced clean, perfectly released cakes every time.
The best way to coat a loaf pan for a pound cake turned out to be applying a thick coating of softened butter followed by an even dusting of flour; the flour provided an added layer of protection against sticking and made for an easy and clean release.
As for regular nonstick cake pans, the traditional parchment lining called for in most recipes wasn’t necessary—even when making sponge cakes. The same buttered-and-floured pan method we used for the loaf pans produced the cleanest release.
Is folding the same as stirring? What are the best practices for this technique?

Folding is gentler and more gradual than stirring, which makes it ideal for delicate mixtures.
The goal of folding is to incorporate delicate, airy ingredients such as whipped cream or beaten egg whites into heavy, dense ingredients such as egg yolks, custard, or chocolate without causing deflation. The tools required for folding are a balloon whisk and a large, flexible rubber spatula.
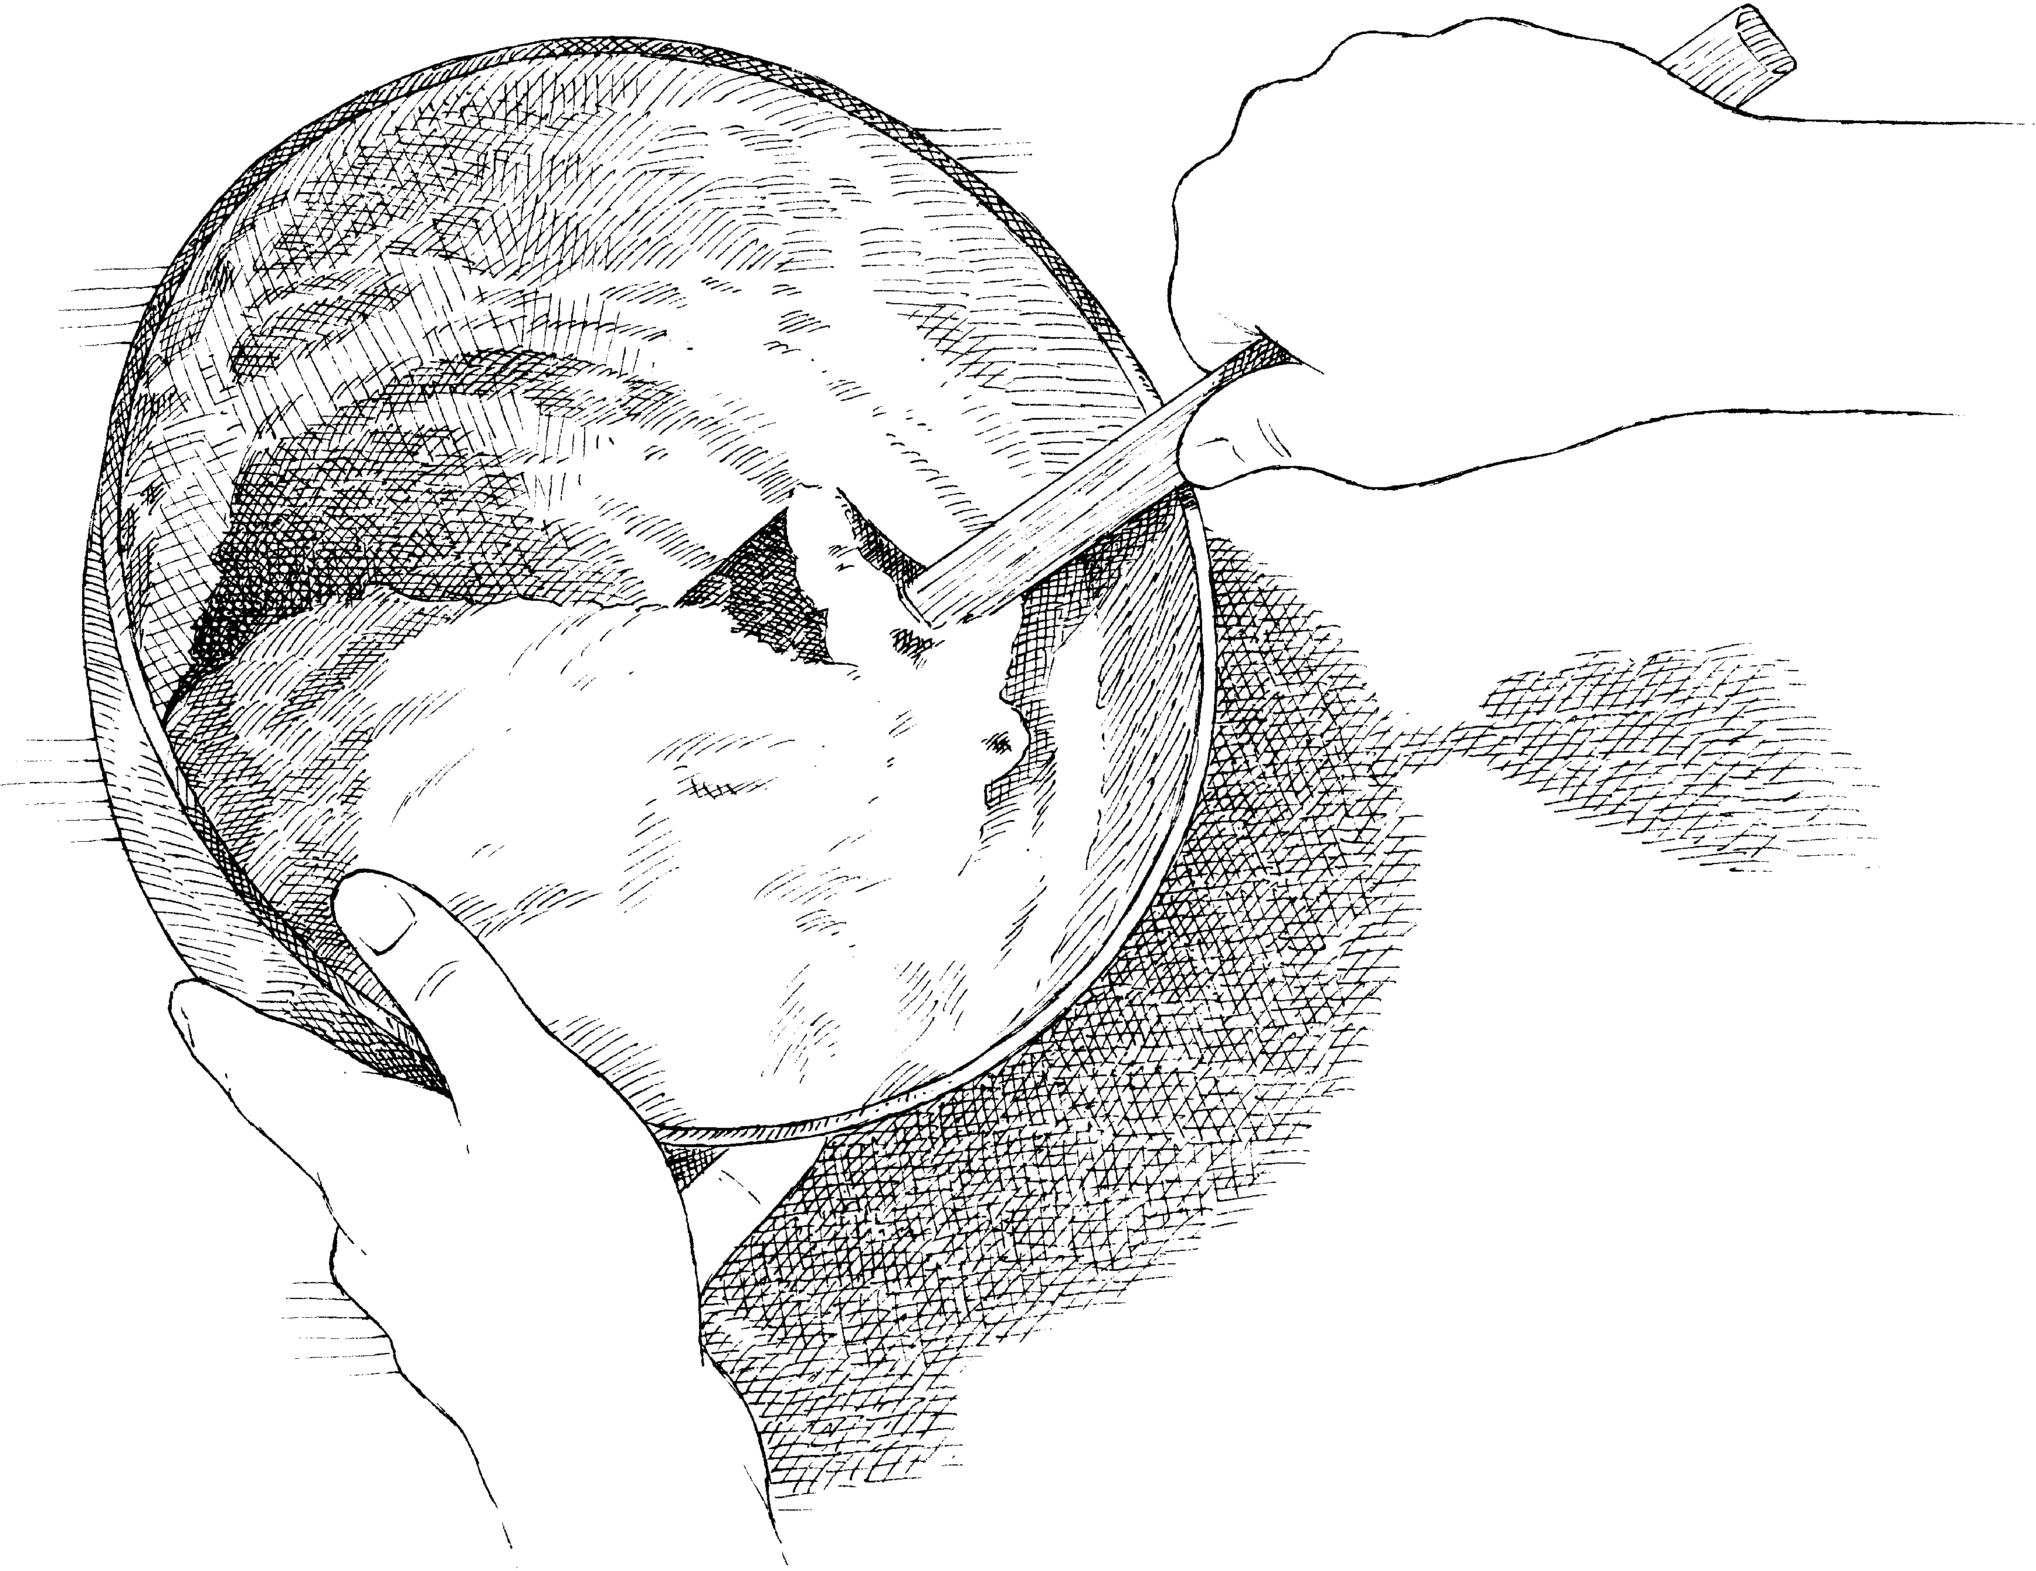
In the test kitchen, we like to start the process by lightening the heavier ingredients with one-quarter or one-third of the whipped mixture. A balloon whisk is ideal for the task: Its tines cut into and loosen the heavier mixture, allowing the whipped mixture to be integrated more readily. Next, the remaining whipped mixture can be easily incorporated into the lightened mixture. For this round of folding, we preserve the airiness of the dessert by using a rubber spatula, which is gentler than a whisk.
To demonstrate the importance of folding, we made two kinds of lemon soufflés and a chocolate mousse cake using three methods: incorporating the whipped ingredients in two additions as specified in the recipes; folding in the whipped ingredients all at once; and finally, vigorously stirring in the whipped ingredients in one addition. The results were not surprising. When the beaten egg whites or whipped cream was incorporated in two batches, the soufflés and mousse were perfectly smooth and light. When we ignored the two-step process and folded everything together at once, the desserts were not quite as ethereal. Finally, strong-armed stirring produced a lumpy, dense end product.
Our recommendation: Don’t cut corners when it comes to folding. Take your time and use a light hand to gradually incorporate beaten egg whites or whipped cream into heavier ingredients. To fold properly and avoid deflating your mixture, start with your spatula perpendicular to the batter and then cut through the center down to the bottom of the bowl. Holding the spatula blade flat against the bowl, scoop along the bottom and then up the side of the bowl. Fold over, lifting the spatula high so that the scooped mixture falls without the spatula pressing down on it.
What’s the best way to toast nuts? Can I use the microwave?

We prefer to toast small amounts of nuts on the stovetop and large amounts in the oven, but the microwave is also an option.
We toasted a range of different-size nuts (slivered almonds, sliced almonds, walnut halves, pecan halves, and whole pine nuts) in a 10-inch skillet over medium heat until lightly browned and fragrant, 3 to 8 minutes, and on a baking sheet in a 350-degree oven until lightly browned and fragrant, 5 to 10 minutes. After comparing the cooled nuts, we found no color or flavor differences. (Note: Properly toasted whole nuts are browned not just on the outside, but all the way through the nut flesh. Cut one in half to check for light browning.) As for technique, toasting nuts on the stovetop requires more attention from the cook; frequent stirring is a necessity. Another strike against the stovetop is that large amounts of nuts can crowd a skillet, preventing thorough toasting. The bottom line: For more than 1 cup of nuts (or if you happen to have the oven on already), use your oven. For smaller quantities, pull out a skillet; just remember to stir the nuts often to prevent them from burning.
But there’s another option: toasting nuts in the microwave. Simply spread out the nuts in a thin, even layer in a shallow microwave-safe bowl or pie plate. Cook on full power, stopping to check the color and stir every minute at first. As the nuts start to take on color, microwave in 30-second increments to avoid burning.
The cooking is more even in the microwave, so less stirring is required. This approach works well not only with nuts but also with other ingredients that need a quick toasting before use, such as bread crumbs, seeds (like pepitas or sesame seeds), shredded coconut, and whole spices like coriander or cumin seeds. Whole spices need only a couple of minutes, while most other ingredients need about 5 minutes (your timing may vary depending on your microwave, of course).
What’s the easiest way to remove all the papery skin from hazelnuts?

Our favorite trick for this fussy task uses baking soda.
The most common method for removing hazelnut skins—toasting them and then rubbing them in a towel—can still leave some skins stubbornly hanging on. Here’s a better approach: In a saucepan, bring 2 cups of water and 3 tablespoons of baking soda to a boil. Add 1 cup of untoasted hazelnuts and boil for 3 minutes. Transfer the nuts to a bowl of ice water with a slotted spoon, drain, and slip the skins off with a towel. The hot alkaline water quickly breaks down the pectin, the primary component in the skins, allowing them to peel off not only more easily but also more completely.
A similar trick is helpful for removing the skins of canned chickpeas. Toss the rinsed and drained chickpeas with baking soda (1½ teaspoons per 14-ounce can) and then heat them in the microwave or in a skillet over medium heat for 2 to 3 minutes, until the beans are hot. Transfer the beans to a large bowl and wash with three or four changes of cold water, all the while agitating the beans vigorously between your hands to release the skins, which will float away easily.
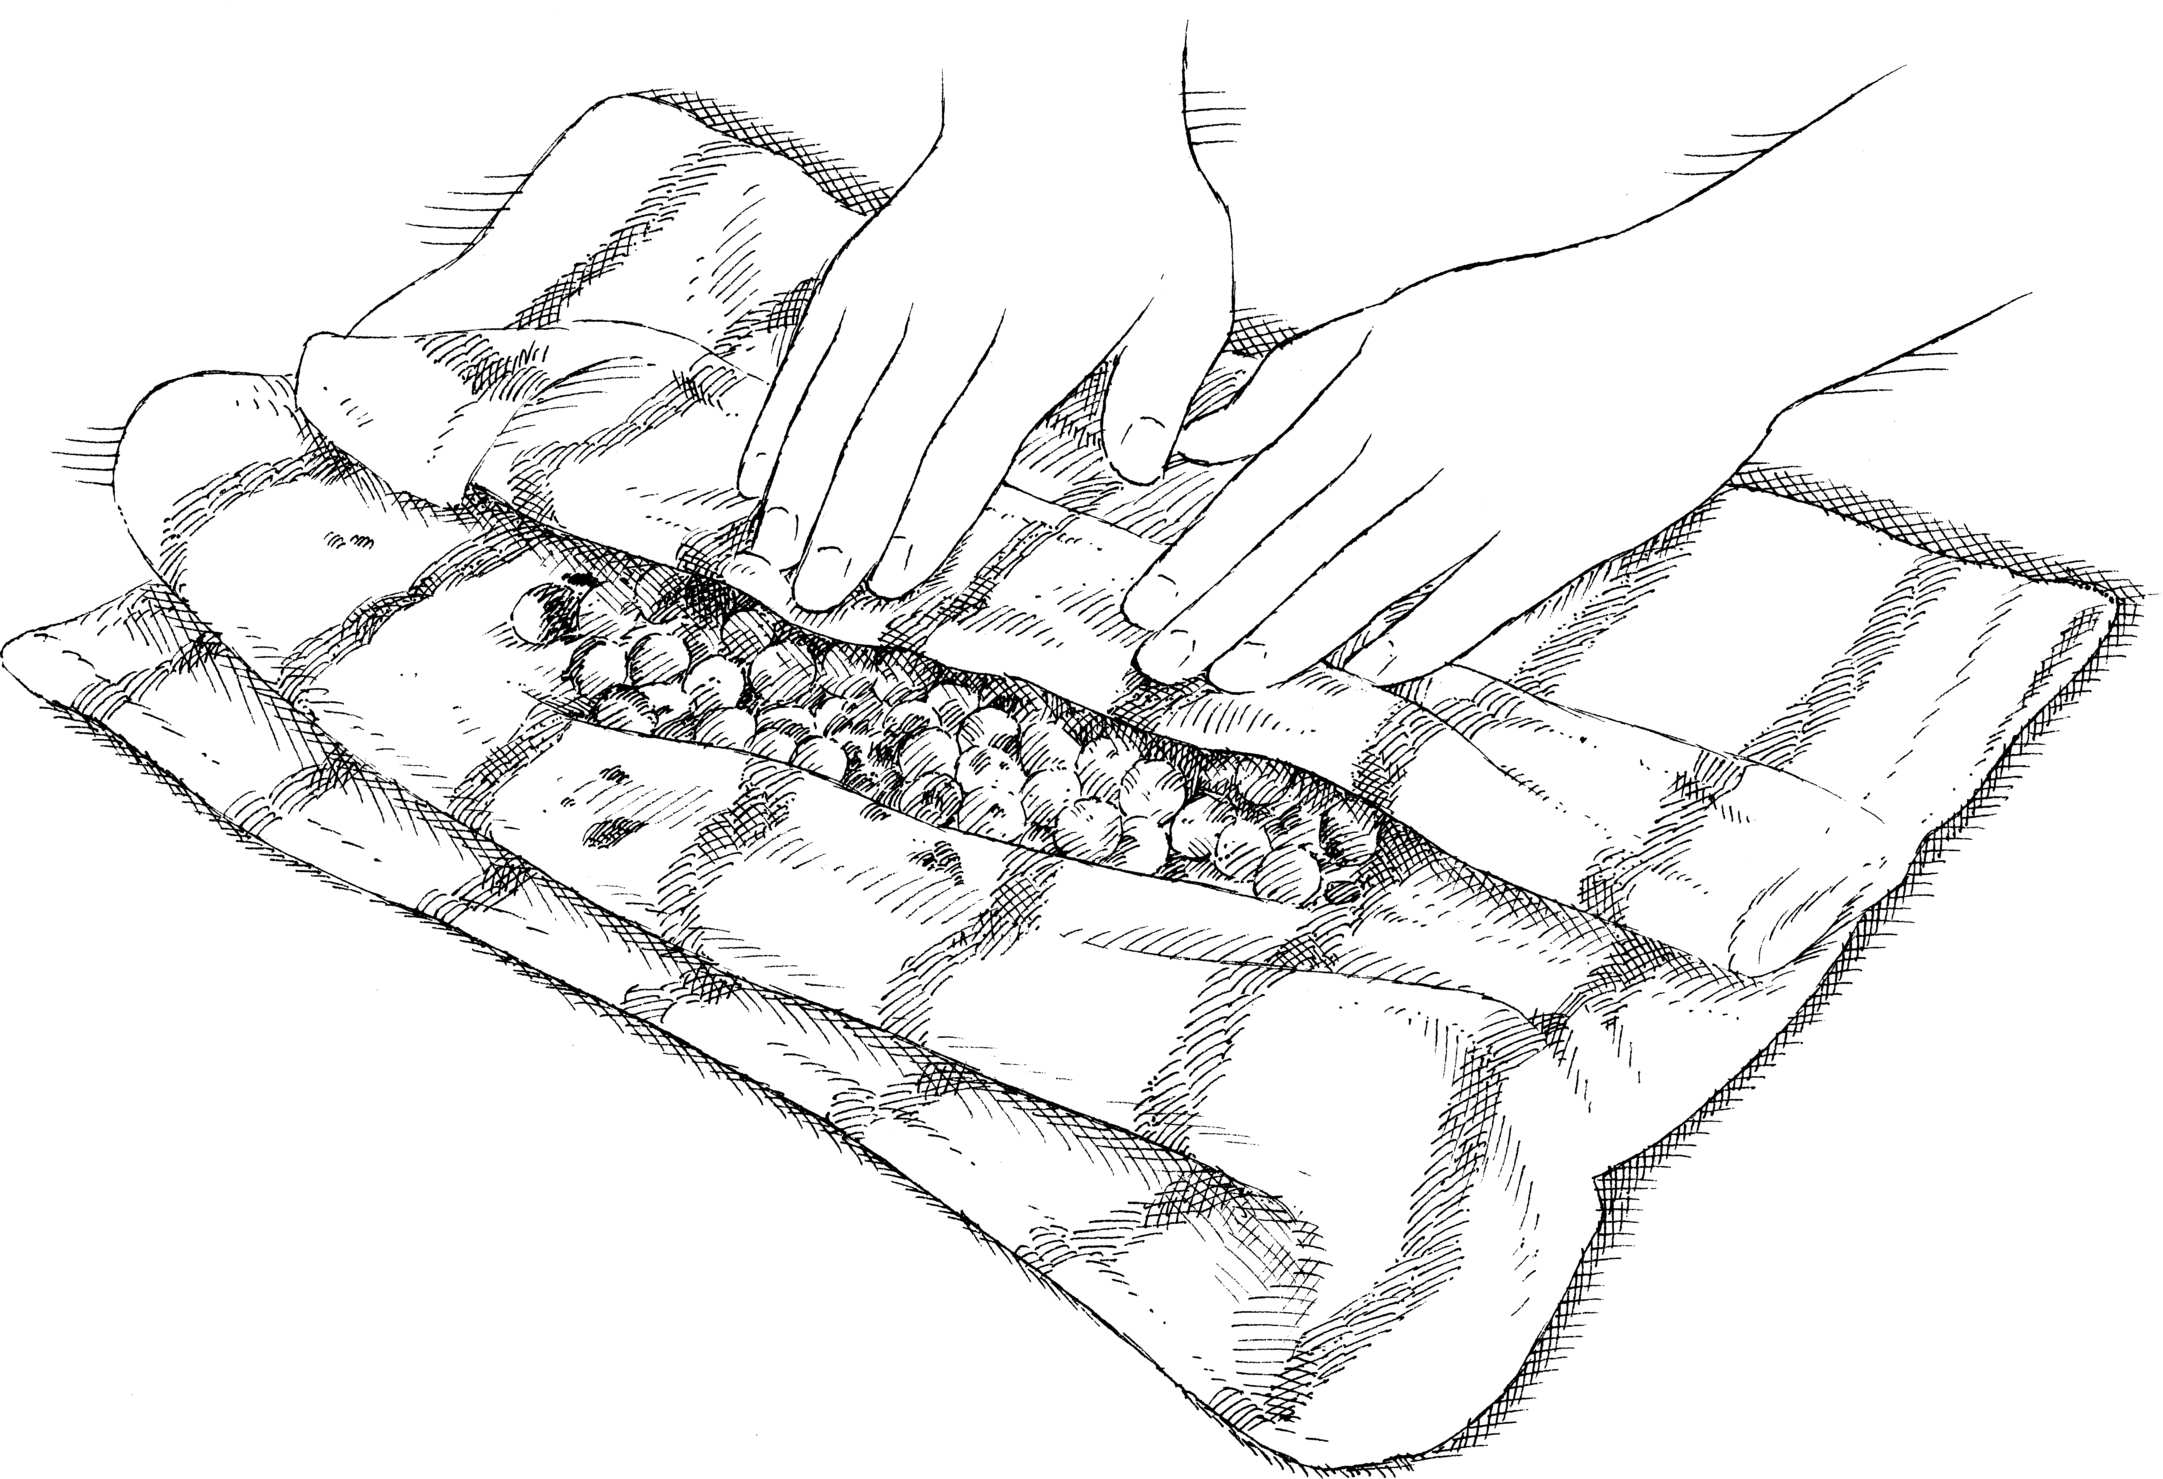
What’s the best way to melt chocolate? I always seem to mess it up.

You can use either the stovetop or the microwave—the key is to employ gentle heat.
Melting chocolate can be a dangerous game—let it get too hot and it will break, becoming irreparably grainy. A heavy-bottomed skillet over very low heat does the trick, but not every burner is capable of maintaining a low enough flame. Here are two melting techniques we’ve tested again and again and found to be foolproof.
Double-Boiler Method
1. Bring a pot of water to a near simmer over low heat; set a large heatproof bowl (the edges should be higher than the pot for easier removal) over it, making sure that the water does not touch the bottom of the bowl (to avoid overheating the chocolate).
2. Add 8 ounces of chocolate chips (or bar chocolate chopped into ½-inch pieces) and heat, stirring occasionally with a rubber spatula, until uniformly smooth and glossy, about 10 minutes (adjust the cooking time as necessary for larger or smaller amounts of chocolate). If the recipe calls for melting the chocolate with butter, add both to the bowl at the same time.
Microwave Method
1. Put 8 ounces of chocolate chips (or bar chocolate chopped into ½-inch pieces) in a large microwave-safe bowl. Microwave on high power for 45 seconds.
2. Stir with a rubber spatula, scraping down the sides of the bowl, and then heat 30 seconds more. Continue heating and stirring in 15-second intervals until the chocolate is uniformly smooth and glossy. (To melt smaller or larger amounts, decrease or increase the initial microwaving time by 10 seconds for every 2 ounces of chocolate.) If the recipe calls for melting the chocolate with butter, do not add the butter until the chocolate is almost completely melted, as adding the butter earlier will cause it to splatter.
How soft does “softened” butter actually have to be?

Butter temperature can dramatically affect the texture of baked goods so it’s important to understand what the lingo means.
Terms like “chilled,” “softened,” or “melted and cooled” are imprecise ways to describe butter, but they’re also very common in recipes. To clarify the nomenclature in our recipes, we came up with the following temperature ranges and tactile clues. (For best results, check the temperature with an instant-read thermometer.)
Chilled (about 35 degrees)
Tactile Clue Unyielding when pressed with a finger and cold to the touch
Common Application Pie dough
Method Cut into small pieces and freeze until very firm, 10 to 15 minutes.
Result Cold butter melts during baking, leaving behind small pockets that create flaky layers.
Softened (65 to 67 degrees)
Tactile Clue Easily bends without breaking and gives slightly when pressed
Common Application Cake
Method Let refrigerated butter sit at room temperature for about 1 hour.
Result Properly softened butter is flexible enough to be whipped but firm enough that it retains the air incorporated during creaming.
Melted and Cooled (85 to 90 degrees)
Tactile Clue Fluid and slightly warm to the touch
Common Application Cookies and bars
Method Melt in small saucepan or microwave-safe bowl and cool for about 5 minutes.
Result Melted butter is the key to chewy cookies and bars.
I was recently softening butter in the microwave to make cookies when part of the stick melted. It was my last stick, so I tried to harden it a little in the fridge, but my cookies didn’t turn out right. Could I have done something different?

You can save oversoftened butter, but you have to act fast.
The fat in butter is partially crystalline and highly sensitive to temperature changes. When butter is properly softened, the tiny crystals can effectively surround and stabilize the air bubbles that are generated during creaming. When heated to the melting point, however, these crystals are destroyed. They can be reestablished, but only if the butter is rapidly chilled. (Returning it to the refrigerator will cool it too slowly and fail to reestablish the tiny crystals.)
To quickly cool down partially melted butter, we mixed in a few ice cubes. After less than a minute of stirring, the butter had cooled to a softened stage, so we extracted the ice and prepared a couple of recipes. (The amount of icy water that leaked into the butter was negligible.)
Our fix worked: Sugar cookies made with our rehabilitated butter were nearly identical to those made with properly softened butter, and buttercream frosting was also acceptable, if slightly softer than a control batch.
If you’re worried about overdoing it in the microwave but still don’t have an hour to wait for butter to soften on its own at room temperature, try this trick: For baking applications where butter is creamed, cut the stick into 1-tablespoon pieces (more exposed surface area helps the butter warm evenly) and stand them on a plate. The pieces will soften in about 20 minutes.
How can I crack and separate eggs without making a mess?

You don’t need any gadgets to separate eggs, but we do recommend using multiple bowls.

We strongly recommend that you separate eggs when they are cold, as yolks are more taut and less apt to break into the whites when cold. Since even a speck of yolk in the whites can prevent them from whipping properly, this is especially important in dishes like soufflés that rely on whipped whites for volume. If a recipe calls for separated eggs at room temperature, separate the eggs while cold, cover both bowls with plastic wrap (make sure the wrap touches the surface of the eggs to keep them from drying out), and let them sit on the counter.
Start by cracking the side of the egg against the flat surface of a counter or cutting board. This gives a cleaner break than using the edge of the counter or a mixing bowl. Then you can either use the broken shell or your hand to separate the eggs. To separate with the shell, hold the broken shell halves over a bowl and gently transfer the egg yolk back and forth between them, letting the egg white fall between the shells and into the bowl. To separate by hand, cup your hand over the bowl, then open the cracked egg into your palm. Slowly unclench your fingers to allow the white to slide through and into the bowl, leaving the yolk intact in your palm. Make sure your hands are clean, especially if you plan on whipping the whites.
Whichever method you use, separate each egg over one bowl and let the white fall in. Then transfer the yolk to a second bowl and pour the white into a third bowl. By using this method, if you happen to get some yolk into the white when separating an egg, you can simply throw out that egg (or use it in another recipe that calls for whole eggs)—much better than separating a dozen eggs only to drop yolk from the last egg into a big bowl of clean whites.

There are some things that professional cooks just know by heart, including basics like how to prep ingredients and how to use common cooking techniques. For those of us who aren’t quite at that level yet, here are some reminders.
Prep 101
Technique 101
