12.11 Playing back Videos

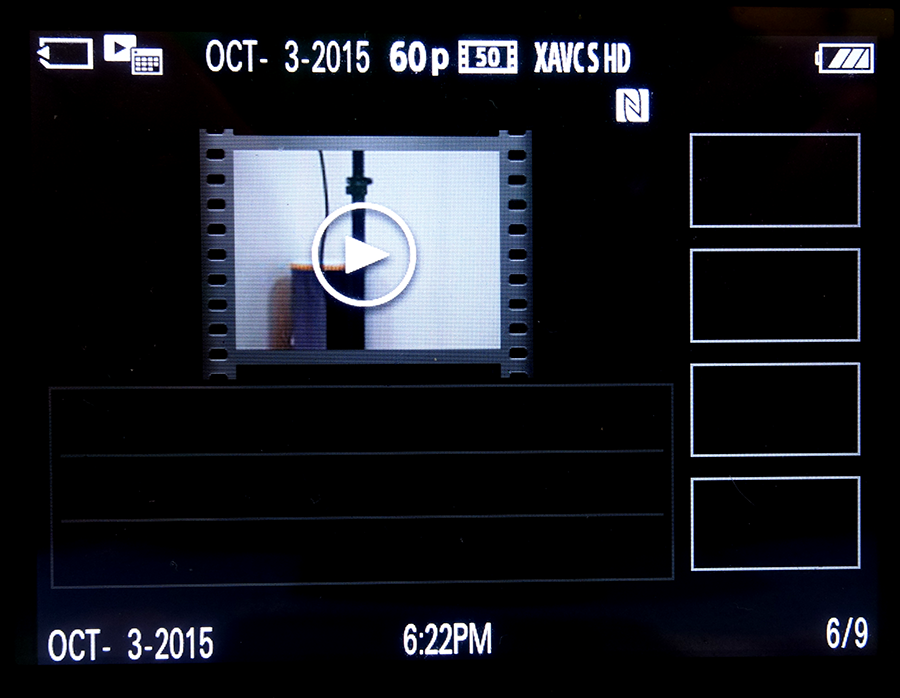
Figure 12-10: You can still get the histogram playback screen by hitting the DISP (Up arrow) button several times during playback mode – but as you would expect, no histograms are shown. (Good news, though: Live histograms now work when you’re shooting movies, which is a relatively new feature for Sony.) |
|
You have a few options when playing back. Not all of them are intuitive.
- Make sure MENU -->
 1 --> View Mode is set to Date View. Otherwise you might not see everything on the card.
- As you scroll left and right to decide what video clip to play back, you can press the DOWN arrow button to adjust the volume (the sound comes out of those two tiny holes on the top plate of the camera, to the left of the hot shoe).
- Press the center button to play back a video clip.
- While playing back, you can press the DOWN button and a whole menu of options appears across the bottom of the screen. Most of the controls will be familiar to you (playback, fast forward, etc.). The rightmost icon makes the control strip go away.
- Pressing the UP arrow during playback brings up stats about the video clip (name, mode, date, etc.)
12.12 External Microphones
Sony has released TWO different external microphones as an accessory to your camera: the ECM-ALST1 (about USD $117 on Amazon.com) and the ECM-CG50 (about USD $170, also at Amazon), both of which appear in Figure 12-11. Each of these microphones attach to the camera’s flash shoe and offer a better-quality, wider-bandwith audio experience along with a real windscreen for cutting out that famous wind distortion noise. The ECM-CG50 is definitely the way to go if you’re an audio pro: it has a serious shock mount (for isolating mechanical noise), a better windscreen, and just looks intimidating to others.
I wasn’t able to test either of these units in person for a side-by-side comparison; and it seems nobody on the internet has been able to do so either. However, I did find these video user reviews of the ECM-ALST1 on youtube: http://tinyurl.com/4h8b75g. And then there’s this test of an ECM-CG50 taken in a Sony store: http://tinyurl.com/4uxmwft.

Figure 12-11: Two Sony options for external microphones: The ECM-ALST1 (left) and the more expensive and intimidating ECM-CG50 (right). |
|
Here's a third option: Sony Alpha guru and f2 CameraCraft magazine publisher David Kilpatrick tested the RØDE Stereo VideoMic and had phenomenal things to say about it. "The difference in sound quality is more than a basic improvement, it's a transformation." David’s sample video is here http://tinyurl.com/7u9rhbv (youtube) and you can purchase one for $249 here: http://bit.ly/1hDFRfK
Got a high-quality mic of your own with a mini-phono plug? You can plug it right into the camera. It even accepts microphones with the “Plug In Power” logo (meaning the camera powers the mic, rather than needing its own battery).

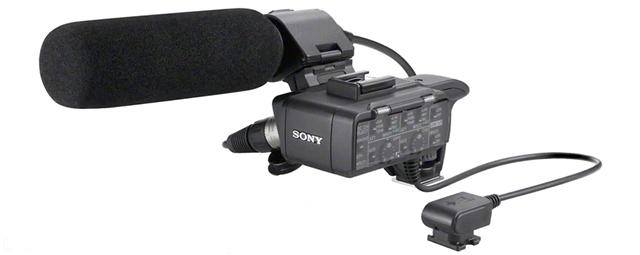
Figure 12-12: The Sony XLR-K1M audio adapter kit can accept two professional-level microphone connections, mix them down, then feed them to the camera via the hotshoe. Don’t forget to buy a VCT-55LH bracket also so you can mount it to the camera. |
|
There is also an XLR mic adapter and audio mixer available for Sony which feeds the audio through the new hotshoe design (Figure 12-12). Know that if you order this you must also purchase the VCT-55LH L-shaped bracket to mount it to the camera. (Most retailers don’t know this.) This bracket also has a hotshoe mount which event videographers can use to attach an LED light source or a wireless mic receiver.
TIP: There’s no “Line in / Mic” switch on the camera. It’s Mic all the way. You have to turn the volume way down on the input (and output) in order to control any distortion. TIP 2: The A6300 doesn’t have a headphone jack, preventing you from actually listening to the audio while you’re recording (to make sure it’s not distorting). A lot of people are disappointed by this omission; however here’s a webpage offering a plethora of options to work around this: http://bit.ly/23wmMCO Important Yet Obscure Tip: The Memory function (Section 6.47) actually remembers the audio levels you set when you commit a collection of settings to memory. So if you rotate the exposure mode dial and pass a memory location that has it, your sound level setting will change to what was memorized. (And your focusing point is apt to change too if you were set to manual focus before.) So be sure to move your exposure mode dial so that it never passes settings 1 or 2! |


