Chapter 15 Digital Imaging Topics
Even experienced photographers can be a little unsure about the tradeoffs between RAW and the quality differences between Standard & Fine .jpg. How can you know what to choose? Are there preferable ways to process RAW files?
In this chapter I will talk a little bit more about RAW, and will share with you my own personal workflow I use with my RAW images. I’ll also go into some of the tradeoffs between shooting RAW and JPG.
DISCLAIMER #1: The workflow I use suits me well but it’s not necessarily the best for everybody. Different tools have different strengths.
DISCLAIMER #2: Some of the techniques outlined in this chapter require what’s called “Pixel Peeping” in order to see the small differences they make. This is something that computers have made very, very easy to do even though such close examination is not at all a meaningful way to evaluate image quality in the real world. The proper way to evaluate image quality is to print it at the size it’s going to be used and view it at the distance at which it’s going to be seen. But for purposes of illustration I must violate my own policy here and show close-ups of certain images. Let it be known that I generally don’t recommend such close examination (see Figure 15-1).
DISCLAIMER #3: Although I do show some of the controls for some of the software packages (Capture One Express, and Lightroom), by necessity this book cannot be a comprehensive guide to using these software packages. (That would require at least one other whole book!)
DISCLAIMER #4: Sony has thoughtfully provided you a FREE copy of Phase One's Capture One Express image editing software which is quite good but, like Photoshop, has its own learning curve. But if you hate Adobe for their new direction of software subscriptions, this might be the viable alternative you've been looking for. Learn more and download your free copy at https://www.phaseone.com/en/Imaging-Software/Capture-One-for-Sony.aspx .

|
Figure 15-1: “Pixel peeping” is generally not a useful way to evaluate the quality of an image. Images that may look poor when examined too closely may actually look just great when printed. Don’t get hung up on this technique to evaluate image quality! (What the Duck Comic used with permission.) |
15.2 An Introduction to RAW
Back in my day, photographers would shoot either slides or negatives. Real photographers who sold images for publication shot slides, since that was the preferred format in the publishing world – they were incredibly sharp (especially Kodachrome 25 or 64), and there were fewer problems with accurate color reproduction, since what you saw on the slide was considered the “correct” exposure and color. (Negatives, on the other hand, could be tweaked in terms of exposure and color balance until the cows came home and the folks in the print house rarely got it right – at least not to the photographer’s satisfaction.)
So professional photographers had a right to be somewhat arrogant, since in order to have the perfectly exposed slide (and therefore a perfectly sellable shot) you really, really had to have the right light and the right exposure. You had to have the right filter on your lens if you were shooting daylight balanced film under incandescent light. You had to get everything right in the camera – there was no safety net of post-processing. One might have assumed that the pros would have vastly preferred negatives, since that would give them more control over the final print later on in the darkroom. But the demands of the industry forced a great deal of people to work within the exacting tolerances of transparencies.
In a very crude way, you can think of shooting .jpgs the same as shooting transparencies – you really have to get it right in the camera. RAW, on the other hand, is analogous to shooting with negatives. Having a negative is not the final product – you have to print it in a darkroom (or a 1-hour photo lab) first before you get your final image. And if the idiot working the 1-hour photo machine made gross errors in printing, you could simply throw those bad prints away, go back to the original negative, and make a better print using different exposure and color balance settings.
Many, many people think of shooting .jpg as the equivalent of keeping the (possibly bad) 1-hour photo prints and throwing away the original negative, leaving no hope of correcting for in-camera processing errors. Therefore, these folks opine that you should ALWAYS shoot RAW, or RAW + JPG if you want the convenience of both prints and negatives. Hard to argue with that.
But there are also plenty of working photographers who shoot under deadlines (without the luxury of time for post-processing) and/or grew up shooting slides. These pros feel (justifiably so) that if you know what you’re doing and take the same care to keep your light right and exposure and color balance set properly for the situation as you did for slides, your final print from in-camera .jpg’s will look just as good as shooting with RAW and post-processing, only it will take significantly less time. (Have a look at the photos on the back cover of this book, for example – ALL OF THEM were .jpgs straight out of the camera.) Speaking such viewpoints on internet discussion forums usually invokes disdain from vocal “experts”, but it is a perfectly valid viewpoint and one which I respect – for only the photographers who really know what they’re doing can get away with it. For everyone else, shooting RAW can offer a safety net and helps ensure you can end up with the highest quality image your camera is capable of producing.
RAW vs. JPG has become a religious issue in some circles, with some saying “RAW is technically better in every aspect, and so you should never shoot anything else. If you do, then you’re obviously an idiot.” Others say “In theory that’s true, but in the real world if you get your lighting and exposure right the in-camera .jpgs are so good that the image won’t be significantly improved by shooting RAW.” (Yet a third, vocal minority shouts “You’re both right, and if you do your post-processing using Adobe’s Lightroom, it handles RAW conversion invisibly so there’s no additional effort to process either format!”)
But I’m getting ahead of myself. My real goal with this section is to remove the mystery surrounding RAW shooting. (RAW shooting, like histograms, seem complex until someone explains them to you properly, at which time they become so intuitively obvious that you wonder what the big deal was.) And so, let’s take a nice deep breath and get a little technical for a minute, while I explain exactly what goes on inside your camera in order to convert directed photons into a file on your memory card. First, let’s see how your camera turns what’s essentially a black-and-white sensor into a color image.

|
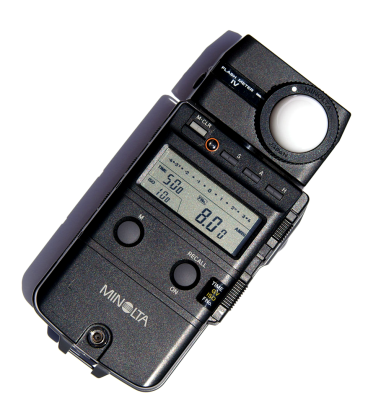
Figure 15-2: Seriously, this is one pixel. Get 24 million of these together and you can make your own A6300. |
15.3 The Bayer Filter and Demosaicing
See that handheld light meter in Figure 15-2? That’s the equivalent of one pixel. All it can do is measure light intensity, not color. It measures light intensity and, internally, the intensity is converted into a number between 0 and 4096 (or between 0 and 16,384 if you’re shooting 14-bit RAW files). (Then the on-board computer suggests an f/stop and shutter speed combination that would work for that given light intensity at a given ISO.)
Let’s say you had a lot of spare time and purchased 24 million of these handheld light meters, and you took them apart and wired them together, taking the numeric output for each one and feeding them to your computer. What you’d have is a giant 24 megapixel sensor, which, when combined with a large lens and an image processing program, will give you a very nice, high-resolution, B&W photo.
B&W Photo? Yes, that’s right. Pixels don’t measure color. When arrayed together, they can only form the equivalent of one large B&W image.

|
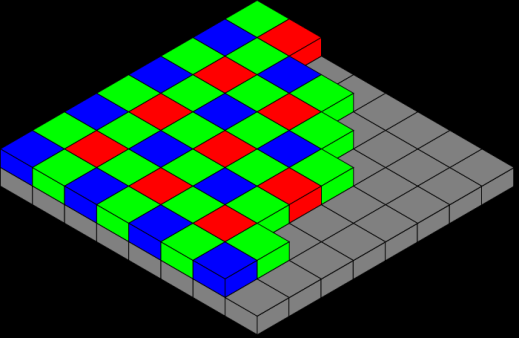
Figure 15-3: The Bayer Mosaic covers each pixel (which can only sense brightness, not color) with a red, green, or blue filter. For each pixel, the camera’s computer must guess what the other colors must have been. For example, for a pixel with a green filter, what should the red and blue values be? A sophisticated algorithm must infer it from the values of neighboring pixels. |
So how can you turn B&W images into color ones?
Back in the 1970’s, a very clever way of inferring color of a scene using only ONE sensor was developed at Kodak by Dr. Bryce E. Bayer. Dr. Bayer proposed using only one sensor but placing different color filters over each individual pixel (a manufacturing challenge, to be sure!). Then it would be up to the camera’s computer to infer a red, green, and blue value for EACH PIXEL even though only one of those three values is actually known.
For example, for a pixel with a green filter over it, you can know the value only of the green intensity. How much red and blue should be assigned to that pixel? The camera’s computer has to guess. To estimate the amount of red that should be assigned to that pixel, it might look at the values of other red pixels in close proximity to the green one in question, and try to interpolate. Same with the blue component. In all, your camera’s computer must perform this guesswork for every single pixel in the sensor as it produces a .jpg image in the camera. This process of estimating what the other color components must be for each pixel is called “de-mosaicing”. It works remarkably well.

|
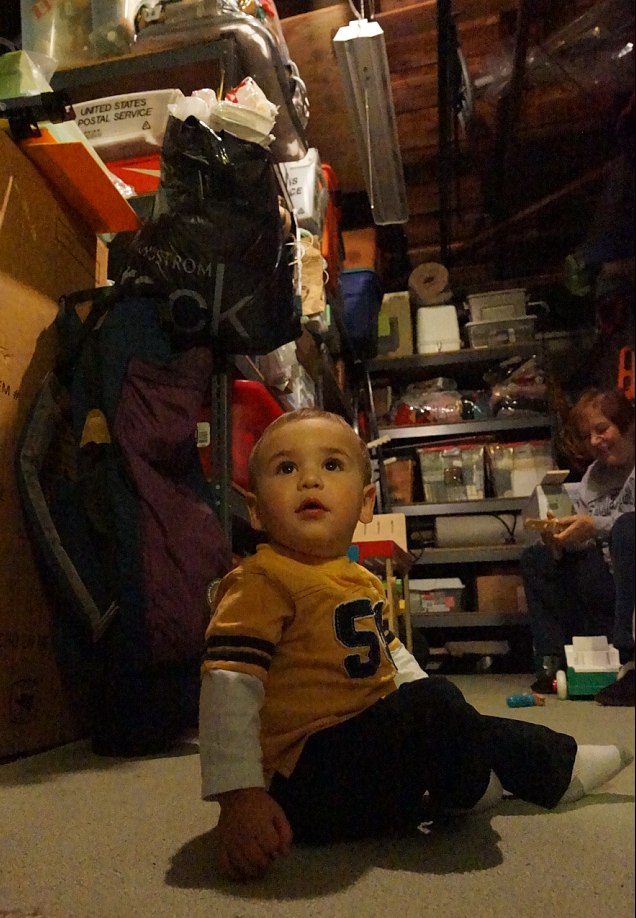
Figure 15-4: A shot taken with the worst light I could find, handheld at ISO 10000. Image was shot RAW + JPG; this was the JPG. |
Now here’s where things get fun. Demosaicing is an inexact science. Many, many people have tried to make a de-mosaicing algorithm that adds the color back “properly”: Spline Interpolation, Lanczos Resampling, Variable Number of Gradients, and Adaptive homogeneity-directed interpolation are just four examples of the very complex methods different software applications use. And each algorithm will work well for certain kinds of pictures, but not well for other kinds. And every method produces an image that has a different look. Want proof?
Have a look at Figure 15-4, which was a handheld shot at ISO 10,000 with Noise Reduction set to “Normal”. This was shot via RAW + JPG, and the JPG is pictured, straight out of the camera. The image probably looks just fine at first glance, but as you zoom in you’ll start to see some of the “watercolor effects” – artifacts of the camera trying hard to clean up the noise at such a high ISO (Figure 15-5a). Many people who grew up shooting grainy, high-speed film would be perfectly ecstatic with this result (this is way better than what film could do!) and not see the noise as being a distraction. Later on in this chapter I’m going to show you how I get a great high ISO image (like the kind in Figure 15-5b) by shooting RAW and post-processing.

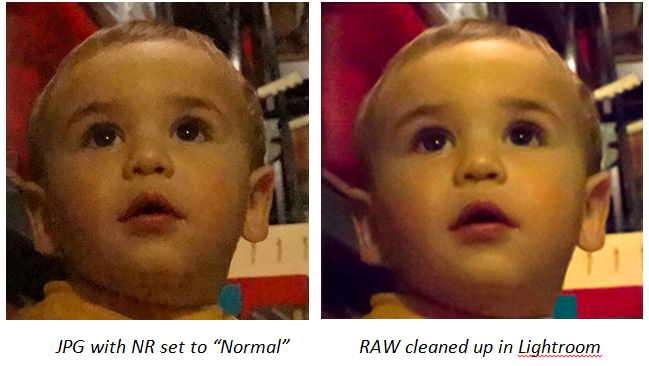
Figure 15-5: Zooming in you can see some of the noise and the “watercolor effect” of in-camera noise reduction on .jpgs (left). Can we do better by processing the RAW file? The right image says “Yes” and I’ll show you the tools I use later on in this chapter. |
|
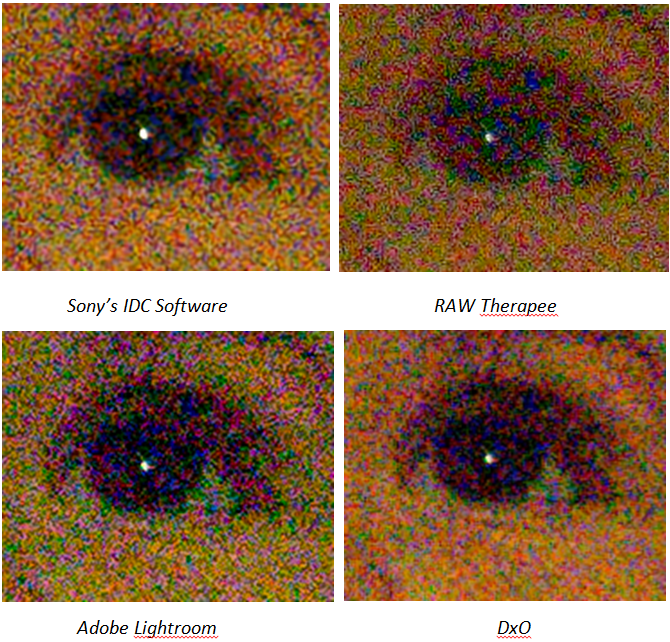
So far we’ve only seen the in-camera .jpgs from this image. Does the RAW image (also produced by the camera) look any better after de-mosaicing? Have a look at Figure 15-6, which shows you the same image as converted by three different RAW processing programs. (No noise reduction was performed on any of these sample images.)
So you can clearly see that the process of demosaicing can be done in many different ways, to many different effects. Your camera will do it one way, Adobe Camera RAW will do it another, Bibble or CaptureOne will do it a third and a fourth way. In 2008 David Kilpatrick (then-editor of Photoworld magazine and runner of the PhotoClubAlpha.com website; currently the publisher of f2 Cameracraft magazine of which I am associate editor and you really ought to subscribe! :-) ) published a comparison of SEVEN different RAW processors, trying hard to tweak the controls of each to get the best possible quality. You can see his results and read his recommendations at http://tinyurl.com/7t4ngj6. He has since done a similar comparison and concluded that Lightroom version 3.3 and later (as well as Adobe Camera RAW CS5 and later) have completely re-done their demosaicing algorithms for Sony sensors, and, finally, they were done

Figure 15-6: An example of how a RAW file looks when decoded using different RAW processors (with no noise reduction applied). (These were taken with an earlier camera.) As you can see, there is more than one way to estimate what the color of a pixel should be without knowing for certain what it was. You can also see that noise and detail are tradeoffs. I go for detail since I can always remove the noise later using different tools. (These tools are getting very similar – you should have seen the differences between these tools in the A900 book from 2009!) |
|
right. David even recommended that all camera review sites (*cough* dpreview *cough*) re-do their RAW comparison sections for ALL older Sony cameras since Adobe Camera RAW (the “level playing field” used to compare RAW results from different cameras) finally makes Sony RAW files look good.
There’s no industry standard for RAW file processing, and all ways have their tradeoffs. Since graduating to Lightroom I now use it for all of my RAW processing needs out of sheer convenience. (That software handles RAW and JPG files identically – no additional steps are needed for RAW, at least in theory.) It’s invisible, and therefore shooting RAW is no longer the pain in the butt that it used to be. But there’s still some benefit to shooting RAW+ JPG and I talk about this plus how to use it to reduce noise in Section 15.9.
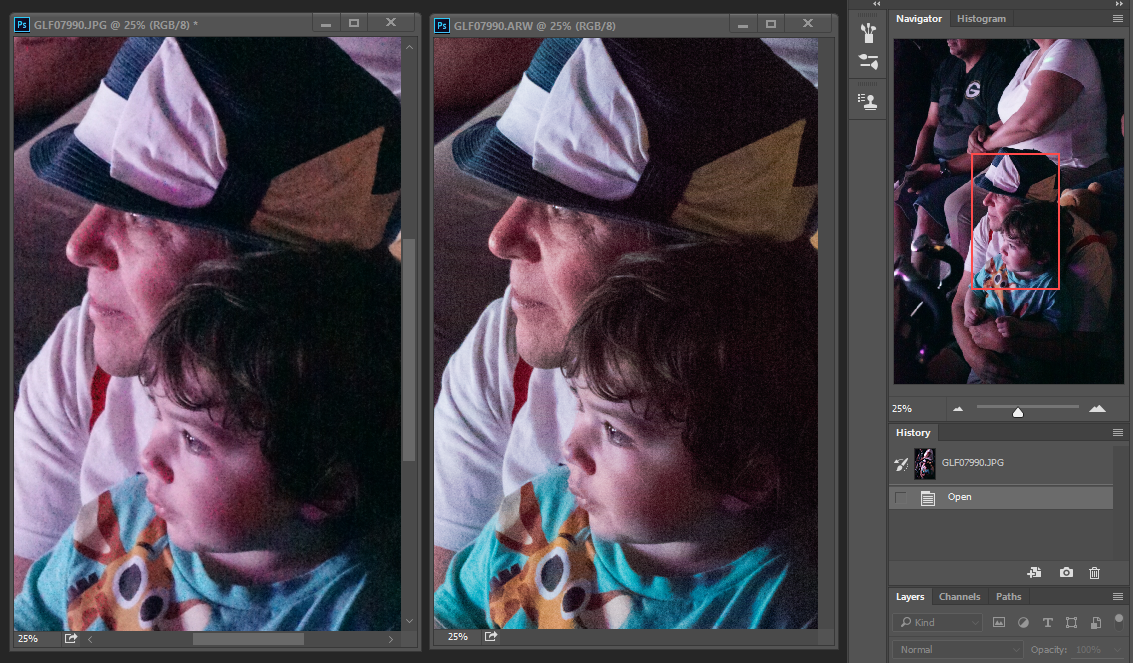
TIP: The above was all "theory", and the example in Figure 15-4 was taken with a 4-year old camera. The A6300 is the first camera I've ever used where the out-of-camera .jpgs taken at high ISO are so close to what I can achieve by post-processing the RAW file that you may not even find it worth the trouble! Below is a close-up of two shots taken at ISO 12,800 – the .jpg is on the left, the processed RAW file on the right. High ISO Noise Reduction was set to "Low" for this shot. I now use the "Normal" setting for even better results. 
|

