Let's take a quick tour of Immunity Debugger and its interface before digging into immlib, the Python library that enables you to script the debugger. When you first open Immunity Debugger you should see the interface shown in Figure 5-1.
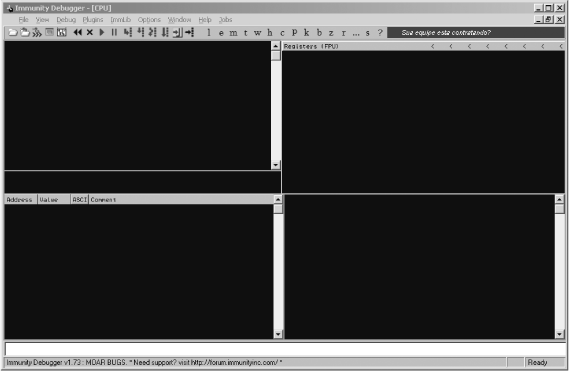
The main debugger interface is divided into five primary sections. The top left is the CPU pane, where the assembly code of the process is displayed. The top right is the registers pane, where all of the general-purpose registers and other CPU registers are displayed. The bottom left is the memory dump pane, where you can see hexadecimal dumps of any memory location you chose. The bottom right is the stack pane, where the call stack is displayed; it also shows you decoded parameters of functions that have symbol information (such as any native Windows API calls). The bottom white pane is the command bar, where you can use WinDbg-style commands to control the debugger. This is also where you execute PyCommands, which we will cover next.
The main method for executing Python inside Immunity Debugger is by using PyCommands.[28] PyCommands are Python scripts that are coded to perform various tasks inside Immunity Debugger, such as hooking, static analysis, and various debugging functionalities. Every PyCommand must have a certain structure in order to execute properly. The following code snippet shows a basic PyCommand that you can use as a template when creating your own PyCommands:
from immlib import *

def main(args):
      # Instantiate a immlib.Debugger instance
      imm = Debugger()

      return "[*] PyCommand Executed!"
In every PyCommand there are two primary prerequisites. You must
have a main() function defined, and it must accept
a single parameter, which is a Python list of arguments to be passed
to the PyCommand. The other prerequisite is that it must return a
string when it's finished execution; the main debugger status bar will
be updated with this string when the script has finished
running.
When you want to run a PyCommand, you must ensure that your script is saved in the PyCommands directory in the main Immunity Debugger install directory. To execute your saved script, simply enter an exclamation mark followed by the script name into the command bar in the debugger, like so:
!<scriptname>
Once you hit ENTER, your script will begin executing.
Immunity Debugger ships with 13 different flavors of hooks, each of which you can implement as either a standalone script or inside a PyCommand at runtime. The following hook types can be used:
- LogBpHook
BpHook/When a breakpoint is encountered, these types of hooks can be called. Both hook types behave the same way, except that when a BpHook is encountered it actually stops debuggee execution, whereas the LogBpHook continues execution after the hook is hit.
- AllExceptHook
Any exception that occurs in the process will trigger the execution of this hook type.
- PostAnalysisHook
After the debugger has finished analyzing a loaded module, this hook type is triggered. This can be useful if you have some static-analysis tasks you want to occur automatically once the analysis is finished. It is important to note that a module (including the primary executable) needs to be analyzed before you can decode functions and basic blocks using immlib.
- AccessViolationHook
This hook type is triggered whenever an access violation occurs; it is most useful for trapping information automatically during a fuzzing run.
- LoadDLLHook/UnloadDLLHook
This hook type is triggered whenever a DLL is loaded or unloaded.
- CreateThreadHook/ExitThreadHook
This hook type is triggered whenever a new thread is created or destroyed.
- CreateProcessHook/ExitProcessHook
This hook type is triggered when the target process is started or exited.
- FastLogHook/STDCALLFastLogHook
These two types of hooks use an assembly stub to transfer execution to a small body of hook code that can log a specific register value or memory location at hook time. These types of hooks are useful for hooking frequently called functions; we will cover using them in Chapter 6.
To define a PyHook you can use the following template, which uses a LogBpHook as an example:
from immlib import *

class MyHook( LogBpHook ):

    def __init__( self ):
        LogBpHook.__init__( self )

    def run( regs ):
        # Executed when hook gets triggered
We overload the LogBpHook class and make sure
that we define a run() function. When the hook gets
triggered, the run() method accepts as its only
argument all of the CPU's registers, which are all set at the exact
moment the hook is triggered so that we can inspect or change the
values as we see fit. The regs variable is a
dictionary that we can use to access the registers by name, like
so:
regs["ESP"]
Now we can either define a hook inside a PyCommand that can be set whenever we execute the PyCommand, or we can put our hook code in the PyHooks directory in the main Immunity Debugger directory, and our hook will automatically be installed every time Immunity Debugger is started. Now let's move on to some scripting examples using immlib, Immunity Debugger's built-in Python library.
[28] For a full set of documentation on the Immunity Debugger Python library, refer to http://debugger.immunityinc.com/update/Documentation/ref/.