Hailing from the bright and brilliant Brazilian neo-pop movement, Romero Britto is an artist, painter and sculptor whose work is a visual feast. We love his extraordinary skill at combining vibrant colours while infusing each piece with history, playful themes and pop art. He makes art that emanates love, cheerfulness and enthusiasm, so of course we were inspired!


1. Prepare your tinted buttercream, bagging each colour in a separate piping bag with the tip cut off to create a small hole. For the black, you may use a Wilton writing nozzle no.5, or just cut the tip off a bag to make a slightly bigger hole.

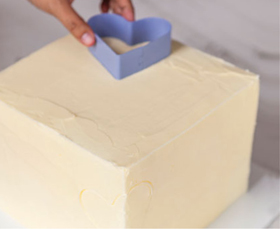
2. Stack and crumb coat your cake (see Buttercream Basics). Then start by marking the position of the largest hearts first as they will be the main decorations. Use a cookie cutter to mark one on the top and two or three more on the sides.
To stop the black tinted buttercream bleeding into the other colours, you can pipe it first then let it crust for between 30 minutes and an hour before piping the rest of the pattern. The best way to mark your patterns is with various cutters, as you can change the design by smoothing them over until you are happy with the overall layout.

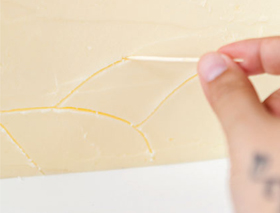
3. Using a cocktail stick (toothpick), start to mark the outline of some half circles on the bottom edge of all four sides of the cake.

4. Draw long lines that will create a visually pleasing division all around the cake. To achieve the right effect these lines should connect with each other. Make sure that the spaces in between lines will be large enough to fit in more decorative shapes.

5. Using the smallest heart cookie cutter, mark some hearts randomly along the lines.

6. Using your black tinted buttercream, with continuous pressure, pipe on top of your long lines, then the big hearts and finally the smaller hearts.

7. Using your Wilton round nozzle no.12, a flower cookie cutter, cake scraper and small cardboard templates, create patterns and stripes in between the long lines over the rest of the cake.

8. With repetitive back and forth movements and continuous and consistent pressure, fill in the smaller patterns (circles, hearts and flowers) in various colours. The motion will be like making embroidery stitches that vary in length and direction.

9. Now fill in the bigger spaces with stripes, making sure that you use all the different colours.

10. Finally cover the rest of the white space over the entire cake filling in all the shapes with stripes and solid colours, ensuring the direction of your ‘stitches’ vary from shape to shape.
