Sharing fine food with friends and family is at the heart of Christmas and, although it can be hard work, preparing the festive offerings yourself is part of the fun. Cooking is a great way to channel all that pre-Christmas anticipation and get the whole family involved. Many families have their own traditions and it is festive rituals such as taking turns to stir the Christmas pudding mixture while making a wish that form the fondest memories.
festive fare
For many people, Roast Turkey (see page 18) is the centrepiece of the main festive meal, followed by Traditional Christmas Pudding (see page 80). Other favourites include Roast Goose with Spiced Apples (see page 36) and Roast Duckling with Clementines (see page 42). If you don’t eat meat, there are special centrepiece recipes such as Honey & Citrus Roast Salmon (see page 38) or Feta and Roast Vegetable Tart (see page 44).
For other celebration meals over the festive period, you’ll want something other than turkey and Christmas pudding. For example, you could greet your guests with Champagne Strawberry Cup (see page 100), then serve them a homemade Chicken Liver Pâté (see page 74) followed by Beef Wellington (see page 40) and Bombe Noël (see page 86) to finish. The ‘Christmas Fare’ chapter is packed with ideas for festive entertaining.
seasonal baking
Seasonal ingredients such as mincemeat, nuts, cranberries, dried fruits, marzipan and festive spices including cinnamon, nutmeg, ginger and cloves make Christmas baking special. Rich Mince Pies (see page 134) are a must and there are plenty of other festive goodies to make. Baking is a great way of involving children in the festive preparations. Even very little children can help use cookie cutters to cut out star shapes, trees and snowmen to make edible decorations for the Christmas tree (see pages 152 and 168), and afterwards they will enjoy hanging up the decorated biscuits with ribbon.
Cakes for Christmas come in all guises nowadays, from the fruit-packed Rich Christmas Cake (see page 106) to novelty cakes to delight the children, such as the chocolate-crammed Santa’s Sack (see page 108). If you would like a fruit Christmas cake, try to make it 1–3 months before Christmas. Store it in an airtight container and drizzle occasionally with a little brandy or sherry. You have the choice of leaving the cake un-iced or covering it with marzipan and a white icing. Other festive cakes include the marzipan-rich Pistachio Nut Stollen (see page 122), the deliciously chocolaty Bûche de Noël (see page 114) and the nut-packed Panforte Di Siena (see page 128).
making edible gifts
Homemade preserves, biscuits and sweets make great Christmas gifts and you’ll find plenty of inspiration in the ‘Edible Gifts’ chapter. Creating attractive packaging is part of the fun. Look out for pretty gift boxes and line them with coordinating tissue paper to prevent the biscuits or sweets from getting damaged. Alternatively, buy cellophane bags and secure them with invisible tape and festive ribbons and bows. If necessary, add a tag or label with storage instructions and a ‘best before’ date.
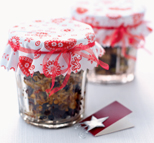
For homemade preserves you’ll need to prepare the jars thoroughly. Sterilizing the jars is a crucial stage of making your own chutneys, pickles, jams and marmalades as the jars need to be spotlessly clean so the preserve will keep. Wash the jars in the dishwasher or alternatively wash them in hot soapy water, rinse and then dry them on the lowest setting in the oven for 15 minutes. Add the preserve to the still warm, dry jars, then press a disc of waxed paper, waxed side down, on to the surface of the preserve while it is still hot. Allow to cool, then add a cellophane cover and secure with a rubber band or add a sterilized screw-topped lid (this is essential in the case of chutney to stop the vinegar evaporating).
When the jars are filled and sealed, finish them with pretty seasonal jar covers and labels, available from good kitchenware shops. Label the jars with the name of the preserve, a ‘best before’ date and any recommended serving instructions.
madeira cake
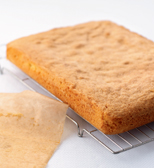
Madeira cake is a good base for decorated novelty cakes. The recipe given on page 10 is required for the Christmas Stocking (see page 120), Smiling Snowman (see page 126) and Christmas Trees (see page 140). The quantities given below make a 30 x 23 x 5 cm (12 x 9 x 2 inch) roasting-tin cake or 2 x 900 ml (1½ pint) pudding-basin cakes.
250 g (8 oz) unsalted butter, softened
250 g (8 oz) caster sugar
4 eggs
2 tablespoons milk
1 teaspoon baking powder (for roasting-tin cake only)
300 g (10 oz) self-raising flour
2 teaspoons vanilla extract
Cream the butter and sugar together in a large bowl until light and fluffy. Beat the eggs and milk together in a small bowl with a fork. If using, mix the baking powder with the flour. Beat alternate spoonfuls of the egg mixture and the flour mixture into the creamed mixture until everything has been incorporated and the cake mixture is smooth.
Beat in the vanilla extract. Spoon the cake mixture into a greased and lined 30 x 23 x 5 cm (12 x 9 x 2 inch) roasting tin or into 2 x 900 ml (1½ pint) pudding basins.
Bake in a preheated oven, 160°C (325°F), Gas Mark 3, for 30–35 minutes for the roasting tin and about 1 hour for the pudding basins, until well risen and golden brown and a skewer inserted into the centre of the cake comes out cleanly. Leave for 10 minutes, then loosen with a round-bladed knife, turn out on to a wire rack and leave to cool completely.
royal icing
Royal icing is the traditional icing used to cover celebration cakes. Depending on the consistency, it may be used for flat icing, peaked icing or for piping on as decoration. This recipe makes 500 g (1 lb) icing.
Glycerine, available from supermarkets, is often used in royal icing to help soften the icing but should be used sparingly. Royal icing contains raw egg, which should not be eaten by children, pregnant women, the elderly or those recovering from serious illness, unless it is pasteurized. Look out for pasteurized eggs in the supermarket chiller cabinet, but if these are unavailable, then make up powdered egg white instead (sold in tubs with other baking ingredients).
2 egg whites
¼ teaspoon lemon juice
500 g (1 lb) icing sugar, sieved
1 teaspoon glycerine
Place the egg whites and lemon juice in a clean bowl. Using a clean wooden spoon, stir to break up the egg whites. Add icing sugar to form the consistency of single cream. Continue mixing while adding small quantities of icing sugar until it is all used up, then stir in the glycerine until well blended. Cover with damp clingfilm, seal well to exclude all air, then allow to stand before using so air bubbles can rise to the surface and burst. Stir thoroughly, to disperse any air bubbles, then apply using a palette knife.
ready-to-roll (fondant) icing
Also known as fondant icing, ready-to-roll icing is readily available in white and a range of colours. You can also colour white ready-to-roll icing yourself by kneading in paste colouring, available from specialist cookshops. Roll out the icing, then cut shapes using a sharp knife or cookie cutters.
Ready-to-roll icing can also be used as an all-over smooth cake covering instead of royal icing. To cover a cake in ready-to-roll icing, first spread the top and sides of your cake with smooth apricot jam or butter icing. Knead the icing on a surface lightly dusted with icing sugar or cornflour to soften it slightly, then roll it out. When the icing is almost the same size as the top and sides of the cake, lift it over a rolling pin, then drape it over the cake. Working quickly, smooth the icing in place over the top of the cake and down to the board, with your fingertips dusted with icing sugar or cornflour. When the icing is in place, trim the excess from the base of the cake.

smooth apricot jam
Smooth apricot jam or economy jam doesn’t contain fruit pieces so can be used straight from the jar for sticking marzipan and decorative icing directly on to cakes and biscuits. If the jam has a very set texture, warm it briefly in the microwave before using. Alternatively, warm fruity apricot jam in a saucepan with a little boiled water and then sieve it before use.
cutters
Plastic and metal cutters are useful for making shapes from ready-to-roll icing, biscuit and pastry dough and even cooled melted chocolate. Cutters come in a huge range of sizes and shapes. Ordinary round cutters have a myriad of uses. Gingerbread people are always popular shapes for biscuits and you can also buy special Christmas cutters, including Santa, star, bell, Christmas tree, angel, snowman, holly leaf, ivy leaf and reindeer shapes. You can even get 3D cutters (see 3D Winter Wonderland, page 156).
Wash cutters after use with a small bottle brush and dry metal ones in the bottom of a cooling oven to avoid rusting. When using small cutters, dip them in a little icing sugar or cornflour before use to prevent sticking. To release cut-out shapes, press them out of the cutter using a fingertip or the rounded end of a small brush.
the turkey
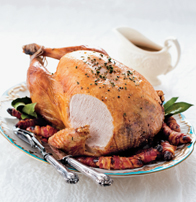
A roast turkey and all the trimmings is often the focus of the main Christmas meal. The turkey is not difficult to cook but when there is so much else going on in the kitchen on Christmas morning, it’s easy for the cook to become harassed.
Some forward planning will ensure smooth progress on the day. First work out the size of turkey you need to buy for the number of people you are catering for, allowing for approximately 500 g (1 lb) turkey weight per person. If it’s to be a large turkey, make sure you check beforehand that your oven and roasting tin are big enough to take it.
There’s a bewildering variety of turkeys available in the run-up to Christmas. Personal preference, availability and budget will influence where you buy it and whether you choose fresh or frozen, whole or jointed, ready-basted or pre-stuffed, organic or conventionally reared. Any of these options will taste delicious if cooked correctly. Whatever sort of turkey you choose, it should be at room temperature before it goes in the oven and the cooking time should be based on its stuffed weight (see opposite).
fresh turkey
Fresh turkeys are available in supermarkets and butchers a week or so before Christmas, but it’s best to order in advance to ensure you get the size you want.
If you’re cooking for a small number or have only a small oven, consider buying a turkey joint instead of a whole turkey. A turkey crown is a whole turkey without the legs and wings, which gives you a joint of white breast meat on the bone. It’s a popular choice as it is easy to carve and there’s less wastage. Another option is a boned and rolled breast joint, which may come in netting to help it keep its shape. Remove the netting just before carving.
Remove the turkey from the refrigerator before you go to bed on Christmas Eve so that it comes up to room temperature and will heat up as soon as you put it in the oven. Once you have taken the turkey out, you can fill the refrigerator with all the drinks that need to be chilled for Christmas Day.
frozen turkey
If you’re using a frozen turkey, allow plenty of time for the bird to defrost slowly and completely before you come to cook it. Depending on the size of your bird, transfer it from the freezer to the refrigerator 2–6 days in advance of Christmas Eve and leave it to defrost gradually, allowing 8–12 hours defrosting time per 1 kg (2 lb) turkey.
Once the turkey is defrosted and there are no ice crystals remaining, remove all the packaging and take out the giblets. Store these separately until required for giblet stock (see page 14). Place the defrosted bird in a deep dish near the bottom of the refrigerator to prevent uncooked turkey juices dripping on to anything else. Then, as with a fresh bird, take the defrosted turkey out of the refrigerator at the last possible moment on Christmas Eve to allow it to come to room temperature before cooking.
TURKEY COOKING GUIDE
To calculate the cooking time at 190°C (375°F), Gas Mark 5, allow 20 minutes per 1 kg (2 lb), plus 70 minutes for birds under 4 kg 8½ lb), or plus 90 minutes for birds weighing 4 kg (8½ lb) or more. These times apply whether you are cooking a whole stuffed bird or any turkey joint.
| Turkey weight | Number of servings | Total cooking time |
| 2 kg (4½ lb) | 4–5 | 1 hour 50 minutes |
| 2.5 kg (5½ lb) | 5–6 | 2 hours |
| 3 kg (6½ lb) | 6–7 | 2 hours 10 minutes |
| 3.5 kg (7½ lb) | 7–8 | 2 hours 20 minutes |
| 4 kg (8½ lb) | 8–9 | 2 hours 50 minutes |
| 4.5 kg (10 lb) | 9–10 | 3 hours |
| 5 kg (11 lb) | 10–11 | 3 hours 10 minutes |
| 5.5 kg (12 lb) | 11–12 | 3 hours 20 minutes |
| 6 kg (13 lb) | 12–13 | 3 hours 30 minutes |
| 6.5 kg (14 lb) | 13–14 | 3 hours 40 minutes |
| 7 kg (15½ lb) | 14–15 | 3 hours 50 minutes |
| 7.5 kg (16½ lb) | 15–16 | 4 hours |
Make your chosen stuffing (see pages 22 and 24), then pack it loosely into the neck of the turkey – loosely because tightly packed stuffing would prevent heat penetrating the centre of the turkey. Similarly, don’t stuff the body cavity of a whole bird as this may prevent it from cooking through completely. If you wish, place an onion, fresh herbs or slices of lemon or orange in the body cavity, to provide the meat with additional flavours.
This book describes how to cook a perfect Roast Turkey (see page 18) and Stuffed Turkey Breast Joint (see page 20). It is important to weigh the stuffed turkey to calculate the cooking time (see page 13) in a preheated oven, 190°C (375°F), Gas Mark 5.
For tender meat, rub the bird all over with softened butter before cooking or cover the breast and legs with rashers of bacon. Cover loosely with foil before cooking, then, during cooking, baste with the cooking juices from time to time. Forty minutes before the end of cooking, remove the foil (discard the bacon if using), baste the turkey and return to the oven uncovered to allow the skin to become crisp and brown.
is it cooked?
Check that a turkey (or other bird) is cooked by inserting a skewer into the thickest part of the thigh. The juices should run clear. If pink, cook for a further 15 minutes and test again. Transfer the bird to a large dish, cover with clean foil and leave to rest for 15–20 minutes. This resting time allows muscle fibres to relax and become more tender, making the turkey easier to carve. Don’t worry – its size means your roast turkey will not go cold quickly.
carving the bird
Using a sharp knife, cut the skin between legs and breast. Bend each leg outwards, cut through the joint and remove the whole leg – it should fall away easily. Remove the wings in the same way. Now make a horizontal cut at the base of the breast as far as the bone, then cut downwards to produce even slices of breast meat. Lastly, holding each drumstick in turn, slice the dark meat off the legs.
giblet stock
Giblet stock is the perfect base for gravy. Discard the liver (which can be bitter) and place the giblets of a turkey or other bird in a saucepan with 1 small quartered onion and 1.2 litres (2 pints) cold water. Bring to the boil, reduce the heat, cover and simmer for 1 hour. Strain the stock into a jug.
leftover turkey
Cooked turkey can be kept in the refrigerator in foil or clingfilm for up to 3 days. You can also freeze cooked turkey slices. Freezing in stock or gravy helps keep the meat moist. If you love turkey on Christmas Day but despair of what to do afterwards, turn to the ‘Leftover Turkey Ideas’ chapter for inspiration. From Rigatoni with Turkey & Pesto (page 218) to Turkey Curry (page 228) and Country Turkey Pie (see page 232), you should find some appealing recipes to tempt the family.
boning a whole turkey
A boned turkey makes a wonderful casing for stuffing, a joint of meat or another bird. A boned cavity and breast (see Steps 1–7) can be stuffed and re-formed so it looks like a conventional bird when cooked. Continue boning the rest of the bird (Steps 8–9) to make a classic ballotine or galantine. A proper boning knife will make the task easy.
1 Cut off the ends of the legs and wings at the first joints.
2 Lift back the neck skin and cut out the wishbone and any surrounding fat.
3 Place the bird breast side down on the board and cut along the backbone, working from the tail to the neck end.
4 Holding the knife blade angled towards the carcass, scrape away the flesh from the ribcage, working down one side of the bird to the wing.
5 Ease the knife between the ball and socket joint and sever from the ribcage, while keeping it attached to the skin.
6 Continue easing away the flesh from the bone, using small scraping cuts, until you reach the leg joint, then sever the ball and socket joint in the same way as you dealt with the wing. Continue in this way until you have reached the ridge of the breastbone. Then turn the bird around and repeat Steps 1–6 on the other side.
7 Pull gently to separate the breastbone from the skin. There is no flesh here, so take care not to tear the skin along the breastbone ridge or the bird will split open during cooking.
8 Lay the bird flat on the board, skin side down. Hold the outside of a wing bone and scrape away the flesh. Work top to bottom, severing tendons as you go. Pull out the wing bone. Repeat on the other wing. Push the skin and flesh of the wings back inside the carcass to make a neater parcel for stuffing.
9 Hold the inside of the leg bone and scrape away the flesh with a pencil-sharpening action. Sever tendons as you go, then release the bone when you get to the bottom of the leg. Repeat with the other leg.