The molding technique dates from the fifteenth century. The first molds were of carved wood and many exist in European museums. In those days, only tallow candles could be made in the wooden molds. Beeswax was too sticky to be removed from the mold—they didn’t have mold release agent. Today’s modern technology has provided us with molds in many materials.
Most of the molds already discussed have been of the simple variety—milk cartons, food tins, etc. But you can create many decorative shapes with molds, as well. The rule of thumb here is: if it can hold boiling water without collapsing, you can use it for a candle mold.
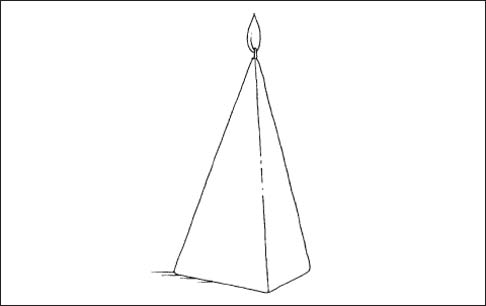
Pyramid candle
Corrugated cardboard—the kind with ridges exposed on one side that is flexible enough to roll or bend—is an excellent material for homemade molds in decorative shapes. The cardboard can be shaped into many forms—from a simple pillar to a pyramid and anything else you can devise.
A second advantage to corrugated cardboard molds, in addition to making decorative shapes, is that you automatically get a beautiful texture on the outside of your candle made in the cardboard mold. And, releasing the candle from the mold couldn’t be easier: just peel off the tape and take the cardboard off the hardened candle.
To make molds from corrugated cardboard, decide first on the shape of the candle. Then, cut the cardboard accordingly. For a conical shape, you only need a square that you will roll into a cone. (See the section on cone-shaped candles in Chapter 10.) For more complex shapes, you will need to draw out your design on paper, and cut and fold it into the shape you desire before you make the cardboard mold. Once you have designed the shape you want, simply transfer the design to the cardboard, and cut and fold it, taping all edges securely with plastic tape so that no wax will dribble out when you pour.

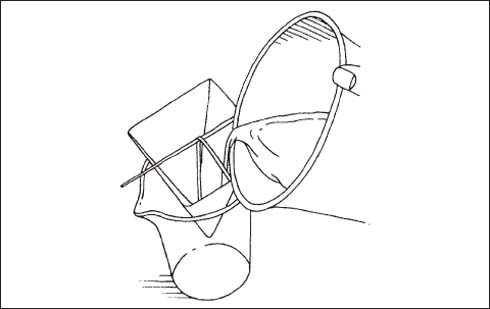
Making a pyramid mold
One challenge you will probably encounter if you use cardboard molds is stabilizing the wick, which needs to be centered. See “Wicks,” p. 70, for how to handle wicking in molds. Also, you must be careful to seal the “top” end—it’s going to be the bottom of the candle but it is also the hole through which you are going to pour your wax. Once you have overcome these difficulties with a bit of practice, you can really go to town making decorative shapes from corrugated cardboard.
Using a cardboard mold
A spherical (ball) mold can easily be made by slicing an old tennis ball in half. Punch a hole in the center of one half for pouring in the wax—this will be the bottom half. In the other half, using your ice pick, make a small hole for the wick. Tape the two pieces securely together and wick and pour as usual. Ball candles are great fun and versatile—you can stick several of them together with wax glue and expand your repertory of candle shapes. And, you can stack them for an interesting decorative shape. If stacking the ball candles, don’t wick them in the mold: use the wicking hardened wax method.
Once you have made a few molds yourself and your confidence is high, you can begin making your own decorative molds from instant molding compounds. (The method for making a molded shape is described on p. 128.) Here is how:
The object to be molded is coated with release agent.
It is then covered with the mold material, either poured or painted on.
The mold is allowed to dry thoroughly.
It is then peeled off the object whose shape you are duplicating and used the same way as a rubber mold.
Once you master this technique—and it does take a lot of practice—you will see unlimited possibilities before you for creating decorative candle shapes with molds. You can copy china dogs, a bust of Beethoven, an interesting wine bottle, or your own—or a friend’s—hand or foot! As a bonus, you can reuse the molds that you create from interesting originals.
“Casting” means using a temporary form as a mold. This can be sand, aluminum foil, or even a balloon. This is a neat method to use for molding decorative shapes. It’s easy, inexpensive, versatile, fun, and provides plenty of latitude for the creative spirit. Molds for casting are used once and then discarded. But, since the material is so cheap, this isn’t a problem as it would be with an expensive fancy mold. Casting candles is a marvelous method, and it may quickly become a favorite once you’ve tried it out. The casting method allows you to experiment with and explore the wonderful plasticity of wax.
Casting works on a simple principle: the shape you make with the casting material is the shape the candle will have when it hardens. You can take a sheet of heavy-duty aluminum foil and squish it into a crinkly shape. Pour the wax into it, peel off the foil, and you have created a superb decorative shape that could not be achieved any other way!
You could form a star shape from foil—or a half-moon, or anything that strikes your fancy—and cast a candle in that shape. Nothing could be easier or more conducive to creativity. A roll of foil, a pot of hot wax, a bit of wick—and you are making decorative shapes all over the place.
Because of their freeform quality, candles made by the casting method may not lend themselves to regular wicking methods used for molds and other types of candles. This, however, need not deter you. There are two ways of wicking a cast candle:
Use the method for wicking a hardened candle.
Insert a cored wick when the candle is partly hard.
Sand candles … represent creative candlemaking at its very best—creating beautiful candles from shapeless sand and raw wax. For sheer flickering, glowing beauty, nothing can compare with a sand candle as the light soaks through the outer layer of sand. Try one and I think you will agree with me.
—David Constable, Candlemaking.
This is a favorite of the young and almost anybody else who enjoys the beach or who likes playing with sand. With sand candles, the sand not only serves as the mold shape, it also becomes a component of the candle itself by forming a crust on the outside. Essentially, sand candles are very simple—an impression is formed in wet sand and this is the mold from which the candle is made.

Kids love to make sand candles. However, because the wax must be hotter than usual to adhere to the sand (145° Fahrenheit or higher), adult supervision is vital. Keep safety paramount.
Because of the higher melt point required, candlemaker Betty Oppenheimer recommends melting the wax over direct heat instead of the usual double-boiler method. If you choose to do this, the safest way is in a concealed-element heater, such as an electric Crock-Pot or cooker.
If you are at the beach, you can melt the wax over your campfire—but do be extremely careful and never leave a pot of melting wax unattended on a stove or an open campfire. Remember that wax, being a fuel, is highly flammable. Don’t ever take any chances.
And always keep items for extinguishing fire close at hand; baking soda, wet towels, and a large pot lid are acceptable options. On the beach, you could have a bucket of wet sand ready in case of accident. You know the old adage: an ounce of prevention …
To cast candles in sand you will need the following:
Sand
Cored or primed wick
Wax with a high melting point
Color chips for wax, optional
Scent oil, optional
Large basin to hold sand
Direct heat source
Thermometer
Large wooden spoon
Skewer or ice pick

Scoop sand from a beach if you have one nearby, or buy it from a building supply outlet or garden store. Different grades of sand produce different textures, from very fine to extra coarse. Match the type of sand you use to the nature of the shape you are making. For example, if you are making a star you might want very fine sand to complement its celestial shape, but if you are making a gourd shape, choose a coarse sand for a rustic, country look.
Once you have assembled your cast candle–making items, you are ready to begin. There are three components to successful sand-casting: (1) temperature of your wax; (2) compactness of the wet sand; (3) ratio of sand to water. The first step is to wet the sand. (Beach sand may already be wet enough.) To do this, fill the basin with sand, leaving some room for mixing, and add water. Mix or stir (use your hands or a trowel) until the sand is wet enough to hold a shape when you squeeze a handful. It must be well compacted.
The next step is to dig a hole in the sand in the shape you want to make. For example, if you want a bowl shape, impress a bowl into the wet sand. A gelatin or baking mold in a fancy shape, such as a fish, bunny, or other decorative shape, can be used successfully if your sand is properly compacted.

You can add legs to your animal sand candle’s shape—an “art form” popular in the 1970S—by inserting a stick or dowel into the sand to form three long holes into which the wax will run.
Have your primed or cored wick ready and cut it to the length needed. Use multiple wicks for larger candles.
Pour your hot wax (at a temperature of 275° Fahrenheit) into the sand-shape (having first removed the object with which you formed the shape). When pouring, go slowly, because the sand is absorbing some of the wax. As the wax fills the shape you have created, it will seep into the surrounding sand, making a shell. For this first pouring, use uncolored wax. If you want a colored candle, allow the wax to cool before adding the color chip: very hot wax muddies color. Add scent if you are using it. Pour again until the mold is filled, holding the spoon under the stream of wax so that the wax does not splatter. Try to disturb the sand as little as possible when pouring the wax into the shape.
When the cast shape is full, wait until a thin layer has solidified on top. Then, insert the wick straight down through the wax to the sand, keeping it carefully centered.
Once you have inserted the wick, set the basin of sand in a protected place where it will not be disturbed (you don’t want your candle spilled) and allow it to cool for several hours. Carefully dig the cast shape up from under the bottom and brush off the excess sand. Congratulate yourself! You have just produced a unique work of art.
Craft shops sell beautifully colored sand—but it’s expensive to use except for small shapes. You can use this brilliantly colored sand in clear glass containers of any shape suitable for a container candle. It is also used without wax to make decoratively colored layered objects.
By mixing sand with wallpaper glue, you can get a “dough” made of sand that will hold together while you shape it into freeform decorative shapes. Proportions of sand to glue will vary with the type of sand, so you’ll have to experiment. Just add the glue to sand and mix until it is of a consistency similar to bread dough. Then, make shapes with your hands. This is just like kneading. You can press the dough into a bowl, an ashtray, a shell, or any other shallow vessel to get a basic shape. Manipulating it with your fingers—just as you would pastry dough—will result in interesting textures as well as a decorative shape. Allow the sand/glue container to dry for forty-eight hours before filling with wax and wicking as with sand candles.