35
Create Hidden Treasure Boxes
AMANDA KRAMER AND BRIAN PALMER
Miller Library, Washington College
Type of Library Best Suited for: Any
Cost estimate: Approximately $10 per student
Makerspace Necessary? Yes
PROJECT DESCRIPTION
Participants create tiny treasure boxes in this maker project that teaches basic laser-cutting skills. They hide the boxes with a note that instructs the finder to share the impact of their find on Instagram.
OVERVIEW
Sometimes a small gesture can prove to be incredibly powerful.
Students in the Washington College “Cultivating a Maker Mindset Course” learned this when they had the chance to Skype with artist Danika Brubaker during the semester. Brubaker is the Madison (Wisconsin) founder of the social art movement #fortheonewhofindsme. She encourages people of all ages to create tiny flower bouquets and hide them in public locales. When the finders locate the bouquets—which are labeled with instructions—they take a selfie and post their treasure on Instagram with the hashtag #fortheonewhofindsme.
This is a similar project that is simple and inexpensive and will give your patrons the chance to learn about the power of kindness. And it also seamlessly connects your patrons to a larger creative movement via social media. Check out http://fortheonewhofindsme.com/ and www.instagram.com/fortheonewhofindsme/.
MATERIALS LIST
- ◦ 12 pieces of 3-mm Baltic birch plywood
- ◦ Minwax polyurethane spray
- ◦ 5-pack of 150 grit sandpaper
- ◦ 1-gallon bottle of wood glue
- ◦ 1-inch-wide roll of blue painters tape
NECESSARY EQUIPMENT
- ◦ Laser cutter
- ◦ Air compressor, brush, or paper towels to clean dust
- ◦ Space to spread out and work
STEP-BY-STEP INSTRUCTIONS
Day 1 of Project
- 1. Start by creating the individual wood components using your makerspace’s laser cutter. We’ve included Adobe Illustrator files in the “Additional Online Resources” link (at the end of this chapter) with plans for a single box and plans for a batch to maximize the use of a full sheet of 12 × 24-inch 3-mm plywood, which fits in our laser. Note: Depending on the power of your laser, the cutting can take a little time. On our laser, etching the message on a set of 6 boxes filling a 12 × 24-inch sheet of plywood took about 40 minutes, followed by another few minutes to cut the pieces out. As teachers, we wanted to share the experience of the laser cutting and etching with our students who helped design the boxes in a previous class. Rather than making them wait through the whole process to prepare the wood for the boxes, we prepared most of the wood in advance.
- 2. Before gluing the boxes together, instruct a group of participants to take each piece of wood and clean up any burn/smoke marks from the laser cutter with sandpaper. Note: It’s easy to do this before the boxes are glued up, but difficult to sand the insides of the outer casing and removable drawer once the boxes are assembled.
- 3. With sanding complete, use an air compressor to dust off the wood, or simply wipe the wood clean with a brush or paper towel to help the glue adhere.
- 4. Apply glue to the tabs on all the pieces of the boxes, and assemble the five sides of the drawer and the pull handle, using blue painters tape to hold the joints tight while the glue dries. Use the same method to assemble the five pieces that comprise the outer casing. Use a damp paper towel to remove glue squeeze-out now while it’s easy to clean up.
Day 2 of Project
- 1. With the gift boxes dry, instruct the participants to remove all the blue painter’s tape and sand the boxes smooth and clean. Participants need to be sure the drawers slide easily into the outer casings, because the fit will be even tighter once the boxes are sprayed with polyurethane.
- 2. When the sanding is complete, use an air compressor, a brush, or paper towels to dust off the wood, and then take the boxes to a location where you can spray polyurethane on them. Apply a light spray coat to each set of drawer and outer casing and set it aside to dry.
- 3. Fill your treasure boxes with a fun trinket from the local dollar store, or slip a motivational quote inside. It will be fun for the “finder” to open the small box and see the surprise inside.
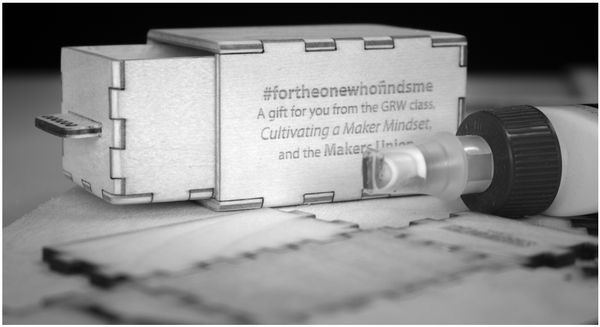
Finished treasure box
LEARNING OUTCOMES
- ◦ Participants are encouraged to develop their own artistic “eye.”
- ◦ Participants learn how to use a laser cutter.
- ◦ Participants learn how to participate in an art movement through social media.
RECOMMENDED NEXT PROJECTS
Invite participants to continue the goodwill. Hiding small projects you create in your makerspace at your school or library serves as a fabulous way to get the word out about your space, and more importantly, can go a long way toward brightening someone’s day. Here are some suggestions for little projects to hide:
- ◦ Laser etch small pieces of leather with your library or school logo and attach them to small key rings for a keychain.
- ◦ Create mini-terrariums with plants and dirt packed inside small fishbowls.
- ◦ Additional Online Resources for this project: https://goo.gl/ZTzBEA.