47
Light Painting
EMILY STRATFORD / TEEN LIBRARIAN
San Jose Public Library
Type of Library Best Suited for: Public, School
Cost Estimate: $0.50 per participant plus equipment
Makerspace Necessary? No
PROJECT DESCRIPTION
Make the world your canvas! Light painting, made famous by Pablo Picasso, is the process of drawing designs in the air using light-emitting objects like flashlights, LEDs, or cell phones and capturing it with a long-exposure photo. This is a great project for teens in a public or school library, with or without a makerspace. This project costs about $0.50 per flashlight plus the cost of equipment.
OVERVIEW
Light painting is a fun (and Instagram-worthy) program that sneaks in some learning, too. Teens will learn how circuits work, creating Popsicle stick flashlights using conductive materials, an LED light, and a power source. Next, they will “paint” with their light in a dark room, or outside at night, and capture each other’s creations using a digital camera with a long exposure setting. If you don’t have access to a digital camera, you can also use a phone or mobile device with a long exposure app. The result is striking, unique, shareable photos.
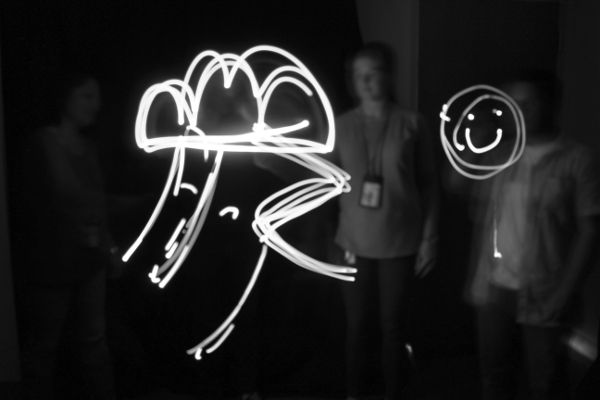
Students drawing with their flashlights
MATERIALS LIST
- ◦ Jumbo craft sticks
- ◦ Metal binder clips (medium size)
- ◦ Copper wire (22 gauge, solid)
- ◦ 3-volt coin cell batteries (CR 2032)
- ◦ LED (10-mm LED, or standard LED)
- ◦ Copper tape or tinfoil
- ◦ Nonconductive tape (masking, electrical, scotch, duct, etc.)
- ◦ Hot glue sticks
NECESSARY EQUIPMENT
- ◦ Hot glue gun
- ◦ Scissors
- ◦ Camera with long shutter exposure option, or mobile device with a long exposure app
- ◦ Tripod
- ◦ Dark room (or do outside at night)
- ◦ Optional: other light sources, like flashlights, toys with lights, cell phones, and so on
- ◦ Computer(s) to upload images
STEP-BY-STEP INSTRUCTIONS
Make the LED Flashlight
- ◦ Remove one leg of the metal binder clip. Simply pinch the sides together near the top of the clip and wiggle it out.
- ◦ Using a little hot glue, adhere the metal binder clip flat onto the Popsicle stick, about 1.5 inches from one end. Make sure not to use too much hot glue or the copper wire won’t fit through the binder’s hole.
- ◦ Next, cut (and strip if necessary) about four inches of copper wire. Feed the wire through the two holes of the binder clip. Previously, these holes were holding the leg we removed. Twist the wire around the back of the Popsicle stick and try to make it lay flat.
- ◦ Take one strip of copper tape (or tinfoil) and place it on the back of the Popsicle stick. It should cover the twisted copper wire and go almost to the end, leaving about 0.25 to 0.5 of an inch at the other end of the Popsicle stick free.
- ◦ Flip your Popsicle stick back over, so the metal binder clip is facing up.
- ◦ Lay another piece of copper tape (or tinfoil) down the front of the Popsicle stick. It should run from one end to about 0.5 inch from the metal clip. Make sure it doesn’t touch the metal clip or your flashlight won’t work (because positive and negative will be touching).
- ◦ Bend the extra bit of copper tape back so the sticky side is up, place the positive side of the battery (the smooth side) down onto the sticky copper tape, and press it firmly down so it touches and lays flat against the Popsicle stick.
- ◦ Flip the metal leg down. It should touch the negative side of the battery.
- ◦ Add the LED. If you’ve followed the steps thus far, the positive side is the top (or the side with the metal clip) and the negative side is the bottom (or the side with the twisted wire).
- ◦ The LED’s cathode (long lead) goes on top, and its anode (short lead) goes on the bottom. Affix your LED in place with some nonconductive tape. Make sure both leads are touching their respective copper tape sides. If you want to test that your light works before taping it in place, just flip the switch.
Take the Photo
- ◦ Affix the digital camera to the tripod. Designate a certain area (perhaps with tape on the floor) that will fit in the camera’s viewfinder.
- ◦ Set the exposure to a relatively long value. If you are inside, turn off the lights.
- ◦ Make the click. Once the shutter is open, use your flashlight to light the areas that you want to paint. You can use the flashlight as a brush or pen to paint the light or draw precise objects. Areas where you go slowly will be more brightly lit than others.
- ◦ Communicate with the photographer about when you are starting and stopping.
Tips
- ◦ Offer challenges like writing your name (teens found this pretty difficult because you have to write backwards), having two people each draw half a face, playing a game of tic-tac-toe, or adding a person or other objects to the painting. Teens really enjoyed doing group painting. Try painting with other light sources such as flashlights, toys with lights, or cell phones.
- ◦ As the program leader, you may want to be the main person behind the camera so you can adjust the shutter speed properly—if the painter is writing out a word, leave the shutter open longer, whereas simple designs only need a few seconds.
- ◦ Making the light sources is relatively simple, but having needle-nose pliers might be helpful in twisting the wire and making sure it lies flat against the copper tape. The most difficult part is attaching the binder clip with hot glue—it seems to secure well, but then while putting the wire on, the clip can sometimes detach from the glue. If the light doesn’t turn on, or flickers, adjust where the copper wire touches the tape and make sure the clip is tight against the battery.
LEARNING OUTCOMES
- ◦ Participants will create a light source and demonstrate how a digital camera can capture a trace of light.
This program aligns with the following Next Generation Science Standards: Science and Engineering Practices—Constructing Explanations and Designing Solutions.1
RECOMMENDED NEXT PROJECTS
To expand upon this program, you may want to try other circuitry projects next, like wearable LED fashions (i.e., a skirt that lights up when you move), or an LED light-up greeting card. The Exploratorium Museum in San Francisco has some great ideas for experimenting with light, like a Poking Fun at Art2 experiment, which involves creating a pinhole viewer and exploring colorful mixtures of light; the Polarized Light Mosaic,3 where you use transparent tape and polarizing material to make and project colored patterns reminiscent of stained-glass windows; and Glow Up,4 a chemistry experiment that uses different types of light to study life.
Notes
1. Next Generation Science Standards, Web, www.nextgenscience.org.
2. “Poking Fun at Art,” Exploratorium, https://www.exploratorium.edu/snacks/poking-fun-at-art.
3. “Polarized Light Mosaic,” Exploratorium, https://www.exploratorium.edu/snacks/polarized-light-mosaic.
4. “Glow Up,” Exploratorium, https://www.exploratorium.edu/snacks/glow-up.