Equipment

Brilliant batches of beer have been brewed for years on homemade A-Team-style collections of equipment. Don’t feel like you need a full complement of steel kit before you can call yourself a homebrewer.
What you need
At its core, making beer is a simple enough process, but it’s worth investing a bit of time and money getting things right.

Your kit will have a huge effect on the end product, more even than the recipe. As you become a better brewer, you’ll get to know your equipment: how it behaves, what it can do, what you need to do to get it to achieve your targets. A fundamental understanding of the processes involved will give you a solid base to move on from. This chapter details what could be considered a minimum of what’s needed to make quality craft beer at home, plus a few more bits and pieces you might consider investing in if you get serious.
Homebrewing has a history of innovating, inventing, hacking, adapting, making do, converting and ingenuity. Many bits of equipment can be adapted at home from everyday components. You can add to it as you go on. And before you splash out, consider the idea of a cooperative: open breweries, like Chaos Brew Club in Chicago, or Ubrew in London, are spaces where members can use top-grade equipment, buy ingredients and share knowledge. But it doesn’t have to be so organised. A few people can pool together to install a brewing set-up in a spare room or even a shed, meaning less individual investment and more hands to join in the work (plus more mouths to drink the results). The creation of beer, much like its consumption, is better with friends.
01 Hot liquor tank
To begin a brew, you’ll need to heat water to a fairly precise temperature (water when warmed becomes ‘liquor’ in the trade). A sizeable stovetop pan is the entry-level option. It has to be big enough to hold the total water for your brew (see ‘mash’), to save you having to heat up twice for mash and sparge; and also if you’re planning to alter the water’s chemical make-up before you begin (see here). But a purpose-built HLT with an element is more accurate and makes multi-rest infusions easier; it will also have a tap to make liquid transfer safer. Advanced models come with volume sight gauges and built-in thermometers.
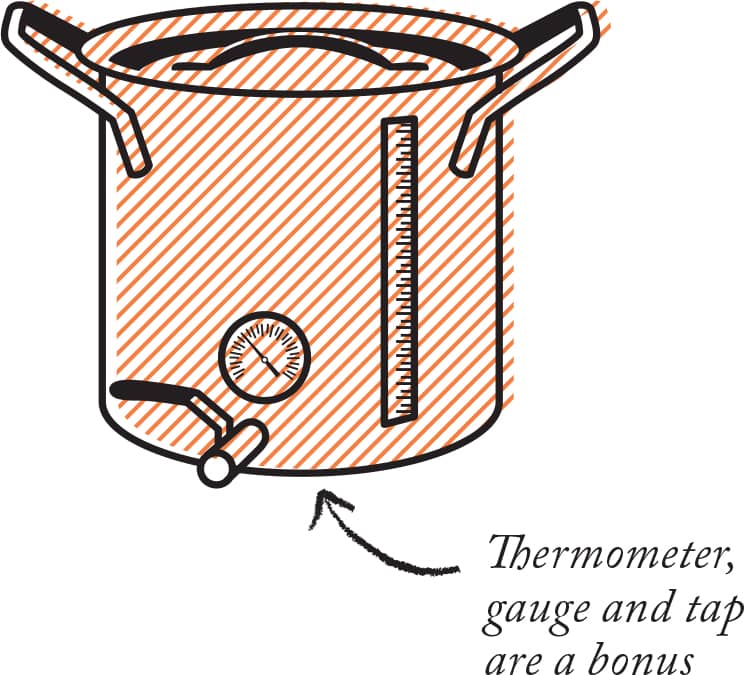
02 Mash tun
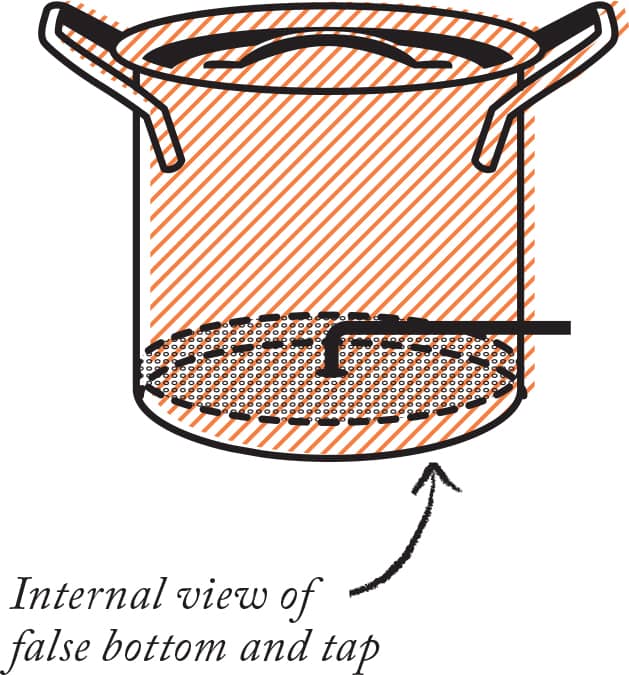
An insulated plastic chill box with a lid makes an inexpensive and straightforward mash tun, following the fitting of a drainage tap and some sort of filter. You can fit these yourself with basic DIY skills and basic DIY store parts – online guides abound – or you can buy them ready to use. The next step up from plastic is stainless steel. Size is important here too. The tun has to be big enough to fit your batch size; however, if it’s too big the grain bed will be insufficiently deep to create effective filtering. For most of the recipes in this book, 30 litres/6 gallons capacity will work (although for the extra-high ABVs, something bigger would be helpful). A filter to separate post-mash liquid from solids is essential. These come in various forms, and all homebrewers have their favourites:
01. False bottom: a mesh that sits proud of the floor of the mash tun, with a run-off tap below it. It holds the grain but lets liquid through. This is probably the most effective homebrew method.
02. Manifold: an arrangement of copper or plastic pipes covering the bottom of the tun, with small holes to allow hydraulic drainage of the wort. This works well too, but can be harder to clean.
03. Braid: a stainless-steel weaved hose that works in a similar way to a manifold.
04. Bazooka filter: more often used in the boil kettle, but some brewers think it works just fine in a mash tun too. It’s a single steel mesh tube which attaches straight to the drainage tap. Issues have been reported with sugar extract efficiency, however.
05. Bag: some brewers fill a nylon bag with their grains, which can be lifted right out after the mash.
03 Rotating sparge arm
Very handy for the sparging stage, this simple bit of kit rests atop the tun and rotates when water is passed through it, showering the mash in a fine spray that won’t disturb the grain bed. A cheap and easy hack is to pierce holes in a piece of aluminium foil big enough to cover the grain surface, then very slowly pour the sparging water over that with a measuring jug.
04 Boil kettle
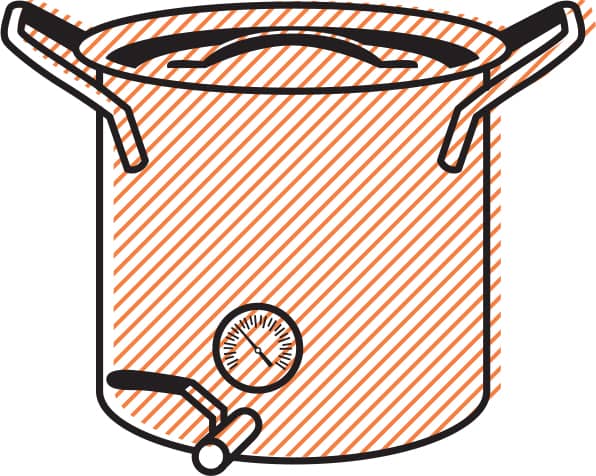
To extract bitter flavours from hops, a vigorous boil is necessary, and household cooker hobs aren’t usually powerful enough to maintain this. Boil kettles are therefore heated by an internal electric element or sit on top of a gas burner. They have to be large enough to hold the batch without boiling over – for safety’s sake, for a 20 litre/5 gallon brew you’ll need a 30 litre/8 gallon capacity. The shape of the kettle is important too: if the diameter is too wide, the evaporation rate will be higher than desired and too much wort will be lost. A diameter/height ratio of about 1:2 is recommended.
05 Filter
Dried hops are a beautiful thing, fragrant and flaky; boiled hops are a sludgy mess and must be kept away from the fermenter. So as with the mash tun, the boil kettle needs a filter to separate hop matter or other ingredients from the wort at the end of the boil. The options are a false bottom, a bazooka filter or a bag (although there’s some suggestion that hop bags don’t allow a proper extraction of oils and acids at the boil stage).

Bazooka filter
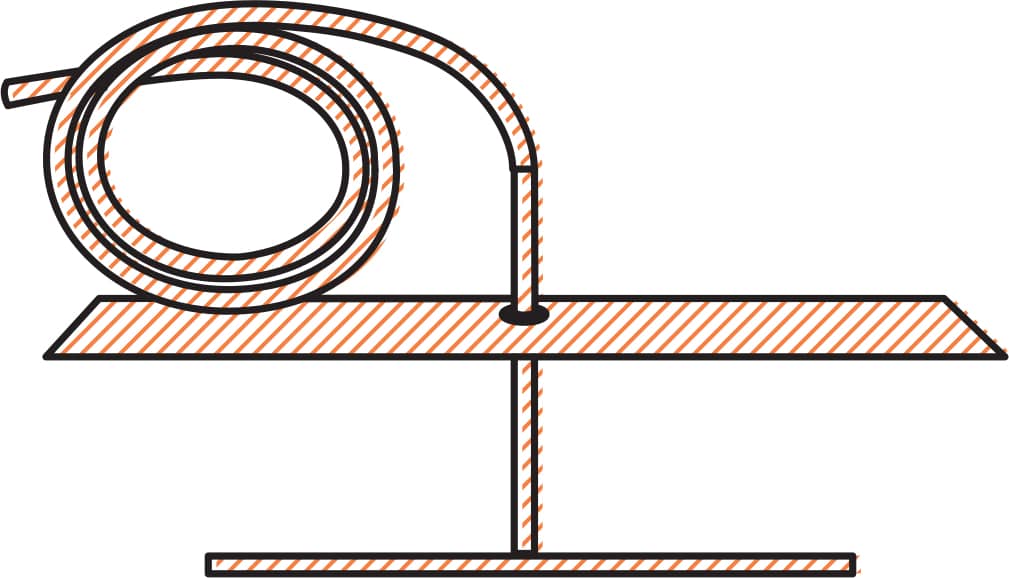
06 Wort chiller
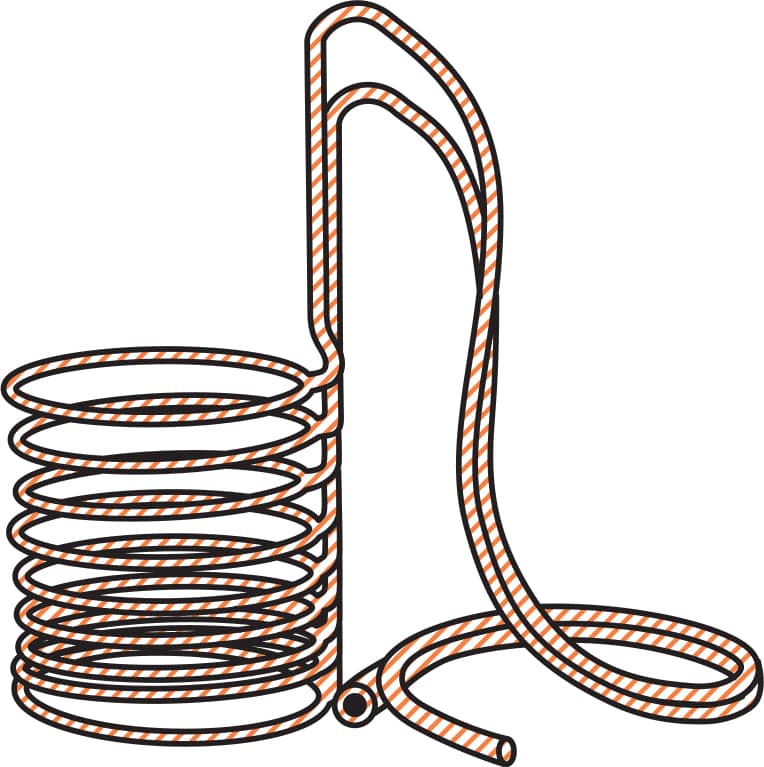
After the boil stage, it’s usually vital to cool the wort down as quickly as possible to minimise air-exposure time and chances of infection, plus it saves you hanging around. (The exception is in the case of a ‘hop stand’ or ‘whirlpool’, when hops are added to the wort after the boil and left to stand.) An immersion chiller is a coiled length of tubing which connects to cold water at one end and drains from the other; it’s placed in the wort 15 minutes before the end of the boil to sanitise, and when the cold water is turned on it transfers out heat. You can make your own relatively easily from copper pipe and plastic hose.
Store-bought plate or counterflow coolers do the same thing faster and, inevitably, more expensively.
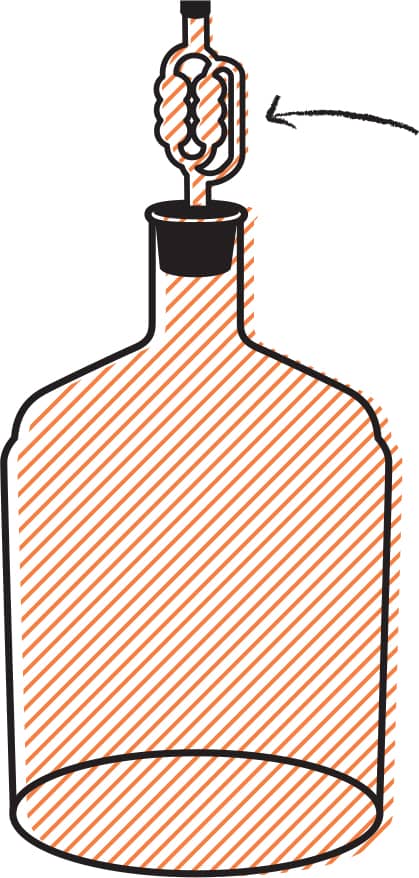
07 Airtight fermenting tub, glass jar or metal tank
A good fermentation is essential for good beer. Fermenting tubs can be made of plastic, glass (a carboy or demijohn) or steel. Plastic is cheapest, lightest and blocks out sun, but scratches relatively easily; glass allows the brewer to easily see the progress of the fermentation, but is heavy when full and can crack; steel protects the beer from sunlight and is, as ever, the most expensive.
Two such vessels allow for a secondary fermentation (see here). They need tight-fitting lids and airlocks or blow-off tubes, and they need to be the right size to accommodate your wort plus its krausen (not a mythical sea monster, but the unappealing-looking froth that forms at this stage). A tap at the bottom makes racking easier.
08 Airlock
A bubbler airlock has water-filled chambers that keep bad stuff out of your lovely beer but let CO2 escape: you can see fermentation taking place this way. Simple airlocks have a lid that does the same job, or a blow-off tube leads from the stopper into a small vessel of sanitised water.
09 Racking cane
Beermaking involves a lot of liquid transfer. A racking cane is attached to a siphon tube and has a sediment trap at the bottom to filter out unwanted solids when moving liquid out of the fermenter into a keg or bottling vessel. You’ll need one if your fermenter doesn’t have a tap at the bottom. Again, steel is pricier but more pro than plastic.

10 Bottle filler
A simple tap/tube combo that makes the final stage of brewing that bit more enjoyable. A stainless steel syphon filler allows you to fill several bottles at once.

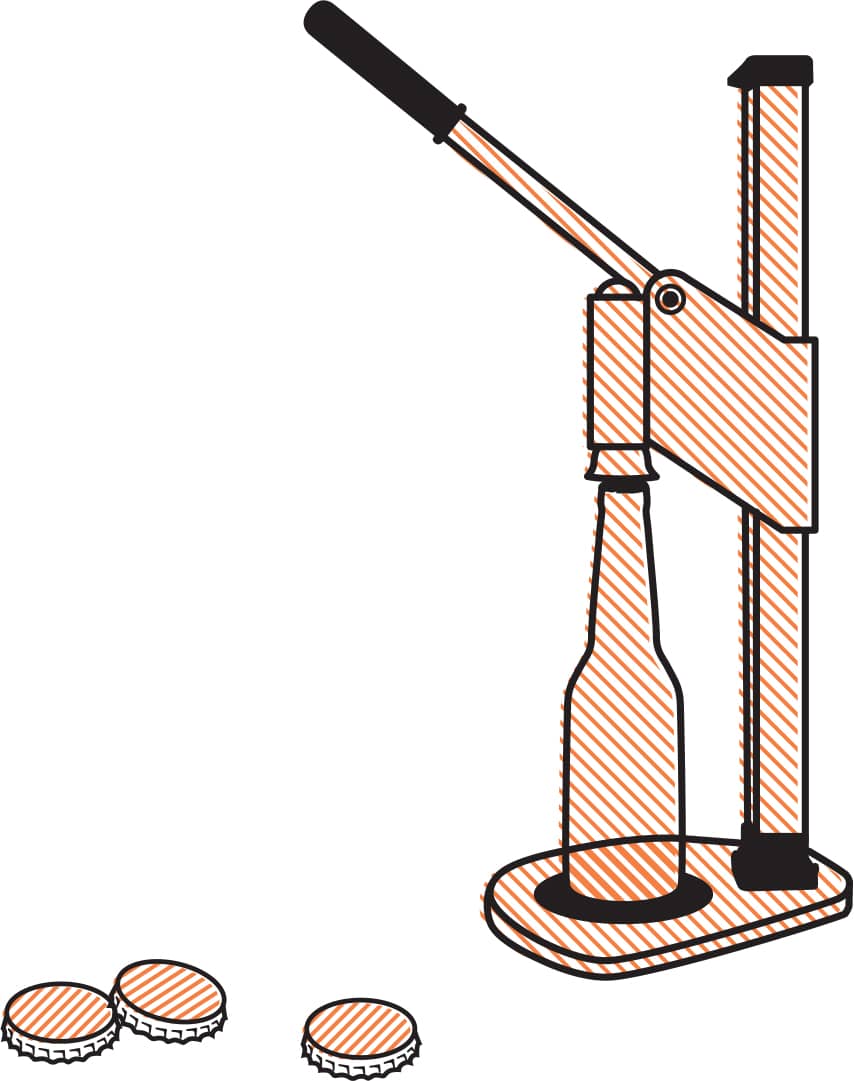
11 Bottle capper, bottles and caps (or Grolsch-type swingcap bottles)
All that beer needs to be stored somewhere before drinking. Bottling is the usual option: you’ll need caps and a capper too. Go for brown bottles to avoid the beer becoming ‘lightstruck’ – a term for when natural light causes a breakdown of hop acids creating a most unpleasant smell.
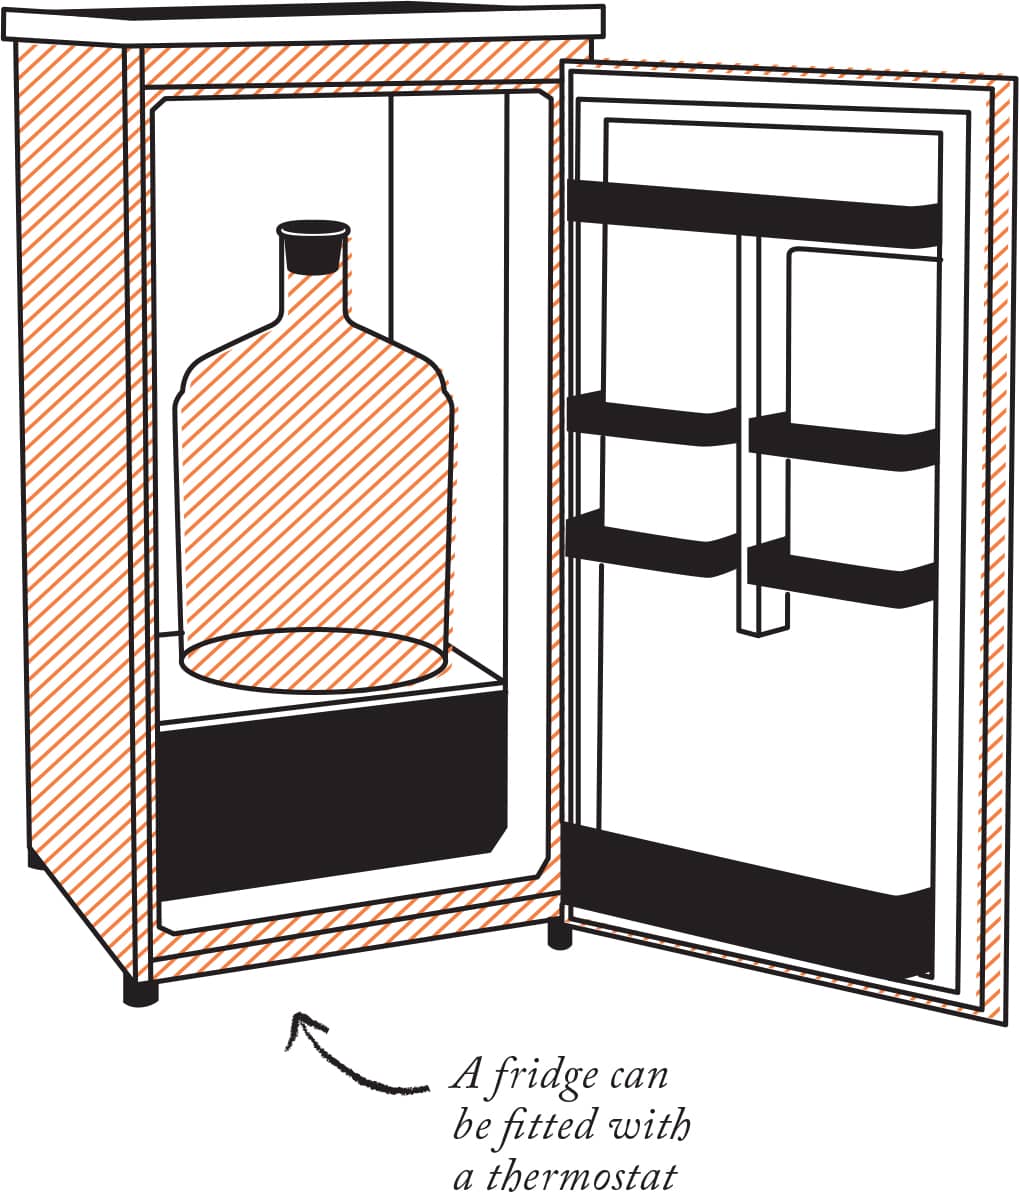
12 Heater and/ or brew fridge
Optimum fermentation occurs at fairly specific temperatures (18-20C/64-68F for ale, lower for lager), which usually have to be maintained for the duration. Too hot and the yeast will go into overdrive or die, too cold and it just won’t wake up enough to do its job. Depending on environmental conditions, the wort might need to be warmed or chilled to hit these targets. Heating is easier – if you’re fermenting somewhere cold, a heat pad will help maintain temperature. Chilling is harder, especially for lagering (see here, for example). Lagering is definitely an advanced homebrew technique, but then there’s not much more satisfying than a cold, crisp pilsner on a summer day. Some people use a fridge with temperature controls. A more basic option is to put the fermentation vessel in a larger tub of water, which can be iced if necessary: like the sea, it will be less susceptible to environmental temperature changes as it’s a bigger body of water. Monitor temperature regularly, whichever option you choose.
13 Long spoon
Steel is best for stirring.

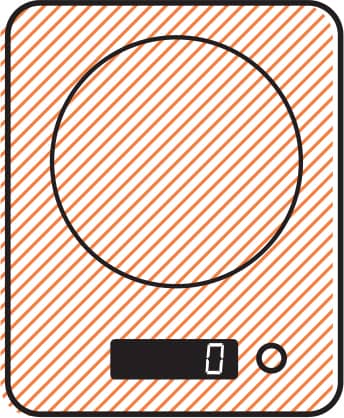
14 Digital scales
Grams and ounces matter in homebrewing. Digital is the way forward.
15 Thermometer
Some models clip on to the side of a pot, some float in liquid; some are digital, others use mercury. The more accurate yours is, the more closely you can follow recipes and control your process. Temperature is hugely important.

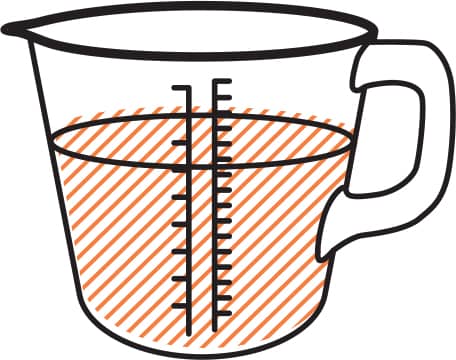
16 Measuring jug
Essential for recirculation, tasting and drawing off wort.
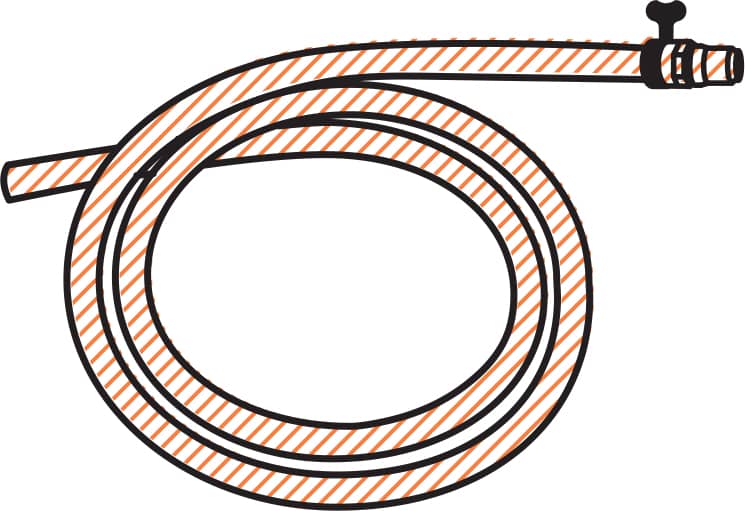
17 Plastic hoses with connections
To allow the smooth and safe flow of liquid between vessels.
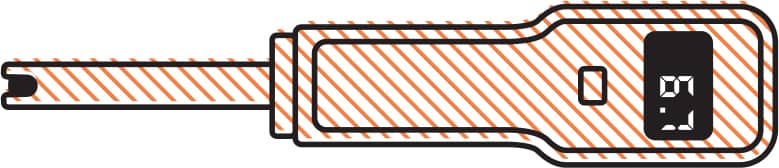
18 pH papers or digital tester
As explained shown here, the pH of water can have an effect on the beer you make with it. Science-class strips are cheap but hard to read. A digital tester is more accurate and won’t cost too much. Neither is essential for a homebrewer just starting out, but to take your brews to the next level, the chemical composition of your water has to be taken into account.
19 Hydrometer or refractometer
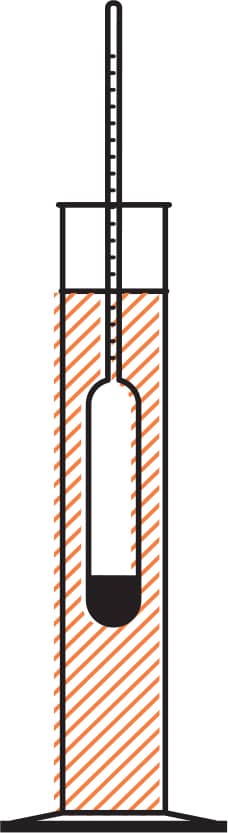
You probably only need one or the other, but these two bits of kit measure the specific gravity (density) of your brew at various stages (see here). These readings help you calculate alcohol content as well as efficiency. Pure water at 20C/68F has a specific gravity of 1; wort’s is higher due to suspended sugars. As a wort’s sugar is converted to alcohol and CO2 throughout the brewing process, it loses density. A hydrometer (left) is a basic instrument: it’s a weighted glass thermometer-like tube with a scale, and it floats in a sample of wort in a trial jar. You can also use a refractometer, which gives readings calculated from a few drops of liquid on a prism: it’s more accurate, and doesn’t require temperature to be taken into account.
To use a hydrometer (which is more properly called a saccharometer, since it’s measuring sugar content), firstly take a small sample of wort using the (sanitised) trial jar. Cool it down externally to around 20C/68F by immersing in cold water or swirling it around – temperature affects density (or, use a temperature conversion graph). Slowly lower the hydrometer into the wort and give it a little spin to dislodge any air bubbles. When it rests on its own, take a reading from the bottom of the meniscus at eye level.
Brew like a pro
Advanced equipment to make your beer even better.
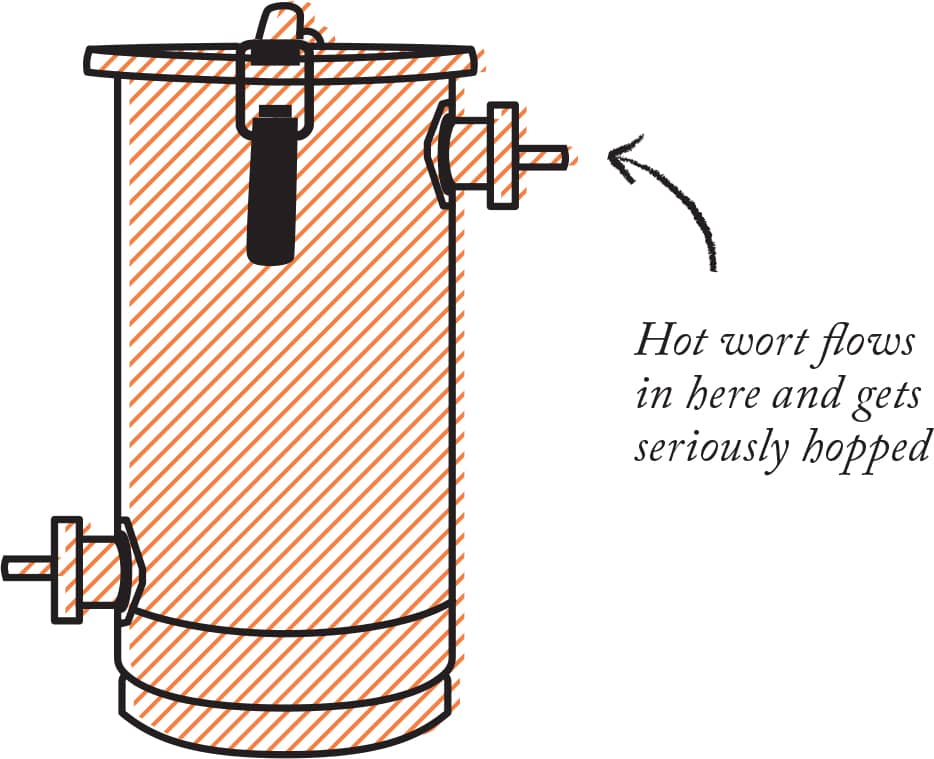
01 Hopback
If you seriously get into hops and want to add even more of that drink-me-now aroma to your brews, consider a hopback. It’s a sealed container which fits in line between the boil kettle and the fermenter: it’s filled with whole or plug hops, which impart loads of flavour without losing any of their oils to boil-off. You can make your own – it’s not too hard.
02 Wooden barrels
Chances are you’ve tried a barrel-aged beer recently. Ageing ale on wood is becoming big news as brewers look for new and exciting roads to take their beer down. Ex-wine, whisky, sherry, bourbon and even tequila barrels are used; if you’ve got room for a brewing set-up, you might have room for a little barrel too. They’re sold in different sizes and can be reused a few times for many styles of beer. Wood chips in secondary fermentation are sometimes employed as a substitute.
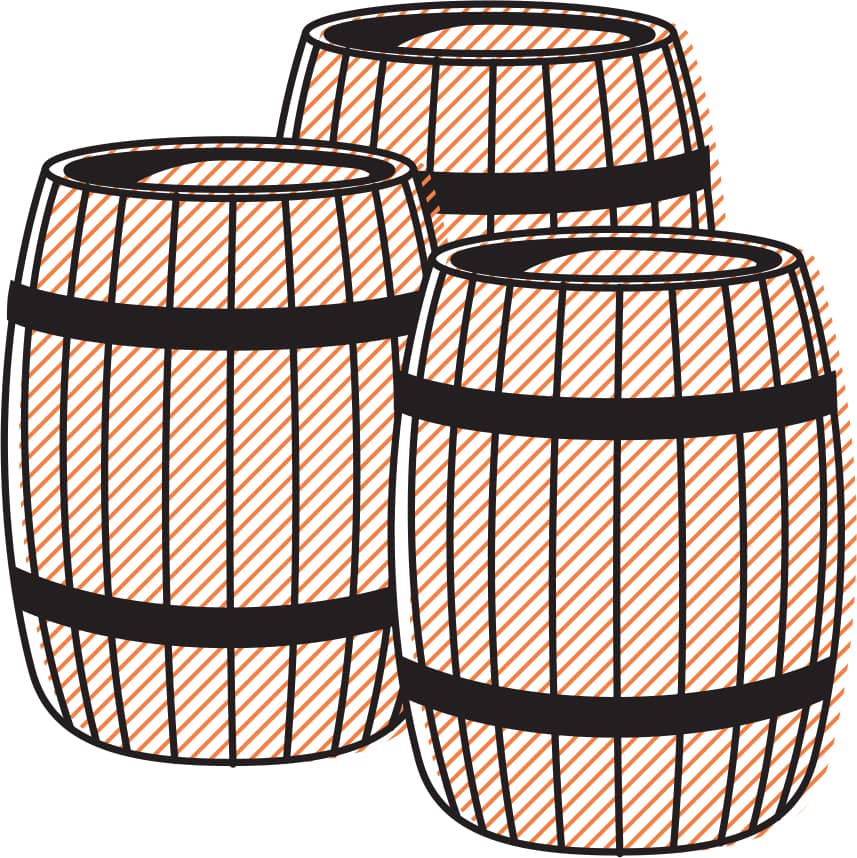
In general, beers with higher ABVs and rich, dark flavours age better than lighter, fresher ones, but who’s going to stop you making that port-barrel-aged witbier if you really want to?
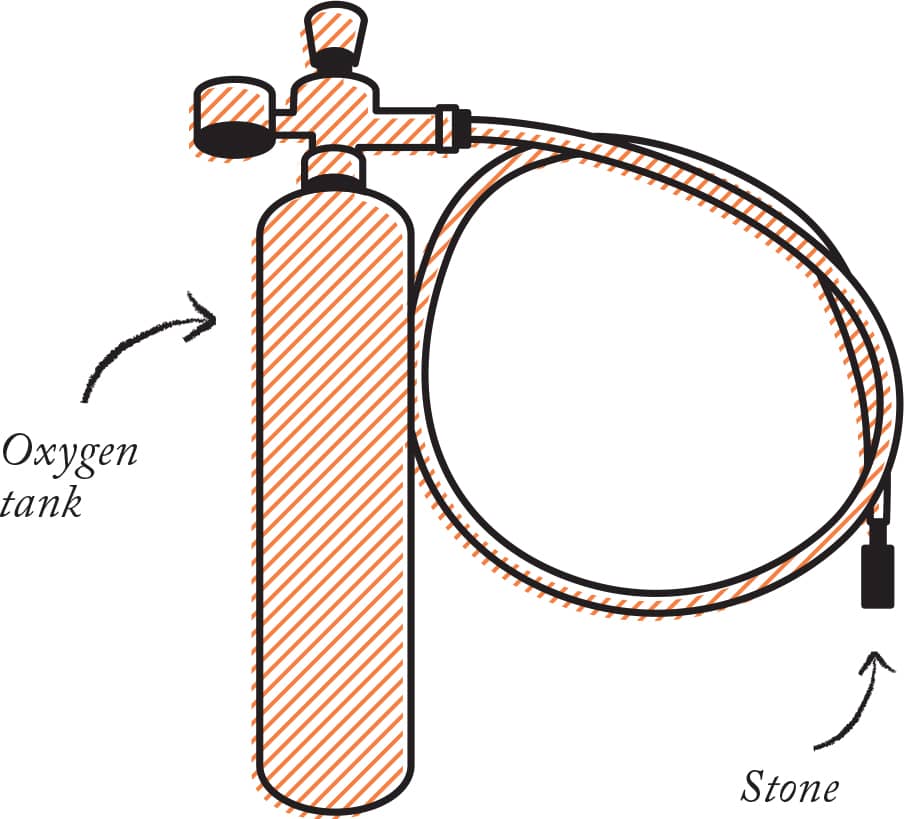
03 Aerator
At later stages of the brew, oxygen and beer are not best of pals. An exception is when racking from the kettle to the fermenter: yeast needs O2 to live. A bit of splashing, stirring and shaking is the hands-on solution, although you can buy a tank with a ceramic or steel diffusion stone to do it more effectively. An aquarium stone with an electric pump is a thrifty hack, provided of course it hasn’t spent time keeping Goldie’s tank fresh.
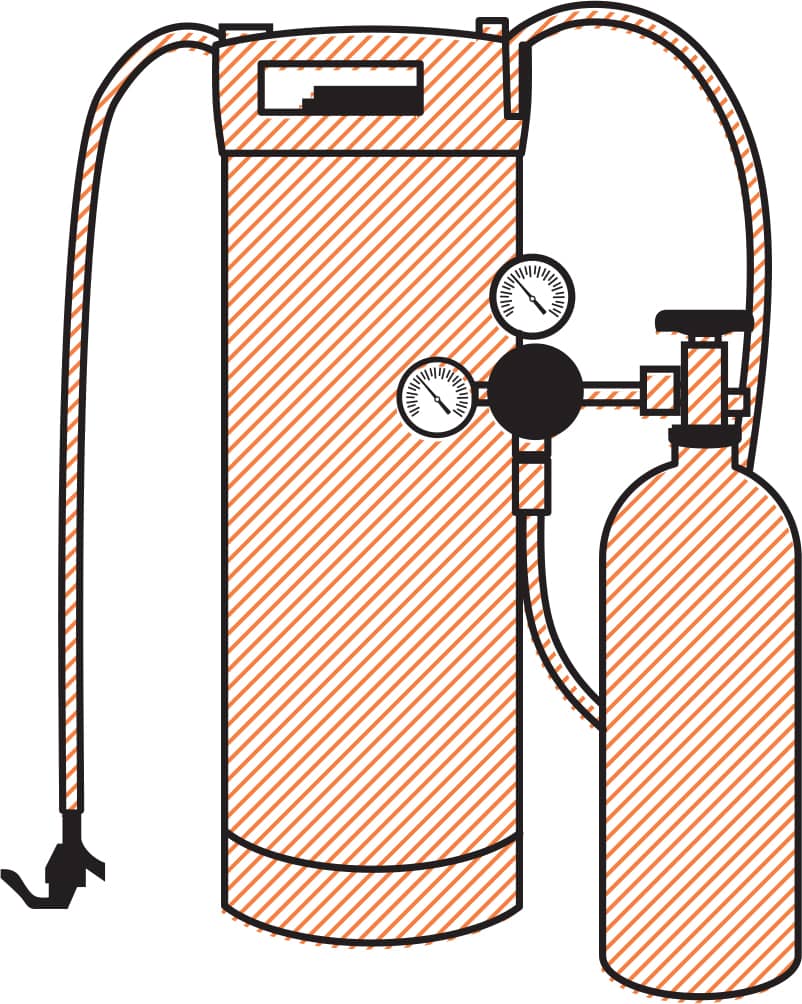
04 Kegs, taps and CO2
A keg-and-tap combo creates the closest legal thing to a pub in your house. Add a dartboard and you can probably start charging neighbours by the pint. Advantages of kegs: they keep beer fresh between serves, they’re bigger and easier to clean and sanitise than a caseful of bottles, and they can be force carbonated (the use of a gas canister to quickly carbonate beer without having to wait for yeast to do the job in the bottle, a system employed by many craft breweries). Modern Keykegs are a plastic bag-in-barrel system that allow brewers to keg beer and dispense it using a bicycle-style handpump.