In Chapter 8, you created a basic bookstore iPhone app with Swift. In this chapter, you will add some features to the app to make it a bit more functional and use many of the technologies you have learned in this book, such as creating a class, using delegates and protocols, and using actions and outlets. You will also learn about some new techniques such as switches, UIAlertController, and landmarks.
Let’s Get Started
Adding a book
Deleting a book
Modifying a book

Adding book functionality

Adding edit and delete functionality along with using a UISwitch
The prepareForSegue Method
Note
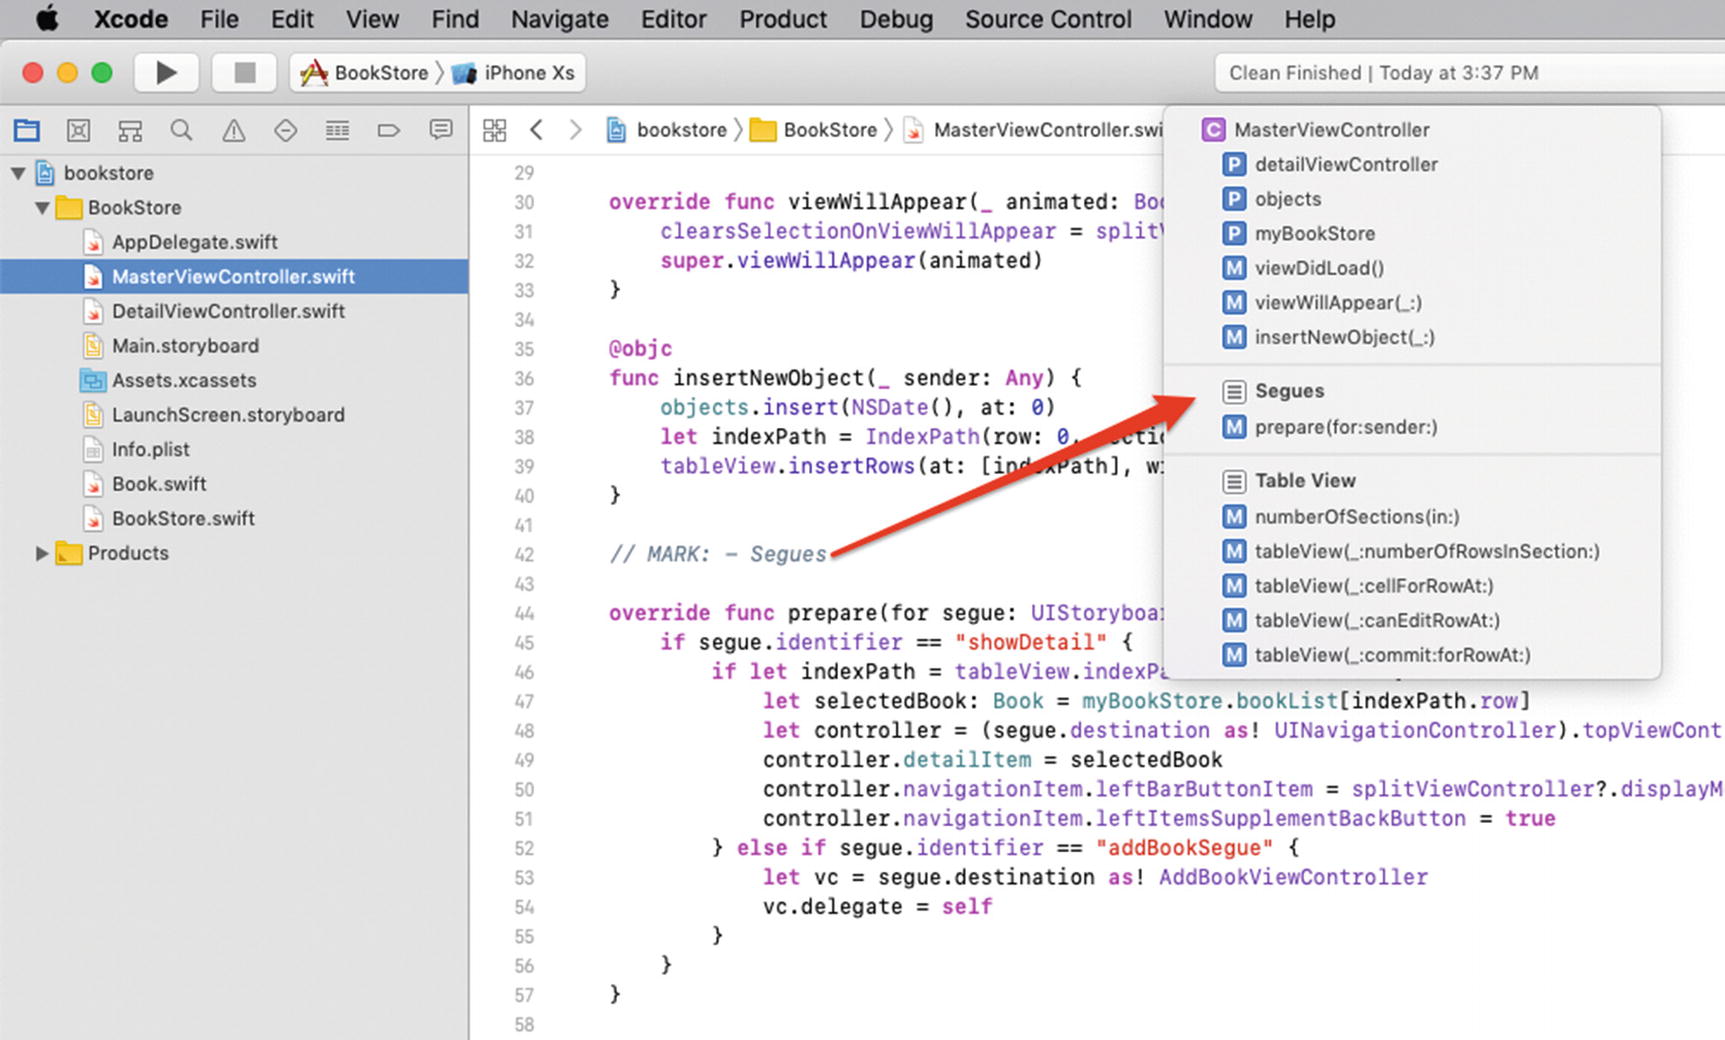
Something that can help organize your code can be found on line 42. "// MARK: - Segues". // MARK: is called a landmark. It is replacement of the #pragma mark, which is used in Objective-C. Landmarks help break up the code in the jump bar and enable you to quickly get to sections of code indicated by the landmark. When you type something following // MARK:, Xcode places the landmark in the jump bar’s drop-down, as shown in Figure 14-3. If you just type // MARK: -, Xcode adds a line separator in the jump bar’s drop-down. Swift also supports // TODO: and // FIXME: landmarks to annotate your code and list them in the jump bar.
Swift’s landmarks
Adding the AddBookViewController and objects
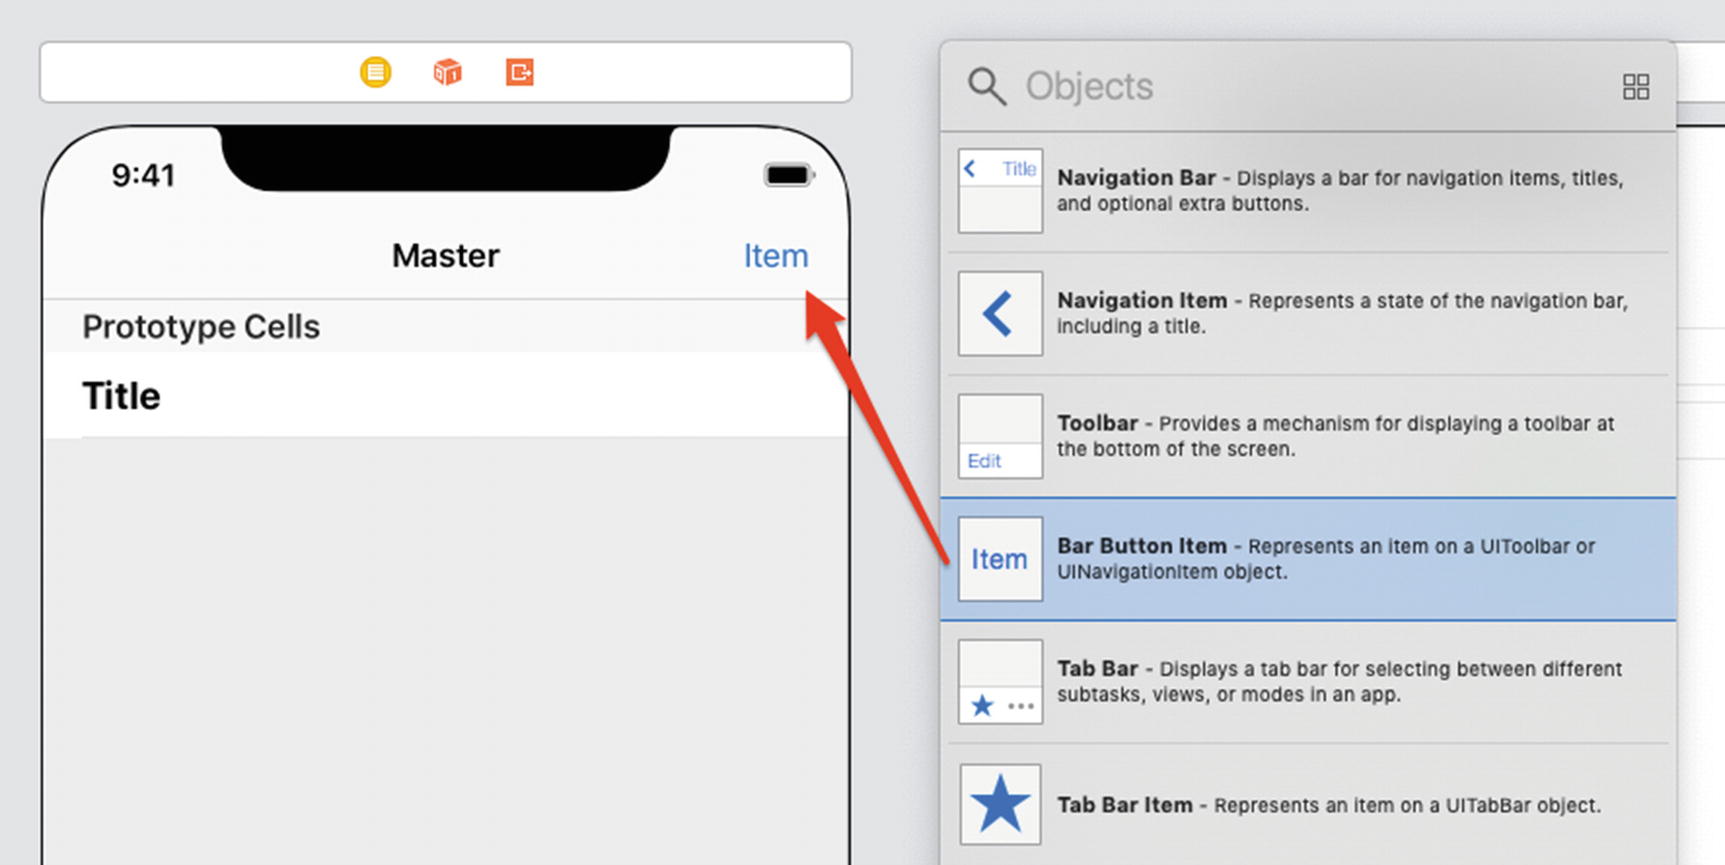
Adding a Bar Button Item to the MasterViewController
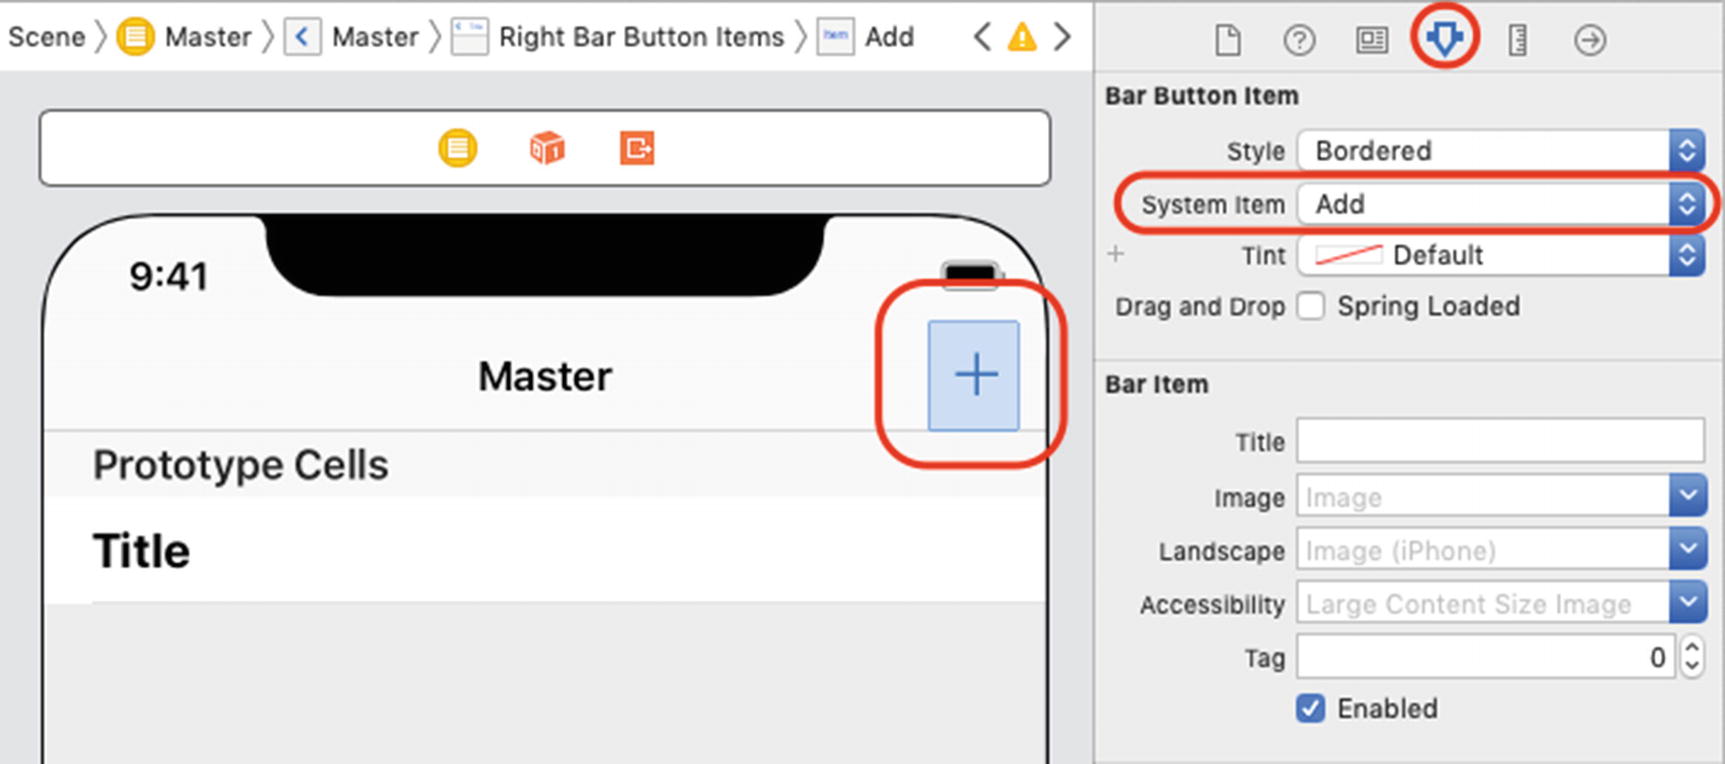
Changing the Bar Button Item from Custom to Add
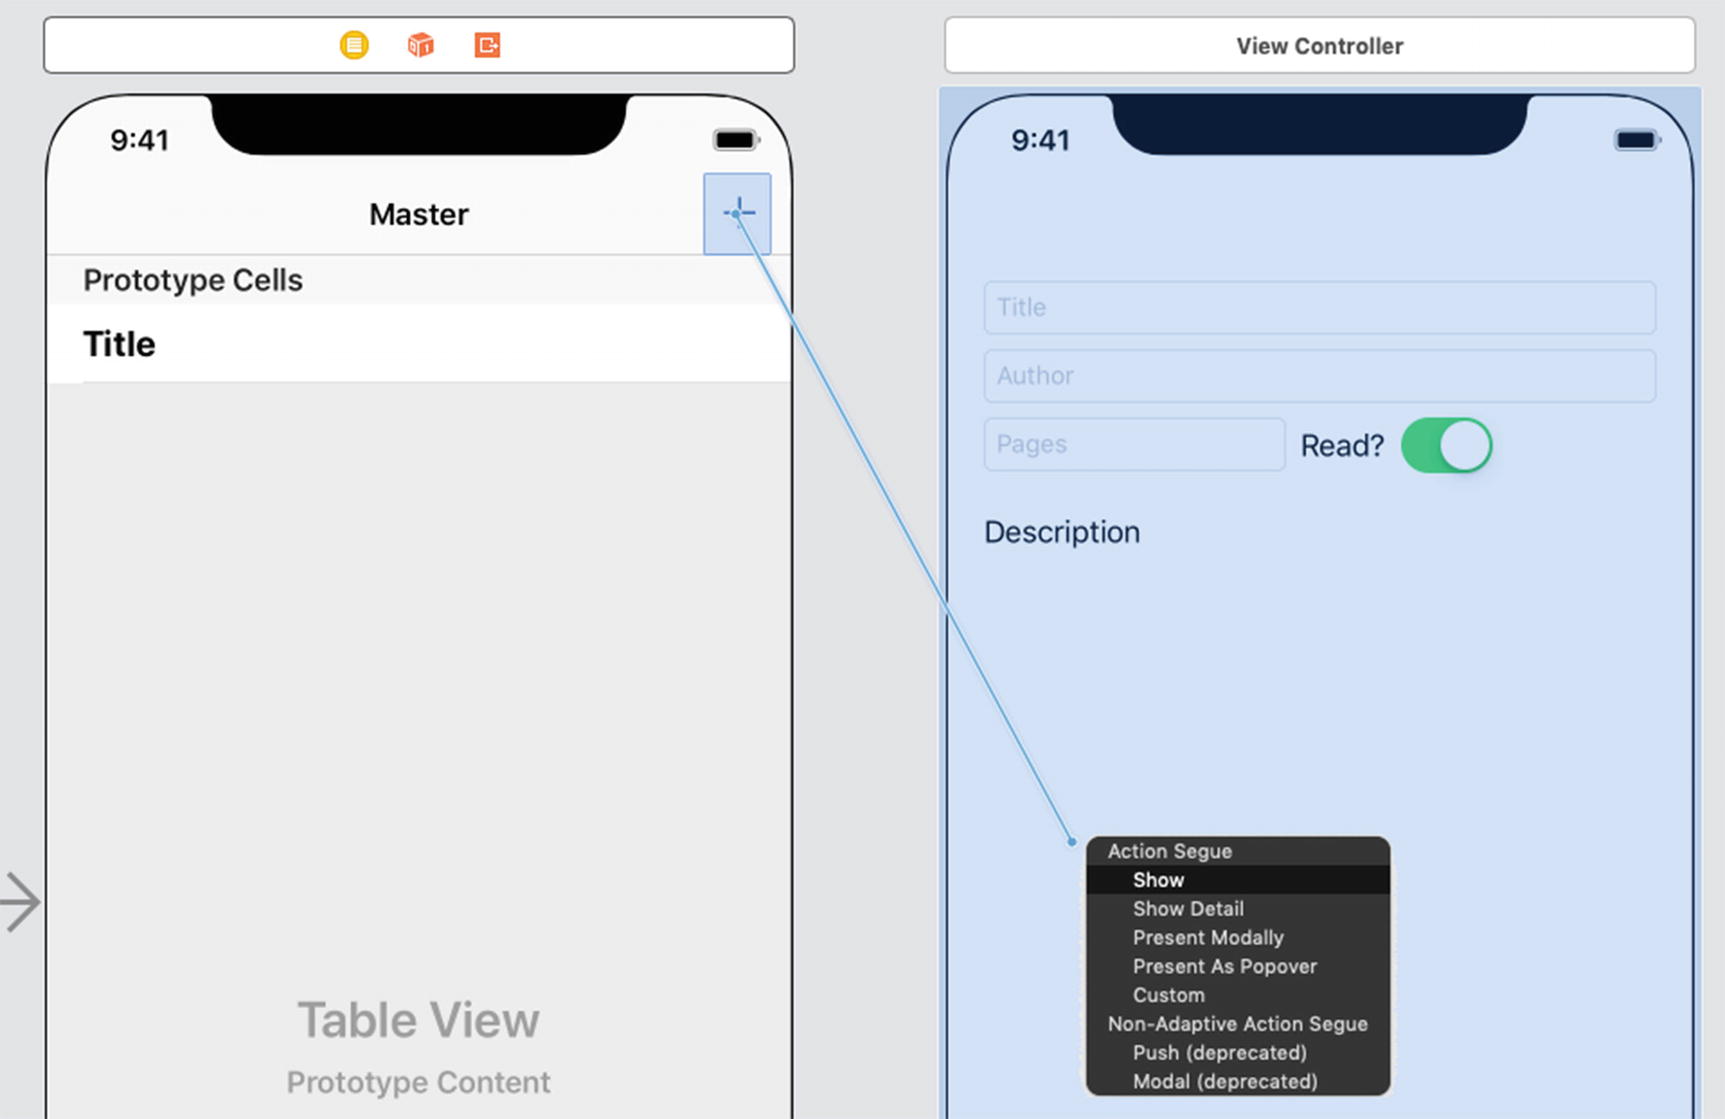
Add a Show Segue object to the new View Controller
insertNewObject Function
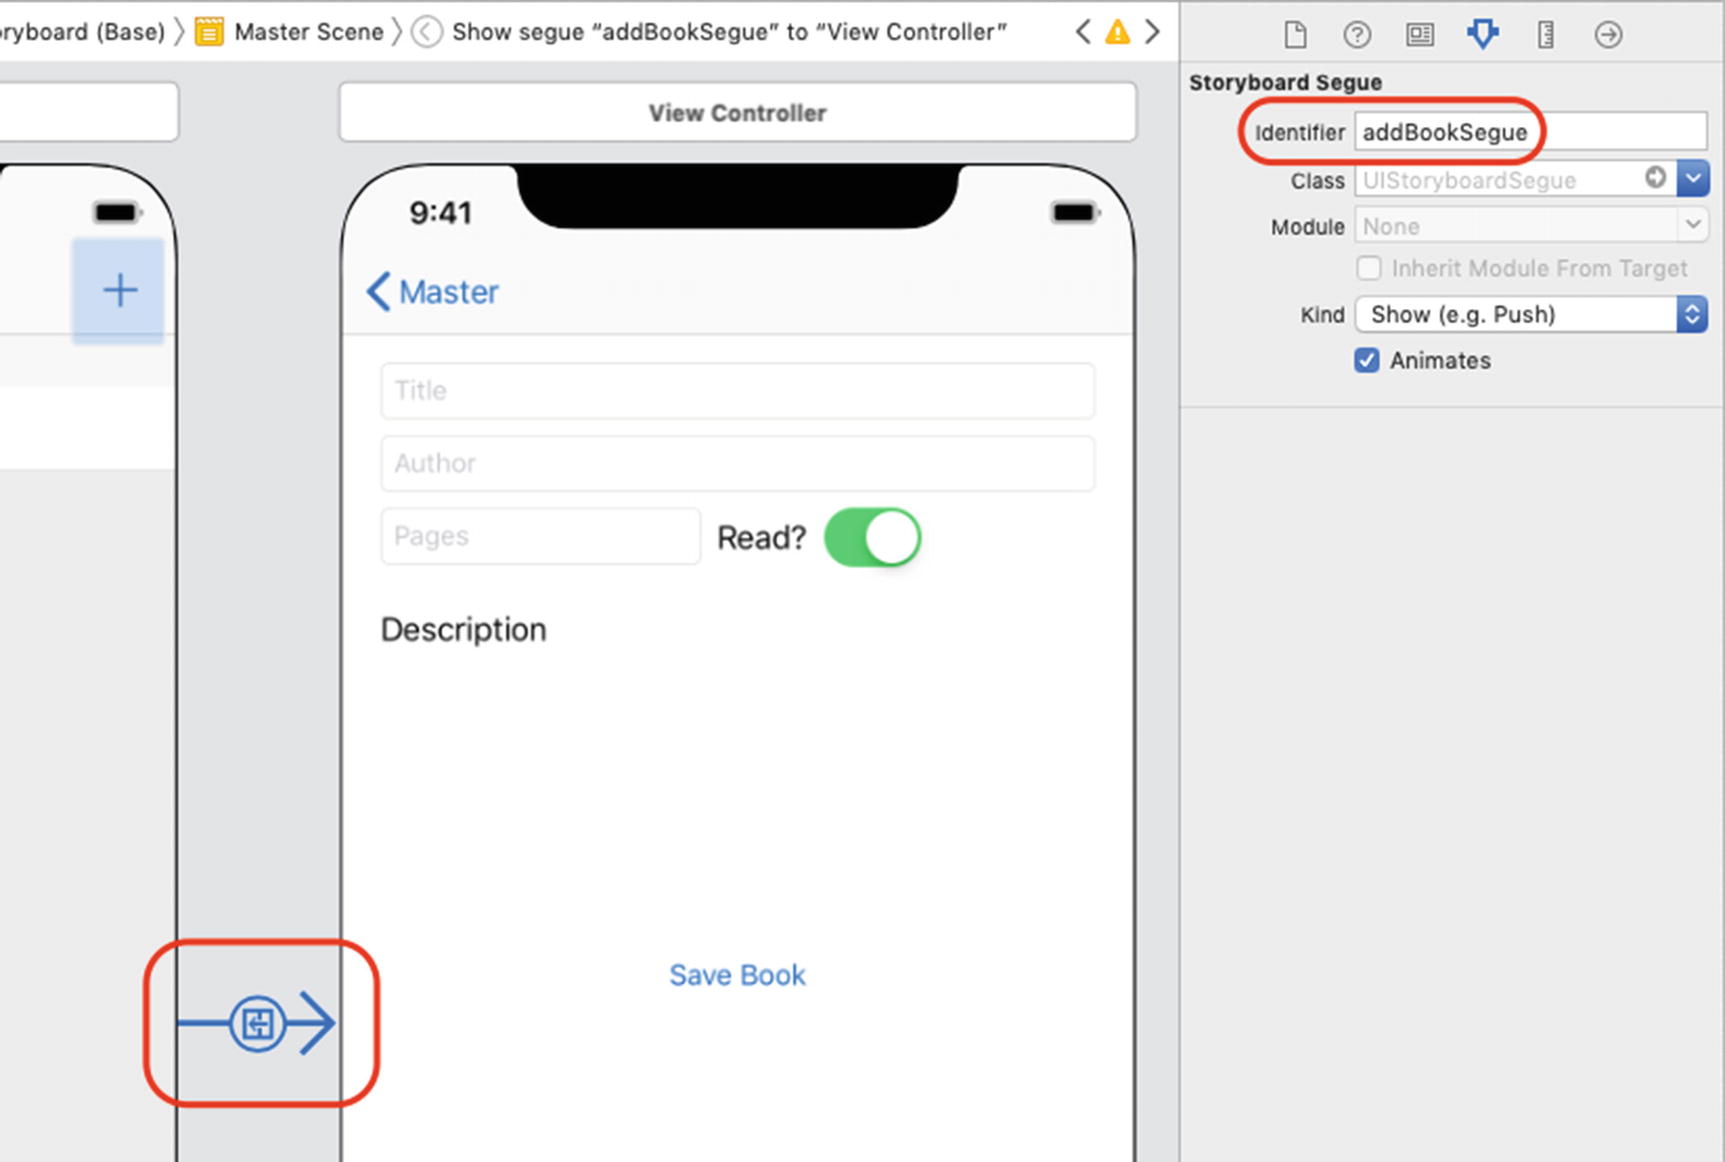
Naming the Segue addBookSegue
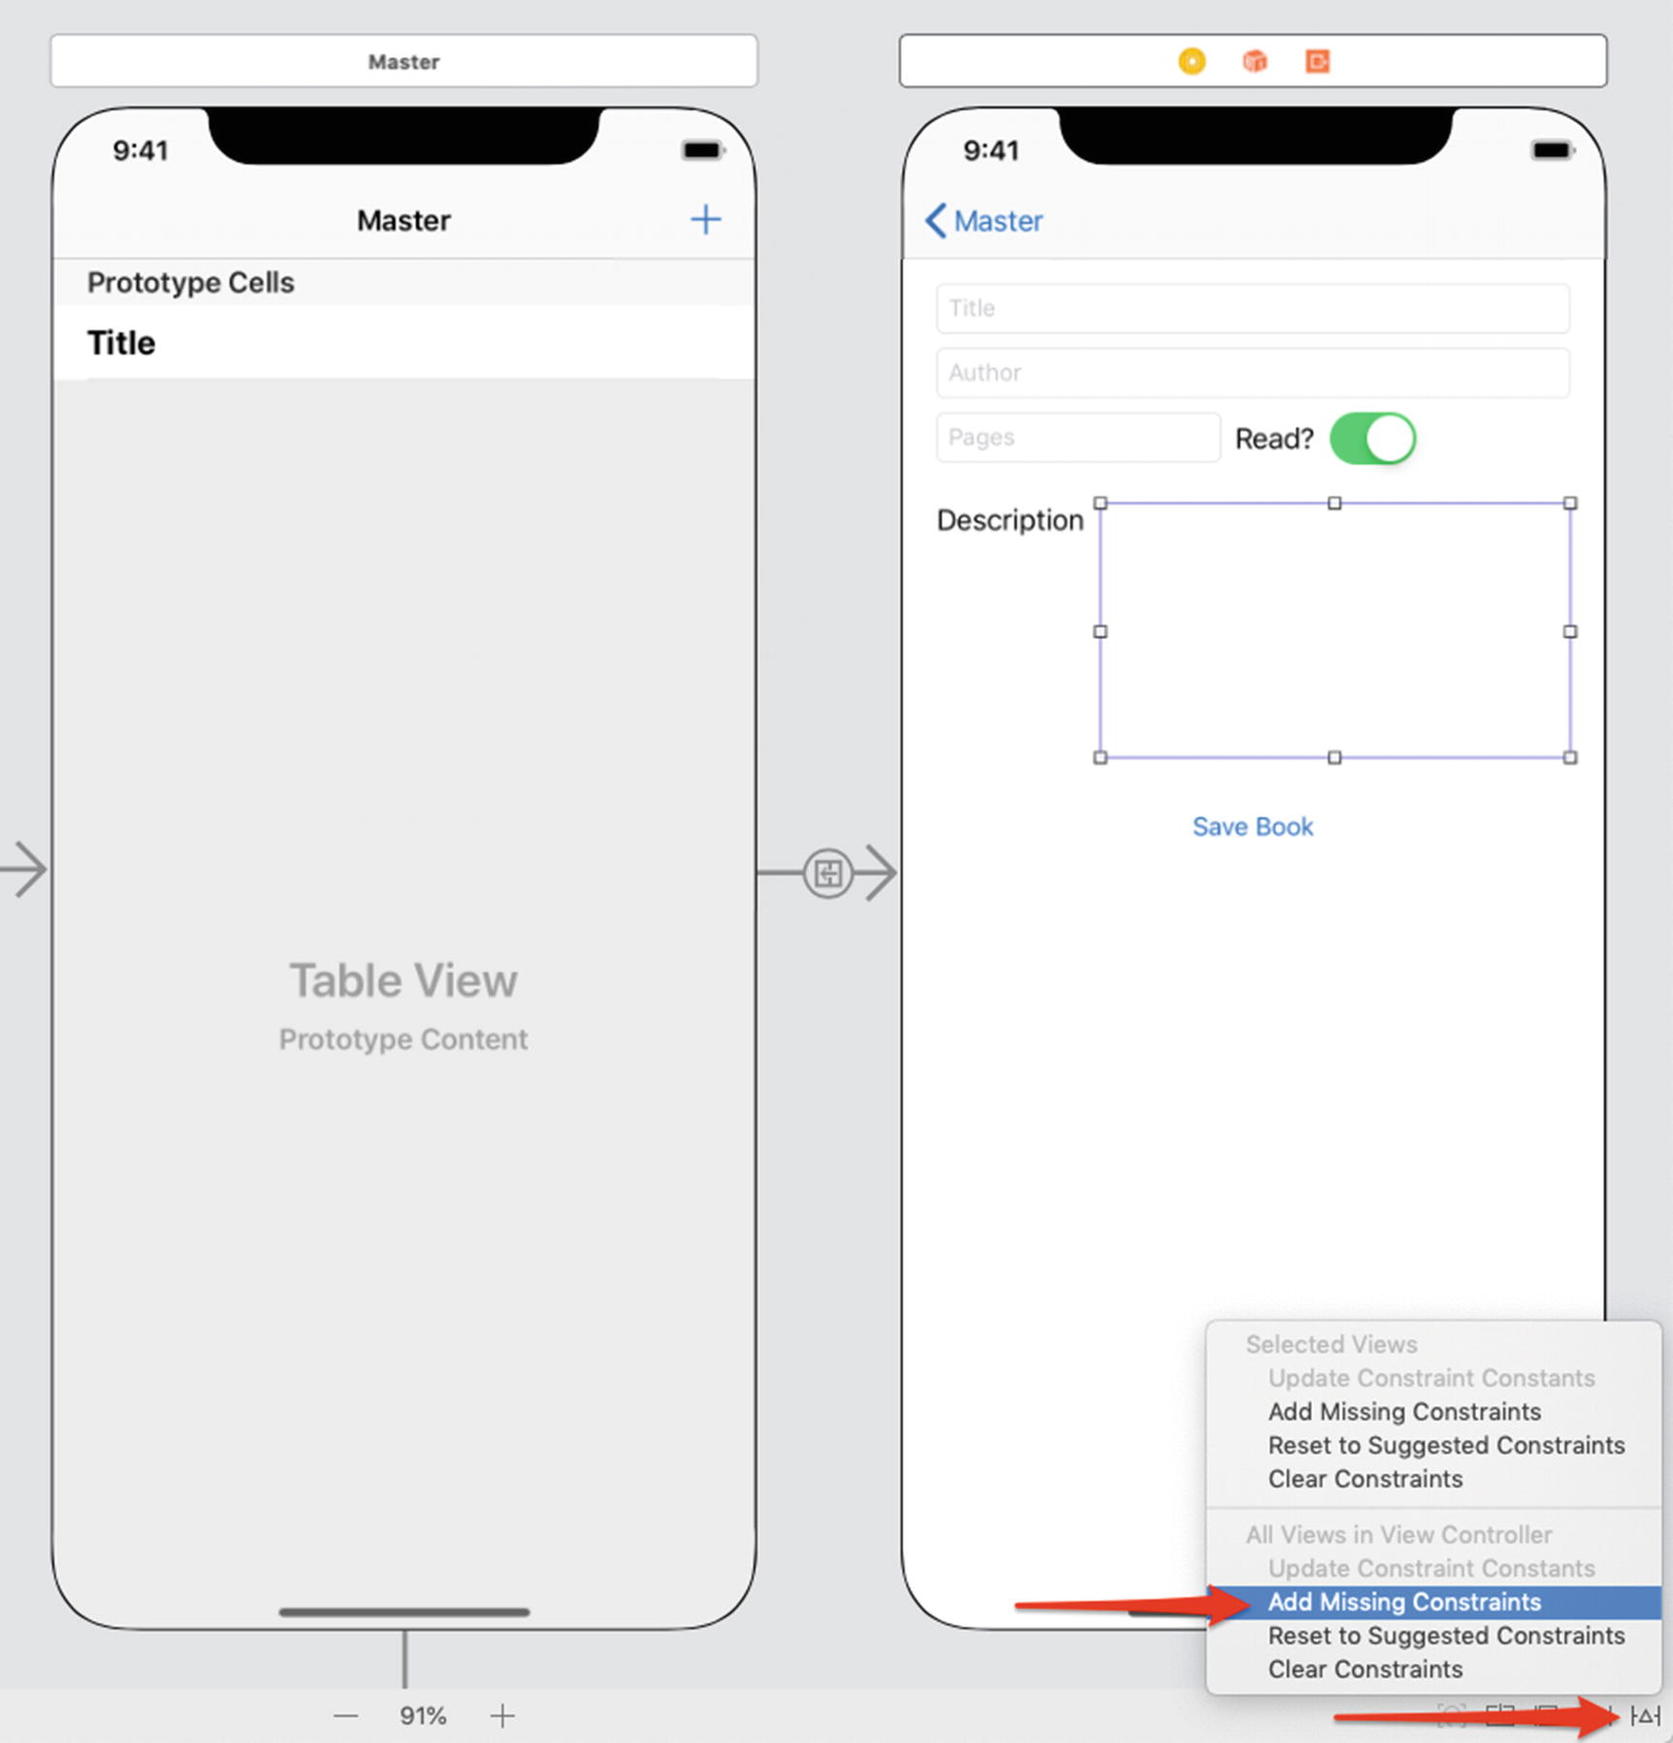
Adding Missing Constraints
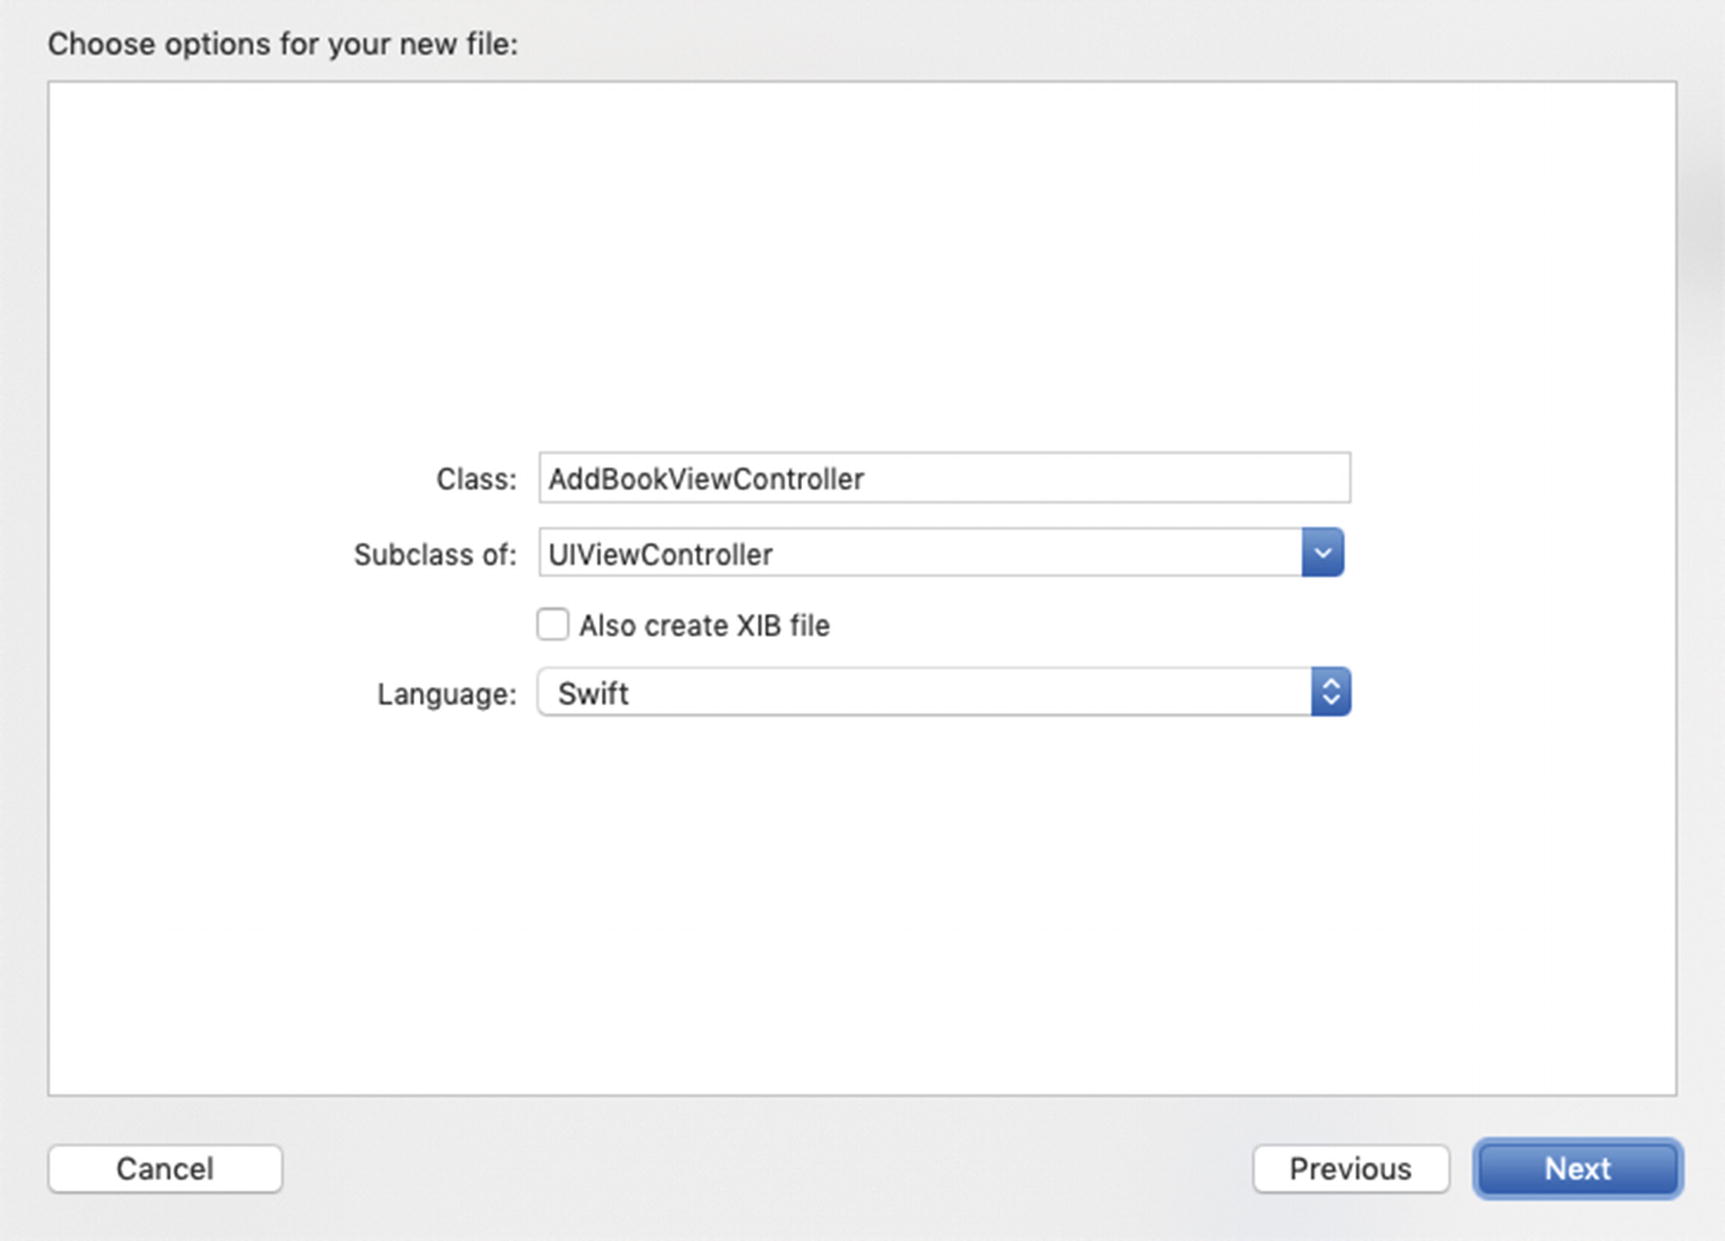
Adding the AddBookViewController class
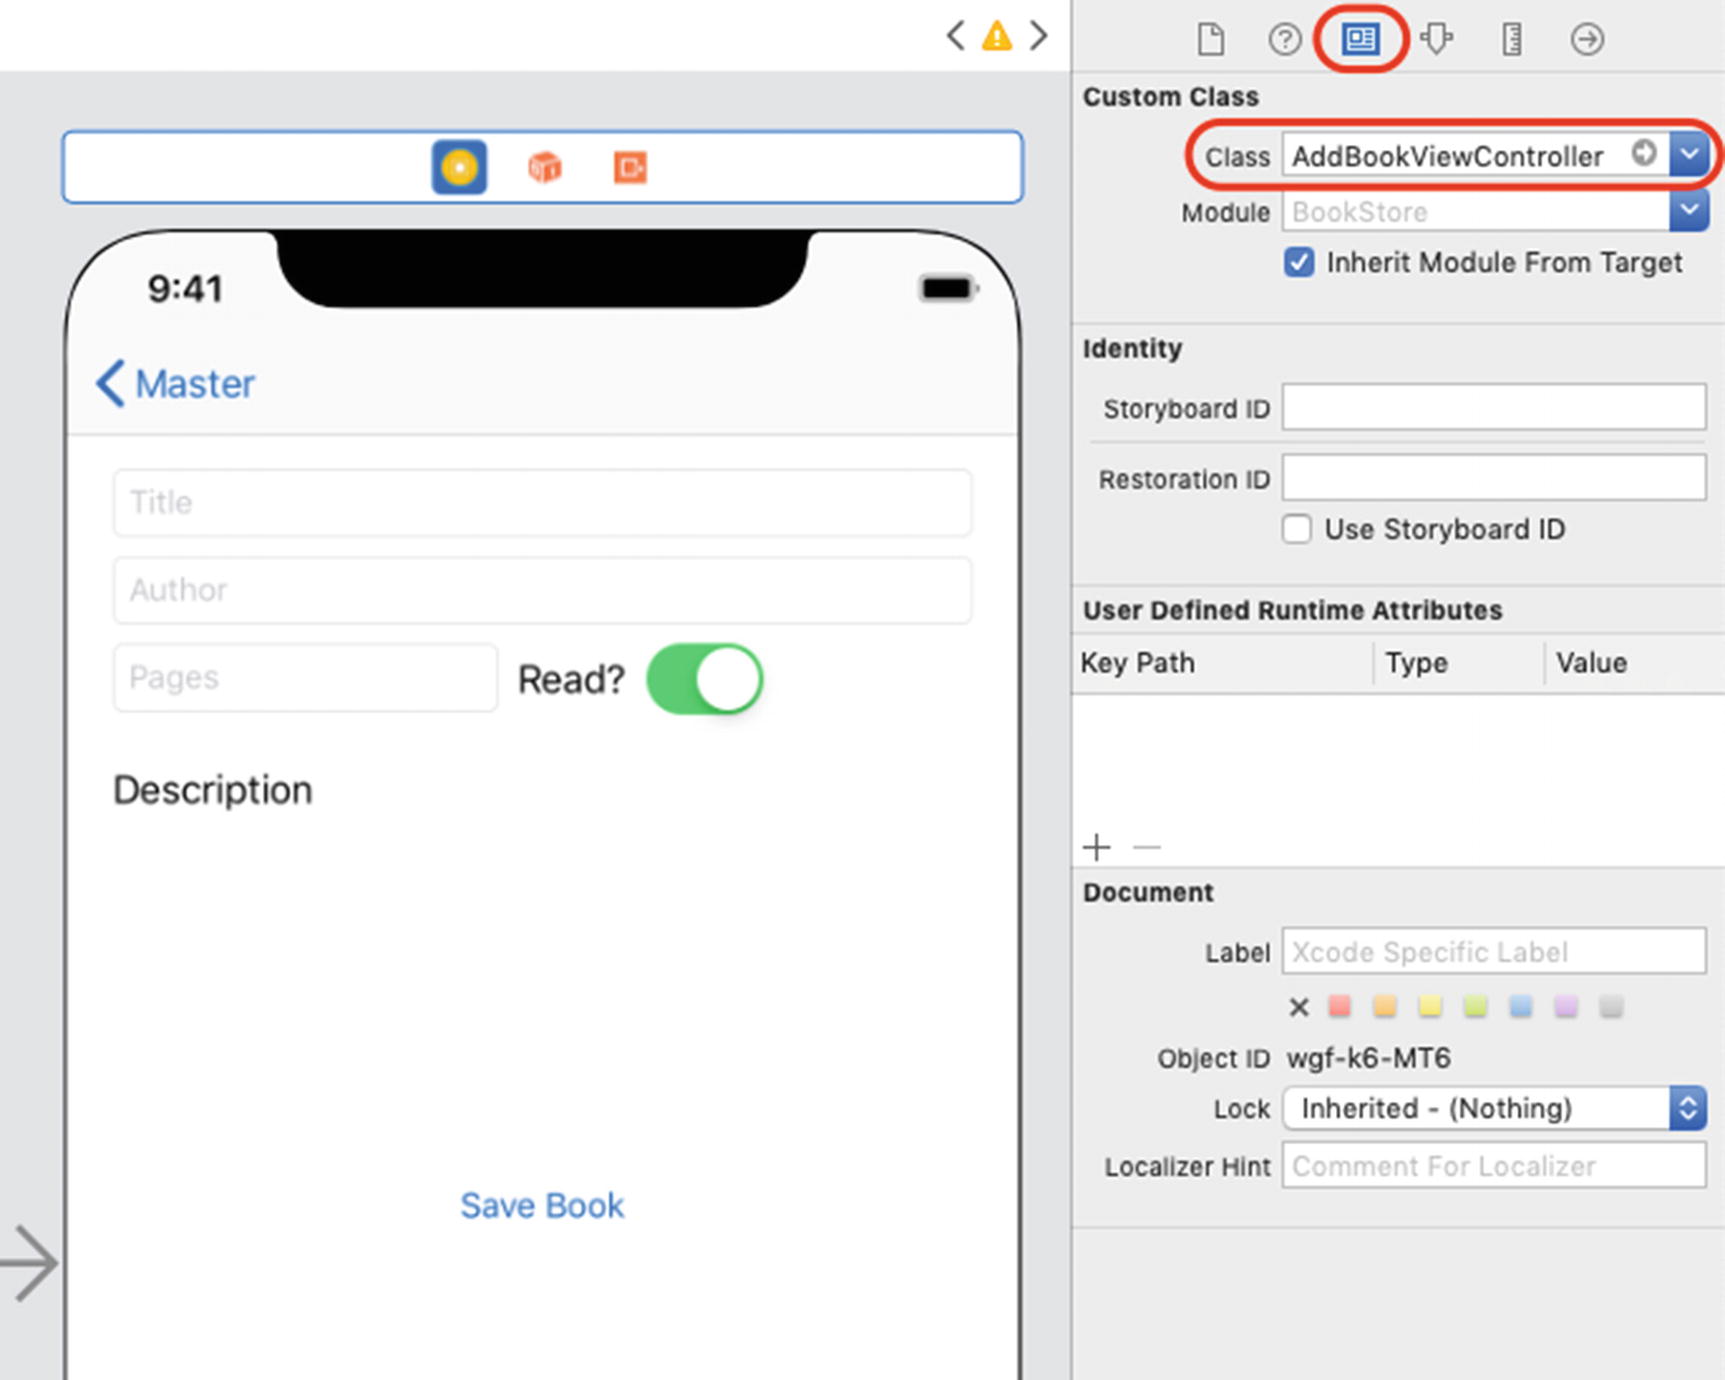
Associating the AddBookViewController class to the new View Controller

Changing the Title of the View Controller to Add Book
The AddBookViewController.swift File
Book Class Changes
Switches
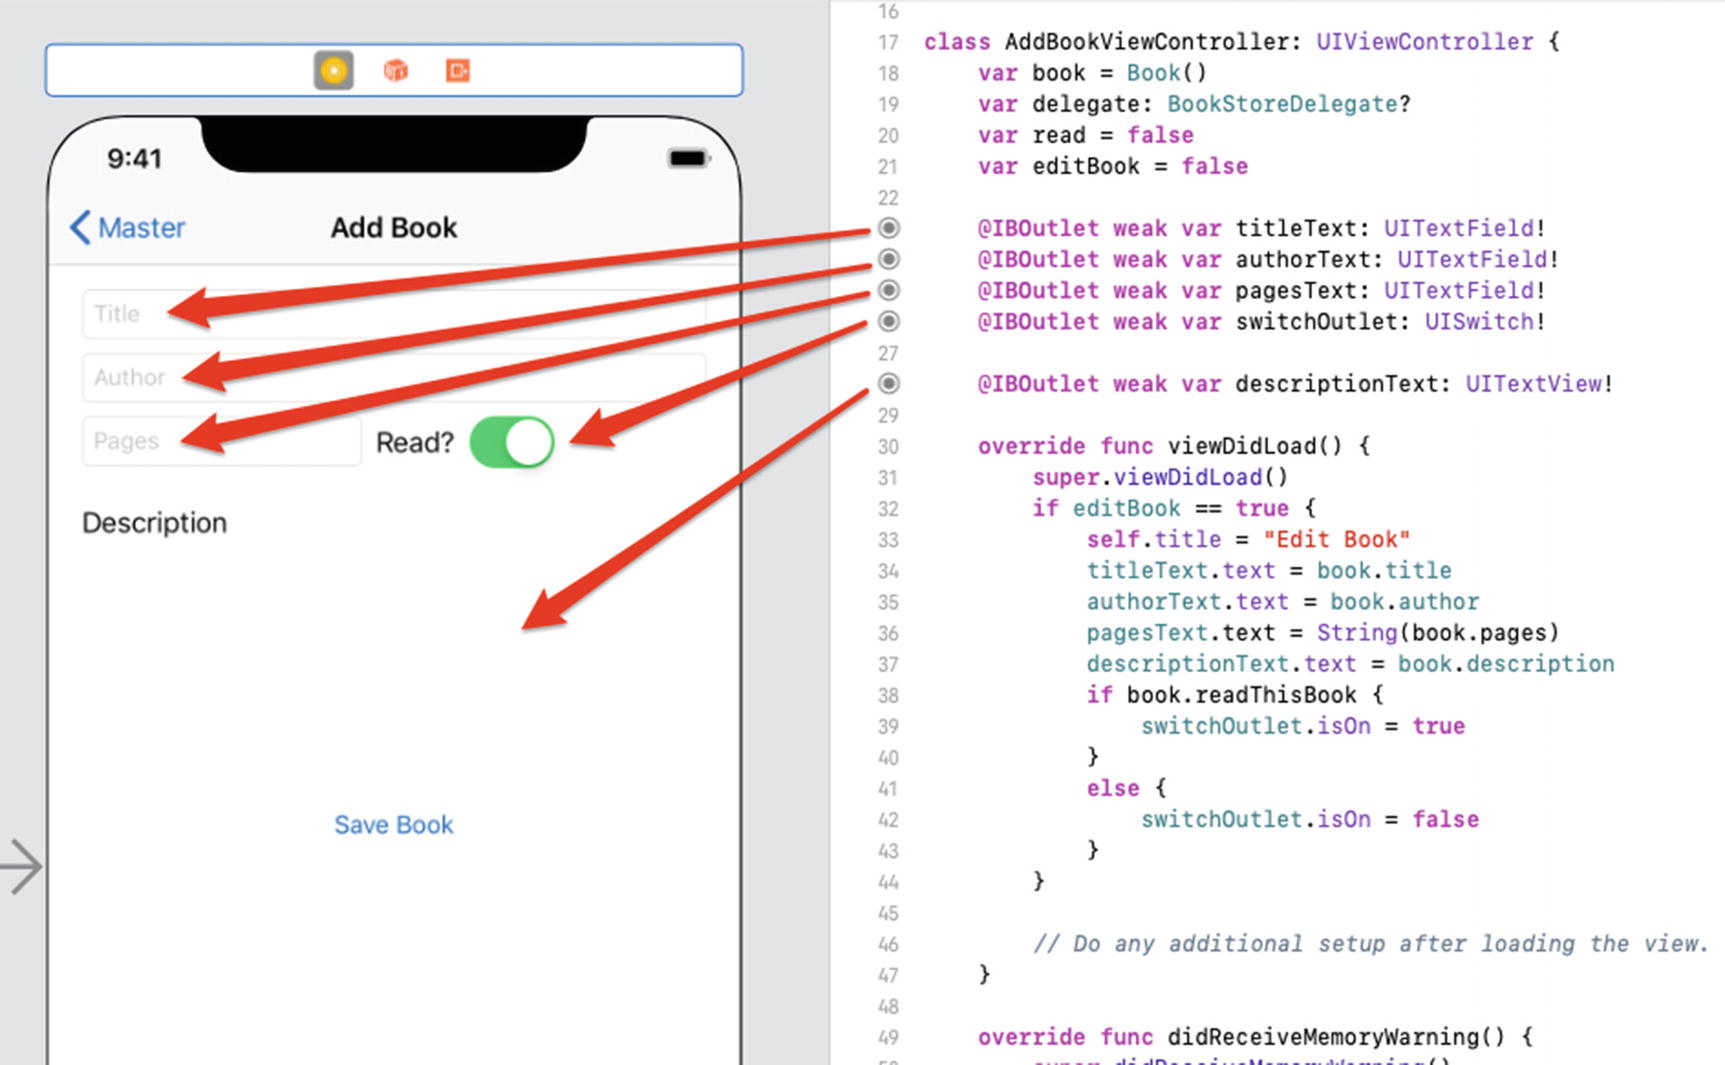
Connecting the outlets
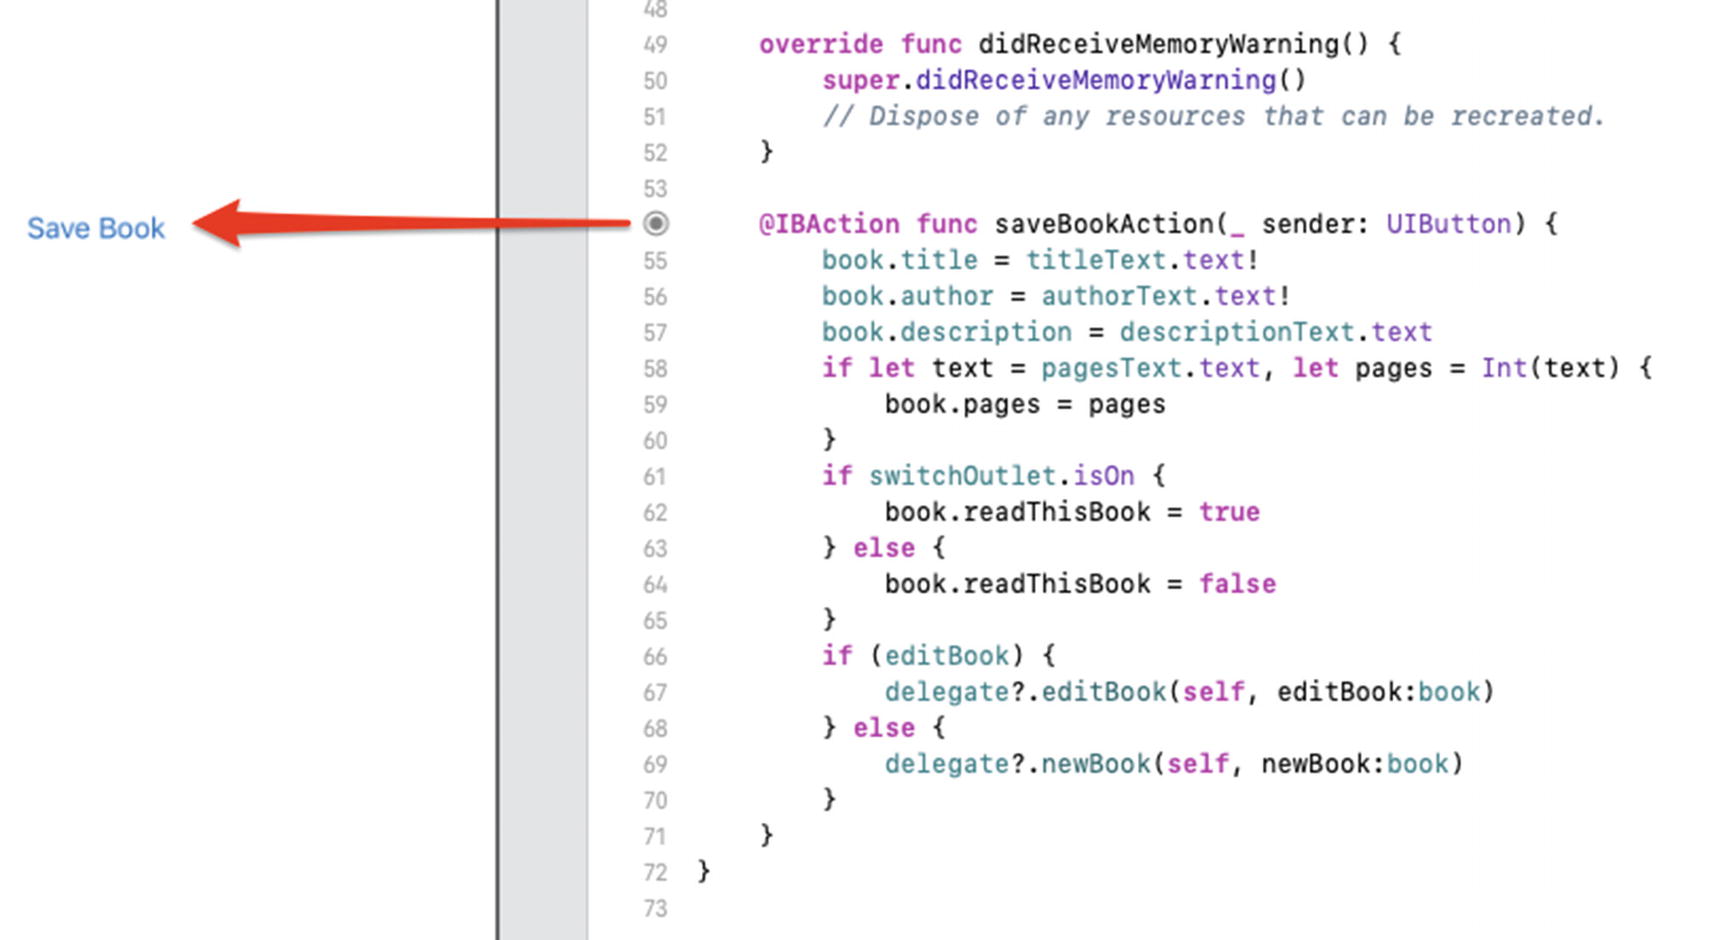
Connecting the saveBookAction
New Properties
Alert Controllers

Adding the Pages and Read outlets
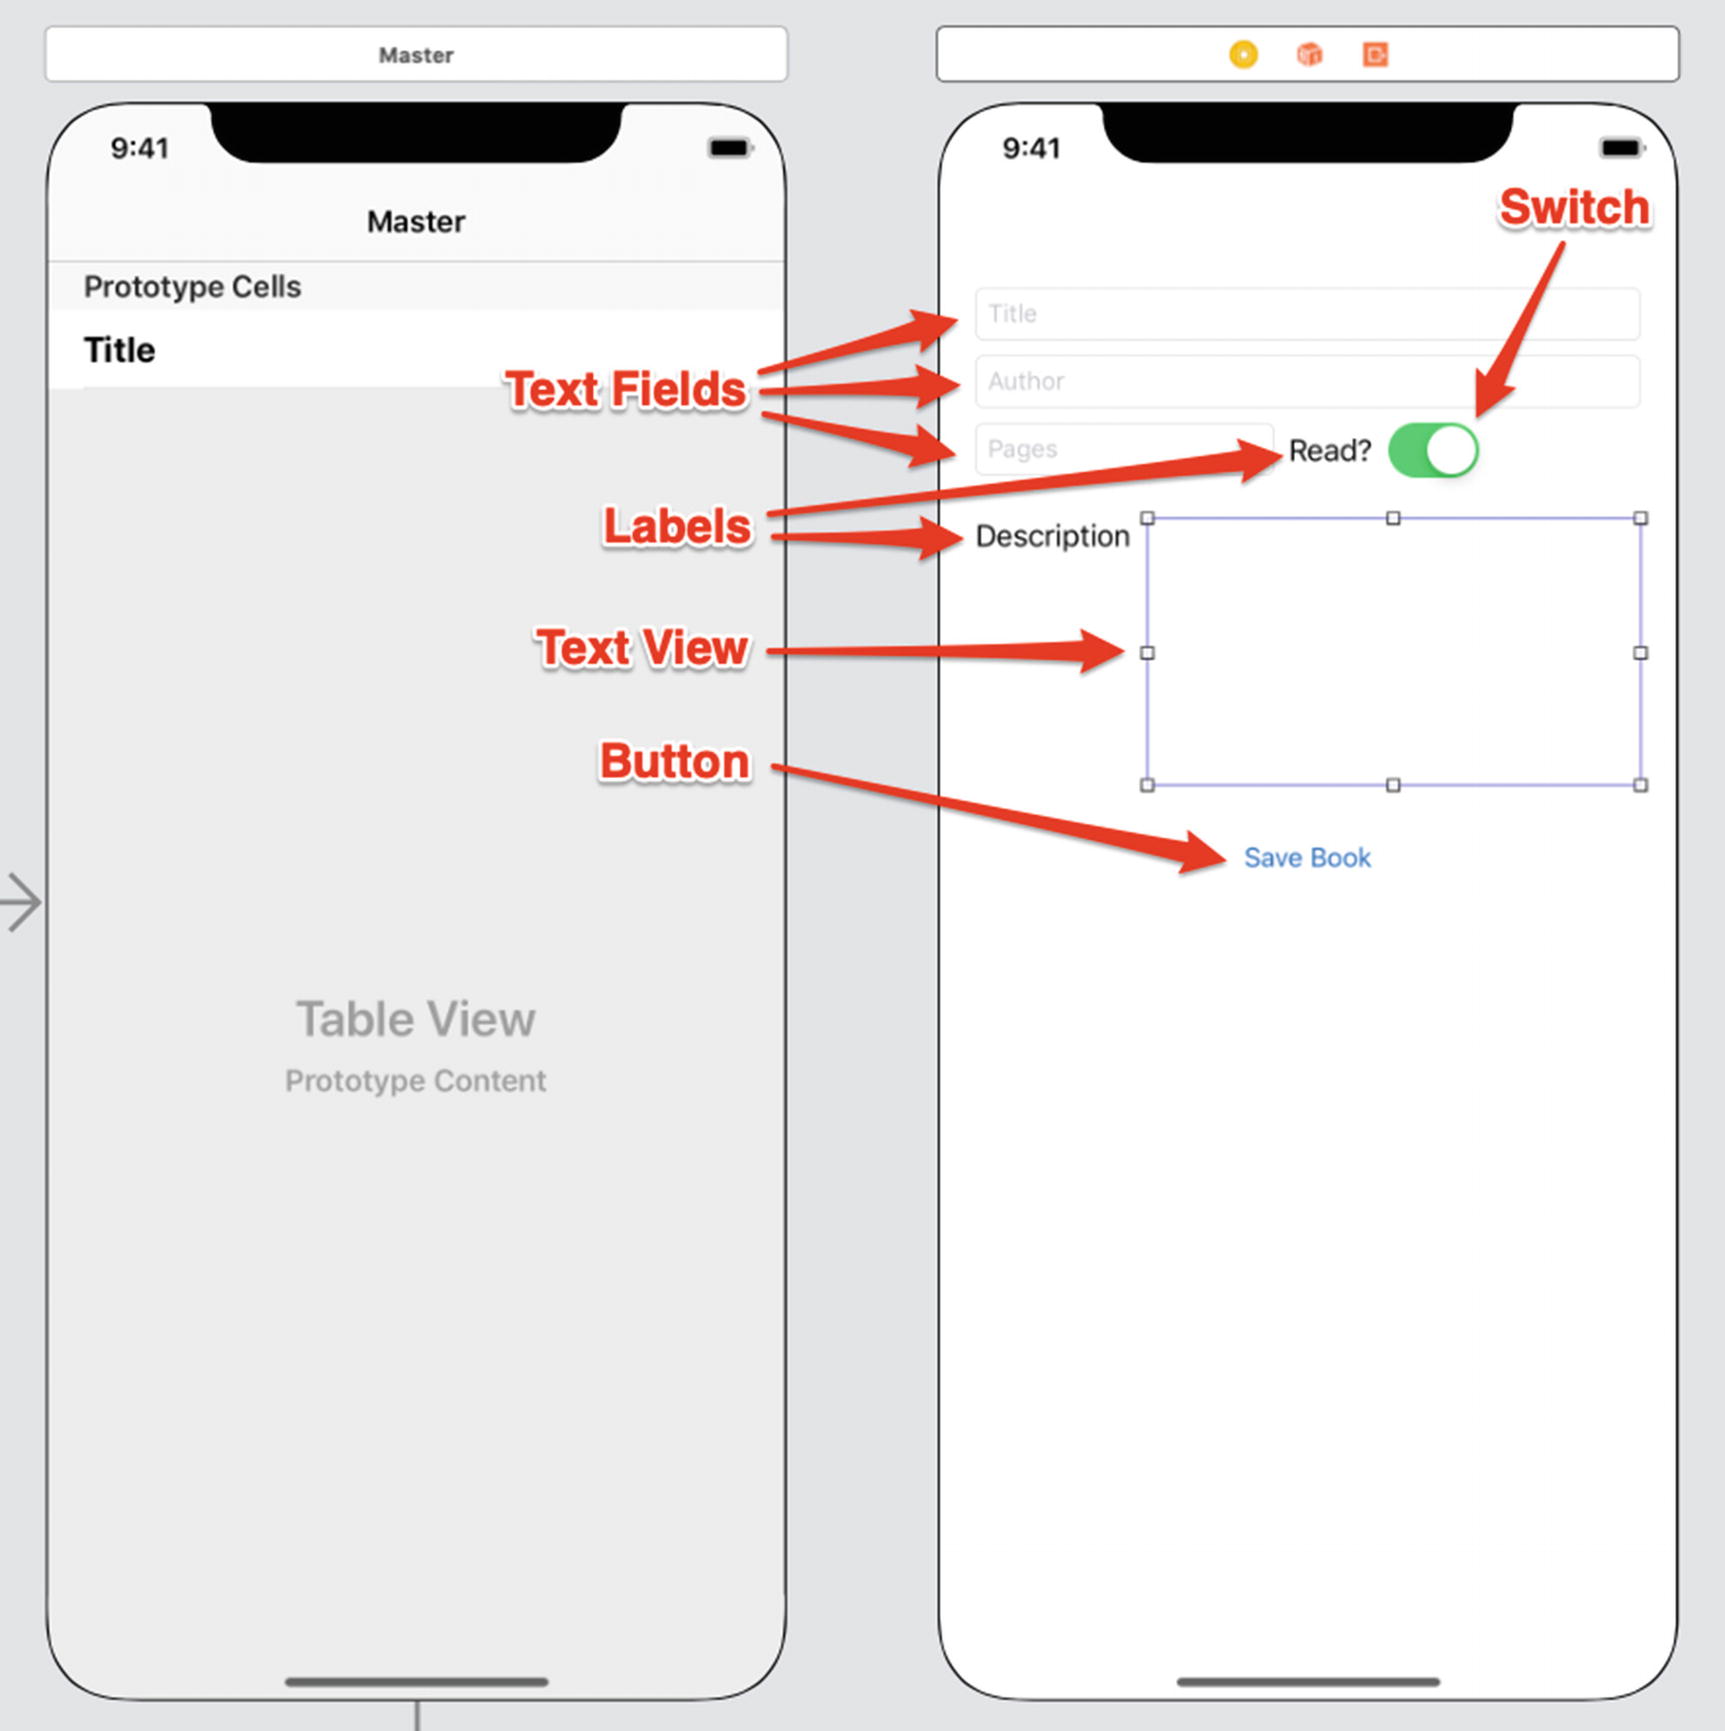
The Read switch is disabled in this view by unchecking the Enabled property in the Attributes Inspector.
Displaying a UIAlertController
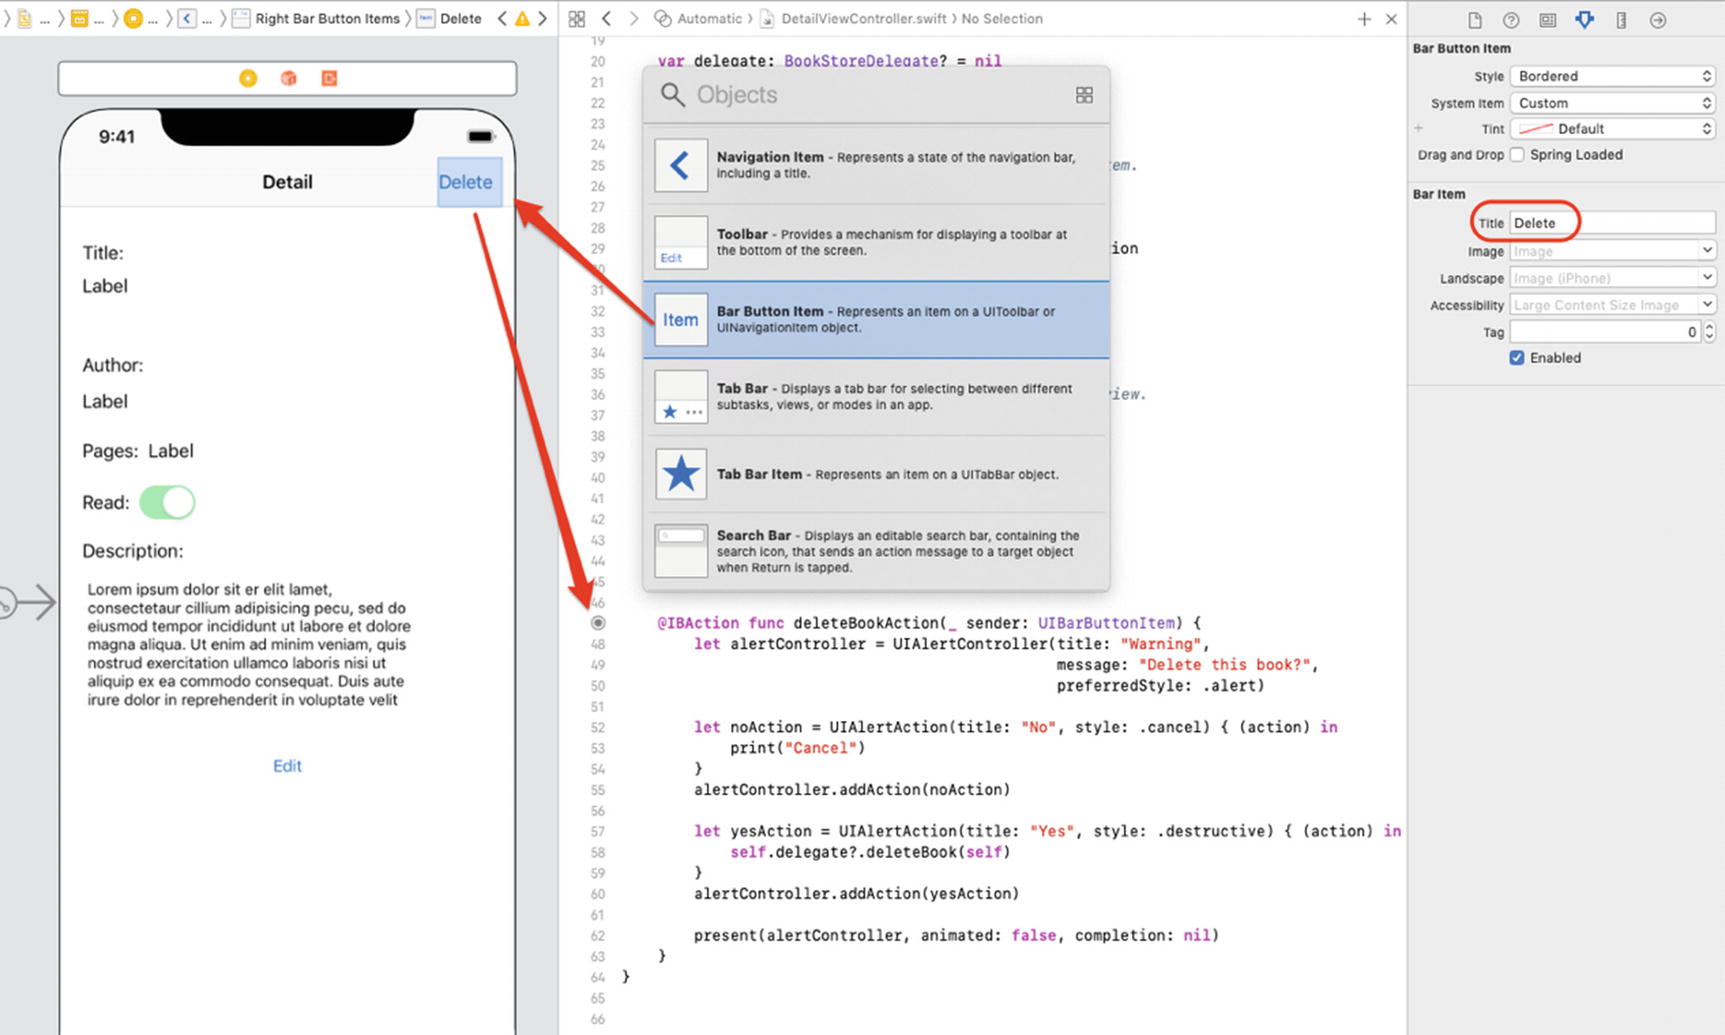
Adding the Delete Right Bar Button Item and action
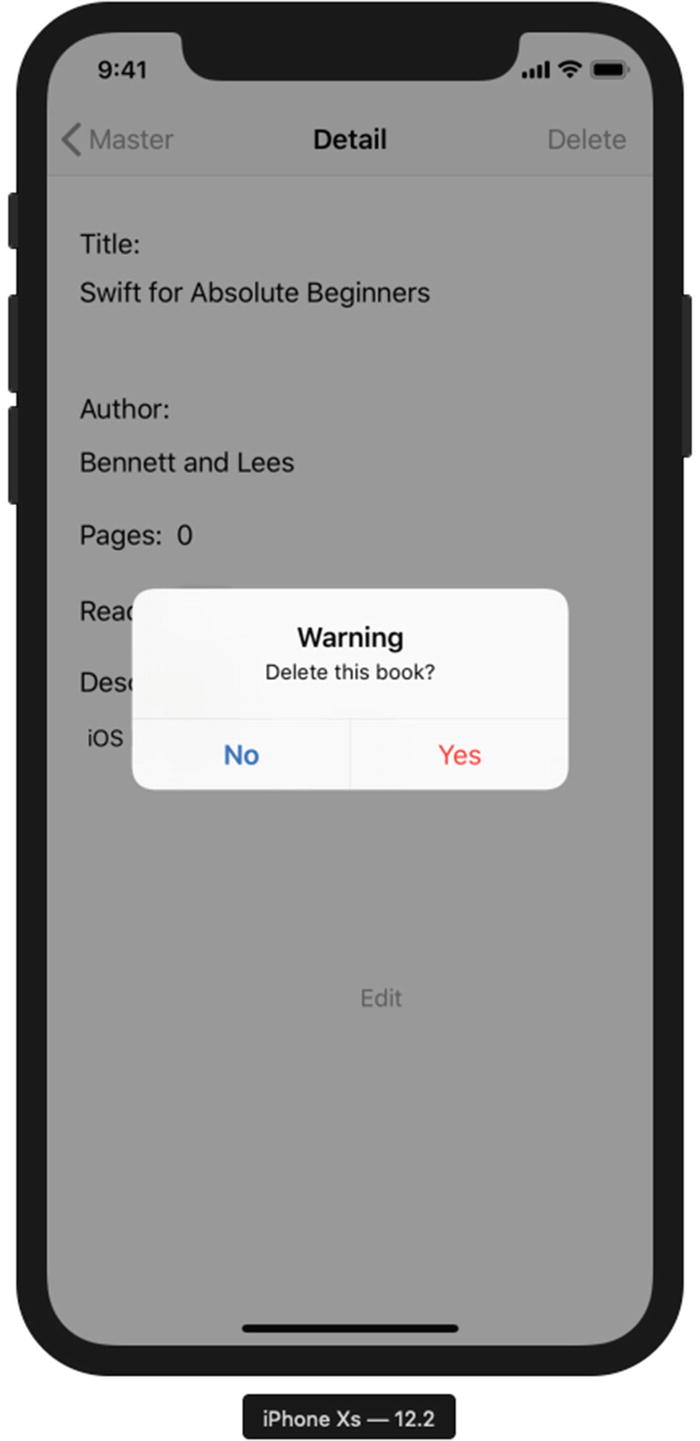
UIAlertController being displayed
Adding the BookStoreDelegate
Conforming to the Protocol
Finally, you pop the DetailViewController from the navigation stack by calling popToRootViewController. Popping the view from the navigation stack means the view is removed, similar to tapping the Back button.
The deleteBook method removes the book from the bookList array. First, you determine which row was selected in the tableView and use that index to delete the book in the array by calling remove(at:), as shown on line 99.
The editBook method enables the user to edit an existing book in the bookList array. To do this, the method replaces the edited book in the array at the row that was selected, as shown on line 107.
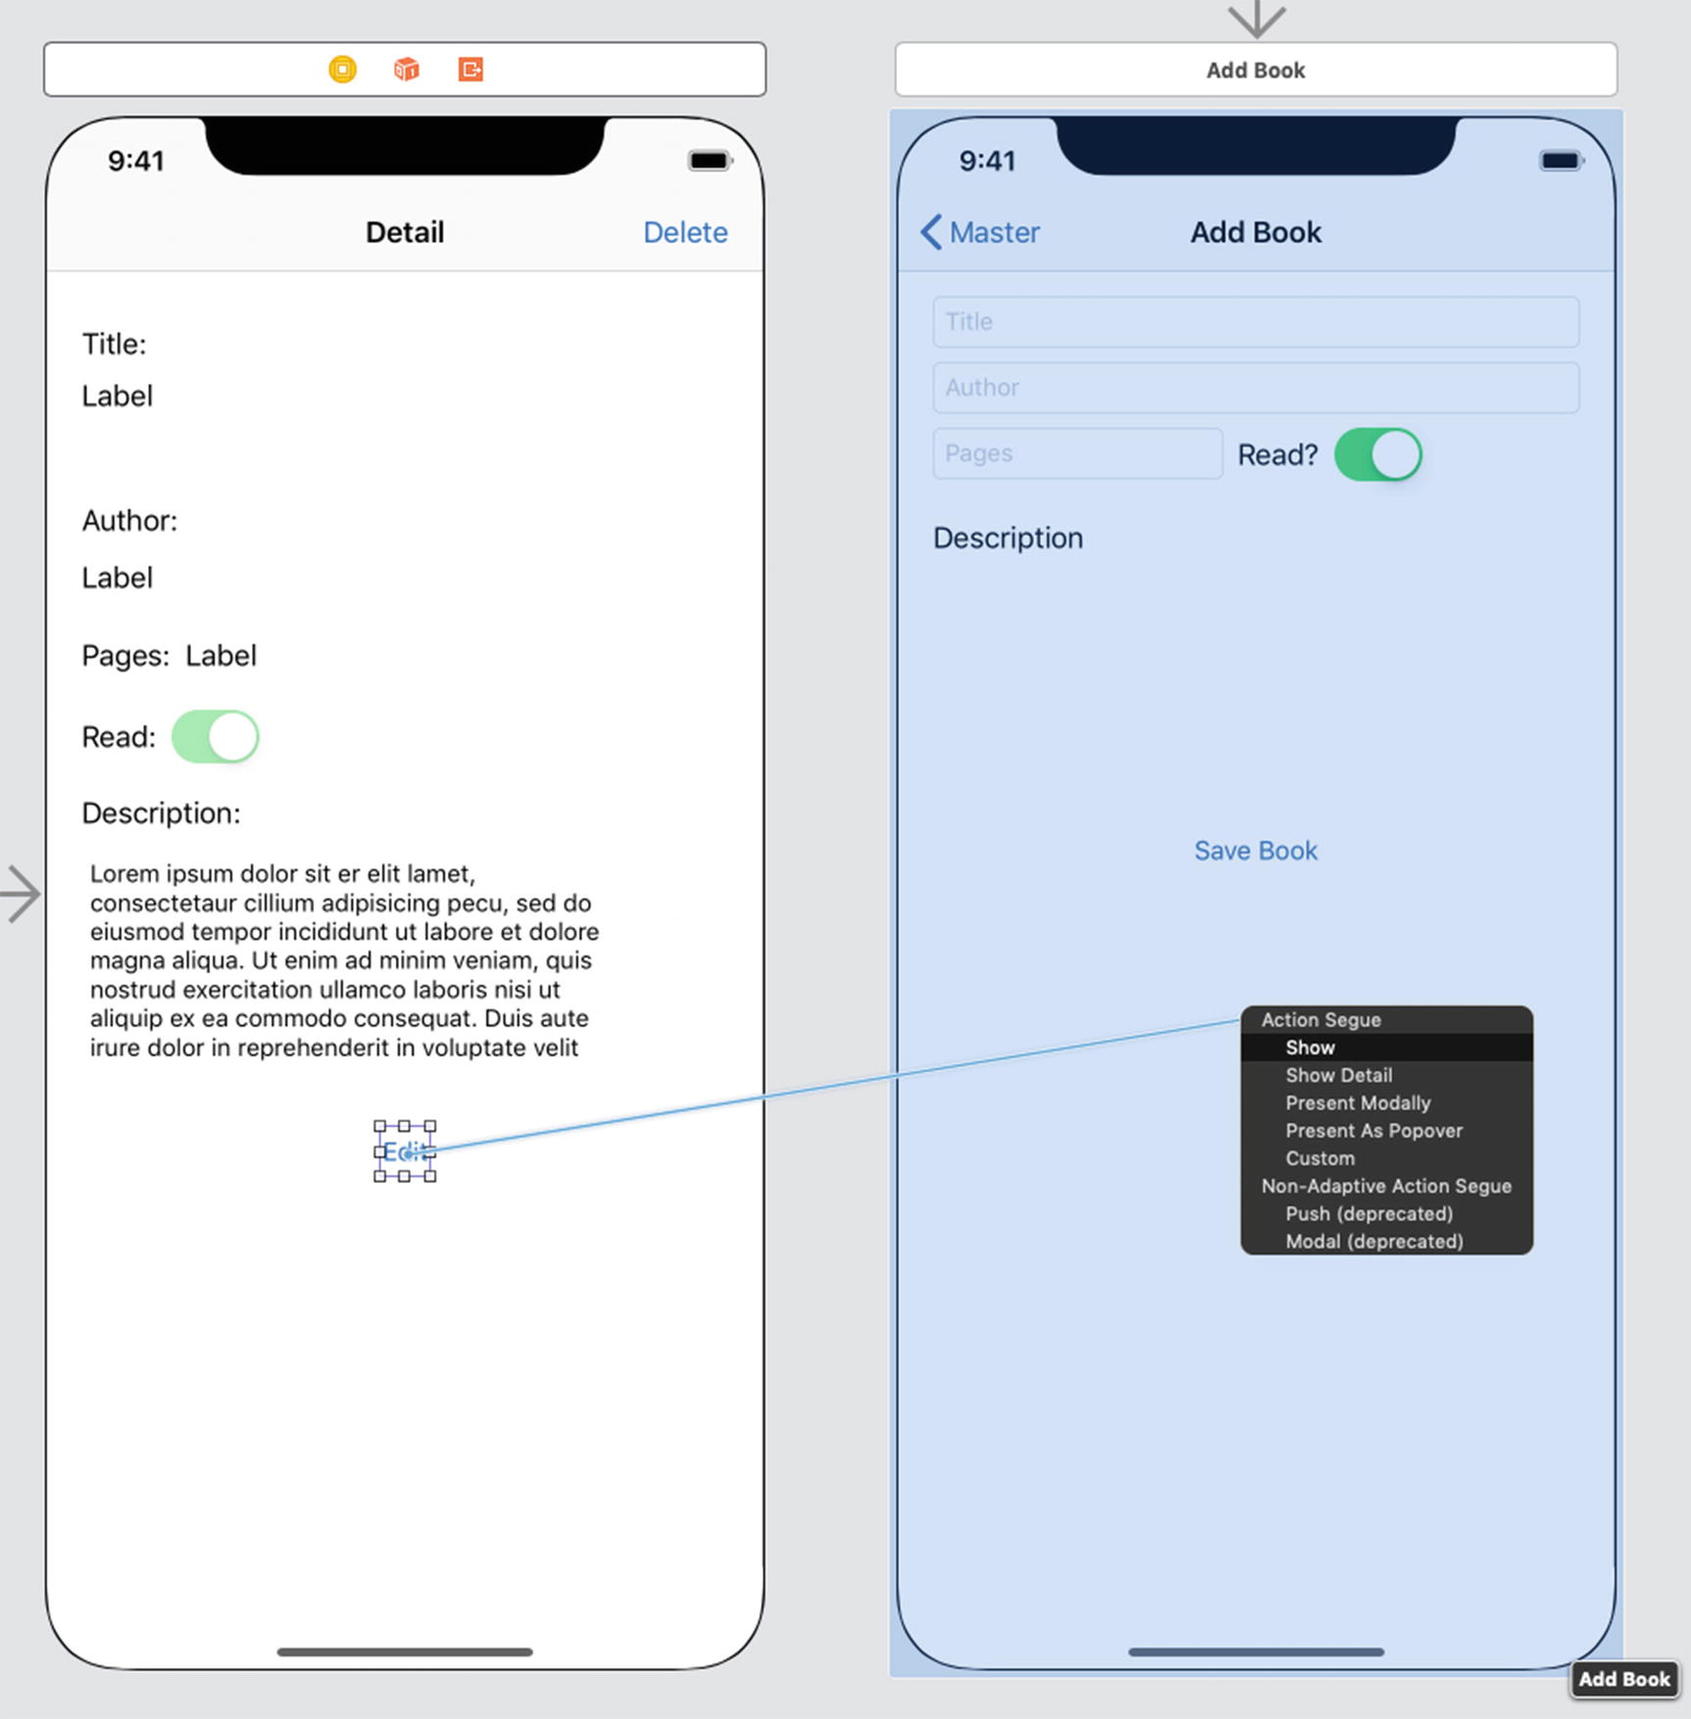
Adding the Edit Show Segue
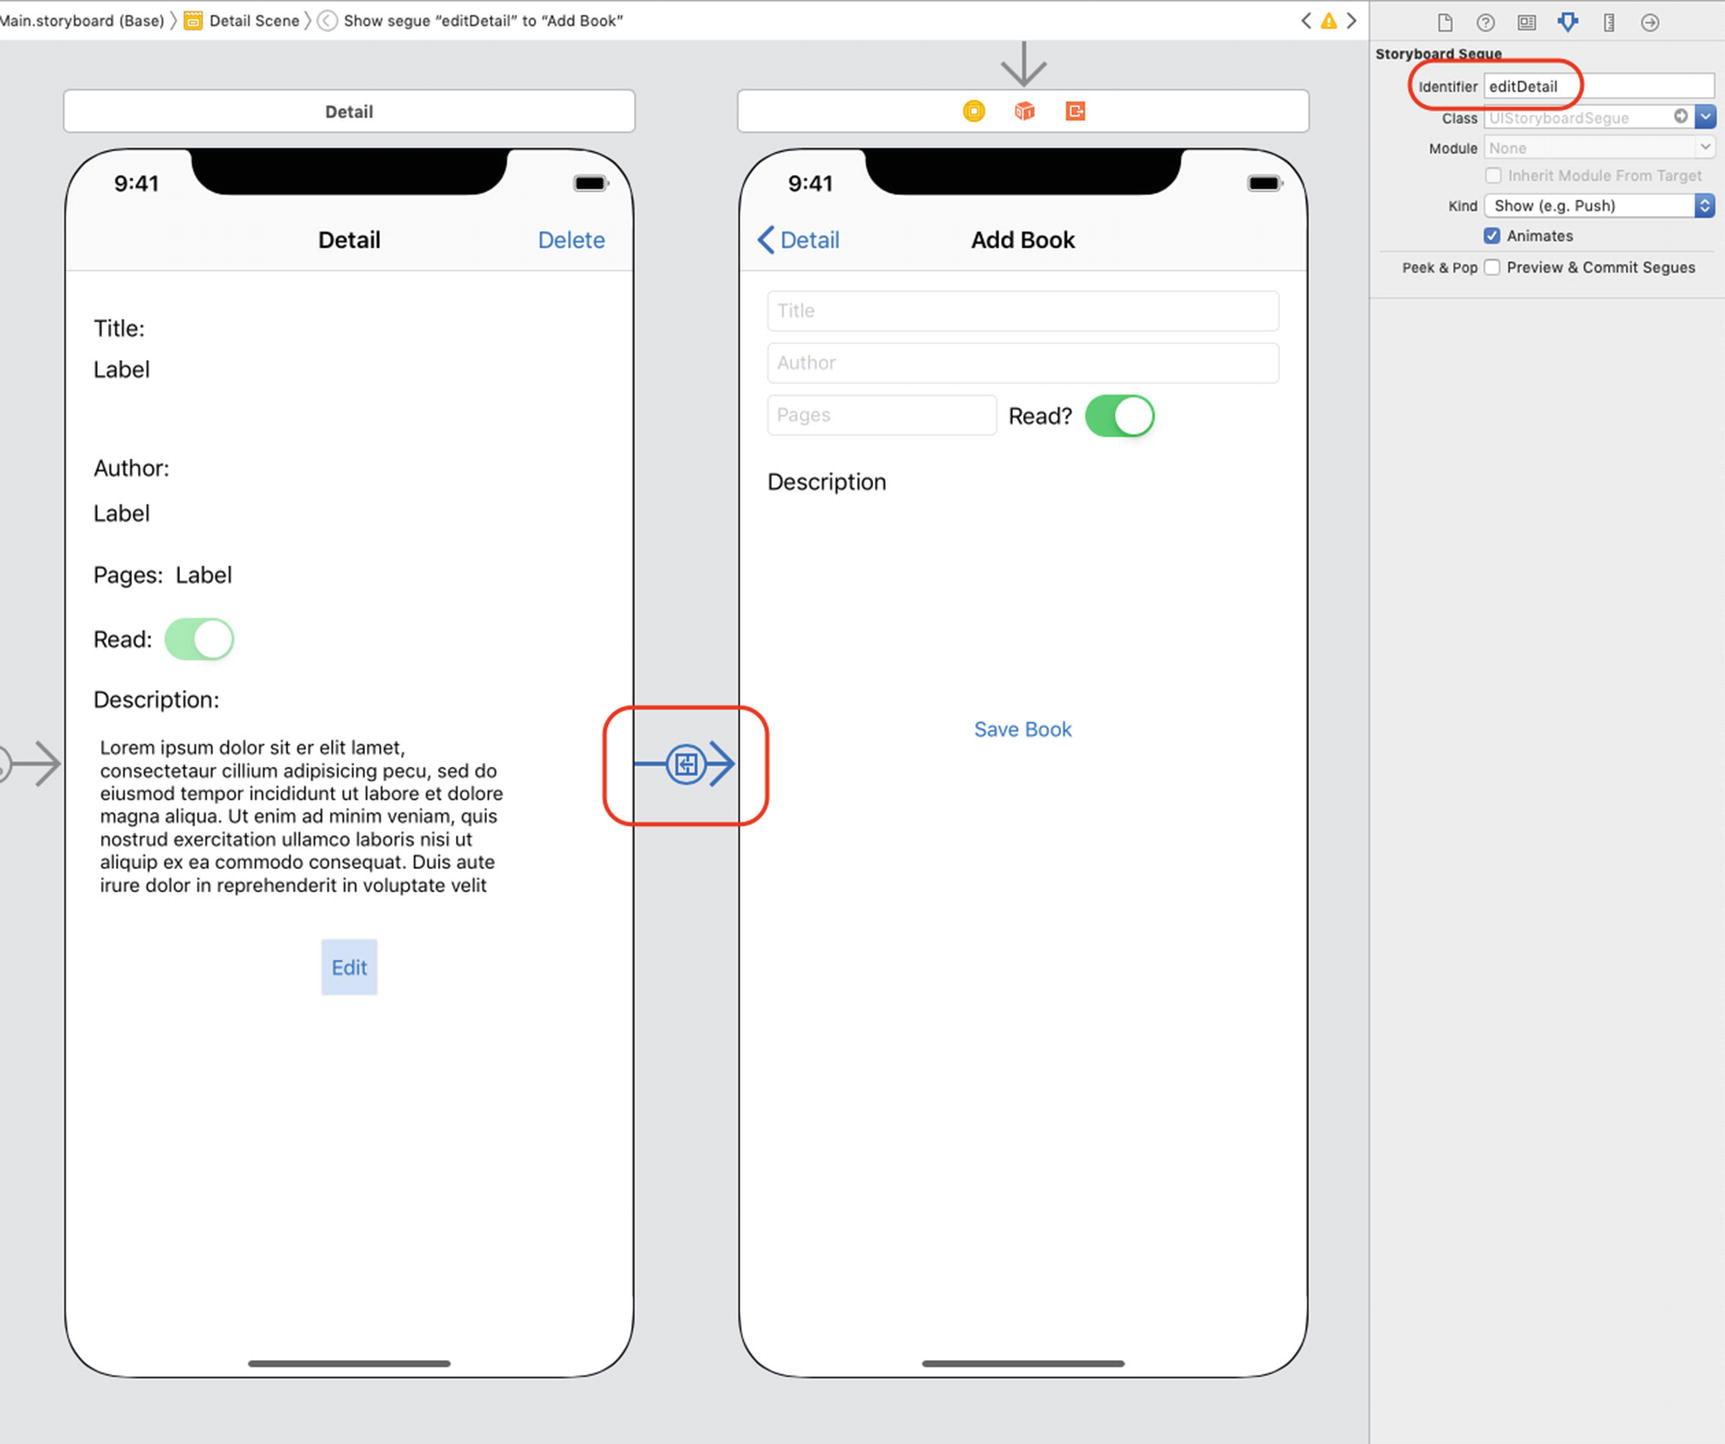
Naming the Segue’s identifier
Add the prepareForSegue Method
Modify the configureView
App Summary
Compile and run the app. You should set breakpoints at the delegate functions to watch the program flow. It is a great app to see how delegates can be used to pass information from one view to another.
Additionally, you can add functionality to the app to make the information persistent by using Core Data or UserDefaults.
Exercises
Add more books to the bookstore using the original program as a guide.
Enhance the Book class so it can store another attribute—a price or ISBN, for example.
Add persistence to the app by using Core Data or UserDefaults.