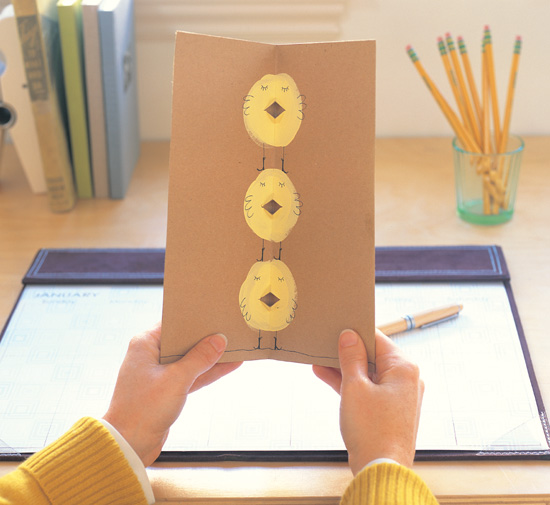
This peppy pop-up card makes us want to burst into song! Outside, a little chickadee sleeps, letting out nary a peep about the gregarious warblers inside. The element of surprise makes this a perfect celebratory card, as well as a cheerful way to just say Hello.
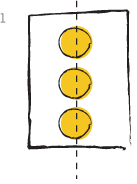
1. Paint the birds.
Paint three spots centered along the fold line of your card (Figure 1). Distribute the spots according to the height you’d like your birds to be (more or less evenly if you’d like them to be about the same size, unevenly if you’d like some of your birds to be squat and others to be gangly and tall). Our bird bodies are about 11/4" in diameter.
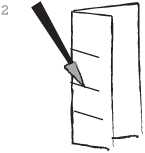
2. Cut the birds’ beaks.
Cut three horizontal slits roughly 1" long (or in proportion to the size of your birds), one across the center of each spot, each extending an even amount on either side of the fold of your card (Figure 2).
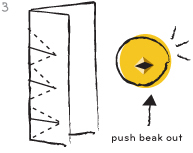
3. Fold the birds’ beaks, and draw on details.
Fold your card, keeping the bird-body spots on the inside. Align your ruler from a point on the fold 1/4" (1/2" for larger birds) above the first slit diagonally to the end of the slit. Score this line using your bone folder. Keeping the card folded, align your ruler from a point on the fold 1/4" below the first slit diagonally to the end of the slit. Score this line using your bone folder. Turn your card over and repeat on the other side of the slit. Repeat this process for the top and bottom and front and back of each slit. The result should be a diamond shape around each slit. Open your card up and push the slits from the outside of the card toward you, popping the paper out to create your birds’ beaks (Figure 3). Draw wings, eyes, and legs onto each bird using your black pen.
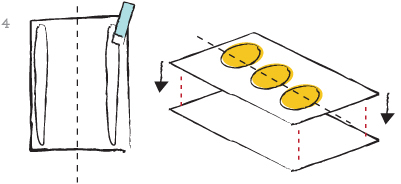
4. Adhere the front of your card.
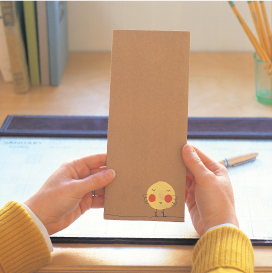
Lay your matching text-weight paper, wrong side up, on your work surface (this will be the front of your card, covering the back side of the birds’ beaks). Apply glue to the right and left edges of the back of your birdie card. Center the birdie card on the text-weight paper and smooth to adhere (Figure 4). Carefully fold the card and paper together, smoothing out any air bubbles. Unfold the card, and trim any excess card stock along the edges, using your utility knife, ruler, and cutting mat.
5. Embellish the front of the card.
Paint another bird on the front of your card (Figure 5).

Open wide! For added dimension, add color to the inside of the birds’ beaks by sandwiching a piece of red or pink paper between the front and back of the card. Before Step 4, cut a strip of paper approximately 1/4" shorter than the length of your card and 1" wider than the cuts you made for the birds’ beaks. Fold this strip of paper in half lengthwise, and apply glue to the right and left edges on the right side. Align the fold in the paper with the card fold, covering the back side of all the birds’ beaks. Press firmly along the edges of the paper to adhere. Continue to Step 4.
Decorate your envelope. Using your black pen, doodle hints as to what is inside—an amusing worm, a birdcage, a nest with some eggs (say, for a baby announcement)—or paint another bird, perhaps peeping up from the bottom of the envelope.
Playful paper. To make the card even more exuberant, consider using a piece of text-weight paper in a playful color or pattern for the outside of your card.
Christmas carolers. Add Santa hats to each of the birdies by painting triangles on their heads using red gouache. Glue down cotton trim for extra flair, or add details using white gouache or a gel pen.
Repeating refrain. Have lots to crow about? Add another chorus (or two!) of birdies. Start with a piece of card stock that is three (or more!) times as wide as your envelope, less 1/4" on all sides. Fold it in thirds so that the two flaps close over the middle panel. Follow the original instructions to make each column of birds and beaks.