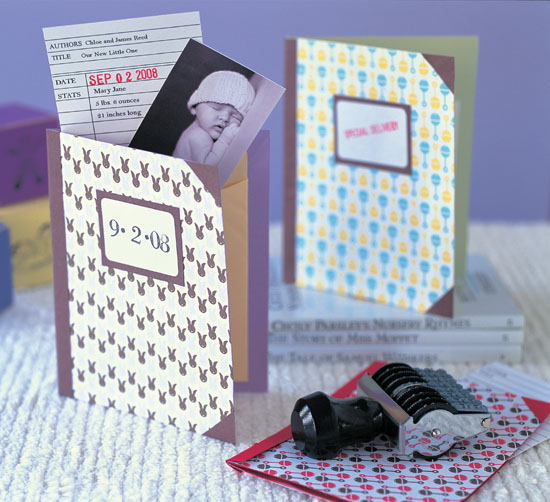
This “library card” is the perfect birth announcement for booklovers, teachers, and future teachers’ pets. Baby’s details fit perfectly, and the card slips into a pocket with a wallet-sized photo. This simple-to-assemble card could be used to invite guests to a baby shower (stamp the expecting mom’s “due date” on the library card), or use the card to collect baby name suggestions (make the “title” of the book Name Ideas for Baby, and allow guests to fill in names on the blank lines). Regardless of how you adapt this project, it is sure to earn you a gold star!
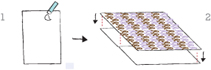
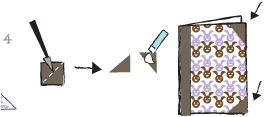
1. Cover the card.
Apply glue to the wrong side of the patterned paper. Center the card stock on the patterned paper, doing your best to align the two sheets (there is no need to be perfect, you will be trimming off about 1/8" on all sides), and smooth to adhere (Figure 1). Using the utility knife, ruler, and cutting mat, trim the papers down to 51/2 × 8". Using a bone folder and ruler, score the inside of the card at the halfway mark, and fold it in half (Figure 2).
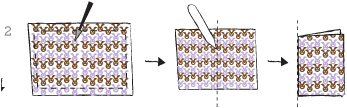
2. Add the spine.
Trim a 3/4 × 53/4" strip of solid-colored text-weight paper. Fold it in half lengthwise. Lay your card flat with the patterned side facing up. Apply glue to the wrong side of the strip, and align the fold in the strip with the fold in your card to create the spine of your “book” (Figure 3). Smooth to adhere, and trim the excess with a ruler and utility knife.
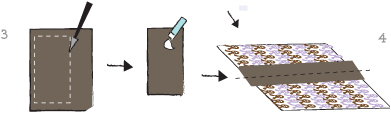
3. Make the corners.
Cut two 3/4" squares from the solid-colored text-weight paper. Cut each square in half diagonally to make four triangles. Apply glue to the back of each triangle, and adhere them to the outside corners of the front and back of your card (Figure 4).
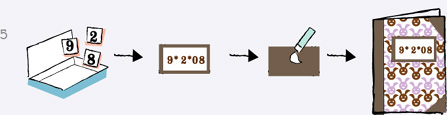
4. Add the title.
Mark the baby’s birth date on the mailing label using rubber stamps, pens, or a typewriter. Using the same paper you used for the spine and corners, trim a rectangle 1/8" bigger on all four sides than your mailing label. Center the mailing label on this rectangle, and smooth to adhere. Apply glue to the back of the rectangle, and adhere to the front of your card (Figure 5).
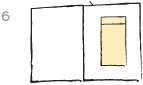
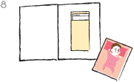
5. Add the library card pocket.
Adhere the library card pocket to the inside back cover of the book (using a glue stick if your pocket doesn’t come with a sticky backing) (Figure 6).
6. Make the library card.
Photocopy the Library Card template provided onto card stock (choose white or pastel colors for a classic library look). Using a typewriter, word-processing program, or pen, fill in your library card with the “authors,” “title, ” and stats. If you are using a word-processing program, print out the text, cut out and paste each line within the grid of the blank template, and photocopy the whole thing. Or, re-create a library card from scratch following the instructions below. Photocopy as many library cards as you will need, and trim them out using a utility knife, ruler, and cutting mat.
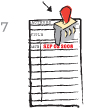
7. Stamp the date, and assemble the card.
Using your date stamp, stamp the delivery date onto each library card, preferably in red ink (Figure 7). Tuck the library card into the pocket, and, if desired, insert a 2 × 3" wallet-sized photo (Figure 8).
Bookish baby shower. With minor adaptations, this card can be turned into an adorable baby shower invitation. Stamp the date of the shower on the cover and, using a typewriter, rubber stamps, or word-processing program, write the event details inside. Title the two columns of the library card Baby names and Due date, and ask friends to suggest baby names and guess the delivery date. Carry the literary theme throughout the shower by collecting books for baby’s library, making bookplates, and creating a keepsake journal for mom. Create a multiple choice “test”—with trivia questions about the new mom—and award gold stars to the winners!
We’re expecting! Stamp the words Special delivery on the cover, or leave it blank. Use a typewriter, rubber stamps, or word-processing program to write your news on the inside of the card, and use the library card to collect baby name suggestions. If you’d like, include baby pictures of mom and dad in the pocket!
Follow these instructions to make your own library card using Microsoft Word. Print multiples of the cards with a laser or ink-jet printer.
Set up the table.
1 Open a blank document in Microsoft Word.
2 From the main toolbar, select: Table -> Insert -> Table.
3 For Number of Columns, enter 2; for Number of Rows, enter 19.
Merge the top four rows.
4 Highlight the top row. From the main menu, select: Table -> Merge Cells.
5 Repeat for the next 3 rows.
Adjust the table size.
6 Hover your cursor over the top of the table until a black downward-pointing arrow appears. Click once on the arrow to highlight the entire table.
7 In the main menu, select Table -> Table Properties. A dialog box will open.
8 In the first screen of the dialog box (Table), check the box marked Preferred Width, and enter 2.7.
9 Click on the Row tab of the dialog box. Check the box marked Specify Height, and enter 0.25. Close the dialog box, and your table’s width and height will shrink to the correct size.
Adjust the lines.
10 Hover your mouse over the line that splits the two columns, until you see the double-arrow icon. Click and drag the icon to the left to reduce the width of the left-hand column to about  .
.
11 In the main menu, select View -> Toolbars -> Tables and Borders.
12 Select the double-line border from the toolbar’s border drop-down menu. A pencil tool will appear. Point the pencil tool to the top edge of the first column in Row 5, and click it to turn the border into a double line. Repeat for the second column in Row 5. Double-click outside the table to go back to your cursor.
Enter the text.
13 Enter the text, using the template provided as a guide. We suggest using an old-school font, such as Courier or Bookman Old Style.
Print and trim the card.
14 Print the card on text-weight paper or card stock. Using a utility knife and ruler, trim the card to size and double-check that it fits in the library pocket, making adjustments to the table size as needed to fit.