If you’re looking for the answers to your sandwich prayers, I assure you this is it. Okay, so it’s probably not a great combo for your PB&J, but your panini will definitely make a quantum leap up the yum scale from delicious to ridiculous.
Makes 1 loaf
1¾ cups whole milk
2 tablespoons unsalted butter, at room temperature
2 tablespoons sugar
1 (¼-ounce) package instant dry yeast
4 cups unbleached all-purpose flour, plus more for kneading
Vegetable oil or nonstick cooking spray, as needed
2 teaspoons kosher salt
¼ cup Sriracha
1 cup (4 ounces) shredded sharp Cheddar cheese
In a small saucepan over medium-low heat, warm the milk, butter, and sugar, stirring occasionally. Remove from the heat as soon as the butter melts. The liquid should be lukewarm to the touch, around 100°F. Allow it to cool to that temperature if necessary. Sprinkle the yeast over the milk mixture and let sit for 10 minutes to proof. After about 10 minutes, there should be a layer of froth on the surface of the mixture, which signifies that the yeast is viable and ready to sacrifice its own life in the name of good bread.
In a large bowl, mix together the flour and salt. Pour the milk and yeast mixture into the bowl of flour and mix with a wooden spoon until a soft, ragged mixture is formed. Transfer the dough to a well-floured work surface and knead for 1 minute. Transfer the dough to a lightly oiled bowl, cover with a kitchen towel, and allow it to rest, undisturbed for 20 minutes.
After its rest, turn the dough back out onto the well-floured work surface and knead until a soft, elastic dough results, 3 to 5 minutes. Transfer the dough once more to the lightly oiled bowl, cover, and allow it to rest in a warm area of the house until doubled in size, about 2 hours.
“BUT BAKING IS SUCH AN EXACT SCIENCE …” Oh, stop it! That is not a valid excuse! Plus, making bread is full of wiggle room for adjustments. In fact, I would never follow the exact amounts listed in a bread recipe. Making proper bread is all about feel.
Flour amounts are estimates. Flour naturally absorbs some moisture from the surrounding air, so depending on the temperature and humidity on the day of your bake, it may need more or less liquid than usual. Don’t be afraid to make slight adjustments. Go by feel.
Your dough should be tacky, but not sticky. The idea is you want it to just slightly peel away from your hand, but you don’t want any dough to actually stay behind on your palm.
Resist the urge to fling flour around carelessly while kneading. A wet dough is far preferable to one that has been overfloured and overworked, and is dry.
Transfer the dough to the work surface and, using your hands, gently flatten into a 9-inch-wide rectangle. Spread the Sriracha over the dough, leaving a 1-inch border around the outside edges free of Sriracha. Sprinkle the cheese evenly over the Sriracha, respecting the same border. It is this border that allows the dough to seal properly in the next step.
Roll the dough up tightly, lengthwise, similar to making a jelly roll. Press down on the last roll to seal and make a seam. Lightly oil a 9 by 5-inch loaf pan. Put the dough, seam side down, into the pan. Cover and return to the warm spot until the dough has again doubled in size and is cresting over the top of the pan, 2 to 2½ hours.
Preheat the oven to 400°F. Just before baking, make a ¼-inch-deep slit down the center of the loaf using a serrated knife. Place the loaf pan on the center rack of the oven. Spray the inside walls of the oven and the top of the loaf with a generous misting of water to create steam. Quickly close the oven door and bake for 30 minutes. Remove the loaf from the pan and continue baking for an additional 10 to 15 minutes. The center of the loaf should register 190°F on a thermometer and the bottom of the loaf should sound hollow when tapped. Let the bread cool completely on a cooling rack before slicing for best results. Store refrigerated in an airtight container for up to 3 days.
IN A PINCH Use a 1-pound ball of fresh pizza dough or defrosted frozen pizza dough, available at some specialty supermarkets and friendly neighborhood pizzerias. Allow the dough to come to room temperature and flatten the dough into the 9-inch-wide rectangle, proceeding as directed with Sriracha and cheese, allowing the dough to rise and then baking as directed.
Spice up your get-togethers with this take on the classic hors d’oeuvre staple. You can also use it on your bagel the morning after your shindig—if your guests somehow refrain from devouring it all.
Makes 8 to 10 servings
2 tablespoons chopped fresh rosemary
2 tablespoons chopped fresh flat-leaf parsley
2 tablespoons chopped fresh chives
½ teaspoon freshly ground black pepper
1 (8-ounce) package cream cheese, at room temperature
4 ounces chèvre, at room temperature
3 tablespoons Sriracha
1 clove garlic, minced
In a small bowl, combine the rosemary, parsley, chives, and pepper and mix well.
In the bowl of a stand mixer equipped with a paddle attachment, combine the cream cheese, chèvre, Sriracha, garlic, and half of the herb and pepper mixture. Beat on low speed until the ingredients are uniformly distributed, occasionally scraping down the sides of the bowl.
Scrape the cheese out onto a large sheet of parchment paper or plastic wrap. Using the parchment paper as a barrier between your hands and the cheese, form the cheese into a log shape about 1 inch in diameter. Roll the cheese log in the remaining herb and pepper mixture, coating the entire surface of the log. Cover and refrigerate for at least 1 hour or until ready to use, to allow the cheese to set up and the flavors to marry. Tightly wrapped in parchment paper, the cheese log will keep in the refrigerator for up to 5 days.
OVER THE TOP TIP Cut slices of Cheddar-Sriracha Swirl Bread diagonally into quarters and bake at 350°F for 15 minutes. Once cooled, serve them as toast points alongside your Sriracha Cheese Log.
These crisp, spicy pickles are a summertime favorite. Feel free to experiment with other vegetables, such as okra or asparagus.
Makes 4 (1-pint) jars
3 cups white wine vinegar
3 cups water
¼ cup pickling salt
2 pounds fresh green beans, trimmed to fit into 1-pint canning jars
1 cup Sriracha
12 cloves garlic
16 peppercorns
4 teaspoons dill seed
Sterilize four clean 1-pint canning jars and lids in a pot of boiling water for 10 minutes. Meanwhile, in a medium saucepan over medium-high heat, bring the vinegar, water, and salt to a boil for 5 minutes.
Remove the jars from the boiling water with a canning jar lifter. Pack equal amounts of the green beans, Sriracha, garlic, peppercorns, and dill seed in the jars. Top each with the hot vinegar mixture, leaving a ½-inch headspace in each jar. Wipe the rim of each jar with a clean towel. Place lids and bands on the jars and process in boiling water for 8 minutes. Allow the jars to cool completely at room temperature. Once cooled, verify that a proper seal has formed on each jar by pressing on the lid with your finger. The lid should be slightly sunken, and should not pop up and down when pressed. Any lids and jars that did not form a seal should be cleaned and can be reprocessed in boiling water. Let sit in a cool, dark place for 4 to 6 weeks before opening. Once opened, jars can be kept in the refrigerator for up to 2 months.
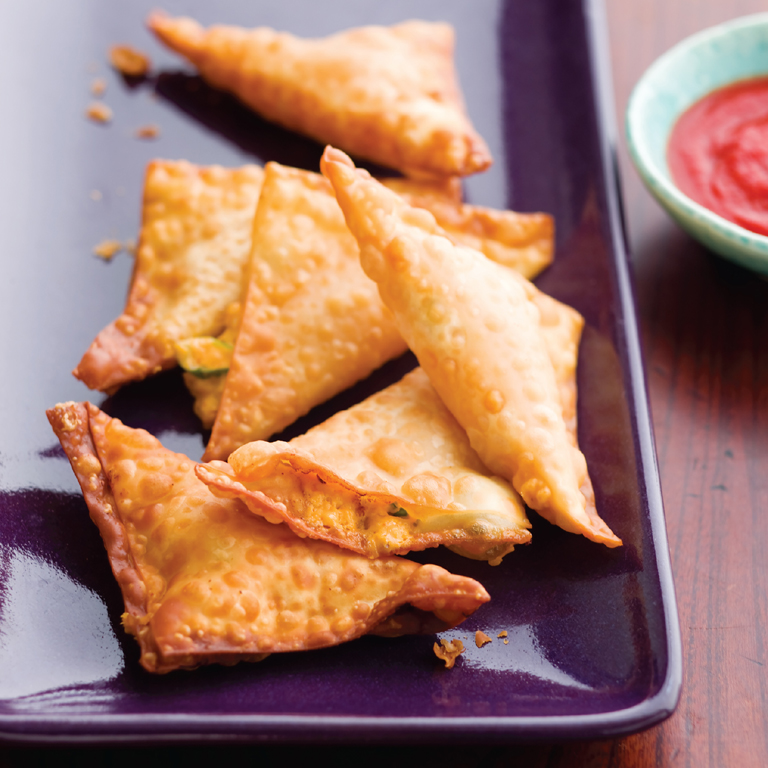
Despite the Burmese name, crab Rangoons were more likely a clever invention of the Bay Area tiki palace Trader Vic’s rather than some exotic tropical import. Premade wonton wrappers, which can be found in the frozen or refrigerated section of Asian markets and some supermarkets, make these an easy fix no matter where you—or the rangoons—call home.
Makes 36 wontons
1 cup Sriracha Cream Cheese, at room temperature
6 ounces drained, flaked lump crabmeat
1 tablespoon soy sauce
1 clove garlic, minced
4 green onions, green part only, sliced
¼ teaspoon minced lemon zest
1 teaspoon toasted sesame oil
36 wonton wrappers
1 egg white, beaten
Vegetable or peanut oil, for frying
Sriracha-Sesame Vinaigrette, optional
In a large bowl, mix together the Sriracha Cream Cheese, crabmeat, soy sauce, garlic, green onions, lemon zest, and sesame oil. Arrange each wonton wrapper diagonally so that it forms a diamond shape. Place a generous teaspoon of filling just above the center. Brush the outer edges of each wrapper with a small amount of egg white. Fold the filled wontons in half, forming each into a triangle, pressing to seal the edges tightly.
Preheat the oven to 200°F. Prepare the deep fryer by filling with oil to the manufacturer’s suggested fill level. (Alternately, a cast-iron or other wide heavy-duty pan can be used; fill with oil to a depth of 2 to 3 inches, but no more than halfway up the side of the pan.) Heat the oil to 375°F.
Fry the wontons in batches for 3 to 5 minutes, until crispy and golden brown. Be careful not to overcrowd the pan, as this will lower the temperature of the oil significantly and result in soggy wontons. Keep the cooked wontons on a wire rack set over a baking sheet (or on a foil-lined baking sheet) in the preheated oven until all the wontons have been fried.
Serve hot, along with a bowl of Sriracha-Sesame Vinaigrette for dipping, if desired.
These salty/spicy/sweet treats are a definite crowd-pleaser, plus they make a great, inexpensive gift when the holidays roll around.
Makes about 4 cups
1 pound salted mixed nuts
1 egg white
1 teaspoon water
1 tablespoon Sriracha
½ cup granulated sugar
½ cup firmly packed light brown sugar
1 teaspoon chopped fresh rosemary
Preheat the oven to 250°F. Line a baking sheet with parchment paper or waxed paper.
Pour the nuts into a large mixing bowl. In a separate mixing bowl, whisk together the egg white, water, and Sriracha for a brief minute or two until lightly aerated. Toss with the mixed nuts.
In another bowl, mix together the granulated and brown sugars and rosemary. Pour over the nuts, stirring to coat. Using a rubber spatula, spread the nuts out in a single layer on the prepared baking sheet.
Bake for 1 hour, stirring every 15 minutes. Serve warm or at room temperature. Extra nuts can be stored in an airtight container for up to a month.
These fiery little bites make a perfect hors d’oeuvre for a quaint Sunday brunch, but also make a fantastic anytime snack. The Sriracha gives the yolk a gorgeous orange hue that is sure to get your guests’ attention.
Makes 6 to 8 servings
⅓ cup Sriracha Mayo
¾ teaspoon Dijon mustard
½ teaspoon kosher salt
½ teaspoon freshly ground black pepper
Chopped fresh chives, for garnish
Split the eggs in half lengthwise. Remove the egg yolks. Using a fork, break up the yolks in a mixing bowl. Stir in the Sriracha Mayo, mustard, salt, and pepper, blending well. Fill a pastry bag fitted with a star tip and pipe the yolk mixture back into the egg whites. Top with the chives. Serve or cover and refrigerate immediately.
PERFECT HARD-COOKED EGGS Place eggs in a large pot and fill with enough cool water to cover the eggs by 2 inches. Slowly bring to a boil over medium heat. Once the water has reached a boil, cover the pot and remove from the heat. Let rest for 12 minutes. Drain the cooking water then place the eggs under cool running water for several minutes to halt the cooking.
Channeling my inner George Washington, I cannot tell a lie: These peppers are hot. Even the cheese and oil from deep-frying can’t help you here. Every bite is delicious, and somehow enjoyably torturous. These may actually be some sort of entryway into masochism. If you want even more heat, use pepper Jack cheese in place of the Monterey Jack.
Makes 6 to 8 servings
18 large jalapeño peppers
1 cup Sriracha Cream Cheese, at room temperature
½ cup (2 ounces) grated Monterey Jack or mozzarella cheese
2 teaspoons ground cumin
4 slices bacon, cooked
Vegetable oil, for frying
½ cup whole milk
1 large egg, lightly beaten
¾ cup all-purpose flour
2 cups panko bread crumbs
2 teaspoons garlic powder
1 tablespoon kosher salt
1 tablespoon freshly ground black pepper
With a paring knife, cut a slit down the length of each pepper, leaving the stem intact. If you would like to keep the heat to a more tolerable level, remove the seeds from the jalapeño.
In a medium mixing bowl, combine the cream cheese, Monterey Jack, and cumin. Crumble the cooked bacon into the bowl and mix together well. Spoon the mixture into a large piping bag or resealable plastic bag. If you are using a resealable plastic bag, cut one corner off to make a mock piping bag, making sure the hole formed is large enough to allow the pieces of bacon through. Fill each jalapeño with the cheese mixture. Set aside.
Preheat the oven to 200°F. Prepare the deep fryer by filling with oil to the manufacturer’s suggested fill level. (Alternately, a cast-iron or other wide heavy-duty pan can be used; fill with oil to a depth of 2 to 3 inches, but no more than halfway up the side of the pan.) Heat the oil to 375°F.
In a bowl or baking dish, combine the milk, egg, and ½ cup of the flour. In a separate bowl, mix together the remaining ¼ cup flour, the panko bread crumbs, garlic powder, salt, and pepper. Dip each stuffed pepper into the wet mixture, then dredge them lightly in the dry mix, pressing to get the breading to stick. Fry the jalapeños in batches for 2 to 4 minutes, until crispy and golden brown. Be careful not to crowd the pan, as this will lower the temperature of the oil significantly and result in soggy jalapeño poppers. Keep the cooked peppers on a wire rack set over a baking sheet (or on a foil–lined baking sheet) in the preheated oven until they have all been fried. Serve hot.
POP ’EM IN THE OVEN Instead of frying, you can mist your poppers lightly with vegetable oil and bake them on an aluminum foil–lined baking sheet in a preheated 425°F oven for 15 to 20 minutes, or until golden brown.
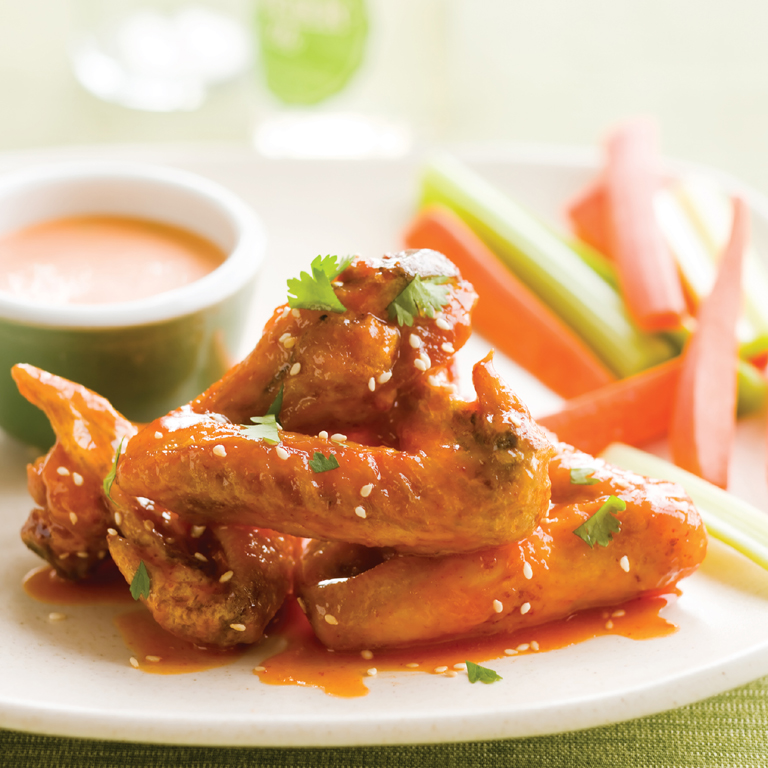
Once you’ve made these for friends or family, plan on making them regularly. Even without a football game on TV, somebody will always have a craving for these and won’t let up until you make them again. Serve alongside celery and carrot sticks with blue cheese or ranch dressing for dipping. If you need even more heat, serve with a side of SriRANCHa Dressing.
Makes 6 to 8 servings
Vegetable or peanut oil, for frying
4 pounds chicken wings
1 cup (2 sticks) unsalted butter
⅔ cup Sriracha
½ cup orange blossom honey
2 teaspoons kosher salt
Juice of 1 lime
Chopped fresh cilantro, for garnish
2 tablespoons white sesame seeds, for garnish
Preheat the oven to 200°F. Prepare the deep fryer by filling with oil to the manufacturer’s suggested fill level. (Alternately, a cast-iron or other wide heavy-duty pan can be used; fill with oil to a depth of 2 to 3 inches, but no more than halfway up the side of the pan.) Tuck the wing tips beneath the wing to avoid burning them, or remove the tips and save to make stock.
Heat the oil to 350°F. Fry the wings in batches for 10 to 12 minutes, until crispy and golden brown. Be careful not to crowd the pan, as this will lower the temperature of the oil significantly and result in soggy wings. Keep batches of cooked wings on a wire rack set over a baking sheet (or on a foil–lined baking sheet) in the preheated oven until all the wings have been fried.
While the wings are frying, melt the butter in a medium saucepan over low heat. Add the Sriracha, honey, salt, and lime juice, stirring to combine. Keep warm over low heat. Put the cooked wings in a large mixing bowl and toss with the Sriracha mixture. Plate the coated wings on a large platter, garnishing with cilantro and sesame seeds.