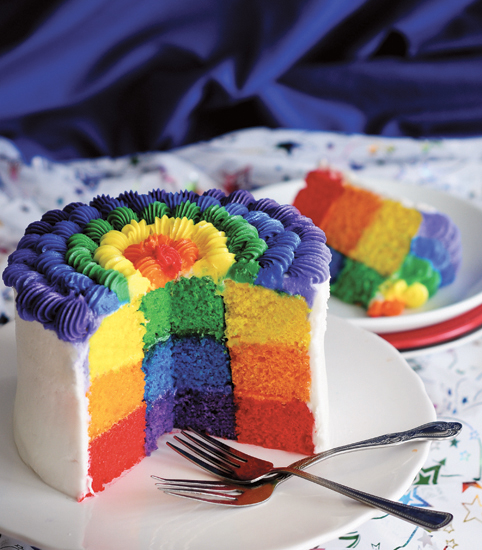
I’m obsessed with rainbows. If you happen to read my blog you already know that, since I talk about them quite often! I’ve made rainbow cakes, double-rainbow cakes, cupcakes, pancakes—basically anything I can stuff a rainbow into, I will. This cake is the grandbaby of my first rainbow cake. The adaptation is minimal, but the impact is just as grand!
Note: This recipe makes two 3-layer cakes.
2 recipes White Cake
Red, orange, yellow, purple, blue, and green gel food coloring
2 recipes Basic Buttercream
SPECIAL EQUIPMENT:
3 6-inch round cake pans; small offset spatula; 2-inch round cookie cutter; long, thin knife; disposable plastic pastry bags; #21 or #32 decorating tip
DIFFICULTY: Easy
TIP: Whether you use my recipe or a cake mix, be sure to sift the dry ingredients. Any lumps will end up as little white dots in the brightly colored cake!
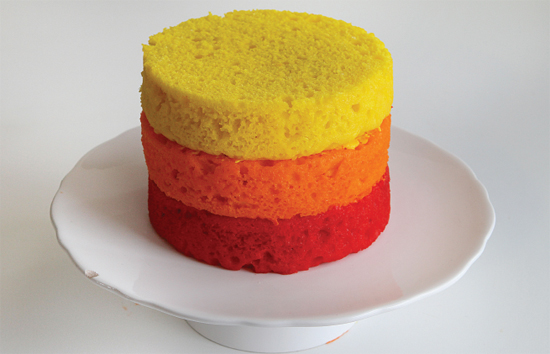
1. Prepare the batter for 1 recipe white cake.
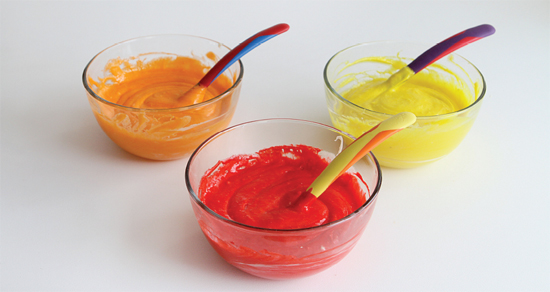
2. Divide the batter evenly among 3 bowls. Add 1 to 10 drops of red, orange, and yellow food coloring per bowl, depending on your desired level of color intensity. (I like a vibrant cake, so I used 10 drops of each color.)
3. Bake each layer in a 6-inch cake pan and cool the layers to room temperature.
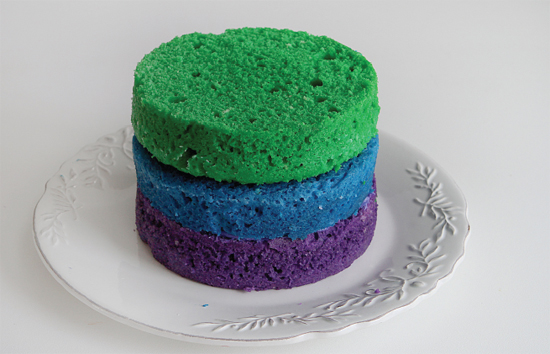
4. Repeat this process to make a second cake, using the purple, blue, and green food coloring.
5. Find the shortest of the six cakes, then level the others to the same height. This is very important!
6. Prepare the buttercream. Place ½ cup in a small bowl and mix in enough orange food coloring to match the orange cake layer. Repeat to make yellow, blue, and green buttercream.
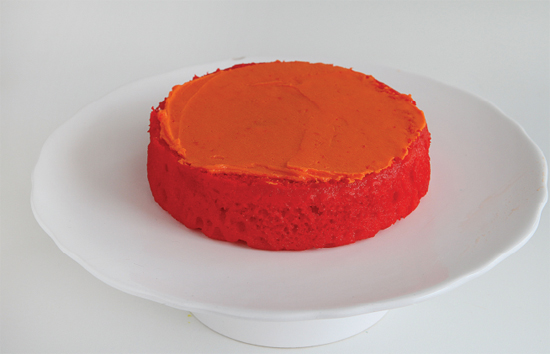
7. Place the red layer on a cake stand and frost the top with a thin layer of the orange buttercream using the small offset spatula. Do not spread the frosting all the way to the edge, just to within ½ inch of the edge. Clean the spatula.
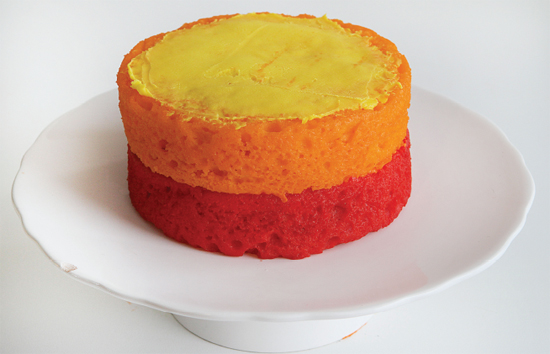
8. Add the orange cake layer and spread the top with a thin layer of the yellow buttercream.
9. Add the yellow cake layer.
10. Repeat steps 7 through 9 to create a second cake with the purple, blue, and green layers, using the blue and green buttercream and cleaning the spatula between changes of color.
11. Gently push the cookie cutter into the center of one of the cakes to use as a guideline, then use a long, sharp, thin knife to slice all the way through and cut out a column. Repeat this process on the other cake. You’re going to place the column from one cake into the other cake and vice versa, so keep the cuts as neat and even as possible. If the cake feels crumbly or soft, freeze it for at least one hour.
12. The easiest way to remove the column is to start with a very chilled cake. Place the cake on its side and gently push on the cylinder with your thumb. Apply pressure and push it through and then out of the cake. Carefully set the cylinder upright. Do this to both cakes. Carefully replace the cylinder with the opposite color scheme into the cake and vice versa.
13. Crumb-coat both cakes with the untinted buttercream and chill.
14. Using the small offset spatula, cover the cakes in a smooth coat of white buttercream. Divide the remaining buttercream equally among 6 bowls and tint it red, orange, yellow, green, blue, and purple. Fill 6 plastic disposable pastry bags with the frosting.
15. Insert the decorating tip into a pastry bag and then add your first bag of frosting. Create a pattern of herringbone stripes on one of the cakes, starting from the top edge of the cake and working your way down the side of the cake. Simply pipe out a scallop at a 45-degree angle, then come back over from the opposite angle.

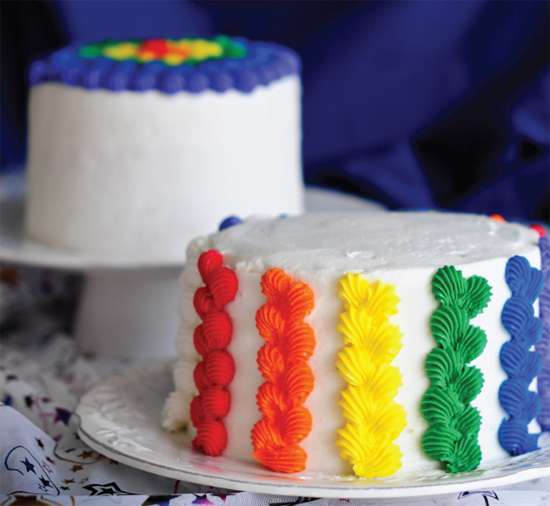

16. On the other cake, pipe out rings of scallops on the top of the cake in rainbow order, starting at the center.