As a project manager for a construction company, my husband knows a great deal about construction. This is a fantastic quality when you happen to have three sons who are fascinated by machines. We’ll drive by a big truck on the road and I’ll say, “Look at the big truck, guys!”
My husband will respond, “That’s a John Deere crawler mounted hydraulic boom backhoe excavator.”
The kids will say, “Whoa. Cool, Dad!”
And I’ll roll my eyes and mutter, “I totally knew that.”
I totally did not know that.
2 recipes White Cake
1½ recipes Basic Buttercream
Orange, yellow, and black gel food coloring
SPECIAL EQUIPMENT:
2 9 × 13-inch pans; cake leveler; long, sharp knife; ruler; offset spatula; disposable plastic pastry bags; #3, #4, and #7 decorating tips
DIFFICULTY: Medium
1. Add a few drops of orange gel food coloring to one batch of white cake batter. Bake each cake in a 9 × 13-inch pan.
2. Freeze the cakes for at least 6 hours, preferably overnight. The cakes must be firm, not crumbly.
3. Level the cakes if they aren’t perfectly flat and trim off the hard edges.
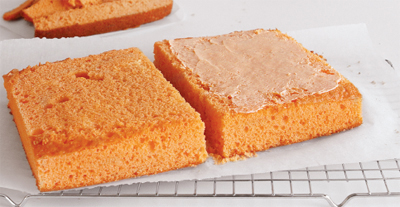
4. Prepare 1 recipe buttercream. Transfer 2 cups of buttercream to another bowl and tint it orange to match the cake. Leave the remaining buttercream white.
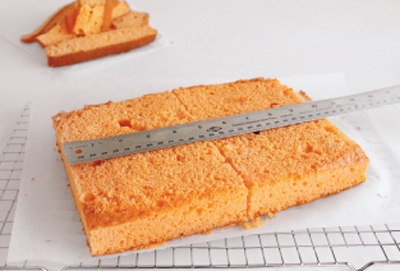
5. Cut both the orange and white cakes into 5 × 7-inch rectangles.
6. Using the offset spatula, cover one layer of each color with a very, very thin layer of orange buttercream for the orange layer and white buttercream for the white layer, cleaning the spatula between color changes.
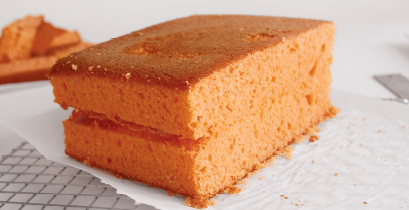
7. Place the unfrosted orange layer on the frosted layer. Repeat with the white layers. Freeze the cakes if they’re soft and crumbly.
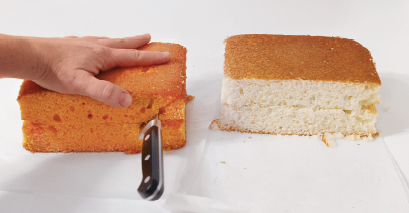
8. Remove the orange cake from the refrigerator and place it on a sheet of parchment paper so that a long side faces you. Using a knife with a blade that’s more than 5 inches long and starting at one end of the cake on the top corner, cut through the cake at a 45-degree angle.
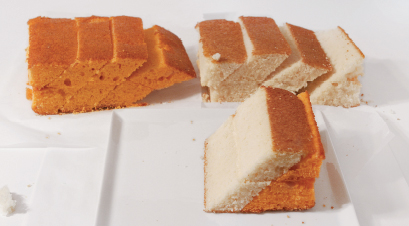
9. Move 2 inches over and make another cut. Try to maintain the same angle throughout the whole cake. Repeat until you’ve reached the end of the cake. If the cake becomes too crumbly or soft, freeze it until it’s firmer.
10. Make the same cuts on the white cake.
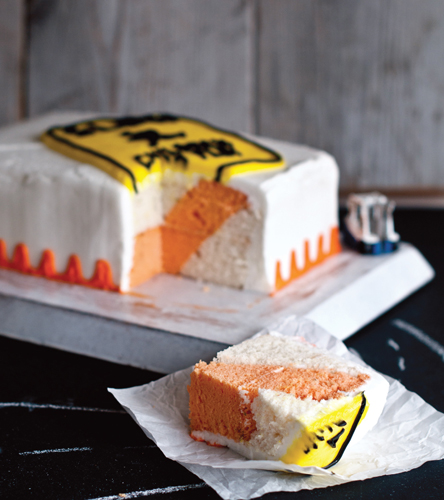
11. Place the lower corner of the orange cake on the right side of a cake stand or serving plate. Take the second piece of white cake and lean it against the orange cake. (You may frost between the layers if desired; the frosting should be very light and easy to spread.)
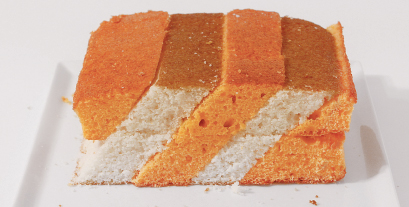
12. Add the next layer of orange cake, then the white cake, then the orange corner, until the cake is assembled.
13. Assemble a second cake with the remaining pieces. If you need only one cake for your party, wrap the extra one in plastic wrap and then in foil. It will keep in the freezer for up to 3 months.
14. Freeze the finished cake for at least 1 hour before frosting.
15. Cover the cake in a crumb coat or white buttercream. Make sure your frosting is very pliable and easy to spread.
16. Cover the cake in a smooth coat of white buttercream.
17. Insert a #4 tip into a pastry bag and fill it with the orange buttercream. Pipe out triangles resembling construction cones around the base of the cake.
18. Prepare a half-batch of buttercream. Transfer 1½ cups to another bowl and tint it yellow, tint the remaining buttercream black. Insert a #7 tip into a pastry bag, fill it with the yellow buttercream, and pipe out a large rectangle on your cake. Fill in the shape with the yellow buttercream, and use a small offset spatula to smooth out the frosting.
19. Use a toothpick to trace the sign you want to display onto the yellow buttercream. Then insert a #3 tip into a pastry bag, fill it with the black buttercream, and pipe out the design.
20. Chill until ready to serve.
21. Since the surprise-inside design is best seen on the long side of the cake, be sure to cut into that side for your first piece!