Babies. Baby showers. Holding babies. Looking at babies. Thinking about babies. Snuggling with babies.
I sorta have a thing for babies. I’ve had five of them.
Babies and cakes have taken over quite a big section of my brain, so dreaming up this little gem was a given. The second I saw this cake I knew it would be perfect for a baby shower. And even though this particular cake is yellow, you could easily make it pink or blue for a gender-reveal party!
2 recipes White Cake
Yellow gel food coloring
1 recipe Basic Buttercream
SPECIAL EQUIPMENT:
2 8-inch round cake pans; 9 × 13-inch cake pan; 4½-inch round cookie cutter; duck or similarly shaped cookie cutter (I used a tugboat); small offset spatula; tissue-paper pom-poms (purchased or handmade)
DIFFICULTY: Medium
1. Bake one white cake recipe in two 8-inch layers.
2. Add yellow food coloring to the batter of the other white cake and bake it in a 9 × 13-inch pan. Cool all the cakes to room temperature.
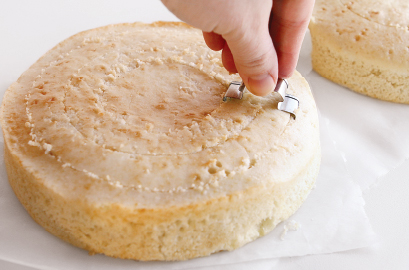
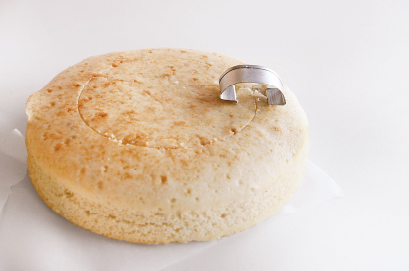
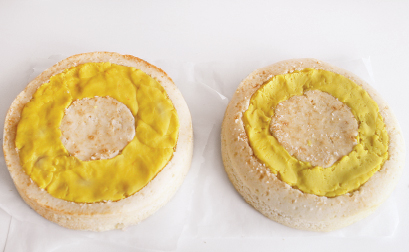
3. Place the white cakes on a piece of parchment. Using a 4½-inch cookie cutter, find the center of one cake layer. Gently press in the cookie cutter to create a guideline. Repeat with the second white cake layer.
4. Center the cookie cutter on the guideline and insert it into the cake at an angle, then straighten it upright. Slowly pull the cutter through the cake, keeping it centered on the guideline the whole time and being careful to maintain a uniform depth. I used the boat deck portion of my tugboat cookie cutter as my reference, taking care never to push it deeper than that line.
5. Remove the excess cake and discard or save to make cake pops.
6. At this point make sure your cake is well chilled—not frozen, but not crumbly or too soft.
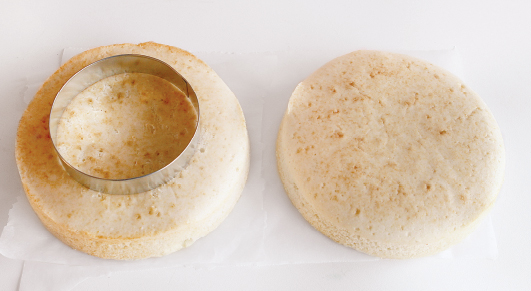
7. Working on the second layer now, turn the cutter over and insert it so that it is centered on the guideline. Straighten it upright and slowly pull the cutter through the cake just as you did on the first layer, again being careful to maintain a uniform depth. Do not cut deeper than whatever reference you’ve chosen on your cutter.
8. Remove the excess cake and discard or save to make cake pops.
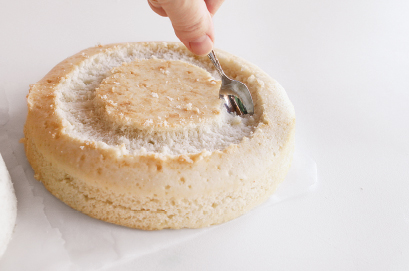
9. Since my cookie cutter is not shaped exactly like a duck head, I grabbed my favorite baby spoon and removed a bit more cake. In the picture I am smoothing out the back of the duck’s head. The inner side is where the duck’s bill would be, so focus on that when carving the bill.
10. Make the buttercream.
11. Trim off any hard or discolored spots from the yellow cake, then crumble it into a large bowl. Add about 3 tablespoons of buttercream and mix to create a pliable cake mixture.

12. Gently fill the spaces in the cake layers with pieces of cake mixture. Take care to press it up into the sides, especially into the narrow edges, like the duck’s beak and tail. Make sure both cake cavities are completely full of yellow cake mixture to the height of the layer.
13. Using the offset spatula, place a thin layer of buttercream on the tops of the cake layers (white parts only). Place the bottom layer (the one with a wider band of cake mixture) on a cake stand. Gently turn the top layer over and center it on top of the bottom layer.
14. Cover the cake in a crumb coat and refrigerate it for at least 1 hour.
15. Tint the remaining buttercream a soft yellow to match the interior of the cake. Spread a thin layer over the cake and smooth it out with the offset spatula.
16. Decorate with tissue-paper pom-poms if you like. Check out the tutorial at hgtv.com/handmade/how-to-make-tissue-pom-poms/index.html.