This cake is dedicated to Sunny Mabrey. I first discovered her through her six-second videos on the smartphone app called Vine, but she is also an accomplished actress on the big and small screen. I have to tell you, she is funny. Like see-her-Vine-on-Monday-then-laugh-out-loud-on-Thursday-just-thinking-about-it funny.
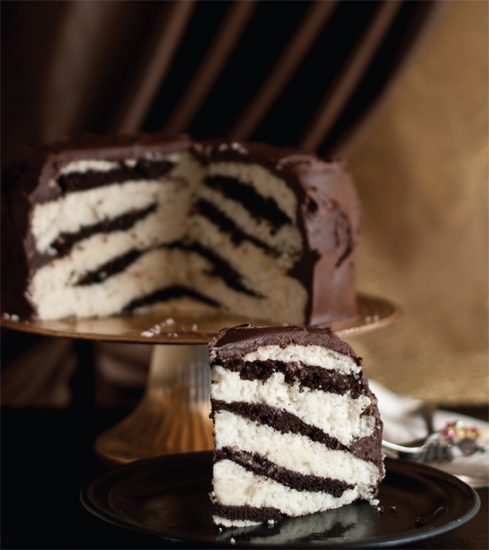
So why a zebra cake for Sunny? I think she is a closet zebra print fan. I also think she would appreciate something that appears classic and harmless, but that secretly disguises a wild and crazy uniqueness, just like my chocolate-covered zebra cake!
This cake would also be perfect for birthdays, for bachelorette parties, and for anyone who has a wild side!
1 recipe White Cake
1 recipe Chocolate Cake
1 recipe Chocolate Buttercream
SPECIAL EQUIPMENT:
4 8-inch round cake pans; serrated knife; small offset spatula
DIFFICULTY: Easy
1. Bake 2 layers of white cake and 2 layers of chocolate cake in 8-inch round cake pans. (You’ll only need one layer of chocolate for this cake. Cover the remaining layer in plastic wrap, then foil, and freeze for up to 3 months—unless you want to eat it now!)
2. Cool the layers to room temperature, then freeze the 3 that you’re using for 1 hour or refrigerate them for several hours.

3. Place all 3 layers on parchment paper.
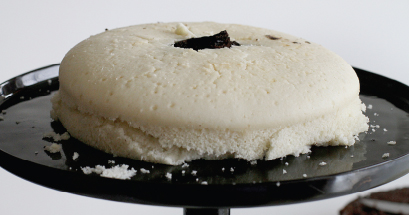
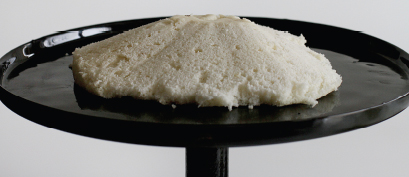
4. Turn over one of the white layers. Using a sharp knife, cut out a cone shape from the center of the overturned cake. Your knife should go all the way through the layer of cake and the base of the cone should be at least 2 inches across.
5. Center the cone point side up on a cake stand.
6. Moving back to the layer of white cake you just cut the cone from, flip the layer over so the right side is facing up.
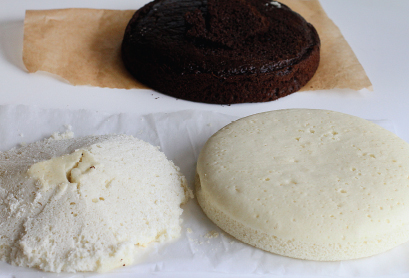
7. Gently carve around the exterior of that same layer, leaving a curved cap of cake (bottom left of photo). Remove the top and set aside.
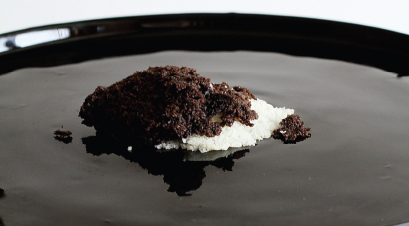
8. Using a serrated knife, start trimming layers of chocolate cake off, much as you would trim a turkey. Place small slices of chocolate on top of the white cake cone on the cake stand, covering it but not in a particular pattern.
9. Now place the center section of the cut white layer (the “cap”) on top of the chocolate layer.
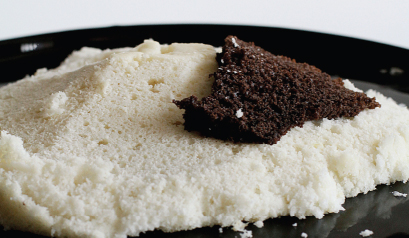
10. Now trim thin layers of chocolate cake and place them on top of the white cake, covering the cake.
11. Place the top of the cut white layer over the chocolate cake layer.
12. Repeat this process with the second white layer. You won’t need to create the small center cone in the second white layer. As you build the layers, keep in mind that you want the cake to be slightly raised in the center.
13. Your bare-bones cake will look pretty haphazard. That’s okay! I was nervous the first time I made this cake, too.
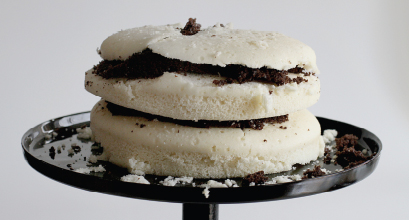
14. Place the cake in the freezer for a couple of hours, then cover it in a crumb coat of chocolate buttercream.
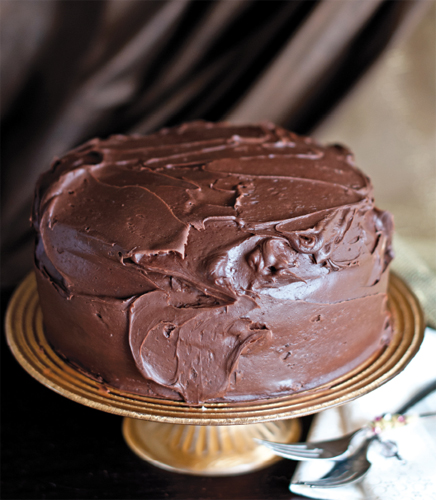
15. Cover the cake with chocolate buttercream, then use a small offset spatula to make random swoops in the buttercream. The surface can be as rough as you want.