Sunsets rock. (I’m sure sunrises are amazing, too, but Mama loves her sleep!)
I wanted to create a really simple cake that would transport you—that would instantly remind you of a happy time and place where you experienced nature’s beauty. Hopefully you were on a beach somewhere, with someone you love.
Now that I think about it, this cake might need a bit more research. I’d better let hubby know we need to head to a tropical island, pronto.
1 recipe White Cake
1 recipe Basic Buttercream
Yellow, orange, and turquoise gel food coloring
SPECIAL EQUIPMENT:
2 8-inch round cake pans; cupcake tin; rubber spatula; disposable plastic pastry bags; cake leveler or long serrated knife; 127D decorating tip; small offset spatula
DIFFICULTY: Medium
1. Place ¼ cup of the white cake batter in a small bowl and add a drop or two of yellow food coloring. You’re looking to achieve the color of the setting sun. Pour the yellow batter into a cupcake tin.

2. Divide the remaining batter among 4 bowls, roughly 1 cup per bowl.
3. Add 1 drop of orange to one bowl and 3 to 5 drops to another bowl. Blend thoroughly.
4. Add 1 drop of turquoise gel food coloring to a third bowl and 3 to 5 drops to the last bowl. Blend the batters thoroughly.
5. Pour each batter into a separate disposable pastry bag.
6. Prepare the pans by spraying with baking spray, then place a piece of parchment on the bottom.
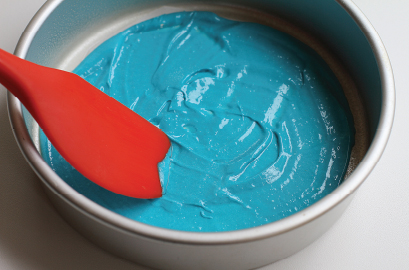
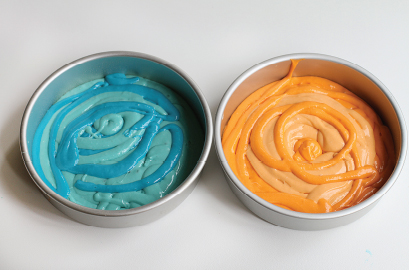
7. Cut off a small tip of the pastry bag with the darkest blue cake batter and pour some into the prepared cake pan. Spread a thin layer around the bottom of the pan.
8. Cut the tip off the light blue pastry bag and pipe out some batter onto one side of the cake pan.
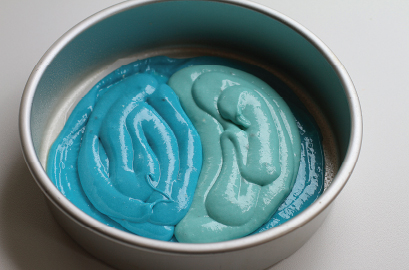
9. I tried to imagine I was creating a wave effect with the batter, so I put a majority of the light blue on one side, then filled in the other side with the dark blue.
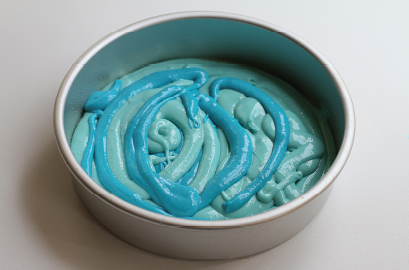
10. Then just fill in with all of the remaining blue batters. You really can’t do it wrong as long as you don’t start mixing the batters!
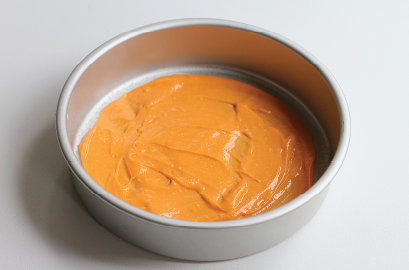
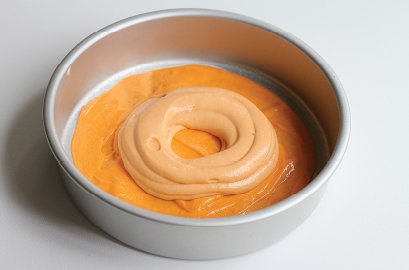
11. Spread a thin layer of the darker orange batter on the bottom of the pan.
12. Make a little doughnut around the middle of the cake with the lighter orange batter. Later, you’ll be carving out the center to hold the yellow sun.
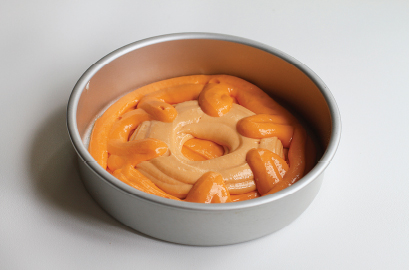
13. Add more dark orange batter, piping it over the light orange doughnut and around the edges of the pan. Then fill in the rest of the pan with all the remaining light and dark orange batters.
14. Bake the cakes as you normally would. Bake the yellow cupcake at the same time. The cakes may not come out perfectly flat, and that’s fine.
15. Cool the cakes to room temperature, then freeze the orange layer for at least 30 minutes.
16. Prepare the buttercream and divide it evenly among 3 bowls. Tint one bowl yellow, one the same blue as the blue layer, and the remaining bowl the same orange as the orange layer.

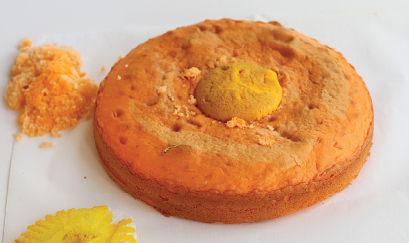
17. Place the yellow cupcake on the center of the chilled orange layer. This will give you an idea about how deep and wide to carve.
18. Using a soupspoon, begin to gently remove some of the center of the orange layer. When you’ve created a small indentation, place the cupcake in the hole and determine if you need to cut out more cake. The cupcake should sit about level with the top of the orange layer.
19. Place the cupcake snugly into the orange layer and refrigerate for 15 minutes.

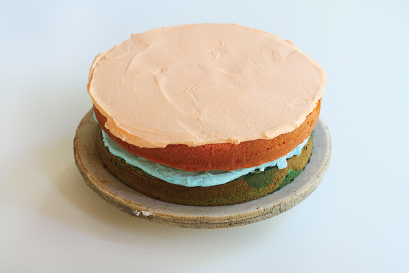
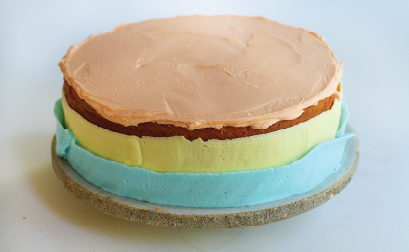
20. Place the leveled blue layer on the cake stand. Cover the top in about ½ cup of blue frosting.

21. Carefully flip over the orange layer onto the blue layer.
22. Cover the top of the cake in orange buttercream. Try to make the top as smooth as you can, but it doesn’t need to be perfect.
23. Place the remaining blue, orange, and yellow buttercreams in individual pastry bags.

24. Place a 127D tip into an empty pastry bag. Cut off the excess bag so that the tip fits snugly in the bag. This will allow you to use the same tip quickly with the three different colors. You will not need to clean the tip when you change out the bags.
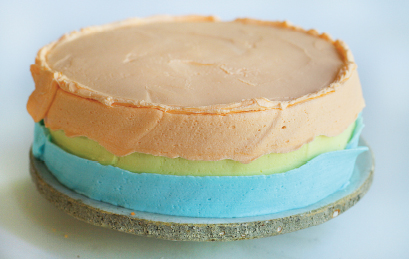
25. Cut a large amount off the tip of the yellow frosting bag and drop it into the bag fit with the 127D tip. Center the tip between the top and base of the cake and, holding your tip flat against the side, pipe out a ribbon of yellow buttercream around the entire cake. You want a consistent line, but it doesn’t need to be perfect.
26. Remove the yellow frosting bag and insert the blue one. Pipe out a bit of buttercream to make sure all the yellow buttercream is out, then pipe out a ribbon of blue buttercream around the bottom of the cake, overlapping the yellow.
27. Remove the blue frosting bag and insert the orange one. Pipe out a bit to make sure all the blue buttercream is out, then pipe out a ribbon of orange buttercream around the top of the cake.

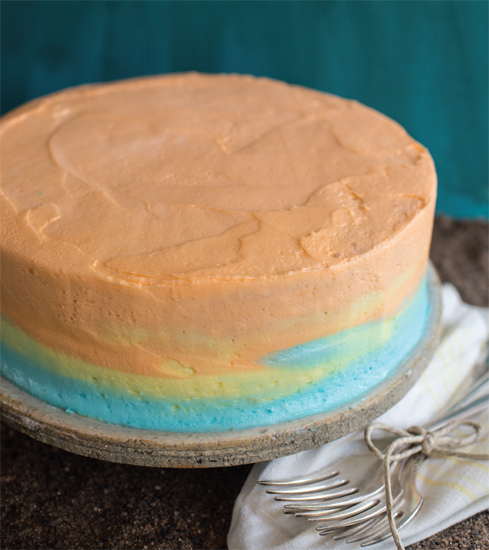
28. Hold a small offset spatula perpendicular to the cake. Gently and carefully start to pull the knife around the cake. You can go around the cake as many times as you want to achieve the desired sunset effect.
29. Clean the offset spatula and use it to carefully smooth the top edge of the cake.
30. Chill the cake until serving.