Truth be told, I’m not a fan of candy canes. I almost feel as if they should be used for decorative purposes only: hanging on trees, perched on the edge of a stocking, taped to cards from aunts, uncles, and grandmas. But the whole process of eating one frustrates me. I like the flavor, so I want to bite it, but then it gets all sharp and stuck in my teeth, which isn’t fun. And simply licking is far too slow.
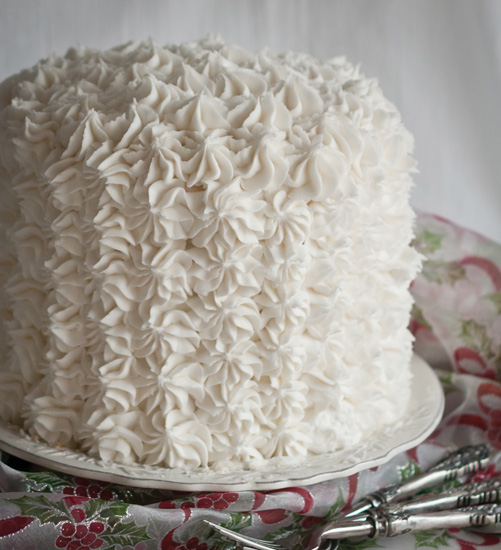
This cake is my happy compromise. Flavor? Check. Design? Check. Ease of gobbling an entire piece as quickly as I want? You betcha.
2 recipes White Cake
1 recipe Red Velvet Cake
1 recipe Peppermint Buttercream (use peppermint extract in place of vanilla extract in the Basic Buttercream recipe)
Red gel food coloring
SPECIAL EQUIPMENT:
6 8-inch round cake pans; long serrated knife; offset spatula; long skewer (optional); disposable plastic pastry bags; 2D decorating tip
DIFFICULTY: Challenging
1. Bake 4 layers of white cake and 2 layers of red velvet cake in 8-inch round cake pans. (There will be 1 white layer left over; wrap it in plastic, cover in foil, and freeze it for up to 3 months.)
2. Cool the layers to room temperature, then freeze for at least 3 hours. The cake should be firm but not crumbly.
3. Prepare the buttercream. Tint 1 cup of the buttercream red to match the red velvet cake.

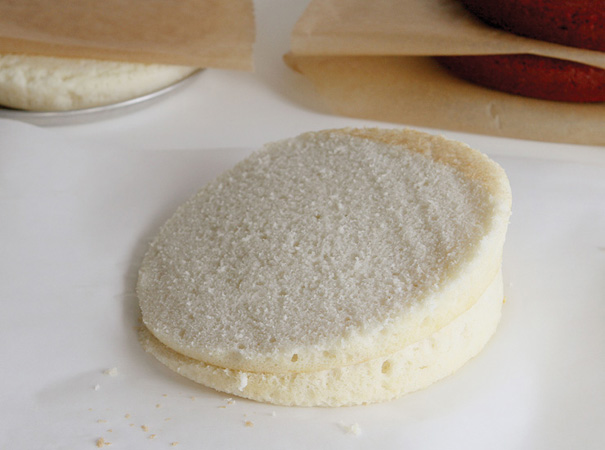
4. Place 1 white layer on a sheet of parchment paper. Using a long serrated knife and starting at the upper-right-hand corner, cut from one edge to the lower left-hand corner at a 45-degree angle.
5. Next, take the top cut white layer and carefully flip it over. Set it on top of the bottom layer so that the thickest parts are on top of each other, creating a steeper-angled layer. Once you get the right snug fit, remove the top, spread a thin layer of coordinating buttercream on the bottom layer, and replace the top. This will hold as a glue and keep cakes firmly in place.
6. Repeat steps 4 and 5 to create the top of the cake, and set this steep cake aside.
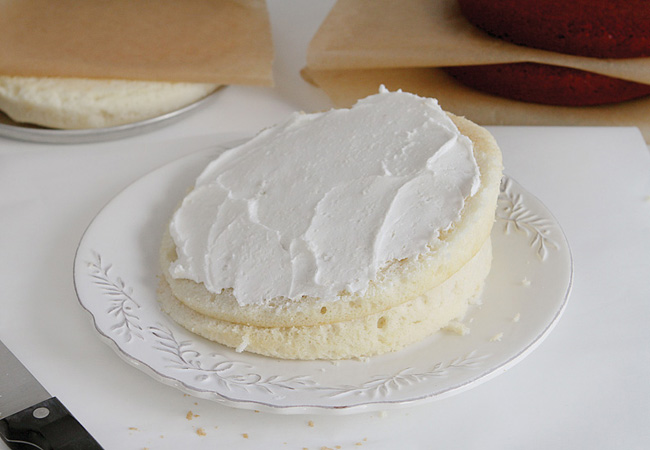
7. Transfer the bottom steep layer to a cake stand or a cake plate and, using an offset spatula, spread a thin layer of buttercream on top.

8. Center a red velvet layer on top of the white cake. It will seem off center because the sides will not perfectly match up, but it’s the centers of the cake that need to align. Spread a thin layer of buttercream on top.
9. Repeat, alternating a white cake layer followed by the second red velvet layer.
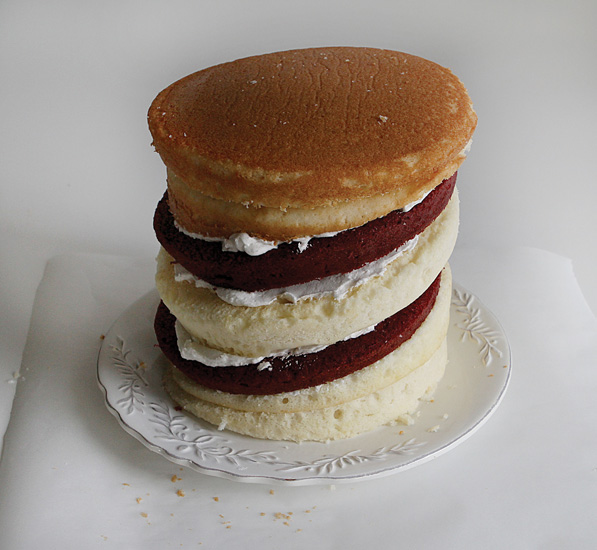
10. Flip the top steep layer and lay it on the cake so that the top of the cake is now level. Voilà!
11. If your cake seems at all unsteady, you can insert a long thin skewer into the cake for added stability. You can also freeze the cake for at least 1 hour or up to overnight.
12. When the cake is steady, spread on a crumb coat, filling the gaps between the layers to create smooth sides.
13. Chill the cake in the fridge for at least 1 hour to set the crumb coat.
14. Place buttercream into a plastic disposable pastry bag fitted with a 2D tip.
15. Apply slight pressure to the bag of buttercream and pipe a single star on the cake. Repeat over the whole cake.